Hey hey what's up my friend so look at this chat over here when I first started with technical analysis this is pretty much how my charts look like I have things like support resistance trend line Trend Channel moving average RSI macd Etc a lot of stuff on my chart after all I was thinking you know the more stuff I have on the chart right the better I can make my you know predictions in the market but boy I was Wrong why is that and simple when I have so much things all right so much tools
and stuff on the chart I get a lot of conflicting information for example the chart pattern can say bye because it's a breakout but when I look at the indicator it tells me that the market is overbought it's a sell signal so should I follow the chart pattern or should I follow the indicator so you can see where I'm coming from I feel very Conflicted very confused right very frustrated it's kind of like no dating a girl she says that all right now I love you I love you so much I miss you and every
time I message her she replies me three days later what's going on if she really likes me I should reply you know within three minutes yeah so this is the same thing for trading I feel very conflicted right with a lot of you know stuff on my chart and it took me a few years to kind of figure out that you Know technical analysis doesn't have to be this confusing so this is why in today's training we're gonna do just that right what you'll learn number one is firstly where exactly on the charts do you
buy or sell without second guessing yourself man I think I can be a poet next you will learn right how to better time your entries and exits with precision how to protect your account and maximize your profits and all in all in today's Trading what we're trying to accomplish is this to share with you a secret formula so you can profit in Bull and Bear markets and this formula it works right for the stock markets the Forex Market or even if you trade crypto sounds good right then let's get started now the first part of
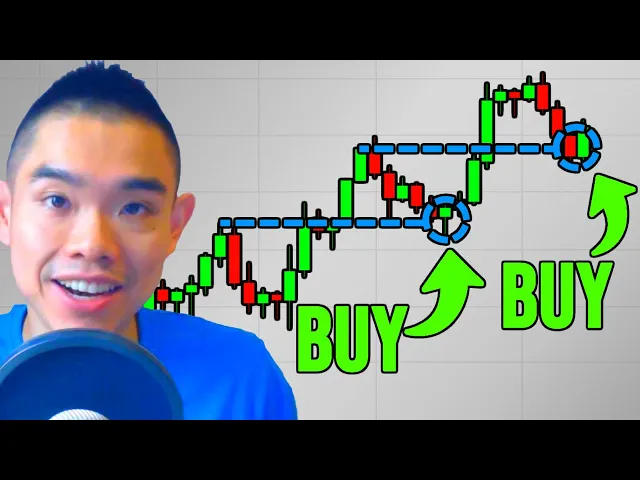
this formula is what I call Market structure the concept is very simple Market structure wants to un to answer this question what to do what do you do in a given Market condition because if you think about this the market can only be in one of three market conditions either it's in an uptrend a downtrend or range not familiar don't worry let me explain so the market is said to be in an uptrend when you have a series of higher highs and higher lows so if you look at this chart look at the highs on
this chart higher high higher high higher high higher high high yeah High if you look at the lows the swing lows Higher low higher low higher low higher low you get a message and you look pretty much from left to right of the chart you see that the market is heading up higher let me ask you when you see the market in an uptrend do you want to be a buyer or a seller it's not a trick question it's a logical question and the answer is you want to be a buyer reason being is that
when the market is in an uptrend and you're a buyer your upside potential is a lot Higher look at the the magnitude of the up move right when the market is in an uptrend so if you look at this when the market goes up this is the huge upward movement right if you're a buyer huge upward movement huge upward movement CD potential right that the market can move in your favor when you're a buyer in an uptrend and if you think about this right if you are a seller this is pretty much the amount of
potential profits that you could get notice that the move Is so much smaller so this is why in an uptrend as much as possible you want to look for buying opportunities and later on I'll share with you where exactly to look for buying opportunities but just understand this concept for now next a downtrend this is just the inverse in the downtrend you'll notice that the price makes a series of lower highs lower highs lower highs and lower low lower low and lower low so look from left to right the market is pretty much Heading down
lower over time so one thing about the markets is that it doesn't go down in one straight line it goes out lower makes a pullback then goes down lower makes a pullback goes down lower same for uptrend and question in a downtrend you want to be a buyer or seller you should be a buyer just kidding you should be a seller I look for selling opportunities right because again the concept is the same if you are selling In the downtrend look at the profit potential this is the amount of profit potential that you could get
right towards the downside this is the magnitude of the move that you can expect this is the magnitude of the move that you can expect whereas compared to you know buying in a downtrend you look at the profit potential if you're a buyer in the downtrend notice that this is the move that you could possibly get over Here the move is a lot smaller right compared to the downward momentum and finally range market so range Market is where the market is just pretty much contained between the highs and low so if you look at this
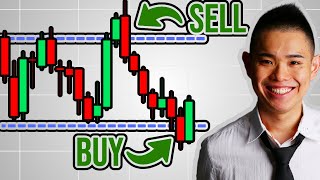
contained between these highs and contained between these lows and let me tell you a secret when the market is in a range right I don't just randomly you know buy the lows of support or sell the highs of resistance in other words I don't simply blindly You know buy over here or sell over here actually right what I do is that I still will take a direction when the market is in the range sometimes I might look to buy at support in the range market and sometimes I would prefer to sell at resistance in a
Range market I'll explain to you why shortly I have actually this particular uh Habit right and you'll discover why surely but for now if you think about this Market structure right six two Do something simple right which is to tell you what to do in a given Market condition for example those of you who are watching this video you're married you have a wife or girlfriend whatever if you know that your wife is in a good mood right you know this is where you can you know sort of take advantage of your asset for massage
ask her to make you some sandwich a nice meal and whatnot okay and if your wife's in a bad mood you're gonna stop asking her for Favors in fact you're probably the one you know doing favors for her to make sure you know she is you know her bad mood doesn't get worse all right so it's the same for trading right you will adjust your trading strategy according to different market conditions and same thing for your wife right you adjust your treatment to her according to her mood swings right so same thing you have to
be adaptable to be flexible and Market structure will give you kind of like a framework to know when to buy when to sell and maybe even when to stay out of the markets and by the way if you're enjoying the training so far smash the Thumbs Up Button if not hit subscribe okay the second part of the formula is this area of value this one is to answer the question where do you buy or sell where exactly you do on the chart do you buy or sell and to answer this question You can use a
very powerful technique or concept called support and resistance so let me explain what this means so support right pretty much means right that it's an area on the chart where buying pressure where buyers could come in and push the price up higher and resistance is an area on the chart where sellers could come in and push the price down lower let me show you right on the charts what this this means right so if you look at this chart this Market as You can see this dollar against the Japanese Yen it's in an uptrend so
we're gonna ask yourself where on this chart right should we look for buying opportunities where is support on this chart so if you would look at this right here is how I would draw support I would look for areas on the chart right where the price bounce off higher right the more significant the level right the more attention I want to pay attention to it here so for example over here I Noticed that hey you know the market has actually bounced off support right twice tested once came back down tested twice Point second time right
so this is an area of support I want to pay attention to another one notice here again how did the price actually bounce off higher from this lows to where it is right now so what I'll do is again I'll draw the area of support somewhere about here so one thing about drawing support and resistance is that you don't need too Many lines on your chart sure and can draw more levels so for example I can draw over here I can draw over here but I wouldn't want to do that why is that because if
you think about this if the market were to let's say come back all the way down to this level or even down to this level whatever I want to be buying at that area of support not a trick question and the answer is is no why is that and the reason is simple if the price does get to this Area of support or even over here at the point of time right the trend has already shifted from an uptrend like this okay to a downtrend and when the market is in the downtrend I don't want
to be buying support I want to be selling resistance so this is why when you draw support and resistance right pay attention right the two most recent areas are pretty much the most significant ones the rest are I would say secondary and if the the lower point Of support gets touched by the market probably the market has really shifted to a downtrend and you don't want to be buying support right that's what I've shared over here so usually I just have the two most recent area of support on the chart like this now I have
drawn lines but for those of you who want to take things a step further maybe you want to you know look at it in terms of an area you can use this tool over here right this uh this rectangle Tool and just highlight it as an area whatever color you like those were like great right have it in red those are like pink have it in pink you know blue whatever and this is another one that you can draw over here right so you can see now you have these two area of support on your
chart that you know that hey these are areas on the chart that I want to look for buying opportunities okay so let's do one more example before we move on how about we look for a Downtrend this time around so Euro against the US dollar okay so as you know in the downtrend we want to look for selling opportunities so let's find the two most recent area on the chart where hey the price has you know come down lower from it so if you look at this here is one and here is possibly another one
and one one thing that is interesting that if you're unaware of is that whenever the price breaks below support right it could become resistant So for example this was previous support support the price breaks below support now retests as previous support become resistance okay so this is again another area of support that you can see over here support support a little bit of support price breaks below it previous support become resisted so same thing right for previous resistance the price let's say this was previous area of resistance price breaks out of resistance it could Now
become support and hit up higher from here okay so this uh what I want to share as well and again likewise if you are not comfortable looking at lines on your child you prefer it to draw as an area the rectangle tool right is a very useful tool that you can use right to help you highlight the area on your chart something like this okay so now you have a highlighted on the chart you know where do you look for buying or selling opportunities right the next Question now is this okie dokie the third part
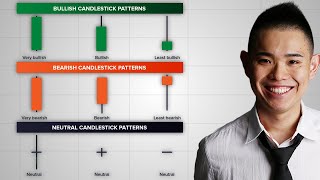
of the formula is this entry trigger and it simply wants to answer this particular question when exactly do you buy or sell so for entry trigger this is where Candlestick patterns are really useful and I'll share with you two popular ones right very useful one that you know will help you in your own trading first one is what we call the hammer let me walk you throughout how this works so the hammer When you see a hammer Candlestick pattern on your chart which you'll see shortly what it tells you is that the market opened at
this price okay and it closes at this price right at this particular level over here this over here is the highest price point right for the time frame so if you look at this Hammer let's say on The Daily time frame this tells you that this is the highest price point for the day and this is clearly over here this lows is the Lowest price point of the day always the opening price of the day C over here is the closing price of the day so very simple so the story behind The Hammer goes something
like that so this is where the market open today right at this price point okay then the sellers took control and pulled the price down all the way down to the slopes and then the bicycle you know clearly clearly they'll push to a corner and then suddenly you know they regain the Stringer no no no I'm not going to tolerate any of this any longer I want to stop pushing the price up higher right and finally closing right near the highs of the day so this tells you that at the early part of the day
are the buyers they were overwhelmed by the sellers but they found the strength the courage to push right the market in the uh opposite direction to push the market up higher and finally closing with signs of strength for the day closing near the Highs of the day so this is kind of like for those of you who watched Avengers end game right you know towards the end of the movie you know Captain America is just alone right against Thanos Army okay and you know that at the point man that guy is screwed right you know
one guy versus like a few a few hundred thousand right soldiers and bad guys some looks like you know I don't know what they look like right and then suddenly right while while you know About to fight right the big battle he hears something right you know to your left or something like that I think he saw the Birdman coming right now his friend right then after which you saw uh who do you see like Panther right in the Army you know forever you saw that right so although after we show you know that the
ending is no of course you're right the good guys Captain America they want the bad guy so you can see that emotional aspect all right of that scene Right it's similar to the Hammer Candlestick pattern right where the buyers at one point in time they were getting overwhelmed by the sellers or at this loses where you know Captain America is getting screwed right by the Army and then slowly the Birdman came up you know uh Black Panther wakanda forever came up and we know they win the war right and close right on Earth High known
right so it's kind of like the Candlestick pattern uh the hammer if you Ask me the other Candlestick pattern or before I talk about the other Candlestick pattern is that so in short right when you see a hammer it tells you that there is a bullish signs of strength it tells you that their buyers stepping in right and you know uh they are temporarily in control so when you see a hammer right it doesn't mean that you blindly you know hit the buy button no you also have to look at other contacts right I know
The market structure uh area of value Etc but once you have all those right there and you see a hammer that tells you that hey now you know it's a time that you could possibly enter the trade on the next candle open right so again I'm getting a hit of myself over here but I want to tell you that the meaning of a hammer is that the buyers they are temporarily in control likewise right when you see a shooting star pattern right this is kind of like the inverse Over here is where the market open
they open at this price point the buyers were in control right uh early part of the day right and then the sellers finally say uh that's enough right then it pushed the price down lower and finally close near the lows of the day so of course this is the highest of the day and this is the lows of the day right assuming this is a daily candle right it's the lowest price point of the day so a shooting star pattern is kind of Like know uh you going for exam man you didn't even study for
your exam right now and and then we realized man I got a I got a for this exam paper so you're really high on cloud line and only afterwards you kind of realize it's a for Epson right the whole world come crashing all the way down closing near the lows over here so it's kind of like what the shooting star pattern sort of mean like at least that's what I think of right when I think of the shooting Star pattern so these two are very useful entry triggers to help you time your entry to know
when exactly to buy or when to sell it especially when you come across these two Candlestick pattern and as a bonus right one last thing I want to share with you is what I call the false brick setup this is not really a Candlestick pattern but it's a price pattern so for example let's say uh this is an area of support okay the price comes down to support it bounced Up higher they came back down for a second time so a false break pretty much means right the price actually break below support and you know
traders.man support is breaking now it's going to collapse lower and next thing you know the market quickly reverse back up support and close back above support so this is what I call a false break and this again is a very useful uh entry trigger right to time your entry to go long don't worry later on I'll share With you some chart so you can see exactly how all this you know entry trigger you know fit in the big picture all right all right so when it comes to exit there are two questions right we are
trying to answer over here first one is this exit when you're wrong so where do you exit your trade if you're wrong otherwise known as a stop loss so when it comes to stop loss right I have a very simple principle your stop-loss must be at a Location right where if the price reaches it it will invalidate your entire trading setup your entire trading idea let me explain so let's say for example you're looking to buy at support okay price comes up you buy it support price up this goes up higher over here where exactly
do you set your stop loss so a mistake that many Traders make right pay attention is that they simply set their stop loss somewhere here or maybe somewhere here Number one and number two and those are horrible places to set your stop loss why is that that's because the market could easily just swing back down lower and then reverse up higher from there so you can see if it does like what I'm showing over you here a false break whether you set your stop loss at level one or level two you're gonna get stopped up
so now how should you set a proper stop loss then so this is what I recommend When you set your stop loss set it away from an area of value or set it away from yeah an area of value away from price structure so for example again go back to our support example so let's say this is support price bouncer comes back down bounce up higher and this time let's say you buy over here let's call it e or your entry your stop-losser you want to set it at a place somewhere about here because at
This point right let's say s over here is your stop loss if the price or it would reach a stop loss over here at s let me ask you do you think that support right at this point in time is broken and I think for most of you looking at this drawing you say yeah support is broken and yeah since your basis of basis of entering the trade is to buy a support now support is broken clearly you should get off the trade exit the trade because this is where the market Has proven you wrong
so whenever you set your stop loss you want to set it at a level right where the market will invalidate your trading setup let me share with you just one more example right because it's so important so let's say you're looking to trade the blue flag pattern for those of you who are not familiar a bull flag pattern is where the market let's say breaks out it forms like this out it's what we call a bull flag pattern and then let's say you Break above the highs you buy so this is what we call a
bull flag pattern now at what price point right where if the market reaches that level your move flag pattern no longer looks like a blue flag pattern I'll give you three scenario 0.1 0.2 or 0.3 what do you think I know this is a little bit of a trick question and answer I'm actually looking for is actually more towards point three Because if you look at point one and two right this low over here right is where buying pressure could come in this is where potential previous resistance resistance could become support So if you set
your stop loss at one or two the market can actually hit down lower bounds into support and then go up higher and if you set a stop loss at level one or level two you probably get gotten stopped out of the trade but if you set it at three this is where you're Giving your trip more room to brief right you're setting your stop loss away from this price structure away from this area of value and that kind of like no put the odds in your favor because you're not going to get stopped out prematurely
or too easily yeah so this is what we mean by exit when you're wrong right you know setting a proper stop loss now what if what about exit when you're right where do you take profit so they have different ways to do It you can you know you know use like you know capture a swing write a trend and stuff like that but for now we keep things simple we talk about capturing a swing so let's say again a market let's say it's uh in a Range okay goes up comes down goes up comes down
let's say you buy at support right and where on this chart right my sellers come in where my sellers come in and push the price lower and as you know this is an area of resistance this is Where sellers might come in so this means you want to set your target profit right just before this area of resistance so maybe somewhere about here it's a good level to set your take profit level because if the price goes up right coming to resistance you take profit great right because what could happen is that the price comes
into resistance and then quickly reverse down lower so if you set your take profit level let's say over here over here You're making the market work hard for you making the market you know break out of resistance resistance to reach your Target and if you were to make the market work hard for you you will usually you know pay the price yeah so as much as possible Right the market is the big boy right follow the clues right that's being left behind by the market right don't try to you know push your luck right but
rather respect the market respect the price Structure if you know that this is an area where sellers might come in and then be conservative right set your take profit level just before that area of resistance and this will kind of like increase your odds of actually you know exiting your trade with the profit so these are two very simple guidelines right that you want to take into account right when setting like your stop loss and Target profit so now I've shared with you the entire formula right if you Realize it's what I call the May
formula a quick recap this stands for number one market structure area of value entry trigger and exits later on which is about right now I'm going to share with you examples right trading examples right to see how this particular formula allows you to profit in Boo and bear markets right let's get to it alrighty so let's walk you through a few examples using the May formula that You've just learned and also along the way I'll share with you some Advanced price action trading tips right to help you better time your entries and exits so first
part of the May formula what is the market structure right based on the chart that you are seeing right now did I hear uptrend well done okay so the first thing we have is the market is in an uptrend and as you know right if the market is in an uptrend that we are looking to buy at an area of value and In this case would be an area of support okay so let's let's see right so I think in this case we can draw this area of our Support over here I want to just
draw this line briefly okay I can draw it as a rectangle right but I'll just leave it as a line for now so let's see and wait right and see how the price reacts at this area of support So as you can see over here the price came into support and then over here we had a nice Uh looking reversal Candlestick pattern I won't really call this a hammer I think it's more of a false break so earlier you learned that one of the entry trigger is a false break with the price Take Out Below
this load and then quickly reverse back above support so this is a classic example of a false break so in this case you can actually enter on the next candle open and set your stop loss a distance below this low so let me take You a step further how can you actually set an objective stop loss so usually what I like to do is to actually set my stop loss in this case right one ATR below this low so what is one ATR ATR stands for average true range it measures the historical volatility of this
currency pair so just go to indicator search for ATR pull out this indicator and you'll see something like this this line over here so I usually like to go with the 20 period settings Since there's 20 trading days in a month I go with SMA and click ok so that's the settings I usually use so over here what you can see over here is this this number 1.401 we will take it as 1.4 what this means is that over the last 20 trading days this currency pair dollar against the Japanese Yen moves an average of
about a dollar and 40 Cent right per day on average so over 1.4 per day so what I will do is I will find out what's the low of this candle so in this Case the low of this candle currently is about 130.39 so I'll take 130.39 130.39 and I minus one ATR and you know 180r value currently is about 1.4 so just take minus 1.4 and that gives me bass up on my trusty calculator right it's about 1 to 8.99 so the value is one two eight point nine nine this tells me that my
stop loss will be placed at 1 to 8.99 so if I were to do that right let's say my stop loss I'm going to put it over here So put it over here okay let's put this line to let's say red color to represent the stop loss and let's say it's at one two eight point nine nine Okay click ok so this point right uh you can see that this level over here is your stop loss all right this level here is your stop loss what about entry you can look to enter on the next
candle open so let's see what happens the next day next day the market open uh pretty much where it Closed over here so this is your entry price so just put a green candle over here to signify the entry okay let's just I mean I mean a green liner not a green candle yeah so this is a green line okay and uh done right that's your entry what about exit so if you remember right to exit the trade we usually want to exit our trade before opposing pressure coming before they sell a step in so
in this case you can see that this over here is a swing High Over here so ideally we want to exit our trade before this highs before you know selling pressure come in and push the price down lower so what we can do is we can set our Target profit somewhere about here I usually don't like to set it at the extreme highs because it may not get to the extreme price so I said it usually a few Pips below it somewhere about here all right let's set it so in this case let's say uh
blue color shall we for Target profit okay and let's see What happens next so as you can see next day the market uh filled got us filled into the trade and then it moves up moves against us we need no favor starts to stall stall boom right now it's moving against us so at this point in time you would notice that your open profit says evaporate right you're not probably sitting in the red and many Traders will be tempted to know just you know take the laws and move on and you know Prevent further damage
but think about this you really set your entry your stop loss and your target they all plan ahead of time your stop loss is at a logical level you set your stop loss at this level because this is where you're giving your trade enough breeding room to breathe right because you know what you know is that the price for all you know it could retest support here and then go up higher right and you don't want to you Know have a stop loss being too tight right because you could get stopped out prematurely so let
the trade do its thing your stop loss is already pre-planned ahead of time follow the plan right and let the market do what it needs to do so let's see what happens Market stalls all right forming something like a dragonfly a pattern right then it starts to head up higher I'll read Kindle some slight indecision then it goes up higher grade up higher Grade right moving up enough direction again finally up again fantastic yes almost there ah so close so closer so at this point Traders might be tempted to take profit but remember you already
set your target ahead of time it's planned right let the market do its thing so in this case or you can see shortly afterwards you would have gotten uh exited this trade for a profit right so again this would have been a winning trade so that's uh pretty much how the May formula works right and for now let's move on to another example and share with you a different uh type of exit that you can consider now let's have a look at another example shall we so again the May formula I'll just do a quick
recap here in case you know some of you have short-term memory like me m a e e right me one ask you what is the market structure that you're seeing on this chart over here this is the New Zealand Canadian the four hour time frame what is the market structure the market is in a downtrend right great right Market is in a downtrend so you know that the market is in a downtrend where will you look right to trade from where is the area of value that you want to pay attention to in this case
area of value is at resistance fantastic all right so let's cover this first two so in the market is in the downtrend area of value I'll Probably highlight this one over here okay that's probably the key one they'll pay attention to and let me just change this to Black right so we don't get confused later on with our entries and exit okay and again for those of you who prefer to have it drawn as a rectangle you can you probably look something like this right as an area on your chart right that's perfectly fine so
all that's left to do or rather the next Thing to do is to wait for the market to come towards your area of value or in this case resistance so you can see the market hit up into resistance okay breaks into resistance at this point and this candle over here we have a valid entry trigger this is what we actually call a bearish engulfing pattern this the story behind it is similar to a shooting star pattern right where the the bias were initially in control and then they quickly write code uh Disrupted and the market
got pushed down lower by the seller closing below resistance also actually you can see it's actually actually a false break as well the market actually took out this highs and quickly reverse back in to below resistance this looks like number one but anyway yeah so this is a valid entry trigger to go long telling you that the sellers are in control so what you can do is again to enter on the next candle open so again uh the next candle Open at this price point let's put this as green right so near to signify that
is our entry point okay I know this has quite a few black lines over here I'm going to remove some of them so you can see better okay now what about our stop loss so in this case again you can pull out the ATR indicator the average true range indicator I'll just do this one more time so what we're trying to do over here is to set our stop loss a distance away from resistance because we Don't want to get stopped up prematurely so what you'll do is again find out what is the high over
here and add on right by this number of uh ATR value in this case is about 45 Pips so let's do a quick calculation the high of this candle currently it shows that it's about uh let's see seven eight eight five okay so seven eight eight five you plus 45 Pips right that gives you seven nine three oh so your stop loss will be Placed at 0.7930 so I'll change this to rate okay and 0.7930 got it okay so that is your stop loss level all right this over here is your stop loss so basically
how you interpret that stop loss level is that from this high you add on one ATR okay get on one ATR is equals to this level that you're seeing on the chart over here next thing right where is your target so if you look at Target right there are two levels that Showing up over here one is this recent swing low and this one is more of an extreme further away right that swing low so in this case usually I like to have a first conservative Target over here so in this case you can actually
have your trade right all exit at this swing low that's a perfectly you know valid uh thought process okay but at the same time right let me just remove the indicator at the same time right some of you might be thinking But right now if you look at this market right if you look back this Market is actually in the downtrend right now and the price tends to break below this low break below this low break below this low because you look at this the price over here it breaks below this low and then it
makes a pullback so won't we like you know be giving up some potential profits because we can still look to capture this additional bit of the move right as the market breaks down Lower lower right so that's a fair thought right so actually what you can do in this case is actually to have two Targets one is a more conservative Target and one is a further Target so let me share with you how to do this so in this case your first Target can be over here okay this is your first Target let me just
change this to Blue let's call this target one right tp1 okay and you can have a second further Target right as you know the market is in a Downtrend it could break below the lows and go a little bit further so in this case this is the extreme low over here for all you know this Market could possibly you know break below this extreme low right and then make a pullback so you want to kind of like take your profits right somewhere about here right where you can get the most bang of for your buck
how do you do this right so how can you do this objectively so what you can do is you can use a tool Right called a Fibonacci extension right and look to uh exit right at a just before the 127 extension so just get up show you what it means look at Trend based flip extension click on this you draw it from the swing High to the swing low and back up high again this is the swing High down to this extreme low and then up higher again okay so once you do that you can
see that over here you can see over here are there over Here I'll just manipulate this chart a little bit okay you can see over here I want you to pay attention to this level over here this is what we call the 127 extension and over here is an objective way where you can look to set your second target so I'll just draw a second blue line over here just before the 127 extension maybe somewhere about here okay so let's see what happens next right so in this case right uh I'll just remove the feedback
extension since it Looks a bit messy but at least you know you know how this second blue line come about we actually use the Fibonacci extension to kind of like project right where the price could go right so we can just take advantage of that extra little Pips right as the market breaks down lower so what I mean by this is that example this is a swing low Market break this Swing Low by quite a little bit before it makes a pullback so the question is where exactly right do you Take profits right as the
market breaks down lower so this Fibonacci extension gives you that a little bit of objectivity to it okay so I'm just going to remove this flip extension first and see what happens so in this case the market you can see that it pretty much went lower over here and hit our first Target relatively quickly so at this point Market continued down lower over here almost reaching our Target here And didn't quite and now he's making a pullback and as you can see this is how the market is right now so at this point in time
right so what you can do is actually you know your stops already in place your first Target is really taken and your stop loss is already at a logical level it's still over here so what you can do is again leave your stop loss as it is right and let the market either you know hit your the second Target or hit your stop loss right because there's really no point you know trying to shift your stop loss right to break even because again there's a good chance you could get your stop loss hit at break
even so what many Traders like to do in this case is that they set their stop loss to let's say Break Even they bring their stop loss down to their entry point but to me that's not really very logical because there is no like kind of like barrier right because this Is an area of resistance if the market comes up higher and it hits down lower you can see that in this case like you will get stopped up on your trade right on the second half of the position and the market eventually hits your Target
and you're not in it because you know you got you're given to your fear so usually what I do is that you know my stop loss is already at a logical level I'll leave it as it is my target is uh at this Point over here I know I almost got filled on the trade but I didn't quite so I'm just gonna leave my plan and see this either it's going to hit my stop loss or hit my target I already taken partial profits on this first Target over here so even if the second position
hit my stop loss hey guess what this overall trade will not really be a loser it probably could be more of a break even trade or a very very tiny loss so at least that's my top process to how I Would you know go about handling this trade alrighty so in this example right I want to share with you an example about the range market so if you look at this one at this point in time this chart Market might seem to be in a range and earlier if you recall at a earlier part of
this training I mentioned that when the market is in a Range I still tend to have a directional bias sometimes I want to be buying only a support or sometimes only to sell at Resistance so now the question is how do I decide when the market is arranged do we buy and support or sell that resistance that's what we're going to cover right now so if you look at this Market at this point in time right what I want you to do is actually to go up to a higher time frame and see what the
market is doing so if this is the eight hour time frame I'm going up to the Daily time frame and as you can see over here the daily time frame this Market is Actually in a long-term uptrend this means right on the lower time frame if the market is in a Range as much as possible I want to be a buyer I want to buy ad support because I know that the market is in a long-term uptrend and because you're buying at support and the market is in a long-term uptrend the chance of the market
breaking out of resistance is higher okay so let's get back to the charts right so this is the eight hour Time frame chart that I was sharing earlier so again the same thing applies right so Market is in a Range we look to identify the area of support that we want to trade from that's the area of value so I'm just going to draw this horizontal line somewhere about here change this to Blue to signify uh support shall we next thing is to wait for the price to come into support so let's see so in
this case the market has come into Support great next candle over here right here is break below support at this point in time many Traders will think oh man right now support is going to break down right let's shot this Market okay then what we see next happens is that the market then show signs of reversal and this is what we call a actually a false break it's a valid false break as the price took up below this lows and then quickly reverse and close back above support at the same Time right traders who are
familiar with candlestick patterns they might call this a bullish engulfing pattern that's fair enough as well because as you can see here the candle has actually engulfed right the prior candle so this is the prior candle this green candle has actually covered the body of this prior candle over here the red one so this is what we call a bullish engulfing pattern so of course needless to say what you can do is actually go along on The next candle open so let's see what happens next candle you can see that this is the opening price
let's set this as our entry right so let's change this to Green this is our entry stop loss I'm not going to do the one ATR calculation because you should be familiar by number your stop loss I would say somewhere about here okay let's change this to red there you have it okay this black line I'm just gonna remove it since you know this is an area of support I remove it so what about Target so to so you know that the higher time frame the market is in an uptrend so how can you you
know take advantage of it so again you can use similar principles that you've learned earlier for example if you want to exit your trip before opposing pressure steps in so I'll say this is a good level to reference to right because this is where sellers could come in Right so over here let's put this as our Target just before this area of resistance over here okay so just before this area of resistance we look to take some profits off the table and as you've seen right earlier you've learned the technique where we use a Fibonacci
extension right to kind of like project where the uh the move might end okay so of course you can use Fibonacci projection for your second target but another technique I want to Share with you is what we call trailing your stop loss this is very useful because as you've seen right on the daily time frame this Market is in an uptrend so imagine this imagine that the market breaks out of this highs it breaks out of this Heist and then continues up higher you can imagine that there's a lot of profit potential towards the upside
so how can we capture this trend so what you can do is to use a trailing stop loss so there are Many ways to Trail your stop loss okay let's go back to the eight hour time frame again there are many ways to Trail your stop loss but one approach you know you can use this moving average but for now let's see what happens in the in this on this time frame so you can see that market starts to you know show signs of uh headache about to hit higher right so this one you can
see Market quickly hit our first Target over here okay at this point in time right your First Target is met right and let's say you have you know uh you sell half your position right at this first Target so you have the remaining half of your position still on so how can you manage the trade on the remaining half of your position so let's say for example right let's just for simplicities let's say buy 10 000 units of dollar against the Chinese Yuan you sell over here 5 000 units right so at 5 000 units
at this highs over here so you Take profits so what's left over here now is you have the remaining 5 000 units on this currency pair dollar against the Chinese yen how can you manage this trade on the remaining 5000 units that you're long so what you can do is to Trail your stop loss you can do something like the 50 period moving average so for example just go to moving average okay so this one comes up uh typically if you're not really stop loss I Recommend I won't really I mean I wouldn't say recommend
but if you know right medium term Trend or you can use a 50 period moving average and click okay okay so what you can see over here on this chart is this blue line over here this is the 50 period moving average that I've inserted on the chart so the way to Trail a stop loss is that you will hold the remaining position that you have until the market breaks and close right breaks and close below this 50 period moving average below this blue line and of course if the market continues up higher that 50
period moving average will continue up higher along with it so let's see what happens so in this case where you can see the market breaks out higher I'm just going to play this a little faster or I can see that as the market goes up higher as the market goes up higher your trailing stop loss your 50 period moving average is going up higher as well so in other Words you're kind of like locking in your profits as the market progressively moves in your favor and you will exit the trade only when the market breaks
and close below the 50 period moving average so in this case can see the market continues up higher okay almost right breaking and closing below the 50 period moving average but it didn't so we continue to hold right the remaining 5000 units that we have on dollar against the Chinese yen until the Price breaks and close below it so it's still grinding up higher as you can see okay and then over here finally it has now finally break and closed below the 50 period moving average and this is where we exit the final portion of
the second half of our portion right of our trade okay so you can see that this if you write this trend of how you can see that this profit potential on this trade uh it's going to be pretty attractive this was your initial risk at the start I can see this was your initial risk and then look how much higher the market pretty much exploded to this point over here so obviously in terms of risk to reward I think possibly risking a dollar you know to make maybe four or five dollars also okay so that's
a pretty much it for this example and let's move on to the next one okay so moving on right if you are enjoying this training so far smash the Thumbs Up Button if not hit subscribe so Moving on right let's do a super quick recap about the main formula so again May stands for Market structure a is area of value e is for your entry trigger and the other is for your exits exits where your right and exits where you're wrong so if you look at this chart over here this is the chart of gold
the daily time frame what is the market structure Market structure is in an uptrend so we are looking for buying opportunities where is the area of value So from what I'm seeing over here I would say this is a possible area of value so this area of value obviously is a little bit tricky in a sense that I see one over here and I possibly would see let me just change this to Black first okay and I possibly see a slightly lower another one over here so you can see that this area of value is
pretty wide right you have no idea whether it's going to re-test this level Or this level and if you draw this like an area it's going to be a pretty wide area how do you kind of like you know set your stop loss when the area is so wide how do you know when to enter so what I like to do in this case is to let the market give me clues right to where it's about to show signs of reversal so what I like to do is to let the market usually come down first
make a first test and bounce and then come down again make the second test giving me like a False break and then bounce up higher so at this point in time I roughly know that okay buyers are coming in around this area I will reference this level right to kind of like set a proper stop loss okay so let's see what happens next so I'll just uh uh let the market continue right heading down lower at this point we have like a hammer okay so at this point I wouldn't want to buy over here because
again The market could at this point go up right and come down and continue the downtrend that could happen so I would want to see the market make another step lower and fail to go down lower right and that at that point in time that's where I would want to time my entry to go long okay so but what we have over here is that the market has come into our area of value let's see what happens Market heads up higher now consolidating a little bit And then hitting up higher nice now it got rejected
a second time so again pay attention to this one over here in the market head up higher swing down lower taking out this lows and then on this most recent candle notice the price rejection the market tried to break down lower couldn't and close almost near the heights of the days over here so at this point when I see this right I want to go along because the market is tell me that he tried to push the price Down lower two times and failed so that to me is a signal that okay buyers are possibly
coming in from this area of value and could push the price up higher so what I'll do is again I'll look to enter on the next candle open so let's see the next candle open over here I would like to go long okay I'll just put this in green signaling my entry price I'll remove the two black lines since you know this is the area of value I will set my stop loss like one ATR From this most recent extreme low which is this one here so probably probably might stop loss is somewhere here okay
just change this to red okay as for Target I will set it just before this most recent extreme High over here okay pretty decent risk to reward so set it over over here okay somewhere about here I said change this to Blue okay some of you might be thinking about right now why not you know this this Level over here I would say this one here is fine uh it's it's okay to be honest right because although your risk to reward is slightly less than one probably one to zero point eight I think that's a
decent level to actually set it as well so let's have another let's set a set of first Target just before this extreme swing it's not extreme but this most recent swing High okay and the second one further away over here so one and then the second one over here Okay let's see what happens next so in this case the market pretty much uh reach our first Target relatively quickly but this is not a big winner because you're probably like risking a dollar over here right as you can see this is your risk this is your
risk okay and this is your reward right to the first Target so I think you're probably risking like maybe a dollar to make 70 cents 60 cents or so right but Because you have a second target overall this trade could still be a profitable Trader if it reaches your second target so first Target is mad let's see what happens next so in this case the market now showing signs of reversal going back to your entry putting you in the rate right now so again remember many Traders you're panicking let me cut my loss let's move
on right no remember your stop loss is already at a place right Where it's logical it's away from the noise of the market it's away from support right now support is not even broken support it's now still intact you don't want to be cutting your laws right into supports right so your stop loss is there for a reason adhere to your stop loss let the market do what it needs to do and in this case you can see over here Market starts to again go up and up and down right messing with your emotions and
feelings and then finally You got stopped up on this trade over here so this trade overall I would say it will be a loser because your first your first Target probably is not enough right your first Target here is probably not enough to cover the loss on the second half of your position and it's perfectly fine why where I'm going over here is to kind of like let you know that you know when you trade as a Trader you will have winners you will have losers along the way I want to be honest About this
upfront the main formula is not the Holy Grail okay so manage your expectations hopefully by sharing losers with you right you would actually go out there to trade markets hopefully on the demo or a really small account and to manage expectations to know that there will be losers plenty of losers right that will come your way okay just one last final example before we conclude today's training right so this last example I want to share with You a concept what I call Stacked areas right this is pretty much where multiple areas of value come together
right to kind of like increase right the odds of the price reversing at that area so I want to share with you this concept so if you look at this chart what is the market structure it's in a uptrend okay so the market is in an uptrend and the next thing you want to do is to identify the area of value so as you know one way to Identify area of value is you know identifying support on the charts when the market is in an uptrend so over here we see the most recent one is
probably here I'll say it's quite significant right where previous resistance could previous resistance resistance could become support okay so around 79 80 price point so that is one area of value so another way to define your area of value is actually using moving average as well so in this case let me just pull Out a moving average indicator let's say we just go with a simple moving average like this oops I think I have it I already have it on my chart yeah so is this one over here you can see this is a simple
moving average and I believe this is the 50 period moving average okay so you can see that the 50 period moving average for this market for this time frame is significant as well because no this is tested once bounce up higher that's the twice bounce up higher test It three times bounce up higher fourth time bounce up higher and what is interesting is that right now the moving average core insights with the area of value the area of support that we have drawn earlier so this is what I call a stack area of value this
is significant because again we have multiple areas of value coming together and that increase the odds of a a reversal right at this area so this is an area that I want to pay close Attention to and of course I don't just for me my style is not to just blindly you know let's say the market come in right place a buy limit order get filled over here no I still want to wait for a valid entry trigger to go long so now what I would look for at least in this case like what I
look for is for the price to hit down lower okay maybe come here right then give me a bounce up higher okay and I come back a second time right try to break below this low But couldn't and then break it and then reverse up and close backup of support So if I do to see this looking something like a double bottom pattern right I'll look to go long on the next candle open stops the distance below the low my first possible Target could either be before this recent swing high or this further swing height
away so that would be my game plan to kind of trade this particular currency pair so this trade is a it's kind of like ongoing I have no Idea how it's going to play out but I just want to you know walk you through the live thought process that I usually have when I'm trading the markets myself and by the way if you're enjoying this training so far uh don't have to smash the Thumbs Up Button because I think you've smashed it a few times already don't don't spoil your mouse but what you can do
is a copy of this book called price action trading Secrets right we talk deeper about price action trading Strategies to profit in Bull and Bear markets how to trade breakouts how to trade pullback how to draw support resistance and much more I'll leave the link below this video where you can get a copy of it and with that said I wish you good luck good trading stay safe I'll talk to you soon