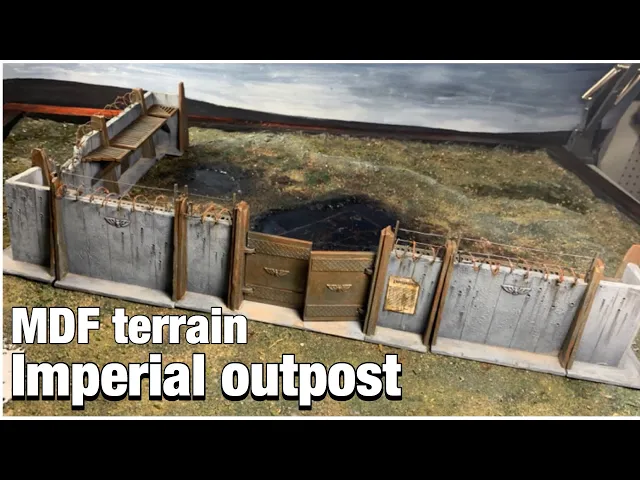
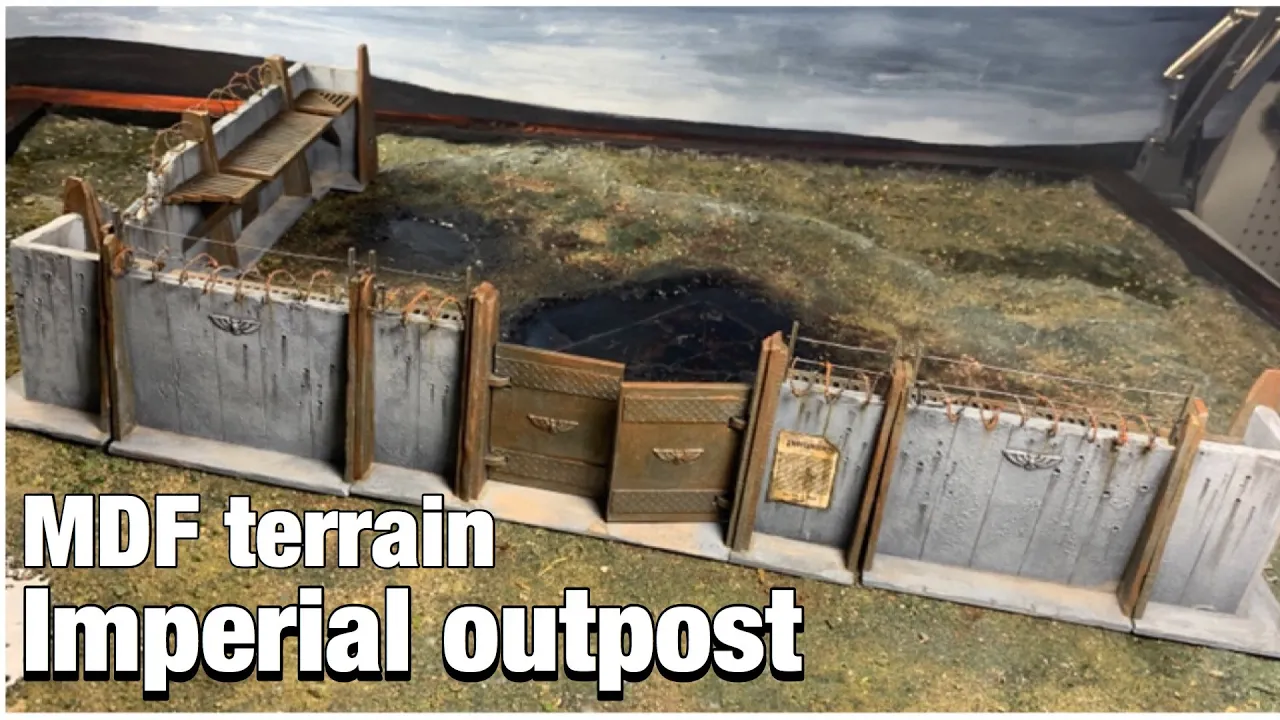
hi everybody in this video I'm going to show you how to make really cool concrete barriers out of an and the F kit this is not really sponsored content but still it was sent to me by the beautiful wonderful man over at scenery factory thank you very much Tom Wanek in this video I'm going to show you a whole bunch of detailing jobs how to texture concrete how to make barbed wire etc etc create a long video hope you enjoy it thank you very much for watching I welcome to the workshop so scenery factory you
can check out the link to the website in the description below this is the kit that he sent me bunch of walls corner pieces bunch of destroyed walls gates and a watchtower I received the boxes and this is what they look like let's take a quick look at the contents and do some dry fitting before we start with texturing [Music] every component of the kit is packaged separately and has its own instruction manual really an you don't have to go online and download it you can just take a look at it it's really simple a
dry fitted a wall section and I prepared some tools as you can see they were needed after all it was a perfect fit some of the pieces have several options as you can see I have to floor options for the breached wall here I made a dry fit I'm going to feature this in a future video I'm going to concentrate on the walls in this one and we're going to start by texturing and assembly you know be by now here over at the talk metal workshop we do like destruction so we're going to start off
by hacking up a piece of the wall sections just one and I use a hobby knife to just carve out a bit of destruction then I glue the straight sections all together with a little bit of PVA glue at the appropriate places make sure to remove the excess PVA glue as this stuff dries rock hard and is impossible to remove at a later stage time to hack up some more of the MDF pieces again with a hobby knife the sites are going to be metal the wall and the bottom sections are concrete but I just
used the same hacking away technique on all the pieces and then I want to simulate some bullet holes so I used my cheap drebbel knock off with a drill bit and I just score the MDF and make some holes in it not through the MDF but just enough then a couple of drops of the plastic putty by Vallejo and with a stiff bristled brush that's a hard sentence for a non-english speaker just stipple on the texture all over the model at the sides at the top and the bottom of course I'm going to use the
same party to simulate a bit of the weathering on the metal parts but then I'm going to use a lot less then I used on the concrete let's add some more detailing to the destroyed wall I want to simulate some rebar so I drilled a bunch of holes at the top and I glued in some pieces of guitar string to which I glued with a superglue a couple of pieces of plaster that I had lying around from other projects here you can see me applying the metal texture a bit more sparingly than I did on
the concrete for a bit of more detailing I also added the imperial eagle to the non destroyed wall sections for this I made a mold out of the Eagle since it was my last bit I had lying around I used blue stuff for this you make it softer in hot water and then you can need it and then press over the model you want to make a copy off let the mold cool off sufficiently and here you have perfect molds to make all your castings with time to lay down some paint we're gonna start with
the concrete for this I used black gesso and I painted everything in black [Music] after drying time I laid down a coat of grey to give a little bit of depth all over the concrete let's add in a bunch of more colors and this is a mixture of the medium sea grey and pale grey and we are going to dry brush the concrete [Music] a layer of pale gray wash this is a little bit darker than the other grades that we laid down not really visible but it adds a little bit of variation in the
gray color palettes and I step along a bit of a darker color quite subtle [Music] and then before weathering a final highlights of light pale gray with a little bit of white [Music] so for the first weathering effects the streaking I mix in a little bit of pale gray wash with black wash and I just pull the paint from the holes down and I do this for all the holes in all the walls on the entire project and I use a slightly darker mix and I blend in all the streaking effects and then on some
of the bullet holes I use a little bit of black wash too deep in the shadows and I also do a little bit of streaking effects a little bit more subtle this time just within the streaking that is already there I use the same colors to give a little bit of shadow to the Eagles and then after this painting step it's time to start assembly again with a little bit of PVA glue in the appropriate places this is to attach the walkways the painting for the metal parts is going to come at a later stage
[Music] time to add a whole bunch of more detailing I'm gonna start off by some debris again with the pieces of blaster that I had from a previous project whenever you cast something in plaster keep the excess don't put it away or don't throw it in a garbage can just pour it into a plastic container let it set smash it apart and you have these little pieces of concrete like I just add them to the base with a little bit of superglue now there are some extra bits in the kit this is a electrical console
used to open the gate I would think what I'm going to use it to control the electricity for the bobbed wire that we are going to make this is simply glued in place and painted up in a metal color for the electric wiring I use 0.5 millimeters abs Raj I take measurements and I just use my nails - bandits as it's really thin and real and really easy to manipulate at a later stage I'm going to paint it black and the console just metal colors with a little bit of shading nothing too fancy I attached
the wire with a little bit of superglue to the model [Music] and it's time to start making a bunch of electrical fencing these are 2 millimeter thick plastic arts bars I use my dremel knockoff to make little holes into them and I use super glue to attach these to the model [Music] simulate the electrical wiring I use 0.5 millimeter metal wire cut to size and glued in with a little bit of superglue [Music] [Music] for the box wire I use the same 0.5 mil metal wire I take a good piece of it fold it in
half attach the two ends of the wire into the Dremel bits and then I can take the other end of the wire with the pliers and I can just twist up the wire so I don't have to spend five dollars for about a metre of it of the stuff god damn that's expensive so easy to make yourself when it's done just twist it around a thick brush and there are your habits you can leave it as this or you can add a little bit more of detail as I'm going to show you here for this
I use zero point four millimeter floral wire which I bent and twist around the main wire to make it look like real barbed wire a little bit of more work well actually quite a bit of more work but at the end it looks really nice twice I think it's worth it and a bunch of metal nuts all over the wire twisted up as I showed previously and then you can attach it to a little bit of superglue to the model and you have your own barbed wire now we're going to continue with painting the metal
parts of the model we started with a black coat of the black gesso now a layer of Games Workshop LED belcher after drying I apply a mixture of sepia with a little bit of water or in my case the wash mix all over the metal parts as a first layer second second is a coat of pure sepia I concentrate this color to the sides and to where I apply it a bit of the texture [Music] [Music] and also with the CPR a little bit of streaking effect to where the barbed wire meets the concrete [Music]
and then finally for a layer of rust I mix in some humble wash with a little bit of rust pigment so it becomes this brown reddish color and I apply this color all over the previous sepia layer so wherever there's destruction or wear and tear and wherever there is texture I applied the rusts final step in the metal painting process is a dry brush of LED Belcher all over the metal parts just very gently to bring out some of the details you have to give it a little bit more life we're going to add some
posters and I went online search for 40k posters on Google this is what I found really cool stuff went to the print shop and got it printed out on a laser printer this is important if you want to whether the posters with ink if you were to use a normal printer it's possible that the inks will destroy the prints I've I crunch up the poster and then I simply attach it with a little bit of PVA glue and I use some sepia and black wash [Music] [Music] with the posters down it's time for the last
step in a project I'm going to add some pigments first I'm going to start with the destructed wall a bit of concrete pigments all around the rubble and a little bit of rubble pigments all over the bottom concrete pieces [Music] and that is it for this project once again thank you very much for watching ladies and gentlemen remember if you want to keep up with the dark matter workshop world I mean WIP pictures go and check out my social media don't forget to Like subscribe you know what to do please leave a comment if you
have any questions I will be glad to answer them and I will see you soon for a new project here on dark matter workshop once again thanks for watching and I'll see you soon bye [Music] [Music]