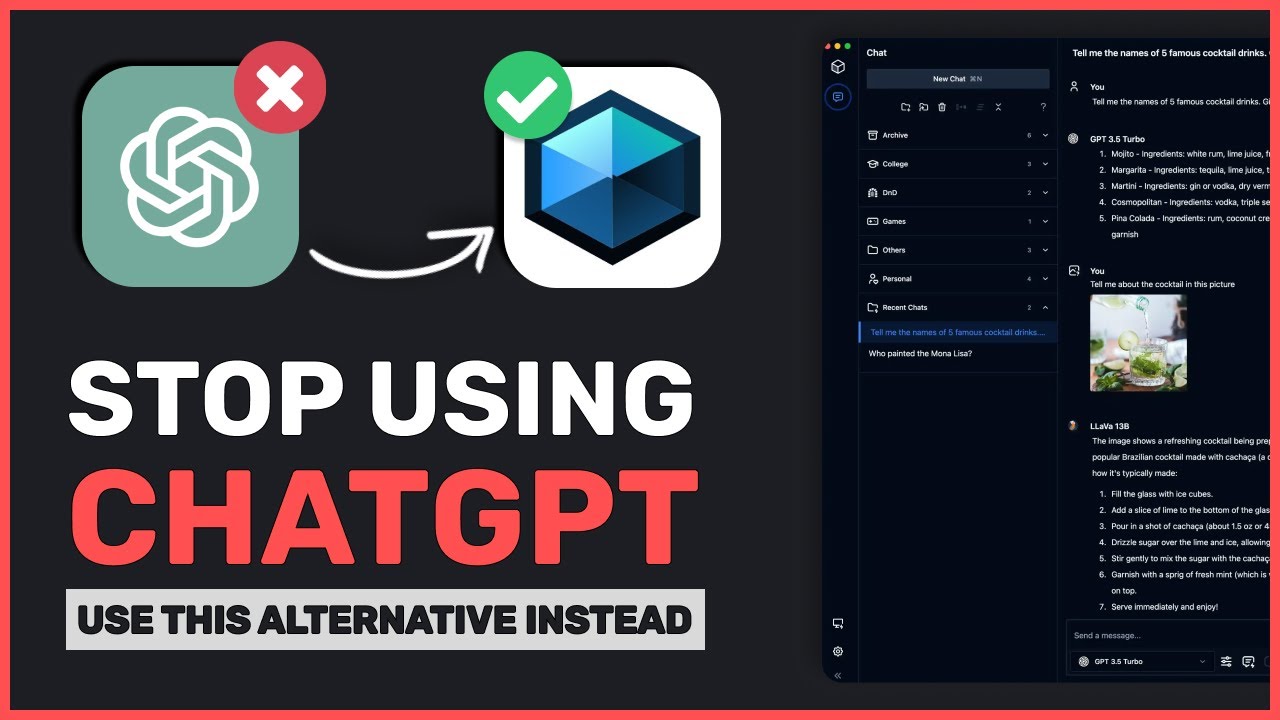
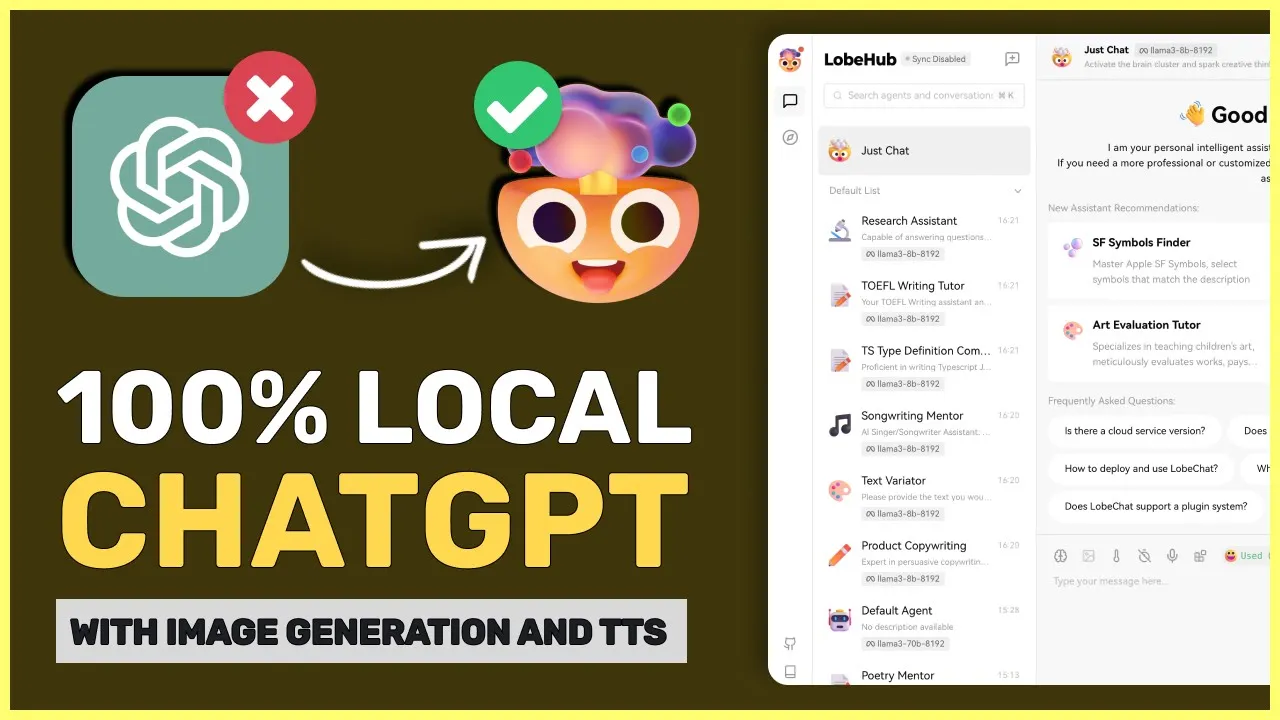
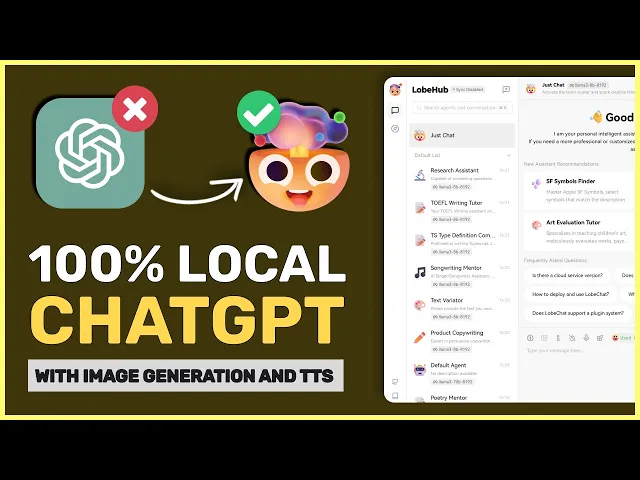
hey there welcome back to AI code King today we'll be talking about lob chat lob chat is a web-based interface that allows you to connect your API endpoints and chat with your API models it is fully open source and has tons of features so let's dive in and explore its features one by one the first feature here is that it has multimodel service provider support which which means that you can connect it with most of the service providers you can think of you can integrate your AI models from multiple providers such as AWS Bedrock anthropic
open AI Gemini Gro open router and together AI so you can pretty much connect it to any AI model you like but if you want to use it locally then you can do that as well to do that you can connect it to Al llama's endpoint and start using your local models such as llama 3 within seconds it also supports visual recognition which means that if you want to use GPT for vision or lava then you can use it here as well so you can use it with images and screenshots you can also convert the
messages to speech through the text to speech option you can also do speech to text with this which means you can just speak and it will auto automatically transcribe your message as text pretty cool another feature is the image generation option I really like this option you can connect it to multiple image generation API providers such as D E3 mid journey and pollinations this way you can get all your images generated from just one place another feature that is pretty cool is their plug-in ecosystem this could be pretty useful if you want a feature that
is not particularly available within the system you can just get the plug-in and integrate it directly into the application which is pretty amazing one of the major features that it provides is their agents Market through their agents Market you can get multiple fine-tuned agents and assistance for specific tasks like you can get agents for stable diffusion prompts or you can get agents for coding as well it also works on mobile devices as it's a web interface so you can easily access it from your mobile devices as well pretty cool also it's 100% offline and open-
sourced so all your chat data is stored offline and you can chat with your sensitive data as well there shouldn't be any issues of privacy as well now that's enough talk let's get it installed I'll be telling you how to install it locally with AMA as well as Gro first you'll need to get Docker installed to get Docker installed go to docker's website choose your operating system and get it installed from there once done we'll need to install AMA to get AMA installed go to alama's website click on the download option then choose your operating
system once installed come back to the GitHub page and copy this command paste it in your terminal and it should start getting installed once installed open it up now click on this get started button once done you'll see this chat interface now click on this button and click here now turn off the open AI option from here and turn on the Alama option now a llama has been enabled close this and now select llama 3 from here now before sending a message let me first tell you about this interface on the left side you have
the menu then after that you have the agents menu you can have multiple sessions with each agent this is just the chat agent so this is just for chatting over here you also have some options like temperature message count voice input and plugins for the voice input you'll need to use the open AI API in the plugins you can add multiple plugins which I'll tell you about later anyway let's send a high message now okay so here's the response with each response you can do these things you can edit the response copy the response do
text to speech but this requires you to use an open AI API you can also translate messages from here then you have the regenerate and delete options next if you look at the bottom near the send button you'll see another button which is add new session you can click here and add a new session if needed you'll see these sessions for each agent on the right hand side pretty cool so that is basically the chat interface now if you need to add a custom agent you can click on this add agent button and this will
create a new agent you can change this agent's instruction over here I have entered that it should be a coding assistant the more you add details to this prompt the more it will give you better results anyway now send a test message and it should work now the this is how you can add your own custom agent but it also has a marketplace where you can get specific pre-made agents to add the agent go to this option on the menu here you'll find a bunch of Agents you can find agents for each specific use case
which is pretty amazing I'll choose this poetry expert click on this add and chat option and you'll be sent back to the chat option now send a test message and check if it's working fine okay it works this is good and all but remember how I told you that you can add extensions to the model to get internet data or generate images well to do that click on this extension icon now over here you can see the D E3 built-in extension but you can click on this plug-in store and get multiple other extensions added here
for example you can add Google search image generation plugins weather and whatnot there are a bunch of extensions I'll add these two plugins the first one is the weather plugin and the second is the image generation plugin that works through pollination API pollination API is fully free and doesn't even require an API key pretty cool now once you have them installed come back to the chat screen now in the extensions option click on the extensions you want to enable for your chat I have enabled the weather extension here now let's ask it about the weather
in New York okay it works pretty well now let's enable the image generation extension now let's send an image generation message okay it automatically detects that it needs to generate an image and starts generating it and now we have the image here pretty cool you can use whatever extension you want and increase your productivity with this also let me tell you how to set up Gro with this to set up Gro just click on this settings button and over here turn on the gro option and enter the API key once done go back to the
chat option and you'll see Gro models pop up over here go ahead and click on the model you want to use and send your messages you can see how fast it is pretty cool it is really amazing for people who want a fully customizable experience with their assistance without configuring multiple things via coding or config files it's fully graphical and works amazingly you you can get multiple extensions and agents configured for your specific use case which is pretty cool I think it will keep getting better as it's an open- source project so let me know
if you will use it in the comments also if you liked this video consider donating to my Channel Through the super thanks option below this video also give this video a thumbs up and subscribe to my channel I'll see you in the next video till then bye [Music]
![I Replaced ALL my ADOBE APPS with these [free or cheaper] Alternatives!](https://img.youtube.com/vi/5EfqHg49kMk/maxresdefault.jpg)