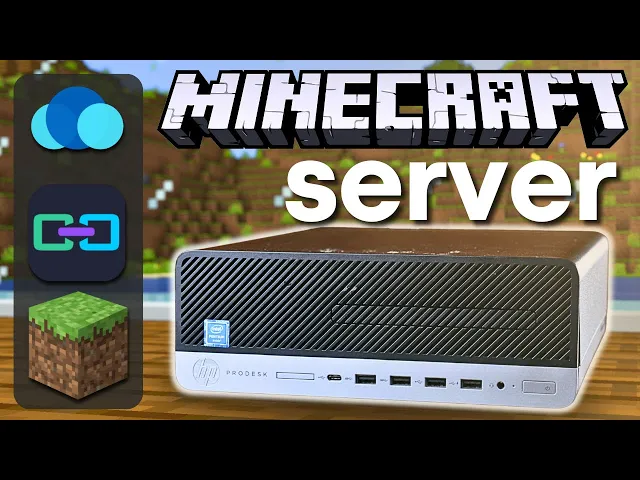
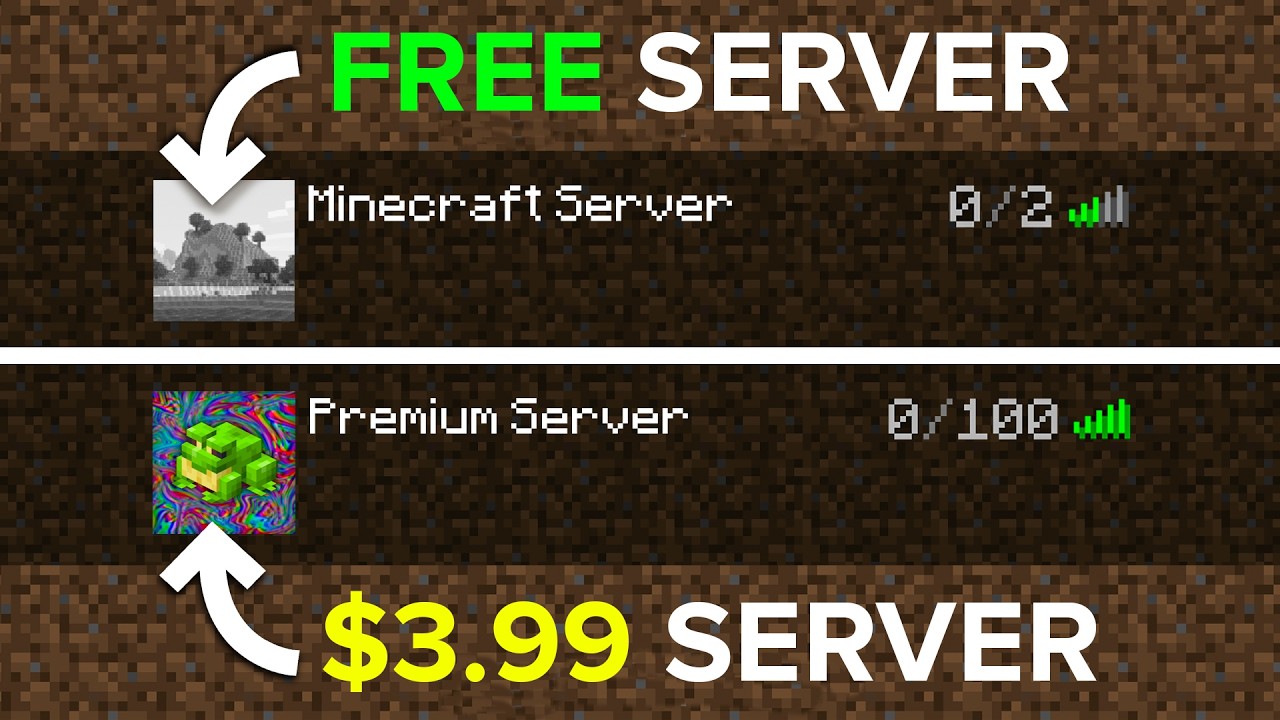
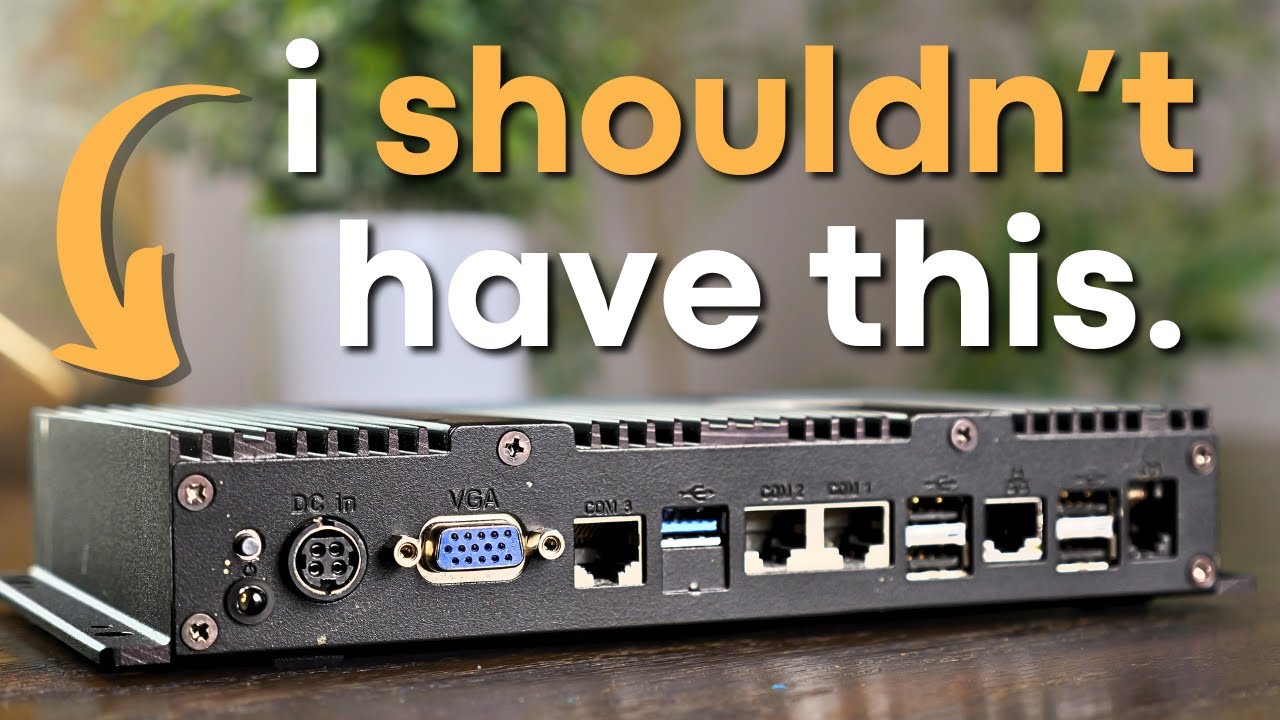
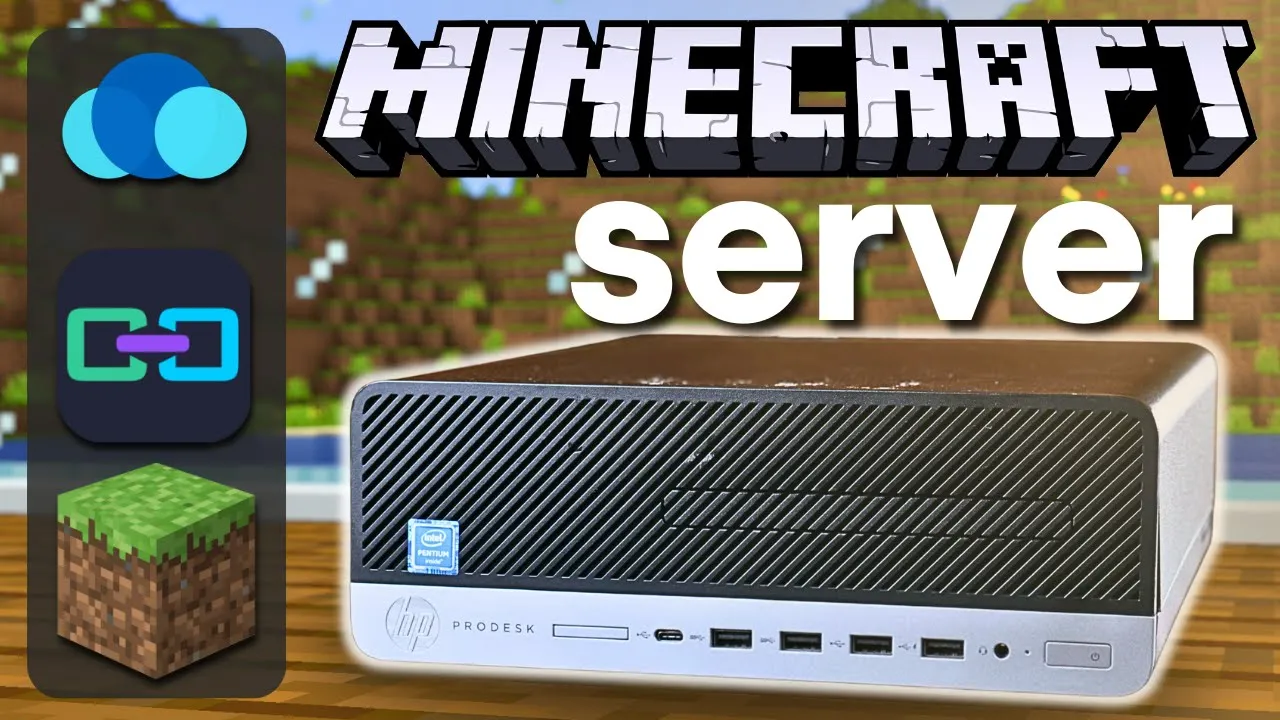
hosting your own Minecraft server actually isn't that hard and today I'm going to show you how you can easily host one or even many Minecraft servers without any experience in networking or Linux or any of that stuff in this video I'm going to cover everything from what Hardware to use and how to set up your first server to how to install plugins and set up backup schedules and even how to share your server with your friends or the entire world without having to deal with any port forwarding oh yeah and other than the cost of maybe buying a cheap computer we're going to do this entire thing for free let's get [Music] started now having a good charger is really important and I think that often gets overlooked so stop overlooking it and pick yourself up one of the super impressive nexo Pro Chargers from today's sponsor ugreen these Chargers pack a lot of power for example the nexo Pro 160 watt can charge a 16-in MacBook Pro to 50% and in less than 30 minutes this is thanks to its ability to provide 140 Watts from a single port and the 100 wat model is no slouch either being able to provide its full 100 Watts from just a single port but you don't just get a single port both of these come with a type a port and then two more type c ports with the 100 W model and three more with the 160 W model having all that power doesn't mean these are Big And Chunky though thanks to the Gallum nitride gain Infinity Tech inside these Chargers are actually surprisingly small I personally find the nexo pro 100 wattt to be perfect for me when I'm on the go it barely takes up any space in my bag and I can easily charge my laptop steam deck and phone all from this little charger the nexo pro lineup is compatible with just about everything since it supports USB power delivery but it also supports other standards such as 45 W Samsung super fast charging 2. 0 if you're looking for highquality super compact Chargers you can't really go wrong with the nexo pro lineup from ug green make sure to check out the links in the description for more info now before we get started let's talk about what all you're going to need first of all you're going to need a computer that isn't the computer you're using for your Minecraft server this can be anything running Windows Mac OS Linux whatever and since you're playing Minecraft I imagine there's a good chance you already have a computer now unless you're setting this up on a laptop you're going to need a keyboard and a monitor of some sort that can be a TV a computer monitor it really doesn't matter just some screen that you can plug into your Minecraft server while we're getting it configured once the server's set up you won't need that monitor or keyboard again to install the software you're going to need a USB flash drive and this can really be anything as long as it's 1 GB or larger you're also going to need an ethernet cable and access to your router because we are going to want to plug our server in you can technically run your server over Wi-Fi but it's not a good idea so just just plug it in and last you're going to need a computer to actually run your server on and this can be just about anything it doesn't need to be a server of any kind if you happen to have an older computer lying around there's 's a good chance it will work and the good news is even if you set this up and the performance isn't as good as you need it to be with how we set everything up you'll be able to migrate your server to some new hardware if you decide to upgrade down the road if you do need to buy a computer there are quite a few options that'll work just fine realistically any type of CPU that's an Intel core I3 I5 or so on will most likely work without any issues or an AMD ryen CPU is going to be totally fine as well if the CPUs are older than that you might run into some issues but more than likely it'll still work but if you try to have a lot of players or something it might get bogged down but once again you can pretty easily upgrade you'll also want at least 4 gigs of RAM but if you want to have a lot of players or you want to run multiple servers I would recommend at least eight or ideally 16 for storage unless once again you're planning on running a bunch of servers you really only need something like a 128 gig or 256 gig SSD or hard drive I'll have a website linked down in the description that has some more info on what you can expect performance- wise with different Hardware now what I'm going to be using and something I would recommend is something like this HP Pro desk this thing has an i76700 16 gigs of ddr4 memory and a 256 gig nvme SSD you can find systems like this on eBay at least in North America for well under $100 and if you want something smaller they sell these little mini systems like this one here that has an i5 6500t and I believe 8 gigs of RAM and you can find these once again for under $100 realistically my recommendation is finding something that's at least fourth gen I 5 or up and right now you can find pretty good deals on desktops with Intel 6th and 7th gen so keep an eye out for those now you might have heard about something called a Raspberry Pi and realistically I would just stay away from those while they can be really cool you can honestly get better performance for less money with plenty of other options all right so we have all of our Hardware what are we going to be doing with it well first we're going to be installing Debian 12 which is a Linux operating system and don't worry that I said Linux we're not going to have to deal with too much of the nitty-gritty command line stuff stuff and that's because we're going to be using something called C OS this is a nice pretty UI that you can access from a web browser that lets you manage your server and install different applications using C OS we're going to install something called crafty controller which is what will let us actually spin up and manage Minecraft servers once we have all of that stuff set up we can finally build Minecraft servers and manage them and install plugins and do backups and all sorts of cool things and we'll also be able to share our Minecraft servers with our friends or anyone else using something called play . G all right so that's enough talking about it let's get over to my computer and start setting everything up okay so I'm over at my desk and I have my soon to be Minecraft server sitting right over here off camera but before we even touch that we need to set up our install media so the first thing I'm going to do over on my computer is go to the bolina eter website and you can either Google this or click the link that I'll probably have in the description once we're here we can hit download etcher and then you'll just select the installer for whichever operating system you're using in my case I'll click download for Windows and then once you go through the install process you should end up with something like this here now we could click Flash from file here and download the file for Debian which is going to be our operating system but we can actually just flash from a URL so if we go back to Google Chrome for example once again I'll probably have this link here for Debian 12 but you can also just Google it and if we go all the way down to where it says amd64 which this isn't an AMD CPU don't worry you're using like an Intel I3 you know any sort of like Intel CPU or AMD CPU we'll click amd64 and we'll just go to copy link address and then back in B etra we can do flash from URL and then paste it hit okay and then we need to plug in our flash drive then hit select Target and scroll all the way down until we find this 32 gig flash drive I have and then hit flash after a few minutes we'll have our Debian install media ready to go all right and so it says flash completed and we we can now safely eject our flash drive now this part gets a little tricky because it's going to be different depending on what your computer is but what we want to do is plug this flash drive in and then try to get to the BIOS I'm going to go and plug it in really quick now for me with this HP Pro desk I can turn it on and just keep hitting the F9 key until I eventually land at the BIOS menu but it might be different for you depending on what your computer is you might need to hit the delete key or F12 or F2 or essentially just Google your computer model and figure out how to get to the BIOS but I'm going to go ahead and turn this on and like I said for me I'm just going to keep hitting this F9 key and you can see it says we're entering oh I was actually wrong that took us to the boot menu which is totally fine I can just go back and then get to bio setup which is F10 so I was wrong it's actually F10 for me now this is going to look quite a bit different depending on which computer you have once again but in this bios menu there's a few things we want to double check typically under a menu called security or boot you want to make sure that this can actually boot from USB so for me under Advanced and then boot option you can see USB storage boot I need to make sure and check that so A lot of times you need to hit enter or space bar to make sure that is enabled sometimes this will be called USB boot or something similar and then you also want to look for something called secure Boot and typically just make sure that's completely disabled once USB boot is enabled and secure boot is disabled you want to try to find the boot options menu so for me that's under boot options once again and then down here this is the order of devices that our computer is going to try to boot from and right now it's actually going to try to boot from that m.
2 SSD that's in there and already actually has deian installed so if I click here I can go change the order and I'm going to put my USB drive at the very top that way it's going to boot from this first and now I should be able to just go back and hit save changes and exit and once the computer reboots we should be at the Debian installer all right and perfect I didn't say this before and I probably should have but at this point we want to make sure our soon Tob server is plugged into Power obviously as well as our monitor keyboard and internet because we'll need internet access to get Debian installed but we're going to go ahead and hit graphical install and while this is loading I'll go ahead and let you know that there are going to be plenty of options here I'm going to skip because they're pretty straightforward like for example this first one I just select my language which is English and then my country and my keyboard so if I skip anything in this install process it's most likely just sort of Common Sense and if it's not Google's going to be your best friend and by the way I'm navigating around these menus using the arrow keys the tab button and the inner button all right so it recognized that my computer is plugged into my network and for this host name you can really kind of label it whatever I'm going to say mc- server then under domain once again this isn't that important but I like to put local now it's going to ask you here for a root password but we're actually just going to go ahead and hit enter and that's going to skip that and make our main user the root user so for your full name you can type whatever you want I'm just going to type Haven and then for my username I'm also going to keep that as Haven now here you want to make sure you type in a good password that you're not going to forget because it's not going to be fun if you do I'm going to use a super secure password here now once again don't forget this username and password and I'm going to refer to this as your Linux user moving forward so here we're going to decide which dis to install Debbie into which is pretty easy because we only have one I'm going to select guided use entire dis and then it should be pretty obvious which one is our flash drive and which one is our SSD so I'm going to select that and then here we're going to select all files in one partition and then we'll hit finish partition and write changes to disk and then yes and continue now I accidentally stopped recording and missed one section you'll be asked to configure a package manager just select your location the top option and then hit enter to skip past the proxy option for popularity contest you can just hit no under software selection we're going to deselect these first two options and just enable SSH server and standard system utilities then we can hit Tab and enter to continue okay and we're done so so at this point we can hit continue and then just make sure once the screen goes black unplug your USB drive this way when the system boots up it'll boot into the SSD that we just installed deban on and there we go after a few seconds we should be sitting at something that looks like this and this is where we can log in so we're going to log in with that Linux user we made so for me that's Haven and then my super secure password now I told you guys we're not going to do a whole bunch of Nitty Gritty gross command line stuff but there's going to be just a little bit of it but we're we're almost done we're almost to the cool part I promise so the first thing we're going to type in here is sudu suo and then apt AP update and then hit enter and it's going to ask for your Linux user password now you won't see that password when you're typing it just type it hit enter you'll be good now most likely this will just say all packages are up to date and if so that's fine if not you can type in sudu apt upgrade and then- Y but since we don't have any to upgrade it's not going to do anything next we're going to type in sudu once again and then apt install curl and then hit y for yes we also could have typed in that Dy flag and that would have worked and then we're going to use that curl package to download Casa OS so to do that it's curl and then Dash little F little S capital S capital L and then space then https colon SLG docasa . io then we're going to type a space and then what's called a pipe which is just this straight up and down line then another space and then Pudu it's really important that you put that Pudu there bash and we can hit enter and you should see something like this Casa OS is going to take a few minutes to install so go grab a cup of coffee or whatever and I'll meet you back here in just a minute so after a few minutes we're greeted with this screen here and KAS OS is up and running so down at the bottom of the screen you can see it says http/1 192. 168.
10. 0 and that is the local IP address of our server don't worry this isn't your public IP anyone can know this and they're not going to be able to access your server or anything like that it's just your local IP but this is how we're going to be able to access our server on our local network so at this point you can actually unplug your keyboard and your monitor and just run your server what we call headless with no screen no keyboard or anything like that and access it from the web browser so over in my web browser I can type in that IP address 192. 168.
10. 0 and hit enter and now we're on the kasos screen now I want to mention really quick this IP address is assigned via something called DHCP which hands out local IP addresses to all the devices on your network and this can change unless you set up what's called a DHCP reservation to do that you basically just log into your router and then most likely look for some settings labeled DHCP and then you'd find this IP address and reserve it somehow each router brand is a little bit different so you might have to Google for your router how to do that it's not required most like if the server is running most of the time it won't change but it's a good idea to do it just in case it does change because it'll be a little bit hard to find what IP address your server is you'll have to plug a monitor back in and that's no fun so I do recommend going to your router and setting up DHCP reservation but let's go ahead and move on so we're here we're at Kasa OS we can hit go and then we're going to make a new username and password and I'm going to refer to this as the casa OS username so I'm going to call it Haven and you do have to make a slightly more secure password here it has to be eight characters and then we'll hit create and we're good to go I'm going to just hit cancel on this news feed and we're now in Casa OS we can see some cool stuff here we can see our CPU utilization we can see our Ram utilization we can see our storage here we can see our Network status and some other stuff up here like we have a few basic settings and then we also have the ability to log in using our Linux username here and get back to a terminal if we want to do any command line stuff again we also have this files browser here where you can see we have a documents folder we have a downloads media and we have this app data folder here and then here's the real cool part of Kasa OS that's the App Store so these are a bunch of different applications you can install and run on your server but the one we're going to install is this one right here that says crafty so we can just click install and then this gives us the default account login which is admin and crafty I'll just refer to this as our crafty user so we have Linux user Casa OS user and crafty user keep track of them all okay so it says installation completed but there's actually potentially an issue if you're installing this right after I publish this video there's currently an issue with Casa OS that causes crafty not to install properly but don't worry it's a really easy fix and I'll show you how to do it if we go here to settings and then we go up here to terminal and logs and then over to logs we we can see we're getting some of these errors here these permission denied errors and once again that's because there's what seems to be a small bug with Kasa OS on this specific release as I'm making this video but like I said there's an easy way around it and I'll show you how to do that if we scroll down these settings we can kind of see what's going on here essentially this crafty application is actually what's called a Docker container don't worry too much about it but it's essentially taking an application or multiple applications and putting them in one little container that's really easy to install in different places and and really quickly like we just did there's a few settings that this automatically set up for us like which Port the web UI is going to be at uh all of these ports that it's passing through for being able to run various Minecraft servers if you're familiar with Minecraft servers you know that the default Port is 25565 which is right down here but there's a whole bunch of other ports it's passing through from our our server into this crafty container so we can run Minecraft servers on them don't worry if you don't understand it it's totally fine but down here we have our volumes once again you don't have to understand this entirely but we have some of these folders like a folder for our backups a folder for logs a folder for our servers our config and these all live in this SL dat slapp data and like I said there's what seems to be a bug with Kasa OS currently and how it installs applications and how it installs doer containers where there's a permissions issue so what we can actually do is just not use this slata slapp data we can make our own folder and bypass this issue so what we're going to do is go back to this file browser and we're just going to go up to the very top where it says says root and then home and then Haven and this is our Linux user home folder in this folder we're just going to hit create and then make a new folder and call it crafty and hit submit now we'll exit out of that and we'll see here crafty is all grayed out because uh it had a bunch of errors and didn't start properly so we're going to go back to settings and we're going to fix it so if we scroll all the way down past all these ports to these volumes here what we're going to do is instead of this SL data datac crafty backups we're going to click this little button here and go all the way back to the top until we get to this root folder and then home double click on Haven and then there's our crafty folder so we're going to select that but we need another folder in there called backups so I'm going to do slash backups and then I'm just going to copy paste this first part of this string here and paste it to all of these others so instead of saying SL data data crafty SL whatever these are it'll say slome haven crafty SL whatever these are after that we can hit save and this crafty container is going to try to spin up once again but this time it should work so if we go back to settings and then up here where it says terminal and logs and logs we can see we're not getting all of those permission errors we get all this goodlooking stuff it even says crafty has fully started and we can even go back to files and go back to rout home Haven crafty and we can see we have all of these folders now and there's actually cool stuff in there and that's because that container for crafty mounted to these folders on our server and started putting cool stuff in there okay so it's all set up it's running let's go ahead and click on crafty and the first time you click on it you'll probably get this screen that's just fine just hit click here and then don't worry about this your connection is not private it's totally fine just hit Advanced and then proceed now we can use that crafty login it gave us which is admin and password crafty hit enter and we're here we did it we're going to I'm going to skip this survey we are at our crafty dashboard and this is where we can start doing really cool stuff now one of the first things you might want to do is go up to settings and then you can go over here to new password and we're going to get rid of that crafty password just because it's the default and everyone's going to know what it is let's go ahead and create a Minecraft server so to do do that we can go over here to servers and hit create new server and there's a few different options here for importing different servers or just creating your own there's also a Bedrock option which I'm not going to touch on because I'm a Java Minecraft guy and that's what we're going to stick to for this video but it is an option which is really cool so back over in Minecraft Java we're going to create a new server and under server type there's a few different things here for example you can just do a vanilla Minecraft server which is great but I like to go with server and then use the paper server the paper server is a bit more lightweight so it's great for older computers for example and for just saving some power the latest version here is 1. 9.
4 which is perfect because that's the version I'm still currently running and under server name I'm just going to type in server one under minimum memory we'll just keep this at one and then maximum memory this is going to depend on how much RAM you have and how many servers you're wanting to run if you only have 4 gigs of RAM I would probably only set this at three that way you have another gig of memory for the operating system to use if you have 8 gigs and you're only going to one run server you might as well set it to like seven or six or seven something like that ideally the more RAM the better but if you're only running a small server with a few people it's probably going to be fine to have a smaller amount I'm going to go ahead and just say six and then under server Port the default is 25565 but if you're running multiple servers you're going to have to change this to something else that way those ports don't conflict since this is our first server I'm just going to use port 25565 and then I'll hit build after a few seconds we should be able to hit this start button and it's going to ask us to accept the Minecraft Ula we'll hit yes and you can see it's spinning up here and if we actually click on server one we can look at the terminal here and see these logs and it looks like everything is working as expected so in Minecraft I can go to multiplayer add server and we're going to call This Server one and then for server address we're going to type in that 1 192. 168 do10 and then 205 obviously change this to be whatever your IP address of your server is now I could type colon 25565 to tell it which port to use but the default is 25565 so I can actually just leave this blank we'll hit done and it looks like it's working if we double click on it we should be able to connect and there we go we are in our Minecraft server and it looks like it's working just fine if you go back to crafty we can actually go to player management for example and see that Hardware Haven is online and I have the option to ban myself kick myself or assign myself as op which I'm going to do now there's also a lot of other really cool stuff you can do here for example you can look at metrics and see how many players are logged on and see your CPU usage and memory usage you can go to config and adjust certain settings some of them that are probably worth turning on is This Server auto start and server crash detection we'll hit save this file section is really important and we'll come back to this when we're doing some other stuff like adding in some plugins now here where it says backup we can actually set up backups which are really important if you want to make sure that if something terrible happens to your server you have a good way to restore it from a previous backup so you can change the storage location but I would just keep it at What It Is by default and then Max backup you can either leave this at zero to mean it will keep all of your backups or you can set a limit for example 10 and then only your most recent 10 backups will stay saved now there's this option for shutdown server during backup and I do sort of recommend this because I've I've noticed some weird things in the past where when you back up the server while it's still running it might miss certain things so I'm going to check this and then hit save then actually just for fun back in Minecraft we can go build something so we'll build these three blocks here we'll back up the server and then we can see we have this backup over here now if I go back to Minecraft I can destroy these three blocks and then back in crafty I can hit restore back in Minecraft these three blocks are here just like they were before so backups are super super useful and they're even more useful if you set up what's called a schedule so back in crafty under server one we can go to this schedule Tab and hit create new schedule and then here we're going to call this weekly backup obviously you could do daily or whatever else and we're going to say basic action backup server and then under interval we want to say every 7 days and then under time we can just say something like 3:00 a. m.
and then if we hit save we can see that the next run is on the 8th of January and we'll run every 7 days it doesn't seem like there's a way to pick which day exactly this starts but uh yeah it's still great great I would recommend probably doing like a daily backup but you can actually set multiple so you could have one that's done every day and then one that's done once a month or something like that you could have multiple backups now if you really want to be safe you can actually go back to Casa OS here and under files you can go find our root folder home Haven and then crafty and go to backups and you can see we have this folder here with some weird text this is a little bit unideal but if we go back to crafty you can see The UU ID of This Server so this 3C dad or 3C dad and we can we can see that uid find the folder and then this is where all of our backups for our server live so if you want to copy these to your own computer or copy them to a flash drive or whatever else that's a good way of having those backups off of your server that way if your server you know catches fire or something you can still build a new server and then put these on that one so it's good to take these backups from your server and save them somewhere else that way if your SSD crashes or or something you have a good backup now let's say something like that does happen and you need to restore that backup to a new server now speaking of restoring a backup let's actually do that let's say we had a server that something happened let's say for example uh someone built this house and uh we had a backup from before this house was built and I still want to keep this on one server but let's say I want to run another server with the backup from before this little house was built so this is server one right now let's make a new server so we'll go to create new server and this time instead of going under this create new server menu we're actually going to go to upload zip file for Server import so back in C OS I'm actually going to download this backup and then back in crafty in this upload zip file for Server import I can go to browse and then just upload the zip file from our backup and we'll call This Server 2 hit upload and then here where it says click here to select root directory we don't have a root directory under this so we'll just hit save and actually back in this menu we can just highlight this paper. jar here and then under server executable file we'll just paste that and then here I'm going to give it a max memory of just four because why not now for Server Port we can't use 25565 again so we actually need to change that to something like 25566 and then hit import server now this is looking good but if we actually go into server two we're going to see that there's an issue if we try starting the server we're going to get this error and that's because the address is already in use because up here it says starting Minecraft server on 25565 and this is because while we told crafty that the server was going to be on Port 25566 because we actually imported the server. properties file the server tried to start with the original Port so what we can do is go to files and then scroll down to the server.
properties and click it and then over here under query Port we'll change that to 25566 and then down under server Port we can also change that to 25566 hit save and then go back and start our server again and we should be good all right so in our dashboard you can see we have two servers running server one and server two and if I go back to Minecraft I can add that new server one 192. 168. 1.
254 66 hit done and here we go we're on our second server currently which doesn't have that house thing that I built but if we go back to our first server you can see it's also running it's it's nighttime actually and we have that house all right now let's say we want to start a new server but we don't want to use just a randomly generated world we want to use a world that we downloaded from the internet I actually already downloaded this Sky Block 2. 1 zip here which is a Sky Block World which is my favorite way to play Minecraft and I'm going to create a server using that Sky Block World so I'm going to go back to create new server I'm going to once again use paper here and then I'm going to call this Sky Block give it four gigs of RAM and then we'll set this to Port 25567 now because we're building this server from scratch when we type in this port 25567 that will actually build that server. properties file to say 25567 so we won't have to go back and change it so let's hit build server but now before running this server we're going to upload our world folder if we go to it and go to files we can see there's not a whole lot in here so to upload our Sky Block World we can just right click where it says files and hit upload and we're just going to choose this dotzip and you will want this to be azip otherwise you'll have to upload each single file individually because you can't upload folders fortunately once this sky block-2 1.
zip is in here you can unzip it and then we'll rename this new folder to just world and we can delete this Mac OS folder and we'll delete this original zip so now our files are the exact same other than this world folder that we uploaded and within this there's all of this other stuff now you might be tempted to just go into Casa OS in the file browser find your new server whichever one it is and upload the world folder here and that sort of works but you run into a weird permissions error that can be fixed if you understand some Linux stuff but I recommend not doing that and I recommend just doing it from The Crafty controller that'll make sure the permissions are all correct and you shouldn't have any issues so let's give it a shot um we're going to go back to terminal here and hit start we'll agree to the Ula again and it looks like we're all good let's go add this server to our Minecraft server list once again 19210 205 and then we'll add the port as 25567 Sky Block and now if we connect to this new server we should see a cool new Sky Block World instead of the standard vanilla and look at that we are in Minecraft Sky Block we've got our ice block our lava bucket our custom world is working now let's talk about plugins because if you're running a server that's probably something you need to use for our main Minecraft server for our main Minecraft server I already downloaded this Essentials plug-in this Do jar here and we need to add it to our server so under server one files we can go to the plugins folder and we'll right click and hit upload choose files and then we'll upload this Do jar hit upload once that's uploaded we can just go back to the terminal here hit restart and you can see as the server's starting up here we see all of these Essentials messages so it looks like it worked after making sure I'm set as an op in our original Minecraft server I can type in something like SL fly and then Hardware Haven and now I can fly look at that okay so we have plugins working we have our servers working even a Sky Block BL world but now we might want to share that server with our friends that may not be living in our house with us if your friends just try to type in that 192. 168 IP that you have it's not going to work because that's your local IP address that only works on your local network now you could share your public IP address and set up port forwarding through your router but that can be a little bit dangerous a little bit sketchy and you also have to figure out a lot of more complicated things so there's actually a much easier way with a website called play it. and if we go to their website there's this download button and rather than downloading it for Windows or Linux or Mac OS we're going to actually download this plugin which I already did and since this is just a plugin you might already know where we're going with this back in our server one files here we can go to plugins right click and hit upload and we're going to upload the play it.
jar and then after we restart the server you'll start getting these gg. playay it messages here with a to claim visit this web address and this will also show up in the actual Minecraft chat as well so only run this the first time when you're the only person in the server we'll copy it and then paste it into our web browser and now if this is your first time using play it. you'll need to make a new account I already have one so I'm going to log into that and then once you either log in or create your account you should be met with this waiting for agent to connect and it looks like it did all right and once this automatic stuff all finishes you should end up with something like this where we can see we have this tunnel created with this Ur we have this tunnel created with this URL of ready - cherry.
jooin mc. link and I can actually hit view tunnel and under this agents tab we can see our server with our public IP so don't share this with people just just don't share that with people and then under tunnels we can see this and essentially how play it GG works is whoever wants to connect to your Minecraft server actually connects to the play it. servers so they don't connect to your IP address and then from those servers it's tunneled into your Minecraft server using something called essentially a VPN tunnel so it's not 100% safe anytime you expose anything on your local network to the internet there's always some risk involved but it's substantially more safe than just port forwarding and sharing your IP all right so now we can actually just copy this ready- cherry.
jooin mc. link go back to Minecraft we'll call This Server play it and for the address we're going to put this ready- cherry. jooin mc.
link and hit done now this may take a while the first time I ran this when I tested it actually took a while for this to finally work but it looks like it's already working I can double click on this and I'm actually back in my original server that I made but I'm not connected via my local IP address you can actually see when I log into the server locally using our original setup here we're in our server it's it's raining but if I go back to the logs you can see down here it says Hardware Haven logged in from 192 to 16185 that's my local IP address on my network that's my desktop PC but if I go back to my Minecraft and I connect using play it. we're on the exact same server but if I go back to the logs you can see I'm actually logged in through this one 127. 0.
0.