Hello guys this is leonardo do speaking channel on the tutorial site and in this video is teaching how to optimize the new windows 10 in version 1903 that was recently released by microsoft at the end of May remembering that this tutorial is aimed at those who made a clean install of that latest version and intends to optimize beauty from scratch here at my case i created a new user however enabled by default and I will optimize the system in real time to show you the result after all modifications the tutorial is being completely redone some
parts from scratch unnecessary or deleted this version or bring the refills with more details and information so without further ado let's get to what interests everyone's first step as as usual will open the microsoft store inside here you saw click on these Three dots will navigate to settings and inside here will turn off this option called refresh apps automatically because always start with this step if you did a clean install of this new one windows is quite capable of this configuration is turned on and as one of the 10 install multiple applications together games as
soon as the system starts and there is an internet connection it will try to update all these apps And games from the list which can leave your completely slow connection so to to prevent this from happening is always important to turn this option off as soon as the installation of your new windows se complete if later you want to update your apps from games manually just click here on this download icon and click on get updates apart from this first option, I recommend that you disability also these options soon Below calls show products on block
and play videos automatically the first serves to show app suggestions games inside the start menu and the second serves to allow the videos play when you visit an app's page game within the same microsoft store the way it happens when you visit game page inside the store extinguished all this consumes bandwidth The internet works so if you have one slow or very limited connection one more reason to disable these settings the next step will be to remove the biggest possible number of dynamic blocks of the your start menu the more dynamic blocks you add to
your start menu more heavy it gets so remove the blocks dynamics of absolutely all apps and games you don't Intend to use or access in this new windows 10.903 you don't need to keep removing each block dynamic at a time if you have multiple dynamic blocks grouped in folders you can just remove them clicking with the right mouse button about the dynamic blocks bet and clicking on challenges ar just start in the same way you can remove a single dynamic block by right-clicking right mouse button on it and Clicking on challenge from start here on
my case I will absolutely remove all if you remove all take advantage and decrease the allocated space for the live blocks so that the menu start become more compact and lightweight so it looks similar to the menu start from old versions of windows taking up less space on the screen the next step will be to open the panel settings to modify a windows 10 settings series So first press the combination of windows keys plus the letter there or simply click on this icon gear in start menu so here inside the panel settings let's start with
the tab system here on video if you don't intend to use the light tool nocturnal disable the same here in my if you use another program called f looks that gives me greater control over the screen tone and brightness then I will Disable night light remembering that in this new version of windows 10 multiple users are reporting a buggy with the buggy tool night light so it might soon in a future update to microsoft fix this bug here at home I use a 24 monitor inches so if i leave the image scale 100% the icons
and letters look great small on screen what i don't like If this is your case and you increase the scale of the desktop windows 10 you can for example choose the 125% scale which is the one I I like it more and recommend using it of course this is optional it's just a tip that I pass on to whoever has one very large monitor and want to optimize the screen image ratio after that have you seen clicking on the notifications tab and stocks if you don't intend to be bothered by On-screen notifications while performing some
task such as watching a movie a video on youtube play a full screen game i recommend that you disability this option especially if you have one very limited computer like hd a lot slow because every time a notification has to be displayed on the your computer screen it will give that slight brake that can be pretty boring at times Now if you use any application or various applications that usually show notifications and you don't want miss them you can click here on focus assist settings and customize notifications for example you can configure the wizard focus
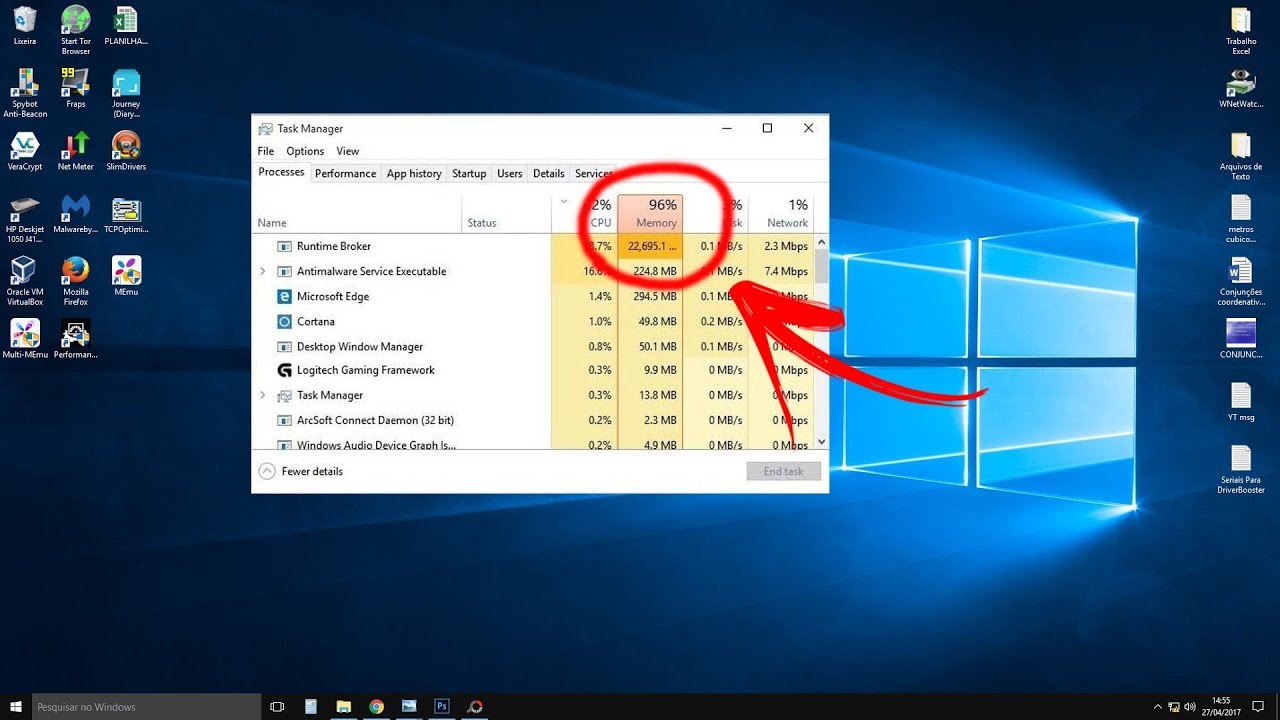
to prevent any notification is displayed on the screen but only when you are playing running a fullscreen application like vlc player for example or what not Notifications are displayed during a specific time you set in this first option so all the notifications that are received while any of these rules are in force will go to the central of actions where you can view them later beauty down here you go to uncheck these two options show windows welcome experiences and get tips tricks and suggestions on how to use the system These two options in the past
used to cause a problem in windows 10 where the cpu and ram usage eventually went up from one hour to the next and although this problem does not currently occur still extremely advisable turn off these beauty options here at up on edit your quick actions I recommend that you remove from action center all these buttons quick action y'all don't intend use just click on the icon Pin and they will be removed automatically as he rarely opens anything in the action center I will remove absolutely all these buttons beauty after that you will navigate to power
and sleep in this new version of windows 10 we have this bar where you can choose between the best power saving mode highest performance energy that is the middle ground between extremes and better Performance this here is nothing more than a form more practical to configure the options of old control panel power on control Panel we have a balanced economic profile of energy and high performance so that here is the same thing only with others names if you don't care about the economy of power on your computer and you don't want windows below put your
cpu or Temporarily turn off others peripherals like mouse and video card the network card while the ps is idle then you can choose mode high performance or here on the bar slide to the end that's what you will only have relevance if you often use the windows 10 to run heavy games because so your hardware is always ready to run at full speed without entering energy saving mode energy taking advantage of what we have Open control panel you will navigate to choose button function of energy will click on change settings not currently available and down
here will make sure that this option called turn on startup fast is selected this here will help the system like this start faster after you turn it off always after performing a format clean upgrade or install system updates is extremely Advisable to do a thorough cleaning on the system to remove files temporary old facilities windows and updates copies downloaded in windows update because when you perform an upgrade windows keeps a complete copy on the release disks old for up to ten days so that you can undo the upgrade at any time time and in the
case of updates downloaded the system also keeps a copy of the Themselves saved to disk by a certain time only that windows 10 has a cleaning tool that's there storage sensor call all that is allowed to remove all this windows rubble with just one click of the mouse leaving the system free of temporary files in this new version from windows 10 as we can see this tool has been completely refurbished and many users may get confused here inside it but it doesn't have the slightest Secret when you access her menu for the first time she
performs a scan on the system and that shows the so much so that each of these items are taking up disk space but what you will pay attention in here is in this part called temporary files clicking on this option the tool performs a deep scan on the system looking for temporary files copies of windows update and old windows installations that You can pay to free up space on your disk so here on the list I recommend that you leave everything selected is right this option of thumbnails otherwise thumbnail box of windows explorer will be
recreated from scratch it is only advisable to select this option in case you think that the cache is too large for example occupying 500 megabytes one gigabyte or any value above that unless that is not advisable to Clear the rest thumbnail cache you can select all done that just click remove files and wait for the cleaning to finish what it can take a while beauty if you updated your windows 10 using the upgrade wizard I recommend that you also take a look on your local disk and other parts your disk if there are more than
one and if by chance you come across this folder called windows 10 upgrade you Will delete it completely from disk because they are temporary folders created by wizard during the upgrade process here in my case the wizard did the windows 10 new version download inside that folder on my part are from backup occupying almost 3 gigabytes so it's always important to keep an eye out in those temporary files that are created during the upgrade process so they don't stay there occupying actor space on your hard disk ok when At the end of this step, you
will return to settings panel back in the tab of the storage sensor I recommend you disable this tool so that it does not perform the shape cleaning it hurts your system because how do you could see this task can leave the hd temporarily slow while cleaning in addition to consuming cpu resources and ram memory and you won't want that it happens when you are Playing some heavy game or simply surfing the internet after that you will navigate to shared experiences and if you log into windows with a microsoft account but don't want to that it
share data of its applications between your computer and another device with your microsoft account logged in too you will turn off this option here in clipboard in case you Don't want to use the tool transfer history where you can copy and paste multiple texts different so please turn it off this option by doing this you prevent the system ends up creating a history of texts that you give control and thus preventing they are saved in ram memory no need to anyone desktop remote if you don't intend to use this Feature also turn this off option
after that you will navigate to the menu devices if you are the type of user who lives using mouse scrolling and bothers with the fact that he makes the roll of way too slow what the board to do inside here is to access the mouse tab and increase the number of lines per scroll an optimized value and that I advise you to to use is anyone that is between the Five and ten for example I use usually the value 7 went from that to scrolling it gets very fast what ends up bothering a little down
here I also advise to leave this option enabled because when you have multiple open windows side by side and no want to click on one of them to scroll any content just you position the mouse pointer over this window and scroll the mouse wheel that the system itself understands that you Want to scroll window contents focused with the mouse a very useful feature interesting and that few people know is that windows 10 is capable of correct and offer suggestions for words typed with the physical keyboard so if you want to optimize further the digital process
are within windows 10 I advise that you come up to typing and enable all these options from there when you type Any content in a text field like in notepad for example the system that offers suggestions for words you can select with the mouse or using the arrow keys keyboard however, it is not always that this resource works will depend a lot on the type of application running now if you don't like to use this type of functionality so just uncheck all that Here after that you will access the menu of windows 10 customization so
here in background you will first choose a still image to be used as a paper wall you can choose one of these images below or you can use a solid color it is also important to avoid using the option of slideshow because this option causes windows 10 Periodically change the wallpaper or which can cause minor crashes and bottlenecks in the system depending on the your hardware settings then you will navigate to the color tab and will disable the effects of transparency automatically to do this you will notice that the menu start and windows in general
became lighter opening in a way much faster just below you go to uncheck this Box automatically choose a color prominently on my background and you will customize the system yourself choosing a specific color by doing this you prevent the own system keep alternating color periodically which may affect negatively the performance of windows since as you can see it takes a while little bit to apply the new color selected already in relation to these two options here Further down is up to you to mark them or not because this here already involves the customization part of
the interface system and not the optimization itself however note that the first option is off and this is another bug and it came up in this new version of windows 10 that prevents the start menu color scheme taskbar and action center be changed you can only change the title bar color scheme and The edges of the windows but this should be fixed soon ok so don't worry right after this will navigate you to start from there here you will enable the option show most used apps and will disable the option just below show suggestions occasionally
on starting the first option will allow quickly access programs and apps you open with more frequency in windows That way you avoid having to stay looking for them all the time start menu and turning off the low you prevent windows from showing hints and tips inside the start menu after that you will navigate to toolbar tasks down here if you don't want the people app appear in the bar tasks you will disable this option here on toggle icons on or off system you can disable some Icons that you don't want to appear on the taskbar
for example you can hide action center or icon network so you leave the taskbar more clean after that you will access the menu of apps here in apps and resources I recommend you uninstall all those apps and games that come pre-installed on system and that obviously you don't Intend to use for nothing However, it is worth noting that a large part of these native windows 10 applications as you can see they occupy a space and significant in the risk so that I advise to do is to sort the list by size and remove only the
native apps that take up too much space and that obviously you will not use one of the greatest examples is the andré lives how he uses google drive to sync my documents on Cloud do end up using android to nothing in the system because it usually uses a lot of cpu when it loads then i can quietly remove it from my system if you did the windows update using upgrade wizard too advisable to remove it from the list since you don't use guns for nothing at least until the next bild comes out what should take
a while in this new version of windows 10 you You can install directly here in the list following 3d viewer apps groove music e mail calculator sticky 23 movies and tv calendar notes and the voice recorder apart from these apps, there are a few more here you can install quietly but others like the pictures the camera you can not install by here just using the command line in powershell so as usual I I will pass you a list with all The commands to remove apps windows 10 natives using powershell this list keeps being basically the
same as the previous version from windows then just access it there in the link that I will make available on video description copy command from app you want to remove from system then right after you go to the menu start type powershell open the power floor in Mode the administrator waits for him to carry the command inside it on your lap and press the enter key after that the application will be removed if you don't use the app maps will navigate you to offline maps will click delete all maps and further down will turn off
the option update maps automatically if you often play content on video inside apps like movie tv or any other application that Will allow video streaming but you uses an unlimited internet connection then you will navigate to playback of video and will check this box allowing windows to reproduce the videos in a lower resolution and This allows the loading of videos themselves occur more quickly and to save the width of band done that you will navigate to startup all these apps That appear in the list are applications that start with windows 10 the more apps start
together of the system but slower will be yours boot then in here disable the maximum possible number of apps obviously some of them like google drive antivirus service my mouse dog driver we need to start with the system but other programs such as ccleaner or spotify or torrent i don't need it to be Starts leasing with the system because it does not it's every time you run it the same if you want to get an idea about the impact that each program or application has at system startup you can come here in this menu dropdown
and sort the list by impact on startup so you can analyze with the application the program weighs more and which one weighs less during initial loading system Done that you will access the menu accounts on the home panel as I said for you I don't use an account from microsoft to log in because although it is difficult to happen there may be a bug during the system login process mainly after some process of upgrade then to avoid these problems when logging into windows eu I always use a normal user account offline Just like we used
in the older versions old windows like in version 7 by example it is clear that using an account from microsoft you have some advantages such as leaving your windows settings always synchronized with your email account sync your settings and passwords between multiple devices but I don't use many microsoft online services I use google services more then for me this account model is not Advantageous if that's your case what I recommend doing here is creating a new user with administrator privileges obviously but be a user normal offline that is independent of your microsoft email account like
this you streamline and optimize the process of login in if then to create an account online navigate to family and other users click add someone else on this pc when this window loads Microsoft will suggest doing just that that I just said create an account linked to the email address of outlook than microsoft email but you will apply here do not have the input information for that person done this will click on add one users on a microsoft account will then fill in the fields with the desired username will create a password and down here
you will choose three different questions and three answers Secret for each so that you can recover your account in case you forget your password in the past I'm not mistaken you only could choose a secret question now you can choose up to three hotels it's very interesting done that you will click on next your account will be automatically created then after that you click on it click change account type and choose the admin option inside From this drop-down menu, then click on ok and ready your online user account will have been created successfully and will
already be with administrator privileges machine then you will access the games guide inside here you will navigate until game mode from here you will make sure this setting is enabled a game mode it serves just to optimize your cpu how to maximize windows performance 10 within your games it does this by limiting the processes and running in the background and prioritizing game processes if running in foreground and that consequently has a positive effect in the games that can have a gain in the amount of fps but it will vary a lot from game to game
to play generally the games that most benefit from this optimization are games that you download from the microsoft store plus Going forward I will talk about the process reada what is optimization software of cpu that also has a game mode then you can choose to use the windows own game or mode lessa process game or stay beauty of you after that you will navigate to the tab ease of access so here is the following on screen tab you will turn off these two options show animations in windows and show Transparency will then navigate to keyboard
and here I recommend you guys uncheck this box allow the hotkey launches hotkeys grip because many times you are in game or using any program on the which has some command that uses the shift key and after you press wash sometimes windows ends up showing this on-screen prompt asking if you want enable sticky keys now imagine it appearing when you Is focused on a game of online play can be very convenient and even make your game crash momentarily so in case you don't intend to use this function leave the box her unmarked as I had
asked beauty after that you will navigate to the tab to look for in this new version of windows 10 this menu has been completely revamped and some new options have been added So here is the following in case you do not use any microsoft services like for example outlook or andrae saw me I recommend that you disability these two microsoft account and account options corporate or student like you do not use these services the idea is to disable the search in them to streamline any search performed within the start menu likewise if you don't have
no other device synced With some microsoft account you can also turn off this third one option called my history device here by searching on windows we have information relevant to windows search indexing so in this new windows 10 bills you can choose between mode classic and advanced search option classic is selected by default and I recommend you leave it like that Advanced option allows you to search on your computer entirely but it uses more computer resources can slow down the system several moments up here you can view the current quantity of items that are indexed
in the search case you notice that this number is very high for example turning around 10 mil it is advisable to recreate the index of zero because many indexed items can refer to files that were Detected from the system to recreate the index from zero you come here in advanced indexer settings search click advanced and click recreate also advisable to recreate the index when you notice a problem slowness with the search remembering that when you create the index it raises import to index all files from new so in the meantime it's normal that some item
you research no Appear in search results beauty because he is still being indemnified if you want to optimize your windows search including some specific folder in indexing just you come here in modify then you navigate to the desired folder that you want to include in brand indexing her box and click ok for example i have a folder of math exercises not showing up in the search so to make me appear I will select this folder to be indexed and with that I can access this list of exercises at least start just be careful not to
index folders containing many files per example the ep the run folder that locate inside your user folder Windows never under any circumstances mark this folder to be indexed by that's what by default it always comes unchecked because it is a folder that contains a Absurd amount of files that only served to make your search more slow and long beauty so always be careful with this here after that you will navigate to the tab cut cane if you do not intend to use the cut in this new windows 10.903 later would teach you how to turn
it off completely we will do it for gp dite and judith but anyway for now let's go turn off all those settings just To ensure that no functionality da cortiana will remain running for while after that you will navigate to the menu privacy here in the general tab you will disable this last option show content suggested in app settings at voice control in case you don't intend to use your voice to command to cut cane or other microsoft store app that Allow interaction by voice command you will then disable this option here in handwriting customization
a ink and typing is as follows when this option is enabled microsoft online services will collect samples of content you typed write so as to enhance features like autocomplete text next word prediction be typed and the spell check so on the one hand this functionality is Good and optimizes the typing process because it creates a kind of dictionary of words in the system and in the cloud but if you don't usually use this type of functionality with the keyboard physical on windows or don't care about to do so I recommend disabling this option here under
diagnosis and reviews you configure the way microsoft collects system diagnostic data so as to help maintain windows always safe and up to date So here you can only choose if you want send basic data to servers from microsoft or send data in a form of your system by default the basic option come checked and you leave like this but through other tools such as the famous spybot peck you can disable this collection of data in a deeper way let's say so honestly I don't lose anymore time by disabling this collection in Windows 10 because it
does not affect me at all in the usability of the system but if still so you want to disable it you will download the habib khan spybot program there in the link that I will leave in the description of video after downloading you will run the file called spybot bicam 1-2 point 1-1 serap will proceed with the installation of it in the system and after the installation complete you will run the program so inside here you will click on Cost more will choose the option was oo to disable telemetry and collection of data from all
these services in the list and after that you will click on damage to apply the changes this was the latest version I found the spybot I arrived to find a 3.1 version of it on the official website only that it doesn't work i don't know why but it doesn't work in this version this tool in practice will modify a series of records of the Fashion windows disable telemetry and data collection for these services that appear here on the list so if you notice that after this customization the your windows started showing problems you can come
here and click name to undo all modifications after that you click yet again that hence the collection of telemetry data remained the way it was before because it can happen to you and block Data collection in a given app and it doesn't connect to internet will start to fail so yeah always good to pay attention to that but down here you will disable these three options this first one can only be disabled if you select the complete option here above so if you chose the option basics just uncheck these two options remaining here in this
drop down menu you will Choose the option never stops never allow windows 10 to ask for write comments and feedback about the system and in this 2nd - suspension you will leave as is ask before fixing problems so if a critical error occurs in the system windows always fit before of trying to make any corrections a shortly after that you will navigate to past activity history builds do windows 10 a microsoft Implemented a button called view of tasks that this one that stays here under this button it shows a kind of file history and web
pages you accessed recently this is a very tool interesting and uses a certain frequency but if you don't use it for absolutely nothing so I recommend that you say check all these boxes here inside there is down here you can enjoy and click clear to Clear all your album history disabling this tool it never more will collect and record your windows 10 activity history or be will be the tool - consuming your cpu's unnecessary resources memory and disk what can a difference for those who have a hardware more limited since in the session of app
permissions we will not modify anything because that here basically concerns the Permissions that apps will have on system to access, for example, your camera your microphone your documents to your image library so I don't recommend disabling anything here so as not to interfere with the apps functionality installed the only thing you will do here is access this tab called apps in background and inside here you will disable background running Of all these apps on the list that you don't use it very often or not use it for nothing for example it is not always that
I open music group or voice recorder so it doesn't make any sense to keep them running in the background in memory the same goes for the other apps the only ones I insist on running in the background and an application from calculator and the photos app then the remainder I will disable Completely just be careful with this app email and calendar because if you disable its run in second plan you will not receive notifications on in the midst of new ones or commitments that you schedule on the calendar now if you it doesn't matter that
absolutely none these apps run in second plan so just turn that off first option right up here that then it not only disables them all at once Only once but also prevents others apps that you come by chance installed on the system are running in second plan beauty after that you will apply until the security update menu like the focus of this tutorial is to optimize windows 10 as much as possible whenever you perform a clean install or do system upgrade always remember to check for updates to make sure the System is completely updated with
the latest tests available after you make sure the system is completely updated what you can do here is to use the download automatic updates for up to seven days by clicking this button if you want you can use the download authorizations automatically by a longer time frame click options advanced and here in this drop down menu chose the maximum time to pause the Updates you can use them for up to 35 days after this period the system will look for for new updates automatically but here this pause encompasses absolutely every kind of update be it
a feature update or a security update but if you want to have greater control about automatic download of permits you can come down here and Choose a longer time to postpone only the updates of improvements and features and updates are just security so if you don't care about receiving updates that modify a system by implementing new features you can postpone this type update for up to one year security updates by have a higher level of importance you can only postpone downloading them for up to 30 days So through these - you get to have greater
control over updates from windows even if you use the home version of system in which you don't have the gp dictate that I will address later taking advantage that we are inside the windows advanced options panel update you can come up here and disable all these options additional by disabling this first option you prevent windows update Have to update other products from microsoft like for example the package office as long as they are installed a system is obvious by disabling the second option you prevent windows update have to download form updates automatic when you are
using a limited connection such as the 3g or 4g modem by disabling this third option you prevent windows update force windows boot When such action is necessary to complete the installation of a update since in notifications of updates I also recommend leaving this option disabled unless you decide enable this option just above if this is your case then yes it is bit that option from below so that the system always notifies you when a update requires a reboot of the system so you will have time to Save your files or close the running programs in
this new version of windows 10 ag delivery optimizations is separate and easier to find so here inside it you will disable this option just below call allows downloading of others computers this functionality already was present in other builds more old windows 10 what does it do basically is to allow your Computer download updates for windows your applications through other computers on the network but At the same time, this feature allows that the system sends part of app windows updates to other users on the network then she basically works as a kind of torrent client so
if you have one limited connection or just not want this internet to be affected for this functionality Once again you leave it off beauty I advise you to call this feature if you need to download an update that be too large and notice that the download it is slow by windows update of this how can you download part of that authorization through other computers on the network that already have completed the download so you avoids having to download directly from microsoft servers that may be Overloaded beauty from now on teach how to do some more
advanced modifications and deep let's say so then it is essential that you create a point of system restore so you can revert any changes made in the system from now on blue they affect its performance then you and not navigate to the start menu they will type restoration here they will click on create points of Restoration in the window that opens you will click on create and will give a name for restore point done that will click on create again then just wait for the restore point be created if the create button is inaccessible that
is pacu is because you need to enable system protection first to do this just click here in configure and enable protection of the system done that we can go to the More advanced optimizations so let's start with the visual effects of windows 10 windows 10 as well as the previous versions of windows have visual effects that can compromise the performance of your computer if your hardware is very limited so you will click with the right mouse button in the start menu will click system when this window open up you will apply on information from the
System advanced settings system inside here will click on this first settings button and here inside the visual effects tab is the next what you will select and not select here will depend much of your hardware settings if you have an onboard video card hardware in general very limited and don't want to waste resources unnecessary with visual effects then you will be first Check this box set to get best performance to uncheck all at once hence the finalist i only recommend you leave the following options selected show thumbnails instead of if you scroll listboxes smoothly and
use screen fonts with corners rounded optionally you can select this option to show window contents when drag so you can View the contents of windows by drag them on the screen but if you don't care about this detail so just leave it select from these three options that I mentioned previously because then you can make the system interface much more light without enabling all these others effects but without affecting the view of the thumbnails inside the folders of the windows explorer and without affecting fonts of the texts displayed on the screen that will not keep
that aspect of being affiliated And also you don't leave scrolling without that softness then made the modifications you will apply on apply to apply the changes if you don't like the changes then just select the option again to let windows choose the best option and click apply again done that we will modify the windows 10 paging file then click on the advanced tab and Click change so it's the following by default windows of management automatically paging file size system and the recommended thing is that you leave so especially if you like I have enough ram
in the system the rule that is and if it is not giving problem leave it as it is in my case I have eight gigabytes so I don't usually modify this here now if you use one of the 10 in one Computer with little ram let's say 2 gigabytes 4gb of approx. you often face problems frequently related to lack of memory or else disk error problems when you are running some game or often see those screen errors blue of death so it is advisable increase file size pagination and to do this uncheck the top box
down here click iac custom size Initial and maximum you will put the value and megabytes corresponding to approximately one and a half times the value in megabytes of your ram and then let's say you have 4 below memory ranking megabytes equals 4,096 megabytes then you will insert in these two fields the value of 4096 x 1.5 which gives exactly 6,144 done this will click in defining remembering that it will be necessary restart your computer to apply the Beauty changes the next step will be optimize system protection then click ok inside this window back in the
properties window of the system click on the protection tab of system inside here select your local disk and click configure inside here first enable protection system so down here the following a percentage of disk space you will allocate for system protection Will vary depending on how you use your computer if you often install or uninstall many programs and games on the system with very often it is advisable to put approximately 15% of your space local disk only for the protection of the system because that way windows creates automatically a larger number of restore points however
if you don't is usually installing programs and games all the time on the system is not worth the Pity to put a very large space for system protection so in that case if you put a space between 5 and 10 approximately percent is already more than enough beauty then after setting this percentage click ok to apply the changes if you don't intend to use the remote assistance service or windows remote work you might want to come up here on the remote tab and uncheck that lower IAC box you leave This first selected option does not
allow remote connections to this computer done this will click ok to close this window if you have the pro version or enterprise of windows 10 you will use the windows gps to disable a series of resources in the system, including cut cane the online search in the menu start smartscreen filter windows defender and automatic windows updates Update in case you are using the home version of windows 10 you can disable any of these items by windows registry also what i would teach how to do beauty too then no worry so if you are using pro
version o enterprise you will open the start menu go type gp dictate point msc and go hit the enter key then the policy editor of the Local windows group known as gp dish will open so in here in the section of computer settings right above you will navigate to templates windows administrative and components if you don't want to use the cut na for nothing and want to disable it from the start menu you will enter the search folder will double click on allow Cortana and everything you're going to do inside Is to select the disabled
option and click ok if you are using the home version you will navigate to the start menu will type regedit and will press the enter key when register if you open will navigate to the following address that appear on the screen remembering that you do not need to navigate manually to this address beauty me I'll leave a link to a file of text in the video description containing All these addresses of the ti regime that I move here so that you can copy and paste them directly here on ti regime address bar just copy and
paste here in this field and press enter ok then in here from the windows folder luck all you will do to turn off the cut in the menu start is to double click on this value called her coordinates and change its value from 1 to 0 Clicking ok to confirm the change if this value does not exist just created manually with that same name is crazy orders beauty the same goes for the windows key hersh if it doesn't exist inside the folder windows here on the left side to which I'm calling it folder to make
it easier for the layman user but the truth is call this here beauty key call folder loot within range Said we call it a key so if she does not watch just believe manually inside the windows folder when you perform a search any in the start menu for a file or folder it by default also performs and gives you some search suggestions on web for example if you search for the term fifty cent the start menu will search for the term on my disk and also on the internet and In this new version of windows
10 the menu start also shows the results of the search within bing this right side what is interesting when you want to access the contents of the web directly from the start menu by example if I wanted to watch a fifty cent music video i could access directly here and obviously the video would open in from the ad browser without having to navigate to youtube or google and search the Video there which is pretty cool isn't it true but on the other hand all this ends up leaving the search process slower and overloaded in addition
to often confuse the user that just want to search for a file directly on your local disk so if do you want to disable this functionality and want to perform only online surveys or in-house computer without searching internet then you will first Enabling these three options does not allow search the web not search the web nor display web search results not search the web or display web results on search in limited connections but amazing it seems just by enabling these options inside the gp dictate you don't disable the web search in full because the web
search on the latest versions of windows 10 is also linked to cortiana and bing service that are Independent services so in that case it is necessary to create two word values within the record from windows so once again you will open the windows registry in here will navigate to the address that appears on the screen here on the right side you will create today's two values of 32 bit one named after big sur chenney bolton and another named orteman consents both must be Configured with the value 0 by doing this you completely turn off the
web search windows 10 as you may know has some native tools of file and application protection considered malicious or suspicious these tools are respectively the smartscreen filter and windows itself defend the smartscreen filter it shows an alert when you try to run the unrecognized application or file Through windows and shows this on the screen message saying windows protect your computer on elite allows confirm or cancel the execution of the file which can be a little inconvenience for the user more experienced who likes to perform his files freely without any protection tool getting in the way
so if that's your case it's advisable to disable the smartscreen because many times he ended up barring Harmless files the easiest way to do this is to open the windows security application that it was formerly called the security not even here inside it, you just have to navigate to application and browser and select the option disabled the second way to disable the filter smartscreen and by gp dictate just access the windows defender smartscreen folder Enter the explorer folder give two clicks on configure windows defend smartscreen and in here everything what you will do is select
the option disabled and click ok the third way to disable the filter smartscreen is by windows registry then within the ti regime you will navigate to that address that appears on the screen inside the windows folder you will access a key called assist If it doesn't exist, you can create it. Annually remembering to write system with the first capital letter beauty then inside the system key on the side right of the panel you will create a new 32-bit dword value with email name smartscreen exactly as they appear on screen then it will change its value
to zero making this your filter smartscreen will be fully disabled when you format your computer with Windows 10 it comes by default with windows defender windows defender is enabled nothing is more than an anti malware service native to the system itself, which has function to protect windows 10 against spyware and trojan malware attacks adware so in general it can be said that it offers reasonable protection and enough for the user who already has more experience with windows and not often perform activities Dangerous in the system in the tests carried out in the laboratory and has
been very well being ahead of antivirus like norton and others like panda but we that other antiviruses more popular ones like avastin or avg or avira continue to do better being very above it in the list other than that on some computers more slow it can end up affecting the system in a negative way when it starts to update for example or Do a scan so if you by you might notice that windows defender is harming your windows leaving even slower is advisable disabled the easiest way and practical to do so and installing another antivirus
on windows and that's what I did on windows here at in my case i am using the several wobbly only by doing this windows defender it is not completely disabled goes into a kind of mode Suspension leaving antivirus installed tasked with protecting the system as the user chose but still he can carry out periodic checks if you want to prevent this from happening reopen the security application navigate to virus protection and threats windows defender options antivirus and here in disability this option to disable it permanently by gp dictate so that he does not stay running
in any way in the manager Of tasks then navigate to the folder the windows defender ante value inside the gp titi inside it double click on disable windows defender antivirus and simply and select the option enabled to disable it by the regime ti navigates to the address that appears in the screen when it arrives at that address on the side right of two clicks on disbursement anticipate ware and configure its value as a reminder that this case is folder called windows defender this Today's value does not exist you can also create them manually beauty like
we saw a priory in the settings panel you can postpone the download of windows updates for one certain number of days or pause the download in real time but that in nothing prevents you from completely disabling automatic windows updates update obviously you can only do that if you are using a version system pro or enterprise Then to do so navigate to the folder the windows update within the gp dictates of two clicks on configure updates automatic and simply select the option disabled that way windows will never check by automatic updates obviously to stay protected and
keep the system up to date advisable that you periodically do a manual search for updates the idea Here is to prevent the services of the windows update mainly the service called windows mobile or if you installed the that runs at a time inconvenient when you are playing for example because depending on the type of update being downloaded or installed not only to the internet it may slow down like your computer can also slow down affecting the usability of the system as a whole because this mentioned service usually Leave the hd at 100% usage for disable
automatic updates within the windows registry navigate to the address that appears on the screen is here inside the key called au on the right side of two clicks on noel the update and set its value as a case any of these folders quoted or this value called in europe let there not be you can too create them manually beauty now I'm going to talk about the de Disk defragment in windows then you will open the start menu will type says frag and will click on defrag and optimize drives so here is the following by default
the windows 10 shred and optimize your disk and its shares automatically when the computer is idle and clear when defrag becomes this segmentation is necessary held weekly and I sincerely recommends leaving it as it is Especially if you usually install or uninstall many programs from windows because this defragmentation is made as a very low priority in the cpu so it doesn't affect the system in any way negative when being performed that way you don't have to either keep coming over here and fragmenting disc manually if you want speed up defragmentation even more that you can
do here if you have Several albums or several participations in the system is to click on choose and leave selected to be defragmented just the local disk ce where is installed the operating system like this defragmenter does not waste time doing a scan or trying to defragment the other units are fine now if you does not usually move a volume of very large files on the system or uses the same for running games and mostly online games that are Very sensitive to any performance on the system there is no need to make changes fragmentation every
week you can then schedule the defrag to be run monthly or if you want perform annually when you well to understand you can just turn off scheduled shredding by unchecking this box and clicking ok then it's up to each one's criteria in mine In case I wouldn't change anything beauty as you already noticed the chain of new from windows 10 some new ones appear services with different names already others simply change the name but the services that are running are vital services for the perfect system working then honestly I don't recommend disabling none of them
to avoid any serious problem in the system with exception is of course from those services on the list that I I went through the previous tutorial and that too will be available in this tutorial the only new thing i did here was add the reporting service to the list of windows errors and also update the super fat service name that now her name is said mother the x men service or super fat you guys already know it improves the performance of the system over time, but it can cause hdd slowdown in some computers when you
start Windows especially when you stay long time without turning on the computer the normal thing is that he left the band in 100% usage for a few seconds or minutes and then it becomes inactive without using nothing on disk but if you notice that he stays leaving hd at 100% usage for a long time time for example 10 minutes half an hour I don't know so I advise you to open immediately the services panel look for the sismmac service in the list and Stop its execution immediately by least until the execution of the others windows
programs and services normalize then you start his service again if you think it gets in the way more than that helps with something inside the windows then you can change your startup type to disabled so it will never run again beauty next step is to optimize the windows task scheduler As you install programs and applications on windows many tasks are being created and scheduled to run in certain time but it may be that these tasks are executed in housing the inconvenience where you are playing an online game for example or performing any other activity so
first you will open the task scheduler right here inside the Your interface you will apply on task scheduler library nor here on the right side will appear a list containing all the tasks that are scheduled to run on system and what you are going to do here is analyze the time that each one is configured to trigger i.e. enter running so let's assume you usually play an online game in the afternoon you don't want a scheduled task be executed during this period because it May end up crashing your game so you will double click on
the task that runs in the afternoon example at 1 pm then when that window opens you navigate to triggers tab click twice about this first one list trigger come in here you choose a time that you think is most appropriate for this task. run for example at 7 pm and after so you click ok to save the Changes done this can close the scheduler tasks the next step to leave the new windows 10 even faster and optimized is to modify a series of chats and values inside the windows registry so first you will download this
dot reguila file in the link that I will make it available in the video description. remembering that it will be compressed beauty after downloading it You will enter his folder within an error or a y la and in here you will double click on this first one file called execute to let the faster windows done that goes this message appears asking if you want to continue then just confirm by clicking on five boxes changes have been made with success the regime will display this message then just click ok this file it will modify a series
Of keys and values within the range of the windows that in practice will make your system shut down faster shut down program processes and services faster will decrease the time to to appear for example a thumbnail when you hover the mouse over a program in the taskbar will slow down the display when you hover about the menu or several - within some program now if you want to Make changes to the registry just run this other file called restore original settings regimen and likewise confirm then done that you will open the registry of the windows
to create an additional key which can further optimize the system startup but only I recommend doing this trick if you running windows on a drive ssd when windows starts it waits on average in the 10 seconds before Run the programs and applications that are configured to start with the system this delay in starting windows programs in the extra time to get loaded by complete in memory and run your native processes first but while that the programs configured to start with the system will not be executed so what this trick actually does is reduce this additional
time already delay Causing windows and programs and load immediately so it was recommended is this trick if you are using an ssd drive because how the same has a reading speed and better recording than a hd consequently you have a system startup and programs much faster so to perform this trick you will have to navigate to that address that appear on the screen inside the folder Explorer will look for a folder call would be laíse if it does not exist just create annually exactly with this name done that you will apply on this folder called
would be laíse and on the side right you will create a new value today from 32-bit with startup name of in ms and c what does it mean to be capture mmc cannes and will set it to a value of 0 done that you have enabled the trick Mentioned after that you can exit the registry windows to finish the tutorial I will name you some programs additional you can be using for another the new windows 10 even more the first of them as usual is the reverse process the process is a light program and at
the same time robust time that basically serves to manage and dynamically adjust the priorities of open processes in your Cpu optimizing each one of them so that you have total performance and fluidity in your system so in practice using it you can say goodbye those constant crashes caused by any process pulling 100% of your cpu and that often make a keyboard hangs mouse hangs or even same do the computer stays restarting randomly if you often use your windows exclusively for games be games Online that are easily sensitive to any cpu and memory jitter ram and
also campaign games then this is one more reason to use this program because it has several settings in a module exclusively for games in the description of the video I will leave a link of one playlist on my channel where you teach how to use this program completely beauty the next program that is also worth a lot to pity you keep installed in System is ccleaner at the beginning of the video I showed you the tools of cleaning of windows itself but how could you come it is a little limited it is very useful in
time to clean the temp files created by windows itself but if you want to pair temporary data and other programs such as the chrome browser or operates firefox or if you want to fix invalid registry entries windows it become useless At these times it is always important to keep installed in the system a cleaner more robust temporary files and the most popular of them is obviously the ccleaner a light and efficient program which will certainly help to keep the windows 10 even cleaner and more organized on my channel I also have a tutorial complete teaching
to use absolutely everything inside it so just access the respective link in the video description and watch another very famous show Used to optimize and clean files temps in windows 10 is advance system that I recently published on channel an ultra mega complete tutorial with more than 40 minutes where teaching is install and configure absolutely everything inside him the status tutorial used for program version 12 so I recommend that you watch it because it is a super complete program that has several different tools Not only manage the company but also optimization that help maintain windows
your internet connection much more fast one of the most common and repeated that we need to run the windows 10 and indeed on any system operational is a double click if you stop to observe you will realize that you achievement with a lot frequency and if you just like me I use a gamer mouse or any mouse That contains several additional buttons like this tech blog that appears on the screen you can assign click function double to one of these buttons so you can run any file enter any folder in windows with just one mouse
click simulating a double click instead of having to click the left mouse button twice times this optimism our time ahead of the computer and also increases the service life Of the left mouse button that has a certain click limit before it starts to fail and a program very good to do this is the ex malzibier a controller I don't have one yet specific tutorial for him on the channel but to use it is very simple first you will install on your windows as for the installation to finish you will right-click the mouse over its icon
here in the notification will click on serap from here You will choose with your button mouse you will want to assign the function double click on choose button 5 which is right next to the left button of the mouse that is the mouse from logitech iac model gt300 in the list is enough for you choose the boucle option and click on apply to apply the changes I know it sounds silly but in the long run deadline goes for me you will realize the how useful it is to have this type of program on windows If
you want to revert all Deep changes made to the system you can restore your computer to a previously created point just open that same little window that you opened to create a point of new restoration, but inside you click on system restore in the next window that opens, click in advancing will choose the restore point created will move forward again and will Click finish then obviously you will have to restart the computer to complete the restore of the system by doing this you undo any deeper modification made to the system after you have created a
point of restoration so that's it guys I hope this tutorial helps you optimize this new windows 10 by as much as possible and if it helped please let olic subscribe to Channel and also like my page on facebook beauty a big hug to all