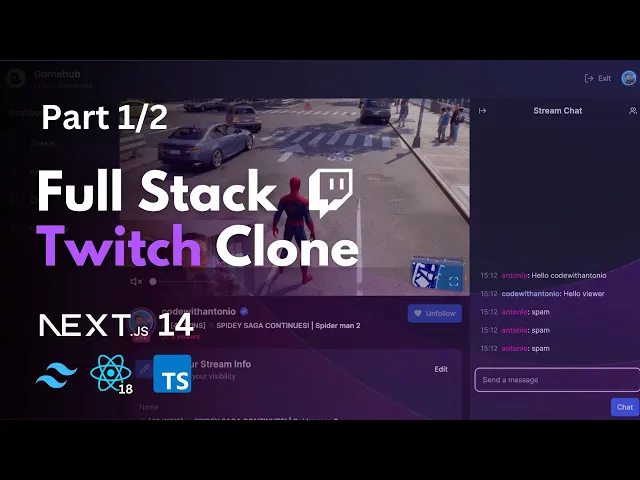
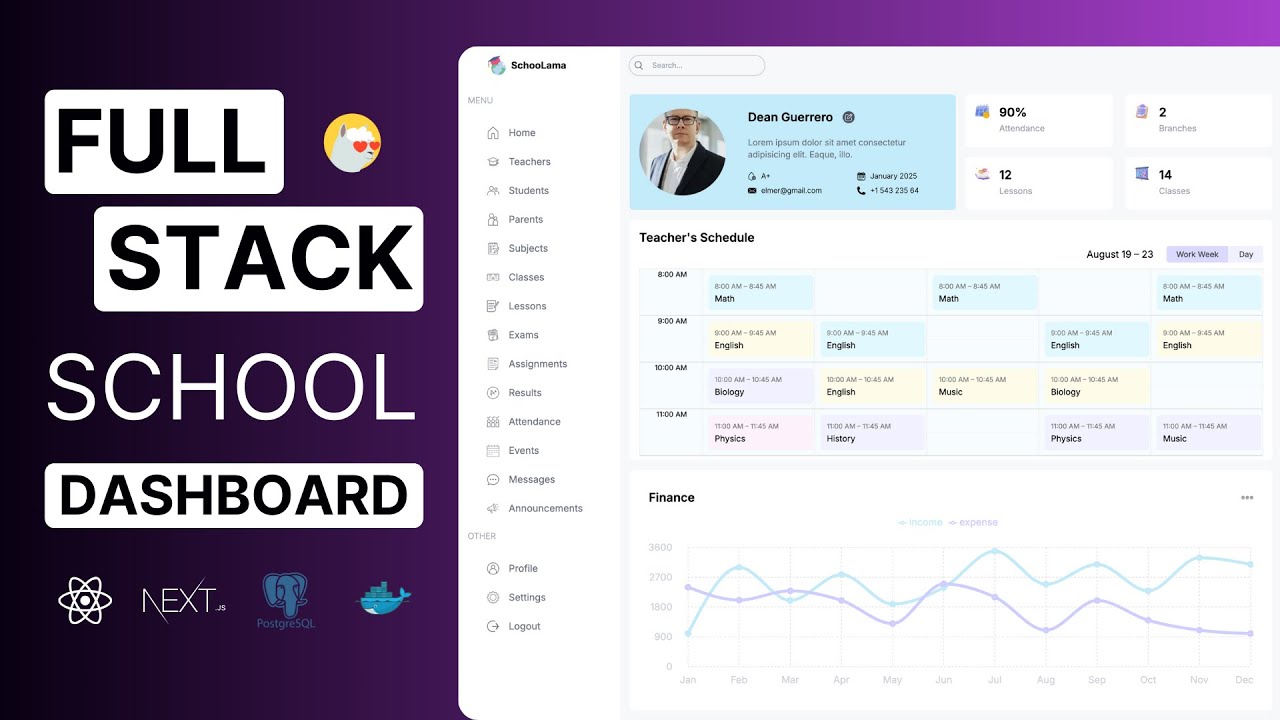
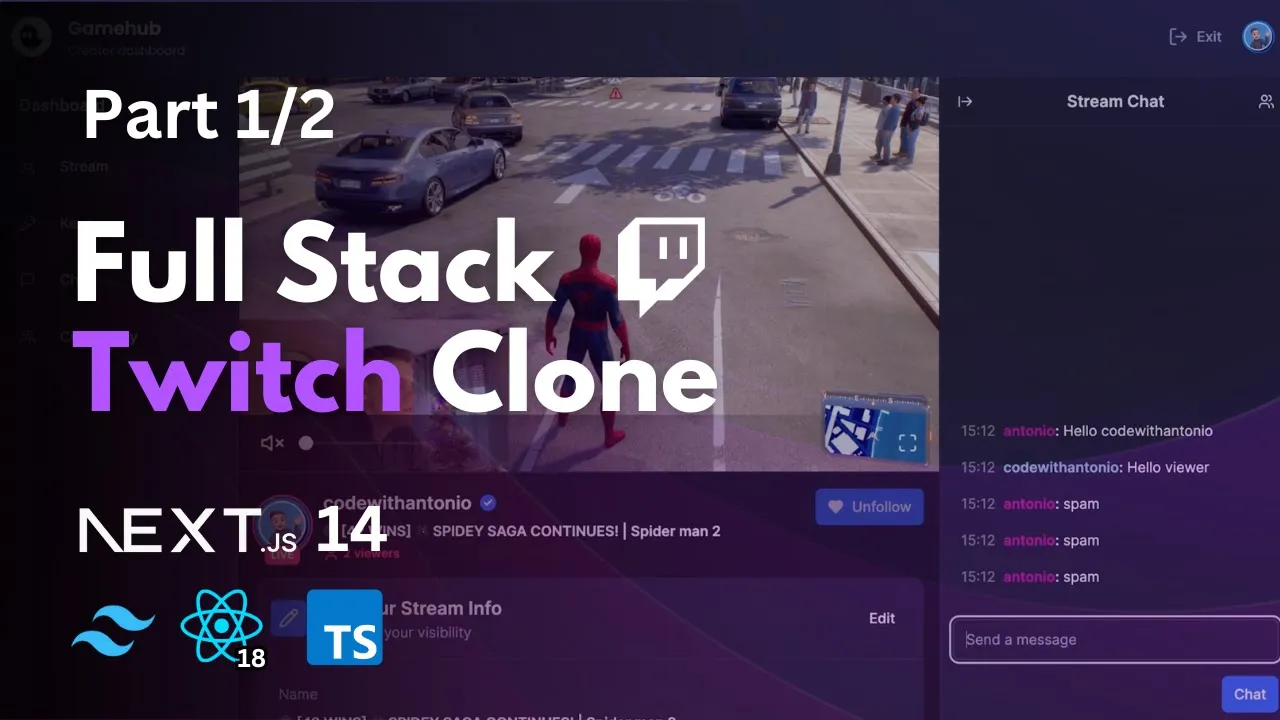
What you're seeing here is not a pre-recorded video this is an actual live stream of me playing Spider-Man 2 on my PS5 which I've connected to this nextjs application that you are going to build so without further Ado let's go over all the things that you will learn in this tutorial as you can see we have a nice stream player with volume controls and full screen controls we also have a clear indicator that this User is live here in the header but also in the sidebar where we have other recommended users we also have the
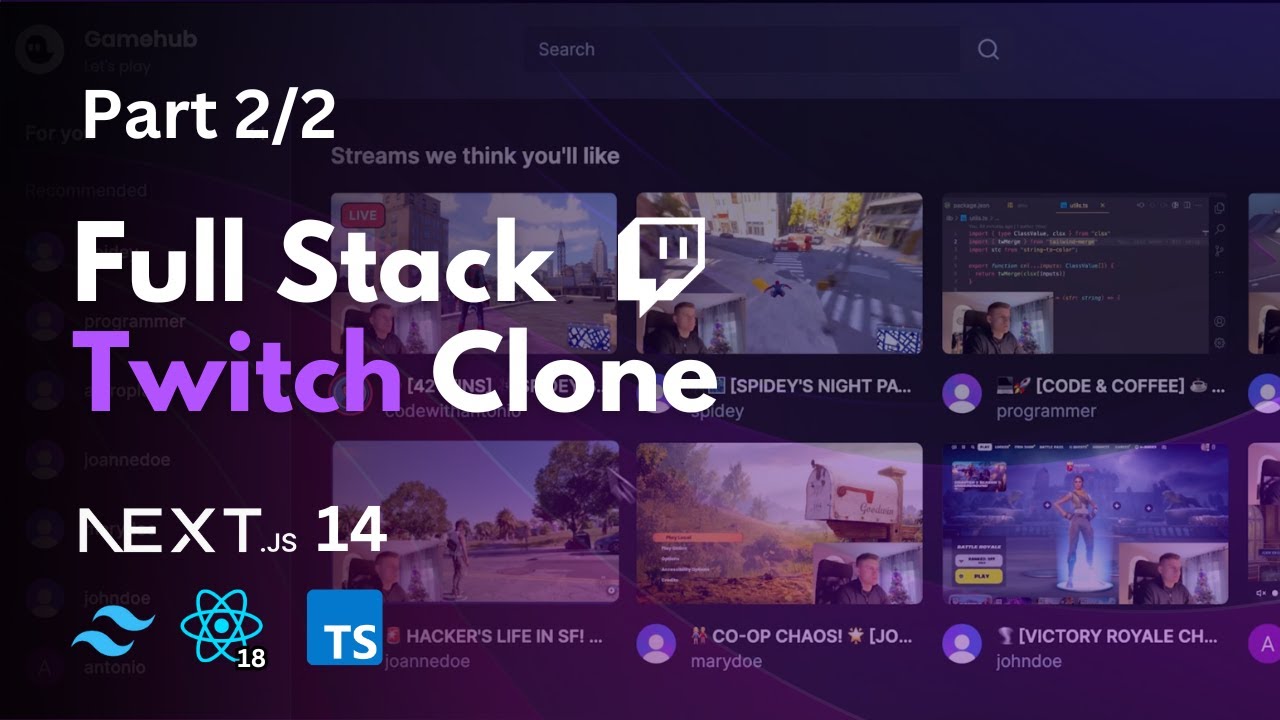
number of viewers looking at the stream in real time and we can also find out some more information about code with Antonio and now let me show you how it looks for the person who is actually streaming so in here we also have a beautiful homepage with all of the streams here ordered by live first but as a logged in user and as an active Streamer I have access to my creator dashboard and in here you can see that we have a similar view but you can see that I have some different options in my
sidebar here and I can also modify my stream info giving it a different thumbnail or modifying the title and I can do the same thing for my bio like this and you've probably noticed that we have a little chat here both the streamer and the viewer have a chat so let's go ahead and say hello code with Antonio like this and we have a username Antonio sending a message hello code with Antonio here in real time and you can see that code with Antonio in their stream view has immediately received this so I'm going to
write back hello viewer like this there we go both of these in real time and you can see how each of them has a unique color identifier so what happens if this Antonio user starts to spam our stream what we can do as the Owner of the stream is go inside of the community find a user that is misbehaving and initiate a block function and they are going to be immediately disconnected from the stream and if they try refreshing it's going to say 404 we couldn't find the user you were looking for and as you
can see it's no longer in the recommended Tab and it's no longer in the Home tab you can't even find them inside of the search tab right here no results found so let's go Ahead and see what happens once we unblock the user so as a streamer I can go inside of my community settings find the user that I've blocked and initiate unblock like this and now when this guest tries to refresh there we go we can see ourselves here and now let's go ahead and try and search again so I'm going to search for
the term Spidey and there we go we have two live streams including Spider-Man and now I can go ahead and visit this user again Great but here's another thing I can do in the Stream in the Stream settings here I can go into the chat settings and if I want to I can completely disable the chat but I can also enable chat delay and I can enable must be following to chat rule so now when this guest goes ahead and visits our stream you can see that they have a notification that followers only and slow
mode is enabled and they can see more information hovering here so messages are delayed by 3 seconds because I'm not following this user I cannot send a message so let me go ahead and click follow here and what happened now is that this changed to one follower and in my sidebar code with Antonio went from the recommended tab to the following Tab and now I can go ahead and send a message as a follower and you can see that it is delayed by 3 seconds so now it's being sent exactly as the the settings we
provided great so what else can we do with this application Well you might notice that inside of my sidebars here I have a little toggle button which allows me to completely collapse my layout let's say I want to hide this sidebar while I'm watching a stream I can simply click here and there we go now it is in collapsed mode and I can do the same thing for the chat if I don't want to see that while someone is streaming so now let's go ahead and let's end this stream and see what happens so here
I've prepared my OBS Studio where I'm actually streaming so this software is connected to my nextjs application and once I click stop streaming right here you can see that in a couple of seconds here this entire stream will go offline like this great and now you're not going to be able to see the live indicator neither in the following neither in the homepage here so let's go ahead and this time try to initiate an opposite thing instead of code with Antonio being the streamer Let's go ahead and make this user Antonio stream what they have
to do is go inside of the dashboard here and they will see their status that they are offline and now let's go inside of the keys right here and let's go ahead and click on generate a connection we can select between rtmp connection or a whip connection so we can handle multiple streaming software let's go ahead and click generate here and now this has generated our our server URL and our Stream key which is hidden by default but we can always show it so just like on real twitch we're going to have proper information to
connect to our streaming software so what I have to do now is copy my server URL and I have to go inside of my OBS settings I'm choosing the stream Tab and I'm going to go ahead and assign the stream URL here and now I have to copy my stream key so let me go ahead and copy that like this make sure it's the same click okay and Then I'm going to click Start streaming and now as you can see I am live as Antonio as a completely different user right and now once the code
with Antonio refreshes there we go you can see that this stream is now live and I can go ahead uh and follow this user and then I can send a message again and this one will receive it in real time here this is just a small part of everything that you're going to learn in this application we're going to have a ton More features including entire uh user management including web hooks including creating ingresses a bunch of things that you will learn inside of this tutorial so without further Ado let's get started on top of
all of that the entire website is going to be fully responsive on all devices everything that you just saw in the demo is going to be cover covered in this free tutorial if you're watching on YouTube you're going to have part one And part two both for free uploaded on the channel That being said if 14 hours of content is still not enough for you and you want to learn more or if you want to donate to my channel you can use the link in the description and look at this content where it says want
to learn more and in here you can unlock it for a price and get all of these features and everything else that I put here in the future let's go ahead and let's set up our next JS application first of all make sure that you have no JS installed specifically 1817 or higher than that you can check that quite easily by going into your terminal and simply running a command node DV as you can see I have a version 20.9 which means that I am okay to proceed with this installation if you don't have node
installed or if you you have a lower version you can simply click on this link here to open the Node.js installation page or you can Google node and once you're on this page I recommend that you install whatever it is long-term support at the time you're watching your video after you've done that go ahead and confirm node V again and make sure you have the appropriate version now we can go ahead and actually install our nextjs application so let's go ahead and copy this right here and let's go inside it our terminal and simply paste
that function and after That give your project a name so I'm going to call this video twitch like this go ahead and press enter select yes for the typescript option yes for esland yes for Tailwind no for Source directory yes for the app router and no for customizing the import Alas and now just wait a couple of seconds for this to initialize after it's been initialized you can see that we have a success message here and a location of our project what we have to do now is open That project so I'm going to click
open here and there we go I have a folder video twitch exactly as I've named my project if you get this popup feel free to press yes right here and let's briefly take a look at our project structure now so we have an app folder which has global. CSS and inside of here we have some predefined code you can see we have this root we have this color scheme here we have this body element here and we have Tailwind directives so We can actually use it inside of our project besides that we have a layout
file which is kind of like a skeleton uh for our uh pages and Views we're going to talk about this a bit later right and here is another important file page. TSX so page. DSX is an actual route right and let's go ahead and run this project so we can see exactly what's going on here so let's go inside of our terminal here and do mpm runev after youve run this application go ahead inside of your Local Host 3000 and you should be seeing a screen similar to this it might be in light mode for
you for me it's dark mode because I use that as the default mode on my laptop for you it might be light it doesn't matter uh great what I want to do now is I want to see how I can modify this page so let's go inside of the app folder page. CSX right here and I want to remove everything that's rendered inside I don't need any of this uh big text Here instead I going to write a simple paragraph hello twitch clone like that and now as you can see I have a very small
text here so I'm just going to zoom in so you can clearly see it here what I want to do now is try out whether our Tailwind has been been successfully configured in here so what you can do is give this paragraph a class name of text red 500 and font bold once you save you can see that my Tailwind is correctly configured so this is now a red text with a bold font and if you're wondering how come I have this little color box and how come when I hover on classes I can see
this useful popup which tells me exactly what is the weight of this bold class the this because I have an extension called Tailwind CSS intelligence so make sure you search for Tailwind select the first one and install uh this package right here great so now that you know how this Works what I want to do next is install shat CN UI which is going to be uh our uh component Library which we're going to uh well it's not exactly a component Library it is more of a collection of components where we can copy and paste
components that we need inside of our project so what I want you to do is just save this file make sure everything is saved you can collapse all of these things go inside of your terminal here and shut down your application so make Sure your application is not running while you do the next steps then what we're going to do is install shadan UI so there we go as I just corrected myself so shaten is not a component Library it is a collection of reusable components that you can copy and paste inside of our application
so let's go ahead and install that for nextjs we've already created our project so we can skip this step instead we can go immediately into the step two which is Running the CLI so I'm going to copy this command for mpm I'm going to go inside of my terminal here and I'm just going to paste it so this is what it looks like and you can just press enter and now we have to match the options from our initial configuration to this configuration so we selected yes for typescript when we configured our project so make
sure you select yes for typescript here as well it's asking us which style we would like to use I Highly recommend that you go with the default option because that is what I'm going to be using if you select New York it's going to look slightly different and you're also going to have some different packages installed so for the sake of uh following this tutorial select the default option and just press enter for the color go ahead and select neutral uh it's asking us where is our Global CSS file and you can clearly see that
it Is right here in the app folder global. CSS so this is correct don't worry if the text is cut out so this is just a placeholder you can press enter you can see that once I pressed enter it's been uh correctly found here now it's asking whether we want to use CSS variables for colors select yes here and here's the thing we have to modify so it's asking us where is our Tailwind doc config located and for me it's asking asking where is Tailwind doc config.js Located and in here I have a placeholder again
for JS if you have it forts by chance if you're watching this into the future it could be that this has been modified and you don't have to do anything here but for the rest of us which have this little issue here we have to modify this to Target the TS file and not JS file it's not going to be a problem if you press enter here you're just going to have one unnecessary file so let's go ahead and Resolve that so very easily you can see in our file explorer here that I don't have
Tailwind doc config.js I have Tailwind Doc [Music] config.txt and I can delete. JS and enter. DS and just press enter ENT the Alias for components is is correct you can press enter here same for lib utils uh and now it's asking us whether we want to use react server components so the answer for that is yes because we Are working with app router in this project and now you have to confirm all of that config so just press enter or Y and wait for a second for all of that to install Perfect and now let's
go ahead and run our project again to see what has changed so let me just refresh this and for me what's changed is that I went from dark mode to light mode so if you were already on light mode I'm not sure that you're actually going to see any Difference but if you were like me and on dark mode now everything is light by default right so what I want to practice now is how to add a component from shatan library inside of our project we can do that quite easily by uh going inside of
the components here so I'm just going to zoom out a little bit it go ahead and find a component you like from this chat CI library for example button component and what we're going to do is we're going to run this Installation command so npx shat CN latest add button so go ahead and copy this for mpm let's go back inside of our terminal here you can either shut down the app and run the command or you can click on this little plus icon here so you have two terminals running and inside of this second
one I'm going to paste this so npx shat cnii at latest add button and just press enter like this and that's going to install the button that is it we now have our very Own button component so again make sure you have at least one terminal running here and let's take a look at that button component so inside of our project we now have a components folder UI folder and inside button. DSS folder right here and you can see how this is literally copying and pasting uh some some code inside to enable us to have
a button and it is built on top of radex UI what's great about this is that it gives us complete ownership and control Of our button no matter how heavy we want to modify our button we can do that because we have the source code to that button you can see that we have the exact sizes in pixels everything we need from borders to roundedness to colors to variants we can modify and rename anything we want want here so shadan is perfect for building your own component Library which is what we're going to be needing
for our twitch clone so let's go ahead now inside of our app folder Inside of page. CSX right here and instead of rendering a paragraph I actually want to import that button component and I can do that by importing it from s/ components slui button so exactly the place uh we were at and inside I'm going to uh right click me like this and we can remove this image import we no longer need that so let's revisit our local host and there we go so I of course zoomed in my page yours is probably much
smaller than mine but This is what that button looks like and let's go ahead and play around with it a little bit so we can give it a size of small for example and now it's a bit smaller we can enlarge it by giving it a size of large we can also change the variant for example let's give it a variant of destructive now it looks like a danger but Buton something we would use to delete a record and we can also play around with uh ghost variant and some other Varian that it has right
but Here's the cool thing let's go ahead and let's revisit our button component so UI button right here inside of this button variance which you're seeing right here inside of this object where we just have all of those uh variants listed you can clearly see the exact CSS that is applied every time you add one of those variants to your button and the cool thing about it is that nothing is stopping you from adding your own for example let's write custom and let's Write text white BG uh blue 500 like this so make sure you
add a little comma here so you don't have an error and then custom text white BG blue 500 and save the file go back inside of your button and now when you try in your variance here there we go we have an autoc completion for our new variant custom and when I save the file there we go it has my reusable variant here so that's why this shatan component is so cool because it truly gives us complete Ownership of our components let's head back inside of this button and now let's just remove that custom uh
variant we are of course later going to add some of our our variants but this was just for trying it out and once you remove it this and save and go back to page you can see that now we have an error here because this no longer exists great so you've just learn the basics of setting up your nextjs project working with tailwind and also how we're going to use Shat CN to add all the necessary components we need great great job so now I want to talk about routing for a bit for example how
did I know that this page. CSX file right here is the root and entry point of our application how did I know that this is the file where I had to add this button in order for that to be rendered on our Local Host 3000 right here well it's because of two things first is the fact that this file is inside of the app Folder app folder is a specially reserved folder inside of nextjs which is going to be used entirely for routing the second fact is that this file is is named page. TSX page
is a reserved file name inside of nextjs which tells the router that this is something we want to show to the client right in a form of a client route what's also important is that inside of this page. CSX we must have a default expert if we don't have a default export this is not going to be Recognized as a valid page component and one more thing if you're wondering the name of the component does not matter so you can rename this to page for example and it's still going to work but what does matter
is that the name of this file is page. vsx so here I've written a very quick diagram inside of the app folder if you see page. TSX or if you're not working with typescript it can be page.js or page. jsx so it's just the name that's important not the extension If you see app SL page that is the equivalent of going to Local Host 3000 if it was something else like app fu. vsx in that case that would not work that is not going to be a route because fu is not a reserved keyword now
that we know that how about we create a another client route all we have to do is create a folder and then put that reserved file name inside of it again and that's going to translate to localhost 3000 SL that folder so let's try that out right now If I go ahead and go to slash folder I have a 404 error so before we create this properly I first want to do it incorrectly so I can show you this example so I just told you that this is going to be a valid route if we
create it like this but if we try it like this first this is not going to work so I want to do that first go inside of your app for folder create a new folder and you can literally name it anything you want I'm literally going to use folder For now and go ahead and create a new file f. CSX and we're going to make it a completely proper component so const is going to be called folder page let's return a div folder page and we're also going to ensure that we do an export default
of that folder page so basically we're following all the rules for a proper named route right but what happens if I try and refresh on Local Host 3000 folder I'm still getting a 44 page even though this is a completely Correct code so that's what I'm trying to tell you page is a reserved file a name so whenever you want to create a client route be that in the root of your app folder or is that going to be a sub route like/ folder it needs to be named page. TSX and it needs to have
a default export so now what I want to do is rename this from Fu to page. THX and once you save this refresh your page again and there we go I am on localhost 3000 folder and I'm rendering a folder Page so now we proved this concept right if it has if the folder has anything except page. CSX inside like f that is another route but if it has page. vsx inside then that is a valid route and what you can do is you can also create as many additional sub routes as you want using
the exact same concept for example inside of this folder let's create another folder called folder 2 and let's create another page. vsx and let's Do one more time so folder to page and let's return a div folder to page and now what I can do is in my URL bar I can go to/ folderfolder two and there we go now I am in folder two page as you can see right here so I can either go to slash folder or I can go to SL folder two so that's how you create nested routes great let's
go ahead and let's remove this folder all together so just make sure you have an empty app folder and you should be Getting a 404 for anything besides Local Host 3000 what I want to show you now is how to create an API route so this is just going to be a very quick preview to show you that you can do that almost exactly the same but instead of using page you're going to be using routee reserved file name so let's go ahead and do that inside of my app folder I'm going to create another
folder and let's call this folder again but this time I'm not Going to put page inside instead I'm going to put route. THS inside and what's important with route. THS files is that you never do a default export inside instead what you do is export function and then you're exporting the type of Route which you need be that get post put options patch let's do a very simple get request here and let's do return response. Json po bar like this so let's take a look at our Structure app folder and then folder so if I
go to Local Host 3000 SL folder you can see that now I no longer have that uh client preview instead I'm returning Json here so I have a little extension in my browser which pries this Json I can you might be having something like this for example but it's the same thing right so This Is How We Do API routes using a very similar method but instead of it being page. CSM X it is routts so route is an equ an equivalent Reserved keyword for creating API routes as page is for creating client routes now
that you know about these two reserved keywords route and page I want to talk about the third one which is a layout so we already have this layout right here and this is called a root layout we're not going to play around too much with that one all that you need to understand about this one is that it is absolutely required for your project so you can never remove this file Layout. vsx inside of the app folder must always exist what it serves is that it renders your actual content which is children inside of your
HTML structure and your body structure later we're going to wrap this even more in maybe some providers like toasters some queries and stuff like that but that doesn't mean that we cannot create our own layout files so let me just go ahead and close everything here and let me delete this folder Al together and now I'm just going to go to/ loost 3000 back here and let's go ahead and create another folder here and let's call it out now inside of it let's create another folder login and create page. vsx inside let's do a very
quick login page here with a div login page and make sure you add an export d default so now if I go to slout SL login there we go I have my login page right so now I'm going to create another one Called register and inside of it create page. vsx let's go ahead and do the same thing so register page a div register page so now I can go to slout SL login and sl/ register like this so what if I want to create a reusable layout which is going to reflect everything inside of
this out folder for example I want my my out routes to have a specific nov bar or a specific sidebar something like that well we can do that using the reserved Layout file so go inside of your out folder and create a new file layout. CSX and the moment you create this file you're going to get an error that's because it dis it does not find the default export inside of this layout so let's go ahead and do that let's call it out layout and let's just render an empty div inside so again make sure
you do expert default out layout here and this is my structure again so this new layout File is inside of the out folder and as you can see now we no longer have an error but we also don't have absolutely anything rendered right now I'm on Local Host 3000 SL out/ register and this is not visible if I change it to/ login it's not visible either so what's missing here is the children so let's go ahead and extract the children let's give them some types and let's go ahead and render them inside of this div
and now we can see Our text again so I can go to slout SL login or slout SL register and both of them are visible so whenever you're working with layout files remember it is a reserved file name meaning that it's always going to behave like this and you're always going to have children in the props of a layout function so if you're wondering how did these children come here well very simply because that's the way nextjs works so what did we actually achieve by doing this it Doesn't look like we did much well that's
because we're not actually using this layout to do anything so let's go ahead and do that so I'm going to give this div a class name of flex flex-all and GAP y4 like that and then above the children I'm going to create a nav element which is going to say out Navar and let's give this a class name of padding one BG red 500 and W4 and there we go now I have an out nav Bar in my register page but also if I go to slout SL login it's a it's also here right so
what I did right here is created a reusable layout which is reflecting all of my routes inside of the out folder both my login and my register page which don't have the navbar defined inside of them all have nav bars when it's actually comes to rendering the route so that's what layouts do layouts are very useful when you want to create a set of reusable Layout elements across multiple routes for example our twitch clone is going to have an off bar and a sidebar and a layout file is exactly what we need to achieve that
so now you know how layouts work but there's one thing bothering me about this approach and that is that if I want to create a reusable layout I first have to create a folder which is going to be visible inside of my URL right so what if I didn't want this to be an out Prefix right what if I just want to go to slash login and slash register without the out in in between right now it looks like we cannot do both that and also have a layout file well there actually is a concept
called rout groups so what I want you to do is to remove this folder so go ahead and completely delete this and go back to/ localhost 3000 and what I want you to do now is instead create another folder but this time give it a name inside of Parentheses out like this and then go ahead and create another folder login create another folder register and let's go ahead inside of login and create page PSX let's do a very quick page here login page let's copy this and let's paste it in the register here and let's
rename this to register page the name of the component doesn't matter it just matters that you do a default exper so what we achieved now is that I can actually go To slash login and look at this it's working without the out in between so I can directly go to slash register or to slash login so by using this parenthesis you tell the router to not take this as a part of the URL so this is only an organizational folder and what's great about these organizational folders is that not only they are well good for
organizing stuff when you don't want this login and register to just be Randomly laying around in your app folder but rather be structured together like this they can also hold layouts so let's do that again let's create layout layout. DSX let's go ahead and render out layout here let's render a div let's extract our children here let's give them a type and render the children and there we go so now our login and register pages are still working and we have a Layout and we can do this exact same thing class name Flex Flex call
Gap y4 a NV saying out nov class name to the N to be BG red 500 and W full we can just do this for now and try it again so go to/ register and go to SL login so both of them are now sharing the same layout and we are no longer having that little problem where we had U out in the as a part of our URL so so that's what route groups are useful for great so this is what I want you wanted You to understand about routing inside of nextjs if you're
still having problems putting this inside of your mental map uh I wrote this little diagram which might or might not help you so when you have a layout inside of a folder it's going to reflect that to every route inside of that folder so this is our first example right where we had the actual out inside of our URL we now change that to be like this Right and then we no longer had out inside of our URL instead all of that just be became slash login and slash register so basically layout encapsulates all of
the routes inside of that folder and what's cool about layout is that it does not render every time you change the route right so that's why layouts are useful because once they are loaded and rendered they're not going to be triggered every single time you change one of the matching folders Inside they're going to stay rendered and now what I want to talk about is types of routes sorry types of components and files that exist inside of the app folder so let's go ahead and remove this as well let's go back to Local Host 3000
and let's go ahead and create just a test folder with a very simple page. vsx inside so cons test page let's return a div hello test page and let's go ahead and go to slash Test and yep I forgot to do export default test page there we go hello test page and now this seems like a normal react component right well let's go ahead and try and do something let's go ahead and give this an on click and let's go ahead and do const on click here and let's conso log something and let's pass this
on click to this function Here what happens here we have an error it says that we cannot do this it says if you need interactivity consider converting part of this to a client component so what does this mean what's important for you to understand is that nextjs introduces A New Concept of components called server components and every component that you create inside of the app folder is a server component by default server components are useful for a lot of things but they differ from Client components when it comes to interactivity so server components are rendered
on the server they are extremely good for SEO they also have the ability to immediately connect to the database so if we want to do what we could do here is literally do await our database then some model that we have like users find many we could literally do that inside of this uh server component so that's what what they are extremely useful for but they are not Good when it comes to interactivity as you can see here we have an error so how do we turn this into a normal component very easily by adding
use client at the top once you do that let me go ahead and open my browser here and I click on this div there we go you can see the console logs in here rendering something and it is increasing every time I click but if I remove use client we get that error back again that's because server components by itself cannot have any Interactivity between them so I just want to clear that up because you're going to see me writing use client a lot so every time I'm writing use client it means that I'm converting
a server component into a client component you there isn't any need to explain client components because they are the normal components that you are used to right there are function components like normal components inside of Standalone react applications but when working with Nextjs all components are server components by default and you need to manually tell it okay for this one I want it to be a client component it's also important to understand that there's nothing wrong with doing having a lot of client components so that's completely okay so now let's go ahead and clear this
up let's bring this back to normal and we can in fact just remove this test we no longer need it so just leave it back at the Local Host 3000 and Here I have one last diagram for you to understand the difference between server components and client components so server components are back in Behavior they have database access server cache they are available for streaming partial rendering they are good for SEO and they're extremely good for initial page load whereas client components are your usual components that you're familiar with and they represent front end behavior
they have access to use effect Use State use callback use memo all of that stuff that you are used to great so now that you know the basics of routing of uh creating named routes of creating API routes of creating route groups you're finally ready to start creating a structure here uh which we're going to reuse to create our authentication so as I've just said previously now we're going to reuse this knowledge which we've just learned about routing in nextjs to create our Authentication system so just ensure that you have the exact same setup as
me we didn't change much for example right here I have a button which is inside of my root page. vsx inside of the app folder here and I have no other folders nothing so I'm just going to quickly prepare this by removing this button and instead a paragraph which is going to say only authenticated users can see this like like that and I can remove this import from my button which we have Right here so just a very simple export default function page here I believe we actually renamed this from home so for you it
might be home if you didn't rename it but don't worry uh the name of the function doesn't matter as I've said the only thing that matters is that the file name is Page and that you do a default export so go ahead and change this to only authenticated users can see this so you have a better uh mental map of what we are doing here so what I want You to do next is go to clerk.com right here and inside of here go ahead and find the big dashboard button or login button depending on whether
you are authenticated or not and you can see that in here I already have a couple of applications from my previous tutorials for you it might be a completely empty screen basically just find the button which says add application and after that you're going to get prompted with options like this let's go ahead and Give our application a name so in my case I'm going to go ahead and call this uh gamehub because we're going to pretend that that's the name of our app this is of course a parody I'm not trying to infringe on
anyone's trademark here uh and go ahead and choose whatever you want for your login provider so you have a bunch of options here as you can see there are 19 more here which are hidden and what I'm going to do is I'm going to disable email address And I'm only going to enable Google so this way I know that my users have to pass at least Google's authenticity protocol right so they cannot spam my email addresses but clerk actually has options for you to disable bot emails and to disable spam emails a bunch of different
things so let's go ahead and select Google or whatever you want for your uh signup provider and click create application like this once you're in here you're going to see a screen Similar to this so inside of here you should have next.js pre-selected and you should also have your environment keys right here and in here we have instructions to paste the keys and the code snippet below into our environment. loal file we're going to do that but in a slightly different way we're not going to do it in a environment. loal because later on we're
going to add Prisma uh which can definitely read from environment. loal but by default it Reads from environment so I just want to skip that little step where we have to change the target from where Prisma actually reads its variables and instead we can just put everything inside of the do environment file but here's the thing we have to do first so go ahead and find yourg ignore file as I did right here and right here you're probably going to see that we have environment. loal mention here so when you create a environment. loal file
it's not going to Be part of your uh git history which is very important because your sensitive information is going to be there and you don't want anyone to see that so since I just said that we're going to put our keys in a environment file that means that we have to modify thisg ignore file and add environment you can literally add it anywhere you want it doesn't matter if you add it below this or at the top it doesn't matter just make sure that you have explicitly done Environment like that great and now what
we're going to do is create a new file at the root of our project so outside of all folders called do environment like that and you can see since that file is in get ignore you can see how it is grayed out meaning that it will not be committed if yours is not grayed out if it's in the same color as all the others right uh that could mean that it just didn't uh it could mean that you didn't save this file but it could also mean That it's just vs code cache so what you
can do if you're really worried about this is press controll shift and P and then just type reload window and after you reload you can see how now for a second it was uh in a bright color and then in turned into gray out color meaning that it's officially disconnected from my git history uh great so let's go ahead now back inside of this clerk dashboard and let's copy this environment keys so you can either Select them or you can use the copy icon from here now let's go back inside of our code let's revisit
that. environment file and let's paste everything inside so you should have the next public clerk publishable key and clerk secret key and now these are these are not two lines so this is one line like this but I use a option inside of my vs code to collapse my lines so I don't have to constantly scroll for you right so you can see everything clearly on my screen but this Should be like this one below another uh one line for each and just save this file perfect once you've done that go ahead and click continue
IND docs and in here you're going to see a beautiful documentation that clerk has prepared for you so let's go ahead and see everything we have to do so first we have to install the clerk's nextjs SDK which is going to give us access to some pre-built components Hooks and helpers which are going to help us with Developing our authentication so this is the first step mpm install at clerk nextjs let's copy this and let's go ahead and what I actually recommend you do is just shut down your app for this part because we're going
to do a lot of changes we're going to add some middlewares and some new route groups and stuff like that so just shut down your app so no background cache will be conflicted right and then let's paste this command here npm install at clerk SL nextjs and then we're going to go ahead and do the next step so I'm going to leave leave this to download and install and I'm going to go ahead and scroll down and in here it says that we have to set environment keys and we already did that so we can
skip this part the next thing it tells us to do is to wrap our application inside of clerk provider and you can already well you can literally read here where it says right but just Try and think of what we learned in the previous part of the tutorial where would you put a wrapper around your entire application every single route and every single component must be wrapped in this well the perfect place for that is the layout file in our case specifically it's going to be the root layout inside of the App application so this
is what we have to import we have to import clerk Provider from at clerk nextjs so I'm going to copy this line You don't have to copy it you can just write it right I'm just saving some time here and let me close this terminal and let's go inside of the app folder and select layout. vsx and it should be named a root layout and it should wrap HTML and body around our children which of course represent all of our routes so let's go ahead and add this import here at the top like that clerk
provider and now what we have to do is wrap our entire Structure inside of the clerk provider so outside of the HTML tag let's go ahead and do that so I'm going to wrap the clerk provider I'm going to start here and I'm going to go ahead and leave it here at the bottom perfect so we are done with step three I believe and now we have step four which is require authentication to access your app which is exactly what we need because right now this page says well I just refreshed and shut down my
app so you can't see it But our root page says that only authenticated users can see that right but that's currently not true so let's make it true by actually adding our middleware file so what we have to do is copy this code so make sure you're in the documentation for this part and go ahead and create a new file in the root of your folder so some things can happen here for example if you have a folder opened and then you click for a new file it's going to create it inside of that Folder
so one simple thing you can do whenever you want to create a file outside of all folders is first click on any file which is outside of all folders and then click on new file and you can see how now it appears outside of everything so let's add middleware dots and what's important for you to know is that middleware is also a reserved file name so make sure you don't misspell this name and then inside we're going to paste that entire code and then later We're going to go ahead and adapt this out middleware uh
it's a very powerful middle world you can of course look at the documentation for even further information but for example you can add public routes which is an array and then you can write for example SL users will be available to everyone be there be that they are logged in or logged out but we're not going to play around with that just yet so just leave this to be an empty object for now great and let's See what else we have to do so right now it says that we embedded the user button but we're
going to do that later we're not going to do that yet we're going to come back to that uh what I actually want to do is create custom sign up and sign in pages so you can scroll down to find the next steps here and click create custom sign up and sign in Pages or you don't have to follow the documentation you can just see what's on my screen and just do that as well so it Says that we have to create a route for signing up right so how are we exactly going to do
that well this is what I'm going to do instead of just creating this inside of the app folder as it's uh written right here I'm going to reuse that knowledge which we just practiced of creating route groups so go inside of the app folder and create a new folder in parenthesis out so you already guessed it we're going to have a specific layout for our login and Register pages right so let's go ahead inside of here and let's create a new folder called sign Dash up like that and if you look at the documentation we
also need another folder inside with this specific syntax with double square brackets and this 3 dots right here so that is a catch all route so let's go ahead and do this so make sure you add double uh double square brackets and then sign Dash up and then inside finally create page. vsx and I'm just Going to copy this code from the documentation it's very simple so you can find it right here so import sign up from clerk nextjs export default the page and return the sign up and now let's go ahead and do the
same thing for our sign in page so inside of our out folder create a new folder sign- in and let's go ahead and create a catch all route by using double square brackets dot dot dot sign Dash in and inside create a new file page. DSX let's Copy what's written in the documentation and let's paste it right here so just ensure that this one is actually using sign in right so I am inside of my signin folders here and I'm importing sign in inside of my sign up I'm importing sign up and rendering the sign
up great so make sure you have this exact structure we have our out folder which is not going to be visible inside of the URL the only thing that is going to be visible is the sign in and sign up Routes so make sure you have this exact structure like this and you can close those files and let's see what else we have to do so after we've added these Pages what we have to do is add specific specific environment variables so clerk knows where to redirect users where they are when they are not logged
in right because just by default we could have named our routes whatever we want there's no reason for this to be sign in and sign up this could have been Register and log in right but we're following the documentation of course but you can change this to your liking but you you then also have to tell clerk all right sign in is my signin route and sign up is my sign up route so if you use login and register instead then you would have to change the environment variables to use those but since we followed
the documentation and I believe you followed it exactly like this you can just copy this and go inside of your Environment file where you added your clerk keys and below the last one just paste these four new options so sign in url sign up URL and after sign in url and after sign up URL so this two routes indicate where the user will be redirected once they create an account or login and these two routes indicate to clerk where to redirect the user if they try to access an authorized route great and I believe that
we can now actually try this out yes I believe that Is true so let's try it out I'm going to go ahead here inside of my terminal and I'm going to do mpm run Dev like this on my local hosted 3000 and let's look at code to see what we should be expecting so when I go to Local Host 3000 I should be seeing this right a paragraph which says only authenticated users can see this but let's see if that's actually true when I go to Local Host 3000 I believe that I will be redirected
and I am take a look at my URL I am on Local Host 3000 SL sign in and then I even have some redirect URL here to bring back the user to where it's supposed to be so let's go ahead and click continue with Google and see if we get redirected back to this page where it says only authenticated users can see this and there we go after I clicked log in with Google there was a bit of a loading page and then it said and then it showed this page only authenticated users can see
this perfect so this is Exactly what I wanted us to achieve right so now what we have to do is find a way for our user to log out right and we can do that quite easily by using that clerk user button component so make sure that you're seeing this page only authenticated users can see this right and what I want you to do is go inside of this page and add an import user button from clerk SL nextjs and let's remove this with a div here and I'm just going to go ahead and give
It some styl is flex Flex SC Gap y4 and here I'm going to add an H1 element uh dashboard right and in and below that I'm going to render the user button and here's an important thing I'm going to add after sign out URL to be a slash so make sure you add this route and now as you can see I have the exact icon of what I logged in with right so when I click here there we go I have some options here I can manage my account and I can also log out uh
so you can go Ahead and click sign out here and you should be redirected back uh to your login page let's see if that is true so once I go here there we go so I'm back uh on on the login page let's try one more time to see if all of this is working there we go so it's working perfect so we can now log in we can log out and let me just go ahead and quickly debug uh if this should be happening here well actually we don't have to debug this right because
later on we're Going to enable this slash route to be publicly available for everyone so we can actually leave it exactly like this but what I want to do next is actually style this login screen a bit better because right now it's kind of looks weird it's here in the corner right so what can I do to make it uh be centered well we can use that layout function so let's go inside of the out folder and create a new file layout. CSX and let's go ahead and do clerk layout actually Out layout let's go
ahead and extract our children from here let's give our children a type of react node and let's uh let's render the children and now we should not be seeing any changes but we should have a proper layout here and if you remember how we did that out thing very similarly we can now Center our application but just before we do that I want to go inside of my app folder global. CSS so go inside Of here and just below this tail Tailwind directives add HTML body and column root like this and go ahead and add
height 100% and add a little semicolon at the end so this is the code snippet we just added make sure you save this file now go back to Al layout here and give this div a class name of H full Flex items Center and justify Center and there we go after I've added this three classes here you can see that my entire code is centered here and if I click on Sign up it redirects to slash sign up and that is centered as well so we just use that knowledge of layouts to actually do something
useful for us so what we're going to do next is we're going to go ahead and start to style our app a little bit specifically we're going to change this background to be a little bit darker and we're also going to add our application logo right here with a little quote to create an account uh great great job so it took us barely 20 minutes to integrate authentication great great job what I want to do next is actually Style this screen a little bit so in order to do that I want you to visit my
GitHub so you can copy some Styles and the reason I want you to copy these Styles and we're not going to write them here is because there isn't any logic by which I can teach you how to write those they are just uh color changes right so I literally uh transfer those colors From hex codes to hsl values right so you're going to see what I'm talking about in a second but I just want to explain why we're copying this and not writing it ourselves so you can find the GitHub Link in the description of
the YouTube video or if you're watching this on my platform you have a little icon below the video with a GitHub logo so go ahead and click on that and I want you to go ahead inside of my GitHub here so you're going to see a repository which Looks similar to this right and I want you to go inside of the app folder let me just zoom in even more so you can see this better so let me view my code find the app folder and go ahead and find global. CSS so it should be
right here as you can see I have some additional folders here from the finished project you're probably not going to have that so just find global. CSS and inside of here you can see that it is exact same thing we just modified recently but now I want you to copy this entire code inside so all of these colors have been changed and as I've said there isn't any way I can really teach you how to do this right I just me manually changed colors until it looked at the way I want it to look besides
that we also going to change the background color and we'll add this little class hidden scroll bar so we can use it in a couple of places so make sure you copy this from global. CSS from my GitHub and now what I want You to do is go inside of the app folder here inside of global. CSS remove everything and paste all of that so there we go now I have this apply I have this hidden scroll bar and all of my colors have been changed so as I've said there's really isn't anything I can
explain here more than that and I think that already if you look at your app it should look a little bit different just like this great and while we are here head back inside of my GitHub and now I Want you to go inside of my public folder so again we are here in in the root of my project go ahead and find the public folder and in here I have some images so go ahead and find spooky. SVG so this is going to be the logo of our application this is from logo dust and
you can go ahead and find even more open- Source logos from their website uh just keep in mind that this is only useful for demos or some side projects right you you cannot trademark this logo Or anything like that this is open source logo so you can go ahead and click right click and just save this image like that and now you're going to drag and drop that inside of your public folder right here so go ahead and open this public folder and you should just have next. SVG and verell SVG inside so go ahead
and drag and drop this file which you can download from my GitHub and make sure you have spooky. SVG inside of your public folder like that And great you can now close my GitHub and we can just focus on this login screen now what I want to do is I want to go back back inside of my out folder right so app out right here and I'm going to create a little component here and this is the way I'm going to create my components folder so there is another type of folder which I didn't cover
in the beginning which is a folder which begins with an underscore so create a new folder underscore components so what Does this underscore do so similarly to this parenthesis which means don't show this in the URL underscore means don't even put it in the router right so no matter what the name of this file is inside even if I put page. TSX inside of this folder it will not be rendered in the router so that's what the underscore does and I think it's perfect for components especially if we have a component which for any reason
is named page right because we know that that is A reserved keyword but if we put it in a folder with an underscore in the beginning that tells the nextjs don't even think about putting this in the routing system so that's why I'm going to put my components in here and for the out folder we're only going to have one component called logo so create a new file inside logo. DSX like that and let's go ahead and import image from next image and let's go ahead and let's import popins from next font Google and Let's
also import our CN from at/ lib utils if you're wondering where this comes from that came when we installed a shat CN so we have this lip folder and utils and we're going to use this to merge our Tailwind classes or to merge our uh well these class names which come from some weird constants like fonts right so now let's define this so const font is Poppins let's give it a subsets which is an array of Latin and let's give it we like this and let's give it 200 300 400 500 600 700 uh actually
we can yeah 700 and 800 so all the options basically and now let's do export const logo right here and for now we're just going to return a div which says logo like this so make sure you do an export const so we're not going to do default exports when it comes to components we're going to do named exports but when it comes to pages And layouts that's when it is very important to do default exports but for our components that's not going to be the case so now I want to import this component so
we can continue developing it and so you can see what's happening inside of the screen so go back inside of your layout inside of the AL folder here and just above children add that logo component from do/ components SL logo and you import it using this curly brackets because it is a named export so It's looking at this exact constant so the naming matters when it comes to named exports right so make sure that this logo uh matches this component's logo right here and save this file and now as you can see here well you
actually you can barely see but I have a text logo here right next to my login box right so what I'm going to do is I'm going to change this Flex actually besides this Flex I'm going to give it Specific Instructions to use column Layout so I'm going to give it flex-all and now my logo text has changed to the top of that box right here exactly where I want to render my actual logo so now let's go inside of logo. CSX here and let's style this so give this a class name of flex Flex
call Item Center and GAP y4 then inside open up another div with a class name of background white rounded full and padding one so we're going to Create a little circle here right and then inside we're going to render our image component which we imported right here at the top and we're going to pass it the source to be/ spooky. SVG and don't worry about this error right so this spooky. SVG comes from our public folder spooky. SVG so make sure you add this from my GitHub as I've instructed before and now we're going to
give this out of gamehub because it's the name of our parody app let's give it it a height Of 80 and let's give it a width of 80 as well and there we go now we have a nice little logo here now let's go outside of this div which is representing a circle and image inside and let's add a new div with a class name Flex Flex call and items Center and inside of here we're going to render a paragraph which is going to say gamehub which is the name of our app right and let's
go ahead and give it a class name but we're going to use Dynamic classes so open curly Brackets and let's use this CN function which we imported from here so now we can add this font class name in combination with other Tailwind classes so in the first line I'm going to write text extra large and font semi bold and below that I'm going to go ahead and write font. class name like that and you can see how now I have my gamehub it's it's in dark color so it's hard to see we're going to change
that in a second by changing the overall Dark Theme of our app so let's just leave it like this for now and below this paragraph add another paragraph which is going to say let's play and let's go ahead and give this one a class name as well to be CN and let's give it text small and text muted foreground and then let's pass in font and class name like that and don't forget a comma after the first one there we go so now it says gamehub and let's play so how can we improve this code
a Little bit it looks like I'm reusing this font class name how about I add that to the div itself I think that could be better so this is what I'm going to do I'm going to change this first paragraph which just says gamehub and I'm going to change it to just use good old class name with strings like this so I'm just changing it to class name like that and I'm going to do the exact same thing for the paragraph below so I'm basically removing that font Class name because I just noticed that we
can do this in a better way and I think I don't even have to collapse this paragraph like it it all fits and instead I'm going to give the font class name to this wrapping div here so let's go ahead and wrap this string of this div inside of curly brackets let's add our CN function and let's wrap the entire thing inside and then I'm going to collapse this and add a second argument here to be fond class name There we go so now only once I'm doing this and the rest has its own classes
perfect and what I want to do now is add a little apostrophe here for Let's Play It's grammatically correct but what happens if I do that if I save it's actually working you can see in my page that there is a little apostrophe here but here I have an error that this needs to be escaped so I can actually use this little snippet here to do that so instead of writing an apostrophe I'm Going to write an and sign write appos and then a column so I'm going to do this and save and you can
see that in my screen it stays exactly the same so it's working and we have no errors inside of our code great what I want to do now is go back inside of my layout here and just give this to items a little bit of space because this text is too close to my box here so at the end of this class thems here so I am in my Al layout right in the out folder layout here after Justify Center go ahead and add space Y6 so they are separated great so this now looks even
better what we have to do now is change our app Theme to use dark mode so then this text is going to become white and this is be going to become even lighter and we also have to change the clerk components to use dark mode as well so first let's change the clerk components for that we have to install a package clerk themes so go inside of Your terminal and I'm going to shut down the app and write mpm install at clerk SL tees like that so let's go ahead and install that let's run our
app again refresh your Lo host every time you shut down your app and let's go back inside of the app folder layout. vsx so this root layout where we actually have the clerk provider and now just below this import of clerk provider go ahead and import dark from clerk themes and now give this clerk provider a property Appearance which is an object base theme dark which we just imported and there we go once you save clerk is now in dark mode what we have to do next is create our uh actual application to be using
dark mode so for that I want you to go to shaten UI because this is the library we are using and I want you to go inside of the documentation here and go ahead and select the dark mode right here and select nextjs so let's install next themes first so I'm going to go ahead And copy this let me just zoom in so you can see so first thing we're doing is installing next themes here I'm going to go inside of my terminal I will shut it down and run mpm install next themes and you
can run your app again and now we have to create our tee provider so let's go ahead and do that inside of our components here create a new file theme- provider. TSX like that and I want you to copy and paste paste this code from components theme provider or you can of Course visit my GitHub and find this exact file and copy and paste it if for any reason it is not available in the documentation page so make sure that inside of your components folder you have them- provider. vsx and you have this exact code
inside and let me zoom out so you can see how it looks in in without line collapsing great and now we have to wrap our application inside of this theme provider so I'm going to go ahead inside of the app Folder again inside of layout. TSX here and let's go ahead and let's import theme Provider from add/ components theme provider so from that file which we just created theme provider right here you can see that this is not a default export it is this is the equivalent of doing that uh con theme provider and then
an arrow function you can of course also write function directly and now you can import theme provider like that and Now go inside of your body element and collapse this children and wrap the theme provider around so theme provider and theme provider like that and let's indent this children and now I want to give it some props I want to give it an attribute of class I want to give it a forced theme dark and I also want to give it a storage key to be gamehub Das theme so these three elements are important and
let's revisit our application now and if I refresh here so make sure you refresh because we shut down our app remember and there we go now this looks much better you can see that our texts are now clearly visible because the app is using Dark theme meaning that it changed the primary color of our text from black to white perfect so the logo is visible we have our Game Hub here and we it's clearly visible that this says let's play and even our clerk is using uh dark mode as well perfect one more thing I
Want to do before we wrap this up is enable usernames to be required whenever user is signing up so clerk can do that and we're going to do that right now so let's go ahead and visit clerk.com again you can either go to clerk.com or use the link in the description so go ahead and find the app which you just created here and you can get some you're probably going to get this little confetti because we have our first user right and first thing I want To do is delete that user so you can do
that by going inside of users here find the user and go ahead and delete it like this and confirm that you want to delete that user the reason I want to delete it is because we're going to create our username field to be required and I want to make sure uh that there is no stale or all the data for where that is not true right so now let's go inside of user and authentication here and let's select the first tab email phone and Username and in here I want to go ahead and enable the
username so so users can set usernames to their account and you can see that it also added two little labels here required and used for sign in but for my case and for our case I actually don't want users to be able to log in using their username I only want them to log in using their email so this is a your choice right but you can click on this little settings icon here and you can go ahead and disable sign in so We are not going to allow users to sign in with the username
and click continue so just make sure that this says required username should be required and everything else can stay the same click apply changes you're probably going to get uh a warning like this and you can just ignore that and click apply changes again and now let's go ahead and refresh our Local Host again and let's try and create a new account now and you can see now after I created my account I am Still inside of our custom signin page with our logo and our slogan here and we have a form to fill in
the missing fields and it says that I need to add a username and what's cool about this that clerk is actually going to warn users if they're trying to use a username which already exists right but since this is my first user there's no chance of that happening but I do believe you can enter a Too Short username there there we go you can see the username must be between Four and 64 characters so I'm going to change this to code with Antonio that's going to be my username and I'm going to click continue and
there we go I am back inside of my dashboard and now when I click here you can see my username right here and users can also change their usernames by clicking on manage account and then clicking change username right here so uh you can try that out perfect so we are are finally ready to actually synchronize this authentication system With our database right because we're going to have some list of users inside of our application and it's also important that our app registers when uh someone uses this clerk toolkit to change their profile picture because
they can do that as well if you just saw it in the settings so we need to create a web hook which is going to handle when user is created so we add them to our own database we have to handle a case when user is deleted so we remove them From the database and we also have to handle cases when user has updated their information from the clerk settings page so all of those cases are what we have to handle to be completely synchronized with what's going on in the clerk dashboard and then we
can uh finally work with our users in an advanced Way by sh showing them on the homepage searching for them and creating uh all the necessary relationships with other models which are going to exist in our Database perfect so we implemented dark mode we stylized and personalized our login screens we enabled the username and now we are ready for some more complex stuff great great job what I want to do next is establish a connection between our application and our database and for that I'm going to be using my SQL on planet scale that being
said you don't have to use Planet scale and you don't even have to use my SQL for this project I do recommend that You choose a relational database rather than a non- relational database but if for any reason you want to you can use mongod DB you can use POS SQL from superbase or neon DB but I'm going to show you how to create a mySQL database from planet scale Planet scale offers one free forever database but it does require you to add a credit card in order to access that so if you don't have
a credit card you have a couple of options the best and the simplest option For you is to learn how to spin up MySQL locally the reason why I'm not showing that in this tutorial is because there are different machines that people are watch watching this tutorial on I specifically have a Macbook so I have one set of instructions on how to do that if you have a Windows machine you're going to have to Google how to set up my SQL locally on Windows if you have Linux you're going to Google it for Linux right
one alternative that I've Heard of of Planet scale is cockroach DB which I'm not sure if it's exactly my SQL I'm not that familiar with it it could be some other relational database like SQL light or something like that but nevertheless I'm going to show you how to do it on planet scale if you have a credit card then you can follow this exact instructions and it's going to be completely free forever if you don't have a credit card go ahead and Google how to set up my SQL locally all that Matters is that you
have a database URL which you can connect to so let's go ahead to planetscale see a dashboard similar to this so I already have a database here so I'm going to go ahead and create a new one so click create new database here and make sure you select the hobby option which is free forever and go ahead and confirm that this says monthly cost free and let's give our database a name in my case it's Going to be gamehub this region can stay the same and go ahead and click create a database so in here
I'm going to select Prisma so I get the instructions for Prisma and I'm going to go ahead and create my password so click create password and you can go ahead and copy this and save it on your machine and what we're going to do next is we're going to install a couple of packages so let's go ahead and do the following I'm going to go ahead and open my terminal Here I'm going to shut down my app and first I'm going to write mpm install dasd Prisma like this and then what I'm going to do
is is run npm install at Prisma client so both of these packages are important for you to have inside of your project so we did mpm install D Prisma and mpm install Prisma client great and now that we've done that we have to run npx Prisma in it so let's go ahead and copy this command and do npx Prisma in it and There we go let's take a look at everything that was created here now so as you can see we now have a Prisma folder with schema. Prisma inside and I have a couple of
settings here and I also in my environment file where we added our clerk Keys we now have this big command here and we have a dummy database URL so first thing I want to explain is inside of this schema Prisma if you don't have a nice syntax like I do go ahead and install an extension Called Prisma and that's going to pretty ify this look right here now let's go ahead and select the optimized if you're on planet scale go ahead and select optimized here and then you just have to go ahead and find your
database URL so if you're not using Planet scale just find a URL similar to this right and you have to add that to your environment file so go inside of environment and replace this database URL with your proper database URL and it Needs to be stored inside of this key right here database URL because that's what we are reading here in our Prisma schema environment file database URL great and now let's go ahead if you're using my SQL you have to modify your schema Prisma a bit so I'm just going to go ahead and copy
this and you can pause the screen and see what I've changed so we have data source DB here and we Chang the provider to use my SQL the UR Ur L stayed the same so it's Database URL but we also added a relation mode Prisma I believe you only need this if you're using my SQL I don't think you will need this if you're using something else but you can still add it here and we also have the generator client here which I believe stayed the same so save this file Ure that you have the
database URL here and what we're going to do next is we're going to go ahead and run npx Prisma DB push so let's go ahead here inside of our Terminal and let's run npx Prisma DB push and I believe we're actually going to get an error here because we don't have any models but that's completely okay all that matters is that we have this the database is already in sync with the Prisma schema great and I think uh that is it what we have to do yes that seems to be it you can now close
this and you can go go back inside of your application so one more thing that we have to do here is we have to create Our database util so let's go ahead inside of the lib folder and create a new file db. DS let's go ahead and let's import the Prisma client from at Prisma client which we installed a couple of minutes ago and let's do export con database to be Global this. Prisma or new Prisma client and then let's write if process. environment node environment is not production Global this. Prisma is assigned to the
DB constant and now Let's fix this error so let's add declare Global VAR Prisma to be Prisma client or undefined like this so why are we doing this that is because when using nextjs every time you save a file something called hot reload happens which is what you see every time you modify a file and save it you instantly see the changes inside of your screen so that's called hot reload and what that does with this little lib which we created here is Creates a bunch of new Prisma clients so what we do is if
we are not in production we store that inside of global this and Global this is not affected by hot reload so that way we prevent a hot reload from creating a bunch of unnecessary Prisma clients here and in production we don't do that because in production we don't use hot reload great so now what I want to do is go inside of our Prisma schema here and create our user model so let's go ahead And write model user let's give it an ID of type of ID that's going to be our primary key here and
let's give it a default value of uu ID then let's also go ahead and give it a username which is going to be a required string which is unique and let's also give it an image URL which is also going to be a string and db. text so we can store more characters inside than your usual string and let's also add external user ID which is going to be a string and it's going to be unique and let's also add bio which is going to be an optional string and also so DB text so we
can store more characters inside and lastly let's add created ad which is dat time and the default value is now and let's add updated at which is also date time with a value at updated at like this so we have an ID which will be created every time this User model is created we have a username field and image URL field which will be populated from our clerk web hook so when user signs up using clerk we're going to fire a web hook which is going to connect to our database and apply the username and
the image URL from there and same is true for for external user ID so inside of external user ID we're going to store the ID which clerk uses for that user and bio is going to be something of our own so clerk is not Going to know about the bio that's going to be our thing perfect so now that we have this we are ready to push this to the database so go inside of your terminal here and run npx Prisma DB push like this and that's going to connect to your database and it's going
to synchronize this new user model as you can see your database is now in sync with your Prisma schema and one more thing we have to run is npx Prisma generate so this is going to add that to Our local environment so that we can actually access this user model and one more command I want to show you is MPX Prisma Studio like this and that's going to open a local host 5555 so let me go ahead here and paste that here and you should see something like this so you can see that it recognizes
that we have a user model it is of course empty there are no rows in this table but you can see the fields ID username image URL external user And more great so you've successfully connected to the database you can now shut this down what we're going to do next is build our web hook so what we have to do next is expose our Local Host to the internet right so let's go ahead and look at that so in my terminal here I'm going to go ahead and run mpm runev and I'm going to go
on Local Host 3000 so this is working right but what we have to do is we have to find a way to expose this Local Host To other services because we're going to be needing web hooks right so we need them uh to be allowed to connect to our local host in production that's not going to be a problem because we're going to be deployed on versal URL so we're just going to use that URL but for development mode we need to find a way to expose our Local Host to everyone on the internet who
has the URL right so right now our website is only accessible on Local Host 3000 and that's not Something that we can connect our web hooks to so what I recommend you do is download and install enrock so go ahead to en rock.com download I'm I'm going to put the link in the description as well and go ahead here and select whatever your machine is or whatever way you want to do this so I'm on Mac OS here so I run this Brew command here or you can also do it using the zip file and
after you've done this so be that for Windows or for Linux this Is very important for you to do because clerk is not going to be the only web hook we're going to need we're also going to have some other services so it's crucial that you have to uh have this installed in your machine but for production we're not going to use this at all this is only for development mode so to confirm that you have angro setup correctly after you've done this install steps you can just write enrock in your terminal and you should
be getting well All the options that you can do with enr you should not be getting a command not found if you get command not found it means that you haven't installed this properly so make sure that you have this installed and after you confirm that your command is working what you have to do is add your out token and for that you need to create an account so go ahead and click on sign up here and create an account so once you are inside you're Going to see a screen similar to this and here
again you have some instructions on how to install enrock and what you have to do next is run this enrock config add out token so basically copy whatever it says right here I'm going to hide my token here so you cannot connect to mine and don't share yours with anyone as well and now go ahead and add that in your terminal so I'm going to go ahead and paste that here and add it and there we go out Token has been saved to my configuration file and then what I can do is enro HTTP 3000
like this and as you can see now I have this forwarding uh right here and make sure you use this https so go ahead and copy this URL here and we're going to go ahead and paste that uh in side of my Local Host here and what I'm going to do is get this error right because we have nothing else running on Local Host 3,000 so go back inside of your terminal make Sure enro is running and open a new terminal and do mpm run Dev so now this is going to be running on Local
Host 3000 right if I go ahead and visit Local Host 3000 my application is running right here but if I go back here let me expand my my screen so I can see my uh URL here uh so you can you can even shut this down and just run angro again and you should be seeing this URL but keep in mind every time you run enr it's Going to be a different URL so just copy this forwarding URL here and make sure you have npm runev running and look at this now we can access our
application but in a different URL and you can even share this with your friends if that's what you want perfect but one more thing that I want to show you is this exact issue right so every time we shut down the enro server so always make sure that your npm run Dev is running and when you want to uh Expose that using enr every time you do this it's a completely different URL right so if I try and refresh on this page now I have an error that this one doesn't exist and that can get
pretty annoying and you can probably forget to you know rerun your gr especially if you're watching this tutorial over a couple of days I doubt that you're going to keep this running all the time right you're going to be shutting down your app so every time you change this you're Actually going to have to change this URL in all the VAP hooks that we use so that can get pretty annoying so this is what you can do to get your stable URL inside of enrock here I'm actually not sure exactly uh where it is it
could be in Cloud Edge end points right here is uh maybe not here in Cloud Edge domain right here in here go ahead and click on new domain you can see that I already have one so I get an error so this is in their free tier also you don't have to Upgrade enrock at all so this is just for development mode no need to purchase anything here so just use the free tier basically just get your free domain uh as the as of time that I'm recording this video they offer one stable static domain
free forever right uh so what you can do is copy this right here you can see that when I click you can click on this little icon here start a tunnel so click on this and then you have the command which you can run so go ahead And copy that as well and then let's go back inside of here and instead of running enro HTTP 3000 we can paste that command like this and there we go now we have our our own URL which is always going to be the same so when I paste that
here uh uh do I have my app running uh oh I think I also have to specify the port for this yes so paste this and you can see that at the end the port is 80 so change that to 3,000 all right and let's try that again So you can see the URL is now the same I don't have to copy it anymore I can just refresh this page and there we go now I have a state able URL here which matches what I've gotten in here in these domains if this has been disabled
for you for any reason well unfortunately you're just going to have to work with different URLs every time but whatever you do no need to upgrade enrock so you can completely use the free version that they have perfect so that's what I Wanted us to do so now you can go ahead and shut this down you know take a break and when you come back just go ahead and run this command again and if you forget it you can always go inside of cloud Edge domains find the domain click on this little icon and just
copy it from here and that way your domain is always going to stay the same perfect so yeah now you know how to expose your Local Host 3000 to the worldwide web which means that we can connect this to our Web hooks so let's go ahead one more time and just establish our knowledge of local tunnels so I'm going to shut down all of my terminals so I will shut down this and I will shut down this I only have one terminal running and I cannot connect to my local host so whenever you're starting your
project in the future go ahead and do mpm run Dev that's the first step you have to do and then in another terminal go ahead and Use that ngr command you can see I have it right here if you don't have it you can find find it uh you just go back in the tutorial where I showed you exactly where it's written in enr.com website and make sure that when you copy that you change the port to be 3,000 and not 80 so now my website is available both on Local Host 3000 here but it's
also available on this URL right here so if I go back here and change this to my URL I'm seeing exactly what I just saw on my Local Host perfect so what we're ready to do now is create our clerk web hook so for that I'm going to use uh their documentation here so what they say to do first is enable web hooks so go to your clerk dashboard here and find the web hooks in the sidebar and inside of here go ahead and click add endpoint and in here you're going to paste not your
local host but that enro URL which we just established which you can get from your terminal right here so this HT ttps Option right here and what we're going to do is we're going to change this endpoint to go to/ API SL web hooks SL clerk so this is very important this is our structure make sure it goes to slash API SL web hooks so multiple because we're going to have more of them and specifically the clerk one great and then in the message filtering go ahead and select user and go ahead and select everything
so user created deleted and updated and click create perfect so Confirm one more time that this URL is correct you can also copy it from here and paste it in your tab one more time and your Local Host should be showing up here great so what we have to do now is actually build the web hook so we just enabled uh everything we need here what we need to do now is get the signing secret so inside of this dashboard here where you added this endpoint you should see the signing secret so go ahead and
click on the little I icon here and That's going to allow you to see this secret and the docs then say to store that inside of web hook Secret inside our environment file but we're not going to store it as that we're going to store it as something else so let me Zoom back in here and go inside of my uh environment file and in here let's go just below this next public clerk sign up URL and in here I'm going to go ahead and add clerk Webhook secret so the reason I'm adding a prefix
clerk is because we're going to have multiple web web hooks here so make sure you paste your super secret signing URL here which you can get from your dashboard right here so sign in secret we clicked on the little I icon and we got the sign in secret all right so now that we have that uh you can go ahead and read even further about understanding the web hook payload so you know how that's going to look but What we have to do next is install swix so let's go ahead and do that so this
is also only needed for development right so don't worry about this so go ahead and install swix like this and I just think I think I just shut down my Ang Rock so make sure you install swix and if you accidentally shut down your enro like I did just go ahead and rerun that Command right uh on your stable domain with Port 3000 and ensure that in another terminal you have npm run Dev Running so it's important that both of these are running at the same time great so I'm going to open a third terminal
what we had to do was do mpm install swix so just make sure that you do that great and now we have instructions on how to create the web hook but we're not going to create it in this exact repository we're going to create it in a different way one so let's go ahead and close everything here go inside of our app folder and in here create a new Folder called API and then inside of that another folder web Hooks and then inside of that another folder Clerk and then create a file route. CS so
app folder API web hooks clerk so exactly what we've given it right here right so let me go ahead and expand this so uh our angro URL SL API web hooks clerk so it needs to be the same great so let me just collapse this go back here uh and let's take a look at what we have to add here so first let's add our Imports So you can go ahead and open this documentation as well I'm going to paste the link in the description or you can just follow along as I do so first
we're going to uh add the web Hook from swix we're going to import headers from next headers and we're going to import this is a type web hook event from from clerk nextjs server after that we're going to go ahead and actually uh enable this route to be a post function so let's go ahead and give it an end curly bracket Here and then let's go ahead and do the following let's see if we have the web hook secret so I'm going to copy this from here and paste it inside and let me just zoom
out a bit so you can see so this is what it's supposed to look like but we have to modify it a little bit so here we look for process. environment. webhook secret but if you take a look at our environment we have clerk web hook secret so copy this from environment File and then replace this so no need to replace this constant just replace where the constant gets its information from which is process. invironment do clerk web hook secret and it would also be a good idea to fix this error which currently tells you
that if there is no web hook secret please add that to your environment so let's be correct and tell it that they need to to add clerk web hook secret to our environment file perfect so make sure you've added that What we have to do next is get the headers so let's go ahead and copy this let's go just below this if Clause here and let's get our headers so I'm just going to indent this like that so we get the headers from nextjs and then from that headers object we get the swix ID the
swix timestamp and the swix signature so we're going to use this three objects sorry these three options in combination with our clerk web hook secret to verify that what is trying to Access this endpoint has permissions to our database otherwise any user would be able to trigger our web hook and that's not good right so we need to enable this to happen and now let's go ahead and add this if Clause that if there are no headers break the function immediately so we're not going to allow anyone to do this if they don't provide the
headers which are swix ID timestamp and swix signature for which we check right here so if any of them are missing we pass in The error and prevent them from accessing our web hook great and now let's go ahead and let's get the body and the payload so after this if clause which checks for fix headers let's go ahead and get the body so we get the payload using await request. Json so make sure that this is an asynchronous F function if you didn't copy it but instead you wrote it yourself uh and then we
stringify that so we turn that object inside of a String and then what we're going to do let me just add it like this is we're going to initialize our web hook with our web hook secret constant and then we're going to attempt to verify it so let's do this step by step first I'm just going to go ahead and create a new swix instance here so after we get our body let's go aad ahead and let's add this so create a new SX instance so we create this VH constant using the new web hook
which we imported from swix and We pass in the web hook secret which we get right here using our environment field clerk web hook secret which if you check is filled right here great and now that we have that let's go ahead and try and verify that so copy this try and catch block right here and just below this uh event paste that here so we open a try and catch block where we use this web hook with our web hook secret and we attempt to verify who this user is who Is trying to access
our web hook using the swix ID from the headers which we have right here swix timestamp and swix signature so all of those things need to match in order for whatever is trying to access our web hook to actually have access so this is going to be a very secure web Hook and the reason we need to secure it like this is because we're going to allow this to be a public URL so anyone will be able to Ping this route but only those with proper uh Headers and which matches in combination with our web
hook secret will be able to actually continue and not get this error that they there was a problem verifying the web hook great so save this try and catch event and let's see what else uh we have to do here so after that we're practically done we can now access the data the event type and just copy these two constants these two console logs and this response return right here so outside of this Tri catch function and The function like this so we have these two new constants with the ID and the event type and
what's important in web hooks is that you return a response in our case our default response is going to be 200 so if you don't return a response I think that then the web Hook is going to stay in timeout out or pending something like that so make sure you always add a response at the end perfect so let's go ahead uh and review this one more time uh inside of your dot Environment you need to have a clerk web hook secret so make sure you copied this in full so confirm one more time in
your clerk dashboard here I'm going to expand my screen make sure you have this sign in secret and make sure that you copied it from start to end then make sure that you have pasted that here and make sure that clerk web hook secret matches exactly what you check in this constant clerk web hook secret like this perfect and Here's you can already try this I believe so let me go ahead and copy this and try that in my browser so if I go here there we go I have a response null here and I
think that's because we got intercepted somewhere so let's go ahead uh and try that is this correct API web hooks clerk uh I think we can try and initiate an event here so let's go into testing so go inside of your clerk dashboard into testing here and let's create user. Created like this and let's go ahead and prepare our terminal here and go ahead and open the enrock terminal so I'm going to zoom out so we can see everything that's going on yes I think I'm not sure if that's going to appear here or in
the Ang Rock one so make sure you have both of this ready so let's go here select user. created it doesn't matter so just fire any event for now uh but we do listen only for user updates so make sure you select one Of the user ones and go ahead and click Send example and let's see if this is working or not oh it looks like it's preventing us from connecting to this web hook because we forgot to add it to public routes right so let's go ahead and do the following before we try this
again so go inside of your middleware do THS right here and inside of this object add a public route with an array and then inside of that you're going to go ahead And write SL API SL web Hooks and we're going to go ahead and enable this route for all web hooks inside so this is going to match both SL Clerk and whatever we're going to have in the future so let's try this again I think that now if I try this here it looks like this page isn't working yes because I get a 405
so that's correct yes so the error is 405 meaning that we are now throwing that error so if we take a look back inside Of our app API route I think that we throw do we throw a 405 well basically it's it's working I don't know what else to say all right and let's try this again so now let's fire that event from the clerk dashboard so send example and there we go look at this we now have so where is it it's not in enrock it's where your Local Host mpm run Dev is running
this is where it appears so you should be having this huge log right here right and you can see that the Event is user. created so let's simplify this and let's Only log the ID with the event type so I'm going to go back inside of my terminal here and I'm going to going I add just a bunch of spaces here like that and I'm going to zoom out here and I'm going to send example again and there we go web hook with ID of some user ID ID and the type of user created so
just confirm that you're getting this console log right here so let's recap everything we had to do to get to this So what's important is that you've enabled your API web hooks to be a public route so anyone can access that whether they are logged in or not and then what's important is that when you try and go manually on that route so look at my URL it's that angr URL / API web hooks clerk when I try like this I get a 405 because I'm not authorized because I don't have the headers right uh
and then make sure that in here you also have the correct URL using that enr URL API web hooks clerk go into testing here select a random user events so let's try with deleted now go ahead and prepare your terminal here and go inside of the terminal where you running mpm around dep so not inside of the angr one but the other one and let me add a couple of spaces here so we can see it I'm going to send this example here and there we go now there is a type of user. deleted perfect
so this is now working and now let's try and shut Everything down so I'm shutting down Local Host and I'm shutting down angr so I'm deleting all of my terminals here right so now my application is not going to be running I believe there we go and if I try and send an example now I should get an error here and let's go ahead and refresh there we go you can see how it says that there is an error right here this one failed because my app is not running so I want to teach you
how to run your app because I guess You're going to be doing this over a couple of days and you're probably not going to have this running all the time so step one npm run Dev step two open a new terminal and run that enrock command with the port 3000 and with your stable URL if you have that feature and then once you get that you're going to have this URL right here so if you're using enr with different domains every time then you're going to have to copy the domain from here every time go
inside of Your web hook click on edit and you're going to have to paste it here just remember to add this web API web hooks clerk so whenever you do this make sure that you go into testing let's go ahead and try another event let's click Send example and let's see if that's going to work there we go so it succeeded the last event right here and I think that we can see that not inside of the Ang Rock but inside of our first terminal there we go web hook with an ID of this User
ID and type of user created perfect so make sure you have these two things running make sure that you're getting this proper console logs and what what we're going to do now is we're going to go ahead and actually connect to our Prisma and create a user inside of our database every time our user has logged in using clerk what I want to do first is actually delete all of my users from my clerk dashboard right here so I'm going To go inside of my users here I'm going to find my user and I'm going
to delete this user so we start from a blank slate right make sure you have no users inside of your clerk dashboard and then what we're going to do is just make sure your Local Host is running of course make sure your enr is running as well what we're going to do is modify this to create a new user model every time we receive an event of user. created and we're actually not going to need the ID Like this so you can remove this just leave the event type and remove this to console logs let's
go ahead and do the following if event type type is user. created in that case we're going to have to uh update our database so let's go ahead and let's import database from atlib DB which is this little util which we created which has access to our database so now that we did that let's go inside of this if clause and let's write await db. user. Create and let's write data external user ID to be payload do dat. ID and we have this payload right here so we're not going to be using the body here
which is stringified we're going to be using payload directly so make sure you don't accidentally use body so we're passing the external user ID which is the clerk user ID to this field and then we're going to pass in the username to be payload DOD dat. username then we're going to add image URL to be payload Dod. image URL and actually it's not image URL like this it is image uncore URL so the field is a bit different you can visit the documentation to see how it exactly looks or you can I think you can
actually see it inside of your dashboard here inside of web hooks let's go ahead and click here when you click on testing and select user. created in here you can see what you're going to get so we all of these things and there we go we have image URL so that's how we Know that it's with an underscore right it's a bit different than ours so we're going to match the image URL and I think that is it for now let's take a look at our Prisma schema Prisma schema we have ID which is automatically
created we have username image URL and external user uh user ID these three fields are required this doesn't matter and this doesn't matter for the web hook great and I think we can already do that so let's go ahead and try that now so we Can go you can still work on Local Host so you don't have to use that URL so just go to your local host right and what I'm going to do before I try this is also run my Prisma studio so I can look at my database in real time so open
a third terminal and run npx Prisma studio and that's going to open it on Local Host 5555 and right now I have no users inside of my database so I'm going to go ahead and click continue with Google and create my account make sure You've also deleted all of your users from Clerk and now I'm going to enter my username code with Antonio and I'm going to click continue and let's see if this is going to work now so I'm going to go inside of my Prisma Studio I'm going to refresh my users and there
we go we are synchronized every time a new user uses clerk to register on our app we now have them in our own database which means that we have their image URL and we have Most importantly the external user ID so for other web hook events like user updated this is what we're going to look for the external user ID and that's how we going to update their image or their username right and the bio is null that is correct and you can I believe also take a look at here in the overview there we
go we have the last event which was fired and it was successful perfect so now what I want to do is an ability to modify my image URL or more Specifically my username and I also want that to change inside of my database so right now my username is code with anonio so let's go ahead and add another type of event here for user updated so let's go ahead and do if event type is user. updated in that case go ahead and do await uh actually first let's attempt to find this user so con current
user is going to be await db. user find unique where external user ID is Matching payload do data. ID so how do I know this is the field I'm looking for because that's what we stored when we created the user so now I know all right this is how I'm going to find the user that my web Hook is trying to do something with and if there is no current user here let's go ahead and return new response user not found and let's give it a status of 404 like that otherwise if we have the
user let's do await db. User. update where external user ID is payload dod. ID and let's modify the data for this user so that can either be the username which is going to be payload data username or it can be image URL which is going to be payload dod. image uncore URL so make sure you add the underscore the same thing we did here perfect let's try that out now so we have our event ready make sure it says use updated so my username right here is Code with Antonio in the database but if I
go ahead and click on manage my account and click on change username and change this to something else and click continue let's go ahead and refresh my Prisma studio now and there we go my username is now something else perfect exactly what we wanted and the same thing is working with the image URL but I can't really show show that because the URL is just a huge string right but the image URL is now also working so you Can also update the image of the user and it's going to be updated everywhere on your website
one last event that we have to take care of is if the user deletes their account so let's go ahead uh and outside of here and let's write if event type is user deleted let's do await DB user delete where external user ID matches payload data ID like that perfect and I actually believe inside of this user updated I Think we can remove this I think we can just do this I think it's like exactly the same thing uh all right let's try that out so now once the user has been deleted our database should
clear it as well so in my database I now have one user but if I go to manage account and if I go all the way down and click on delete account and confirm delete account and click on delete account and go in my Prisma studio and refresh and it looks like it's still here and you Have to refresh two times so the web hooks are not exactly instant but there we go our user has been deleted officially from the database as well let's go back to Local Host 3 ,000 and let's go ahead and
create a new account again so I'm back and let's write code with Antonio again so I'm creating a completely new user let's go here let's refresh there we go the user is back let's go ahead and try and change my username something else let's click Continue let's refresh and there we go so our web Hook is working perfect we have synchronized our clerk users with our database that's going to be very helpful for us because we now have them inside of our familiar lib where we can access them with directly in the database we don't
even have to use all the clerk uh uh features now which for this project is going to make some things a bit simpler great great job so now that we have our web hooks Ready let's go ahead and let's actually start developing how our application looks like so make sure you have Local Host running you actually don't need to have your angr running right now except if you're not going to be creating any new users so from now on if you plan on modifying your user by changing the image URL or the username deleting your
user or creating new users you need to have your web hook running so if you accidentally create one without your Database is not going to be synchronized with your clerk dashboard so what you can do is go inside of Prisma studio and delete everything you have in users and then go onto the clerk dashboard and manually delete all users and then try again but for this part that we're going to do now we're not going to do anything like that so you can just have your Local Host running here and let's go ahead inside of
the app and what I want to do is I want to modify my structure a Little bit so this page. CSX is going to be my main page but the thing is I want it to be a little bit different I don't want it to be Standalone like this instead I'm going to go ahead and create a new folder called browse and then inside I'm going to go ahead and create another folder called home and go ahead and drag and drop page. vsx inside of that home right here if this pops up you can click
okay and now as you can see I have this weird Unsaved file here so look at your open editors and you should see page. THS in/ types slapp so if you have this just click on that and click save and you can close everything and make sure that you close this next folder right so that is just cache because we just moved our root page from one place to another but because of the route groups what does this page equal to well it equals to Local Host 3000 nothing has changed it's exactly the same we
just put it in a Couple of group folders so we can work better with it uh great and one more thing I want to tell you so if you had some problems with that next cache with that weird unsaved file here's another way you can fix it go ahead and shut down your app so I'm going to go ahead and shut down both both my Ang Rock I don't need it now my Prisma Studio I don't need that and also shut down the app and what you you can do is manually go ahead and remove
next and then do mpm Run Dev again and once you do that next will be created again there we go and everything should work just fine so just in case for some reason you got stuck on that little page thing it's not a big deal great so now that we have that structure let's go back inside of the browse right here and what I want to create is a layout file so go ahead and create layout. TSX and let's let's go ahead and give this uh browse layout let's go ahead and extract their Children let's
give them a type of react react node and let's go ahead inside render a div and inside very simply render those children and you should not be seeing any differences now because we are not using this layout in any special way uh great so what I want to do now is I want to create a Nar component so I'm going to replace this div right here to be a fragment and that is still going to be exactly the same and then in here I'm Going to create another div with a class name of flex H
full and padding top of 20 so I'm adding a little bit space here on the top so our n bar has space and then here I'm going to render the NV bar itself and when we save of course we're going to get an error because nvb bar does not exist so inside of this browse folder create another folder underscore components like that and then inside go ahead and create another folder called sidebar and In then create an index. TSX which is going to be the entry point for our sidebar the reason I'm creating this as
a folder and not as a component like sidebar. TSX is because it's going to have a lot of elements itself and I did not mean sidebar I meant Navar my apologies so we're going we're going to work with Navar first so go inside of Navar and let's do export cons nav bar and let's go ahead and instead of div let's actually use the nav element And let's just write nav bar inside and you can save this go back to layout so inside of the browse layout right here and import navbar from do/ components Navar and
when you save you should have a text nav bar here at the top now let's go ahead and give this nav a class name of fixed like that so it's always at the top let's also confirm that with top zero let's give it a full width let's give it a height of 20 let's give it a zindex of 49 let's give it the Background color of a specific hex code 252 731 like that and let's give it a padding on left and right of two on large devices it's going to be padding of four let's
give it Flex justify between items Center and Shadow small like that great so now we have our nav barar right here at least the skeleton off it perfect now inside of here I want to go ahead and create my logo component which is going to be Similar to that out logo which we created recently so let's actually go ahead inside of our app inside of out in components here we have logo. vsx so let's copy that let's go inside of browse and let's go inside of the nav bar itself and paste that logo inside of
here like that great and now we can import that logo from do/ logo and no I did not just r randomly duplicate this uh so obviously it doesn't look good now as you can see but we're going to modify It now but it is going to reuse a lot of elements so it was better to just copy it it was easier so make sure that you still have the logo inside of the out but what we did was copied it inside of the browse inside of underscore components inside of navbar right alongside our index we
now have the exact same logo here great and this is what I'm going to do I'm going to remove everything ins side right but we're still going to need this popins and We're still going to need a CN here as well as the image but one more thing we're going to need is the link component from next link and now let's go ahead and let's add link hre to be slash like this let's create a div with a class name of hidden on mobile devices but on large devices it's going to be Flex like this
let's give it items Center Gap X4 power opacity d75 and Transition and now to actually see that element let's go ahead and create our little circle here so class name BG white rounded full and padding off one and then inside of here we're going to render our image so make sure you have image imported which is going to have a source of SLS spooky. SVG so the same thing that we have inside of our out logo component right so make sure you have spooky. SVG inside of your public folder let's give this an ALT of
Gamehub which is the parody name of our app let's give it a height of 32 let's give it a width of 32 as well and I believe that's it uh I think that should work so you can see now on small devices it's not visible but on big devices it is visible right here and when I click here it's going to redirect us to uh the root page great so now let's go ahead outside of this div right here and let's add another one which is going to have a Paragraph uh of gamehub and then
below is going to have a paragraph of let's play and let's go ahead and fix this by escaping it with this oppos right here so just replace that like this and I will just zoom out so you can see this there we go so you can see how now we have uh a text gamehub and let's play below it so let's go ahead and style this even further so I'm going to go ahead and give this do a class name to Use CN font. class name like that so we have CN imported and our font
is Poppins right here so now both of our gam hub text and let's play text are going to share that same font perfect and what I want to do now is give the first paragraph a class name of text large and font semi Bold and the second one text extra small and text muted foreground like that let's take a look at it and there we go we have our nice little uh component here in the nav bar And every time you user Clicks in that they're going to get redirected to the homepage because of our
link component perfect uh great let's go back inside of our index now and what I want to do next is create our search input so let's go ahead and write search like this and if you save of course you're going to get a little error here so let's go inside of the nav bar bar here and let's create a new file search. DSX and what I'm going to do now is Mark This component as use client because this one is going to be an input which is going to have on change it's going to have
a use effect all of those things and if you remember in my brief introduction in server components and client components all components which we create in the app router are server components by default so we have to explicitly tell uh this uh framework that we want this to be a client component so let's do export const uh Search return a just saying search for now now go back inside of your navbar index and you can import that from dot not from Lucid react but from do/ search like this and now you should have a text
which says search right here great and it's even visible on mobile here uh great and let me just show you one quick difference which you can if you're not sure whether your component is client or server because you don't have to always add use client for example if our search Component explic explicitly has used client written and then inside of here we add another component right that component let's say this is a new file so another component. CSX then that component does not have to have use client at the top so they you don't have
to write that you can just do expert const another component right so that way the reason that works is because everything that is inside of you client Is automatically going to become client from now on right but there is a certain way that you can also render server components inside of client components and that's by using children so this is the way which where you can kind of inject a server component inside of use client and I I have a feeling like this will just confuse you now so I'm going to stop myself because we
are going to have these examples and there are are going to be clearer when you actually See the purpose behind them right but for now here's one cool thing which you can do so mark this as use client and add a simple console log which says I am logged here and now when you take a look in your inspect element here and I will just filter this here so I am logged here there we go you can see right here that it is logged so I am logged here in my inspect element right here but
if I remove move use client what happens then Let's refresh all of a sudden there are no logs here but uh let's just add search here the component is still rendered so where is this log well it's inside of our terminal because this is by default a server component there we go you can now see the logs here I'm logged here I'm logged here I'm logged here so that's how you can easily recognize whether something is a client or server component if you're not sure so for now bring back use client for This component and
let's go ahead and develop this so what I want to do now is add uh one component from shat CN UI so do npx shat cn- UI at latest add input like this so let's go ahead uh and wait for this to be added and do mpm rund Dev again and every time you shut down your app make sure to refresh your Local Host here perfect and oh I actually need one more package my apologies so also let's add npm install query string like that and we already have the button so that Should be it
for this component so refresh your local host and let's go ahead and import Qs from query string let's go ahead and import use state from react let's go ahead and import search icon and X from Lucid react so it's important that you don't you can also import search from lucid react but obviously it's going to conflict with our component name so you can either rename this to like search input or you can rename this import to as search icon Or what Lucid offers at least for the version I'm using is just directly using search icon
like this so that's why I'm doing that all right and let's also go ahead and import us router from next SL navigation so don't accidentally import it from router because that's going to break your app inside of uh the app router which we are using and now let's go ahead and import the input component from at/ components UI input and let's import the button Component from s/ components UI button so we have both of those input we've added just now and button we added in the beginning of the project all right so now I want
to replace this div with a form and I want to go ahead and give this form a class name of relative W full on large devices we're going to use a specific width of 400 pixels flex and items Center let's go ahead and give it an Onsubmit to just be an empty Arrow function for now and inside of here let's render our input component let's go ahead and give this uh a placeholder of search so there we go now you can see see how we have a nice little search component here in the top and
now what I want to do is I want to do the following outside of this input add a button component and inside we're going to Render the search icon great so now you can see how we have a big search icon next to this input so let's go ahead and style this a bit so give this search icon first a class name of a H5 W5 and text muted foreground now let's give this button a type of submit and I'm just going to collapse all of the attributes so a type of submit a size of
a small a variant of secondary and I'm also going to give it A class name of rounded L none like this so I don't want it to have any borders on this side because I want it to flush with the input so I'm going to have to do the same thing on the input and obviously I'm going to have to remove this kind of a ring or an outline because it just seems to clash with what I'm trying to do here all right so now that we uh took care of our button let's go back
to the input and let's give it a class name of rounded Das rounded d r- None so now when this to meet their roundedness is going to be equal and it's going to look flush with one another and now let's give it a focus D visible ring zero so we remove that outline and we also have to give it Focus Das visible ring transparent and focus D visible ring offset Z like that so these three classes Focus visible ring zero Focus visible ring transparent and focus visible ring offset zero so now if you Try you
can see how it looks very flush with one another and if you if you if you click here it's going to submit the form so it kind of refreshes but that's going to be fixed in a second great and now what I want to do is I want to add some functions here so let's go ahead and let's add our router to be use router which we added an import right here then let's go ahead and let's add value and set value to come from use State and give the default value of an Empty string
let's add const on submit here let's go ahead and give it an event to be react. form event HTML form element and let's do event. prevent default so we don't refresh our page every time if have if we have no value written and User submitted it we're just going to return so no need to do any search if user hasn't uh written anything right and then let's do const URL is going to be Qs do stringify URL like That and let's write URL to just be an empty Arrow function and query is going to give
a term a value of value which we are storing inside of our state and let's also go ahead and add options to skip empty string to be true like that so things like this term are not going to happen right so we're never going to have a URL which ends like this because of this option it's just going to be like this right and now what we have to do is router. push and Push that URL because stringify URL is going to result in a string so it's going to look like Local Host 3000 slash
sorry not slash but it's going to have this query term and then uh value which user has searched so that's what we're pushing to the URL all right and now what I want to do is I want to add that uh to this input and to this onsubmit so let's change this onsubmit here to use that onsubmit function which we just created and let's Change this input to have a value of value and let's give it an onchange to get the event and uses set value with a value of event. target. value very very simply
and you can already try try this out now so look my URL is Local Host 3000 now but if I write test and press enter you can see that now my URL is slash term and it equals to exactly what I've written inside of my input great so now I want to allow a user a way to clear Their input by H by using this x icon from which we imported from Lucid react here so first I want to define a function for that so const on clear is very simply just going to call set
value and empty it like that and then what I want to do is go ahead just below this input here and add if I have value go ahead and render that X icon like that so you can see that now I have this x icon I don't know if you can see let me zoom in so now I have this x icon but if I remove it I don't have it and now let's go ahead and style this so it looks a bit better so we're going to go ahead uh and give this x a
class name of absolute top- 2.5 WR 14 h-5 w-5 text- muted D foreground cursor D pointer power opacity -75 and transition and let's give it on click on clear there we go so absolute top 2.5 Right 14 so this is to position it exactly in this place in the input where I want so let me expand this a little bit so exactly where I want it right here then text muted foreground that's what makes it the same color as the little icon here the H5 and W5 give it the exact size that I want cursor
pointer makes sure that when I hover on this it looks like I can click on it so it's not just a pointer right and the hover opacity 75 means that when I hover It has a little bit of an opacity as you can see and transition just to smooth that out so it's not too stiff perfect so you can actually try and click this and there we go you can see that now this is empty and we are not going to clear the URL so we're going to handle that differently and what I want to
do now is go here and change this URL to actually lead you to slash search because that's what we're going to end up with later when we create the Search page right now we don't have it right so we can't really test this out so I'm going back to Local Host and if I write test I'm going to get redirected to 404 but my URL is correct so just ensure that your Local Host 3000 goes to/ search and then uses that term and you can leave it like this for now we're going to work on
that search page later but for now we have a beautiful and ready component to do that great so what we have to do now is go back inside of The uh Index right here and we have to create our third uh component which is going to be called actions so go ahead and render actions like this and if you save you're going to get an error so let's go ahead inside of the Novar and create a new file actions. TSX and let's go ahead and Export con actions here and let's just return a div actions
let's go back inside of the index here and import actions from do/ actions like that and there we go you Can see that now in here next to my input uh I have the actions right here so let's go ahead and actually will develop this actions now so go inside of here and first thing I want to do is turn this into an asynchronous function we can do that because this is a server component by default right so if we added use clent client here all of this would become client components even if they don't
explicitly have used client at the top that's what I was trying to Explain to you earlier right because you're going to see patterns like that happen but since we don't do that then this is a server component this is a server component in search we explicitly tell it this is not in actions we don't so this is a server component so we can make it a synchronous and then we can get our current user from await current user from clerk nextjs like that and now we have access to the currently logged in user so let's
go ahead and do the Following let's give this div a class name of flex items Center justify and GAP X2 ml4 but on large ml0 like that and then let's check if we don't have the user so if we don't have the user in that case go ahead and and render sign in button from clerk nextjs so add this import next to the current user and inside we're going to add our button from components UI button so I like to separate my imports by adding the mpm packages at the top and then This packages which
have the little add sign and then below that I would add like something which goes like this right which doesn't have the add sign so I separate them by spaces so if you're want why I separated this all right and so it's just a practice it doesn't matter right I just like it that way inside of this button WR login like this uh and now what I want to do well actually I'll come back to this because we can't really see this right now Because we're logged in right so we're going to have to come
back to this I want to give it a specific color right uh and now let's go here and check if we have the user so you can write user like this but what I like to do is turn this into an actual Boolean and in order to do that you can add double exclamation points so not one this will turn it into true or false right but this will turn this into a Boolean if the object exists or if it is null it's going to render This as false and it is important to do that
I mean nothing dangerous is going to happen but you can get some bad user experience if you have a practice to not check what value comes before this end end Turner right so I like to convert that to a Boolean and now in here let's go ahead and open a div with a class name Flex items Center and GAP X4 and let's again render our button component uh and inside I want to go ahead and add a link component from next SL link so make sure you add this import as well and let's add this
end this link component and in here I'm going to give it an HRA to be dynamic so slash you slash open template literals and write user. username like that so that's why we needed our user to be loaded in full because we need the username and now in here let's go ahead and let's add a clapboard a Clapper board icon from Lucid react like that and let's go ahead and write a span here dashboard and let's go ahead and give this button a size of small let's give it a variant of ghost let's give it
a class name of text muted foreground hover text primary and let's give it an option as child so we can proper L render this link inside great and you can see how now we have this big dashboard button uh right here when we are logged in and we Are logged in because we can we can right see this so great let's go ahead and continue developing this so This Clapper board is going to have a class name of h-5 w-5 and on desktop or large devices it's going to have a little margin here and the
reason it's only going to have this margin on desktop and not on mobile is because this will be hidden on mobile and only appear on large devices right so you can see how now it is just a Clapper word icon but When I expand and zoom out a bit it becomes as you can see a nice little dashboard button and when you click on it it's going to redirect you to 404 but the URL should be slash you and then the last username which you modified when we practiced our web hooks of the currently logged
in user great so now we have that and what I want to add beside it is the user button so that's why I've wrapped this inside of a div so you can hold two elements side by side so after this Button here let's go ahead and render user button from clerk nextjs so make sure you have the sign in button make sure you have the user button and the current user imported from Clerk nextjs and let's go ahead and give it an important prop after sign out URL to lead to the slash so it stays
on our page here so let's go ahead and look at this now and there we go you can see how now I have the control over my user right here and I also have this button Here perfect so we finished our navbar uh what we have to do now are two things so first thing that I want to do is revisit our middleware right so make sure you save all of this make sure your knv bar is nice and Here and Now go inside of middleware and besides having this this API web hooks I also
want to enable all users whether they're logged in or not to visit my root page right so just like on real twitch I don't care if you're logged in or not I want you to be Able to see videos but you're on only going to be able to stream videos if you're logged in great so when we added this it's also it would make sense that we go back inside of our app inside of browse homepage. DSX and we no longer have to render this user button here instead I'm just going to call this homepage
like that great so now if we try it out and refresh this and go ahead and sign out there we go now I have just a login button here and that's what I Want to do uh next so I want to go ahead and modify this button so it has a specific style that I want which we're going to reuse a couple of times in this project so let's go ahead inside of the components UI button right here and go ahead and find the button variance here and find the last one which is link and
now let's add one which we're going to use throughout this project so let's write primary and that's going to use the text primary BG blue 600 and on Hover it's going to be BG blue 60080 like that so that's going to be our style here so let's go ahead back inside of our app folder browse components navbar actions. DSX right here and I told you that we're going to get back to this button so find this one which is wrapped inside of sign in button and let's go ahead and give this button a size of
small and a variant of primary which you should have now have Access to and there we go now this button looks much better and when you click on it you will be redirected to our custom signin page and we didn't even have to explicitly tell it where to redirect that's because this signin button comes from Clerk and inside of our environment file we've pretty clearly told clerk what is my sign URL so it knows exactly where to redirect us great so I'm going to go ahead and log in now to confirm that this is Working
great so just make sure you didn't accidentally create a new user now if you have multiple email addresses I mean if you did it's it's not a big problem right we're going to reset our entire user database and all of our clerk users a lot of time in this project because we're going to keep adding some new models so we have to make sure that we have a Clean Slate uh so just don't worry for now if you accidentally did that because we don't Have enr running meaning that our web Hook is not working if
any events are being fired but it doesn't matter because right now we're just focusing on the nov bar here great so this is working I have my dashboard button we have our search right here but one thing that I feel like it's missing is when I Collapse there is no way to redirect to the homepage right so I feel like we shouldn't hide this entire gamehub parody logo but instead We should just show a little element here so let let's try and develop that so I'm going to go inside of logo here let's see if
that's going to work and I'm not going to hide this right I'm not going to hide the entire thing so instead of hidden an LG Flex here I'm just going to write Flex so now I should see the ENT entire thing here and I do and instead I'm going to give this div which renders the text that uh Dynamic thing so let's go ahead inside of this CN here and in the first paragraph I'm going to give it hidden by default button LG use block like this and there we go now I have a little
icon here so what we can do is separate these two items a bit right so we can do that by adding Gap x one or two is it what which one oh we already have Gap X4 all right we're going to do it like this we're simply going to go inside of This div which holds our image and give it a margin right of two like that and let's also give it a shrink of zero can I do that so maybe margin right of 4 5 8 10 maybe 12 all right 12 it is and
this is only going to be visible on uh on small devices so that means that I have to add on LG Mr is zero and on LG shrink is just shrink I think I can write it like that so when I expand there we go now it looks better now our mobile view clearly supports this button Here as well perfect so let's just actually try it out in Mobile to see if it works and there we go it looks good great we can now click on this we have our search we have our user dashboard
so and this is the iPhone SE is the smallest you should aim for right so it makes no sense to go even smaller than that because this device doesn't exist so I always try to go to iPhone SE even though I think this is maybe unrealistic example I think most people have larger Phones so you can even use like this ones and it looks good it looks good enough great so we finished our navbar and now we're ready to start developing our sidebar which is going to be collapsible and it's going to render a list
of recommended users for both logged out and logged in users great great job now that we have our navbar finished I want to go ahead and create our collapsible sidebar so let me go ahead And show you what I have running in my terminal so I only have mpm run Dev running right right now I'm not running any of my hooks I'm not running angro or any local tunnel because I will not be creating or updating any of my users so I recommend that you don't do the same and instead I recommend that you do
the same and just focus on creating the sidebar now so let's go ahead and let's revisit our app folder browse layout. TSX right here so layout is the perfect Place place to also put a sidebar here and this is where I want to put it I want to put it right above this children right here so I'm going to go ahead and render the sidebar like this and when we save I'm going to get an error here that sidebar is not defined you can refresh the page if you're uh if you didn't get the error
and now I'm going to go inside of my components here and I'm going to create a new folder sidebar like this and then inside I will create a new file Index. TSX and I'm going to export const sidebar and return a div sidebar like that let's go back inside of our browse layout here and now we can import sidebar from not from Lucid react but from do/ component sidebar so the same way we did with navbar and now next to our homepage text here which is our children which is rendering the the actual page which
is here is also rendering the sidebar text next to it so we're going to go ahead and turn this Into an actual component so the first thing I want to do is replace this div with another component called wrapper so I'm going to go inside of the sidebar and create a new file wrapper. TSX so wrapper is going to be responsible for handling whether this sidebar is collapsed or expanded to its full width so let's go ahead uh and let's write interface wrapper props and I immediately wanted to receive children and that's going to be
a type of react React node and the reason it needs children is because this is what it's going to look like so export con wrapper and let's go ahead and pass in those children props here so let's assign wrapper props and let's get the children here and inside what we're going to do is we're going to return an aside element and render the children inside like that so A very simple component and then we're going to go back inside the Sidebar index here and instead of using this div we're going to use that wrapper which
we just created in the same folder level so right here and nothing should change but now we have this little component which takes care of collapsing our sidebar and inside of here we can handle anything else and this will be a server component meaning that from here here we're going to be able to fetch our uh followed users fetch recommended users and stuff like that because this Is a server component so it has access to the database but our wrapper later is going to be a client component right so it's going to have use client
here at the top I'm going to remove it for now I just want to give you an image here and the reason it's going to have use client is because it's going to have access to a hook which will work with twoand which is going to be responsible as kind of our Global store Global state to detect whether it's collapsed or not and Because we're passing the children inside and not direct uh components we can also add another server component inside right later when we create that so that's how we inject a server component inside
of what is going to be a client component so that's what I was kind of trying to explain earlier if you remember where I stopped myself because I I I thought that it's getting too confused at that moment so I hope by finishing this it's going to get just a Little bit clearer so let's remove this and just write sidebar here make sure your wrapper looks exactly like this and let's go ahead and give this aside some class names so let's write class name here and I'm going to go ahead and give it a fixed
property so as you can see now when I added that you can see how it kind of goes one above another and now let's go ahead and give it a property of left zero so it's always on the left side let's give it Flex Flex call so all Items go one below another let's give it a fix width of 60 and H full property ABG background property and now as you can see it has completely hidden our text which was here which said homepage so it's still here it's just underneath all of this stuff here
so let's do BG background border right so it has just a tiny little border so it's easier to distinguish where it ends and let's also give this border a proper color of 2D2 e35 like that and let's go ahead and Give it a z index of 50 like that great so now that we have this what I want to do is I want to install a package called two stand so I'm going to go inside of my terminal here I will shut down my my app and run mpm install to stand like that so let's
go ahead and wait for this to install and let's do mpm run Dev perfect so what I want to do now is create the store which is going to take care whether this wrapper is expanded or collapsed so I'm going to close Everything and I'm going to create a new folder called store so I'm going to click on a random item here because I want to create that folder outside of everything so just create a new folder called store like that and inside create a new file uh use sidebar. TSX actually it can be TS
because we're not going to be doing any react inside so use- sidebar. TS and let's go ahead an import create from sust which we just installed let's create an interface sidebar store It's going to have a property collapsed which is a Boolean so true or false it's going to have a function on expand which is which is going to be a void and on collapse which is also going to be a void and now let's write export const use sidebar here to use that create which we imported from here and let's give this create an
interface of sidebar store like that and then go ahead and open parenthesis open parenthesis again and write set and then go ahead and Return an immediate object like this so make sure you wrap it inside of parenthesis because if you did this it's not the same as doing this so This returns an immediate object and inside of this object let's give it some default States so collapsed by default is going to be false on expand function is going to be a function which calls set which we extracted from the props here and what it sets
is my apology is not like this so open a function like This and go ahead and set collaps to be pulse and then below that let's do on collapse let's call set again collapsed through like that there we go so now we have our default State we have our on expand and our on collapse function right here so I want to go back inside of my wrapper now so let's go ahead inside of uh app folder browse component sidebar wrapper right here and now we have to add that hook inside of here so You can
do that quite easily just by adding const collapsed and then use sidebar from store use sidebar which we just created let's get the state and let's just return all state here so we can properly destructure only the collapsed element inside and make sure you do the export so you can actually import this and when you save uh I believe that this is not going to work and in fact we're going to get an error so let's refresh here and There we go so use ref only works in client components and you can see that it
exactly points to this hook which we just added inside of the wrapper so that's what I said that this wrapper component is going to have to be a client component so make sure you add use client at the top of the wrapper here and then once we have this collapse property we can dynamically change the width of this sidebar so by default it's 240 pixels wide and then what we're Going to do is dynamically change that if it is collapsed or not so in order to do that we have to import our CN package from
lib utils and now let's make this Dynamic so I'm going to wrap the entire thing inside of curly brackets then I'm going to wrap the entire thing inside of the CN function and I'm just going to collapse this like that so I want my default classes to be in the first line I added a little comma here and then I'm going to write if we are collapsed in That case all I'm going to do is change the width to be 70 pixels just like that and now you can see that it still looks the same
but if you go back to your use sidebar and let's change the default value of collaps from false to true and there we go you can see how now it's just a small little sidebar here even our underlaying content is kind of sticking out so that's what we achieved here so bring this back to false and it should expand like this and leave it at False and now what I want to do is go back inside of the index here and I want to go ahead and create a toggle element so instead of this I'm
going to render toggle like this and if you save you're going to get an error because it doesn't exist so let's go ahead inside of our uh sidebar here and create a new file toggle. DSX like this and let's export cons toggle and let's return a div saying toggle like that let's go back inside of The index and import toggle from do/ toogle and there we go now we have our toggle component here and here's the cool thing so remember how I told you that you can use console logs and look at where it logs
to see whether something is a server component or a client component so this wrapper is a client component so you might be thinking all right everything we put inside is now a client component as well right well that's not true because we Are using the children method which means that we can inject server components inside so if I go ahead inside of this console here and add a console log I am logged here like that and if I look at my inspect element you can see that it's not being logged inside of the inspect element
but instead it's being logged inside of my terminal right here meaning by that because of that children thing that we did right here this is still a server Component right so I just wanted to demonstrate that quick thing but but it doesn't really I could have chosen a bit of a better example because we are going to turn this into a client component as well but I promise it's going to make sense once we add another component inside of this wrapper which is actually going to connect to our database to load the recommended users here
and then you're going to see how useful server components actually are but for now Let's go ahead and let's develop this toggle component so first things first let's mark it as use client as well because it's going to have to access that uh use sidebar store right so let's go ahead and let's extract collapsed on expand and on collapse and on expand should be with the capital E and let's give it use sidebar which you can import from store use sidebar and in here I want to get the entire State and just return that State
like this great and now let's write our Dynamic label so const label if it is collapsed in that case we're going to tell the user expand otherwise collapse so we are doing uh we are giving them an action to do if we are collapsed the action is going to be all right you can expand this if we are not collapsed in that case the action is going to be collapse this sidebar so that's what we're storing here so we can easily use it Inside of here so let's go ahead and change this from a div
to a fragment like that and first things first let's go ahead and write if we are not collapsed so if we are not collapsed make sure you add a little exclamation point at the end here in that case let's go ahead and render a div with a class name of padding 3 pl6 margin bottom of two Flex item Center and full width let me just expand my screen here and inside of here I want To write a paragraph for you like that and there we go now you should have a little text here which says
for you if you're not seeing that make sure that you did a a proper uh Turner here with an exclamation point and make sure that your used sidebar has collapsed false so this should be expanded right so let's go back inside of our toggle component where we added for you and let's give this paragraph some class names so class name for this one is going to be font Semi bold and text primary like that there we go now it looks a bit nicer and then what I want to do is add our button component which
you can import from components you I button and inside of here I'm going to add Arrow left from line which you can import from Lucid react as I just did right here and I'm going to move that to the top and let's go ahead and give this Arrow left from line a class name of h-4 and W-4 and now let's go ahead and give this Button a class name of H Auto padding to an ml AO and then let's give it a variant of ghost like this and there we go now we have a nice
little toggle button here right so when we click on this what's supposed to happen is this goes to its collapsed State and we can do that quite easily because we have the function right here on collapse right so let's go ahead and I'm just going to collapse all of the attributes which this button has and I'm Going to add on click here to be on collapse like that so let's take a look at that now when I click on this there we go it's collapsed and you can see how that entire content now disappears and
you can just refresh your page to bring it back to its original state great so this should now be working for you and now we have to create an alternative state which is when we are collapsed so go ahead and click collapsed and make sure that all of your content in the Sidebar disappears because above here we're going to go ahead and write if we are collapsed in that case we're going to render something entirely different so create a div a class name of hidden by default but only on Flex is on large devices it's
going to be visible using the flex let's give it a full width items Center justify Center padding top of four and margin bottom of four then inside just add a button which we already have imported and render Arrow Right from line from lucd reacts so I believe this was Arrow left from line and now this is Arrow right from line like that and now you should have uh a little button here let's go ahead and continue uh developing so I'm going to go ahead and give this button uh a variant of ghost a class name
of H AO and padding two like that and let's give this one a class name of H4 and W-4 and it's not appearing For Me Maybe not even for you that's because on Mobile devices we're you're not going to allow the user to expand this sidebar but if you expand your screen there we go now you can see that you have a little button here which indicates that you can expand it back but on mobile devices we're going to hide that button because I don't want users to be able to expand because they already have
a small space to work with so I don't want to cause any more trouble with our space and now let's go ahead uh and give this Button so again I'm just going to collapse all of my items here and let's give this button on click to be on expand like that so expand your screen make sure you're in desktop mode and now you should be able to both collapse and expand your sidebar but keep in mind that on mobile mode you should not be seeing the button to expand it back right so also one more
thing that we're going to De develop later is that when user goes from desktop to mobile mode This is going to automatically collapse so we're not going to leave them with this because then it's just weird that they they can expand this on desktop then they go to mobile and it will automatically collapse for them so we're just going to do all of that automatically for them great so confirm that on desktop you can expand and uh collapse this item perfect so now what I want to do is I want to create a little indicator
that when user hovers on this It's like a little tool tip or a hint to tell them all right by clicking on this you will expand by clicking on this you will collapse and for that we're going to use this label right here we're going to create a component called hint so we can wrap this buttons inside of that and then we're going to render this inside so let's go inside of our terminal and let's add a package from shat CMI called tool Tip so let's go ahead uh and make sure you add add I
believe add tool tip that there we go so make sure you add the add command as well now it is installing our tool tip and you can do mpm run Dev again refresh your local host and now let's go inside of the components folder alongside theme provider we're going to create hint. vsx and let's go ahead and let's import everything we need from s/ components UI tool tip which we just Installed so we are going to need the tool tip itself we're going to need the tool tip content tool tip provider and tooltip Trigger like
this and let's write interface hint props to get the label which is a string children which are going to be react react node as child which is going to be an optional Boolean side which is going to be optional and have the properties of top bottom left left and right and we're going to have a line Which is also going to be optional and have the properties of Start Center and end like that and now let's go ahead and let's write export const hint let's assign the props hint props and let's destructure all of the
props inside so label children as child side and align and then inside of here let's go ahead and return our tool tip provider and let's add tool tip itself inside let's give it a delay delay Duration of zero so I want it to immediately when the user hovers in this I want to show the tool tip and then let's add uh inside of the tool tip let's add tool tip trigger and let's render the children inside side and let's give it an optional prop as child to match our prop as child so as child prop
is what we're going to enable whenever we are wrapping a button right so that why we we're not going to have any hydration errors when It comes to that uh and now below the trigger add a tool tip content and inside we're going to render a paragraph which is going to render our label so now what I want to do is give this tool tip cont a class name of text black and BG white and I want to give it a side of side so let me just collapse its attributes and besides side I also
want to give it an align property of align so we can always modify it if it's going to the left and we want it to show on the Right for example or add even a little bit of offset if we want and now let's style this class name here by giving it font semibold like that so that is our hint component and now that we have this make sure you save this file we can go back inside of our sidebar toggle. TSX and let's go ahead and let's import hint from components hint which we just
created and first things first let's do this for the not collapsed state so this thing that I'm seeing here So just refresh your page and you should see that by default and wrap this button inside of the hint component like that and now go ahead and give it a label of label which we defined in this constant right here so make sure you have that and give it a side uh of right and give it a property as child because it is wrapping a button so now if you try you should have a nice little
indicator to tell the user what this action does and we can do the same thing for when we Collaps so I'm going to wrap this button inside of the hint as well and I'm going to give it a property label of label I'm going to give it side right and as child as well like that so expand on your desktop make sure you're testing this on the desktop mode now it says collapse and now it says expand and one more time if you're doing it on mobile it's not going to be visible so that's not
a bug we're going to take care of that right now we're just Focusing on the desktop mode great so we finished this and now what I want to do is I want to ensure that the content which you can see that it's kind of peing from here it's hidden right remember that text which we have homepage also expands and collapses depending on the sidebar state so that's what we have to do next so we have to go back to our browse layout now so let's go ahead and go inside of app browse layout here and
Instead of just rendering our children like this I want to create a client component which is going to be a wrapper around our children so that way we can inject server components even though it's wrapped inside of a client component so let's add container like this and wrap the children inside and if you save you're going to get an error so inside of your components folder where you have the nav bar and the sidebar just create a file Container. DSX like that and let's go ahead and export const container let's return a div here and
let's go ahead and give it an interface container props to accept the children which are react react node and inside of it let's assign the props container props and let's get the children like that and then we can simply render the children then when you have this go back to the layout and import container not from l should react But from do/ components container so you should have three Imports the knvb bar the sidebar and the container and nothing should change right now but let's go inside of the container here and let's give it access
to our sidebar store so wrap this in use client and children are still server components because we are using that children injection method so make sure this is used client in the container here and then let's go ahead and add our Use sidebar which you can import from store use sidebar and let's just give it all the state information and then inside of here let's get collapsed like that we're later going to add two more elements here but for now I just want to do this so give this div a class name which is going
to be dynamic so we're going to import CN as well and we're going to go ahead and first give it some default classes which is going to be Flex one And then if it is collapsed it's going to have a margin left of 70 pixels otherwise it's going to have a margin left of 70 pixels on mobile but on large is going to be it's going to have a margin left of 60 like this so go ahead and save that and let's take a look at this now and there we go you can see how
this says homepage right now but when I Collapse you can see how it has a smaller padding and if I go here can see how it has that padding by default right And now just to wrap this entire thing up we're going to do that automatic collap automatic collapsing on mobile mode and I'm going to exp explain why did I use this exact values here in a second first thing I want you to do is go inside of your terminal and install a package use hooks DTS like this make sure you run mpm run Dev
and make sure you restart your Local Host I mean refresh your page and then let's go ahead uh and let's import two things so We're going to import use effect from react and we're going to import use media query from use hooks DS and then in here let's go ahead and add con matches to be used media query and inside of it inside of here I want to add parenthesis Max width is going to be our LG breakpoint our LG break point is 1,24 pixels so we're going to match that here 1,24 pixels so this
is going to be a JavaScript way for us to know whether we Are in desktop mode or mobile mode so what we're going to do now is add a little use effect here below this which is going to watch for that matches property and besides collapse from this sidebar we're also going to need on collapse and on expand and then we're going to write if it matches meaning that we are in desktop in Mobile mode in that case let's go ahead and do on collapse automatically for the user else we're going to do on expand
and Make sure you also add those two in here so on collapse and on expand like that and now if you look at it see how it automatically collapses and expands right on desktop we control that ourselves so on desktop we're going to allow the user whether they want it expanded or collapsed but on mobile regardless if they load the page initially on mobile mode or if they go from desktop to mobile we're going to collapse it for them and we're not going To allow them to expand it themselves so you can see when I
refresh you can see we're going to improve this even further don't worry about that little blink we're going to fix that as well but you can see how even even if they go from loaded mobile and then expand the desktop we expand it to give the user a reminder howy you can actually control these values and you can see how our content here is following the exact width of the sidebar so now I can Explain those values here which I've written so margin left of 70 pixels when we are collapsed equals our sidebar wrapper here
where we wrote that when we are collapsed the width of the sidebar is 70 pixels which means we have to push our content by 70 pixels and then so this is if we are collapsed and then if we are not collapsed we do kind of a weird thing right because I again I write this but why do I write this again that's because let me remind you we have To check if we are on mobile so even if we are technically expanded inside of our uh store and JavaScript we never going to render that and
I believe we also have that here so maybe we don't all right but we never wanted this to be loaded on mobile mode as ml60 I never want to push content that far away because I know that on mobile mode regardless if this has been run or not it's never going to be able to be expanded right but this is what should Matter for you here ml60 on large mode which matches the width of 60 right here when the this element is not uh expanded which when it is expanded right great perfect so we have
now our very intuitive uh and collapsable sidebar here it works great on mobile uh and what we're going to do now is well kind of add some features here so that you can finally see those server components in actions we're going to render the recommended users in here which for now Is basically just going to be be a list of all of our users from our database uh and then we're going to add some little loading skeletons which are especially going to help with this you can see when I refresh on mobile mode for a
second it's expanded so it just looks weird so we're going to go ahead and fix that now great great job so now what I want to do is create our recommended list of users here so when users open this sidebar or when It's collapsed I want to render a couple of user items here and a small label which reads recommended so let's go ahead first and let's create an out service which we're going to reuse throughout our project so I'm going to keep my services inside of the lib folder here let's go ahead and create
one called out service like this so it's going to be a very simple service which is going to be using the current user from Clerk and then fetch The the matching user inside of our database so that way we're going to have uh the exact information we need which we might not hold in clerk but instead hold in our database so let's go ahead and do import current user from clerk nextjs let's go ahead and import our database and I'm going to change this to use slash lib you don't have to but I just like
it more this way and now let's export const get self so that's going to be the function which we're going to use Whenever we need to fetch the currently logged in user and also fetch what we have about that user in our own database so first we're going to just get normal self from await current user then if there is no user or if there is no user username we are immediately going to go ahead and throw a new error unauthorized and let me just not misspell this unauthorized like that and Then we're going to
attempt to fetch the user from the database so wait database user find unique where username matches self username like that and actually we don't even have to use the username what we can do is match the external user ID and then use self. because this self is the clerk object and Clerk's ID is what we store in the external user ID so this would be An even better idea because usernames can change but IDs cannot and if we cannot find that user it means we don't have them synchronized in our database so we're just going
to throw an error not found and then let's just return the user themselves so this is what we're going to reuse throughout our project now wherever we need to get the full user in combination with our database user and now that we have that service Let's go ahead and create a new one called recommended service so this is what is going to take care of recommending uh new users to the currently logged in or logged out user so recommended Dash service let's go ahead and let's import the database and let's go ahead and import get
self from the out service and I'm going to change this Imports to use lib I like it more that way you didn't have to of course and now let's write export Cons get recommended like this and make sure this is an asynchronous function and first we're going to do a very very simple one so we're just going to go ahead and write con users to be await db. user find many and we're going to order them by the latest creation like this and just return the users and we're going to use this out service just
a bit later because right now I just want to make it very simple what this Does is just loads all the users uh inside of our database right and later we're going to use this get self to detect whether we are logged in or not and if we are logged in we're going to exclude ourselves from the list of recommended users right no point to recommend yourself to yourself right and if we're not logged in we're just going to load all users and we're also going to later go even further here and make sure that
none of these users have Blocked each other because we're going to have blocking functionality as well and then we're going to do a similar service for followers but let's leave this recommended as it is right now just ignore that we're not using this for now we're going to come back to that later and now let's go back inside the app browse components sidebar index. TSX right here and below the toggle let's add a div with a class name space y4 padding top of four but on large devices Padding top is going to be zero so
the reason we have padding top of four on mobile but not on zero is because on mobile we're also uh not going to have this toggle as you can see it's going to be hidden so we have to add a little bit of space there so it looks just a bit better on mobile devices and then in here I'm going to add recommended which currently does not exist so let's go ahead and just quickly create that so go inside of the sidebar here and create a New file recommended. DSX and let's export con recommended and
just return a div recommended like that and now we can go back here and import recommended from do/ recommended the same way we did with toggle and wrapper and now you should have this text which says recommended inside of your sidebar great and now we're going to use this sidebar to actually load the recommended users so let's go ahead and turn this into an Asynchronous function ensure that you don't have accidentally have used client at the top because this needs to be a server component and let's go ahead and give it a const recommended to
be await get recommended from our lib recommended service like this and now that we have these users let's go ahead and pass them as data to the recommended uh uh component right here so go back inside of here and now what we have to do is modify the props so it can accept That so interface recommended props is going to accept data which is going to be a type of user user which we can import from Prisma client so the reason it has this user with the exact properties which we added in Prisma schema is
because of that command npx Prisma generate so npx Prisma DB push synchronizes the remote database but npx Prisma generates synchronizes your local development instance so you can do stuff like this great so it's going to be uh An array of users from Prisma like that and then we can go ahead and match that here so recommend props and extract the data and now you should no longer be having any errors when you use this recommended right here perfect so now what I want to do is I want to make sure that this recommended is also
a client component because it's going to behave differently regarding uh depending whether our sidebar is collapsed or not so let's go ahead and extract collapsed From use sidebar you can import that from store use sidebar I'm just going to separate them and let's get the state and return the state so we have the collapsed State here and now let's add a property which is going to uh decide whether to show the label of recommended or not so we are only going to show the label which says recommended if we are not collapsed and if we
actually have something to show so if data. length is Larger than zero otherwise no point in even telling the user that there is something something recommended for them right so inside of this D let's use that show label and let's go ahead and render a div with a class name of PL 6 and margin bottom of four and then inside of that a paragraph which says recomended like that and class name is going to be text small text muted foreground and now if you go ahead and Expand your screen you should be seeing the recomend
recommended right here uh and if you're not seeing it it could be that you don't have the enough uh information in your database so what you can do is conso log data length sorry for that so data length and since this is a client component it's going to be logged inside of our inspect element you can see when I log and let me just close this and let's refresh there we go you can see that it Says one right here so I have one element in my database and I can even confirm that by going
inside of my terminal here besides my mpm uh run I'm going to do npx Prisma Studio like this and you can see that I have one user right here so ensure that you have a user in your database otherwise it's not going to work uh great so now that we have that so on mobile it's still hidden right this is only going to be visible when we are not collapsed even if we Collapse here here it's not going to be visible so this little label is only visible on desktop and if the sidebar is uh
extended or not collapsed more precisely all right and now what I want to do is below this show label create an unordered list with a class name space Y 2 and PX of two and I want to go over data. map get the individual user and then I just want to go ahead and add a little div here which will render the user username like this and give it a Key of user ID and now you should have a list right here which says the username of your uh well I only have one user in
my database so this is exactly what I have right here I am that user you can see that it says something else that's what I last renamed my user when we were testing whether our web hooks for updating the user is working so my name here is something else perfect so we are successfully loading our users and now what I want to do is turn this into a Component called user item we're going to need a couple of shatan components to create that in full so I'm going to shut down my Prisma Studio here and
you can you can even shut down your mpm runev you didn't have to but I'm going to do it and let's do npx shaten UI at latest and let's add Avatar which we're going to need to create our reusable component called user Avatar and let's also go ahead and let's add a component called skeleton so We can start doing some loading States here because we can finally load some data so add this two and let's do mpm run Dev again refresh your Local Host to ensure that everything is in sync and now I'm going to
go ahead and replace this div with a user item like that and I'm just go going to go ahead and give it a key of user. ID so I don't forget that and we're going to have an error that user item does not exist so let's go ahead and create that inside of s Mar Create a new one user item. PSX and let's go ahead and Mark this as use client and let's export cones user item here and return a div user item so just a very simple component go back inside of the recommended and
then you can import that from do/ user item and you should no longer be having any errors great so now that we are here let's go ahead and pass some more props to this user item component so I'm going to pass in the user name which is going to be User username I'm going to pass in the image URL which is going to be user image URL and I'm also going to pass in the is alive property which for now we are going to control manually so we're going to change it from true and to
false so leave it as true for now because it's going to be easier to see how it's supposed to look like when the user is live so it has a nice little indicator in the sidebar that they are currently streaming so now we have to Assign all of those props inside of the user item so let's create an interface user item props which accepts the username which is a string the image URL which is a string and is live which is going to be a Boolean like that and let's also make it optional and now
we can go ahead and apply those props user item props and extract the username image URL and is live and now you should no longer be having any errors when rendering this user item in your Recommended component and now inside of this user item let let's go ahead and let's import a couple of stuff which we're going to need so we're going to have to have use path name from next navigation and we're also going to have to import CN from lib utils we're also going to need to have a button from components UI button
let's also go ahead and import use sidebar from store use sidebar so we know how to show this user item whether it's collapsed or not and The let's also Al go ahead and import skeleton which we just created so which we just added from shaty nuui so this uh five packages Right Here and Now inside of here let's go ahead and get the path name whoops path name path name is going to be used path name then let's go ahead and let's extract collapsed from use sidebar let's get the state and let's return all state
back let's go ahead generate the hre so where are we going to redirect the user once they click on This user item that's going to be uh to slash username like that and we're also going to add a Boolean is active so we indicate to the user whether they're currently seeing the stream of this user in the sidebar so we're going to do do a very simple check if path name is equal to hre just like that great and now we're ready to actually style this a bit so so let's go ahead and replace this
div with a button which we added an import right here and what I want to do Is give this a property as a child I want to give it a it doesn't need a roll actually it's already a button I want to give it a variant of ghost and I want to give it a class name which is going to be dynamic like this so let's write first the default classes which is full width and height of 12 and then let's say if it is collapsed in that case we're going to justify Center otherwise we're
going to justify Start and if it's active in that case we're going to give it a different background color of BG accent like this great and now inside of the user item let's render a link from next link so make sure you add this and the H to that link is simply going to be the H which we defined right here in the con Conant and then inside let's go ahead and open a div and let's go ahead and write a class name which again is going to be dynamic depending On whether we are collapsed
or not so Flex item Center full width and GAP X of four and then if we are collapsed let's go ahead and do justify Center here as well like that great and what I want to render inside is the user user Avatar which is the component we're going to have to create so add a user Avatar here and let's go ahead and immediately pass in the image URL which is going to be the image URL which we have from the Props username which is going to be username and is live is live so we have
all of these three from our props right here and now let's go ahead and create this user Avatar and we're not going to create that inside of the sidebar but rather we're going to create it inside of our components folder because we can reuse it throughout the project a lot of times so inside create user avatar. TSX like this and then let's go ahead and let's import CVA and type variant props from class variance Authority so we're going to use this package to create custom variants and sizes which users can pass well theel Vel opers
more specifically can pass so we have a nice developer experience here let's go ahead and let's import CN from lib utils we're also going to need a skeleton and I I'm going to use components for this one and let's also go ahead and import everything we need from at/ components UI Avatar and that's going to be the Avatar The Avatar fullback and the Avatar image great and now let's go ahead uh and let's just quickly create our user alatar here user Avatar and let's just return it div user Avatar now go back inside of the
user item and import the user avatar from at/ components user Avatar and now you should be seeing a text which says user Avatar like this and you can already see how this is a nice button and if you Click it's a 404 error so just make sure you are here on the sidebar so now we're going to change this to actually display the Avatar of the currently logged in user what we have to do is allow this component to accept this three props here so go back inside of the user Avatar and what we're going
to do is simply write an interface user Avatar uh user Avatar props like that and let's give it a username which is a string let's give it An image UR L which is a string as well is live which is going to be an optional Boolean uh and also we're going to have show badge which is also going to be an optional Boolean so the badge is going to be the live badge on the Avatar so depending on where we're using that sometimes I want the live so little red live badge to display and sometimes
I'm not going to want that to happen so let's go ahead and just assign this user Avatar props like that and now you Longer be having any errors for passing this props here but before we continue developing this I actually want to create uh my avatar sizes here right so that's why we imported this too CVA and type variant props so let's go ahead and write const avatar sizes is CVA let's leave the first default classes to be completely empty and then open an object and write variance size the default size of this Avatar is
Going to be h8 and W8 and the large is going to be h14 and W4 and now let's just give it some default variants here so I wanted to always use the default size whoops my apologies I wanted to always use the default size unless user or in our case developer specifically tells us that they want a larger version of this Avatar so why am I doing this in this way why not why not just use any Turners well this is the inspir I got the Inspiration from this from the actual shaten component so if
you go in any of our components like button you can see that that's what they do in the button variance here this is how they Define variants and I think this is a much more structured way to do that rather than having a bunch of Turner here and if else if else comparison with the props right so this is a much more structured way to do it you can see how complex it is here but our version in user Avatar Now it's quite simple right so we have the VAR variants we Define the type of
variant which we want the developer to be able to control which is the size so they're going to have a new prop now for this user Avatar which is going to be called size and inside they're going to be able to either pass default or large and if they don't pass anything then it's just going to fall back to default so now we have to combine these Avatar sizes with our existing props right here And what the way you can do that is by adding extends so I'm going to do this in a new line
so extends variant props and then pass in type of Avatar sizes like that so we have this variant props here which we imported and then we use the type of Avatar sizes and now we don't have to manually def Define this size prop inside instead it's going to read from this and it's automatically going to do the typescript for us so if you add an extra large here you know Something like this in the future that's it you don't have to change your your props it's automatically going to allow you uh you can see now
when I go to user Avatar here in my user item right if I add a size prop you can see how it allows me to add default large or extra large so that's what we achieved right now I'm going to remove extra large because we're going to not going to need it for this project but I just want to show you how useful it is to do your Variance for components in this way right great so now that we have this let's go ahead uh and let's actually render uh all of these items so username
image URL is live show badge and size and you can see how we didn't have size defined in here but because we do extends right here that reads the size props so that's how cool this is now let's go ahead and Define a little Boolean const can show badge so we are only going to show the live badge if the User explicitly tells us to show the badge I mean the developer and if the user for which this Avatar is being referred to is actually live and streaming otherwise we're not going to show that badge
so let's go ahead and give this div a class name of relative and inside let's add an avatar so we have Avatar imported right here make sure you have Avatar Avatar fullback and Avatar image from components UI Avatar here inside of here I want add the Avatar image and I want to give it a source of image URL and a class name of object cover and about this Avatar here I want to give it a class name which is going to be Dynamics so make sure you add CN from lib utils here and let's go
ahead and give it a first a dynamic if is live in that case we're going to add a little border around our a Avatar so you can already see it right here right you can see our little Avatar here on you can See how it looks this is how it looks on desktop so we're going to have a space for our username here but on mobile it's just like a little badge here so this is how it looks when the user is offline right but now if it is live what we're going to do add
a little ring to ring rows 500 border and Border background so now if I go ahead back inside of my uh inside of my recommended right here you can see that I set is live to true and you can see how now I have a nice little Red border right here but if I change this to be is live false you can see how the Border disappears nice so let's go ahead and enable this so you can clearly see how you're developing so go back inside of the user Avatar Here and Now what I want
to do is I want to apply those sizes which we talked about so we can do that quite easily now by just using this Avatar sizes constant inside of the CN Library so just pass in the Avatar sizes and inside of the object Passing whatever size the user provided if they didn't provide anything it's going to fall back to the default option great and now if if we fail to load an avatar image or if it's taking some time we also need an avatar fallback so let's go ahead and render the username the first letter
and then username username length minus one which is the last letter like this great and now what we have to do uh is we have to Go outside of the Avatar and dynamically render that badge right so can show badge let's go ahead here and let's add a little div with a class name of absolute minus bottom minus 3 left one and a half transform and minus translate minus x one and A2 so these are just very specific values which I found to be the perfect for putting the live badge right in the middle uh
of the The Avatar right so we actually cannot see this text right now because we need to create another component called live badge so let's go ahead and just quickly do that I know you can't see anything now I'm sorry for that uh so let's go ahead and just quickly create that so we can see that I maybe should have done this first so inside of our components folder create a new component called live badge. TSX it's going to be very simple this is just styling so this live Badge is going to actually show that
little indicator so import CN from lib utils create a little interface here live badge props and I wanted to accept optional class name since we're going to be reusing this you can see that I put it inside of our components folder sometimes we are also going to want to have it styled a bit more differently so export con live badge here go ahead and assign live badge props and extract the class Name and in here just return a div which is going to say live and go ahead and give this div a dynamic class name
so we're going to pass in the class name prop and above it I'm going to go ahead and write our classes so that's going to be BG rows 500 text Center padding of 0.5 PX of 1.5 whoops uh I think I switched my component let me just go back to components live badge my apologies for that so PX 1.5 rounded MD uppercase text 10 Pixels border border background font semi bold and tracking wide not tring but tracking wide like that that's it that's our live badge and now you can go back inside of the uh
user Avatar here and let's go ahead uh inside this user Avatar and inside of here go ahead and render the live badge component from do/ live badge and you should be seeing the little live badge here uh or perhaps oh we cannot see it yes because we have to enable the Prop for that so just make sure you imported live badge from live badge and I'm going to change it to SL components and in order to see this badge what we have to do is go inside of the user item find the user Avatar and
give it a prop show badge and there we go you can see how it looks now it's huge right but later when we use it in combination with a larger Avatar it's going to look a little bit better so for this case that's why I didn't even pass that prop In the user item component because we're not going to need it so you can just hide this for now just confirm that it actually works for you right great so now that we have our user Avatar I want to go ahead and also create a skeleton
for our user Avatar so whenever we are loading something we have a nice little indicator of the appropriate size that this component is going to be when it loads so let's go ahead and do interface use Avatar skeleton props extends variant props whoops and the type of Avatar size so let me just claps extends like this and just add an empty object at the end Avatar sizes like this and now let's do export const user Avatar skeleton here which is going to accept that size so user Avatar skeleton props like that and in here we
can get the size so our skeleton is also going to be different depending On what size the developer passes and very simply just return a skeleton we have this imported from Shi and UI and let's go ahead and give it a default of rounded full and then very simply just passing the Avatar sizes here to be this size component that's it that's going to be our Avatar so this is what we're going to show while something is loading and in the end it's going to use the Avatar component great so if you're having any trouble
with this this was a Lot of code you can always visit my GitHub directly this is the finished user Avatar so you can just jump in here and see if something is missing if you're having any problems now let's go back inside of our user item and what we can do now is besides this user Avatar we can also render the username but we're only going to render the username if we are not collapsed so make sure you put a little exclamation point here if we are not collapsed in that case let's Go ahead and
render a paragraph username and let's go ahead and give a class name of truncate so if it's too long it won't spoil the entire sidebar and I think already there we go you can see how I have a nice little uh username here but on mobile it's hidden perfect and last thing we're going to do again if we're not collapsed and if we are live I mean this specific user then we're going to reuse that live badge which we just created And we used it inside of user Avatar but now we use it separately here
so that's why it was useful for us to create that inside of the components folder because we're going to reuse it a lot of times so let's go ahead and give this live badge a class name of ml outo so we use that little class name prop which I was talking about because sometimes it's going to be use useful for us to add some specific Styles without having to do the whole you know div and then wrap That inside of this this way is just simpler and now if you expand there we go you have
a nice little live badge nice little indicator perfect so it's very clear that this user in the sidebar is Al and if you go back inside of your recommended here and change is live to false you can see how it looks on mobile and you can also see how it looks uh on desktop so now let's go ahead and create the user item skeleton because we just did The user Avatar skeleton right so now let's go ahead and create the user item so make sure you in the user item here and go ahead and write
export con user item skeleton go ahead and return a list element here and give it a class name of flex items Center Gap X4 PX3 and py2 so these are just some specific values that I know will look good uh a lot of you sometimes write to me and tell me that I'm not exactly Clearing up why I use specific class names uh a big part of that is definitely my false I try to do better at that at explaining my class names but sometimes it's just trial and error you know uh I already finished
this project before obviously that's how I know how what to write and some specific CSS values here I just tried a bunch of s until it looked good you know what sometimes it needed a little bit more space sometimes a little bit less space So that's how I get this specific values there there isn't any logic behind this right I just go ahead and try and I of course I try to be consistent with the overall spacings that I use throughout my project just in case you were wondering all right and now let's add our
little skeleton component here and let's go ahead and we have this imported great so now let's give this uh skeleton a class name of Min AG 32 pixels and let's give it a Min Width of 32 pixels as well and rounded full so this is actually representing our user Avatar skeleton perhaps we can actually use the user Avatar skeleton here we're going to try it out in a second so let's do it like this for now and then we're going to see if maybe we can actually reuse that from the actual user avat you can
see that in here we have that exact skeleton but I I believe we're going to need some specific sizes right here just for this Edge case where It's just going to look a bit better so give this div below that a class name of Flex one and what this following skeleton is going to represent is the username right here so we're going to kind of give it some class name H6 like this so that's the size that I want to give it uh all right so now we have our user item skeleton here and what
we can do now is go inside of our recommended here and now we can finally create recommended skeleton which is going to Be uh very simple because we have all the necessary skeletons so just go ahead and return an unordered list here with a class name of px2 and inside we're going to create a mock array so we're going to pretend like we are loading three users right and let's just forget this first index here my apologies you have to open another parenthesis inside of the map here so you can just skip the first parameter
and go immediately to the Index here and just render user item skeleton and make sure you import user item skeleton from user item like that and let's go ahead and simply give it a key of I like that so that's it we created our recommended skeleton uh very very fast and what we have to do now is we have to go ahead and add that to our sidebar skeleton right here here because this is where we are actually loading our users so go inside of sidebar index. TSX right here and let's go ahead and do
Export con sidebar skeleton and I know you're kind of not even under seeing the result of what we're typing now with the skeletons but I promise in just a second when we actually add the suspense and include the skeleton it's going to be clear why we did it this way so what I want to do now is do this wrapper and we know that that is an a side property right so let's go ahead and do that here so it's going to be a side and it's not going to Be anything dyamic so it's just
going to be a class name of fixed left zero Flex Flex call it's going to have a width of 70 pixels automatically on mobile but on large it's going to be a width of 60 so this skeleton is actually going to fix that flickering which we have right now you can see how for a second when I refresh here it loads the desktop mode right and only then it goes to the mobile mode so this skeleton is going to fix that because automatically it's Going to load only a small skeleton and then when it loads
at that time our use effect with matching query with media query is already going to trigger so there's not going to be this flickering effect here so on large the width is 60 we're going to have H full BG background border R and border is specifically going to be 2D 2 e35 and let's also give it a zindex of 50 also just to clear this up so this withth 60 is larger than this withth 70 Because this is a specific value that I'm telling it exactly 70 pixels but this is 15 Ram which is 240
pixels so the reason I'm doing this specifically here is because I'm not sure if Tailwind has the exact width which is 7 pixels maybe it has maybe I could have just WR wrote like with 10 which I think then is 40 pixels I don't know maybe it has but it's just simpler for me this way so just if you're having any confusion why is it smaller and large it's not it's Bigger on large it's 240 pixels and then what we can do inside is we can add the recommended skeleton like that so make sure you
import recommended skeleton from recommend Ed and now what we can do is go back inside of our layout so inside of browse layout here where we render the sidebar and we're going to wrap it in suspense from react so make sure you import suspense From react here and then we're going to give it a fullback to use whoops to use the sidebar skeleton like that and you can import sidebar skeleton from sidebar right here so make sure you have that and now let's go ahead and see if we are we seem to be having some
errors here so let's just see uh what that is and why exactly is it happening let me just go ahead and debug This I'll be back with you in a second and tell you what I found out all right this is what I'm going to do for now I'm just going to leave it like this so obviously we are getting some error but it only happens when we have suspense oh now it doesn't happen when I when I expand on desktop it doesn't happen but on mobile oh so it only happens on mobile on desktop
it seems to be fine okay so I'm going to go ahead and debug this in the next module Because I want to end this part for now it's already 40 minutes long and I'm going to tell you what I found and how I debugged this but for now just leave it as it is so add a suspense and a fullback of sidebar skeleton and I think you should be kind of seeing that uh what we can do is we can add a little delay for you to see this so let's go inside of our lib
inside of the recommended service here and you can add just before you Load the users this so a wait new promise and time out the resolve for 5,000 milliseconds and this should make it load for 5 seconds and there we go you can see how for 5 seconds we have a nice little skeleton here and after 5 Seconds it loads so just make sure to remove this later bar but on mobile it seems to work on mobile as well now hm I don't exactly sure why we are getting that hydration error it could be just
cash if I remove this from get Recommended so it loads instantly yeah now it's super fast so we're not even seeing it and here we're having an error okay that's interesting that's what I'm I'm going to debug in the next module but for now I hope I kind of made it clear what we did with this layout here make sure you have the suspense and the sidebar skeleton and basically we built from the lowest component to the highest component so we can easily reuse those skeletons with Recommended skeleton then the user skeleton all the way
to the user Avatar skeleton so that's the way we're going to do all of our components so all of them have reusable skeleton and then we can easily build larger skeleton layouts for better loading States great so leave it as it is for now perhaps you're not even getting this error maybe this is something that just I'm having but I'm not sure I'm going to go ahead and debug that in the next module for now great Great job you finished loading recommended users here and after we finish this bug we're going to go ahead and
improve this recommended service a little bit so it shows more relevant users all right so now I want to resolve this hydration error it looks like this is happening only on mobile mode and it looks like it only started happening after we've wrapped our uh sidebar inside of a suspense if I'm not if I'm correct so if we go into layout here Once we added this suspense this errors started happening so if we go and remove this suspense then these errors don't happen right so I can't tell you exactly how suspense triggers those errors but
I can tell you that we definitely do have some hydration mismatch here and here's another thing you might be wondering all right why does this happen on mobile but when I expand to desktop why is it perfectly fine how come this is working as intended well that's because inside Of our store use sidebar we have collapsed false by default if I move it to True by default and try this again on mobile mode you can see that we no longer have any errors right but if I expand on desktop mode then I have the errors
because you can see how there's a visible shift for a second so that shift is the mismatch between server side rendering and client side rendering so make sure you bring this collapsed back to false because that's how we want it So on desktop you should not be having any hydration errors but then on mobile you should definitely be having a hydration error here so this is what I'm going to do I'm going to ensure that specific parts of our application only show on client mode so on server side rendering I'm just going to show a
loading skeleton and here's how I'm going to do that so first I'm going to create one more skeleton that we need so go inside of the app browse components Sidebar toggle. TSX this is one of the problematic components as you can see it heavily relies on this collapsed state which we've just confirmed that is obviously causing hydration mismatch between our server side rendering which does not have access to this and our client side rendering which has access to this and thus they create different states and that is called a mismatch between the server and the
client now this isn't exactly the most dangerous Thing to happen I don't think it will break your app but still I don't want to go ahead and proceed with these errors that we have so let's go ahead inside of this toggle component and first let's create a skeleton for it which we're going to use to display to the server side rendering and only then we're going to go ahead and do all of this right all of this Dynamic stuff with the collapsed uh uh Boolean so let's do export cons toggle Skeleton and let's go ahead
and let's return a div with a class name of padding three PL 6 margin bottom of two hidden on mobile devices large sorry Flex on large devices items Center justify between and full width so that's our div that's happening like right here and then what we'll do is we're going to go ahead and render a skeleton for this text and render a skeleton for this button so inside of here first we need a skeleton for our text so make sure you Import skeleton from at/ components UI skeleton here and go ahead and give it a
class name of H6 and width of 100 pixels which is an appropriate width of our text here and below that add another skeleton which is going to be our button so it's going to have the same width and the same height like this and this just by itself did not fix anything we're still getting the exact same errors because we are not using this uh anywhere right now so the next thing That I want to do is I want to go inside of our wrapper component which is obviously very problematic because again it shifts our
entire layout based on this use sidebar Hooks and the collapsed state which is only available in the client which means that serers side rendering has no idea what's going on here and doesn't know how to match what's seeing what is expecting on the client and what it expected during server side rendering so this is the First thing I'm going to do first thing I want to do is fix this layout flickering which is happening so in here I Define that default width is 60% but that's not true right that's only true if we are on
large devices the actual default width is 70 pixels which is this collapsed withth so now when I refresh you can see how we don't have that layout change but now we have this weird content which is sticking out for a second so the next thing I'm going to do Is ensure that this entire thing our wrapper only renders on the client and during the serers side rendering it's going to render some skeletons instead so this is how we are going to do that so let's go ahead and add const use state from react so make
sure you import use state from react and while you're here also import use effect from react and I'm going to move them to the top here this is one of the methods which you can ensure that you only render Something on the client and not on the server because this use client doesn't mean skip server side rendering this means this is a client component you are still going to do serers side rendering on here but it is not a server component so serers side components and server side rendering are two different things right so what
we're going to do is add is client and set is client here and give it a default value of false that's what server side rendering is by default It's not client and then we're going to add a use effect and here's the cool thing about use effects they can only happen and execute on the client serers side rendering has no access to use effect so this is the perfect place for us to switch this variable from false to True set is client is now true and then in here we're going to write if is client
for now just return null like this and now if you try and refresh here uh sorry if it is not client my Apologies so make sure you put an exclamation point here so if it is not a client completely skip the rendering of this problematic component and look at what happens now I no longer have any errors but the solution is kind of ugly isn't it because even on desktop the our entire sidebar disappears for a second so it kind of doesn't make sense that we built all of those nice skeletons just for us not
to even see them now but at least we got rid of our hydration error But don't worry there is a very simple solution for this now so instead of rendering null what I'm going to do is I'm going to render this exact aside element and I'm going to go ahead and copy the this default class names here so give it class name and paste those so they are exactly what you just saw here as you can see it matches but we're not going to do this collapse thing at all because this is server side rendering
and then inside I'm going to render the Toggle skeleton like that and I'm going to render the recommended skeleton so make sure you import toggle skeleton and recommended skeleton from toggle and recommended respectively go ahead and save this and now if you refresh there we go you can see how now there's no flickering well I mean it is but it's from skeleton flickering that's good we didn't want we don't want that weird layout shift and on the mobile it looks good at as well so you can clearly see That we no longer have those errors
now perfect uh and let's see if there's something else we can do here so we just resolve those errors of ours but I want to do one more thing inside of my sidebar index we have the recommended skeleton here what I want to do instead is also add a toggle skeleton above it so you kind of have to understand what we did here so make sure you import toggle skeleton from toggle as well what we Just did here is we have two types of skeletons showing up so the first one is inside of our suspense
right here so this skeleton will show while this get recommended is loading and can we bring back that promise we can so you can write this promise as well and you can save it and now when I refresh you can see how for five seconds I have that loading skeleton but don't confuse that skeleton which comes from our uh where is it from our suspense with this Skeleton from our wrapper right here this is a different skeleton so this one takes care of server side rendering and nothing else so those are two different skeletons I
know this is a little bit confusing now but you know server side rendering server component client components these are kind of a new way of thinking when working with nextjs right one great article that you can read is the Perils of hydration go ahead and Google that and read that entire Article and it will do a much better job of explaining what's actually going on than I am and even better it shows you examples of this happening in real big websites like Airbnb so they also have these issues and they also fix them in similar
ways so this is not some dirty hack that we are doing here right you don't have to worry about that perfect so now we should no longer be having uh our errors and we have clear loading States here both during the server side Rendering and then during the actual suspense which is loading the information so before we end this just make sure that you remove this uh snippet right here and you can also store it somewhere because it's quite useful if you want to test your skeletons and see how they look so I'm just going
to go ahead and remove this for now great so again I'm testing on here we have no hydration errors when I expand my screen no hydration errors Here as well let's go ahead and test oh it seems like we do have a little issue here which I did not notice so let's go ahead and see what's going on with this so when we click here it looks like uh this is not collapsing back and I think that is because when we went inside of our wrapper here right here oh yes we gave it this values
yes this is incorrect I I have to correct myself I told you that that w60 which width of 60 which was here is not Correct but it actually is because in here we control with differently so go ahead and bring this back to just be with 60 and be entire ly controlled by this I believe that now we're not longer going to be having that issue that is fixed and now let's again test our hydration errors on desktop it's fine on mobile it is fine as well perfect great great job so just one more time
to recap inside of our wrapper we actually didn't change anything in here so we left this Exactly as it was but we added a little is client here and you can do this even prettier you can maybe wrap this inside of curly brackets at least I prefer it that way like that so in here we take care of that hydration error right and we added a little toggle skeleton so it looks even better and here's one more information if you need it so I purposely wrote this like this so you understand what's going on behind
but you remember that inside of our I think It's uh the container component we installed a package called use hooks use hooks actually has a hook for this as well so you don't have to write this every time you have some hydration errors in your project you can actually do this as well you can import uh is use is client from use hooks TS like that and then you can completely replace all of these codes you can just R const is client use is client and remove this use effect and it's going to be the
exact Same thing as you can see here no errors on mobile mode and when I expand no errors on desktop mode and everything is still working exactly as we intended so if you want to you can use his client you wrote it yourself first so you know how it works but I think it's shorter and it's even better to do it this way great so you can go ahead and visit my GitHub if you're not sure or if you're still having those hydration errors but also if if you cannot resolve these Hydration errors for any
reason they're not going to stop you from continuing to develop this project as I've said I don't think they break apps exactly uh well some could possibly but I think this one that we had isn't that dangerous but still I don't want to proceed without fixing that first because it just looks bad especially if you're going to put this on your resume or show it to someone so this way we got rid of those errors great great job Now let's go ahead and let's modify our recommend service so it doesn't include the currently logged in
users so this is one of the users that should not be shown in the recommended tab because that is myself right here so what I'm going to do is I'm going to go back inside of my recommended service here so make sure you are inside it's located inside of our lib folder here and we already have the get self function so this is what I'm going to do I'm going To define the user idid as default to be undefined and then I'm going to go ahead and open a try and cache Block in the catch
I will let the user ID be null like this otherwise I'm going to attempt to get the user ID uh by first getting self from await get self which we have imported right here and we have created it here so we use the current user and then we fetch the user into the database here and then we're going to assign the user ID to be self. ID the reason I'm putting this inside of a try and catch block is because our out service throws errors and breaks functions if it doesn't work so this way I
mean you can go ahead and change this if you don't like it you can put this entire thing in a try catch to encapsulate it but I wanted to break the app if someone is not authorized right this is my choice of design for this one and because of that I have to do optional stuff like this all right and Now what I'm going to do is I'm going to dynamically do the query here so I'm going to Define users to be an empty array like this and then I will assign users like that so
what I have to do is check if I have the user ID and in that case I will do one query otherwise I'm going to do this simple query so that's what we're going to do so this is going to be for the loged out user in the else here and inside of here we're going to go ahead and create uh one for loged in Users so that one is going to go users await DB user find manyu and let's go ahead and let's give it order by uh inside of here and I'm going to
order them by created at descending as well but I'm also going to go ahead and add a where Clause so in here add where and we're going to write uh not ID user ID so we exclude the current user so now as you can see since I'm logged in I have no recommended users For me and I also don't have the label recommended because inside of our recommended component if you remember so inside of the sidebar right here we have the recommended component if our data is empty we don't even show the label right so
that's why this is empty so if you want to see the users now what you have to do is sign out of your account like this and then as a logged out user you can see them but if you go ahead and log in it's not going to work so this is What I want to do next I want you to create another user account here so let's go ahead and fire up all the hooks we need here so make sure you have mpm run Dev running and inside of a new terminal go ahead and
run that engro command with your stable URL or if you don't have a stable URL you can run just enro HTTP 3000 like that and that's going to generate a completely random URL but then you also have to change that in the web hook so I'm going to go Ahead and use this and I will also show you again where you can find this URL so you have to go inside of enr.com go inside of cloud Edge domains and in here you have your domain and in here you have a little button start a tunnel
and this will show you the command you can copy and then you can safely paste that right here as I doing right now but remember when you copy it like this it's on the wrong Port so when you copy it make sure you change this number 80 to 3,000 so your Port is running on the correct version like that perfect and just go ahead and ensure that you have the matching uh web hook in clerk so inside of your web hooks inside of clerk you should have that domain evolved humbly Gopher for me and you
can see that that domain matches this evolved humbly gopher right so make sure you have that running and you can go ahead and copy this URL and just confirm in your new tab Here so I'm going to close enr now and there we go you can see that I have the same page right here as it is on Local Host great so it means that our web Hook is now uh running so make sure you have both of that and I want you to go ahead and create a new account so click log in here
and go ahead and create a new user which you haven't done before so I created a new user and I'm going to give him a name of Antonio and I'm going to click continue and there we Go now I'm in this new user here you can see that I'm called Antonio and now in my recommended I have that other user so this time it's not empty even when I'm logged in and if I log out completely I'm going to see two users inside so go back inside of that one of the users doesn't matter which
one because now we're going to implement the follow functionality great so make sure you're logged in and what we're going to build now is this page 404 but the URL is Localhost 3000 and Slash the name of that user so let's go ahead and do that so I'm going to go inside of my app folder inside of browse right here and what we have to do is create a new folder which is going to be called inside of square brackets username like that and I'm going to explain what the square brackets mean so go inside
of here and create page. CSX and let's go ahead and call this user page like that and a just return a div user Page like that and when you save make sure you have a default export and let me zoom in uh you should no longer be having an error instead it should say user page here and when you click here you're on the homepage and when you click here you're on the user page and you can see how this stays highlighted because we have that little check is active instead of the user item component
I believe uh great so this is now working and let me just briefly Explain what does this username in square brackets do so this tells the router that this is d Dynamic part of the URL so it's not hardcoded and that means that inside of this page. vsx here we can access that part of the URL so I'm going to quickly show you how to do that so I'm going to create an interface user page props to include pams and those pams are going to have a username which is a string like that so how
do I know that username is going to be inside Of the pams well because that's the name of my variable right here so I can name this anything it doesn't matter right this is just part of the URL and how the URL is going to show that inside of oper Rams here so because it's named username inside of square brackets this doesn't literally mean username it means whatever value it's passed in that part of the URL and then when you have that you can assign that user page props here extract the pams and then you
can write User pans. username like that and there we go now I'm on user something else exactly as I wanted it so in here it matches in here it matches and inside of my URL it matches great now what we have to do is we have to create the Prisma schema for our followers and following structure and also one thing that I kind of forgot to talk about so once you create that new user make sure that you have them inside of your database right Ure that this was All correct so I'm going to open
a new terminal and run npx Prisma Studio here here and that should open Local Host 555 and there we go I have two users inside of my database so ensure that you have two users as well if you don't have two users what you can do is remove all of the users so just click this and delete all users then go inside of Clerk and remove all users from there as well and just start from the beginning right and also don't worry if sometimes you get Errors inside of here from web hooks that is because
when clerk web hooks fail they do something called a retry and they're going to keep retrying until they succeed or until it reaches the maximum amount of retries so during development that can happen right because you might forget to turn on your web hook or your local Tunnel right you might try and create an account and then the web hooks are going to get out of sync so it's not a horrible thing to Happen but if you keep seeing those errors even though everything is okay in your database that means everything is okay no need
to worry uh great so just ensure you have two users inside of your database Here and Now what I want to do is I want to go back inside of my Prisma schema. Prisma right here and let's go ahead and let's create the follow model so just below the model user create model follow let's go ahead and give it an ID which is going to be a type of String and our primary ID with a default value of uyu ID give it a follower ID ID which is a string a following ID which is also
a string and now let's create relations with the user model so a follower is going to be a user with a relation with a name of following and Fields for that are going to be follower ID so all of this is in one line right references are going to go to the ID and on delete we're going to Cascade this model so let me zoom out So you can see oh it's a very long line I don't know if this helps you but this is how it's supposed to be uh in one line right so
follower user relation name following Fields follower ID so we work with this field and we reference the ID of the user right here and if user gets deleted we will also delete this relation with them right so let me Zoom back in and one more thing that you need to do here is go inside of the user model And now you have to create an equivalent relation back so after bio go ahead and add the following so you're going to add uh follow you're going to add following like this and then you're going to say
follow add relation following like that so follow the follow model which can be array and array relation of following and there we go now we no longer have an error here but what we do have is uh a warning so we Have to create an index so at that index here go ahead and write follower ID and there we go the error is gone and now we have to create an equivalent relation for following right so following is also a user with a relation which we are going to call followed by fields are going to
be uh the following ID so that was the follower before but now it's following ID references are going to go to the ID and on delete is going to go to Cascade so I I will zoom out again so You can see it's very similar right so this is for the follower and or the the ones that this model is following and this is for the ones that this model is followed by they both this one uses the follower ID and this one uses the following ID they both reference to the ID and they will
both get deleted if the main user that this refers to is deleted so just as we created a back relation for the following we now have to create a back relation for the followed by so Let me go back in here and write uh followed by I believe or yes like that and let's give it again a follow model but the relation is going to be followed by like that and and now we no longer have an error here but we do have uh we do have a warning so let's go ahead and add an
index to be uh following ID is it oh following ID and there we go no more errors and besides this let's also go ahead and let's add uh add at unique so we create a unique combination Of follower ID and following ID and that's also going to create an index for for faster querying and besides this let's also create create ad which is date time default now and let's add updated ad which is date time updated ad like that great and now that you added this model here what you have to do is you have
to run uh your Prisma uh commands right so make sure you don't close any of your terminals here open a new one and let's go ahead and write npx Prisma generate so this will add it to our local environment and then npx Prisma DB push like that that's going to push it to the main database uh in my case on planet scale and there we go and after you do this go ahead and restart your app so find where you do npm run Dev and do npm run Dev again so you have new models inside
otherwise you're going to get errors during development so once you've done that just refresh your page like this so everything is uh up to date Great and now what we're going to go ahead and do is we're going to create a follow service right so let's go and close everything here let's go inside of lib and let's create a new file follow service.ts like this great so let's go ahead first and let's check if we are following a user so I think that's that would be a useful util for us so let's import database and
let's go ahead and let's Import get self so import database and get self and I'm just going to change those two to use lib and then let's export const is following user is going to be an asynchronous function which AC accepts the ID of the user we are trying to follow and then let's open a try and catch block and in the catch block we're just going to return false so if Anything goes wrong we're going to fall back to telling them that they are not following this user so now let's go ahead and attempt
to get self and then let's get the other user using await DB user find unique where we have a matching ID of user users if we don't have the other user in that case let's throw new error user not found and that's by itself going to return false here in the catch block and Now let's go ahead and check if other user. ID equals self ID so if the user we are trying to check whether we are following equals ourselves no need to even search through the database we're just going to fold back to true
so we are always going to be a follower of ourselves right and this way we're not going to be able to follow ourselves either and now let's go ahead and do const existing follow to be await database. follow which we now have find First where follower ID is self. ID and following ID is other user. ID and then we're just going to return whatever is the result of that and turn it into a Boolean by adding double exclamation points existing follow like this so we find the existing follow in the follow model by passing the
follower ID to be the person that is checking whether they are following and the following ID to be that user that they're trying to check their relation With great so now that we have uh this is following User it's going to be useful for us to create uh another service called user service so let's go ahead inside of the lid folder and create user service and in here let's do export cons get user by ID sorry get user by username let's do that one first so uh because that's how our URLs are created right so
get user by username is going to be an Asynchronous function which accepts the username which is a string and we're going to attempt to get the user so wait DB which you can import from do/ db. user. find unique where the username matches so as simple as that and just return the user and I'm going to change this to be at/ lib DB so now we have get user by username and what we can do now is go inside of our app folder browse username page CSX here and now that we have this Username pams
let's turn this into an asynchronous function here and let's go ahead and write H user to be await get user by username and pass in pam. username like that and if we don't have a user we're going to throw not found from next navigation so that's a cool little thing that you can do and you don't even have to return this because this will return by itself right uh so make sure you import not not found from next navigation uh and then you can use This user to show the username so user. username and let
me do it like this so I'm going to create a div with a class name Flex Flex call Gap y4 so just some temporary styling here and let's turn this into a paragraph and let's go ahead and give it something else so this is going to be the username and then this is going to be uh the user ID and that's going to go to User. ID like that and now when you look at my page here for user something else the username is something else and I have a user ID so this is directly
from my database but if I try and change my URL to something that doesn't exist I have a 404 page exactly as we wanted so go ahead and click on this page here and let's continue to work here and now what we can do is we can also check whether we are following the user or not so After this has been confirmed that this user can be fetched from the database let's add const is following to be await is following user and you can import is following user from SLI follow service and go ahead and
pass in user. ID like that and then below that we're going to add uh is following is following like this uh and let's go ahead and just see why this is not working so is following is not rendering Anything for me let's go inside of the is following user here and check why that is happening it should return true or false maybe it's because it's not serialized so if I turn this into a string will it then change no oh yeah it looks like it's because of string things so render it like this open back
ticks and then render it like that there we go so now it's working so we have the username the ID and is following is false so now what We're going to do is we're going to create an action to actually follow the user so we have to go uh back inside uh of our follow service and after is following user go ahead and create uh follow user action which is an asynchronous function which accepts the ID of that user right and let's go ahead and attempt to get self so a wait get self and no
need to put this in a try and catch block like we did with this One because this one is important to be inside of TR catch because logged out users can run this function and this function is always going to break for logged out users so we will just fall back to telling them that they are not following anyone right but for an action to follow user should not even be initiated by by someone who's logged out so we don't care if the if any error gets in the way we need to break the function
right everything here must work So now let's attempt to get the other user using await DB user find unique where we have a matching ID if there is no other user go ahead and throw new error uh we're going to say user not found now let's see if the user uh that this user is trying to follow is themselves so if other user ID is equal to self ID we're going to throw new error cannot follow yourself all right and now let's check If this user is already following another user so const existing follow is
a wait DB follow find unique where follower ID is self. ID and following ID is other user. ID uh and instead of find unique let's do uh find first like this so this function will work and if we have an existing follow let's throw new error already following all right and if all of those tests have passed let's do const follow To be await DB follow create data follower ID is self ID and following ID is other user. ID and let's also include following true and follower true so we're going to uh have access to
who was followed and by whom in our result from this function and let's return follow great so now we have our function to follow the user so what I want to do now is I want to do a little practice With server actions here uh I have a more indepth tutorial about server actions in my Trello clone if you are interested in that and the nextjs documentation has great explanation and even a little course on server actions so you can take that if you're very interested in them but we're going to do the most basic
version of them here so inside of your username in here let's create underscore components and let's go ahead and create a new file actions. TSX like that let's mark them as use client and let's export const actions here and let's return a div uh or we can actually return a button component so import that and let's write follow and let's give it a variant of primary all right and now go back to the page and below this add uh the actions from do/ components actions which we just created great and now you can see how
I have a huge button here which says follow for that user so let's go ahead And do a little crash course on actions here so actions are built in rpcs which can replace they allow us to do uh API less mutations so the same way that server components allow us to do API less uh querying server actions allow us to do the equivalent but for mutation so we don't even need to create a post route for this which which is something you might have been expecting with seral actions you don't need to do that so
this is built in RPC so let me Show you how you how we're going to do that uh I'm going to close everything and I'm just go ahead and click on some random item here so you can create a new folder called actions like this and then inside create a new file follow. TS like that and what you're going to do here uh is you're going to first mark this as use server like that so it's now not going to be conf well first it's going to work and second this is what ensures the security
so that This actually behaves like an API route and doesn't accidentally spill into some JavaScript bundle right so it's protected and now let's do export const on follow to be an asynchronous function which accepts the ID and let's go ahead and open H TR and catch block and inside of the this catch block I'm actually going to throw new error internal error here so just like I would On my API route and then inside of try here uh what we're going to do for now is just conso log I am the same as an API
call right oh obviously it's not the same but just to help you understand and you can also pass in the ID from here great and now let me show you how you can call this action from a client component you can also do it from server components but I'm going to focus on client components for this case so going to browse username components actions in Here and now what you want to do is you want to import that on follow from your actions here and then let's do Con on click here to call on follow
and let's pass in one two three like that and let's give it an on click here on click and go ahead and open your terminal and prepare this so where you're running mpm runev and now if I'm not mistaken when you click follow here There we go you can see that it's logged in my server so just like this just like this would have been an API call this is logged in the server from our client component so that's RPC right those are server actions and now you might be wondering can you do pending and
loading states with that yes you do and react actually has built-in hooks for this yeah an important thing for you to understand so server components and like uh This Server actions they're not Necessarily a nextjs thing they are a react thing it's just that they perform very well inside of nextjs because nextjs seems to be built around server components right so what you can do here is import use transition from react like this so in here let's go ahead and extract is pending and start transition and then wrap this inside of start transition like that
and if you're Wondering what does this do now well now you can use this is spending on disable right and now if you try and click follow you can see how for a second the button gets disabled right of course it's very fast because all we do is throw back a console log but you can see that this start transition allows us to get a proper is pending without us manually doing you know set is loading the true and then do a Dot finally or whatever else we do to get that so we Can do
that quite easily using use transition and server actions uh great so what I want to do now is just a couple of more things so go back inside of your page. vsx here and let's let's use this is following and let's pass it as a prop here so is following to be is following like that go inside of actions here create an interface actions props is following is going to be a Boolean and go ahead and give them here so actions Props is following like that and then go ahead and let's I'm just going to
collapse this three attri use for this button here so give it a disabled if is already following the user or if it's spending like that uh great so by default this should be turned on but what you can do is you can try and go to your username so copy your logged in username and change it inside of your URL and now as you can see it's disabled why and you can see that it says is Following true because that is ourselves right and inside of our follow service inside of the lib here we have
follow service here uh you can see that if it's ourselves uh not not follow user sorry this one is following user so if it's ourselves we always return true so that's why this exists even though in our database we don't actually have a record that we're following this user but I think that's a common practice to do to just disable the user from trying To follow themselves so now go back to this other user where you should be able to click on this follow button here great and now what I want to do is go
inside of this actions here and I want to create a little uh success and error messages so we can go ahead and play around with that so go inside of your terminal here and I'm going to go ahead and open a new terminal and add mpm install soner like this this is going to be a package we're going to use uh To to to trigger toasts so now go inside of your app folder inside of your your layout here and you can just go ahead and import toaster from soner like this and then just go
ahead uh and wrap your and add a toaster somewhere like this so I'm going to add it inside of the body here actually we can do it inside of theme provider maybe just above the children uh and one more thing that you can also do here is give it a theme and a Position so I actually going to keep my toasts in a light mode because they just look better and they're more not more noticeable and they're very small right so just like our hints you can see that our hints are in light mode right
they're not dark because they're more visible this way and it's the same thing for toasts so I'm going to give them a light theme and I'm going to give them a position of bottom center like this because that's where we're going to have The most space right here in the middle and on the bottom gra so just add that toaster from the sonor package which we just installed and now let's go back inside of browse username components actions and you can just as easily as you would in an API request you can just as easily
chain den and catch for Server actions so go ahead and import toast from sonor so I'm going to move it here to the top and add toast. success followed the user right or catch Toast. error something went wrong like that and let's go ahead and try this out now so when I click follow there we go it says followed the user right perfect and we can try an error as well by going inside of the actions follow here and let's throw new error something and now if you try you can see that we have an
error great so both of our use cases are working so now what I want to do is also add one more prop to this actions and that's going to be the User ID so it's a string and user ID here now go inside of your page for the username where we render all of this stuff and pass in the user ID to be the current user. ID like that so now our actions know what to send inside of this on follow function right so let's go ahead and send that here on follow and then let's
go ahead and actually develop this follow function so instead of this conso log what we're going to do is do const followed user to be await follow User from our lib follow service like this and passing the ID of that user and then uh well let's first actually let's immediately do this so what we can do from server action this is a cool thing we can revalidate our paths meaning that we can kind of of refresh server components so that they instantly have the newest data because think of how you would usually have to do
this right so in here we just loaded this is following state which says false and then inside Of the actions we follow the user and usually you would have to like update your Global uh Redux store for for this exact page and change uh optimistically right a mutation from is following false to true but with server actions and server components you can just revalidate the path and then it's going to be quite easier so let's go ahead and do this import revalidate path from next cache and then let's go ahead and do the Following first
path I want to re uh reinv validate is the global root path like that so my sidebar gets updated because later we're going to have uh alongside list of recommended users we're going to have a list list of followed users so this revalidate path will uh refresh that and recache that right and then if we have the followed user from this function because remember inside of follow user here what we do is we return this new follow model which we Created and we also include the users which were followed and which followed that user so
we're going to have information like username ID and that's going to be useful for us because we need to revalidate the path that goes slash and then the name of the user right so it should be SL Antonio or slash something else in my case so go ahead and let's do that dynamically by using the followed user do following. Username like that great and in the end return followed user great so now we have this function let's go inside of actions here and what I want to do next is I want to add a uh
data here access to the data as you can see it right here and let's go ahead and let's dynamically write this so I'm going to say FL the user or let's say you are now following and then write data. following do username like that I believe it's Following let me just check yes it's following perfect so I think that we ready to try this out I'm going to prepare my Prisma studio so MPX Prisma Studio like this and let me just open that uh on Local Host 5555 like this you can see that in my
follow model I don't have absolutely anything inside so what should happen is when I click on this follow I should create be created that model so let's click follow it's disabled meaning it's loading and it Says you are now following someone else and you can see how it immediately revalidated this path so this changed from is following false to is following true and now this button is entirely disabled right and let's finally check my Prisma studio and in here there we go we have a new follow model with the correct follower ID and correct following
ID perfect so our follow system works great so what I want to create now is an Option to unfollow the user and just for fun let's try and not disable this if we are following the user so what we should H what should happen now is an error so when I click follow there we go something went wrong exactly as we expected because we are already following this user perfect so what we have to create now is a function to unfollow the user so we have to go back inside of our follow service so let's
go inside of lib Follow service right here and it's going to be very similar to this function follow user so let's write export con unfollow user is again going to accept the ID which is a string and it's also going to be an asynchronous function let's go ahead and get self from a weit get self which we already have imported here let's get the other user so wait VB user find unique where uh ID matches right we're going to check if the user we are trying to Unfollow exists so if the other user does not
exist we throw new error user not found now let's check if we are trying to do some action on our own user so if other user and self has the exact same ID we're going to throw a new error here and say cannot unfollow yourself to be honest we can't even follow ourselves but that's something only we know right basically we don't want to uh create or delete any models regarding following For ourselves it's just going to complicate things and not much is going to be achieved here and now let's check if the user is
actually following this user that they are trying to unfollow so const existing follow is await DB follow find first where follower ID is self. ID and following ID is other user. ID and now if there is no existing follow in that case we're going to throw New error which says not following so we are trying to unfollow someone who we are not even following so there is nothing for us to do here we cannot delete any record otherwise if this tests have passed so just make sure that you put a little exclamation point here at
the end right and let's do const follow to be await DB follow. delete where ID is existing follow. ID and include following to be true and return the follow itself like That so very similar function as our po user but in here we do the opposite we get the existing follow and we check if it does exist so right here on the bottom we check if it doesn't exist but in here we check if it does exist and then we throw an error and then we create a new one because it should not have been
existing and in this one it's the opposite right so in here we delete the follow model great so now what I want to do is I want to go inside of Actions here inside of follow and I want to go ahead and create an on unfollow function so let's go ahead and Export Con on unfollow to be asynchronous accept the ID which is a string open a try and catch block and let's throw new error internal error and now let's do const unfollowed user to be await on follow user which you can import from the
follow service so we have both the follow user and the unfollow user here and pass in the ID And then let's do revalidate path and if we do have unfollowed user information in that case let's also reinv validate and let me just not misspell this so unfollowed user and let's also revalidate slash un followed user. following do username and let's see if it looks like there's some slight mistake here let's also return unfollowed user so I think I forgot to include this so go back inside of uh Unfollow user here and in here we do
add include following true so why exactly is it not working here following does not exist on this type so unfollow user H but it looks like we do include this so I'm not exactly sure why let me go ahead and quickly debug this so I'm still not sure why this is happening I'm going to try so I pressed command shift p and I'm going to try and reload my window first to see okay it's Still not that so it's not some cache Perhaps it is what if I add follower true here so this is my
on unfollow user right here do I have access to that follower I don't have access to that either so why is it like that so unfollow user it is an asynchronous function we await for this we also await for the delete and we also return the Follow hm where we H I'm really not sure so for now let's just let's just go ahead and and let's let's do this following username like that following does not exist on type ID string it could be that it's some very simple M very simple mistake that I've made but
for some reason I cannot uh figure out what it is and the bug is very very obvious and I just didn't notice it so this is how I debugged it so I kept looking at this property here and it says property following does not exist on this type and it's a function which return a promise so that's obviously not what this returns and then I noticed that in here I wrote unfollowed user and in here I wrote unfollow user which is our function so that's why it's not working so this would definitely not work we
have to use this unfollowed user and There we go now we have no errors right here and also make sure you you return unfollowed user so maybe a better thing would be user we unfollowed so it's pretty clear right so just make sure you don't accidentally reuse this follow user it could have happened in here as well you can see it's very close followed user and follow user one is a function and one is a result from that function so make sure you don't do the same mistake so we don't have to include Follower here
inside of our um inside of our unfollow user function great so this is good this is good as well great so now what I want to do is I want to use this on unfollow so let's go ahead back inside of our app folder browse components whoops username components actions here and this is what I'm going to do I'm actually not going to disable it if we are following instead I'm just going to change the text so if we are following the user the action is going To be unfollow otherwise it's going to be follow
like this so now for this one it says unfollow because is following is true in the database and then what I'm going to do is I'm going to change this to be on follow actually handle follow right and I'm going to copy and paste this and this one is going to be handle unfollow and inside it's not going to use unfollow it's going to use a server action on unfollow from actions follow so make sure you import on follow and on Unfollow which is the one we just had this annoying little bug here when I
forgot uh to add the proper variable name right great so now we have handle follow and handle unfollow and now I'm going to change our const on click here to be if is following handle unfollow else handle follow like that all right and let's just modify the handle unfollow to say you Are uh you have unfollowed the user like this and I believe this should already be working so right now in my database I have one follow model here inside of my user here I believe I have a proper relation here there we go so
you can see that this new user is following this user because it has a followed by which is this user right so let's check if all of this will be deleted once I click unfollow it's loading and it says you have unfollowed this user you can see How this says is following false let's check our database so my database for follow is empty and let's check my user here they should and they don't have any relations between them perfect and if I try and follow them again again it should be working there we go you
are now following someone else and in the Prisma Studio they should now have relations there we go they are following one another perfect so you just finished the follow system and what we have to do Next is we have to create uh an equivalent sidebar place to show our followed users the same way we show our recommended users great great job and I hope this kind of cleared up how you can work with server actions right they're actually very simple they're not complicated at all they're even simpler than your usual API routes right and again
sorry for me not seeing this little bug here it was very obvious but uh you know too many words at once uh Great great job so now that we have implemented our following system I want to create a little side by sidebar here similar to recommended which is going to show the followed users and also when we follow a user we want to remove that user from the recommended users right because they're already following that users no point in recommending them so what I'm going to do is I'm just going to run mpm run Dev
because I shut it down so mpm Runev and in my other terminals I'm not going to run anything so I don't have anything running besides mpm randev no need for enrock or any local tunnel because we already added our users so just make sure that you have at least two users in your database so I'm logged in as you can see whoops I'm logged in here with a user called Antonio and in here in my sidebar I have another user so just make sure you have at least two users so you can actually see the
effect Of what we are going to build so the first thing I want to do is I want to go back inside of my lib and inside of the follow service right here and in here I want to create a function which is is going to get me all of the users that I am following so I'm going to do that at the top here export const get followed users is going to be an asynchronous function and first thing I'm going to do is I'm going to open a try and catch Block and in the
catch I'm just going to return an empty array because if a logged out user tries to do this it's going to immediately fail because the first thing we do is we attempt to get the currently logged in users so this will throw an error for users that are not logged in as you can see right here we throw that error if we don't have the user and in that case we're just going to return an empty array meaning you're not following anyone because you're not Logged in but for logged in users we're going to do
the following we're going to return db. follow. find many where the follower ID is self . ID like that and we're also going to include following true so we have the uh information about that user and let's actually put this in a constant first so followed users and then let's go ahead and return followed users like this there we go so we have our very simple function which goes through the database And looks at all the users which have a matching follower ID of the currently logged in user meaning that it's followed by that user
and we also include information about the user that we are following so we can display them nicely inside of our sidebar so just make sure you added this small little util here and what I want to do now is I want to go inside of my app folder browse uh components sidebar index and alongside get recommended I'm also going To add follows so wait get followed users like that so make sure you import get followed users from the follow service and make sure you have the recommended service here and now we're going to do a
very similar thing here so in here I'm going to create following and pass in the data to be follows like that and perhaps we can call this following as well it seems to be matching so let's rename this constant to following and this to following as Well great now we have to create this following component so let's go inside of the sidebar and create following. TSX like that and I'm going to mark this as use client and Export con following very quickly and just return a div saying following and now you can go back to
index. CSX and you can import following from slf following the same way we did with these other ones so I'm just going to go ahead uh and align those now I Will move this two to the top because I like my imports in that way uh great and let me just uh collapse this elements like that so we have toggle and toggle skeleton and we have this great so now let's go back inside of the following and first thing we have to do is resolve this typescript error because currently it cannot accept this type of
data so let's create an interface following props to accept data which is going to be a type of follow which we can get From Prisma client because we run npx Prisma generate but we also include something in there and we include the following property which is our user from Prisma client so write it like this and make sure you put an array at the end and make sure this is in parenthesis right and then let's go ahead and assign that so following props like that and there we go you can see how immediately this error
from my side of following has has gone away so if yours hasn't confirm That you have the exact same type here and in your follow service make sure you include following true like this now go back inside of here and let's extract the data and since we marked this as used client it means that we now have access to whether the sidebar is collapsed or not so let's go ahead and do use sidebar which you can import from store use sidebar I'm just going to separate the Imports let's get entire State and return it and
let's extract Collapsed like that and first thing I want to do is if we have no data so if data length is zero right so we can do that quite easily by using this faly method we're just going to return null so no point in showing anything if we are not following any users otherwise let's go ahead and let's create a div here and dynamically render the label so if we are not collapsed in that case let's go ahead and render a div here with a class name of pl6 and margin Bottom of four and
inside a paragraph which just says following and now I'm going to give this paragraph a class name of text small and text muted foreground like that so make sure you follow at least one user and I think that already you should be seeing this following uh tab right here if you click unfollow this should now disappear there we go you can see how it disappears because we do that r validate path right inside of our actions here you can see That we do revalidate path both on follow and unfollow meaning that all of our server
components which in our case is a sidebar gets retched and thus it has the newest information and it changes according to this if Clause right here data. length so when you're not following anyone you should just have the recommended but when you click on follow it should appear for now just a label following because we have enough data to display that so we skip this Return null and instead we show this but of course when we are collapsed we cannot see that so we can only see that when we are expanded right and now let's
go ahead and render our users and we can do that quite easily because we have the user item component already from the recommended part of our code so let's write a class name for this unordered list with space Y 2 and PX of two and the inside let's do data. map and let's get the individual follow Model and then inside let's render the user item from do/ user item so make sure you import user item we already have that right here because we already used it inside of our recommended here so go back inside of
the following where we just imported the user item and in here let's go ahead and pass all the necessary props so that's going to be a key which is follow. following so so that's the actual user and then we can get the ID of the user let's pass in the Username which is follow. following. username let's pass in the image URL which is follow. following. image URL and let's also pass is live which for now we are manually going to change from true or false so let's put true for now and let's see how this
looks like and there we go you can see how now because I'm following this user I have it in my f in Tab and when I unfollow this user it's going to disappear from this tab right here and When I follow them back they will immediately appear here perfect so what I'm going to do now is I'm going to remove this is live prop from here because later we're going to control it with another model which we don't have just yet so one more thing that I want to add here is the following skeleton so
let's go ahead and do export const following skeleton and let's return an unordered list let's give it a class name of px2 Padding top two button large padding top is zero and we're going to do a mock array so we're going to pretend like we are loading three users and let's map over them skipping the first one and going directly to the index and inside rather the user item skeleton which you can import from the equally named component user item which we already did here and all we have to do is pass in the key
which is I like this great so make sure That you have the following skeleton and now what I want to do is I want to add this following skeleton to our sidebar skeleton so go into the sidebar find the index and here we already do the recommended skeleton so first thing I want to do is I actually want to show the followed users before I show the recommended users so let's switch the position of this to so this is inside of the main sidebar fun function let's move the following to be above recommended I Think
that's just better practice and then let's add the following skeleton above the recommended skeleton great so this is going to add that following uh for our loading functions I'm not sure if there we go you can see that for a split second now we have the following skeleton but we also have to add it to one more place if you remember and that is the wrapper because in here we also have a little skeleton for server side rendering and that hydr issue that we Had so just above uh recommended skeleton add the following skeleton as
well so our uh skeletons now match so make sure you have this three so this is the wrapper component inside of our sidebar folder like that and now everything should be completely fine so when we are loading here there we go you can see we have twice the amount of users that we had before because we're also loading the followed ones and you can see that as well in the mobile mode And we seem to not be having uh any hydration errors here exactly what we want and now what I want to do is that
when I follow a user I want to remove them from the recommended list the same way we're doing right now with the followed list when we unfollow someone so in order to do that we have to revisit our recommended service so go inside of the lib recommended service right here and now we have to modify it only for this Clause where we have the Actual uh where we have the user ID meaning that the user is logged in so we have to create uh two queries so right now we have a query which says do
not recommend yourself meaning do not recommend the currently logged in user but we have to add another one and we can do that by using the end query and that is an array like this and then you have to open an object so go ahead and copy this not and put it inside of this first object like that great so now I Will actually do it like this and indent this there we go and then you can join as many of these queries as you want so open another object and then write another knot and
then write followed by some open an object again follower ID not to to never be user ID meaning that we are not going to recommend the user if they are following that user right so make sure you modified your wear query to this so we added an an end Property we opened an array we opened an object and copied that old uh not query then we opened another query here and we spe specified that we also don't want to be following that user and now you should only have the following so expand to your desktop
mode and it should only say following but if you unfollow the user it should remove the following and instead it should say recommended exactly as we want and if you log out completely it should still work but both Of them should only be in the recommended when we are logged out we are never going to have any followed users great so you just wrapped up the follow service and now we're going to go ahead and we're going to create the equivalent actions uh for blocking a user now that we finished our following system what I
want to do is I want to create a blocking system so in order to do that the first thing we have to do is add it inside of our Prisma schema so Let's go inside of here and just as we created this model follow we're now going to create a model block which is going to be very very similar to this one so let's go ahead and write model block let's give it an ID which is a string it's going to be our primary ID with a default value of uuid and then it's going to
have just like above we had the follower ID and following ID here we're going to have the blocker ID which is a string and We're going to have the blocked ID which is a string and then we have to create two relations relation for the blocker and we have to create a relation uh for the blocked user so first let's do the creation for the blocker so that is a user with a relation which we are going to name blocking fields for this relation are going to work work with blocker ID blocker ID so this
fi right here and it's going to reference so references an Array to ID let me zoom out so you can see this is all supposed to be in one line when you're writing this so references ID which refers to the user ID right so references ID and after that we're going to add on delete to be Cascade like that that and while we are here oh I misspelled this so this should be Fields like that and you should be having an error here because we don't have an equal relation for the user so We're going
to come back to that for now let's just create the exact same thing but for blocked so blocked is also a user relation name blocked by Fields blocked ID references ID and on delete Cascade so keep in mind that all of this is supposed to be in one line as I've zoomed out right here and now that we have this we have to go back inside of our user model and we have to create the equivalent relations so just make sure That in the blocker relation the name of the relation is blocking and the fields
is blocker ID and in the blocked relation name is blocked by and Fields is blocked ID and now go back inside of your user and just as we created the following and followed by let's create blocking to be the model block and the relation name for that is going to be blocking and then create blocked by which is also block but relation name here is blocked By so very similar to what we had here for the following and now what we have to do is we have to go back to the block model here and
create the indexes so let's go ahead and create an index for blocker ID and let's create an index for the blocked ID and then let's also add a unique constraint on the blocker ID and the blocked ID so this will also create an index for us for faster querying so just make sure that you have this exact model block again confirm that the Blocker ID is used in the blocker relation which we name blocking and ensure that the blocked ID is used for for the blocked relation which we call blocked by and uses the field
blocked ID great now that you've done this let's go ahead inside our terminal shut down your app this is important otherwise you're going to have some errors and do npx Prisma generate so we add those to our local environment and then npx Prisma DB push so we add them to our local Database and only after you've done those two go ahead and confirm by doing npx Prisma studio so this should open it on Local Host 5555 so let's go inside of our browser here and let me just try that out and now when I click
on this plus here there we go I have a new model block alongside my follow and my user so we successfully added that great so you didn't have to start the application just yet because what we're going to do now is we're going to develop our block Service so let's go inside of our lib folder and create a new file block service serv. DS let's go ahead and let's import the database let's go ahead and let's import get self and what I'm going to do is just replace this Imports to use at/ lib like this
you don't have to do this and now let's do export con is blocked by user ID is a string and this is also going to be an asynchronous function so this is going to be obviously a function Which checks whether the user currently logged in user is blocked by any specific user we are loading so let's open hry and catch block and in the catch here I want to return false so if anything goes wrong we're going to default to telling them that they are not blocked by that user and then let's go ahead and
attempt to fetch self using await get self which we have imported and then let's get the other user so that is await DB user find Unique where we have a matching ID so just in case you don't know writing ID like this or like this is the same thing so if they if the key and the value is named exactly the same you can use a shorthand like that just in case you were confused about that if we cannot find the other user let's throw new error user not found so we cannot check whether we
are blocked by this user or not so we're going to fall back to telling them false and now let's check If this is ourselves so if other user ID is equal to cell ID we can just return false right so why am I even doing this checks right I also do that inside of the follow service I also prevent uh any querying from going on if we are doing an action on ourselves well we technically don't have to do that Prisma could do that check for us but this way we don't even do any uh
querying in the database so we optimize it just a little bit so we Don't do any unnecessary r row reads or row wres if this function is not even supposed to be supported so that's why we do this checks to break the function early if it's something that we're not even supporting so make sure you're back inside of your block service and working on the is blocked by user function and after we confirm that this is not the user themselves let's check if we are blocked so const existing block is going to be a Wait
DB block. find first where the blocker ID is other user. ID and blocked ID is self. ID and then what we're going to do is return Boolean based on the fact whether this record exists in the database or not so if it exists we're going to return true you are blocked if it doesn't exist we're going to return false and we ensure that this is a Boolean by adding this to exclamation points here so now when you use this function you can see that it is A promise which returns a Boolean and if you didn't
add those two well you could probably still work with it but you can see that now it's a promise which returns an entire object or a Boolean so it's just kind of weird to work with so this way we save ourselves some types here and I believe that we can actually improve this instead of using find first I think that we can use find unique but then we have to use a specific type I believe blocker ID and blocked ID yes Like that and then inside we can pass blocker ID to be other user. ID
and blocked ID to be self. ID so what's the difference between find unique and find first well both of them can kind of serve in the same way right but find unique in this case we'll use an index on that unique constraint which which we just created so this is going to be a faster query rather than find first where it would go through all of the records until it finds the matching one Whereas this one will use the index which was created by by the unique uh constraint and I believe we can also improve
that in our follow service but we're not going to do that now but yes here we also do find first uh if I remember I'm going to come back to this uh I want to make sure that we test it out that it's actually working properly so I'm just going to leave it like this for now for this module I will just focus on the blocking features here so Let's go ahead and leave it like this for now and that wraps up our is blocked by user what I want to create now is the function
to block and the function to unblock the user so let's write export const block user with capital u to be an asynchronous function which accepts the ID of the user we are trying to block gets the self from await get self checks if self. ID is equal to the ID of the user we are trying to block and in that case we're going to throw an Error cannot block yourself and this way we are optimizing our applications and no unnecessary uh queries rows reads or writes are done Beyond this point now let's go ahead and
get the other user we are trying to block so await DB user find unique where we have the matching ID of that user if there is no other user let's throw new error user not found what I want to do next after to reconfirm that this user exists is check If we already have blocked that user right so const existing block is a wait DB block find unique where and let's use that blocker ID and blocked ID constraint here so blocker ID is self. ID and blocked ID is other user. ID so if we already
blocked this user we're going to throw an error because this is a function to block them again right so if existing block is true throw new error already blocked and now let's go ahead and Finally create this block function if none of the the the above is true so const block is a wait DB block create data blocker ID is self. ID and blocked ID is other user. ID and I also want to add an include here so in our success message we can clearly write who we just blocked so we're going to populate the
field blocked and that way we're going to get the user which was blocked because blocked is going to be our user you can see in here blocked Field has the ID username image URL so that's our user relation and just return block at the end and now let's go ahead and wrap this up by creating uh an equivalent unblock user so export const unblock user again an asynchronous function which takes in the ID which is a string let's get self using await get self if self ID is equal to the ID we are trying to
block let's go ahead and throw new error here cannot unblock yourself basically we cannot either Block ourselves or unblock ourselves if the ID is the same we no point in running the function further and now let's go ahead and get the other user using a weight DB uh user find unique where we have a matching ID inside and let's go ahead and check if we don't have the other user throw new error user not found otherwise let's go ahead and check if we have an existing block for this user or not so const existing block
is a Wait DB block find unique where let's use our unique constraint here so if you're not getting this autocomplete here I probably should have mentioned this earlier right if you're not getting this autocomplete which we are using inside of this unique uh find unique right so the reason this exists is because of our Prisma schema so in here inside of our block model we Define a unique constraint on blocker ID and blocked ID and that's what creates An index and allows us to do this querying by blocker ID and blocked ID you can see
how it generated a combination of those two so go back to the unblock user function here and here we are looking for an existing block so let's give the blocker ID to be self ID and blocked ID to be other user. ID and if we don't have an existing block so the opposite of what we check in the block function so make sure you put an exclamation point here that means That this user is not blocked so we cannot unblock him so we're going to throw new error not blocked and now finally let's go ahead
and write const unblock to be uh await DB block. delete and let's go ahead and pass in where ID is existing block. ID and let's also include the blocked person well previously blocked person right so We can tell in our toast message who was unblocked and let's return block uh let's return unblock sorry great and later we're going to have one more function in here which is going to be to load all blocked users but we're going to do that later when we get uh when we get to the part where we actually uh need
this information uh great so we finished our blocked service for now now let's go ahead and create our server Actions which are going to use this block service so let's go in set of actions and create a new file block. TS and in here let's write export const on block to accept the ID which is a string and inside of here let's go ahead and let's write uh const blocked user to be await block user from uh lib block server this and let's just pass in the ID like that and then what I want to
do is just simply write revalidate we can do the same thing that we did in the Following action right if we have the block not block oh almost made that mistake so make sure you're not writing block user when you're doing this so this should be blocked user this constant right here in my unfollow function I used the equivalent of block user and then it was very confusing because this this is a function so this is blocked user Make sure you use that uh so if we have blocked user what I want to do is
I want to call uh Revalidate path here from next cache and I'm going to go ahead and revalidate that user ID here so let's go ahead and call slash blocked user dot not uh blocked user do blocked do username like that and let's also call their validate path on the root as well and let's return the blocked user great and now while we are here let's also create an equivalent uh to unblock the user so we can just copy This here let's name this on unblock let's call this unblocked user let's await unblock user from
our uh Leb block service so make sure you import the unblocked user function here and then we're going to work with the unblocked user so if we have the unblocked user use the unblocked user username and return the unblocked user so what I'm going to write here is a to-do list adapt to disconnect uh from live Stream and to do allow uh ability to kick the guest right because if we are trying to we're going to reuse this function later when we Implement our chat right so what that's supposed to do is a block the
user in our database but also immediately kick the user from the screen from the stream and disconnect them so they're not going to be able to see the stream uh immediately right the moment the stream Creator clicks the block button they're immediately Disconnected uh but we will also allow guests to look at the stream meaning people that are not logged in so this function will most likely break so we're going to have to come back to this later and adapt it but for now this is just fine what I want to do now is I
want to go back inside of my uh username page so that is make sure you save this file of course go inside of app browse username page right here and in here we have is following now let's go ahead and let's Add is blocking and do await is blocked so this is is blocked by user actually yes so uh uh okay we're not we're not going to do anything here uh this is what we're going to do we're going to go remove this import you're not going to need this yes because we don't have uh
this is blocked we can can we create that function H let me go ahead and see maybe we can create because we're not going to need it but just for this Example maybe it's better that we create that function so this is is blocked by user but how about we create an equivalent one for if we blocked a user right but let's leave it like this for now this is what I'm going to do so inside of my uh actions here I'm going to go ahead and add two buttons here so go ahead and add
a fragment here and I'm going to add one button below this which is going to say block User right or we can just write block here and let's go ahead and run our app so mpm uh run Dev here and let's go inside of Local Host 3000 here so we're not going to look at this by any logs but what what we are going to do is we're going to look at our Prisma studio so let's also open up Prisma studio so MPX Prisma Studio that should be running on Local Host 5555 here and click
make sure you're logged in now go ahead and click on a random User and we should be having the block button here great and now let's go ahead and do the following so let's add a const on block here and let's actually call it handle block because we already have a function called um we already have a function called uh uh uh Block in our actions and in here I'm just going to reuse the start transition and I'm going to call on block from actions block so go ahead and Import that so this is of
course just a test component where we're trying out our services now and inside passing the user ID and let's add that then here let's get the data and let's call toast. success and let's write uh blocked the user data blocked username and let's also add catch tost error something went wrong like that and now let's go ahead and give This button and on click to be handle block and disabled is pending here and now let's go ahead and see if this is working so inside of my Prisma Studio here right now I have nothing inside
of my block uh table right it's completely empty but if I click block here it looks like something went wrong so let's go ahead and see uh what exactly went wrong so did we call the correct function actions block inside of here on block so the way I'm going to debug this because I don't believe we got anything in our terminal yeah it looks completely empty what I'm going to do is I'm going to wrap this on block inside of TR catch so I'm going to write try and then I'm going to write catch here
I'm going to get the error and I will write conso log error so this way we can debug what's going on here so I'm going to open my terminal and I will click B again it looks like we are immediately getting an error it could be That I wrote something wrong in here okay let's see why let's do this without this catch functions what does that do does that give us uh an error in our terminal does it add something in our database it doesn't so it's not working something is wrong here let's go ahead
and check the on block so we pass in the ID and we await block user here and we pass the ID here but we're not getting any errors it seems so I'm going to add A conso log here oh I think I know what it is yes so inside of our actions we did not add use server that's what we forgot that's what important with server actions so it's good that this didn't work because otherwise we could have spilled our API Secrets somewhere in the bundle let's try this again so what I'm going to do
now is I'm going to go ahead I'm going to bring back these actions because I still want to debug this how come uh This is not working how come data is possibly undefined here when I'm doing the same thing for the following here so let me check my on block function again so oh I think it's because I WRA this inside of try and catch so if I remove try catch yeah then it works so I'm going to remove my try and catch now I added the use server here so make sure you do that
I'm just going to save save this to be exactly as it was from before and I'm going to go ahead and prepare my Prisma Studio again so now it says block I will click block and let's see block the user something else perfect and if I refresh here I should have the model block and I do and in my users model I should have the equivalent relations here so let's see blocking this user which is my currently logged in user Antonio seems to be blocking someone and the user above is blocked by someone which can
only be the other user in my database so this is officially working What I want to create now is just change this to be unblocked so I'm not going to do anything complicated I will rename this to unblock and I'm going to go ahead here and I'm going to write uh well I'm just going to call the on unblock right from actions block so make sure you import on unblock here so we're just testing our functions and in here I'm going to write unblocked the user right let's write out now so I'm going to go
ahead in my Prisma Studio I have my block model which should be deleted after I click unblock here so let's try it out and it says that I've unblocked that user and when I refresh here there we go you can see that now it it we no longer have any blocking relations meaning that these users are officially not blocking one another perfect so confirm that this is working for you what we have to do now is we have to modify our recommended service and our following service to Exclude blocked users from the list right so
we're going to do the following uh just leave this as it is for now this is just our test component and let's go back inside of our lib inside of the recommended service and in here we already started doing some combinations on our queries so alongside this uh followed by let's also go ahead and let's add another not blocking Some blocked ID user ID so when we load our recommended list this way we ensure that none of those users in that list are blocking the currently logged in user right uh and I also want to
do the same thing inside of my follow service so let's go inside of the follow service here and in here we have get followed users so even if we follow them if they blocked us we are no longer going to show them in the following list because there's going to be no way for uh the User to for the user to look at that user's Stream So inside of this wear Clause alongside the follower ID we're going to add if the following user has has a blocking relation and it's supposed to be none for the
blocked ID self ID so we ensure that the user We are following is not blocking that user great so in order to test this out we have to do the following we have to create a block uh we we have to initiate the Block action so let's go back inside Of components actions here and change this handle block to again use the on block right so we already have this imported in here so make sure this time you use on block as we did the first time and I'm going to rename this function to block
then make sure in your database that you don't have uh any block relations right or if you do you can just leave it as it is or just initiate an unblock function basically it's going to be easier to follow if you Have the exact same thing that I am so I have nothing inside of my blocked here and my users have no relation with when it comes to being blocked by one another so now I am as Antonio am going to block this user here so I'm going to go ahead and click block here like
this and uh and my tost message I think stayed the same and now in here there we go I now have one blocked user so what I'm going to do now is I'm going to log out and I'm going to enter as this user and this User should no longer be recommended right here right so let's go ahead and log out now and now I'm going to go ahead and log in with the other user and as you can see I have nothing inside of my recommended or my following tab because that user is blocking
right and here's what we can do now so I know that my other users's username is Antonio from my database right so I'm going to copy this username I'm going to go manually to localhost 3000 anonio and This is what I can do now so since I know that I am blocked by this user we can go inside of username page. vsx and we can write the const is blocked by this user oh wait is blocked by user so that's why I named this is blocked by this user because our function name is is blocked
by user which you can import from block service so I'm just going to move this here and let's go ahead and pass in the user. ID so is blocked by this user or we can Just do is blocked so is blocked a wait is blocked by user and in here I'm going to write a paragraph which says is blocked and let's go ahead is blocked by this user and we're going to go ahead and open back text like this and render is blocked like this and it's should be rendering true and it does as you
can see right here it says is blocked by this user that we are trying to load is True and what we're going to do later is very simply in here we're going to check if is blocked in that case we're just going to render the not found function which we already use here so now when someone tries to manually visit the blocked user as we just did right now they're going to get a 404 so we're going to completely prevent the blocked person from finding this user anywhere uh great and I'm just going to remove
this for now just in case we need to Come back to this and do some more testing perfect and just to confirm that this is still working with backwards compatibility what I want to do is log out and as you can see here we have both users now I will log back in with the other user and I will unblock myself so here I am in the other user and in here what I'm going to do now is I'm going to unblock myself so let's go ahead and just go back inside of the actions and
now we're going to use this On unblock function here so let's just uh replace on block with on unblock here make sure you save that let's click on this now it says block but you know what the code is actually doing uh and now in my database I should no longer be having this block relation again there we go and if I log out and if I go back inside of the other user now there we go I am fully unblocked and I can visit this user again and it says is blocked by this user
false and you Can see that it was the same user you can see in my URL that it says Antonio which I previously went to manually and it clearly said that I was blocked by that user and you're probably noticing that once I block a user I allow the user who blocked that user to see their profile but I don't allow the opposite right so that's my design choice you yourself can go even further and make sure that those two users never see each other right so I'm imagining the block Function to be more used
as block block this user from my stream right but I still want to be able to see that user in my uh homepage but that user that I blocked should not see me anywhere on on the page so that's how I imagined the block system you can of course modify the code if you like it some other way but I would recommend that you keep it this way until you finish the tutorial and then when you finish go ahead and play around and make it your own right Uh great so we now finished our blocking
service and now what we're finally ready to do is start creating our stream model which is going to control whether we are live or not and we're going to go ahead and create this little user dashboard where we're going to control the settings of the stream and then we're going to be finally ready to create a live stream connection and some real time chat great great job so what I want to build now is the Creator dashboard and we already have something prepared for us here so I want you to go inside of the app
folder browse components navbar and in here you have the actions component and in here we have a couple of things so we have our login button if we are not logged in but if we are logged in we render the user button and alongside user button we render one button with an icon Clapper board which says dashboard on desktop and it redirects to slash you and then The username of the currently logged in user so that is this button in the knar bar right here which says dashboard so I'm currently logged in as the username
something else and when I click here you can see that in my URL I am on Local Host 3000u something else and it's a 404 page because we don't have that developed yet so you can already kind of imagine the structure we need to build this page but I've also prepared a little diagram here So it's supposed to be something like a u folder and then Dynamic username folder and then page. TSX and that's absolutely true but what I'm going to do is do exactly that but I'm also going to get going to add another
route group inside of it called home so I can keep my page. TSX in a separate folder because then this home folder will also have some components some loading States maybe even its own layout so it's better for it to be like this rather than just Cluttered around in the username folder where it doesn't belong and this route right here I mean this folder structure is going to equal this Local Host which we just saw a second ago so let's go ahead and let's close everything here and what I want to do is I want
to go inside of the app folder and first I want to create another top level layout group called dashboard so go ahead and create a dashboard route like this and then inside create another folder called You and then another folder Dynamic username like that and then inside we're going to create another route group called home and then inside page ag. TSX so the reason I created this home is because now inside of here I can create a new component called new folder called components which are only going to be components used for this exact page
because later this username page is going to have another set of sub routes like Keys chat community so it makes Sense that we also hold the initial uh route inside of its own folder but I also don't want this home to be part of the URL it would just be weird so this way we took care of that so let's go ahead and create this page so I'm going to call it Creator page and just return a div Creator page like this so if you have your actions properly so this actions in the browse components
Novar actions which lead to SLU slash username from the Current user here you should be seeing this Creator page now when you click on the little dashboard icon here at the top or if you are on mobile it's just going to be the clapperboard icon so when I click here there we go it says Creator page and I'm redirected to the correct URL great so I'm going to leave this Creator page to be as it is now and what I'm going to do is I'm going to go ahead and create a little uh useful lib
for us in the out service so go inside Of the lib folder out service and the same way we did get self I'm going to go ahead and I'm going to write export con get self by username like that and go ahead and write an asynchronous function which accepts the username which is a string let's go ahead and get self using the function await current user so we already have this from uh clerk Above So a wait current user and then what we're going to do is we're going to check if we have that current
user so if there is No self or if there is no self. username throw new error unauthorized like that and then let's go ahead and fetch the actual user by this username from our database so wait db. user find unique where we have a matching username if there is no such user throw new error user not found and if we do have that user we still have to check if that's the currently logged in user so this this Function is not the same as our user service where we have get user by username so this
is to load any user at all but this specific service is to load our creator dashboard using our username right because that's the structure of our URL and if you're wondering why did I even choose this URL structure no that's because I looked at other live streaming websites and how they handle that and this is the solution they use we could have technically just do Something like slash dashboard or slash Creator but one thing that this could allow in the future is modularity right so for example if you were to continue developing this platform and
maybe enable some moderators right which can modify specific username uh specific users stream and settings so this way you're going to allow them to be admins of multiple users because our URL uses the username for the Creator dashboard so that's one pro row of this solution The con is obviously that we have to do this bit complex query here so now that we confirm that we have our user Make sure you are in the out service working on the get self by username now let's go ahead and check if self. username is equal sorry is
not equal to user. username and if that's the case throw new error unauthorized so we are never going to be able to look at someone else's Creator dashboard and then just return Self like this or we can actually return the entire user from the database that might be even better like that uh great and now what I want to do is I want to go inside of the app folder inside of dashboard and I want to go inside of the username here and I want to go ahead and create layout. CSX so not inside of
the home folder but inside of the username folder here and let's go ahead and create create uh this uh Creator layout here and let's just go ahead and give This layout all the props it needs so interface Creator layout props is going to have forams which hold the username which is a string and the reason we have that is because this is a server component by default and it's inside the dynamic username folder meaning that it has this in the params and since this is a layout file we also know that we have the children
so we can add that as well and then we can just easily render the children inside and of course let's go Ahead and actually add these props so Creator layout whoops whoa Creator layout props and let's extract the params and the children and now you should be seeing the Creator page just as we did a couple of moments ago but now what we can do is we can go ahead and write const self to be await get self by username from our lib out service here and in here we can pass pam. username and we
have to turn this into an asynchronous function as well And then let's go ahead and write if there is no self redirect from next SL navigation to the root page like this there we go so if you're are trying to be any other user uh we're going to get an error from this function or if by any chance we don't get an error from the function function but we don't get self as an object we're just going to remove the user from that page so this way only ourselves can load the Creator dashboard for our
username anyone else Who tries will get redirected and get thrown errors and we are later also going to create an proper error page for this so now let's go ahead and let's actually style this thing so it's not going to be a div it's just going to be uh an empty fragment and let's go ahead and wrap this inside of a div inside and let's give this div a class name of flex Age full and padding top of 20 so now you can see that our creator page has some space here at the top and
that Space is going to be for our Navar so what we can do here is we can copy the nov bar from our existing uh browse component here so go into browse components and you should have the NV bar so let's go ahead and copy this entire folder here and now let's go ahead inside of the username and create another folder underscore components and you can just paste the entire navbar folder so you should have the actions index logo and search and now go ahead And let's render the navbar above it from do/ components navbar
because we now have them in these components and now you should have the exact same nav bar as you have on your other page but of course we're going to modify it a bit because we don't need the search page and we also need an exit button from here so let's go ahead and do the following go inside of this newly created Novar and go inside of the index here and I first I want to remove the Search and I want to remove the search import so no search for this one so now your search
should disappear from here right and what you can do now is also remove the search component make sure you don't accidentally remove it from the browse so just close browse make sure you are inside of dashboard inside of username components navbar and go inside of here and remove that search and refresh your page to ensure you're not getting any errors and now let's go Back inside of here and first thing I want to do is I want to modify the logo a bit so let's go inside of the logo here and let's modify it so
it doesn't say let's play here instead let's write Creator dashboard so now when you expand to desktop mode you should be seeing the Creator dashboard right here great and what we have to modify next is the actions component so let's go inside of the actions of course the copied actions Right and this is what we're going to do we're going to remove this await current user we can remove the sync from the actions and we no longer need this login button because this page will only be visible for users who are already uh logged in
so this is what I'm actually going to do I'm just going to remove everything from here right I don't need anything at all and let's start from the beginning let's create a div here with a class name Flex item Center justify end And GAP X2 then inside let's render a button component and let's just simply add a link inside with an exit and let's write an hre to go to the root page and let's add a log out icon from Lucid react so make sure you import log out we can remove everything from clerk here
for now and we can remove The Clapper board like this and now you should have this exit button here so now what I want to do is give this button a couple of Properties so give it a size of small a variant of ghost a class name of text muted foreground and hover text primary and let's give it an as child property so it properly handles this link and let's give this logout URL a class name of H5 width five and margin right of two and outside of this button let's add the user button from
clerk nextjs so make sure you import clerk nextjs user button here and this is Going to be a self closing tag and let's give it a property after sign out URL to go to the root page like that and now as you can see we have our new dashboard here so I'm just going to refresh this page and there we go now this says Creator dashboard when I click on the exit I am back on the homepage and I have my recommended users but when I click on the Das dashboard here there we go I
am on SLU my username which I can confirm from here as well and now we can Go ahead and continue developing this so now let's go ahead and let's create the Creator sidebar right here so for that we have to go back inside of our username so inside of dashboard U username layout here and just above the children let's go ahead and let's add the sidebar component and make sure you don't import this from anywhere because it should not exist so don't accidentally import the existing one from App browse components we're not Going to use
that one it's going to be similar but we're not going to use it so now let's go ahead inside of the components and create a new folder sidebar and inside of here create an index. DSX and let's export con sidebar from here and let's return a div sidebar now go back inside of your layout. DSX and you can import the sidebar from / components sidebar so just as we did with the knf bar and when You save you should have the sidebar here on the side great so what I want to do now is I
want to go ahead and create uh a store for our creator sidebar so we can collapse this as well right so for that I'm going to close everything and I'm going to go inside of my store folder and I will copy and paste the existing use sidebar and I'm going to rename it to use- Creator sidebar like this so make sure you have this one and then let's go ahead and replace all Instances of sidebar with Creator sidebar like that so it's going to have all the exact same props so we have the create sidebar
store we're going to call it use Creator sidebar and in here we're using Create sidebar store everything else stays exactly the same all right so so now what I want to do is I want to go back inside of my app folder uh dashboard U username components sidebar in here and we're going to go ahead and we're going to replace this div to be Our wrapper component right so we already have one but we're not going to reuse it because we're going to create a new one here so go ahead and create the wrapper. DSX
component inside and go ahead and Mark it as use client and now let's import uh CN from lib utils and let's also import use Creator sidebar from store Creator sidebar let's create an interface wrapper props here which is going to accept children which are react. react Node and now let's export const wrapper here and let's assign the props wrapper props let's go ahead and extract the children from here let's go inside and let's return an a side element let's give it a class name which is going to be dynamic so first I want to give
it classes of fixed left zero Flex Flex call width of 70 pixels by default on large devices is going to be uh 60 which is 240 pixels H full BG background border right and border of a Specific hex color 2D2 E3 five and let's give it a Z50 index and now inside let's just render the children like that now go back inside of your sidebar index component and import that wrapper from do/ wrapper like that and now as you can see we have a nice little sidebar and you can see how on mobile it is
collapsed and on desktop it is big great so now what I want to do is I want to enable that hook to also be part of the CSS here so let's go ahead And extract collapsed from use Creator sidebar let's get the entire State Here and Now what I want to do is add Dynamic if it is collapsed in that case we're going to go ahead and fix the width to 70 pixels just as it would be on the uh uh mobile mode right great so now that we have our wrap what we have to
create next is our toggle component right so let's go ahead inside well first let's add it here right so I'm going to add a little toggle component And don't import this from anywhere we're going to create a new one so inside of the new sidebar folder create a new file toggle. DSX let's mark this as used client and let's go ahead and Export cons toggle like this and let's return a div saying toggle let's go back inside of our new sidebar index and let's import toggle from do/ toggle now go back inside of the toggle
component and let's go ahead and develop This so first thing that I want to do is I want to go ahead and extract everything I need from use Creator sidebar so make sure you import this and make sure that toggle component has used client let's go ahead and get the entire State and return it and now let's extract everything we need so we need collapsed we need on expand and we need on collapse here now let's go ahead and write the dynamic label so label is Going to be if collapsed it's going to say expand
otherwise collapse so just as it is in our uh toggle component in our main sidebar on the homepage right so it's going to be very similar to this one you probably could have found a way to reuse that to reuse that but I just find it easier to write it twice in this cas case I don't think it's such a big deal it gives me more clarity and gives me more control if I want to customize it even further later in the future so This is what I'm going to do I'm going to replace this
divs with a fragment and first thing I'm going to write if we are not collapsed actually let's start with collapsed so if we are collapsed in that case let's go ahead and open a div with a class name with full hidden LG Flex items Center justify Center padding top of four and margin bottom of four and inside let's add our hint component which we already have developed so make sure you import the Hint component in here let's pass in the label to be label from our constant here above let's give it a side of right
and let's give it as child property and inside let's open up a button component so make sure you import button from at/ components UI button and let's go ahead and give it a couple of attributes here so I'm going to give it on click to be on expand I'm going to give it a variant of ghost I'm going to give it a class name of H AO and padding two and inside I'm going to render Arrow right from line from Lucid react so make sure you import Arrow light right from line from Lucid react here
and I just want to give this little icon a smaller size by using the height of four and the width of four right and this should now not be visible anywhere right but if you go inside of your store inside of use Creator dashboard and change the collapse to be true by default and expand to desktop mode you should be seeing a little icon Here right and this icon is a toggle button so the same thing that we had previously right so now change change this collapsed from True back to false in the use Creator
sidebar and let's go back inside of our new toggle component so make sure you're developing inside of dashboard you username components sidebar toggle right here great so now we finished the collapsed State and now let's go ahead and let's create the not collapsed state so if we are not Collapsed go ahead and create a class name padding 3 pl6 margin bottom of two hidden LG Flex items Center and width full inside create a paragraph which says dashboard and let's go ahead and give this class name font semibold and text primary and below that let's open
up a new hint component here let's go ahead and pass in the label to be label let's pass in a side to be right and as ch property and then inside let's render Our button component which we already have imported because we just used it a couple of moments ago and inside of here I'm just going to prepare a couple of attributes so I'm going to give it an on click to be on collapse and I'm going to give it a variant of ghost and I think I misspelled this variant like that and let's go
ahead and also give it a class name of H out padding to an ml AO and let's render Arrow left from line from Lucid react like this so make sure you import this as well so this is the not collapsed State finished now and I believe that if we expand there we go we now have our dashboard here like this great so now it seems like we just have to modify the actual functionality but this one seems much larger than the one below let's see if we misspelled something here yes I forgot to give classes
to this one so go inside of the arrow left from from line And give it a class name of H4 and withth four and now they should be appropriately the same size like this great so now what we have to do is we have to enable our wrapper to actually change the sizes because it seems like it's not doing that so I want to go ahead and revisit my wrapper component so go inside of the sidebar folder inside of your new wrapper component here and in here it seems like we are Using the collapsed State
here but for some reason this doesn't seem to be working so let's go ahead and see why that is happening if I go ahead and write it like this will that work then let's try it out so if I go here and click on this now it seems to be working so it seems to be because of these default classes which I have uh right here right let's take a look here yes it seems to be because of that so let's go ahead and do this I'm just going to make It like this on default
so in my new wrapper component make sure that the default size is w60 like this and that should fix this issue right so when I'm collapsing here this seems to be working just fine all right and now what we have to do is an equivalent container to push our content on the side when we are expanded and when we are collapsed so let's go back inside of our dashboard layout here or create our layout right and Let's wrap the children inside of a container component so don't import this from anywhere it does not exist yet
we only have the one from the home layout right but this is a different layout let's go inside of the components and let's create a new file container. TSX like this and let's go ahead and Mark this as use client and let's go ahead and let's import use effect from react let's go ahead and let's import use media query from use hooks TS let's go Ahead and import CN from lib utils and let's go ahead and import use Creator sidebar from our store and now let's create an interface container props to accept the children which
are react. react node and now let's export const container let's assign the props to it so container props and let's go ahead and just simply let's do a return div which renders the children right and Now let's just go ahead and extract the children from the props and now we have our container component go back inside of your uh Creator layout and import that from do/ components container so this is the Imports you should have navbar sidebar and the container great and now you should no longer be having any errors here so let's go inside
of the container now and and here's what I want to do first I want to go ahead and I want to import everything I need from Use sidebar use Creator sidebar so let's get the entire State here and let's extract the collapsed State on collapse and on expand like that and then let's go ahead and let's use the use effect here actually let's also add const matches to be use media query and let's use max with one 1,24 pixels so now we're going to do that automating automatic collapsing and expanding of the sidebar if the
user Changes from desktop view to mobile view using the use effect this so the same thing that we did inside of our first container component so if it matches on collapse else on expand and now let's add all the necessary dependencies which are matches on collapse and on expand like that and now I want to go ahead inside of here and write a class name to be dynamic Flex one by default and then if we are collapsed ml is going to be 70 Pixels otherwise ml is going to be 70 pixels on mobile but on
large it's going to be 60 meaning that it's going to be expanded great so let's go ahead and try this out now so in here when I click collapse there we go the content is being pushed if I am on collapse mode in desktop and then go to mobile mode it collapses back great so now let's check this out if we have any hydration errors so this seems to be uh not having any hydration errors for now but I don't Like the flickering on mobile mode so let's go ahead and see if there is a
way for us to improve this so I'm going to go inside of the app folder dashboard components sidebar inside of the wrapper here and in here we already attach tempted to do something like that let's go ahead and give it one more try so I'm going to give it a default value of 70 pixels on large is going to be 60 and then inside of this collapse I'm going to change this to also use the large I'm Just going to add a prefix for this to be large like this and let's say if that fixes
the flickering and it seems like it does right so when I go here and refresh there's no flickering if I go back here there's no flickering either perfect so exactly what we wanted from here great and now what we have to do is we have to create our navigation and this one is going to be a bit simpler because there is nothing to load usually we have to load our recommended Users and stuff like that but in this one that's not the case in this case we just have the finished uh navigation hardcoded right so
let's go inside of the index here and below the toggle add the navigation component and now let's go ahead and create that component so go inside of the sidebar and create a new file navigation. DSX let's mark it as use client and let's export cones navigation like this and let's return a Div navigation let's go back inside the sidebar index and now you can import navigation not from Lucid react but from do/ navigation and when you save you should no longer be getting any errors and instead in your desktop mode you should see the navigation
here also on your mobile mode but it should overflow like this and now let's go ahead and let's actually uh create this so I want to import a couple of stuff Here so let's import use user from clerk nextjs let's import use path name from next navigation and let's go ahead and let's import the following icons from lucid react so we need full screen we need key round we need message square and we need users like that now let's go ahead inside of the navigation here and let's write a path name be use path name
let's extract the user from use User and now let's go ahead and let's render our routes which is going to be an array of objects so so each array is going to have sorry each object is going to have a label for this one it's going to be stream and the hre for it is going to be dynamic so open backck SLU and then user username and make sure you use this Turner right here and icon is going to be full screen like that and now let's go ahead and copy and paste this and the
One below is going to be our keys and that's going to lead to the exact same URL with Slash keys at the end and it's going to use key route let's go ahead and copy that one as well this one is going to be chat and it's going to lead to slash chat and it's going to use the message Square icon let's go ahead and open this again and last one is going to be Community which is going to lead to slash community and the icon is going to be users which we already have imported
So this four icons here great now that we have that uh let's go ahead and and let's change this from a div to an unordered list and inside I want to go ahead and do routes. map get the individual route and for now let's just render a div with route. label and passing the key to be route. H like this and there we go now inside of our sidebar here we should have stream Keys chat and community so now let's go ahead and give this unordered List some Styles so I'm going to give this a
space Y 2 px2 PT for an an LG pt0 like that great so now it looks a bit spaced out and now what we have to create is our nav item component right so we're going to replace that with the nav item component so let's go ahead and do that here so nav item let's go ahead and give it a key of route. hre like that let's go ahead and pass in the label from route. label let's pass in the icon from route. ion HRA from route. HRA and let's give it is active prop which
is going to be a simple comparison of path name and the route. HRA so we know that we are on that page and if you save you should get an error because nav item does not exist so let's go inside of the sidebar and create a new file nav item. DSX like this let's mark it as use client and let's create an interface NAB item props from here let's give it an icon to be a type of lucid icon from Lucid react Let's give it a label to be a string an HRA to be a
string is active to be a Boolean and let's export cons nav item and let's just assign this props here so nav item props let's extract the icon the label the hre and is active and now let's go ahead uh and let's render this right so I also want to include the collapsed state from use Creator sidebar so return the entire State here And make sure you imported use Creator sidebar like this and now we can dynamically render our button component so make sure you import button from components UI button and then let's go ahead and
give this some attributes so it's going to have as child attribute the role well we don't need the role the variant is going to be ghost class name is going to be dynamic so make sure you import CN from lib utils here let's go ahead and pass In some default classes which are going to be full width and height of 12 and then if we are collapsed justify Center otherwise justify start and if we are active in that case BG accent so if shows that we are currently on that page now inside of here render
a link component from next SL link so just make sure you add an import for that as well let's go ahead and let's pass in the hre to be hre prop let's create a div inside with a class name of flex item Center And GAP X4 let's render the icon and yeah I didn't explain where we get the icon from so we pass in the icon as a prop here here and the icon looks like this so users full screen right so what we have to do is we have to turn this prop into an
icon with a capital I and we can do that by an alias so let's go ahead and give it a colum and then icon with a capital I and now we can use it as a component so go inside and simply render That icon and let's go ahead and give this some Dynamic class names as well so in here write h-4 and W-4 and if we are collapsed go ahead and and give it a margin right of zero otherwise a margin right of two like this and then lastly go ahead and write if we are
not collapsed only then also render the label inside of a span like this great so go back inside of the navigation and you can now import that from slnv items So make sure you add this component and you should no longer be having any errors as you can see now we have a beautiful navigation here it's collapsable and you can see how it looks on mobile without the toggle button you can still access everything you need from here perfect so it's very similar to what we had right here right but now it's here but there
is a loading state that we have to take care of here and that is this state right here inside of Our navigation component in here we have use user but use user can either be the user or null right so that's because this use user Hook from clerk has a loading state so this is what we're going to do we're going to go inside of the nav item and we're going to create a skeleton from it so let's go ahead and let's write export con nav item skeleton here and let's return uh a link element
uh sorry a list element and give it a class name of flex items Center Gap X4 PX3 and py2 let's add a skeleton component from components UI skeleton so just make sure you add this import all right let's give this skeleton a class name of minan height of 48 pixels and a Min width of 48 pixels as well and rounded medium so that represents our icon and then create a div with a class name of Flex one hidden on mobile but visible on desk on desktop and inside render a Smaller skeleton which is simply going
to have a height of six like this great and let's try it out now by going back inside of our navigation here before we render this so make sure you're inside of the navigation component we also need to check if the user has actually loaded so we can do that by checking if we don't have user do username in that case is let's go ahead and let's return an unordered list with a class name space Y 2 and let's go ahead and render array of Four items do map skip the first one get the index
and render nav item skeleton which we just created and give it the key of that index so make sure you import nav item skeleton from /nv item and now I don't even think if this this is going to be visible you can see actually it is visible for a for a split second it is visible because that's the the time it takes to load our user and let's check this on mobile and there we go we have No hydration errors it seems everything seems to be working fine so we had some hydration errors here looks
like because of that suspense component but in here we don't have it at least for me we don't but then again even if you're having it I don't think it will break the page enti so I'm not having it this seems to be working just fine so great this is going to be the end of this module and what we're going to do next is create the Actual stream uh model inside of our database and then we're going to create the settings for all of these things inside and then we're finally going to create our
live stream page great great job so what I want to build now is the stream model so let's go ahead inside of our PR ma schema right here and let's go just below the user here and let's create a model called Stream So model stream let's give it an ID of string which is going to be our primary ID and A default value of uu ID let's go ahead and give this stream a name which is also going to be db. text let's give it a thumbnail URL which is going to be an optional string
and also it's going to be db. text so you can so you can have more characters than a regular string and now let's go ahead and create an Ingress ID here which is going to be an optional string and it's going to be unique so this is going to be the Ingress ID which we're going to work on Later which we're going to use to connect to a streaming software let's also add a server URL which is also going to come from the Ingress creation and that's going to be db. text let's create a stream
key so that's going to be a string optional string as well N db. Text and now let's create a couple of properties here so I'm going to separate this so these are the default name and thumbnail URL and ID these two uh these three come from Creating our Ingress which are going to be used for connecting to a streaming software and now we're just going to have a bunch of options uh so we can control our stream like enabling the chat disabling the chat and stuff like that so let's write first is live so that's
going to be a Boolean with the default value of false and it's going to change every time the user turns on a stream and we're going to control that using a web hook later on and now let's Do is chat enabled so that's going to be a Boolean as well with the default value of true so by default all chats are enabled for every new stream and now let's that is chat delayed that's going to be a Boolean and a default value is going to be false so the delay chat option is going to be
used if the streamer wants to slow down the chat so they can read the messages more clearly and now let's add is chat followers only so that's going to be a Boolean with a default of false as well and now we have to create a relation with the user that owns this stream so let's create user ID to be a string and unique and then let's create a relation user user at relation Fields user ID references ID and on delete Cascade and now let's go ahead inside of the user and let's create a relation with
the stream so go inside of the user here and let's do this after this blocked stuff let's add a stream and Make it optional like this so a very simple relation like that great now let's go ahead and add a couple of more options of the stream model so we're going to add created at which is date time and we're going to give it a default value of now and let's do updated ad which is date time with updated ad decorator like this and now let's create a couple of indexes so let's add an index
for the user ID let's add an index for for the Ingress ID and Let's do a full text here for the name right so I want the stream to be searchable and let's make sure you do double at at here and right now I'm getting an error here so what I have to do to enable full text search on the name of the stream model I have to go inside of my generator client and I have to add preview features and add full text search and full text index but this is only for my SQL
so if you're doing this in postra SQL I think you Might not even need to add this but you can try you're going to get errors if it doesn't work right and if you can get it to work just remove this line right we're going to come to searching later and it's not even that important for the entire project but if you're using MySQL make sure you add full text search and full text index uh great so so this should be our stream model here and what I want to do now is I want to
push that to our database so let me just shut Everything down here and let me shut down everything and do npx Prisma generate so we add this locally and then npx Prisma DB push so we add that remotely right so let's wait a second for this to push there we go and let's check our Prisma studio now so this should open on Local Host 5555 let's go inside of here and when I click on the plus here there we go I have a stream model and the table is empty none of these things exist right
now so uh what We have to do now is we have to create this stream every time a user is created so we're going to do that inside of our app folder API web hooks clerk right here so go ahead and find user. created and after the image URL go ahead and add a stream create and the only property we're going to fill so if you look at the schema the only required property for it should be the name everything else is optional or it has a default value meaning that we don't have to fill
It right so let's go ahead uh and give this property a name to be open btic the user's name which is payload DOD dat. username and then an apostrophe so that users stream that's going to be the default name of the stream right and now in order to synchronize this with our database what we have to do is remove all users from our database and all users from clerk so this is what I'm going to do first I'm going to go inside of my terminal here and I will run npx Prisma Studio again so I'm
going to ref refesh this here I'm going to go ahead uh and I just delete everything here here's an easy way to do it so you can either do it manually by going into each block by going into each follow right and deleting your models by selecting them like this or one more thing you can do is this you can do npx Prisma migrate reset so this will shut down the entire database I mean reset the entire Database and you can see it says all data will be lost so obviously only use this in development
mode and confirm it like this so this will reset the entire database for you like that and after you do that make sure you run npx Prisma generate again and then make sure you do npx Prisma DB push again so it's quite important that you do that uh because the collections will now be updated again with the remote database and now if you do M MPX Prisma Studio one more Time here you should be having no users no block no follows no streams nothing everything should be empty but remember we still have some stuff inside
of our clerk so let's visit Clerk and let's remove everything from there as well so go inside of your users here and go ahead and select the user and delete the user and go ahead and do that twice like this and now all users are empty and if you take a look at your web hook you should be getting some errors now Because the web Hook is trying trying to fire those events so we just deleted a couple of users and if I look at my activity I think that now I should be having some
failed attempts here right so we're going to see that once we start our uh web hook again right but you can just ignore that because we know what's going on we know that our users list is empty we know that our database is empty so we are now ready to start our web hook Again so we have to do the following uh I will well I will shut this down for now and first thing I'm going to do is do mpm run Dev like this and let's ensure that this is working so I'm going to
go ahead on Local Host 3000 and I should be completely logged out and I should be on the homepage it should be completely empty so no users to recommend nothing to search and we can't even uh find anything on the homepage right what we have to do now is open a New new terminal and we have to run that enro command so if you don't remember it you can go to enr.com inside of your Cloud Edge you have domains and in here you have a little button which says start a tunnel and in here you
have your stable domain you don't have to use it of course but it's the one that we have registered inside of our clerk web hooks right here you can see that is that domain so if you Use that one all you have to do is just paste that here and of course change this port 80 to 3,000 because that's where our app is running right or if you don't have this domain for any reason you can just do enro HTTP 3,000 and then you're going to get this new URL so then you have to copy
that URL you have to bring it back to clerk here and then you have to click edit here and just change this part of the URL with that thing we just copied and make sure you add SL API SL web hooks clerk at the end so I'm not doing that I'm going to keep using this one which I can again copy from here so it's inside of cloud Edge domains click on start a tunnel and copy this Command right here and then I will just shut this down I'm going to paste that and I'm going
to replace the port to go to 3,000 like that and now if I go ahead and copy this and try it out inside of here instead of Local Host I should see the exact same thing and it looks like It's working great so now my local host and that domain is in sync meaning that my web hook will work and we have to test this out now because we just modified our web hook that when a user is created we also create that new stream model which we just uh created in our Prisma schema so
go ahead and click log in here and create a new account I'm going to go ahead and write my username code with Antonio and let's see if our web Hook is going to work so It looks like my user has been created and let's go ahead now and I'm going to open a third terminal here so I have the npm runev I have my enrock and I'm running another one npx Prisma Studio here and that should show me that I have a user and a stream and let's see if that is correct and it is
correct I have one user right here let me just close this too there we go I have a user and the user has a relation with the stream so make sure that you have one User and make sure that you have one stream and it should be called code with Antonio's stream or whatever is the username of your user great so now you can feel free to shut down Prisma studio and you also don't need Ang Rock anymore running unless you plan on creating new users so here's what I actually recommend you do go ahead
and run enrock on that domain right make sure that the proper domain is set in your clerk web hook and just go ahead and create a new User again so I'm going to log out and I'm going to create a new user just because it's going to be easier for us to test out different States during our development so I logged in with a new user and I'm going to name them Antonio I'm going to click continue and there we go it seems to be working and if I check my Prisma Studio again which I
shut down so let me go back just to confirm that this also so make sure you did this while you were running your web hook Right uh if you accidentally mess it up you can always do npx Prisma migrate reset right what we did recently to delete your entire database and then go into Clerk and remove your users manually so you can always reset the entire thing like no need to worry if you mess it up so let's do npx Prisma studio just to confirm that now I I have another user and another stream there
we go Antonio's stream code with Antonio's stream and two users I hope let's see There we go Antonio and code with Antonio perfect so we're back where we started but this time our users have their stream model which means that inside of our creator dashboard now we're going to be able to create these elements for keys for chat and for the community great great job so now that we've ensured that in our database we have a stream for each and every of one of our users we are ready to create this page right here for
When we click on chats so right now when I click here I get to a 404 because that page could not be found and my URL is SLU the username of the currently logged in user slash chat like that so if yours is anything different of course your username will be different but you can go ahead and confirm that by going inside of the dashboard U username navbar sorry sidebar and in here you have a navigation component and I believe that in here we defined our Routes so just confirm that your chat has the proper
HRA to go to slash you the current username and then slash chat and now what I want to do is I want to go inside of the username folder here and just as we created this home folder let's go ahead and let's create the chat folder like that and then inside of chat create page. TSX and let's go ahead and do chat page return a div chat page like this and now if you go ahead and try and click on your chat again you should be Seeing chat page right here and you can see my
URL here at the top great so let's go ahead and give this a proper title here so I'm going to go ahead and give this div a class name of padding six so everything is a bit indented now I'm going to add a new div with a class name of flex items Center justify justify between and margin bottom of four and then inside I'm going to go ahead and render an H1 element and I'm going to write chat settings and I'm Going to go ahead and give this a class name of text to Excel and
font bold like that so a huge text which says chat settings like this and we actually don't need this classes here so we can just do a margin bottom of four like that you can also put this class directly into the H1 element if you need it so it's the same great and what I want to do now is I want to create my stream service so that I can get the stream model from the database using the user ID so let's go Ahead and create the stream service so going inside of your lib folder
and create a new file stream dserv service.ts and in here let's go ahead and let's import our database I'm just going to change the import to go to slash lib and then I'm going to export con get stream by user ID to be an asynchronous function which accepts the user ID and simply loads the stream using a wait DB stream find unique Where we have a matching user ID and then just return the stream so this is going to work because in our schema here in the Stream uh we have a relation with the user
ID which is unique so only one stream can exist per one user so this will work with the find unique instance here so now let's head back inside of our chat page so app folder uh dashboard U username chat page let's go ahead and turn this into an asynchronous component and first thing I Want to do is I want to get self so a wait get self from the out service and then get the stream using a wait get stream by user ID and passing self. ID like that and if we don't have a stream
we're going to throw new error here stream not found like that great so if you have everything properly in your database you should not be getting absolutely any error here instead it should just load chat settings without any errors like it is on my screen uh Great so what we're going to do next is we're going to build a component called toggle card so let's go ahead and first add one component which we're going to need uh from shat CN so you can actually shut down your web hook and grck so I'm going to close
everything and I'm even going to shut down mpm runev you don't have to do it but I will shut it down and do npx shat CN UI at latest add switch like that so that's one of the components we're going To need here and now it's installing the switch component great let's do mpm run Dev again make sure you refresh your Local Host so it's up to date and we're now going to create toggles to change this properties of the stream model so is chat enabled is chat delayed and is chat follow only so we're
going to create the functionality for that so let's go inside of our chat page here and outside of this div which is wrapping the H1 element let's create uh A new div like this and inside of here uh we're going to go ahead and give it a class name of space y4 and then we're going to render toggle card here and we're going to be reusing this toggle card three times for each of our properties so is chat enabled is chat delayed and is chat followers only right so we don't have to create three different
components instead we're going To create one reusable component which is going to modify a specific field so go ahead and give this a property field of is chat enabled that's going to be the first one we're going to do let's give it a label of enable chat and let's give it a default value of stream. is chat enabled and we load the stream from here I made one mistake while I was developing this on my own I wanted to use a property key for this but remember key is a reserved keyword in react right It's
used when you do a map or an iteration over items right so key will not be passed as a prop inside of that component you won't be able to access it so just in case you're wondering why I chose the name field for this prop so just make sure it's field or if you you're doing something else make sure it's not key uh great so now let's go ahead and create our toggle card component so I'm going to go inside of the chat here and create a new folder Underscore components and in here I'm going
to create toggle dasc card. DSX like that and let's go ahead and Mark this as use client and let's export cons toggle card and return a div Google card now let's go back inside of the chat page and now we can import the toggle card from do/ components toggle card and when you save you should no longer be getting any errors and instead you should see the text which says Toggle card just below the chat settings here so let's go inside of the toggle card and now we have to enable all of this props to
be passed here so I'm going to create an interface here uh interface called toggle card props I'm going to give it a label of strings and the value of Boolean and for the Field property we're going to create a type so type field types are going to be a couple of possibilities and the possibilities are only going to be these Three so is chat enabled then we're going to go ahead and use is chat delayed and then we're going to go ahead and write is chat followers only so that's going to be our field types
and then we can pass the field to be field types like that and then when you go ahead here and assign those props so toggle card props make sure you add this and go back inside of the page you can see that in the future when we write Field you can see how it will autocomplete to only control one of the three elements because that's the only thing we enable for this component so that's why we did this we could have just passed a string but this way we ensure type safety for our API I
mean our server action which will receive this uh great so let's go ahead and extract this Fields let's extract the label let's give the value a default value of false and let's extract the Field like this and now I'm going to go ahead and give this div a class name of rounded extra large BG muted and padding of six and inside of here I'm going to go ahead and create a div with a class name Flex item Center and justify between and I'm going to go ahead and create a paragraph here which will render the
label and I'm going to give it a class name of font semi bold and Shrink Z great and now below that I'm Going to go ahead and create a div here with a class name of space Y2 and inside I'm going to render my switch component make sure you import it from at/ components UI switch like this so don't import it from rtic and inside of this component I'm going to render a value right so uh if value is true then it's going to say on otherwise it's going to say off and let's go ahead
and give this a couple of properties so uh I'm going to give it an uh check Property of value for now that's the only one we can give it now and now as you can see we have a nice little uh toggle here and we cannot click it yet but we're going to go ahead and enable that in a second so what I want to create now is the server action to actually update the stream so let's go inside of our actions folder and create a new file stream. DS let's mark this as use server
that's very important and now let's go ahead And let's import revalidate path from next cache and let's import database from at/ Li database let's import the stream uh from Prisma client and I will just move it here at the top and let's also import get self from uh lib out service like this and now export const update stream here to be an asynchronous function which takes in the values and it's going to use partial values of stream like that and now let's go ahead And wrap this inside of a try and Cat block and let's
throw new error internal error in the catch great and if we are inside of the tri block first let's attempt to get self using await get self then let's attempt to get self stream from await DB stream find unique or we could use that lib which we created but let's do it like this for now and let's do user ID to be self. ID if we don't have self stream it means There's nothing for us to update so throw new error stream not found like that and now let's go ahead and create valid data here
so name is going to be values. name and we get values from our props here and we know that it has name because we're using the stream model but only partially so only some values will be able to be updated here and we're going to Define which ones using this object so name then is chat enabled which is going to be values Is chat enabled then is chat followers only is going to be values is chat followers only and is chat delayed is going to be values is chat delayed so just make sure that all
of this are matching right great so these are the values which we're going to allow the user uh to update from the stream and then let's simply do cons stream to be await database stream update where ID is self stream. ID and data is simply going to Be a spread of valid data like this and now let's revalidate a couple of paths here so let's revalidate the path slash you self. username SL chat let's revalidate the username entirely and let's also revalidate the uh homepage where someone else will be looking at the stream so those
three and simply let's turn stream at the end great so this is our update stream server action uh you can of course always confirm your code with my GitHub if you're having any doubt now let's go back inside of my app folder dashboard U username chat components toggle card here and let's go ahead and import a couple of stuff so I'm going to go ahead and import tost from soner I'm going to go ahead and import use transition from react and then I'm going to go ahead and import update stream from actions stream like this
and now let's create an on change function here so I'm going to Write const onchange to be an asynchronous function and let's go ahead and write start transition and we actually don't need to make this asynchronous so just a normal function start transition inside and let's do update stream and we're going to update this specific field so make sure you wrap it inside of square brackets because this means the actual field right and you can see how it Already throws an error here because that's not part of the partial stream values right so let's go
ahead and make sure that this is inside of square brackets and then we write field and then you can write stuff like this and this is completely okay because field field can only be a part of is chat enabled is chat delayed or is chat followers only which matches the partial of the stream because it has those three values right here you can try and if you Go and write something else like ABC you can see that we have an error because that's not part of the stream great now let's go ahead and add do
then here and let's write toast. success chat settings update and let's do catch post. error something went wrong like that and uh I just realized that I didn't tell you where I got this start transition from so my apologies yes There is a start transition from react but that's not the one that I wanted to use my apologies so remove this for now and instead go here and add cons is pending and start transition from use transition like this my apologies uh all right and now let's go ahead and assign this unchange here to the
switch element so let's give it a property of unchecked change to be on change and let's also give it disabled of is pending like that and now What I want to do is also open my terminal and run npx Prisma Studio here so make sure this is running so you can see the result in the database so refresh this I'm going to open this in the new terminal and in here I have two streams right so right now I'm logged in as Antonio which means that the stream I'm looking at is Antonio's stream and right
now it says is chat enabled is true so let's go ahead and click on this and what should happen is this should Turn off like this and it says chat settings updated and if I refresh my Prisma schema I should be seeing that for Antonio's stream is chat enabled is now false great and now I should be able to turn it back on again so now it's pending and then when it gets updated and revalidated it should go back to this one I'm not really sure why is it not going back so let's go ahead
and see if uh we did oh because we hardcoded this To fall my apologies what we should hardcoded is to the opposite of the current value like this in the own change my apologies for that let's try this again when I click here now there we go now we can switch between uh on and off and one thing that I want to do is I want to go ahead and change this switch component to look a bit nicer because it's almost invisible when it's turned off so let's go and Close everything here let's go inside
of our uh components UI switch component here and in here what I want to do is I want to change uh the colors a bit right so inside of this first one switch Primitives do root uh I believe that we can control the color of checked by finding this data and then in square brackets State checked and let's move it from BG primary to BG Emerald 500 like that and let's go ahead and change This one to not be BG input when it's unchecked but instead be BG white sl10 like this and now what we
have to do is we have to change the color of the thumb here as well so let's go ahead and change this from using BG background to use BG primary like this and there we go now our button looks much nicer as you can see now when I turn it off it it should be visible still uh let's go ahead and try see why this is not working so this is State Unchecked here and it looks like BG oh I wrote BG BG white so it should just be BG white like this and there we
go now it's visible when it's off and when I turn it on uh it's back here again great so now we can just easily copy and paste this component a couple of times for all of our uh other fields right so let's go back inside of our chat page so app dashboard username chat page here and we can copy and paste this two times so Make sure you have three instances of this the second one is going to be is chat delayed and let's change this to be delay chat and the last one is going
to be is chat followers only and this one is going to say must be following to chat like that and let's go ahead and try this three out now there we go so we have enable chat this works oh looks like it's not exactly working let's go ahead and see why so is chat followers only is chat Delayed let's go ahead inside of the toggle card to debug why this is happening here so we have our Field property and let's go ahead inside of the update stream action to see what's going on here so we
get the values is chat enabled is chat followers only is chat delayed so what I'm going to do is I'm going to cons log the valid data here to see what's going on so I'm going to open my terminal and I'm going to be inside of where I'm running npm Run Dev to debug this so it seems like whenever I turn one on every everything else seems to trigger as well even though they explicitly get undefined so I'm not sure why they're changing their values so let me check inside of the actual database to see
what's going on here so in my Antonio's stream is chat enabled is false is chat delayed is false and is chat followers only is false oh okay okay okay I think I know what's going on here we can remove this Console log here it's because I don't pay attention so go back inside of the chat page. CSX and you can see that for the value I use the exact same one instead of using the appropriate ones so for this first one it should be is chat enabled for the second one it should be is chat
delayed and for the last one it should be is chat followers only so make sure you modify the values of each and every one of them let's go ahead and refresh this let's try this again when I Click here only that one is enabled when I click here only that one and when I click here only that one and in my Prisma studio if I refresh now all of the values for Antonio's stream in my case should be true except of course is live so is jet enabled true is chat delayed true and is chat
followers only is true perfect so this is working what I want to create now is the loading skeleton for our toggle cards so let's go ahead inside of the toggle card Component here and let's go ahead uh and let's import the skeleton so go ahead and import skeleton from components UI skeleton and then let's go to the bottom here and export on toggle card skeleton here and very simply we're just going to return a skeleton component with a class name of rounded extra large padding 10 a and width of full like this and now what
I want to create is the loading page for our chat so in here In the page we call these two items so we cannot wrap this page inside of suspense because it's in the root page so what we can do is add loading. CSX which is going to act as our suspense around the page so create a new file on the same level as page called loading. CSX and in here we have an error now so we can quickly fix that by adding chat loading like this and let's add a div loading like that so
make sure you do an export default and now I think for a Second there we go you can see how it says loading for a second here and now we're going to replace that with our new placeholders so let's go ahead and let's import the skeleton component from components UI skeleton and let's also import toggle card skeleton from at slash components _ components toggle card like this and let's give this div a class name of padding 6 space y4 let's go ahead and give this a skeleton component which is Going to represent the chat settings
label right so let's give it an H1 and a width of 200 pixels and then below that open up a div with a class name of space y4 again and render three instances of toggle card uh skeleton like that and now our skeleton should look much better so when I refresh here well it's very hard to see but you can see how for a second there is a nice loading skeleton here and it's especially Visible when we go from one page to another there we go you can see how we have a nice loading State
now it's cached of course so it's much faster but if I refresh from here and then go here there we go you can see how we not have a nice skeleton great so now that we finished our chat settings here uh what I want to do next is I want to go ahead and create our keys so I'm going to leave the community for last what's going to be inside of the community is An ability to unblock someone but we're going to do that later because we have to create a whole table for that right
so instead I'm going to go ahead and create Keys which means that we are finally starting to create some ingresses here and some live stream connection great great job this marks the end of part one of this tutorial visit the link in the description to get to part two which is of course completely free or simply go To my channel and find part two of twitch clone