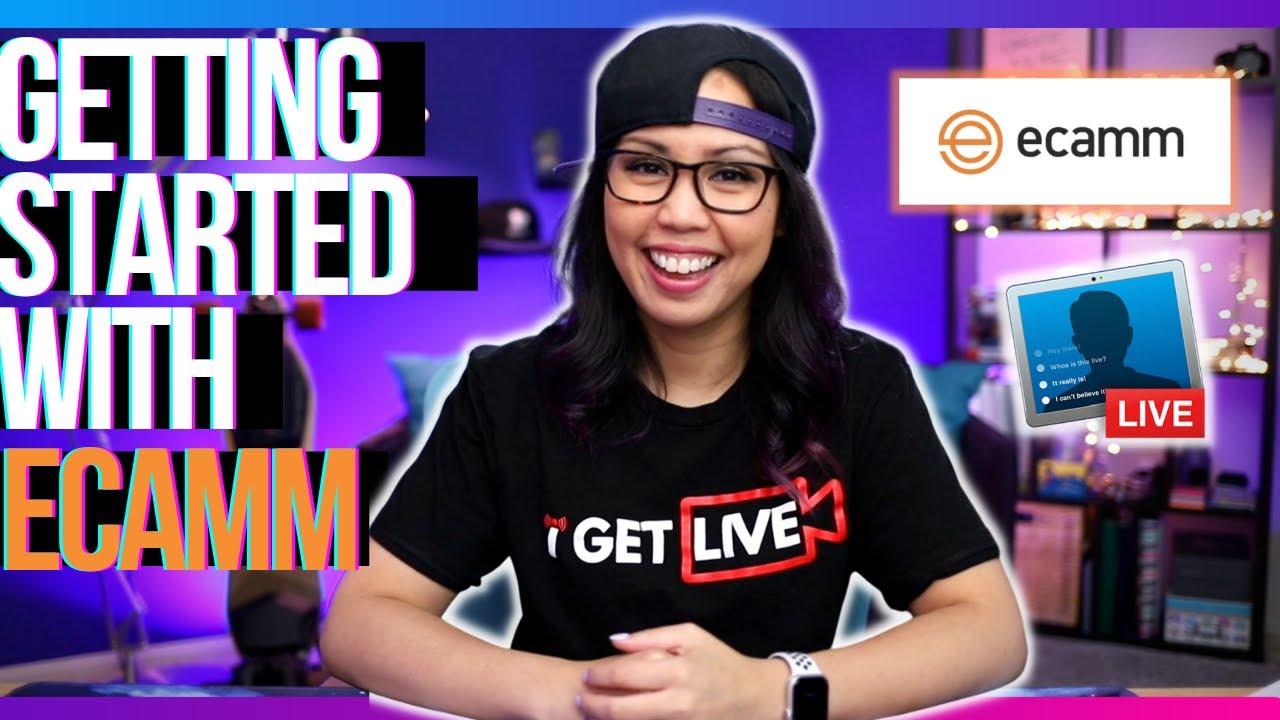
so just downloaded ecam live or maybe you've had it for a while but every time you open it up you're looking around like what is all this and what do I do with it don't worry I've got you covered ecan fam what's good y'all in this video I'm giving you a high level overview of ecam lot and showing you the very first things you should focus on when you first open it up so think of this video is like the introduction to ecam 101 okay we're talking the very Basics so by the end of this
video you'll know exactly how to get started with ecamm and you'll definitely be less intimidated so you know how when we were kids seeing our parents drive it was so intimidating with all the buttons the knobs the pedals and gears but we learned how to drive and we realize it's not even that much stuff in here we're not using everything all the time but it's there when we need it and we know where everything is and what it does so think of ecam like that and to be honest most of it is set it and
forget it all right let's go so if you're brand new to ecamm you can use it to create some really dope shows and videos whether you do them live or pre-recorded but if you're not quite ready to hit the main stage you can practice just by recording into ecam and honestly most of the videos that I record using ecam aren't even live so let me show you around so when you first large ecam live it'll probably look something like this so there are tons of different windows and it may look intimidating but we're only going
to focus on a couple things okay so what I'm going to do is I'm going to go to window I'm going to hide all utility windows or you can just use the shortcut so the first thing that you're going to need to do is connect your camera and microphone so I already have my camera connected I'm using a Canon R6 and it's connected to my computer via Elgato cam link 4K so depending on the type of camera that you're using you may even be able to connect it via USB so once your camera is connected
you'll see it pop up in the mini camera switcher down here so as you can see I have Cam link 4K which is the camera that I'm using right now then you want to connect your microphone so I'm going to go up to window and then go down to sound levels and see what microphones we have so I already have my microphone connected via Scarlet solo USB depending on your microphone you may be able to connect it directly via USB or if you have a more professional microphone you'll be connecting that via an XLR cable
into some sort of audio interface but once you have your microphone connected you'll be able to select it from the available options so as you can see by default it'll be the MacBook Pro microphone in this case because that's what I'm using I can use my iPhone microphone if I wanted to but in this case I'm using the Scarlet solo USB because I have my short sm7b connected to the Scarlet so as you can see as I speak the levels are shown here so once your camera and microphone are connected you want to just get
your picture looking the way you want it okay so go up to window and then go down to camera effects and you can also get to this right here you can also hide your sound levels using this button so I click camera effects and I'll expand this alright so I love this panel if you guys have seen me on the channel you know I use this panel a lot so I don't really use a green screen too much but if I did I would just toggle this one and then add my image there but I
do zoom in pan so I'll take this off boom but I like my shot to be a bit tighter so I'll click zoom in pan and then bring it in like this so it kind of cuts out the lights you saw in the corner of my shot now I'll adjust the picture settings so this is how my shot looks directly out of the camera but I'll just go through and kind of eyeball these different settings and see how I like it so this is exactly how I like my shot to look and I don't really
mess with any of these but you could if you wanted to mirror your shot you can do black and white or Superior tone I'll take these off I like it looking just like this so now that you have your camera looking the way you want it you can actually practice inside of ecam by just hitting this record button here but hey real quick before we even do that you just want to make sure that your virtual camera and virtual mic are installed so go up to Output virtual cam make sure you click install and virtual
mic install so this will allow you to use this actual camera shot inside of applications like Zoom Google meet Microsoft teams Etc we have tons of videos on the channel about how to use the virtual camera but go ahead and do that now so as you can see there are three modes we have stream mode for live streaming record and virtual cam so once your virtual camera is installed you'll be able to toggle this on right now I just want to record by just hitting this button right here so I'm going to hit record and
once you're done you can hit show file and your files will come up so this is what I use to record all of my videos directly to my computer including this one without having to use memory cards and without even going live but of course when you do go live your videos will automatically be recorded to your computer as well so now that you have your camera and your mic connected I'm going to show you a couple more things all right so I'm going to close out your camera effects I'm going to show you scenes
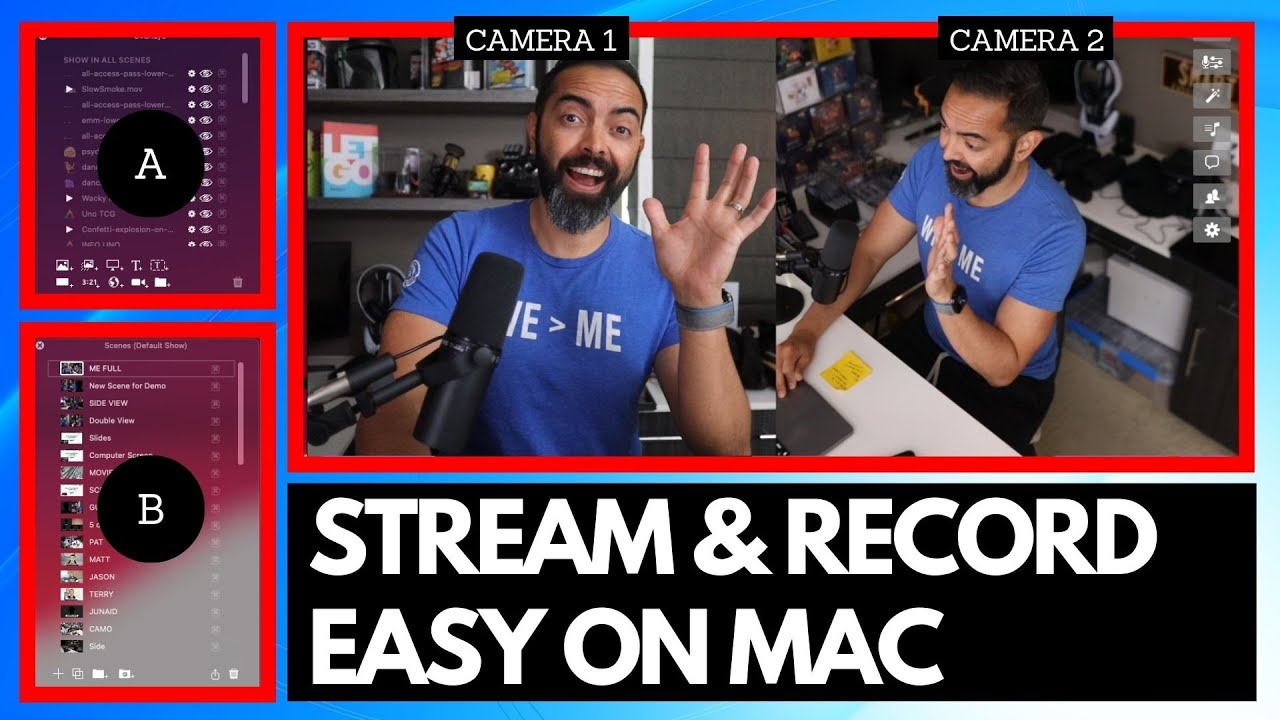
so what are scenes I want to show you so go up to window then go down to scenes and the scenes panel will pop up here so this is considered the scene this is considered a scene and this is considered the same so let's say you have a show or you just want to have some branded frames or graphics on your screen that would be considered a scene okay so you're able to easily switch between them depending on what is going on on your show or you're recording so as you can see here I have
myself and then I have a placeholder for a guest and here I have myself and then two guests shout out to Doc and Kelly who I've used as placeholders here so these scenes are created with what we call overlays so overlays are essentially Graphics that you add on top of your image for example if I move this overlay away you can see what's going on underneath right but let me put it back and adjust it accordingly so they're layers of Graphics that you add to create these scenes so there's an overlays panel if you go
to window overlays so here's my overlays panel you can also get to it right here in the ecan window with this button here so in this scene I have this three person overlay here so if I remove it you can see I have these two images sitting there so I can adjust them accordingly by remove dock remove Kaylee it's just me but I'll add this back as you can see that layers and then my layer is all the way at the bottom so if I move this up above this three person overlay you'll see my
box just sits on top but we want it below so I'm gonna move it below boom there I go so now I fit nicely within this box so I'm going to show you how to create these scenes from scratch okay so I'm gonna go to the scenes panel here and I'm going to click new empty scene so here I am is showing my MacBook camera here but I'm going to click cam link 4K and here is my folder so I move this up so all I'm going to do for this first scene is I'm going
to drag this Marshall main overlay right onto the screen boom so this one is done so I'm going to call this Marshall so now I'm going to create one with me and a guest so I'm going to click this new Plus but this time I'm going to do Source blank so down here in the overlays panel I'm going to click this new camera overlay button then I'm going to click this pencil icon so I can change this camera view so I'm going to go for my FaceTime HD camera to this cam link 4K hit it
again because I actually want to change the shape of this to custom so I can adjust it like this but I want to go ahead and add this overlay to it boom so I'm in the wrong spot so I need to move myself over here and adjust it accordingly now I'm going to add another camera overlay for a guest the new camera overlay hit this pencil icon and then go down to video Source guest one so you have to be a pro member in order to get interview modes in order to have guests so I'll
hit this pencil icon and then go down to shape custom doesn't have to be perfect so you may notice that this box is above the overlay so if I go to the overlays panel I just want to drag it below the overlay that I created all right so now I have the placeholder for the guest so I'll name this me plus guest so this is another example of a scene it's a countdown scene so here I just have the countdown graphic overlay which I'll show you boom is the same thing I just put it on
top but I have a countdown overlay here so in order to add a countdown overlay delete this I'll click this countdown overlay button right here so you can change the look and feel of it then add it so whatever font you have installed on your computer they will show up inside of ecamm so I have the duration set to 10 minutes but of course you want to set it to something more reasonable like less than two minutes okay or depending on if you have a song or something playing you would just match it to the
duration of the song so that's exactly what I do for Marshall creates so I'll jump back here and we'll create one more Scene really quickly so what I'm actually going to do this time is I'm going to go to me plus guest and I'm going to duplicate this scene so I'm going to do command D to duplicate it and I'll do me plus two and I'll delete this overlay from the top okay so I know I'm going to want myself and I'm going to want one guest I'm also going to want another guest so I'm
going to add this overlay first boom so as you can see it looks a little weird but I'm going to move myself into the corner and I can actually drag this cam link to the top layer to make it easy to maneuver boom that looks good now I'll go ahead and drag myself underneath of the overlay for this guest overlay I'll bring this to the top move this over actually duplicate this by hitting option clicking and dragging this over but now I don't want two of the guests to be the same so I'll click this
pencil icon for this one I'll do guess two so now if I have two guests they'll be assigned guest one and guess two but you can see the lines here so I'll just make sure I drag this overlay above all of these layers and overlays panel boom so now I'm all set up you'll see these lines here but it's just to show you the bounding box of these two overlays and check this out y'all if I wanted to zoom into myself I will go to my camera effects select my cam link I'm going to zoom
in just my framing gotta love it and I said y'all now I have fully functional scenes ready to be used go to this regular one hit the play button myself and one other person see here I'll adjust my framing go back to my cam link zooming pan zoom in a bit I move myself over and now I'm centered that way I don't have to move and shift my chair my microphone depending on the scene and that's it y'all as you can see it's literally easy peasy that's just a brief overview of how to connect your
camera and your microphone and then how to set up some simple scenes so you can start using ecamm just like I said at the beginning of the video don't feel pressured to go live go ahead and hit record and just practice and see how you like it get comfortable with the overlays and the scenes so of course you could either have a designer create your overlays for you or you can create them yourself using something like canva we have videos on the channel about how to do that so once you have your overlays it's literally
drag and drop so go ahead and play around with it this video was helpful let me know drop a comment hit that like button and don't forget to hit the Subscribe button on the way out see you guys in the next video peace