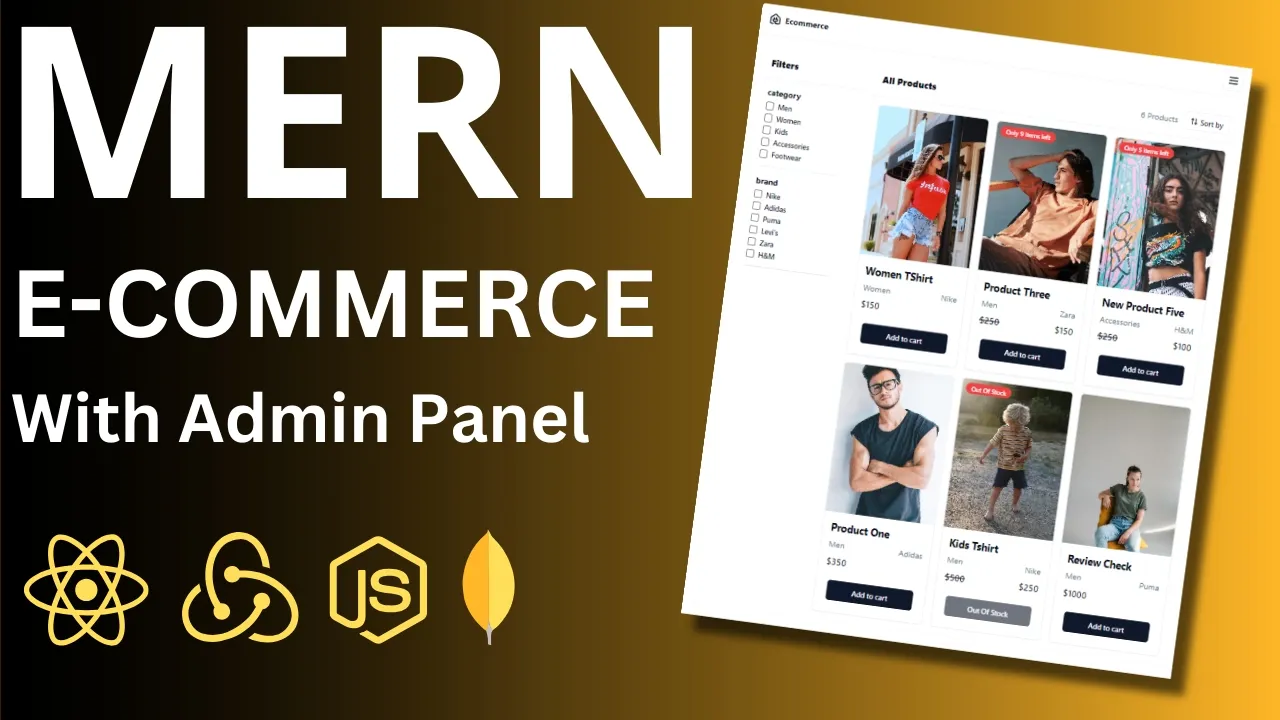
Hello and welcome everyone so in this particular video we are going to implement this awesome looking industry level e-commerce application from scratch using mon we will be using react Redux toolkit nodejs Express and mongodb and we are going to implement lot of features we also will be having a completely separate admin panel where admin will be able to manage products create a new product and manage order Status in the shopping view we are going to implement product listing checkout page and also Paypal payment indication I'm pretty sure that you'll be learning a lot of things
in this particular video so what we going to do right I will be giving a completely demo in each and every details that all the features and functionality that we are going to build and after this we will be getting started so let's get started and good luck all right so let's go through with The demo in details so as you can see that this will be our shopping view homepage so we will be having two view one will be for the normal users and then one will be for the admin view so let's start
with the admin view first so for admin user there will be only one super admin so super admin can access to the dashboard products and orders in the dashboard super admin can basically upload images and whatever image they will upload you can see that these Images will be reflected in our homepage of the shopping view then admin user can add a new product so let's say I'll try to add a new product here for the uploading image we are going to use cloudinary so here let's say I'll select an image let's select this one and
I'll give this one name as kids insert okay and let's give some this description we'll give some category we'll give some brand price I'll give 500 and sales price I'll give 250 and total stock is Let's give this one as five now I'll add this product so this product is already added now let's go to our shopping View and here you can see that we will be able to obviously s by category and by brand and whatever you will basically select here it will automatically go to the product listing page and it will uh like
apply the filter and based on that you'll be able to see the filter products so first let's go to our all products and you can see that just now We added this particular product so this product is now visible and you can see that you are getting this Banner this for this product only five item is left okay so now here you can see that on the left side we'll be having the category filter and on the right side we'll be having the sort so you'll be able to sort using price and also using title
okay and for category so let's see if I apply for men it will automatically filter you can see That for women for kids and other things it will automatically filter all of these okay and similarly it will be for brand also it will filter okay now here let's uh see one more thing and that is the details view so the first thing if you click on any of the product you can see that the details view will open on form of this dialogue and here you'll be able to basically give the product and U sorry
you will be able to give the review for This particular product but there is some certain condition that I'm going to discuss later so here you'll be able to add a new product so let's say I'll add this product this product product is now added and this is also updated here let's add one more time four five and now see if you try to add one more time you can see that only five quantity can be added for this particular item so now you'll go to the card page and from here you'll be able to
go to the checkout Page so from here you can see that we'll be having the in the checkout page we will be having the address section and the right side will be showing the card page and then you'll be able to check out using PayPal if you don't have any address you also will be able to add a new address from here or you can directly go to the account page and from here you'll be having the orders and the address section all right now let's go to our checkout page and here you can See
that you try to check out so you need to select any address to proceed so let's select this address and now I'm going to click on check out with PayPal so now it will automatically trigger the PayPal uh payment and for this one we are going to use the sandbox and then all else we can directly continue to review because I already logged in that is the reason we are showing this but so now it will go autom go back it will process and if this is successful you Can see that payment is now successful
and you will be able to go to the view orders and once you'll go down you can see that the payment is now confirmed and some of the payment will be getting rejected or will be in the pending State on click of this you'll be able to see the view details and now if you go to the admin View and let's go to the orders and you can see that scroll down you'll see this is the latest order just now we placed click on view details and Admin will be able to update the order status
let's do this one to delivered and now let's click on update order status you can see that this is updated here and if you just go back and refresh this page you can see that the last part will be automatically updated to delivered okay so this is all the feature now let's go to our products page all right now you can see that in this this product we already just now uh bought so now this product is already Out of stock and if I now click here and you can see that I'll be able to
review it because I bought this product so that is the condition so let's give a five and I'll give awesome product and let's submit and you can see that now you are able to add this product and you'll be able to see the review okay also we have implemented the feature of global search so if I go to the search page so you'll be able to search product using title description category and brand let's say I'll search for something product and you'll see that automatically data will be coming here and from this page also you'll
be able to see the details you will be able to add cut and everything all right so now this is all the features that we are going to basically Implement for this particular project we will be using lot of things like react Redux toolkit for managing inate deln CSS SN and lot of other features so this will be a very long video so take your Time and then try to implement all the things and also one more thing uh like I've given lot of effort while creating this video so if you like this video please
give a like and comment down so the target for comment is 1,000 comment and 10,000 likes and I'm pretty sure that you'll learn a lot of things so let's get started and good luck all right everyone so let's get started so there are lot of things that we need to do definitely so first we will basically Install all the packages that required for this particular project and then after that we will start uh step by step all right so what I've done right I created a folder so first thing we will be creating both our
client site or basically our react project so for react we are going to use V and also the server site configuration and also we need to install the dependencies so what I'm going to do right so first let's copy this path and I'm going to open a Common line and first navigate to this path okay and then what we are going to do right so here uh let's create a folder first what I'll do right uh I think we already have project so let's create one more folder here and I'll give this name as M
YouTube CES okay and then let's navigate to this folder YouTube CES and then I'm going to open this one in vs code and there only we are going to do everything step by Step so now first thing uh I think what I've done right I'm going to I'll be using the following structure so that it will be side by side and it will be easy to understand so let uh keep it like this okay the first thing we will create two folder here so first one will be our client site and then second one will
be our server now again as I already mentioned right so whatever things that we are going to learn all the concepts and everything we will be learning by Using example and that way it will be easy to learn all the concepts right so first thing what we need to do right so first let's uh install all the packages that required for This Server now I already have some packages here that I'm going to discuss that what are the basic things that we need so first we need uh bcrypt JS so this is basically to has
your password and everything then we need Cloud inary so this we are going to use for our image upload using malter Okay then we need the cookie Purser course. NV uh do not n. EnV then Express Json web token mongus for our mongodb database uh connection so these all the things we need but before that whenever we will create any project on the back hand side or basically you you will be creating a Express server so what we going to do right we need to basically create our first package.json so how we are going to
do that so first I'm going to open this folder in our terminal okay And now here what you need to do right you need to basically create some configuration and how we are going to do that so first there is a shortcut that it will automatically create and that is npm in it hyphen y so if I hit enter right it will create all the the configuration or basically package. jsn automatically but here if you just do npm in it now here it will ask you some of the things that you basically can configure so
first it asking for package Name so I'll keep this on a server then version you can keep uh like 1.0.0 as it is description you can give some description entrypoint index.js so later you can basically change this one that is also fine and then we are having like test command G repository you can give keywords author you can give my name let's say I'll give my name here okay these things you can configure license you can keep it like this if this is okay just do yes and hit enter now you See that there is
a package.json is created now what you can do right you can change a couple of things like main what are the things that you uh like which file will be your main what are the scripts that you need to run and all those things now the first thing what we going to do first I will install some of the dependencies that are record right so start with so I'll do npm install and obviously you need to go to the server folder and inside the server folder you Need to create so as I already told you
we need our bcrypt J so let's copy this from here because see some of the things I will go little first if you're not able to understand then you can basically directly comment or you can join my Discord server also so there uh people basically will discuss and if you have any doubt I will also able to help you or you can also message me directly on LinkedIn uh sorry in LinkedIn or Basically on Instagram if I get time I'll be able to help you but the reason why I will go little fast because in
this project we are going to do lot of features once you'll start right you'll be able to understand but we will be doing everything each each and everything step by step but I'm going to go little first if it is difficult to understand you can basically decrease the playback speed on YouTube or you can watch the section multiple times okay And that will be very very helpful so these all the things that you can do next I install Cloud inary so this is for our image upload right then we have our cookie parser give space
cookie parser then we need our quarts then we have EnV okay then we have Express we also need Json WB token we need mongus we need malter for basically we will be using both malter and Cloud to Save our image in the cloudinary uh space okay and also you need node one and also I think this will be more than enough so now what you can do right hit enter now you can also install all of the this node one as a de dependency but this is fine also one more thing I want to mention
like this project will be a beginner uh point of view right so we are not going to do everything very difficult some of the features and Everything I create this video in such way that it will help you in so many ways and after completing this course you'll be able to understand it okay now what we are going to do right see another thing is that whenever I'll be posing this code to GitHub I'm not going to push the node modules right because we have lot of dependencies and everything and there is no point of
doing that because your package.json will hold all the configuration and Everything that is needed so for this one what we need to do we need to create a g ignore file to tell that what are the things I don't want to push whenever I will be deploying this application or push this code to the G so here what you can do right just create a git ignore file okay and in this file what you need to do basically first you explain that I don't want to push the node module so you'll give node hypen modules
so this I don't want to push Also let's say if you Created an EnV file that also I don't want to push and also if there is a dis folder that also I don't want to push so these three things is the first thing that we needed all right so this configuration is done now next thing what we need to do right we need to basically create our main server.js so from where it will be our entry point correct so here what I'm going to do inside this uh let's do one thing let's create one
let's create a file here so I'm going to create server.js okay so this will be your main file from where or this can be your entry point now what you can do right you can go to package.json and whatever name that you have given you can basically change it so in our case it will be server.js so now here first thing we need to connect to our database but to connect to your database what are the things that we need to do first we need A database setup and also you need to create our Express
right so those things we are going to do first let's go to our mongod DV and here what I'm going to do right I'll create a new project so first you need to just log logged in in your mongodb Atlas once you'll come here you need to basically go to I think if you scroll down you'll get a new project so click here and then give any name so what uh we can give like we I will give like YouTube mon complete course 2024 and here you need to I think you can select like whether
this is application or not something like that and you can also select some value and click on next right and now click on create project now this will take some time now quite a few things you need to do first you need to create a cluster so what basically This does right this will create a configuration and I'll show you that how we are going to do that and also you need to do some certain things like how you can do network access and those things you need to WID list your current IP so now
first create a cluster so click on create I can see that here basically you can uh select the option so obviously we are going to do for free for now keep uh you can give the name and what Provider that you can do and what is the reason okay so for this one I'll keep AWS and I I don't want to change this one so I'll keep it like this and here you can also keep some tag like whether this is application or something and some value you can give whatever but I think it's not
that much important now you need to uh click on create deployment so now what we'll do mongod will start deployment and it will do all the configuration and everything right So click on create deployment now this will take some time okay now I need to do something let me do it all right so now they will deploy the changes this will take some time first thing what you need to do see here you need to add your current IP address so that also I'm going to show you how you can do that and you need
to create a database user and this will be your admin user so you have the username and you have the password so I'll copy this And also one more thing please try to create your own you own username and own password don't use my uh URL okay I'm not going to post it also but I highly recommend don't use this one try to create your own I'm going to give 2024 as my password and now click on okay first you need to create the database user so uh create here now click on choose a connection
here you can see that we have this mongodb for vs code and this is the exact thing that we need So first I'm going to okay now this will take some time let me do one thing I'm going to close this now let's go to network access now here you need to go sometimes you might face some issues right and if you see there are some timeout issues and everything that means your mongod is not getting connected so what you need to do first you need to come to this network access and you need to
check whether you have WID listed your current IP address or not if not You need to add it but what I'm going to do right for this one I'll click on IP address and I'm going to do allow access from anywhere but you should not do this one okay so I'm going to do this because we are doing a like kind of tutorial project so that is the reason so I'm click on allow access from anywhere and I'll click on confirm now this will also take some time so till this is done right there are
quite a few things we need to do first uh we will Basically uh configure our front end now here what I'm going to do right I'll remove this one this client folder I'm remove and then I'll do everything from scratch so remove this now I'm going to open our this one in a terminal now if you notice that we have a uh server folder now what I'm going to do I'm going to create a client folder and for this one I'm going to use vit so now first come here and you need to use this
npm C vit latest so copy This paste it here and now it will ask for the project name now again you can give any name you want because we are creating a m so we have a client side and the server side so I'm going to keep this on name as client so I'll use react we'll use JavaScript and now once this is done so this will basically see how first this is it's already created all the config but you need to install all the packages so if you go to the package.json you Have some
of the things like dependencies and everything so those we don't have correct so here now what I'm going to do so first go to client folder so I'm do CD and then I'll do client and now I'm going to do npm install what this will do this will install all the dependencies and everything that is recorded and after that I'm going to install our Tailwind CSS and also we going to use sad CN for our component Library so both I'm going to uh install Now if I go here right let's go to our database and
let's see if this is done or not cluster is ready to use now what you can do click on connect and click on mongod D4 database now this will give you a URL and this is the exact thing you need to do but we need to change this this password Here Right with your password that you have created so let's copy this and let's go to our Server.js now here you can create a different folder with database also that is fine but later we are going to modify all of this but now I'm going to
start everything from scratch and line by line that what are the things we will do so first we need to create a Express server right now to create Express server you need to create app so first thing what you need to do always you need to create your app and this is our app and here I'm going to Use express but we need Express right so first we need to import it so loon Express and this will be require so we need to import Express now this will automatically create an express application right and this
is the top level function exported by the express module now what you need to do whenever will run a see when application will run it will run a particular Port right just like your client side Application run on a particular Port your back end or server will also run on a particular Port so what I'm going to do right here so we do const and here I'm going to do port and I'll do process. EnV right and do Port so if this is Port is already there it will take from that or else we are
going to keep this on Port as 5,000 so that means your backend server will run at 5,000 this is very important now next thing what we're Going to do we also need our Mong so here I'm going to take mongus and I'll do reel so we need our mongus now what you need to do you need to create a database connection now again I'm repeating here I'll also mention that you can create you can also create a separate file for this and then import it import or use that file here that is also fine and
that is better way but I just want to Show you what how we are going to do that see the first thing is that mongus will help you to connect this server with your database right because you need to save your information to database so first you need to use this mongus and this will give you this connect method now what this will does this will take the URL of this database URL that we have we are having here it will return a promise right and once the promise is getting resolved that means You have
successfully connected your server or basically your server side database connection is successful as simple as that so I'm going to copy this from here now here I'm going to paste it now again that part I'm going to do later for now so we we can create we'll create NV file and then we'll use all of this in EnV file but now I'm going to copy this and then instead of this DB password you need to change with the password and my I password uh for me I Think the password was 2024 okay save it and
after this what you do this will return a promise and then we'll simply log here that mongodb connected all right if there is any error so we are going to log that all right so this is done so now that means what you are doing right first you are connecting to your database you created a app which is invoking the Express and now what we need to do we need to do a couple of things so first thing we need to use here the cookie parser so that will help to parse the cookies that we
are going to use then also we need to configure some of the Cs related things and that is very important or else you'll get some error okay CS related error so here I'm going to do right so first I'm going to use our cookie parser this also I'm going to do reer this will be your cookie parser Also I'm going to need our cords which will be require cords so both the things we need after this I'm going to do so this app will give you some property use property right and this use property you
can basically mention some of the things that what are the things that uh this app is going to use as simple as that now here we are going to configure our CS now what we are going to configure in Course right so this part I'm going to show you but before that we need to go to client now see how I'm creating so that it will be easy for you to understand like how things are connected with each other so now what I'll do right so let's go to our client I think client I think
it's already done right okay node modules it's already done so now what I'm going to do right this client I'm going to run in npm run Dev and see what will happen So this will run on a port and if you notice the port is 5173 so let's open this one so that means your client side project is running on 5173 and this is the thing that you need to mention to your CS that okay whenever I will be running I want to run my client side on this 5173 port and this is the thing
that you need to give your origin here okay so this is your origin then you you need to mention the methods That what are the methods you want to use so we have get we have post we have delete and we have put right and after this you can also mention some of the headers that you are going to use so allowed headers and here you can basically mention all the things like we are going to use content type we are also going to use authorization we are going to use cash control right and also
we going to use expires and also we going to use pragma Now I'm going to discuss all of this why we are doing all of this and at the end we are going to basically mention that we are going to use credential so this will basically help us in our login and registration part so this credential we are going to keep as true so this will be our course configuration we have added the origin which origin this will use basically what are the methods we are going to use the headers property you can add other
all other properties Also and credentials will be true this credential property after this you are going to tell your app that okay use now you already used the C so now you need to also use the cookie parser okay and also you will be telling that use express. Json once this is done after this you need to run your server but how you're going to run it so to run this one you need to run this server on a port so this port you need to run so this app Will give you a prop method
that is called listen so you are basically telling that okay now all the configuration is done so now you need to listen to this particular port and for us the port will be 5,000 for now so pass the port here and then here I'm going to do right so let's log here console.log and we'll tell server is now running on Port and then I'm going to pass the P here and this is Done all right so now you have created your basic server configuration now we are going to basically do some of the things that
we needed the first thing is that we need to go to package.json and we need to basically tell that which file sorry we need to go to the package.json of server not client that what will be our some of the scripts that we need to add that which will be our start file and those things so here you need to add a start script right so You need to add a start script and which file is your start or entry point if you noticed your server.js is your entry point so you need to mention here
server.js okay and also you need to add another that the de server we are going to use so for this one we already use node mod so we already use node modon so node mod will basically run your uh server continuously you don't need to basically every time if you make changes on the Server side right so you don't need to run the command to get the updated data so node modon will automatically run that for us and here so you've added a de script so you're telling that run this script using node one but
you need to tell that which file you want to run so in our case this will be server.js now let's save it and now we need to run this server and if you run this and if this is successful what will happen right you will be able to see This server is now running and also you'll be able to see that mongod database is connected so now what I'm going to do right I'll open this one and here I'm going to first go to CD server and if you see we have a have our this
script right Dev so we need to do npm run Dev hit enter and let's see what is happening you can see that we are getting that node one is now running the server.js file and you have a now server is already running now mongod is also Connected so both the things are Done Right awesome so now you see that what are the things you have learned that how you can create your main server.js file how you can create Express server and then how you can configure CS and everything and also how you can create a
simple mongod database to use or basically connect your mongod database with your Express server so everything the basic level of setup is done so now we need to go to our client side and we Need to install some of the packages that we needed so now let's go to our client folder okay let's go here so now I'm going to go to client and if you noticed here I already have so we need our Redux toolkit because we are going to use Redux we also need react Redux we need axios right and what else we
need we also need I think all of other are fine ah we Also need react router Dom for routing we need to use that so we'll do react router Dom okay now what you're going to do right I don't save this one let's close this also now I'm going to go here and we are going to install our San configuration right so this is important so for this one first this part we've already done now we need to install our Tailwind so I'm going to copy this and let's clear this and let's Paste it here
now this will install all the Tailwind related configuration and everything that you needed and once this is done we need to create our Tailwind config file so let's copy this one this command and I'm going to close the server for now notice that one file will be created here so if I just paste it and run here you see there will be a tnd config file that will be created so you can see the Tailwind config file is here Right now what you need to do we need to add some configuration because we using JavaScript
here so instead of creating TS config.js we are going to create JS config.js so inside this I'm going to create JS config.js okay now in this file what you will do right simply copy this path from here copy whole thing I'll just minimize this one and paste it here and you don't need this You only need the compiler options okay the the path that you are going to use now let's save it this is done after this what you need to do right you also need to add something on your vit config so let's go
to our vit config file so vit config.js and you need to you can see that it's already mentioned that you are using react as a plugin that is correct so you need to add this resolve property that what are the path that you are going to use because we going to use Absolute path for importing and exporting so that is the reason we are going to use this one so I'm going to copy this and let's paste it here and also you need to import path from path so let's copy here that's it so V
config uh file you need to create now after this you need to run the CLI to install your s CM so I'm going to copy and let's again expand this one and Paste it here now this will ask some queries and once you'll answer all of this it will basically create the component. jsn file and after that we'll be able to use this one so here we we are going to keep this on as no then we have sub default base color will keep this on now here what is your Global CSS file now if
you go here right you have a source and you can see that you have index.css so inside source you have index. CSS which is your Global CSS file if you have this file in somewhere let's say you want to you you have created another folder and you move all of this inside that folder you need to give that path for now in our case it will be source index.css so I'm going to give Source SL index. CSS right would you like to use CS variables yes uh are you using a custom Tailwind prefix no what
where is your Tailwind doc config.js located so it's located here only right twin. config.js so twin. Config.js so you don't need to do anything configure the default UT so we are going to configure it like this so hit enter so where we are going to create our utils inside leave and utils this is also fine are you using react server components no and then now once all of this is done now config right configuration for component. Json so it will create a configuration so I'm going to write here Y and now you can see that
There will be a component. Json is created right and if you see here all the configuration whatever you have done source and everything is added for component we are going to use this lysis and now what we are going to do right once all of this is done we can create our components so for example let's say whatever components you are going to use those components only you will be able to install so that is the advantage of using this s for example if I come here Let's say I want to install a button component
so I can copy this and then what I'll do right I'll just enter this now inside this components folder one UI folder will be created and you'll see that they will automatically add all the components that are basically needed so inside this once this is done now let's see so you see it is installing the button and if I just expand this one there will be eyi and there is a button component is now created okay okay so This is the basic configuration that we needed so now in the next what what we are going
to do right we will be set up our Redux and also the react router Dom so let's do that in the next part so let's uh set up our react router Dom and also let's set up the Redux toolkit before that what I notice right so we are getting some error that uh it's not able to find this Tailwind CSS animate so let's install this in our client folder so we'll do npm install and we'll Paste it now the first thing what we need to do right so we need to set up our react router
Dom so for that we will go to our main do jsx first and I'm going to close this and let's close everything now because we are starting our functionality so we need to do everything step by step so let's refresh this first okay so I'm going to remove the strict mode from here so the first thing we need we need to wrap our app in Browser router right so because this this is our main wrapper component of react router Dom so this is the first step and let's remove this strict mode also now next thing
we need to install our sorry we need to set up our store so for this one inside source I'm going to create our store and here I'm going to create our main Global store now because see as I already told you right so here we are not going to explain all the features of Redux toolkit and everything because this is a monack application so you you should have know how react router Dom Works how you can create store and everything or else this video will be very long and it will be like very repetitive so
here I'm going to create our main store.js okay so what this store does so this store will create on global reducer right or basically it will hold all the application state so now what we need to Do because we're going to use Redux toolkit we need to create all the slices now each and everything will be a different slice for example let's we are doing some login and authentication related thing so we are going to create a Au slice if we are doing something on the admin side we were we are going to use admin
slice if we are doing something on the client view or basically the shopping view we will be creating a shopping slice something like That so here I'm going to create a folder and let's give this on name as o slice right now again this naming and everything whatever you want you can give all slice and inside this I'm going to create index.js now again many of you actually commented that why I usually use this index.js the reason is see the folder name I already given a unique so there is no point of using folder name
as o slice and again give inside this Au Slice. JS either what you can do right if you are creating a file inside this then you can give Au slice do JS I hope you're getting right because you're not creating a folder so you're directly creating a file but but if you're particularly creating a folder with that name then there is no point of creating another o slice instead you can use a index.js right so this is uh one thing now next thing in the all slice we need to create our main uh like setup
all Right so let's start creating our o slice so first thing so let's take this one as o slice so we're going to create a slice so we do create slice here we need to give a name so name I'll give o we also need a initial state so for initial state right so here I'll take initial State mainly we need three things so the first one we need whether the user is authenticated or not let's import it like this we'll import from Redux Toolkit okay so first we need is the user is authenticated or
not which will be false then we need let's say we'll take a loading state which will also will be false and also you need a user information which will be null so for now obviously we not going to do anything but this is just for the setup so we will be having our initial State and then we need to take our reducers right so here we have all the reducers And also we going to add some extra reduc users but for now what I'm going to do simply so here let's say we have a method
which will set our user info so we'll take a set user info which will be State and accent and for now I'm not going to do anything so here I'm going to just do export const and this will be our o slice. accents and here I'm going to pass the set user and at the end we are going to just Do export d default we'll do Au slice do reducer right so now we created a very basic slice here and what we need to do we need to use the slice or basically the multiple slice
how many slice whatever we will be having we need to combine all the slices into one slice and that will create a global reducer so here I'm going to create a const and this will be stored and here we don't need to use or manually combine all the reducer Redux Toolkit will do it for us so here we need to use configure store and here we're going to pass a reducer property now see this reducer is a mandatory property that you need to pass and here you need to specify all the reducer I'm pretty sure
if you already worked with this Redux toolkit previously you'll be you'll be aware of this one and I'm not sure why this is happening but let me import it like this so we do configure store and here I'm going to pass AU so this will be my Au reducer so I'm going to import o reducer from so we'll go to our o slice and then I'm going to pass this o reducer here now how many reducer whatever we be having we'll be adding all of this reducer inside this and this will created a global reducer
or root reducer and at the end we need to basically export this store now we have created our store now this store we need to Connect with our react with uh or basically this store we need to connect with our react application so for this one again what we need to do right we need to go to our main. jsx which is our root file and here we are going to provide that using provider component so this provider component will be using from react Redux and this provider component take a store property and here we
are going to pass this store that we have created so here I'm going to pass Store and then we need to wrap this app inside this and that's it so now this will create all our reducer and everything now the basic react router setup is done and the Redux setup is done next thing what we need to do we will be start creating all our Au related packages uh sorry pages so first thing let's go to our source and inside this Source I'm going to create a Pages folder okay now We will be starting everything
and inside this Pages folder we will be creating a o folder okay now again this all the naming you can give by your own see each and every video whatever I created every time I I tell you basically that don't try to copy everything what I'm writing try to apply your own knowledge and try to do things something differently and it will going to help you okay so let's say for example I'm writing Pages inside o Instead of creating like this you can also create a different structure but at the end the concept will be
same okay and inside this for see each and every pages will have a layout okay now what we are going to do right so for layout we are going to create that layout inside components now see how this will be related so inside Pages we have a o page similarly for components inside this we will be having o component means whatever components that we will be Writing that is related to this o Pages we are going to write inside this folder and and here I'm going to create our layout. jsx now again you can give
this one name as o layout but the reason why I'm not doing because I'm already given the folder name as o right so now inside these Pages inside o I'm going to create two file so one will be our login. jsx and one will be our register sorry and one will be our register. jsx so these two file that we Needed all right now let's start working on the layout first so let's go to layout and now what we are going to do so let's create a function and this will be our Au layout here
we'll return return a div let's take a class name Flex we'll do mean height screen and we'll do W as full inside this we'll take another div we'll take a class name we'll do This on hidden we'll do large Flex we'll do item as Center justify Center we'll do BG as black width we'll do 1 by two and PX will do 12 inside this we're going to take another div we'll take a class name we'll do math W MD we'll do a space y of 6 we'll do text Center and we'll do text primary foreground
inside this We're going to take H1 and we'll give this one let's say we can give any text like welcome to e-commerce e-commerce shopping okay let's take a class name here so we give text for Excel we'll do font extra bold and we'll do tracking tight that's it now let's save it now after this what we need to do right so here we will take another Div and we need to render all the common components or basically the children so this will be our always common and inside this we need to import our Outlet so
what this Outlet will does right sorry this Outlet if you over here right so this will render the child route and here I'm going to give a class name let's give this one as Flex Flex of one item Center justify Center BG background we'll do PX of 4 py of 12 For ASM we'll do PX of 6 and large we'll do PX of 8 now let's save it now obviously nothing will come here because we haven't used this in our app.jsx so now we need to configure all right so now we are going to use
this in our routes so let's go to our app.jsx and here let's remove everything we don't need all of this so I'm going to remove everything from here Okay and now let's remove this also we'll take a div and here I'm going to take a class we'll do Flex Flex column we'll do overflow hidden and we'll do bgs white now here see what will happen you can render all the common components that you'll be rendering in all the pages now there are multiple ways you can do that but this is just to show you for
example let's say you have a header component so you'll render the header component here Something like that and then after this you will be having all the routes configuration for example let's say you want to go to the O page and then you want to go to the soft page or admin view so you need to switch route from one route to another route so for this one we need to use this routes component from react router Dom and inside this you need to use all the routes so what we are going to do first
I will take one route And this will be your route and then here you need to give the path so let's say I'll give a path as o and here you need to give the element so in the element what we are going to do right very very important here I'm going to render the O layout that I have created so whenever I'll go to the O page I want to render this common component so this will be my o layout now if you noticed in this o layout we rendering all the outlet for Examp
example sorry when you go to the let's say SL o/ login that time I want to render the login page but the common will be always same when I'll go to the/ loginregister I want to render the register component right so this will be your children and this is how you'll be writing so you'll be writing a route and inside this route you can write again multiple route so again I'll take a one more route and I'll take one more so what you basically telling that this AU Lay out will be the parent and inside
this whatever you'll be writing those will be child so now here let's I'll give for example path so I'll give login and then I'll go to this layout component and let's go to the pages first so we have a login page and the register page right so if I go to the login page let's create our Au login and let's return a div and this will be my login let's copy this and let's paste it Here so this will be my o register and this will be my register page so now when you go to
app so you are basically telling that go to/ render this component and then go to// login that time you render this o login component I hope you're getting so now this will be o login so this mean this o login is a children of this Au layout out similarly copy this and then you'll paste it here so For register so right we have a register so here I am to render Au register component let's save it now see what will happen see we already getting header and let's refresh this awesome so you can see that
we getting welcome to e-commerce shopping and you're getting register I don't know the spelling is wrong okay let me do it register so register now if I go to the login page you see the left side will be always common see the left side is Common and you're getting this login here that means what is happening this path is always common so that is the reason we created a common layout and what is the advantage the advantage is that you don't need to write this code every time in all the pages correct so this is
how you can create a common layout so now we created our login and register now let's quickly set up some of the things in our admin View and also the shopping view the reason why I'm Trying to complete all the Pages first so that we will be able to complete the authentication part First Once the authentication is done then we need to start working on the admin view so now what we're going to do right let's go to our pages and inside Pages we'll create one more folder and I'll give this on name as admin
or you can also give this one name as admin view so let's give this one admin view I think this will be better to understand then you'll be Having one more folder inser pages and that will be your shopping view that means the normal user will be able to see so I'll give this one name as shopping view okay again for both right again we'll be having the components and for example so here I have admin view so that means whatever components will be related to admin that I'll be creating inside this so we'll create
one more folder here and that will be our Shopping view right so all the shopping related components we going to create inside this now for each and every folder we need to create our layout right so let's create our admin View layout. jsx and let's close everything else for now so here I'm going to create another function and this will be our admin layout okay now here again one very important thing is that try to create all the layout separately and it will be Easy to understand obviously you can create common layout for all your
pages that is also fine but the reason why I'm writing because the view whatever we will be having in this particular project that that is basically different so for o we we are having this particular view for admin we are having a different View and for for shopping we have a different view so that is the reason we creating a separate separate layout now here we are going to return a Div let's take a class name so we'll do flex mean height we'll do screen and also one more thing sorry if you're getting any noise
uh so there might be some noise might be coming from outside okay and here what we going to do we will be having our sidew so we'll be having our admin sidew and then we'll take another div and here I'm going to do class name and this will be Flex Flex of one and flex column and if you notice I'm not going to explain all The CSS while CSS I'm doing little fast because I know these things are very time consuming and the main agenda will be missed so main agenda is to understand how you're
going to create a good project from Scrat so that you will be able to understand the mon concept by creating project right and here you having admin side one now I'm going to having admin header here so this will be my admin header component and after this we'll be having A main and here again what you need to import we need to use the outlet component because again admin view will have multiple child components right and in this main I'm going to take a class name and let's make this on Flex One Flex I will
do BG muted sorry BL muted 40 and then we are going to do a p of four and we'll do MD P of 6 awesome now here you can see that we having admin sideward and also we having the admin header but this is fine let's Do one thing let's go to admin View and let's create a sidebar. jsx and also we going to create a header. j6 and you notice everything how we are organizing because we'll be having multiple pages and files right so it will be like a m if we are not managing
properly so now this will be my admin sidebar so I'll give admin sidebar so here let's return a div and We'll do admin sidebar and let's copy this one and we'll do admin sorry we copy this and we'll paste it here and we'll do this on admin header so this will be header so so now these two we are going to import here right so we having admin sidebar and here we'll be having admin header so now if you noticed if I go to let's say okay we obviously need to import this one so again
we'll go to our Main uh app.jsx right and each and every file that you'll be creating or route right you need to configure it here and this is very very important or else it will not work so now if again what we will do we'll create another route here so we do route and inside this we are going to give a path so I'm going to give SL admin so this is our home admin or basically parent admin path and here I'm going to render which component I need To render I hope you're already getting
so you need to render admin layout correct so this is my admin page and inside these you need to create all the child pages that you will be having so now what I will do again now inside of pages then admin view I'm going to create all the pages that we will be having so first one I'll be creating our dashboard right jsx then let's say we'll be having a products page products. jsx then we will be having a orders page Orders. jsx then we we can create some features page now just to give example
like probably not all the pages we going to write but definitely products page orders and dasboard these three pages will be there definitely okay so now what I'm going to do let's go to this dashboard and create all the file one by one so this will be our admin dashboard let's return a div and this will be my admin Dashboard let's copy this paste it here this will be my admin features these will be my admin orders the reason why I'm writing admin at first because we will be having the shopping orders also right so
that it doesn't conflict for understanding purpose again I'm repeating it's up to you you can give any name you want and this will be my admin products so now we have basically created all the admin related pages so Now what we can do right simply go to our app.jsx and inside this admin route we are going to rout write all the child components so admin view will have a parent which is admin layout and now I'll be having multiple route so first I will take one let's copy paste it four times and let's copy this
one from here and paste it here so this will be my dashboard Sorry so this will be dashboard right and for SL admin SL dashboard so that will be the path for this one which component I'll render I render admin dashboard correct so this will be my products so this will be/ admin SL products and this one I'm going to render admin products similarly this will be my orders for this one I'm going to render admin orders and this will be let's say my feature and this will be my Admin features now we have created
admin related pages also right now let's see what is happening see if I go to SL admin so you are getting only the header component and the admin sidebar component right and if I go to the layout so you can getting this admin sidebar and header but if you go to SL admin SL dashboard now getting admin dashboard if I go to/ products you're getting admin products if I go to SL features you're Getting admin features and at the end we're having admin orders see all the component now we have created correct and this is
the setup that we have used now similarly what we need to do we also need to do the same thing exact same thing for what we need to do it for soop also right because in so also we will be having multiple Pages correct so let's uh do for so also so first I'll go to pages this and here I think we already have a shopping view Correct so now let's go to our shopping View and again I'm going to create our layout. jsx all right so let's create the shopping view layout so I'll give
this on name as let's give shopping layout and here again we are going to return a div let's give a class name so we do Flex Flex column background white and overflow I'll give hidden and here what we going to do right we'll be having our common header component of the shopping View and after this we'll Take a main we'll take a class name we'll do Flex Flex column we'll do with full and here again what you need to pass you need to pass the outlet component because we'll be rendering the child so now let's
close everything so we have a common header component right so inside shopping view again I'm going to create another component which will be my header so this will be the shopping view header so here I'll create function and This will be shopping header and let's return a div so this will be my shopping view header and let's import it in this shopping layout so we'll do shopping view do shopping header I think right yeah okay so now we created our admin routes we created our o routes now we need to create our app in the
app.jsx we need to create now what we need to create all The shopping related routes so now here we will do route and again we need to pass the path so in the path I'll give SL shop so this will be our shopping related main path and then in the element I'm going to use here soap layout right a shopping layout okay so this is what we are going to use now inside this we will be using all the shopping related child components one more thing we can do so we take one more route Here
so we'll give a path so we'll give star and this will be for our not found page so what I can do right inside Pages I'll create one more folder and I'll give this on name as not found and let's create our index. jsx and here I'm going to give give not found that means if user try to access a page which doesn't exist so we'll do like page does not exist okay and this I'm going to pass it Here so do element and let's do not found so now what will happen right let's say
if I try to go to some random page so you can see that we getting page doesn't exist but you're getting this header component always and this is coming because we have a common component but this will not record this I just explain you that time that you'll be able to use but I'm going to remove This one so you can see that we're getting page doesn't exist now what I'm going to do right so we already created a shopping layout and if you try to go to the SL shop right you'll see that we'll
be getting the shopping view header now let's quickly create all the pages that are recurred in the shopping view so here we start with our home so we need a shopping home which will be our main homepage of the of our e-commerce app then we need a product Listing page and let's give this one name is listing instead of products page so this will be our listing page then we also need now for this one as I already discussed in the intro video that we will not be having a separate details Pages or card Pages
what we going to do we try to do something different because I see lot of YouTube videos they're using like card page and server so what we are going to do we'll be creating the card or shwing the card as a form of a Seat view so seat is one of the one of my most favorite component in s CN and that is that looks really really awesome so the component I'm going to show you and this component we will be using in lot of places if you click here right this part so this kind
of dialogue and this looks so awesome so this is the one that we are going to use for the cart View and also the wish list page so that is the reason for the shopping view homepage we will be having a listing Page and then we will'll be having a checkout page okay so we having a checkout page and also we'll be having a account page that's it and all the other things we are going to write and we'll be learning everything like why we need only these pages and everything but let's first quickly create
all of these pages so this will be my shopping home and let's return your div so this will be my shopping view home save it And this will be my shopping listing so this will be my list page listing page then this will be my sorry shopping checkout right then this will be my account page so this will be my shopping account or user account whatever you can give it's up to you so we do shopping account so this will be your account page awesome now let's go to again the app.jsx and let's close everything
now Inside shopping SL shopping we are going to use all the route so we'll start with our route and we need a home route correct we need a listing route we need a checkout route and also you need a account route and let's copy this and paste it let's copy it from here and we have this one and also here so first we have home so this will be my shopping Home then we uh products or sorry listing so we have a shopping listing oh sorry then we'll be having the checkout so this will be
my shopping check out and then we'll be having the account which will be my shopping account now you see how we have implemented this routing right and it is just still clear like what are the things that we have done and how we have completed now if I try to go to slop Slome sorry this page doesn't exist so we'll go to shopping view home then we have a listing page so getting shopping view listing then we have a checkout page so we a shopping view check out and if you see the header is always
common and this is because this is coming from the shopping layout so from here and this Outlet is changing this content and then if I go to SL account so we getting shopping view account now all the pages is done Au related pages is done Shopping related pages is done and also admin related pages is done so what will be the next step next step is going to be one of the very important concept that you are going to learn and that is how you can handle authorization and also authentication in your application because we
haven't implemented any API routs or controllers for now and we haven't integrated with our react what we are going to do right I'm going to explain you that concept using some Dummy uh State okay so I'm going to use some dummy State and then I'm going to show you and believe me this uh concept is very important and later when you implement it with our back end that time we are going to replace that dummy state with our actual state so let's see how we are going to do that in the next part so let's
uh learn one of the very important Concepts that we are going to do in this part right so see before that we need to discuss couple of things Right the first thing is that if you go to the/ O and login page right so who can access this page now try to think by yourself right see this page can will be accessible by those user who haven't logged in or registered they can only access but let's say if you're already logged in and try to access this page what will happen you'll be redirected to the
authenticated Pages next who can access these pages so let's say the user is already authenticated some Imagination like they have already logged in and they have already authenticated user and they try to go to the admin page so what will happen who can access this page so the user they can access who have only admin access so for now in this particular project I'm going to keep one super admin something like that but you can also keep some concept like let's say you can onboard some users or basically admins so let's say in your project
you have only five Admin so only admin can access these admin related pages and then who can access the shopping pages so shopping Pages can access anyone right who have authenticated user or basically the user who came for shopping in your application but admin can't access these pages right will not give admin access to uh to this page so these features we are going to implement so for this one what I'm going to do right I will be creating a common component inside this So we have a components and then we have admin view Au
View and also sing view right so we'll create one more component which will be my common component so here we will be creating all the com common related components that we are going to use and inside this uh we will let's give this on name as check right so we'll give here check au. JX so this component will check all the authen authentication related things now try to do this one very carefully right this is Very very important let's create this function and we'll do check Au now this function sorry this component will receive some
of the things the first prop it will receive whether the user is authenticated or not so this is the first thing next it will receive the user information like if the user is authenticated so user will have a name email or password something like that then it will receive the children children is nothing but the component That we want to render and you'll be able to understand now here what we going to do right first in this function we will take a location property so what this location will does this will tell you the current
location that you are add so this location it will give you right let's say we're in the admin page so this location it will give you if you're in the O page it will give you the current location something like that so now what Will happen here you need to do lot of things first thing is that what we need to check first we'll check if now notice this one very very carefully if the user is not authenticated so is not authenticated right so user is not logged in and then user try to access any
other Pages than the login page or register page so think about think for one minute that what will happen if the user is not authenticated but user is trying to access the shopping page so User will be read direct back to the login page correct this is what exactly happened in a normal application so you need to login first then only you'll be able to access so this is what we are checking if the user is not authenticated and if user try to access any page which doesn't exist login or register so how we are
going to check that so we'll simply check if this location. paath name do includes so if this includes Let's say SL login or or if this location do path name do includes so if this include SL register so what will happen right user will be redirect to the login page sorry okay we need to leave here so let me format this so if the user is not authenticated and user try to access any page other than login and register page so we'll simply return this user and for returning we are going to use this Navigate
component from react router down so we'll tell that okay if the user is not authenticated just go to the uh SL sl/ login page okay so this is the one logic save it next logic what we need to do we are going to check that if the user is already authentic integrated means if the user is already logged in and then they try to access the login page so what will happen they will be going to the shopping shopping Page or the admin view so see what I'm going to do and this will be very
easy to understand that's the reason I'm repeating everything multiple times so we'll check if the user is already authenticated so if this is true and here we are going to basically check that if the loc. paath name. includes let's say SL login okay or so here we are going to do if location. paath name. Includes SL register so what will happen in this case right user will be redirecting to the either shopping view or admin view but how we are going to do that now think once again that if the user is authenticated then we
need to check from user role if the user is a normal user they will be going to the shopping view if us user is a admin user user will be going to the admin View and how we going to check that now here this user will Comes into picture so now again we'll check that if this user do rooll correct if this is equal to equal to let's say uh what we'll do we'll do admin so if this is admin user so we return we'll navigate to what we navigate to the slash admin slash admin
SL dashboard else if the user is a normal sorry if the user is a normal user so we'll return user to the shopping view So we return to/ shop slome so this is another logic again I'm repeating if user is already authenticated and user try to access login page so user will be navigating to the either admin page or the shoping page and that we are going to check based on the user role and last thing what we going to do right we will be doing one more thing that is that if the user is
authenticated now this is a optional thing that you can do And user is try to access a admin page right so what will happen for example let's say I'm already logged in and then I a normal user but I try to access the admin page so what will happen you don't have access to this page right because you are not admin so we are going to render some kind of Uno page that you don't have access to this page something like that and that how we are going to check so we can simply check that
if user is authenticated and User. rooll this is not equal to equal to admin and location. path name do includes if this includes any admin route so what we going to do simply return navigate the user to/ admin sorry we are going to not admin we are going to navigate the user to ano page okay so this is one logic and last thing what we are going to do if the user is authenticated and User is admin user correct so what will happen if the user is admin user and they try admin user try to
access a shopping page so what will happen they can't access this so we'll redirect the user to the admin page so this also you need to check that if the user is authenticated and user. rooll if this is equal toal to admin and this admin user is trying to access so we do path name. includes if this user is trying to access a shopping page so soop so what Will happen we will redirect the user to the so here we'll simply redirect the user to navigate and we'll redirect to the let's redirect the user to
admin page so we do admin SL dashboard right and if nothing no of the this condition satisfied so simply just return the children so I'm going to render the children here that's it so now again repeat once again right so first we checking if the user is not Authenticated and they basically trying to access any o Pages for example any shopping related page or admin page they'll be going to the Au login page if the user is authenticated and they try to access login page or register page then then based on the user role we
navigating to the admin page or the shopping page if the user is already authenticated and user role is not admin that means user is a normal user and they try to access admin lout so user Will navigate into the Arno page and last if the user is authenticated and user is an admin user and they try to access a shopping page that means like this so they'll be navigating to the admin dashboard now these all are done but how we are going to use this component this component will we need to use in our app.jsx
and this is very important so let's go to our app.jsx and you you can see here right we have this main layout for each and Every so we have Au layout we have admin layout and we have a spping layout what we need to do basically here we need to wrap each and every layout inside this Che o component so I'm going to cut it from here so I'm going to use check o and I'm going to pass this o layout and if you notice here right this check o this is nothing but the children
that we are getting so this is the children and here I'm going to pass let's say so Let's take some dummy so we'll do is authenticated right so I'll do this on let's say false and const user I will do null so this my dummy data and here I'm going to pass e authenticated which will be my is authenticated and I'm going to pass the user which will be this user which is null so save it now next same thing we are going to do for this admin layout also so you cut it from here
and then you'll wrap this check o component and then pass the admin layout same pass Is authenticated will be is authenticated and user will be user and last the same thing we are going to do for shopping layout and here we are going to again pass check o and then we are going to pass the shopping layout and again we'll pass the user which will be user and is authenticated which be is authenticated let's keep this one on the right side save it now we have basically protected all the routes and based on The role
see what will happen now user is not authenticated and I'll try to refresh this page which is in the shopping page see what will happen refresh this see it going to the Au login page awesome right if I try to access the admin page see it's going to the Au login and which condition is satisfied say this is this one that user is not authenticated but they try to access A Different Page other than login page so they are going to the login Route correct you can't access no way you can access this one if
I try to go let's say check out page right so soop let's check out and it will be going to the Au login page you can't access that page only now see how we are going to check the role so now I'm going to make the EAS authenticated as true and let's say I'll pass some user info so user I'll pass let's say name name as my name now the user is already authenticated right so this condition user is Authenticated and if you try to access the login page what will happen you will be redirect
to the either admin dashboard page or in the shopping page and here I'm going to pass the name let's roll pass as user save it and see what you have it see what is happening you're going to the shopping homepage correct and this is the condition is satisfying so user is authenticated so now if the user is a normal user you'll be going to the shopping homepage but See what will happen if I try to go to the Au login refresh this you'll be in the in this page only if I try to go to
Au register you will be in this page only but if I try to make this on admin and save it see awesome right now this is going to the admin dashboard page so now you can't access the shopping page also see if I try to go to the shop view right you'll be in the admin page only because you don't have access to that page now One more thing we need to check and that is if I make this one as user right and save it now we need to go to un it's going to
the on off page currently we don't have this page that is the reason we getting this error so we need to quickly fix this so let's go in our pages and I'm going to create one on o page and let's create index. j6 so this will be our on o age Yeah not page is correct so do you don't have later we are going to change all of this access to view this page right so now if I go to the app.jsx and let's say I'll add this one quickly here so do route path I
will give SL on o page and element I will give are not page and I'm going to paste it here save it you don't have access to this page the reason is why this is happening Because currently user is a user page right sorry the role is user right and if the user try to access admin page so you don't have access right so that is the reason it's happening but if we make this one to let's say admin view let's first uh let's refresh this first so if I try to go to the admin
Au login see it's going to the admin view right so if I go to products you'll be able to see all of this because currently the user role is a admin user so this is what Exactly the logic behind the authentication and authorization based on the role that you have done now what will be our step once the back end is completed the uh the integration is completed with front end and back end then we are going to replace this user and is authenticated user with our actual state so that we are going to do
in the next part so let's start working on the login and the registration e first okay so for this one see we are Going to create quite a few forms so what we're going to do right we will be creating our own custom form component okay without using any third party Library package so for now what I have done right I keep this e authenticated false and the user as null okay so now let's go to our components and inside common I'm going to create a uh let's give this our name as what we can
do right let's give form. j6 okay now I'm close everything Else and before that we need to do one more thing and that is we need to install some of the components from our s SC so we need uh we need our label component here so let's go to our input first input label select text area so these things we need so let's go to input and let's copy this and paste it here sorry let's copy this one clear it clear and then paste it also we also need select we need label we need text
Area and what else we need I think input lbel button I think we have already installed and I think this will be fine so these all the components we needed okay now let's create our components we'll do function we'll do common form we'll give this on name as and what this will return right so this will return a form component and here we basically will be creating this form based on the form configuration and that I'm going to show You so how we going to do that right so inside sours I'm going to create one
more folder and I'll give this one name as config and inside this I'll create index.js all the configuration we're going to create in this file and let's uh export our first configuration which will be our register form controls okay now this will have some name so let's give this a name as for register we will have a username correct this will also Have a label so which will be username this will have a placeholder which I'll give like enter your username this will also have a component type now based on this component Tye we are
going to decide whether we need to render input or select or text area something like that and also this will have a type which will be let's say it can be a text it can be a number and it also will have a options so options can Be optional so options means when we have a select component so that time we can have options so that is the reason so now I'm going to copy this and I'm going to paste it two more times so second one I'm going to do this one as email now
see the first configuration I'm writing this but for from the next time I'm not going to write each and every name level and those things because these are extremely repetitive so I'm going to just copy I already have In my local so I'm going to just copy and paste it but I'm going to discuss what are the fields that we are going to use here I'm going to give enter your email component type this will be input and type will be email then we'll be having a password property label I'll give this one name as
password then placeold I'll give enter your password component type password and type will be password so this is our Configuration okay now this configuration we are going to receive in this form component so the advantage will be basically we no need to write each and every input in every time we'll be creating a new form right so based on that configuration it will automatically create that I think you are getting some noise let me just pause it for something all right everyone so let's start working on the form component so whatever form component that we
are Going to create based on this component type that config that we have created okay so the first thing uh after this form uh we will take one more div here and inside this let's take a class name and let's do Flex Flex column and gap of three all right and now what we are going to do right this common form will receive form controls as a prop from the parent component so what we will do so these form controls will be these form controls that we will be Passing from the individual component so now
we are going to basically do map so we'll do just map it and this will be my control item and what this will return so let's return a d here for each and every uh input type and for this one first thing what we'll do right we'll take a key and for this one let's take control item dot name as the key okay and for this div we are going to take a class name so let's make this one Grid we'll do width of full and we'll do gap of uh 1.5 okay and after this
what we are going to do we'll be rendering a label for each and every input so I'm going to import label and here I'm going to render control item and if you see here we have a label property here so we'll do control item. label and here also we going to take a class name so for label let's only keep some margin bottom as one and after this Level now what we're going to do right we will be rendering the input based on the component type so what we can do simply create a function here
so we'll do render uh inputs by component type now it's up to you you can give other name you want and here I'm going to pass the control item now let's create this function so I'm going to create this here so this will be get control item and what we going to do right we'll Take a element property here which I'll keep this one as null and then because we can have multiple uh objects here and for each and every object we will have a component type so what we can do right we can take
a switch here and then we can just do get control item dot component type right and based on this we can we will be able to identify that what kind of component type is that so if this is a input so here we are going to do if this Is a type of input so here we are having a component type input right so for input what we'll do right we'll simply render input element so I'm going to just do element and here let's return return a input so I'm going to import in input from
our side SC that we have install and here we are going to take the following properties so first we'll take the name which will be our G control item. name then we going to take a Placeholder which will be again G control item. placeholder ER because we also have a placeholder here next we also need ID so we're going to take ID which will be get control item. ID sorry name name we can keep as ID that is fine because name will be always unique then we will be having a type so here also we
are going to take a type which will be get control item. type and also we need to take two more things one will be the value and one Will be the on change but that we are going to do later so this will be one type now in the default case means when we don't if you don't pass any component that time also you're going to do the same so we'll render the input type element and at the end we're going to return this element okay so this is for input now coming to select now
let's copy this case right and then what we'll do we'll paste it two more times so one I'll Paste here and one more time and this I will make this one as select and then we can also have text area now you can do one more thing right now these all the things whatever I'm mentioning these you can do by yourself okay don't think like I'm not doing means you don't have to do it please try to improve this code by your own what you can do right you can create a types something like this
let's say types and then this will have a input type which you will map to input I Hope you're getting then you'll take a select type then you'll make this one as select now instead of doing like this string value what you going to do you can simply do types do input so so this will help you in so many ways this is going to help you when so the first thing is that let's say if there is a spelling mistake here right so there will be some problem so this is the reason you can
take these kind of types also okay now for select what we going To do simply we render a select element so I'm going to remove this and let's import select now this select will take a value and unchange that we are going to do but after this we need to take a select trigger and here we're going to take a class name and we'll do this one as with as full okay then after this we need to take a select Value now in this select value basically what we are going to do we are going
to just render the placeholder and placeholder will be our G component sorry G control item do placeholder so this will be my select trigger and after this we're going to render a select content right so in this select content what we will do we need to basically render the options let's say some of the things will have options right so this option we are going to map it when it Will be type of Select so that also we going to see so here what we will check simply we'll check if this gate control item do
uh options and then so we are going to check if the options length is greater than zero and do length again you can take optional also like something like this you can also take this one that is also okay but I just like to do like this so here you just do map and this will be my option item and what you'll return right so this will Return as select item okay and here what you will return return you will return return sorry render the option item. Lael and in this select item first we'll take
a key so in the key we'll take option item. ID and also we need to pass a value property here which will be option item. ID okay I think we are having some problem okay if nothing then we are going to just render null so we need to take a render null here all right and after This if this is a text area then what we going to do so render a text area component okay so here uh the first thing again we are going to take a name uh which will be get control item.
name we are going to take a placeholder which will be G control item. placeholder right also you're going to take ID which will be get control item. ID and then we going to take value and onchange so that we are going to see how we are going to do the value and Onchange okay so this will be the basic structure now what are the things that uh this will receive so aport from this form controls this component will receive couple of things the first one will be the form data and based on this form data
we are going to manage each and every input value then it will receive a set State method which I will give this one name as set form data you can give any name you want then this will receive a onsubmit method okay and Also it will receive a button text so now let's Implement all of these so the first thing is that after this form controls this div right so here what we going do right sorry this one so we going to take a button and then we're going to check if there is a button
text already provided or else we'll keep this one as default as submit okay and then let's give a class name here so I'll give a class name let's Give margin top of two and with as full okay and also you need to give a type as submit this is important because this is inser form so we'll keep this one as submit then in this form we going to take a on submit which will be the on submit prop that we will be receiving so this one is I'm talking about this on submit so this is
done now next thing what we going to do right we need to basically get the value so how we are going to get the value so here we are Going to take the value so see notice what will happen so this value that I'm going to take this value will be this form data that we will be receiving so form data will consist of all the key values that this form control will have so for example here we have a name as username so name is the key so here name is the key and the
value is username so here we have a username then we have a email then we have a password so based on this name we are going to get the Form data and I'm going to explain one second so here we are going to check if this form data consist this get control item. name that means form data of username form data of email form data of password something like that okay or else this will be empty so this will be my value now this value I'm going to pass it here also we need to pass
this value in in our select component So let's go to select so you're going to pass a value here right so this will be my value and also you're going to pass a text area here also I'm going to pass a value which will be this value now next thing what we need we also need a on change for each and every element so now I'm going to take on change so let's start with this one so this will have a on change so this will give a event and here we going to call this
set form data right and here what we going to do Right we're going to destructure the form data that we are having and then we will simply do G control item. name this will be the value okay so here this will be event sorry this will be event. Target dot value so this will be for your input the same thing we will use in our default case also because in default case also we passing the input right now for text area what we can do simply this will be also very Simple for text area again
we will do the same logic so we pass so we'll get the set form data and then get control. name will be even. target. value only for this select we need to do this thing so this select component of this s CN will give you a value property that you will be able to access directly so here what you need to do right you need to use this on value change okay and this will give a value here of event and this we can simply directly use that set form Data so I'll get the form
data and I'll do get control item. name will be this value or basically the current value that we are going to select so this will be our basic or basically complete the structure of this form but how we are going to test it now see when I'm going to implement the registration form first you're going to understand it's very clearly like what is happening okay so now let's go to register component so we'll go to our Pages then we're going To go to our Au View and then register page okay so now let's do step
by step so first thing I'm going to remove everything and I'm going to take a div here we will take a class name we'll do MX of Auto with as full Max wmd and we are going to do a space y of six okay now I'm going to take another div let I'm not going to explain all this CS we'll take a H1 and what we are going to do Right so we'll do simply sign up we can keep it simple like we'll only keep sign up or create new account I think we can give
create new account I think this is better okay and here let's take a class name so do text 3 XL font bold right we'll do tracking type right and text foreground so this will be my H1 now after this what we going to do we can take another P here and we can do that like already have an account so that User will be able to switch from this register page to login page right and after this what we going to do simply take a link component from react router Dom and we'll pass this log
in here and here we're going to do two which will be SL SL login let's take a class name so we'll do margin top of two and I think let's keep it like this for this link we'll take a class name so for this one we'll do font Medium text primary and also we going to do for hover we'll do underline Also let's give some space here I think not space I think we can do something like this margin left okay so this is done now see how it will be very very easy to do
so what you need to do right so first thing I'm going to create a state here so this will be my form data right so this will be my form data and then I'm going to do Set form data which will be U state of initial State the local state we are not going to manage using Redux we are going to use local state here I think that is much better so we'll do a const and we'll do initial state so we need username correct we need a email and also we need a password all
right and then what you need to do simply call the common form Component that we have created right and then need to pass all the elements so first we'll pass the form controls which will be my register form controls so we'll do register form controls we'll pass button text so here we'll do right something like create account then or let's give this one sign up instead of this we need form data which will be my form data that's now we created set form data which will be set form data and these two is basically these
Two also we need to create one on submit so here function on submit and this we are going to pass it here so we'll do on submit which will be on submit now see what will happen if I now save this right now this will automatically create this let's refresh this think this is getting loaded let's wait for some time I think there are some error is coming is it I think it's getting loaded let's see Yeah see now it's coming right okay now you can see that we having username email and password and the
button now the only B thing about is that you don't have to write all of this what you can do simply create the configuration here and just pass it like this and that's it it will automatically create for you so now what we can do right for login we are going to use the exact same format as I already told you right I'm not going to write each and Everything these things takes a lot of time because we are going to do lot of functionality in this project and you are going to understand like there
are lot of complicated things and those things so those things we're going to focus much so what we going to do right to create the login one simply copy this go to login page and we'll paste it here and we'll give this one first I'll change to Au login right and for this one for login We have only email and password so I'm going to remove this and then here I'm going to create one more so I'll copy this one from here and this will be my login from controls and then we don't need username
so I'm going to remove this all right and now all everything will be same so this will be like uh we'll give this one like what we can give welcome or something like that sign in sign in to your account I think this is fine And here we can give like don't have an account and we can give like register right because from login page we'll be able to go to the register page and here we're going to give register now instead of this we're going to pass the login form controls so this will be
sign in form data will be form data set form data and on submit will be same right and now see with this it's done and I'm going to remove this let's Save it now see if I go to the login page see login is coming if I go to register and you're able to switch and this is working fine so now what we need to do simply we'll start with the register functionality so we need to start working on the back end now this is where we need to learn all of these things these things
you might be already working on the CSS and creating structure so that is the reason I'm not focusing on those things so let's start Working on the backend part for this so we need to create models so we need to create controllers so we need to create middleware and also we need to create routes and after that we are going to integrate this with our back end so that we are going to do in the next part so let's start uh creating the model first so I'm going to close everything and let's go to server
and then we'll create a folder and let's give this on name as Models we also need controller so controllers hold the logic that we are going to write for each and every route then we will be having the routes right so API routes so from where we will be calling the API from our front end side so these three things we need so now the first thing always you need to create a model model basically will specify that what are the properties that you are going to save in your database so first uh we will
create our Register page register will have a username correct it will have email it will have a password and also it will have a role role will be always default to user because there will be only one super admin something like that so here I'm going to create a model and let's give this a name as users user.js okay and here the first thing you need the mongus so we'll do require so this will be Mongus and here we are going to create our user schema so we do user schema so this will be new
mongus do schema and here you need to basically specify all the things that you're going to use so first thing we need a username correct so this will be my username so username will have a type of string this will be required will be true right and this username you can also keep as unique unique also will be true or else it it will give error Okay let's copy this and we're going to paste it four more times so right so then we'll be having a email so type also will be string required will be
true uni will be true then we'll be having a password type will be string and record will be true okay and at the end we'll be having a role so role what you're going to do we do type as string and we'll do Default to user so always default will be role as a user so this will be my model once we create the model now we need to basically export it so look user and we need to basically create the model so to create a model you need to use this mongus do model property
okay and here we're going to pass user and then you need to specify that this will be your name and what is the schema that you want to add also you can pass a collection that is optional so we are Going to pass this user schema and then simply do module. exports and we're going to export this user right and this is done so this will be your very first step whenever you will be start working on any backend logic or basically mon so first you need to create or specify the model all right now
once you created the model now you need to think that what are the things that we need right so if you think right here see first thing you Need to register route register route in the sense whenever you click on the sign up button you need to get the information of username email and password and whatever user will be typing you are going to store this in your database correct similarly you need one for your login and then you also need for log out so these three is mandatory and then we're going to create a
o middleware so what middleware does right so for Example let's say whenever I refresh this page I need to get the information that whether the user is authenticated or not and that that Au middleware will handle so we are going to store a token and based on the token if the token is valid so that time we are going to understand that okay the user is basically now authenticated or else if the user is not authenticated user will be redirect to the Au log out he sorry o login page so first what we'll do simply
Go to your controllers and we'll start creating our controllers now here what I'm going to do create a folder Au and then I'll give Au controller.js so first as I already told you that we need to do for register we need to do for login we need to do for log out and also we need to do a for Au middleware right so first start with register so this all will be a async Method so we do register so do asnc everything will give a request and response object and now what we going to do
right first how we going to write a route so whenever you will do register right you need to think that what are the fields that I will be having in my register so we notice you have a username you have a email and you have a password and these three thing you need to pass it from Your client side to back end so from where you'll be getting you'll be getting it from request. body so in the body we are going to pass all of this data correct so that is the reason first you need
to get this information from request. body so this is first thing which is very important and what are the things you need so you need a user name correct you need a email and also you need a password so you have Email and then you'll be having a password so this is the first thing then what you're going to do right simply we'll take a try catch so here you can simply log this and then pass status so response we need to pass right to our client side so we'll pass a 500 and we'll do
do Json so what we'll do right we'll pass a success will be false and we'll pass a message will be some error orod okay now this structure will be Also same for your login also so what I'm going to do right I'm going to copy this part and then I'll create one more for our login so we'll do login again this will be ask sync we'll get request response and then we'll paste it here and inside this obviously we going to write the logic so now now once it will go to the tri block what
you need to do so first whatever password that user is Typing let's 1 2 3 4 5 6 78 that you need to has so that like you need to basically whenever you will store a password the standardized ways you need to has that password okay so that is very uh important so that is the reason if you remember we have installed this bcrypt J so I'm going to do bcrypt okay and this will be re so I'm going I'm going to need bcrypt CH then we also need the JWT so we do JWT and
I'm going to Doer and here we are going to do Json web token and also we need the user model and if you see this model based on this model we are going to tell this controller that okay for this user schema you need to store user name email and password and roll so you need this user right so you do user and this will be again require so we need to go to model and then we need to go to user so this will give you the user Model now once this is done so
first thing you need to has this password so how you're going to Hash it so we'll do create your con hash password call this bcrypt and this will give you this has property also you need to use AIT and we're going to basically tell that which thing that we want to has so we want to has the password pass the password here and also you need to pass a Sal number which I'll pass as 12 That's it then I'm going to create a new user so I'll do new user and this will be new user
this user is our user model this model right this will have the username email and password and rooll correct so in this user I'm going to pass username we will pass email and password and we don't need to pass the role because already we have a default value as uh user okay so now This will create a new user and then what you need to do once you create a new user you need to save this right in your database so will do aate and we'll do new user that we have just now created do
save so this will give the save property which will save in your mongod DV database see okay and once this is done so what you going to do right you will pass a status property of 200 and we'll tell that okay in this that success will be True and we are going to pass registration successful awesome and this is all about all the things that you need uh one more thing sorry my bad here you need to pass the hash password instead of this password so we pass the hash password here okay so now this
is done so this will store a data or basically user into your database now let's do one thing before we'll create this login and log out and O middleware so what we're going to do Right we need to export this so I'm going to do module do exports and I'm going to for now I'm going to only export the register let's do one thing let's keep this one register user instead of register okay and then we're going to pass it here so now the first controller you already created now once so first thing you created
a model you created a controller now you need to create a route right so now what we will Do right we'll create a routes inside this we have o and then I'll create o routes.js so what you need to do you need to basically tell that by which route I need to call which controller simple as that to create a route the first thing you need the router Express router so I'm going to create my router which will be so let me first get the express which will be require and I need Express so this
Express will give you this router right so this will create your router interface you can say and then you're going to call this router and this will eject all the methods that you can use normally like post get delete put something like that okay so here I'm going to do like okay when I will do a register of an user so that means I'm I'm saving something in my database I need to do a post method not get because I'm posting so here we need to do/ Register means whenever I'll call this route from my
front end this register route I need to call this register user controller I hope you're getting so this is the reason so that means this route is linked to this controller so first you need to get that right so we'll get it so we do require and here I'm going to go to my controllers and we need to go to both controller and here we need our register user correct this will receive and then We are going to pass it here and this is done so now we are basically telling that whenever I do a
post method post API called with this API route I'm calling this controller once everything is done will it work no the reason is in your server.js or basically root file you need to basically tell that that okay I want to run this Au router to a particular endpoint so for this one you need to set up something here so what you need to do Right first you need to import that auth router so I'm going to do Au router and this will be reare so here what we're going to do simply we'll go to routes
we'll go to Au and then Au routes so this will give us your au router okay and also one more thing we need to do I think this we haven't done and that is we need to export this router this is very important so do module do exports and then I'm going to export this router Here so now we'll get our auth router correct and then what you need to do simply just call this or basically you need to use it you see how we are using each and everything right so you need to tell
that okay use and then here I'm going to call SL API SL so I'm basically telling that whenever I'll go to this API route SL API o you call this o router now I'm going to explain what Exactly we are doing here let's save it first see whether we are receiving any error or not in the server I think no we not receiving or no it's working fine right yes so I'm basically telling that this will be my main API route for Au so/ API SL I'm going to use Au router and then it will
go to Au routes and it will check SL register means what I'm trying to say that when I'll go to/ API right then SL O then SL register user so I'm telling that okay whenever I'll go to this route you need to run this register user controller okay similarly we'll do for SL API SL o slash let's say login user or not register let's keep this on register and let's keep this on login and this time I'll again tell that okay when I'll go to this route now this time you call this login user PA
controller okay so this is what exactly we're doing and you need to do this this is very very important so now the basic Setup is done for your server side for your register so now what we need to do right we need to create a user so to create a user we need to go to our like uh Redux and then we are already managing some state right so now what we can do simply whenever I click on this button I need to call this API and then I need to store this user in our
database so let's do that in the next part all right so let's start working on the front end part now okay so now we Will go to our client let's go to our Pages Au and then register right so first thing what we will check that what we are getting in this form data so let's log it form data and let's see what we receiving first so let's give name here let's give a email 1 2 3 4 5 6 7 8 right so you're getting this data here so now what you need to do
whenever I'll click on this submit button I need to call it ASN tunk now there are two ways you can do that see multiple ways I'm going to show you so one is what you can do right see for each and every API call you no need to create a sing tun that is not required if you want you can organize like this so what you can do right inside the source you can create a Services file and in that Services you are going to basically write all kind of API called Services logic and then
those Services also you can basically use from here that is absolutely fine but here I'm going to show you that how we going to do it using Redux for that let's go to our Au slice and then index so if you see here we already have e authenticated false is loading true and user information is null so now here uh we are going to create our async tun right so what we Going do right let's do like this so we'll create a method so first we'll do export const and let's give this on name as
register you user okay and you you can also give like register user accent but I think this is fine we'll give register user so this will be create as sync tun and here first you need to give identifier okay so I'll give this one a sl/ register and after this we need to take as sync function now this will Receive the form data so form data is nothing but this username email and password whatever this user will be typing here and so once they will receive the form data so simply we will create const response
and this will be AIT xuse so this will be post and here we need to basically pass the URL now later we are going to modify all of this but for now what we can do right simply let me just copy this path from Here I will show you what exactly we doing so first we need to take a local host SL 5,000 the reason is because the port is running on 5,000 then you need to go to/ API SL now this part is important to understand because first we going to the main API route
or base API route then we going to/ API / so I'm going to copy this paste it here and then where you need to go can you guess I already told you so this will basically run the main Au router and Then you have a child router so SL o/ register that time you will call the register user so you need to go to/ API sl/ register okay and then you need to pass the form data so this form data that will be receiving and also you need to pass the with credential this will be
true that's it all right and now what we going to do Simply Save it and then we're going to return response dot Data and this is done okay so this will be your tun that you need to call that I'm going to show you but here we need to manage some of the things so first thing what we need to do we need to create extra reducers property now this extra reducer will give you a builder and based on this you'll be able to manage like for example what will happen Whenever I Call this I'll
be getting some data back right and that data I need to store in my state so those Things we're going to do in our extra reducers so here what you going to do simply we'll need to do this builder. add case right so here you need to check like register user so when this will be in the pending state so it will give you three state pending fulfilled and rejected so when this will be in the pending state so it will give a state and then you want to do something for example I want to
do state do e loading will be true that means currently it is In the pending state DOT add case then we need to do this register user do fulfilled so that means when the API call is successful that time what we need to do so that time we'll do state. e loading will be false right and then we also need to do state do user now you will be getting the user info right so from where you'll be getting so these will also give you a accent Here right and here for now I'll keep this
one as accent. payload but we need to check it what is coming so this is one thing now next thing what we are going to do we also have the is authenticated now when user will register for the first time they will not be is authenticated to they need to go to the login page and again they need to basically enter the password and email then only they'll be uh like uh identified as authenticated So here I'm going to do state. is or authenticated will be false then I'm going to copy this paste it here
and this will be rejected so loading will be true use user information will be null and state do is authenticated will be false okay so these three things we needed so we have what we have done we have created our Asing tun method and also we have added all the Builder use cases that based on what state what will Happen now what we need to do we need to somehow connect this with our like server means we need to call this on click of this sign up we need to call this register user Asing t
as simple as that so we can go to a register page and here you can see that we are getting function and on submit so this will first will give us event and then we need to First default it so and these are a normal JavaScript Concepts so that is the reason I'm not explaining like or Else what will happen when you'll click this button it will refresh the page okay so that is the reason we are doing this one and now what we can do simply we need to dispatch or basically call this this
register user so what we can do simply first we are going to take const we'll do dispatch and this will be use dispatch and here what we going to do simply let me give enter and we can simply do something like this we'll do Dispatch and I'm going to call this register user from the O slice so from this one this registered user and here what we need to do we need to pass the form data so we'll pass the form data here and then dot then what we going to do right we'll simply navigate
the user to the login page also I don't think we required to for this one right when this will be fulfilled let's keep this on N only because we are not going to store the User information in our uh like uh state so we'll keep this on null only it's not required so when this will happen I'm going to Simply navigate the user to the log in page so I think what is the name of this I think it will be use navigate yeah and then I'm going to just do navigate and I'll go to//
login save it now I'm going to explain what we have done right so First on click of this submit we are dispatching this accent do then if this is successful we going to navigate the user to the Au login page and also you can check it like if I just go to network tab I'm going to give my name then let's give a email and I'll give 1 2 3 4 5 6 let's click on sign up okay we are getting some C error and this part we Need to check why we are getting this
so getting this this is basically blocked doesn't pass the access control origin header as a value that is not equal to the supplied origin okay that means something we need to pass in our server side that is missing here all right so the problem is actually here we need to remove this slash after this okay and then also one more thing I want to show you that we are navigating to the login rate so first let's see what We getting here in this response so in the data so I'm going to log this data here
so let's save it refresh this page now I'm going to give some dummy user for now okay 1 2 3 4 5 6 now let's click on sign up so you can see that if you noticed you are getting a payload here right this this is the I'm talking about so success true and Registration is now successful and if you go to browse collection so you will be able to see the data so we have a user collection and there is a data so D me email is this password is this and roll is by
default user that is fine so now what you can do right simply you can check if this data. payload do success if this is true so check give this data. payload do success if this is true then only I navigate the user to the o/ login Page okay and this is done so now let's save it so now let's see refresh this page so I'm going to add my name here now okay 1 2 3 4 5 6 let's click on sign up so it's going to the login page now there are quite a few
things that we can do something like we can add a toast that we are going to do but I just want to first show you now very important thing what we need to do right we need to show some kind of notification so You're going to do everything each and everything step by step so first you'll go to toast so it'll do something like this and let's add this component also so let's go to client and let's paste it here so how this will work right first we need to basically use this in our main
component so we have uh like if you go to the main. jsx right so here so we can basically add it Here so what we can do simply you can pass this toaster component here and this we need to import save it and then what we can do simply you can also add it in your app component that will also work let's go to our register and then I'm going to use this so we have a use toast hook that we need to import and this will give you a toast property so first thing what
we can do you can simply show here right that if This is successful so display toast and I think we need to display title here I'm I'm thinking we have a title and description so we'll show some title like title registration you can also uh display the message because we are already returning the message right from our back end so if I show you if I go to this controller right so you have a message that success is true and message registration is successful so this also We can uh show here and this is done
so let's see if this is working or not sometime this can give some error okay something is going wrong here I think okay I think we need to use some kind of no I think this is fine let's go to register first now I'm going to create another user okay let's click on sign up register successful and and then you're going to the login page see here We are coming you'll be able to close it that is fine but the main registration functionality is done now once the registration is done as I already told you
the user is not authenticated still see if you try to go to admin page will be in this page so we need to log in and once the user is logged in we need to store a cookie and based on that cookie we are going to basically redirect the user to the either shopping page or the admin page based on user role so for This one one very very important thing that we are going to do now in this part and that is how you can manage admin user now see there are multiple ways you
can do that many many ways so what we are going to do right normally in large application how these things works I'll tell you so we have something called CCM so what CCM basically does right so we have a super admin so super admin has access to add multiple admin something like that so we have a CCM admin panel And there you need to manually configure all the admin related information so this is how exactly work okay so you you can search it on Google that some kind of CCM tools and everything normally very large
applic very large companies using CCM but for now what we going to do right we will so if I refresh this page here first thing and this is very important as again I'm repeating that we can do multiple ways okay so here we can so I have my account right s mukarji Gmail.com so here I'm going to manually update this one for now later I'll show you how many other ways we can do that so we'll do make this user as admin so this is called manually updating in your database this is also absolutely fine
there is nothing wrong with it if you don't want to have multiple admins now there are two scenarios so you can have also three things like first thing is your shopping view then you can have multiple admins and then you have a Super admin so super admin can access super admin can control your multiple admins and admin can control the users so something like that but here we are going to only keep only one admin and based on that we are going to do it and you can tell this uh user as a kind of
a super admin okay so this is a very important step so now what we are going to do right we'll do the login functionality and once us are logged in so we have a s mukarji which who is a Admin and then we have a samam one who is a user and based on these two things we need to basically check whether user is redirecting to the correct page or not so that we are going to do in the next part so now we will start working on the login controller okay so step by step
again we are going to do so first we'll create our controller we'll go to routes we'll use that route we already used the Au router here then we'll go to our slice and then we will create our Asing Tong and then we are going to call that from our component so this is the whole process that what we are doing and the same process we're going to do throughout this particular video and see see the see if you notice my videos right the way I actually explain I try to keep things simple and the reason
is because it's not about like doing some fancy projects and then using some fancy libraries when you'll go to a real life project right and any Companies believe me or not I worked in multiple service based and both product based companies see they don't want to use like very fancy things and everything there you need to know the very Basics it's not about you'll get uh like very large project all the time sometimes what will happen right you'll get this kind of project like some of the projects is already done and you need to basically
do a code fixes on top of it that means whenever you'll do a Code fix you need to understand someone's else code so it's not about always creating a brand new project you need to understand and how you'll understand when you'll do the same thing again and again that time it will be very easy okay so this is the way you should learn all the things I see in YouTube there are many channels they created very fancy projects typescript Prisma this and that if you go to any large companies right most of the time You
will they will try to keep the technology very simple believe me or not you will if you go there right you will understand and you can comment down okay and basically you need to understand or Master One Thing very clearly so that you'll be able to do it sorry about taking some time but I thought it will be very important to discuss this kind of thing okay don't try to run always for like very complex project first do the same thing again and again and try To do the things in a simple way and that
will help you in a long run okay now for this login what you're going to do so this will be again the same process so I'm going to copy this and for login instead of this login and username we'll be getting use email and password only right we don't need username so this is the first step and you notice all the things will be almost same in identical now in the tri block first thing what you need to check see When user is actually logged logging in first you need to check whether this user is
already exist or not and how you're going to check it you'll be checking it using email because email will be always unique so if you go to the model right let's go to the model email is already I've given unique right so you can't register with same email so what we're going to do simply let's go to what what's that controller okay first If I do const and then uh let me just quickly show you one more thing I think it's important to do that if it's not working then we need to add something I
thought it would be better to check it let's go to the register page once okay and then we'll go to network and then I'll give some random name here and I'll give sunum gmail.com 1 2 3 4 5 6 let's try to click on sign Up and if noticed here what is happening some error occurred now here the point is if I go to this error right let's go here and you can see that you are getting error message that the duplicate key error collection and there is a key pattern and also there is a
key value and this is happening why you know I'll tell you the reason is because in our model we have kept this uh email as unique so not be able to do it so what will be better right we can actually Send this error also right or else there is a another way that we can do simply let's do it actually I think that will be better so what we can do simply we can check here when we are Hing before this so we'll do const so we'll check check user and here we are going
to do AIT then we are having user and then we're going to do find one and we're going to pass this email right right so if this check user if this is true that Mean this user is already exist so we going to return race do Json or let's directly uh I think we can return the message only so return a success will be false and we're going to return a message will be user already exists with the same email okay please try Again okay so now let's save it now let's go to register page
and if you see here we're checking if this is success is true or else what we'll do we'll simply render the toast here with the same message so now what will happen this time if you try to login with the same user and let try to sign up user already exist with the same email please try again also you can also pass a variant here which will be destructive I think something like that Destructive let's save it now let's close it see you're getting this one you can also reset this form everything is correct you
can also keep it I I I think it will be better to keep it because if you reset this then user needs to again write all of this username and password so they can simply just change the email and they can sign up right I hope you're getting so let's not reset this one so now let's go to the login page I thought that will be better way to do this one Hand to handle that okay now everything is done for register let's go back to the login so now again what we'll do right similar
thing we need to check for login it will be opposite because for register we need to check if this email is already exist or not for login what we'll check that if this user doesn't exist that means you don't have your account only so first you need to create account so what will happen we check if this is Not false this check user so we can simply return race. Json we'll return success will be false and we'll return a message like user doesn't exists okay so do please register first that's it so this is the
first step and then we need to check your password right that when you'll enter your password in your login time you Need to check that the password that you are having here and the password you're entering here both are same or not right so that we need to check so do const check password match and simply just call AIT and we're going to do this bcrypt and this will give you this compare method and here what you can do simply you can pass this password that user typing and the user password that is already exist
in your database but how you're going to get That so you'll be getting this check user so this check user will give you the password so here we're going to do check user. password okay if this check password match if this is false that means the password that you've entered that is wrong so what will happen we're going to return again error so we'll do success will be false and we'll do password is incorrect we'll do invalid for incorrect Password please try again that's it so this is one more step and after this if both
are done if both the things are correct means what will happen we are going to create our token so we'll do create token and we'll do JWT do sign so this will give a method and here what we going to pass we going to pass the ID so ID will be my check user do ID okay also you're going to pass the ro ro will be my check User do roll all right and also you're going to pass the email which will be the check user. email that's it so this will create your token now
here what will happen right you need to also pass a secret key here and now you can pass any key want but for now what I'll pass I'll simply pass a client Secret key this has to be secret as the name suggest and here you can pass a property That how how much time you want to keep this token active so here the uh sorry so this will be expired so best is like you can keep it like Max 15 minutes or 30 minutes I'll keep this one for now 60 minutes because we need to
work on the development right later we will change this one so here we'll keep this on 60 Minutes not minute it will be 60 Minute like like that that's it now this will create your token now once the token is created Right what you need to do simply you'll do race response. cookie and here you're going to store this token and this will be your token that you have created right and you need to pass some properties like you can pass something like HTTP only we'll keep this one as true for now and you can
pass the secure is false and then once all of this is done then we going to pass Json and here I'm Going to pass success will be true message will be logged in successfully and here you can pass some properties like what you can pass right let's pass all of this we'll pass user info let's pass this user here object okay and then uh what we can do we can simply pass the email which will be check user do email then you're going to pass The role which will be check user. Ru right and also
you're going to pass the ID which will be check user do ID okay that's it so now this is done now let's save it so you can see what we done we are going to change all of these also later so HTTP only we can keep it false and we can keep the SQ is true but just now for day purpose if we're doing for the first Time or you're like basic to intermediate level first you should understand all of this uh concept first how you can store a cookie and those things now what will
happen we have created the method login method and let's do this one as login user and once we have done this one next step step by step so need to pass it here again once you pass it again you need to go to Au routes and then you need to get it right so you will get login user and you need To again create one more API route and for this one this also will be a post method and here I'm going to pass login and this will be my login user right this is done
let's save it now where do we need to go we need to go to our Asing tunk now here I'm not going to write all of this again I'm going to just copy it from here register user and I'm going to pass it here and let's make this one as login user okay now everything will be exactly same you just need to change the Identifier so this will be au/ login so this will be unique identifier and instead of o/ register because just now we have given right so we have given SL login so this
will be API SL so if I show you one again so this will be API or and then it will be/ login okay so this is Exel reading so API sl/ login and with credential you need to give this true save it so now what you need to do so you have created all Of these now you need to create three cases one more time now I'll copy all of this one second and paste it here so now here we need to do login user do pending so e loading will be true login user do
ffi so when the user is authenticated that time what we need to do the is authenticated will be what from false to True correct and this state. user so here I'm going to do for now I'm going to keep acc. payload but We need to change this one so for this one I'm going to log this here also that what we getting in this accent. payload or else we can log it in our component that is and when this is rejected for example in any way this login user get rejected so we keep this on
false user will be null and E authenticator also will be false okay so now let's save it and let's see what is happening so now what we need to do we need to Basically go to our login page where is login page okay now again here we need we have onsubmit so we'll take a event and we'll do event do prevent default and we need to again take our dispatch so Lon dispatch which will be use dispatch and here uh we are going to do dispatch and we'll do login user correct and we're going to
pass the form data Dot then so we're going to get the dat data and first we're going to log this data here and let's see what is happening first let's save it and let's do something here so I'm going to give this suum gmail.com and have 1 2 3 4 5 6 let's click on sign in so you can see that it's already fulfilled and in the payload we are getting user very very important right you can see accent. payload do user so if you go to this Right if I go to here in this
login user. ffield and if I just log this accent you'll see the same thing is coming here also so save it and let's see what is happening so I'll pass sorry I'll do suum gmail.com and I'll do 1 2 3 4 5 6 notice if I click on sign in see in your accent also you'll be getting accent. payload do user okay so this is what we need to save so here Instead of accent. payload we'll do accent. payload do user I hope you're getting right and then what you're going to do now let's go
to here and here we don't have to do anything simply we can check something like this so here we'll check if this data do pay load dot success so if this is true so we going to get our toast so do use Toast and I'm going to do here toast right so if this is true so we going to do toast and we going to show a title so title I will show the message one right we already have message payload do message is if this is false so we render the same thing but we
need to add a variant so I'll add a variant I'll do Destructive and I think this is done now one very very important thing we need to do I I'm not sure whether you remember see if I go to this page now right app.jsx you remember remember we have hardcoded these two things see now we don't need to hard code why because we already have this this already stored in our state right so go here and then what we can do right simply we can take it from where we can do use selector and we'll
do state and then what we need to Do what is the name that we have given we have Au so this is my reducer name right o so this will be my state do o and what we'll get we will get let's close this so we'll get our is authenticated and also uh user both so we'll get is authenticated and also we'll get user now see the moment I'll just save this what will happen if I go here right let's go here and let's give some value and try to sign in user doesn't exist But
it's going to the this page and this part we need to check okay why this is happening this is very weird Okay this part we need to check it this is wrong something we have done wrong here so this part we need to check I think something we are doing wrong here because okay let's go here I think uh we are returning this success false message oh okay I got it now so what we Are doing right in this login when it is getting fulfilled we directly making this is authenticated as true we should not
do this one so what we should do if this accent. payload so first let's log this acction do uh let's log this acction and let's see what is happening right we'll go to O login and then let's open console and what I'm going to do right it give I'm wrong here and let's click on sign in so we see here we are getting Fulfilled that is fine but we getting a success as false so here we can check that if this accent dot payload and then we are having this oh sorry so we having this
success right so accent. payload if this is false so in that case so if this is false what we'll do we'll keep this on null or else this will be this same for this one if this is False so if this is false right so is authenticated will be false or else this will be true I think this should work now let's see what is happening now let's see if I try to give some wrong let's click on sign up user doesn't exist please register first and if I give suum gmail.com this user is exist
but I'll give some wrong password here let's try to sign in incorrect password please try Again let's try one more time sign in I think we'll be getting success false right H correct but if I try to give a correct password 1 2 3 4 5 6 let's click on sign in now this time we'll be getting success true and user information so okay let's do one thing I think instead of doing opposite we'll do if this is true then only I'll save this user or else I'll keep this on Null and for this one
also so if the success is true this will be true or else we're going to give this one false right this is fine now what you can do you can also keep it like this like if this is accent pad. success so it will be either true or false right and when this is getting rejected that time it will be null or false this will also work so now let's refresh this page and then I'm going to give suum at the gmail.com correct but I'll give some Wrong password here let's click on sign in incorrect
password please try again if I give some wrong email try to sign in user doesn't exist but if I give some correct 1 2 3 4 5 6 click on sign in we're going to the admin asbo page if you noticed here this we don't have to do anything now because we already handled all of this in our app.jsx so if I go to app.jsx right you remember we have done this check o and in this Component we are basically checking all the things if the user is admin user then redirect this user to the
admin dashboard page and see what is happening but now the main thing will come where we need to create our middleware so middleware will basically check before the page is getting rendered right whether we need to render this page or not or we will be redirecting this user to some other page now the user is already logged in correct but if I try To refresh this page see what will happen I refresh this user is going to the Au login page and this is completely wrong right this would not happen so every time the user
will refresh the page we need to check that whether user is authenticated or not and also whether the token is valid or not because we have a token here in this controller where we have given the time as 60 minutes obviously we're going to change this one later when we'll do impro Improvisation in the later part of this video we'll give this on 10 to 15 minutes but now somehow we need to check that whether user is authenticated or not one more thing I want to show you that if you see that we have one
more user suum one and this is this user is not admin user if you go here right suum one is a normal user see what will happen if I try to log in instead of going to the admin page it will go to the soof page see it's going To the soof page awesome right but again if you refresh this page it's going to the Au login page and this we need to obviously we need to fix this so let's do this one in the next video so what we're going to do right we'll be
creating a middleware and then every time user refreshes the page we need to check the Au status and for this one also we need to use create Asing Tong and that is very very important right because we need to check that before the Dom is getting rendered or Dom is getting pinned in our browser so let's do that in the next next part so let's uh start working on the middleware part so before that uh I'm going to create one more that is for log out and this is uh pretty simple okay so let's quickly
do this one so we do const log out and here we don't have to do anything we'll just take uh request and response and we'll simply going to clear the cookie so we do race. clear cookie and here We're going to clear the token because this is the key name that we have given here right we have token and once we'll clear the token we'll simply pass a Json and here we can do success is true and we'll do message which will be log out successfully awesome that's it and this is what we need and
then we'll pass this log out here okay now coming to next one and that is we need to basically create a o middleware here okay okay that will Check our o status every time user will do some action like refreshing the page and everything so we do Au middle world so this will be as sync and here we need request response and also the next property now again if all of this you are not able to understand please check the official Doc and if you want me to create very basic level of this uh this
video then I can create the the theoretical video also based on this okay now here the first thing we need to Get the token but how we going to get the token because remember we have stored the token in cookie right so from cookies we need to get it so L con token and this will be request. cookies and then you need to give the key name which is our token okay now if this token is not present so what we'll do return response. status 41. Json so what will return success will be Definitely false
and message we are going to return the unauthorized user that's it if the token is not present correct definitely user will not be able to access then we'll take a tri block and now what we need to do we need to decode this token this is very important because see what will happen right this token is basically keep this all this info this token hold the ID of that user role of that user and email of this of this user so when You'll decode this token we'll get all this information back because currently the token
is encrypted so we need to decrypt so how we going to do that we'll do decoded so decode the token right so we'll do simply here JWT do verify right and you need to pass the token that you just received from your here so this is the token but how we going to verify it you need to pass that secret key that we have used and Here actually this is where it helps this client secret key right so this you need to pass it now once this will decode this one right so we'll do request.
user and this will be decoded and then what we'll do simply we'll do next and we'll call this method that's it now this is done and then in the cat block we'll take error and we'll do race. status do 401 and we're going to render the same Message okay and I think this is done so now this will be our o middleware now you're going to pass it here right so this will return you the user information okay request. user but how we are going to use this so now you need to use this correct
so to use this one again you need to go go to our Au routes now this will basically we need to create one more but before that let's first import our log out here and also you're going to import off middleware And for log out this also will be a post so we'll simply do log out and we'll pass the log out log out user I think let's keep log out user I think uh this will be consistent and we'll do this one logout user and also pass your logout user now we need to do
the O middleware logic so what we'll do right this will be gate method because we need to get the status so here we will pass check o okay you can give any name you want now You need to pass the middleware or handle so we'll pass o middleware and this will give you the again request and response and then we'll get the user right so we'll do cons user which will be request. user now from where this is coming again we have passed this request. user the decoded from our token correct so this is what
we are getting request. user and then simply do raise. Json sorry we'll do raise do status do 200. Json so we'll do Success will be true and also so we are going to pass message user is authenticated or let's keep authenticated user authenticated user and also we are going to pass our user information right so we'll pass the user here if you notice that if while log loging we also pass the user this information so the same we pass it here So that we'll be able to understand also one more thing you can pass like
is authenticated as true but that also you can manage it like here also you can pass like is authenticated as true but how we are going to check it again because if you go to my our here right so we are simply checking this accent. payload is Success if this is true mean user is actually authenticated and this is what we have posed the success is true so now this actually is done but How we are going to do it now again to do this one we need to create one more asnc tun right and
that is very very important and then once we create that Asing T we need to again check it on page load so every time user will do some kind of page load we need to do that so for this one I'll copy this and let's paste it here and this one I'm going to do check o and I'll give this on o/ check o now here what we need to do we Need to get the out so we have API sl/ check o correct so we need to remove and paste it here right this will
be a gate method definitely so we don't need to pass this one so form data is not required here so after this what we're going to pass we'll pass the width credentials sorry I need to take this one so look with credentials will be true and also we can pass some form data like we can pass some headers so here What we're going to do right we pass C control control so C control what we can do we can no store we can we don't want to store any cash we do no store no C
right and also we do must revalidate and also we're going to do proxy revalidate okay and that's it and we can also pass something like expires as zero and also you no need this one Let's uh only pass the headers and let's see what Is happening because I already passed the with credentials as true right now let's save it now what will happen we are going to again add some cases for this so we will first copy this paste it here so we have now check o. pending so is loading will be true check o.
fullfill bu again is loading will be false state. user will be if success so we payload or else this will be null authenticated will be if this is Success Means it will be successful and this is what we have done right this one and then we are having the rejected so for rejected e login will be false State user will be null and E authenticated will be false let's save it so now what we are going to do we have created this method check but we need to now dispatch this method every time user will
basically Lo load this page but what is the best place to do this one because we can do this simply In the app.jsx because this is the homepage right this is where all the logic exist so what we going to do simply uh here we are already getting this we'll take a dispatch so Lon dispatch and this will be use dispatch so what we going to do simply we'll take a use effect and then we can simply dispatch this so we do dispatch and we'll do check o from our slice now let's save it and
let's see What is happening awesome it's kind of like it's immediately working the reason is because we have done almost everything so now what is happening right if I just open the network you'll be able to understand very easily see every time you refresh this page right it is checking the Au and here you can see we're getting authenticated user and also you're getting the user information here email uh ID Ro expires and everything if we try to go to the O page Now see what 11 see it's going to the shopping home page right
even if you don't you can't go to the register page you will it will be always going to this page now we can do some more thing here so what we can do right uh we have some like loading property here right this loading so this loading we can get it here from our state and then if this loading is true so if this is loading is true we'll Simply return a div and we'll return a loading something like that okay so now let's try to go to the O login see it's going to this
page Au register it's going to this page even you don't access the admin view because you'll be always going to the S S View because you don't have access to that page correct so this is done awesome so now what we can do Simply we can basically create the log out method also but that we are going to do later but first thing what we I want to do I want to show you one more thing and that is if I go to the application and go to cookies right you can see there is a
token is getting stored so this is where and also there is a expires we have session and you can basically again I'm repeating you can change the uh this expires this time here if you give 5 minutes 2 minutes Whatever you can basically give here so this is how it will work so now you will be able to go to the others pages also let's say I'll go to the products page okay page doesn't exist let me check what is the rout name I forgot actually listing page I think we have given right I believe
listing page given so let's go to the listing page okay I think something is going wrong here because if I try to go to the listing page right it's going to the Homepage okay so let's do one thing let's see what is coming in this is loading and also in the user let's go to checko and then let's I think I already logged here let me just log only okay let's log the location do path name also I log the is authenticated let's save it and let's see what is happening okay let's say try to
go to this listing page so you're getting false and null First time that is correct because it's getting false and we are checking that if it is true then only we returning loading so that means for the fraction of seconds this is getting false right so it's coming to this uh Cheo component and that time we are getting listing and is authenticated is false okay I got it so now what is happening it's coming to this that is authenticated false and you are not in the login page so that is the reason it's redirecting to
the I think Off login page correct and then we are again getting true okay to fix this one there are multiple ways we can do that I think the easy will be what we can do right simply we'll keep this is loading as true on page load because anyway the East loading we are making false in every instance right if it is pending and fulfilled we are making it false on register then for login also we making it false and also also for check off we Are making it false in case of it's like error
or something now I think this should work so now let's see okay now I try to go to the listing page now it's going to the listing page now it's not coming in there only right see now it's coming here and also if I go to this one okay let's uh log this is authenticated I think it's coming true awesome now I think this is very fine Now if I try to go to the admin dashboard it's go to the Aro page it's going to the Aro page now to check this what we can do
we can also clear the cookie and now let's try to go to the shopping page it should go to the O page awesome now it's working now we'll go to the SOP listing page it's going to the off login page now I try to sign in so getting loging successful and we are getting this one let's say go to the checkout Page it's going to the checkout page awesome now I think this is working now what we can do right we can replace with this loader I think we have this skeleton loader right see something
like this this we can do but later we are going to make it uh look little nicer for now what I can do right let me first install this one sorry let me install this first just to checking purpose and I'm going to paste it here oh Sorry and then let's import it and let's go to our app.jsx and I'm going to import this one here and then let's return this skeleton so let's copy this instead of this I'm going to return this skeleton component width uh let's see how it's coming like if I give
WID let's say 600 PX and height 600 PX rounded full let's save it and let's see refresh this we are getting this one Also you can remove the rounded full one I think this is not recording let's see how this is looking okay it's happening very fast but we can check it see now it's coming for some time right what will happen if I give with full let's give with 800 and let's give a BG background black let's see now uh it's coming for sometime it's not able to see yeah it's coming right I think
it's fine uh let's check one more time Right so we go to application and let's clear this and now try to refres this okay and now try to sign in ah it's coming okay awesome so the loading screen is coming that is what I want to check but I'm going to make uh that one little uh like it will look nicer so we'll create a common component but for now the main authentication part is done now what we can do right we will be start working on the admin view first Right so because until unless
we'll uh complete the admin view features like adding new product we'll not be able to start the shopping view the reason is once admin will add a product then only you'll be able to display it in our UI right so that is the reason what I'll do right for now so go to application and again I'm going to delete this because we haven't implemented the log out for now we are going to do this one in the expert so now I'm going to refresh this So it will go to the Au login page and now
I'm going to login with with my admin user so this is my admin user sign in so now it's going to the admin page correct so this is my admin page now we'll not be able to access the shopping Pages if you see it's going to the admin dashboard then we'll be having admin products and everything right awesome so now we'll start working on the sidebar admin header first and then after that we'll be start working on the cloud iny To store our images and to create a new product so lot of things to do
so let's start working on uh these things from the next part so let's create the admin header and the sidew work component all right so for now I'm going to close everything else and then we will go to admin View and then we have a header and also we have a sideb word all right because we have already imported both in our layout component so let's start with our header Component right so I'm going to remove this part from here and let's take a header let's give a class name so we do Flex we'll do
item Center we'll do justify between PX of 4 py of 3 we'll do BG background and also do B border bottom okay inside this we will take a button and and here uh what we going to do right so let's use some hamburger menu from here yeah kind of this one so Let's copy jsx paste it here and let's import it for this button uh first let's see how this is looking and after this what we're going to do right we will take a span and we'll do toggle menu and this one uh we are
going to take a class name we'll do a S only and for this button we'll take a class name and for this one we will do Large for large device we'll make this one hidden and for small we'll make this one block so this is the first thing okay so this is coming now after this what we're going to do right we'll take a div and we'll take a class name we'll do Flex Flex of one and we'll do justify let's make this one end and here I'm going to take one more button and let's
give this one as log Out let's use some other icon so have log out and for this one let's use it here let's save it let's see how this is looking first so you can see that we are having this log out button here and this icon will be only visible for see smaller devices okay so this is fine and I think that's all we needed for this uh button so sorry for this component let's give some class name I think to uh we'll make this one Inline Flex uh we'll do gap of two we'll
do item Center rounded let's make medium PX of 4 P1 y of two text we'll do small font medium right uh let's give a sadow and I think this will be fine let's save it let's see how this is looking yeah awesome so now this header is done next thing what we're going to do we will be basically creating our sidew bar and then we need to manage something like whenever we will be in The smaller device right on click of this we need to open the sidebar on form of a SE component so that
we are going to do so first let's uh create the sidew structure first all right so let's implement the sidew so here uh what we'll do right we'll take a fragment and the first thing we will take a aside component and inside this we're going to take a div so let's take a class name for this one so we'll make this one Hidden width of 64 let's make this Flex as column we'll do border right BG background padding of six 24px and for large we are going to display as Flex for other we we are
keeping this one as hidden okay inside this div we'll take a class name so we'll do Flex item Center gap of two and here uh what we'll do right we can give some icon at or else let's take some H1 and uh what we can do let's dis play some like admin panel Okay first let's see how this is looking so you can see that we getting this admin panel and let's use some random icon right I think it's not required like we need to give some icon let's give some cool icon let's search some
admin let's see admin is there or not okay let's search for analytics yeah I think this one we can use right it's up to you like if you want to use you can use any icon here so you use this One say let's say how this is looking okay and for this one we'll do a class name we'll do text uh let's see Excel font extra bold for this one let's give a size of 30 let's see how this is looking okay awesome and also we are going to give this one cursor pointer the reason
is uh we also will take navigate so this will be use Navigate and on click of this right we will navigate to the admin dashboard so admin SL dashboard okay so let's say if I try to go to the products so click here it's going to the admin dasb awesome now after this uh what we will do so we have this H1 so after this we're going to create a menu items component so let's do one thing let's create this here only so do menu items Because we will be only using this one in this
component so uh I don't see any point of creating in a different component now what we're going to do we go to our config let's go to index and let's import export some config here so do admin side word menu items right so for each and everyone we give a ID so ID will be dashboard right label will be dashboard and also we going to give a Path uh which will be SL admin SL dashboard okay now let's copy this and paste it to more times for now we'll keep only three so this I will
keep this one as products and this will be also products and this I'll give orders so this will be orders and this also will be orders let's save it now let's go there so in this Manu items we return we return a Nav let's take a class name so we'll do margin top of eight Flex column flex and gap of three let's make two and now what we going to do right we will uh log this sorry map this admin sidebar menu items so admin sidebar menu items do map so do menu item and we'll
render a div and here we will take a class name so for this one we'll do Flex item Center gap of two we'll do rounded medium PX of 3 py of 2 and I think this is fine now inside this uh what we'll do we'll render the icon okay one more thing what we can do right we can also use some some icon from here so let me search something like dashboard let's see what you're getting okay let's use this and we'll go here and also I'm going to render some icon here okay then we
have products they search for product let's see what we getting okay let's use this One so we'll give icon which will be the shopping but baset also have orders so for orders let's use something order let's see how it's coming anything is that or not okay I don't think it's very see this is the only thing that I don't like actually spending so much time so let's use some random let's anything uh I know I'm not sure which one is looking good but let's use this one okay I know these all are not Relevant but
there is no point spending time on this okay this is fine now what we're going to do right so here we'll simply render that menu item do icon and after this uh what we'll do take a span and I'm going to render menu item dot label and here we will take a key which will be menu item do ID and also we'll take a on click so on click of this I will do navigate to menu item dot path obviously We need to pass the navigate so let's do one thing I think we can use
the same here or else you can also pass it I think anything is fine let's uh let's use it here only instead of passing it use it here okay now let's save it and now what we going to do right simply we will render this after this so after this we are going to render the menu items first let's see how this is looking and based on that we will change it so Let's okay something is happening here that we need to check I expected token all right okay I got it I got it so
this is this will not allow sorry this is my bad it will not allow here because we need to write it inside jsx so what we can do right we can use it inside that component only I think there is no point so what I'll do this I'll remove from here and Let's use it here only and then I'm going to import all of this okay now let's save it now let's see okay for dashboard it is not coming this is weird actually not say why it's not coming let's use some different and let's see
so let's use let's search for analytics use this one Oh sorry I have done icon that is the reason okay now this is this looks okay but what we're going to do right we will keep this on make this one this text we'll add some more style here so let's add this text muted for ground and for hover we'll give VG muted right and hover will give text uh foreground okay and also you need to give Text let's do text Excel and let's see how this is looking okay this is fine for this one right
also you need to give cursor pointer and then here uh this one I'll make this one let's do three XEL let's okay let's do two okay now let's click here so it's working fine right so now what we need to do right because when we'll go for smaller device we need to hide this so it's already hiding right and on click Of this we need to open the SE component so that is pretty simple what you can do right after this uh we are going to take a seat component here now this will take some
of the props from this from our pent component so we'll take open say open so here I'll keep the so in this we need to pass a okay first let me import it I think okay we already imported so open we need to pass here open and also On open change okay that is the reason the this thing is not working we have imported it from wrong place so we need to import it from I don't think we have installed the seat component right so we need to do it so let's see so let me
just copy this and install it because this will need some either you can use some SE trigger that you can use but we will use this state so I think it's almost done let's Wait for some time okay it's done so now let's let's open uh import this and now this will take an on open change where I'll pass this set open now inside this uh we will be having the S content so here you can basically mention the side side so we going to open this on left side and for class name we are
going to do with as 64 inside this we'll take a div we'll do class name we do Flex Flex Column and also we going to do height as full after this uh we will take sit header and here we'll give us some class name so we'll give border bottom all right and here we'll give a SE title and I'll do here admin panel and let's uh use the same icon that we have used this one okay and after this uh so simply s this header we are going to render the menu items save it now
obviously this will Not work because we need to pass this from our parent component so what we'll do right simply we'll take a state in this layout so we do open sidebar set open sidew Word and this will be use state of false so in this sidebar I'm going to pass the open which will be open sidebar and set open which will be set open sidebar and also we need to pass this in this admin header component also now Let's save it and let's go to the admin header and here what we receive we receive
that set open method and now because we have this button where on click of this we need to show it so what we can do simply we take on click and we make this set open as true that's it right and now if you notice and go there so this will work see it's working now this part we need to check so what we going to do Okay let's go to this part so you have sidebar and then we have this one right so what we going to do we'll give a class name here so
we'll do flex and gap of two and we'll keep this one in a span or we can use the same right let's how this is looking based on that we'll change it okay this is okay but let's give some uh margin top margin top I'll give five also I'm going to give margin Bottom as four let's give five only okay now this is working now on click of these menu items we can also change this one right that part also you can do so what you can do right here we can pass this set open
and we'll pass the set open in this menu items let's go to this component so receive set open now what we can do so first we'll Navigate and we will check if set open is there so we'll do set open so this I'll make false or else this will be null or let's see what is happening so if I click here okay this is not closing this we need to remove I think this is what you've done wrong so okay add dashboard and orders awesome right now if I explain uh sorry expand now this is
also Working and also let's try one more time orders okay so now this part is done next thing we will start working on the main main thing that is because we need for some kind of products right so that we'll be able to start working so first we'll start working on that products page so we need to create our add products s component that we are going to open on the right side and also First thing we will will be start implementing the image upload so once the image is uploaded we are going to upload
that image to cloud inary and then we'll be getting a image and that image we are going to store in our mongod database correct and once that is done then we are going to fet our list of products and we are going to render here so lot of things to do so let's do that part in the next video all right so let's start working on the uh the Products page okay so first uh we will go to our Pages then we we have admin View and then we have a products page correct so now
let's close all of this and let's start working now from this video we are basically mainly starting most of the functionality okay so we'll take a fragment so we'll be having a button and so we'll keep this one as let's keep a class name of margin bottom of five we'll keep flex and we'll do justify end here we'll take a Button and we'll do add new product okay let's save it so you're getting this one here this is fine now what we're going to do right I think uh let's do one thing we'll make this
one with full so that it will be on the right side I think it's fine you can also keep it here now after this uh we need to render the list of products but we don't have any products created for now so we'll just keep a placeholder okay so we'll take a div and here I'll Take a class name we do grid we'll do gap of four uh for MD I will do grid Columns of three all right and for large uh let's do this on grid Columns of four so this will be my placeholder
and after this uh what we're going to do right we will be opening another SE component for this and now again for this one right we need some configuration because I already told you previous video that this kind of configuration we already discussed how To create the common form so I'm not going to write all of this because this will take a lot of time right so I'm just going to show you that what exactly I have written so I'll copy this and uh and also to be honest I also don't write personally so I'll
go to chat GPD and then I'll tell to create all of this because if you see that these things are extremely time consuming like so if I just paste it here right so if you see so we have a add products from elements So products will have a title the component type will be input type is text now I don't have to say also like you'll be able to understand very easily description again this will be text area then category then I have some main Omen kid accessories foodware then I have some popular brand that's
it and then we have a price which will be type of number sale price and total stock that's it so this is the main uh uh the form controls that we need to create new Product I'll close this and also now let's go here so after this I'm going to take another component and let's do a so we'll do open products we'll do open create products dialogue and we'll do set open create products dialogue right and then we're going to use State of false now on click of this we'll take on click and we'll do
set open products uh open create products dialog true and here we are going to pass the open which will be our open create products dialogue and on open change for now what we'll do right we'll simply just do set open products diog will be false all right right now inside this uh what we'll do so we'll take a Content SE content so for this one uh we are going To open this one on the right side so we'll keep this one on right okay that's it and for class name I'm going to give here overflow
Auto after this we'll take a header and inside this we take a title and let's give this on name as add new product awesome so now let's see what is happening if I click here right it's opening it's looking nice and after this so after this right uh what we going to do we'll be rendering another component Which will be my our image upload component and after that we are going to render all our forms form elements so here we'll take a div and we'll take a class name and we'll do pu of six and
inside this I'm going to render the common form and here I'm going to pass the form controls which will be my ADD product form elements and also uh we need to take some form data right so we'll do form Data set form data and this will be use state of initial form data right or initial state whatever you can uh take here so what we'll do simply we'll take it here only so the const initial form data so this will be I think something [Music] wrong okay so here we'll have a image which will be
null right then we'll be having a title Empty then we'll be having a description which will be empty then we'll be having a category empty then we'll have a brand then we will have a price okay and let's give this on string only and we'll do sale price and also we'll do total stock now we will pass our form data which will be our form data and set form data will be our set form data right and also you need to pass a button text so Here I'm going to pass like add and what else
we need to pass we also need to pass on submit function so do function on submit and we are going to pass it here so we'll do on submit which will be on submit let's save it now see the advantage if I click here right see I don't have to do anything it's automatically created all of this okay something is wrong here this part we Need to check I think we have done something wrong in the select component let's go to this and let's see what is the problem is happening here I think we have
imported from the correct Place only but something is going wrong in the select part so select trigger oh sorry sorry sorry this will be label yes but still it's not coming correctly okay you can see that select Content we are importing from a wrong place that is the problem we need to import it from here now let's see yep okay so now I think this is [Music] fine so we have all the data but we need to start working on upload image UI so that part we are going to do okay so now let's go
to that and uh go to the admin section on the admin view inside components and here let's create one More component and I'll give this one name as image upload. jsx so let's start uh working on this particular component all right so let's start working on the image upload component okay so we'll create the component and we'll give this one as uh let's give like product image upload let's return return here aiv and we'll give a class name of with full Max wmd and MX of Auto okay and inside this we take a Label and
we'll do upload image okay and here we'll take a class name so do text as large we do font semi bold margin bottom of two and we'll do a block first uh let's import this in our so after this we're going to import here so we'll do product image upload so getting here okay now after this uh what we will do we'll take one more div and inside this I'm going to render A input so let's take a ID so we'll do like image upload okay type we are going to do file class name we
will do hidden so we'll hide this one okay also we need to take some on change disable property and also R but that we are going to do before that we need uh actually some kind of uh State here okay so what we're going to do right we will be managing the state from Our parent component or basically in this component where we will be rendering the list of products so we need here couple of things so first thing what we'll do we'll take your const and we'll do here that image file and we'll do
set image file and this will be US state of null okay and what else we need we also need one more which will be our lastly uploaded image URL that we will be receiving from cloudinary so we'll keep This on name as like uploaded image URL set uploaded image URL and this will be use state of empty now this uh things we are going to pass so let's pass it here so we'll do uh the file which will be our image file and we'll do set file which will be our set image file okay and
we'll do uploaded image will be uploaded image URL and set uploaded image URL will be set uploaded image URL Let's save it now we will be receiving these two as a prop in this component correct and also we are going to receive these two as a prop in this component awesome now what we'll do we'll take input ref here in this component so do input ref which will be use ref of null okay now what we are going to basically do in this input first we'll pass a ref Property right okay I think we already
logged out because it's over so let me just log it in one second so ref we are going to pass the input ref that we have created okay I think we have given some wrong let's do input ref so this will be our input ref and also we need to pass on change so we'll do on change which will be handle image file change right so now let's create this so We'll create this function so now what we are going to do right in this handle uh this file change we will be receiving event and
first let's log here event. target. files let's see what is happening so I'll go to products click on add new product I think we are getting some error let's see what is the error that we are receiving input two cannot be invoked without new okay see I'm doing this mistake every Time we have to import it from this one that's the reason so now let's click here okay we actually need because we keep this on hidden so let me just remove it for now and see if I select right so now I have some images
uploaded I select here you can see we are getting a file list and here we are getting all the information related that file okay so this is just I want to show you so now what we can do simply in this handle Image file change uh we can simply get like selected file something like that which will be again image. target. files right and here we'll be getting the first element now what we're going to do here we'll simply if this selected file is true so we'll do set image file will be this selected file
okay so this is the first thing now after this uh what we are going to do so we'll come here and then after this input we'll check that Whether this image file is available or not means whether user already selected any image or not if yes then in that case we we will be showing the image related information or else we need to basically show like drag and drop or you can manually upload it okay so how we are going to do that so after this right we'll simply check if not equal to image uh
file so we'll take a label and inside this what we going to do simply uh we need to take a HTML for Here right so we do HTML for and we're going to pass this image upload or else if image is already there so we are going to render something else so in this level uh what we going to do let's take a class name so here we'll do Flex Flex column we'll do item Center we'll do justify Center we'll do height of 32 and we'll do cursor as pointer okay and inside this we're going
to use this Upload Cloud icon so let's take a class name here so we'll do this one as width as 10 height as 10 we'll do text muted foreground and margin bottom of two and after this we'll take a span and we'll do something like drag and drop or click to upload image Okay so so let's save it now we can basically make this one hidden one Again see we are getting this one right drag and drop or click to upload image so this is fine now what we're going to do right also one more
thing we need to do here before this input in this div we will take some class names we'll do border as two right and here we'll do border Das we'll do rounded large do p of four what else let's see how this is looking let's save it yeah and also uh For this one we'll take a margin top of four okay we are getting this one this is fine now there are some more things we need to do so in this div we are going to take two more event so one will be on drag
over so here we'll do hand handle drag over and also we'll do one more that is on drop so we'll do handle drop now these two we quickly create so one will be function handle Drag over and then will be function and handle drop okay so what we need to do right when user will do drag over we can simply do here so this will give us event and then we'll simply do event. prevent default here so do event do prevent default and when user will already dropped that file or the image so again first
thing we need to prevent it and after this what we'll do simply We'll do const dropped file so we'll do event do data transfer right so this will give and here you'll get the files of the zero element same thing and here if this Dro file is true so we do set image file will be this dropped file okay now this is done and if the image is already uploaded in that case what we are going to render we will be rendered some image related information so here we will take a class name and we'll
do Flex item Center justify we will do between and inside this we'll take one more div we'll take a class name we'll do Flex item Center and here I'm going to render a file icon okay and let's take a class name so we do with as 7 height as seven let's make eight we do text primary and also we are going to do margin right of two okay after this uh what we will do so We'll take one more paragraph and here we are going to render the image file. name and here we'll take a
class name we'll do text uh small and we'll do font medium right I think this will be fine uh what else we can do right we can also add one more property to remove the file so here after this we'll take a button and inside this we'll add this x icon and let's take a class name so width of four height of four and After this we'll take a span and we'll do remove file but for this one we don't want to S this we keep a class name of ASL only okay now for this
one this button we are going to keep a variant of ghost and we are going to pass a size as icon we'll take a class name so we'll do text muted foreground and for hover we are going to do Text text foreground okay and on click we're going to do handle remove image okay so now let's copy this and we'll create this so function and handle remove image so what we'll do right uh to remove this one simply to set this will be null and also if this uh input ref do current is present so
it will do simply do inut R uh ref. current. value this will be we Can make this on empty that's it now let's save it and see what is happening okay something is happening here let's see any error or anything because we need to check what we are getting in this Mage file okay this is coming undefined okay something is wrong here that we need to check okay something we are doing wrong here is it let's see selected file set image file is not a function okay The problem is here but why it is coming
set image file is not a function oh see this we have done set file that is the reason so this has to be image file okay this is the problem okay that's right now I think this should work so let's see okay so we are getting this one and also this is icon and also if I close this we getting this awesome and also if I just quickly show you Right so let's go to my folder UD me and then know let's go to video YouTube Project and then if I try to let's say drag
and drop it's working right drag and drop it's working and if you read remove it's working awesome job now I think this part is done and let's close open select and this is working awesome so now uh the file handling part is done so first uh we are going to create the Create the backend Logic for this uh image upload so once the image is uploaded to our cloud in we'll be getting uh image URL and based on that we are going to create our product uh SK schema and other controllers okay so let's do
that in the next part all right so let's uh start uploading the image so first thing what you need to do right you need to create a cloudinary account and then you need to log to console now this is extremely Straightforward just login using your email or direct you can log in through Google also once you'll do that you need to choose the hdab we are going to use node nodejs and if you remember we already installed this Cloud inary package also as much I can recollect let me just check once so we have this
package already installed okay now the main interesting thing is that what you need you need the cloud name the API key and the API secret key this is to Basically configure so what we'll do right if we go to this view API Keys is I'll be getting all the information here right so the first thing what I'm going to do so we'll be going to the server side and then here inside this I'm going to create so first let's create a config or like uh config folder or helpers whatever let's do helpers right and inside
this I'm going to create cloudinary do JS and let's do everything uh step by step so the first thing you need this Cloud dinary so this will be require and we are going to use this version V2 also we have already installed the package malter so we also need the Sim right now we need to config this one so we do cloudin do config and here you need to pass the Cloud name and this all you need to pass okay so I'm going to copy this again everyone please don't use uh like what I'm using
obviously we are going to change this one we are going to replace all of these with envirment variables but I'm highly suggest uh like don't uh use this one okay try to create your own and that is going to definitely help you and it's pretty simple just create the account and that's it also you need the API secret key three okay so I'm going To copy this and then we going to paste it here so this is the first thing you need now second thing what we going to do right you need to create a
storage instance or variable so I'm going to create storage and here we going to create a new multer do memory storage we are going to use okay and then I'm going to create a function so we do async function and We'll do handle sorry we'll do as sync function and we'll do handle image upload right here I'm going to do getting the file and I'll do const result this will be AIT Cloud inary so this will give you this uploader do upload method and this will take a file okay and also you can pass some
options so file I'm going to pass the file our image file that we are going to receive and we're going to pass a resource type Which I keep this one as Auto that's it and then we just need to return this result now again first we have basically created this ordinary config created the storage using multer and then a function which will return the result okay after this what you going to do you need to create I'll create upload and then I'm going to use the molter instance and I'm going to pass the options now
here what we going to do We going to pass that storage that we have created right so this one let's give this spelling and at the end what we are going to do simply do module do exports so I'm going to pass both these upload and also we going to pass this handle image upload this util that we have created this one because this we need to use okay so this is all about the first step this is one of the first step that we need to Do next we need to basically need API API
route right so that we'll be able to hit it from our front end so to do this one we need to again create a controller so inside controllers I'm going to create a folder I'm going to give this on now name as admin so the admin related controller we are going to create here and here I'm going to give this one as products controller.js okay and let's start with Our image upload so we'll do handle uh let's change this name I think we'll give uh we'll give image upload utils util okay and here I'm going
to give this one as handle image upload so we'll do asnc request comma response now here we'll take a try catch and here uh first we log this and after this we will uh just do some message like uh let's do Race. Json and and then we'll do a success as false and we'll re render some message like error occur okay in the tri block what we need to do right so here we need to First convert this to a base 64 so we'll take buffer do from so here what we'll get we'll get the
request. file do buffer and then we are going to do two string and here we need to convert this one to A base 64 okay once this is done after this we'll get the URL so URL will be so here we'll do data right plus we have request do file dot meme type and plus what we are going to do here we are going to pass base 64 comma and then we are going to pass this B 64 that we have created here and after this we'll do const result and here we are going to
pass AIT And you can see we've created this image upload util and here we're going to pass this Bas 64 okay and once this is done we're going to do rise. Json and here what we can do we can do success is true and here we are going to pass this result let's say uh which will be this result here okay so this is done sorry I think we need to pass the URL here not the basic St because this we are already using here so this will be the process once this is Done we
are going to do module. exports and we'll pass this handle image upload all right now once this is done now we need to create our uh routes correct so what we're going to do right inside this routes I'm going to create another folder let's give this one as admin and here I'm going to give products product so we'll do products routes.js Okay so what we're going to do first we need Express right so this will be Express and here we need that handle image upload method that we have created controller admin then product controller and
here we need the handle image upload also we need one more thing and that is we need the upload property also so we'll go to reare and we need helpers Cloud inary so We have a upload utility that we have created okay now I'm going to create the route so this will be router okay first let me just create this so do const router which will be Express do router and then we'll do router dot post let's give this one name as upload image okay this will be the URL and here we are going to
call this upload method and we'll do a single upload and I'm going To give the file name as my file okay and then we need to basically tell that which uh Handler we need to pass it here so we going to call this handle image upload and this is done so this is is all the configuration that we need and once we've created this again the same process we need to go to our server and we need to call this so we we will give this one name as admin products router okay and this will
be re so we go to Routes admin product routes and let's give this one as so we'll do app.use so this will be/ API slash admin and then for this one slash products correct and for this one we're going to use this admin product router that's it and this is done all right now once this is done what we going to do right we need to go to our front end so once we'll upload this one we need to basically at the same time we need to Upload this or basically call this API uh URL
here and I I think have we exported this one I think again we are doing mistake we need to export this one that is the reason it's coming so we do module. exports and this will be router okay so this is done now let's go to our uh file upload component or image upload image upload now how we are going to do it right uh this is pretty simple so this image file that we have stored in our state we can simply check that if This image is available that means uh we already have uploaded
the image so how we going to do that so we already have this image file correct so we can simply take it like this so we'll take a use effect here and we'll keep this image file as a dependency and we'll check if this image file sorry if this image file is not equal to go to null so I'm going to do upload image to Cloudinary okay now let's quickly create this uh method so we are going to create this one so for this one we no need to create any create Asing we can simply
call use any function Asing function inside this okay and here we are going to do const data so we'll take a new form data now uh we are going to do data. append so we have my file you can see if I go here right we have a my file so this I'm going to copy And we'll pass it here my file and then here we are going to pass the uh this image file that we have created correct this one and then we're going to create const response this will be a axio do poost
and then we're going to call our uh this URL so let me just go to any store that we have created correct here and then I'm going to copy this URL from here so that we don't need to write once again and now we will pass it here so now this Will be API SL admin SL products SL I think we have given image upload image right so this will be upload image so this will be my post API URL and after this what we need to pass we need to pass the uh this data
correct so this will give you the response back and once we get the response back so we'll check if this response is true so we'll do set uploaded image URL and here we are going to see what we getting so we'll do Response do data okay also let's log this response. data here and let's see what we are getting and let's save it everything is done so now we need to check whether this functionality is working or not we open console also go to network tab click here let's select this image open okay see 200
awesome and now what you're getting you're getting success to and result you see you'll get everything API key and everything right you need this uh this URL this is the thing that we need and if I go to console right you'll be getting data inside this data you have a success and then you have a result so what you can do right simply you can check if this response. data do success if this is true right so we going to do response. data dot so we have response. data. result dot this URL okay data do
result do URL this is done one more thing that what we can do right we can also give some kind of loading so until unless this uh image is getting loaded correct so that also you can do so for this one again let's go to the products page so here right what we can do we can take one more State here so let's take something like image loading State and set loading set image loading State and this will be U state of False now I'm going to pass both and let's first let's pass it pass
this one so image loading State and then after this we'll go here so we receive this one and where we are calling the API right so here we'll make this set image loading State as two and once you'll get the data back we'll do set image loading state has False right that's it now let's see what is happening so if you open this one we can do something like this when we'll select and then select an image right if it is in the like uh loading phase we can disable all of these or S some
kind of loader something like that okay so that we can do and also one more thing that uh we need to do basically once we'll get the image W back now what we can do We need to replace this image W or basically the updated image whatever we are having with this original image in this our initial form data the reason is because this is the data that we are going to stored in our mongodb database and from there we are going to get the URL back correct so this is very important but before doing
this loading State and other things the next thing what we need to do because you can see the form data will will be having Already getting because the reason is we already have this handled so if I just go here and just log this form data correct because we already created the common form so no need to handle anything from the form uh form side so here if you notice right if I type something see we're getting description then category let's say woman brand let's say puma uh price let's say 100 sales price uh let's
say zero and total stock let's say 1,000 and if I do or Expand this one you can see everything we are getting the data only for image image we need to what whenever we'll upload the image and get the URL from cloud inara we need to replace that with this URL so this part we need to do so let's do this one in the next part and after that we need to start working now the main thing and that is to create all the API routes for products so that we'll be able to add a
new product edit a new edit existing product delete a Product and also fetch list of products from our database and this is only from for the admin once this is done right once we'll be able to add a new product then we'll go to our shopping View and then we'll be rendering all list of products okay so let's do that in the next part all right so now we are going to do four things so first we will be adding a new product we are going to fetch the list of products we are going to
edit a product and Delete a product okay so first uh we will start with creating all the API routes controllers and also the model first we'll go to models and here let's create our product model so I'll create product. JS so first we need mongus so we need mongus here then I'm going to create our product schema so we'll do product schema so this will be new mongus do schema so we are going to write what are The things that we need so first we need a image which will be a type of string title
we'll keep this one as string we need a description right so this will be also string then we need a category which will also will be a string we need a brand name which will be string uh we also need a price so right so this one we're going to do as number then also you're going To do a sale price which also will be a number also you're going to do a total stock which will be a number all right so these all the things that we need so after this here we are going
to pass the time stamp which will be true okay so now we'll create our model we'll do module. exports and here we are going to do mongus do model and here we're going to Create this model or name this model is product and then we going to pass a product schema that we have created okay so this is done so this will be our model now next thing we need to go to our controllers again step by step that we need to do so we already created our handle image upload so after this we need
to create four more controller so we'll be add a new product right so and then we need to do a fetch all products now this will be For admin right so admin will be able to fetch all the products then edit a product and also we are going to do delete a product all right now first we'll start with add a product so Lon add product this will be ask sync so we get request response so first thing what we need to do first we need to get all the information that we needed means whatever
user will be typing here Correct all the properties that we need so we'll take a try block we take a catch block so here we'll simply log this error and we'll simply return a race. status of 500 do Json again these things we are doing very repetitive I know but we don't have any options we need to do but uh if you want you can actually skip this part also because this part will be always same and here we'll do some error ORD okay That's it now let's copy this and I'm going to quickly create
all the methods because these will be same for all other so here will be F all products this will be also async so we have request response then we will be creating edit a product so we'll do edit product and also we need to do a delete product right and both of these we are going to delete by ID or edit by ID but for all these this part will be Always same because we need to handle the TR catch so this is the reason we just use the same instead of rewriting okay and at
the end we are going to pass all all these so we will do add product and we'll do Fage all products then we'll do edit product and also we'll do delete a product okay now let's start with creating our logic so now in this try block now what we'll do we'll simply get the data right So here what we going do inad of data so we need to get all the properties so we'll do request body and we need all the things we need image we need Title we need description we need category we need
brand right we need price we need sales uh sell price and also we need total stock okay so these all the things we need and then we'll create our new product so we'll do newly created product which will be uh we'll take new And then product right so we need to import it from our model so this will be our new product and here what we going to do we will pass all these properties so copy this so whatever we will be receiving from here we going to pass it here and then we'll simply do
a it so we'll do newly created product do save right so this will save and then we are going to do rise. status 20 we'll do 2011 and then we're going to pass Json And we'll do success will be true and we are going to pass the data right so in the data we we will pass this newly created product that's it so this is what we are going to return once the responses or basically the data is saved successfully in our database so this is about the adding a new product now to fetch fetch
will be pretty simple because you need to get all the products right so what you can do simply you'll do const so we'll do List of products and this will be AIT and here we need to do this product that we having the model do find so find will do find will find everything right here and this will simply return you the list of products and we'll do status of 200. Json and again we'll pass the success as true and here we're going to pass the data which will be our list of products and this
is pretty simple because you don't have to do anything here on the shopping side we need to filter and sort But here we need to get all the list of products so this is all about the fetching all the products now editing and the uh deleting so editing how you're going to edit right so we need to edit by the product ID so so let's say there are 10 products and we are clicking on a particular product so we need to get that product ID and based on that we are going to update that product
so this is also pretty simple so what we're going to do right in our URL from Where we'll be hitting that edit API URL so there we are going to pass our product ID as a param and that param we are going to receive from this request okay so this will be something like this so let's say this request will give you this params property right and here I'm going to get the ID so this will be my product ID and based on this ID I'm going to filter that whether the product is already exist
or not if that product is not exist that Means product cannot be found so return error but if the product is present so you're going to replace the product uh information with the updated data because once we'll edit the product right we'll be able to change some of the properties and everything so that we can do so first we'll get the ID and then we'll also get the uh all the data so this data will be receiving from request. body so I'm going to again copy this part and then we are going to paste It
here and then we are going to first check the uh find we'll do find product because first we need to get the product so we'll do a it and here we'll do product so we'll do find by ID right so we'll do find by ID and here we'll pass the ID so this ID is this ID that will be passing now if in any case this fine product is false that means we are not getting the product so what we need to do we need to return from here right so we'll do return uh ra.
status we'll do Phone not for and we'll pass a Json and we'll do a success will be false and we'll pass a message so let's render M select product not found okay and if this is not the case then what we'll do simply update the product information so we start with product do title right so this product or title will be the title of the product that will be passing from here so this title this title so if we are passing or updating the title so it will pick from Here or else it will pick
from existing product. title right so we do product dot sorry this will be this product not that I think we are doing fine product okay so we do find product. title will be either title or find product. title and the same we need to do it for all the other information so we'll do paste it and this will be our description so this will be either description or this description that we Having then we are having the category which will be category or this category here existing category then we are having the brand so the
brand will be either the updated brand that will be selecting here or else it will be the existing brand then again paste it so we'll do price we'll do sales price total stock and image so we'll do price so this will be either price or price from here then we have the sales price see everything I'm doing line by line Okay so that it will be easy to understand then I'll do total stock so either it will be total stock from here or it will be here and then we will keep the image as it
is because we'll not edit the image functional for now so we'll keep it like this so image will be this image whatever we'll be passing here or El uh the existing image that is fine so once this is done then we are going to do Aate and we'll do find product right and we'll do do save so we're going to save this and then we'll simply return a status of 200 and we'll return adjacent and we'll do success will be true and message what we going to do let's do pass a data so data we
are going to pass which will be our fine product so that is the updated product that will be doing after editing okay so this will be our edit functionality first we get the product We check if the product is present then we just update the product based on what we are passing so this will be editing now deleting will also will be pretty simple so for delete also we need to get the ID of that product because we need to understand which product we need to delete correct makes sense so first we'll get the ID
so this we'll get from request. params so we'll get the ID now again we need to first uh get the product so we Do const product and this will be aate right and this will be product do find by ID and delete right so it will find the ID and based on that it will delete the product now here we'll see uh check if this product is not present so we'll return uh what we'll do is again we'll return this let me just copy it from here instead of doing like this I'm sorry if you're
getting some noise I can't do anything about it seriously Because my friends will be talking all the time and okay so if we'll we'll do this right so if the product is not present then we'll do a 44 product not found and if the product is already deleted then what we'll do simply a uh return a status of 200 and I'll do Json and I'll do success will be true and here I'm going to pass message like what we'll do right message we'll pass that product deleted Successfully and this is done so this is all
about the all the uh API controllers that we need so now uh we'll go to our routes and let's update the routes so let's go to our product routes and then we'll receive all of these right so we have ADD product we have edit product we have fet all products and also we have a delete product so now the first one so we have router. poost so let's keep this one as ADD so This will be our ad product now let's copy this so for a edit so for edit we are going to do put
right so we'll do put and this will be edit and then we're going to pass the ID because this is the dyamic ID that will be passing the current edited ID and for this one this will be our edit product then we have a uh like delete so this will be delete and then again we need to pass the ID of that Product and this will be delete product and at the end we'll be having one more which will be to get all the products so do get and here we need to pass the G
and this will be our FAL products okay so we have four and I think the back end uh setup is and functionality is done so now what we need to do we need to go to our slices and we need to create all the state and everything in our store so in the store right I'm going to create one more Folder and I'm going to give this on name as admin and inside this I'll create one more folder and I'll give this on name as products slice and let's create index.js all right everyone so let's
start creating the slice so we'll give this name as admin products slice and this will be create slice okay I don't want to import it like this let's import it from here okay So I'll give this a name as let's give admin product slice okay or let's give only give admin products I think this will be fine then we'll give anyal state so what are the things that we'll be having in the initial state so we will keep a ease loading as false also we going to keep the list of products right so we keep
a product or product list okay then uh we will have a reducer but For now we don't need anything in the reducers but we need extra reducers okay so here we need the Builder so we're going to write all our cases but before that we need to create some Asing tun right so we'll start with first so we need add uh new product so this will be equal to create a sync tun so here we need to give the uh identifier so I'll give this one As products slash add new product okay and here what
we receive we receive the form data correct and then we are going to do the API call here so for this one the first thing we'll simply do const response or result equal to AIT Lu axus dopost also we need to I think we haven't take the async we need to take async here Also right so let me just copy the URL from here instead of writing so we need API till till this part this will be common so I'm going to paste it here right and after this what else uh what is the end
point that we have given let me just quick check once so we have this on/ add but what is the Bas so Bas is API SL admin products right so this is what we need to use so SL admin SL products SL add and then we're going to pass the Form data that's it and here we are going to pass a headers let's pass a headers so here I'll pass like content type right so this will be application SL Json and then what will happen so after this we're going to Simply return result dot data
that's it so this will be our add new product Asing T now I'm going to copy this and I'm going to paste it four times now obviously we're going to Change all of this uh step by step so now this will be our fet all products so this will be let's give fet all products only and here this will be a gate method because we need to get the list of products and we don't need any form data in this case so we are going to remove all of this only this part and then after
this uh what is the name that we have given I think for gate it will be SL gate right so this is what we Going to use so this will be in B this will be get and then we going to return the data so this will be our fet all products then we will be having our edit a product edit product edit a product let's give edit product so this again I'm going to give edit product here also you're going to receive the form data but we also need the current ID right so what
we'll do right we'll pass something like this We'll pass ID and also we going to receive the form data and then if you go here right so you're having slash edit SL ID and this value will be dynamic right and I'm going to explain why is that so for now I'm going to copy this part and then I'm going to remove this and place it here and instead of this we going to take it uh time uh like template literals because we need to pass the dynamic value here so here I'm going to pass the
ID and this ID will be The product ID so we doing a post request to edit ID and then simply we are going to return the data this is done and for delete right for delete it will be also simple so do delete product and then this will be delete product and this also will be post and for this one also I'm going to receive ID correct and here I'm going to do template literals so I'll do this one as delete and then I will do so we need to Pass the ID so we do
SL we pass the ID okay and for this one this will be a Del request and we no need all this and one more thing we need to do for the edit one we need to make this one as a put not post okay so now for this one is done now what we need to do basically we will add some uh basically uh uh this Logic for here so Builder logic we need to write so first case will be so here we need only case for uh fetching one I'll tell you why so We
add a add case and this will be our fet all products. pending right and here we need the state and then here what I'm going to do right so I'll do state DOT e loading will be true then I'm going to do another add case and here I'm going to pass this this will be fulfilled and here we need the state and the aent and here what we're going to pass Right so we need first state. e loading will be false this will be false and then we are going to pass the state. products list
for now I'm going to do this on accent. pad but remember we need to change uh this one so I'm going to log this here and we are going to see what exactly we are getting in this accent. payload so that it will be easy now let's copy once again and paste it here and this will be for Rejected so here we'll keep this one as false and product list I'm going to make this one as empty array if this is fails and this is done so now what we are going to do is simply
do export default and we'll do admin product slice. reducer right and this is done so now we'll go to our main store okay so now let's import it so we going to import that admin products slice right so we'll do it from uh not Slice let's do this on admin product what is the name that we have given I think admin products slice right so admin product slice from so we'll go to admin / product slice and here I'm going to give the name as admin products admin products okay so this will be admin product
slice awesome so this thing is now done now one more thing we need to do right remember that when we'll upload the Image we'll show some kind of loader here so that it will be like it will be a good experience for users so we'll go to our admin view let's go to the first we'll go to the products page under admin view then we have a product page right and I'm going to close everything else and here uh let's I think we already have this image loading state that we have already taken right so
what we going to do right will pass this image loading State here in this product Image upload component and these we're going to receive as a prop here and what we're going to do right when we already have a file available means in this part right so here we are going to check if this image loading state is true so for sometime we are going to show this skeleton component I hope you're getting and then here uh let's give a class name so what we going to give class name uh so uh let's do something
like this So we'll make the height as 10 here and we'll do BG gray let's do BG gray 100 let's see how this is looking and based on that we can change right so let's I'll choose some image here so YouTube and then I'll select this see we are getting this loader and once this will be done then only you'll be able to see see it's I think it's still in painting state so this takes some time sometimes see now it's done Okay so now once this is done now what we need to do as
I already mentioned that once this available we need to basically save this image URL here in in our state so now first we'll start with this uh add functionality so we have this on submit so first we'll take event here and we'll do here event dot prevent default okay and then what you're going to do so in this case first we need to call that Asing tun that we have created correct and uh once we'll Call that ASN tun method or basically once the product will be saved we need to face the list of products
to two things we need to do first let's do the list of products fetching that will be uh better so if I go here right if you see we have this fetch all products correct so what we need to do this is pretty simple so in this component admin products page we'll take a dispatch and we'll do a use dispatch and Simply call this right so we'll take a use effect and on page load we need to get the so we do dispatch and we'll just dispatch here uh F all products that's it so now
how we'll be getting this so we'll be getting from our state right so we already have this state product list so we copy this and uh let's take it here probably so we'll take this product list so we'll take use selector so do state and what Is the name we have given remember we have given uh if I go here right so we have given admin products so this is the reducer name so we do state. admin products now we will log this product list let's see what we getting here save it and and you'll
see one thing that we need to check and that is if I go to console right remember in this component we have logged this accent. payload here see here line number 75 and I'm pretty sure that will Be rendered here so 75 and you can see here we are getting this data so now success is true data is empty so if I go here right and let's refresh this page one second so I'll go back here and then come back see we are getting this product we calling this list of products so what we need
to do instead going ACC accent. payload we need to do accent. payload do data correct so this will be do data and if I now save this now you'll see that we'll be Getting empty array because currently we don't have any product saved and that is correct awesome next thing what we need to do now when we'll submit this right we need to basically get the or basically pass the uh form data the existing form data that we are having along with the image that we have uploaded but how we going to get the image
so image you'll be getting from this uploaded image URL I hope you're getting see how it is Working let's if I just log this uploaded image URL so it will be empty let's say I'll click a new product and then I'll add this product open so it's loading loading loading once this is done see you got the URL okay so now what you need to do simply we'll just do a dispatch and we'll do a add product so add new product and in this add new product what we are going to pass we are going
to pass the existing form data and we'll pass the image right so we have The image which will be uploaded image URL awesome now once the product will be saved what we need to do once we we'll save a product we need to get the updated products right so we'll do a DOT then and we'll do a data first let's log this data here so I'm going to log this data let's save it now see what is happening I refresh this page so click add new product let's add this here so it's save it's I
think it's taking some time let's do product One product one and category doain brand I'll do let's Addidas price I'll do 250 sales price zero and and stock I'll give 1,000 now let's click on ADD it's already fulfilled awesome and now you can see that in the payload you're getting success true and in the data we'll be basically getting back the data so now what we going to do if the success is true so we do if this data so we do if data. payload do success if this is true what We need to do
couple of things we need to do first we need to reset this form second we need to close this model and we need to face the list of products and also we need to show a toast that product added successfully quite a few things so first uh what we'll do right first we'll do if this is true so we will do the first we'll make this image file as null after this we'll do set form data will be initial form Data then we will also dispatch our accent to face is the list of products we'll
do F all products and also we need our toast so we'll do here use toast and we'll do toast and we'll show here and title alsoo product added successfully all right so all the things we have done and at the end what we'll do we'll uh we need to also close this Uh open create product dialogue so this also will close so let's close this also so we'll do this one false so again I'm repeating see what are the things first we'll get the F the list of products again once the data is saved successfully
we'll close the model we'll make the image file as null we'll reset the form and also will show a toast save it and let's see what is happening here now now I'm going to see now if I go there right there is already a product Is added so we should get now one product see we are getting one one product already getting right okay now let's do one thing let's add another product go here add this image so this is now see here lot of improvements you can do when this image is getting loaded you
can disable this properties you can also disable this button I'm not going uh into those details for now because I'm pretty sure that this video will be already very Long you you will understand why so that is the reason first complete all the basic functionality that is absolutely necessary let's do Omen let's give Nike let's give 500 sales zero now let's give 100 sales price and give 5,000 as total stock now let's click on ADD awesome Now product added successfully and everything add new product and everything is reseted so now this is done so now
we need we are able to add a new product And even if I go to the console you'll see that there will be two products instead of one see there are two products now okay so now we need to render the product uh products here and after that we need to start working on the edit and the delete functionality so first let's fetch the list of products here and then we'll do those things all right everyone so let's start implementing the products page okay so the first thing what we are going to do Right I
think let me just expand this a little bit we will go to our uh so in our slice I believe we already have this fet all products correct so this is the fet all products so two things we need to do first we need to fet all the products on page load and also whenever we'll click we need to get the updated list of products and that part we have already done here so now let's create one component inside this and I'll give this One name as product tile so there will be two product tiles
one will be for admin view one will will be for the shopping view if you want you can create only one and then manage like that but but I want to keep this one clean so that we don't have so many code in that single file so inside components and then admin view I'm going to create a product tile okay jsx now let's give name so we'll give This one as admin product tile right now what uh this basically receive this will receive product single product and let's return so let's write a card first we
need to import it I think we have't installed so let's go to our SN and then install card component and let's copy this now apart from card we are going to also install some more things here Okay so we paste it and also uh button we already have and also I'm going to install the badge component so these two things we need okay so inside this card uh what we are going to do we'll take a [Music] div and let me just import it still I think it's not done I think oh sorry I think
we have done some mistake we need to do it in the select uh we need to do it in the client folder I think we have done outside so let's go to CD client and now install it okay inside this uh what we'll do we'll take one more div and let's give a class name as relative and here I'm going to render the image okay so we'll take a image so let me just import this one also here card and here we'll give a class name so we'll give with as full Max W ASM and
MX as Auto so for this image we will be receiving the source which will be our product do image okay alt what we'll do we'll give the product do name as the I think we have title not name so it will be product. title let me just quickly check once so we'll go to server and then model and then product so I think we have a title okay this is fine so this will be our alt for that image and also we're going to use a class and we'll give width full we'll give height As
300 PX we'll do object cover and we'll do rounded T large okay so this will be our image so after this image what we're going to do uh we'll keep this admin part simple because in the admin view it's not absolutely necessary to render everything everything we can render the product image the product name and what else uh we are going to render two Button one will be edit and delete but the main thing what we going to create that will be on the shopping part shopping view correct but here it is not required so
what uh we will do right so after this div let's take a card content now let's render the product Dot title and let's give a class name here so L text Excel font bold and margin bottom of two okay also uh if you want we can also Render the category and the uh the brand here right uh but I think it's not that much required let's do one thing so after this uh we will take one div and we'll render the class uh the prices I think that is fine to render the prices so that
you'll be able to understand what is the price of that particular product from the admin perspective so here I'm going to render so we'll give a dollar and then I'll do product do price okay now I think let's take this One inside something so in this div uh we will take one span and then render it and for this particular div uh we will take Flex we'll do justify between item Center and margin bottom of two okay and then let let's copy this and let's paste it here and this will be our sales sell price
okay and for this one uh for this pan we'll take let's take this one as text large font semi bold and text as Primary okay and I think this is fine now one more thing we need to do if there is already a sale price for any particular product if the sales price is greater than zero that means currently product is in sale so what we can do right we can give some styling for this price uh because we'll do we'll basically give a some kind of underline or line through for this price and we'll
show like this is the current price which is the sales price okay so how we Going to check it so we can do like this here so we'll take bracket in this let's take template uh literals and now what I'm going to do simply we'll check here right if this product do sell price is greater than zero so I'm going to do a line through okay or else I'll keep empty that's it and for this one we'll take a class name so we'll do this on text ASM or let's do uh what we going to
do right we do text large only and font Bold let's say how this is looking and based on that we will change okay so after this sales price what else we need to render we need to render a button so we enter two button so I'll take a card footer and we'll take a class name here so let's do one thing we'll do Flex justify between and item center now I'm going to render two button so one button will be to edit the product and one will be to delete it now we're going to see
how this is Looking and I think this is fine so now what we're going to do right will go to our products page so we need to render the list of products here correct and if you see here we are already I think uh give some placeholder for this part so we having this grid part and inside this we're going to render the product so what we'll do right so we have the product list that we are receiving so this one I'm Going to Loop it so do product list and then product list. Lane greater
than zero so I'll do product list. map this will be my product item and here I'm going to render that admin product list admin product tile okay all else will r a null now here we are going to pass the product as a prop which will be our product item okay let's say save it and let's see how it is coming okay something is breaking uh this part we need to check I Think we have done some mistake in our structure so let's inspect here I think there is some Flex is will be there I'm
pretty sure so we have a main okay so in the main we need to give Flex column but from where this is coming this main let me just copy this part and then search it here okay this is from the admin layout okay we need to make this on Flex column now I think this would work yeah Okay so now you can see that we getting product one product two and from admin point of view right this is more than enough because we no need to display everything and also if there is no sell we
will not display this uh here so what we can do let's go to our admin product TI and we have this sales price right so we'll simply check here this product dot sell price is greater than zero then only I'm going to render it or else I'll Not render this one or else this will be null okay and I think this is fine let's do one thing let's go to our product title and let's give some margin top of two okay so now let's go and add a new product right so we'll see what is
happening so click on add new product so let's up upload one image okay so it's loading now sometimes it takes sometime because it is getting uploaded okay this is done now I'll give this one As product three enter description category I'll give men brand I'll give let's say Zara I'll give 500 sale price I'll give zero and total stop 1,000 let's click on ADD and you can see that we got okay we have to make this one category as woman but that is fine it's coming right awesome so this is done so now first thing
what we're going to do is start working on the edit functionality and then we'll do the delete now for edit What we need to do right so edit uh will be so also this part we need to break uh it's breaking here so this part we need to check see if you noticed here right so for this one what we going to do uh we'll give some ellipses something like that in this product title but for now this is fine uh that is not that much important now first uh let's Implement all the functionality as
I already mentioned that there will be a part two of this and in that part two means in This video only not a separate video in that part two what we're going to do we are going to do all kind of improvements we'll do some validation in all the forms and everything correct but now let's Implement all the basic features and some medium level of features so first thing we'll go to our products page and here right I'm going to take some more State we needed so what we need whenever we edit right we need
the current edited ID that is very important Because we need to store the item id which I'm currently editing let's say if I click on this edit right I need to get I need to store this product ID so I'll give a state here and I'll do current edited ID and Set current edited ID and this will be use state of null right now what we going to do whenever I'll be clicking on edit that time quite a few things we need to do correct so first thing is that when I'll Do edit I need
to open this form this form here and also we need to uh basically fill all of these properties that whatever we are having and also need to store the current edited ID so what I'm going to do let's pass this Set current edited ID here also we need to pass this set open create products dialogue because we need to change this one also so let's uh where is that here so Set current edited ID so Not Set current edited ID set open products dialogue and also you need to pass the set form data which will
be set form data so these three things we need so let's go here so we need our product set form data we need set open create product dialogue and and also we need our Set current edited ID save it and save it here so these four things we needed now we'll go here and we have this edit button right so We'll give on click on this button and the first thing what we'll do we'll open this set open dialogue this will be true we'll also do Set current edited ID which will be product. ID so
we have this product right so this will be product do ID also we do set form data which will be this product info right so let's save it and let's see what is happening see if I click on edit here right see all of these are Getting already prefilled if I click this one these are getting updated but uh when we'll do edit we need to disable this particular section because we not going to basically show any kind of uh image upload when we'll edit this one we'll keep the uh the image as it is
so for this one what we'll do simply so we need to pass this so we have this image upload component right so we pass this current edited ID so when this current edited ID value Will be present so that time what I need to do I need to disable the product image functionality and this is uh very important if you want you can also like edit the uh image uh if you record but currently I think it's fine because if we just keep this on disable okay so we'll go here and then simply pass this
something like we'll pass that uh okay we are already passing current edited ID but let's pass like this that is edit mode and we'll do this current Edited ID not equal to equal to null that means currently we are editing so let's save it let's go to image upload and we'll receive this one is edit mode and when we will be in E edit mode we will make this input as disable okay so this is the first thing and what else we need to do so we need to also add some kind of uh styling
in our label so what we going to do right we can do like if we are currently in the editing mode we'll make the cursor as not Allowed so here we'll take a bracket and we'll simply do here if we are editing so if this is a edit mode we'll do are not allowed or else this would be empty let's save it okay so now let's check once whether this is working or not so if I click on edit okay I think it's not working so something we need to check here what is coming in
this e edit Mode Let's log here okay EAS edit mode is coming as true so if I click here right okay this is disabled but I think this cursor is this part is not working also we can do one more thing and that is we can give some kind of opacity in this uh in this div so let's do that also I think then it will be clear so what we'll do we'll check that if is edit mode so in that case we'll give some Opacity let's give like 60 okay I think this is fine
uh now what else we can do right uh first we need to do couple of things when we will close this if you see if I click on edit and then close this and click on this add new product I can see these values are getting uh these values are getting populated here so this we need to fix so how we going to do that so whenever we'll click on the outside of this model right or let's say click on this close Button so that time we can reset all of this right and that is
very very important concept so how we are going to do that so we have this one open change right here so you're making this on false so when we'll close this one right so here we can check you can do Set current edited ID as null again again and also here we can do set form data will be initial form data so now let's save it and now let's see so first I'll click here we getting now click on Edit click on outside now click here see all of them are reseted and also you'll be
able to uh like upload uh one more product here so if I click on edit we are getting product two click on here product three but click outside and then click on add new product now all the values are getting received so this is done now once we have done edit if you noticed here right if I go and then log This form data let's see what we getting so we'll click on edit see you are getting the form data which are getting uh basically updated here now let's say I'm going to do product one
to product one edited and if I go here right if you notice that this value is automatically updated here now this one we need to take it and then you need to save in in our uh database now there are two ways that we can do I'm going to Show you two different ways how you can do the edit functionality first thing whenever we'll click on on submit here we need to basically check that whether currently we are editing the product or we are adding a new product so how we are going to check that
we are going to check using this current edited ID if this is not null that means we are editing what else we are adding okay so now before that one more thing we need to do when we will click on this edit Button here that we have done in the product tile right so we need to change this thing so this add to edit this is very important and also we'll do edit product here in this SE so we'll go to this component so we have add new product right so this is pretty simple we
can simply check this current edited ID not n so we'll do edit product or we'll do add new product so this is the first step and then we having the button text so we'll do here Also that current edited ID is not equal toal to null we'll do edit or else we'll do add now let's click here so we getting edit but if I click here now we getting add new product awesome now everything is done so we need to now uh basically call the edit API call so that part I'm going to show you
two different ways how we going to do that so one thing what we can do right we can ED call the edit API and then we can face the list of Products again and that will update and second thing we can do we can do the edit API call and if we are getting data as success we can basically only update the UI from the state and then when user will refresh the P anyways they're going to get the latest right so two ways I'm going to show you okay first we'll go to on submit
here and here what we going to check that if current edited ID is not equal to equal to null so we are going to dispatch now here we need to do edit Product now let's go here so what we are passing we're passing ID and form data so let's copy this and here what we are going to pass we're going to pass the ID so ID will be which one which ID we need to pass we need was the product ID that which product I'm editing so here this will be the current edited ID right
so this will be current edited ID and form data will be your the form data that we are having so this is this form Data I think we don't need to pass I think this only we can do okay so now once this is done so we'll get our response right so similar something like this data. pad. success but first let's see what we getting we'll do dot then and then I'm going to log the data here console.log data or else we're going to add a new product now let's save it and let's see we'll
keep some message like edit and let's see what we getting so I'm going to inspect go to Console so do edit and then I'm going to click on edit and here I'm going to do product one to product one edit edited something like that okay now let's go here let's click on edit so you're getting fulfilled and in the payload we are getting what we are getting success to and if you notice that we are getting updated data here product one edited but two things we can do either we can Update this one directly in
our Redux or else we can face the list of products again okay so now here we're going to check if this data. payload do success if this is true so we will again face the list of products again so this is the first thing then what we going to do we'll set our form data will be our initial form data right we'll do set product form sorry set open product dialogue this will be false we'll close the dialogue And also we do Set current edited ideas null again so four things we'll do save it and
let's see what is happening now okay now I'm going to refresh this I'm getting product one edited I'm do product one edited to product one okay let's click on edit so I remove this and also let's make this one 350 instead of 250 let's click on edit so you can see we are getting this one updated and this is also updated if you delete uh sorry edit let's say this One and instead of sales price zero I'm going to keep sales price as now 250 and click on edit see now you're getting 250 and this
is now coming as line through all right everyone so now uh let's do one thing right we need to test some of the features on the edit whether it is working or not so I'm going to add one more product so let's add uh let's say this one here okay so I'm going to give product let's say Six any category brand price sales price let's say 50 stock is 100 let's add this so you're getting this product now let's click on edit and I'll edit this one let's say product edited okay let's click on edit
and let's remove the sales price edit all right so this is not working sales price is not getting edited okay there can be some problem in the product controller let's see Okay so first we are getting this uh okay I got it the reason is because we are checking the price or the fine product uh do price and then if we are giving empty here so it's basically taking the existing one so to fix this what we going to do right let's make this one L and here I'll do if the price right if the
price is equal to equal to empty so I'm going to do zero or else it will take from price and also you can remove this part from here this right Side it's not actually mandatory so you can remove this so I'll do sales price and this will be sales price okay so now let's save it now let's click on edit let's remove this part from here let's click on edit awesome so now this is working so it will take from that one so I'll give here let's say 150 60 let's click on edit and it's
working fine okay now before one more thing we need to do right because as I already told you then In the part we we will be doing some kind of improvements in all the sections but before that let's give some kind of very basic disable functionality on this button until unless we will F all the fields okay so let's do this one so to do this one what we can do right we create a function here so we do function is form valid something like that and how we going to do it right so we'll
simply return here that if object do keys or of this Form data that we are having do map you can use object. values that is also fine it's up to you and here we're going to check if this form data of key if not equal to equal to empty do every so every every item or basically every item value has to be true then only this form will be valid okay so now what we are going to do simply we'll pass this we'll take this form valid and then we'll pass in our common form because
we need to make the button disabled okay so I'll do Here is button disabled so when this button will be disabled if this form valid will be false that means some of the fields you have been filled so if this form valid is false then we'll make the button disabled so let's save it let's go to common form and let's receive this is button disabled and then we'll go here and we'll do disabled and here we are going to do if this is button disabled is true then Button will be disabl and you can see
that we are already getting this one so button is now disabled okay so now let's try to submit some so just for checking purpose so once this is uploaded then we'll add something here okay let's click on men brand price sales price and stock see now it is enabled and it is disabled once again okay so this is one part I want to do so now let okay I think we need to log in so now One more thing we need to do that is the delete functionality so for delete it will be pretty straightforward
so what we can do simply we'll create one more function here so let's create function handle delete so when we'll delete something we need to get the current product ID when we'll be deleting so get current product ID and let's log this product ID first now we'll copy this and we'll pass it in our product tile Here okay now let's go to product tile and let's receive this handle delete and then we have a delete button here so here we'll take on click and we'll do handle product handle delete and this will be product. ID
okay so now if I go here and then let's say go to console and I'm going to click on delete you can see that we are getting the ID and now we'll go to products so what You're going to do simply so here I'll dispatch so we have a delete product right and here we need to pass the ID so get current product ID dot then so here also we get the data and we'll check if this data do payload do success this is true so we need to do a couple of things first we
need to get the list of products one again so we'll do dispatch fetch all products correct and this is what we need to do So now let's remove this save it and now let's see whether what is happening here so go to network let's click on delete okay we're getting successful but this is not getting deleted this is weird then I think we have something wrong in the product controller again we'll see so getting the ID here product find see okay these things is always happened with me so we need to find not find by
ID and update we need to find by ID and delete that is the problem okay So now this would work so now let's do one thing let's refresh this let's click on let's say I want to delete this product delete okay now this is deleting so if you go back and come back we getting three product delete it's deleting let's add a new product so I'll add this one uh we'll give new uh what we going to do new product description category brand price sales price and stock 20 let's click on ADD so product add
added successfully we are getting and then if I do delete let's do like 200 and I remove the sales price okay we need to give some value here this is also important so we'll give zero or something now what we can do let's click on edit see you are not getting this one if I do delete one again sorry edit let's change this value to 250 we're getting 250 edit and then we'll do sales price as 150 so now we this is line through we're getting updated if I just delete the product image so new
product image or something edit we're getting new product image and this is working let's delete this it's deleted refresh this we are getting updated product list awesome so now this part is completed so what we need to do next we'll start working on the shopping part so first we going to render the list of products that we are having and then we'll be implementing The filter functionality after that we need to start working on the product Details page cut functionality and the homage and once all of this is done we'll be moving to checkout and
the orders page right so this is how I want to approach actually so first we'll complete all the basic functionality and the basic Pages after that we will pick each and every page one by one and we are going to we will fix lot of things we'll improve lot of things and then We'll be adding some advanced level of functionality so let's start working on the shopping part from the next video hey everyone before starting the shopping uh view right so we need to basically start working on the log out functionality also so let's quickly
do that or else it is very irritating to remove the token and then manually do or basically the cookie so what we'll do right we'll go to our store and then let's go to our o slice go to Index you can create a ASN tun that is fine um I thought I'll create ASN tun only okay or you can directly call this like there is uh not an issue with that also so let's do one thing let's copy this login user from here and I'm going to paste it and I'll do log out user so
this will be Au log out and here uh what we going to do right so this will be so simply we need to first check the log out endpoint that We have used let's go there we have router is router routes Au Au routes and then we have SL log out okay so copy this and we'll paste it here and here we don't need to pass any form data but we'll pass with credential as true and then we are going to receive the response. data and then uh we will simply create our log log out.
fulfilled so we'll add one more case here and we'll do log out user dot Fulfilled so we'll do state. is loading I think it's not record that is fine you can keep it or here we'll make the user as null and is authenticated will be false okay so here we don't need to do this okay something is going wrong here what is the problem oh we need to do log out [Music] user yes because we are calling with same right we can't call that so this is Fine now let's go to to our admin components
admin view header and we're having this log out button so we'll click on or do a on click and we'll do handle log out right and then what we going to do simply first we'll create a function we'll do handle log out and also you do const dispatch this will be use dis patch and I'm going to just do dispatch and we'll do log out User that's it so now let's save it and let's see what is happening first so I'll click on log out see now you'll not be able to access admin dboard page
oh okay this is weird so this part we need to check that we are still able to access this but why this is happening so if I go to network let's click on log out so it's actually 200 successful but if I go to application token is still there so I think token is not getting deleted so This part we need to check let's go to our o controller some problem in this and then we have this o and O controller so let's see what we are doing in the log out we doing the clear
cookie then token then do Json but this should work right what is the problem here okay let's see but I don't see any issue here but what can be the reason let me check the this part what we are doing we are doing AIS dot this is log out only right with credentials to oh Okay the reason is because we are not passing any form data right so we need to keep this empty so because we are not uh the configuration is wrong in the AIS so now let's save it so now let's refresh this
page so we'll be here now let's click on log out see now it's getting deleted awesome so now I think this will work so if I try to go to the admin products page it will be in the admin login page even you will not be able to go back see It'll be in this Page only so refresh this let's uh sign in one second and then go to products refresh this let's try to go to the shopping view sop view right we have shop then we have the listing it'll be in this page only
let's click on log out and let's try to go back see you'll be in this page only awesome so that was the problem like we need to pass this on as empty okay so now the log out functionality is done uh is also Done so let's start working on the shopping view all right everyone so now I'm in the shopping view so first we'll start with the listing page okay so let's implement the header first and then we'll uh implement the list page so here uh we have this shopping view right and inside this we
have a header and layout and then we have this shopping header correct this component this header so This one we are going to implement first so let's get started so first I'm going to remove everything from here and let's take a header component so we'll give a class name we'll do sticky we'll do top as zero we'll do Z index let's make this one 40 we'll do width as full we'll do border bottom and BG background inside this we'll take one more div we'll take class name we'll do Flex height of 16 item Center justify
between PX of 4 and for MD we'll do PX of 6 okay after this we will take a link component from react router Dom and here I'm going to render some icon so let's see what icon that we can use let's take some home icon let's see which one we can use this one or this one let's copy something okay so here I'll paste it and then I'm going to use class name So we'll do height of six width of six so let's see what is coming here okay and after this we will take a
span and we'll do e-commerce and here we'll take a class name so we'll make this one as font bold okay let's give some class name in this link also so we'll do this on Flex item Center and gap of two and two it will go to the so where it will go right so it will go to the home page so we'll do/ sop and then home Okay awesome now after this link what we need to do right so when for smaller device we're going to again render a SE component so for this one uh
I'm going to take a component here from UI and then we'll take a trigger say trigger and here you need to pass as child and here inside this we are going to take a button and here we'll take a span and we'll do Toggle header menu but what I'll do right I'll keep this one class name as ASR only so that we hide this spot yes and in this button uh what we're going to do so we'll do a variant as outline we'll do size as icon right and for class name we're going to for
large device we're going to make this hidden and here I'm going to so let's see some hamburger menu here so we do Hamburger so let's copy this and we'll pass it here okay and for this also we'll take a class them height of six and width of six awesome so now if I make this one a small right we are getting this part okay obviously this will not work now but we are going to implement this one all right after this trigger we'll take A SE content so we will open this one on the left
side so we'll do side as left and class name we will do with as full and we'll do Max W we'll do x 5 5 XEL or let's make this one EXs yeah okay and here we are going to render our menu items okay and also we need to have some right content so in the right side we'll be having a cart icon and also you'll be having a menu Where you'll be able to go to the account page and also can log out the user so this will be inside our seat content now after
this so this will be for the smaller device we will take a div and then here also we going to render the menu items which will be for larger device we'll be having here so for this one we'll make this class name so this one I'll make this one hidden and only for large device we are going To make this one block oh sorry this will be block all right now what else we need to do we need to also check that if the user is authenticated then only we want to display that correct the
right content so here what I'm going to do so first we need to check whether the user is authenticated and how we going to check that so we can easily check it using our state that so we take your const and we'll take use selector do State and we'll do state. o and then we'll go to our store and if you see right we are having this ease authenticated so you get it here and then we are going to Simply check it that if the user is authenticated then only you display this so is authenticated
you display that write content or else will display null okay now this is done two things we need to create now the first thing is That we need to create our menu items so uh let's go so we'll create here only in this compon ENT only okay first we'll go to our config and I'll create a menu item so we'll do export const we'll do shopping soft view shopping view header menu items okay so we'll have id id I'll give let's say we'll do give this on home label I'll give as home and two will
give as SL sop not to let's give this one as Path slop slome let's copy this and paste it so we'll do this one as [Music] men so for all of this path right we are going to go to the listing page okay let's copy this and paste it here so here also we going to do like this will be woman and this will also go to the listing page then we having Kids this will go also go to the listing page then we'll be having let's say watch and this will also go to the
listing page and then what else we are having we are having one more right we have something like accessories yes so I think we are already having all this so main kids accessories okay so let's paste it here and this will be listing p and we don't have any uh this watch option so We'll keep this in footware and this will also go to the listing page for now now so these will be your menu items so now what we'll do right we'll create our menu items here so do function menu items and this will
simply return a NAB and let's take a class name so do Flex Flex column margin bottom of three for large we'll do margin bottom of zero for large we'll do item Center gap of six and for large you're going to do Flex row okay inside this we're going to basically render that shopping view menu items do map so this will be menu item and here uh what we're going to do right let's return a link and I'm going to render that menu item do level let's give a key here which will be menu item do
ID and two this will go to menu item do path now let's give a class name So we do text as small and font as medium so now let's save it and let's see what we getting I think we need to go here and we need to render that menu item so we'll render the menu item here so you're getting this awesome and also we need to render the menu item inside this seat content because we also need here right so render the menu items here also awesome so now let's see what is happening here
if I go here right so You're getting all this but this one we need to do WR this we will fix first we'll implement the uh this is coming we need to implement the header right content so in the right content we will be having couple of things okay so first thing is that we'll create here only we'll do function we'll do header write content let's return so what we going to return here so let's uh return a Div and we'll give this one as Flex oh sorry class name we will give Flex for large
we'll do item Center for large we'll do Flex row normally we'll do Flex column and gap of four okay okay after this uh we will basically take a drop down menu so let's take a drop down menu I think we need to install the drop down component Also let's go here and we'll take a drop down And let's install this one so you also need to render a cart icon here right so let's see whether we have cart icon I think it should be there definitely so you have this cart icon so let's copy this
and before let's paste it here oh sorry we need to copy the jsx and we'll paste it here shopping cut okay and let's use the same class name so the height of six sorry width of six and height of six so this will be our shopping item uh Sorry shopping icon and also wrap this one inside button and we'll keep it inside this and also always keep a span here like this will be our span and this is our user card but we will give the class name as Sr only okay so for this button
again we'll keep the variant as outline and size will be icon now we need to import the drop down menu inside this we are going to have a Drop down menu trigger let's see where is that menu trigger this one and here we are going to pass this on as as child and then we also need a upar component right so I think with there is a component something like that here let's see yeah we have this one right this part so we'll copy this and we'll install it Here till now if I save this
how this is looking let's see okay we need to also render this header right content so we will do we'll just render it here right so do header right content okay we're getting this one and also that is done so now let's inside this what we're going to do we take a up component and we'll take a class name we'll do this on as BG black and inside this because currently We don't have any image so we're going to use this other fallback and here we'll do a class name so we'll do this on as
BG black text as white and we'll do font extra bold okay and render some dummy data for as something like that okay so this is done now next thing if you see right we are getting this part now we need to render the this drop Down menu so how we are going to do that's after this trigger right you need to render the drop down menu content so we do drop down menu cont content this one and here we are going to keep a side so we'll keep this one on the right side and then
what else we need we also need a class name let's give a class name we'll do a width of uh let's give 50 or 50 56 56 and then we are going to render a drop-down menu Label and we'll render like something like logged in as some value so first thing we need to check one more thing is right and that is what we getting in this user info and this is very important this we haven't checked that what exactly things we are getting or what are the things that are stored in this user so
let's copy this if this is something else is there so we need to fix it like we will pass Something else so go to this user right and let's see what we getting we're getting object so you can see we are getting email and the role but we are not getting the username and the reason is because that is actually not an error or anything we are not passing that so to fix that it is very simple fix we can go to this Au controller right and if you noticed here in this so in this
login user we are just creating the token based on ID role and Email here what we can do right we can also add the username right and this will be check user dot we are having username correct so this we can do so this will create the token also while passing it we can pass this username also here along with this email Ro ID and username and also if you go to this o slice I think where we are setting this user information right so there we need To check how we are setting it so
you're setting this accent. payload do user now this will be fine so see what will happen right if I go to Now application and clear this token refresh this page it will go to the login page and now let's say if I try to sign in and let's go to the listing page see what we getting we we are getting usern name awesome right so this this is the thing that we need here that Username because we haven't added that so it's up to you you can add some more feature or more uh like properties
also from there so now this is fine now we can render this username here also like the the first name only something like that okay so what we'll do simply we'll go to our header component and we'll pass this user or see both things is fine like instead of passing it like this we can copy this and then we can go to this Header right content and we can also get it here also it's absolutely fine actually and then what we can do simply we can pass it here that user dot username of zero so
so now let's save it let's see what is happen so you can see that we getting this thing and then we can do two uppercase okay so now this is fine and what else we can do like uh we okay we need to create this logged in part so we'll do loged in as And we'll render here what we'll render the username right so we do user do username so logged in as s so this is my username okay and what else we can do we can add some separator here so we'll add drop down
menu separator so this will give you this separator here if you see some line is coming that will be visible clearly after We'll add something else and here what we can do we'll add a drop down Menu item so we do drop down menu item sorry we need to do it from UI and here what you'll do simply import some user icon here so do user copy this or let's skip it which one is looking good this one let's copy this and we'll pass it here import it and here we'll give a class name so
we'll do here margin right of two height of four and width of four save it and let's see how this is Looking so here it's coming and after this uh what we going to do right simply we'll keep another separated here it will look nice so after this menu item and then we'll take one more menu item here and inside this we will take a log out button so I think we already have some logout button right or we don't have let me just check I think we can take it from here log out this
one we copy This and we'll paste it here log out here also you take a class name we do margin right of two height of four and width of four okay and then what we're going to do we just take something like log out let's see how this is looking let's save it click here awesome now here this is coming ah okay one more thing we need to do after this right we'll add a account text so that user will be able to go to the account page from here so we get Account and on
click right so what you can do simply uh let's take like this so we'll do const and we'll do navigate and we'll do use navigate and on click of this right menu item we'll do on click so we do navigate and it will go to slop SL account page save it here now see if I click here it will go to the account page PA aome now here we need to uh implement The log out and that we have already done in the admin view right and the same thing we need to do here this
is pretty simple so do function handle log out and we'll take a dispatch we'll do dispatch we'll do use dispatch and we'll do dispatch and just log out that user that's it now let's save it now click here log out awesome let's go back it's not Working and also something is wrong here is it okay no it's working fine so now let's say if I try to sign in it's going to the home if you click here it's going to the account if you click here it's going to the log out and if you try
to access the shopping page let's say listing it'll be in the login page click sign in now also on click of this we going to the list listing page this is also correct and if I click here it's going To the hom page awesome job and for smaller device I think this will be in this okay this part we need to check right this we need to hide it because we haven't add that logic so we'll go here in this part where we are passing this header right content and also I'm thinking because we are
only showing this header when the user is authenticated so it's not required to pass this is authenticated also it will work fine okay so even if If I remove this part right so let's remove this part and here I'll sorry in this div I'll add a class name like we'll make this one hidden and for large I'll make this one block so it is not there right now if you click and also you need to pass this inside this seat content also so we pass the header right content here also and if I save it
now you see you'll be getting all of this here awesome now I think this is done so header is done so Now we need to start working on the listing page first so we start working on the listing page in the next part all right so let's start working on the listing page so first uh we will go to our list page let's remove this part and we'll start everything from scratch now these things will become interesting from this part because a lot of things we going to do so do grid grid Columns of one
I'm going to go little first for this uh uh CSS okay and for this one for MD we will do grid column let's make this one 300 PX 1 a okay and also for Gap we'll do gap of five uh no let's make this one six P of four and for MD we'll do p of 6 here we are going to render the product filtered section so first implement the product filter so we go to shopping View and here I'm going to create Filter do jsx so let's create here function and we'll do product filter
category filter also you can give or let's give product filter only okay so here because we will be able to filter based on category and brand so first let's create this we do div we take a class name we'll do BG as background we'll do rounded large and we'll do sadow SM here I'm going to take another div I'll do a class name I'll do p of4 and Border bottom and inside this I'm going to take a H2 and I'll do filters let's take a class name and we'll do text as large and we'll do
font same again I'm repeating you don't have to do exactly what I'm doing in terms of the CSS part you can basically make it look nicer by your own adding extra CSS it's up to you so I'll do product filter let's save it let's see what is Happening so we getting product filters here all right now after this we'll take another div and we'll take a class name and we'll do p of4 and space y of three or four and here what we going to do right we are going to use some filter options that
I already created in the config you see that we have a filter option we have a category category will have ID and name a level M woman key accessory foodware similarly for brand okay so I'm Going to copy this and then go to our config and here I'm going to export it so do export const filter options now we'll come here and then we'll do object do keys of filter options do map this will be key item and here what we're going to render so let's render a fragment and inside this we'll take a Div
and let's take a A3 here I'm going to do so we need to render the key item right so if I go here you can see we have a category and also have a brand so we'll do here key item let's save it let's see how this is coming so category and brand that is f fine and after this we'll take some class name also for this one so let's text base and what will font bold or semi bold let's do this on Bold let's See how this is looking okay this is fine if I
make this on Bold right let's make this on also bold or do this on extra bold okay now after this uh we'll take one more div here and we'll take a class name we'll do grid gap of two and margin top of two and here we are going to render this so we'll have a key item so we'll do key item of this current key which will be this part so how we going to do that We'll do filter options of that key item do map and then we'll do option and here what we going
to return we return a label and we need to get some checkbox so we'll go here let's install checkbox I think they have added some new chart features also which is looking awesome actually see okay now let's go here and Then let's add checkbox and Here Also let's give some class name in this label so we'll give this one as Flex item Center gap of two and we'll do font normal inside this we need some checkbox so we need to pass some checked property but for now this is fine let's save it and let's see
how this look first okay we are getting all this and then after this we are going to render the option lbel so we'll do option dot We have the label okay and one more thing that I'm thinking that we'll make this on font medium I think we already have font normal let's remove this it's is looking not good font [Music] medium I think this is fine now after this what we're going to do right okay we have label div div so here I'm going to give Some separator I think they also have some separator component
let me check this one so let's install this also so the so that in every SE and we will have some kind of separator if you want you can add some more also here so I think it's installing and it is done so we add a separator component let's see how this is looking okay this is fine so now once This is done this part is the basic UI part is done obviously but we need to implement lot of functionality part but we need to also start working on this right right side so where we'll
be rendering the products as well as the sort options so we'll go to listing and after this product filter we'll take another div we'll take a class name we'll do BG background we'll do withth as full we'll do rounded large and we'll do sadow SM we'll take one more div here we'll do class name we'll do p of4 border bottom we'll do Flex item Center and justify between inside this we'll take a H2 and we'll render all products let's take a class name so we'll do text large and we'll do font semi bold now I
think it would be better if we make this on extra bold only because it will be it will look identical or Same kind of of yes okay so now after this A2 what else we need we need to render the sort options we'll take another div we'll take Flex item Center and gap of two and inside this we'll take one more span and we'll do class name as text muted foreground and here we going to render the count so let's say we have 10 products so it will come here so having 10 products or something
okay and after this we're going to render one more drop Down menu so we do drop down menu and inside this we will have a drop down menu trigger so render as child and inside this we are going to render a button okay and there will be some Arrow icon I think Arrow up down or something Arrow up down something is there or is it let me check there will be some Arrow up down yeah this one Arrow up down icon and here I'm going to pass a class name So again we will make this
on variant as sorry sorry not class name we need to pass the variant we'll do variant as outline and we'll do size as SM also we do class name so we will do this one as Flex item Center and gap of one then we'll be having this one so here also we'll take a class name so we do height of four and width of four this part we have already done multiple times so I'm Not discussing in details and this I'll give this one a sort by okay let's save it let's see how this is
looking and see that we're getting this okay also one more thing that we need to do here we need to make this one on the right side right and for that what we can do we need to move this drop down menu inside this div only so that it will be on the side by side yes also let's give some margin right as Two okay not margin right I think we need to uh for this div right will give a gap of 12 okay let's see what is happening here oh sorry I think I have
given in the wrong place not here not here we need to give here so gap of three now I think this should be gap of three yes okay so now after this sort by we need to render the menu content so after this we'll render Drop down menu content and here we will pass a align property which will be end and also we'll give a class name so we'll give a width of 200 PX and in inside this we need to render the drop-down menu radio group okay so here we need to render the S
options so for this one I already have some s options we have a price low to high price high to low title A to Z and title Z to A it's up to you you can Change this ID value I thought I'll keep it like this but there is no absolutely not required that to use the same you can modify by your own so here I'll do export and I'll paste it here and then inside this I'm going to render in this drop down radio button I'm going to render the sort options do map this
will be my sort item and here I'm going to do drop down menu radio item okay and here I'm going to Render the sort item do lbel and also let's give a key here which will be sort item. key no not do ID okay and I think this is done so now let's save it and let's see what we getting so if I click here right see we are getting all this so whatever you'll select now what we need to do basically we need to pass a value property here and whatever value property we will
be passing based on that we need to create the selection but that is fine first Thing is that the main structure is done and this is looking nice so first let's do one thing let's uh basically face the list of products and then we are going to render the list of products and after that we'll start working on the filter functionality so let's do that in the next part all right so let's render the list of products now okay so first uh let's go here after these we'll take one more div here we'll take a
class name we'll make grid grid Columns of one for As I'm going to do grid Columns of two for MD I'm going to do grid Columns of three I think let's keep this one three or four we'll see what which one is looking good right uh we'll test it and we'll do p of4 and here what we need to do we need to render the list of products so for that remember we have created one product tile for admin View and we decided that we'll keep it separate for shopping and admin admin view so again
Don't get confused for the shopping view I'm going to create one more product tile okay so this will be product tile. jsx and here if you go right in this product tile we have given an admin product tile so this will be my Shopping product tile so do function and I'll do Shopping product tile now here we are going to render everything so let's start one by one the first thing uh what will happen we'll receive the product item correct I Don't have to explain I think this you are already getting the single product item
and here I'm going to return a card component and here we will be adding some more things right so we'll add uh because in admin view we haven't added all these things so we'll do with as full we do Max WM and we'll do ax of Auto oh sorry after this we'll take a div and here we'll take one more div and we'll keep a class name as Relative and inside this we're going to render the image so here again we have a source which will be our product dot image and for alt property we
are going to pass the product do title so let's take class name so in the class name we'll do with as full we'll do height as 300 PX we'll do object as cover we'll do rounded T large this one okay so this Will be our image after this is what we're going to do we will simply check if this product has a sale price remember we have this property if this sales price and that is greater than zero so we going to render a badge component so if we go here right we have a badge
component here so let's see this we have this badge component see there is a reason why this ad SC is very popular because the components and the uses everything is Really good and the UI looks extremely well okay so it's look very clean uh so that is the reason most of the YouTubers also love this to use this batch and everything all the other components from SN and or else uh okay we need to keep it like this and we'll make this one as null and here because if it is in sale means we'll show
a sale badge and let's display class name so for this one we'll make this one absolute we'll do top as two and we'll Do left as two we'll do BG red let's make this one 600 or 5 will'll change it later how it will look and on Hover we'll do BG red 700 let's make this on we'll do 600 and we'll make this one 500 okay so this will be our badge component now once this is done we are going to render one more component uh I think for now this will be fine we'll only
show the badge here and after this we are going to render the card content Okay so here for this one I'm going to give a class name and we'll do this one as padding of four four and inside this we're going to take H2 and we're going to render the product. title let's give a class name and here uh we'll give a text as Excel we'll do font as bold and we'll do margin bottom of two after this we'll take one more div and here we are going to render the Category so no not category
we need to take one span here inside this so we'll take one span and we'll render the product dot category okay and for this one we'll take a class name so we'll do Flex justify between item Center and margin bottom of two so render one product category and also lend the product brand we need to change some of the things that we are going to do uh but for now this is fine let's take a class name we Do text as SM Lo text muted foreground and we'll use the same okay I think this is
fine after this uh we will take the similar structure and we'll do render the price so so we'll do price here and remember we need to do that thing that if the if the product is in sales price so we need to line through that product so that also we need to do here so we'll take this and instead of this we'll take uh template literals and We'll do if this product do sell price is greater than zero right so we'll render a line through or else this and the rest of the styling let's remove
this and let's use some different ding so we'll do text as large we'll do font semi bold and we'll do text primary okay and for this one also we use the same we'll copy this and here we need to do this on sale Price and also here also you need to give the condition like if the product do sell price is greater than zero then only I'll render or else not so I'll cut it from here and let's use the S awesome so now this is done after this uh what we going to do right
so we also need to render some button so let's do one thing after this card content we'll do card footer and here I'm going to render a Button and this will be add to cart okay and for this one we'll take a class name and we'll make the with as full and we'll see how this is looking and based on that we'll change it okay so now let's save it this is fine so now we have created our basic structure for the product tile we'll go to listing now this is very simple the first thing
what we need to do in this page we need to fet the list of products and that we Have already done so we do Fage list of products so we'll take use effect simply and we need to dispatch so we'll do const dispatch and this will be use dispatch so I'll do dispatch and we'll do fet all products but the trick is here we no need to use this this part here uh this is the only difference sorry I forgot to mention for this product shopping view right we are going to create a separate controllers
which will only consist the SOP product uh sof product controllers not the admin controllers because both will be different the reason is because we also need to implement the filter functionality okay so instead of doing using like this let's quickly create all of this and those things will be pretty simple okay let's save it and let's go to our server side and in the controllers I'll create one more and I'll give this name as sop okay and inside this uh we will Create uh what is the name that we have given products controller so we'll
give the same products controller.js so let's create this so lons get products here we also need to get the we also implement the filter functionality right so instead of doing get products let's give this one name as filtered products although we haven't implemented the filter functionality till now but we need to do it so request Response and now here simply we'll do a try we do a catch error and if there are any error simply return this one so we log this error first and we're going to do erase. status of 500. Json so we'll
do success will be false and message will be some error occurred in the try what we are going to do right simply we will get the products for now because we haven't implemented The filter function and this will be aate product so let me import it so const product this will be re so you need to go to the models and product okay so this will be product. find and we'll get the all the products for now and then we'll pass your race do status 200 do Json success will be true and data will be
this Products awesome now I'm going to export this we do module. exports this will be get filtered products so we have created the very basic controller here now what we need to do we need to create one more route now this route will only hold the soft related information right just like we have created for admin so that I don't want to mess up things so I'm creating separate so here inside routs I'll create another sop View and here I'm Going to create products product routes so we have product let me see the name what
we have given so we have this inserted menu have products route so we'll do products routes.js okay so let's go here and let's copy this from here we don't need to write product routes and we need to change couple of things so we don't need all of these and this will be slop SL product Controller and we need the gate filtered products correct we don't need this one we only need to get the product so we'll do router. getet and this will be get filtered products and then we we'll be exporting this one this is
fine then we need to go to our Main server.js and what we'll do we'll create one Moree right and this will be for our shopping so we do const sop products router and this will be Reord so you need to go to routes need to go to sop and then you need to go to product routes and then this I'm going to use here so do app.use this will be/ API slop see the difference for admin it will be admin for soop and then slash products so for shopping I'm using a different endpoint for admin
I'm using a different endpoint now see these things is also better for your analytic purpose for example like if you want to check how many products are getting sold so in That case it will be it will be it will not be a myth basically so now what I'll do I'll go to my slice and inside this store I'm going to create one more folder and let's give some name as soop and then I'll create one more folder which will be my products slice and inside this I'll create [Music] index.js now let's create this Lon
what is the name that you have given There let's see given an admin product slice so I'm going to give this one as shopping Shop product slice this will be create slice name I'm going to give what is the name that you given admin products so we give shop products shopping products or shop products I think shop products is looking weird let's give shopping products and same I'll give Here also Shopping product slice then I'm going to give initial state so let's take here initial state so I'll give ease loading will be false and products
what is the thing that you have given here here product list now don't get don't get confused with this this is for the shopping view okay here I'm going to pass the reducer which will be empty and also you need to pass the extra reducers right because we Need to write some logic so now what we do is simply copy this from here this F all products and then and what is the name that we have given I'm thinking like so that it will differentiate so we have F all products let me think we'll do
F uh F all filtered products okay and here instead of this I'm going to do this on sop products and Get because you'll be getting from the shopping so fch all products right and then what you're going to do is simply add the cases so we'll do Builder do add case so we'll do Fage all products dot pending oh I think we have to import it let me just import it from here so copy this and then this will be dot pending so this will give us State and accent so here do state do e
loading Will be true we'll add one more case so let's copy this paste it here and this will be for if this is getting fulfilled so this loading will be false and we'll do state DOT product list so for now again I'm going to do accent do payload but we're going to log this and we'll see what we getting so log accent do payload and we are going to add one more B which will be this is getting rejected So I'll make this on loading false product list will be empty that's it so now I'm
going to export it so do export default and this is our shopping view product slice do reducer and I think this is done so now we need to go to our store let's import it so we'll do shopping sop product slice and we need to go to sop SL product slice and I'll give this one as Sop products so we have admin products and then we have sop products that's it so now let's save it and now we'll go to our product listing page and remember we're dispatching this right so we'll do use effect now
we'll do dispatch and instead of fetching from the admin side I'm going to fet we'll do get filtered what is the name that we have given let's see Once fetch all filtered products okay so we do fet all filtered products and then I'm going to get the product list from where from our selector so do selector and then we do state and instead of instead of doing state. admin products we need to do sop products you know why because we have given here sof products this is the one so we do state do sop products
and here we need to get the product list now let's log this Here so let's open console okay we're getting error of zero refresh this page okay this is not triggering something is er there is it we're getting empty but the AP is not getting called this is weird actually so let's go here let's see what is the thing that is happening here it's only calling this one so what is the step that we've missed I think this is sop products and Get only right let's see once shop / products and then product routes this
is gate only gate filtered products I think this is fine I think it's not triggering from here it's not it's not going here I think that is the problem let's see if this is coming here or not so F all filtered products it's coming here actually okay and if I log this result here okay something is going wrong ax we Haven't in oh my God God man I I I know this kind of issues I'll do now we getting get and then success to and data is now two awesome and also if you go here
right we will be getting this accent. payload so here also you'll be getting this so save it let's see what we getting here so we getting this data right and inside data we having the so instead of doing this accent. payload we need to do accent. payload data let's save it now you go here right We'll be getting two products see we're getting two products now what we need to do it's very simple so we need to just log these products right so we'll go to our product listing and here we need to basically check
if this product list and then product list. length greater than zero so we'll do product list do map we'll do product item and we'll import the product TI uh what is the name that we Have given I think product tile Shopping product tile okay so import The Shopping product tile Lo Shopping product tile and here we need to pass the product which will be my product item or else render null let's save it and let's see what is happening that's it okay but here this is breaking this part we need to check why it is
coming like this something we have done done wrong in the I think in this layout structure let's see first thing first we'll go here right and we'll give this one as dollar so this is the first step we need to make fix and then here also we need to change it like we are getting in small right so this part we can check it uh change it very easily so what we'll do right we'll go to our config and then we have this category Filter and the brand filter right so in that case what we're
going to do simply let's do one thing so I'm going to copy this and we'll do export const category options map right and then what we can do we can simply pass this so uh what we can do right we'll do something like this so if it is men it will be men right if it is Woman it will be woman then for kids it will be kids or what I'm thinking right we can just simply make the first letter as capital why we are doing all of this right the reason is because we need
to we need this something like this okay let's do this one I think it will be better we'll do kids then we have accessories this will be accessories and then we Have a footware okay then we'll copy this and we'll do brand options map so here we have the Nike then we have the editas then we have Uma so Puma is there then Levy then you have Zara and at the end we are having the H&M so H and M okay so now we'll go to a product tile And what is the name that we
have given so brand options map and category options map correct where we have done all of this man again I'm doing this kind of mistake I'm I've done this here in this category filter map we need to fix it so we need to do it here see this kind of of thing right because I've done there again I need to write okay let me quickly do it I'll just fast forward this part all right so I just created this okay so now we'll go there in the product tile and we rendered this right so we'll
do this one as category options map of this and we'll do this one as brand options map of of this so now this is fixed but this part we need to why this image is coming like this so let's see the issue here I think there there must be some problem with this Flex property or something all right everyone so let's See what is the problem so the first problem if you see right we have given width it will be full and the badge we have imported from Lucid react we need to import it from
our UI awesome also let's do something like this also we are not able to see the title that is actually weird so that part we need to check what is happening here in this product. title so this will be title all right so you're getting title Man editors and then for this category right so if I do excel how this is looking let's see yeah let's do this one and let's do this one also so we do Excel or this is looking bad I think it was previously it was is good or let's do something
like if I do like manually 16 PX how this is coming let's do 18 no I think 16 was good let's do 16 only then okay so now you can see we are Getting this one but this is looking very bad that is that is not bad that is the reason I decided like we'll see and then we based on that we'll change so go to listing right and for large you'll make this one uh grid Columns of four okay now this is fine awesome so now this is working fine let's refresh this all right
so now I'm going to test it once okay so let's go here and then log in with my admin account Go to products so you're having two products right so let's add one more product here let's add uh let's say this one and then I'll do some uh product three we'll do product three add this one we'll give some anything like accessories brand I'll give Zara product price 250 sale 150 stock 10 now I'm going to to basically do add so now we are getting product three And then let's edit it and change this one
to let's say men edit this one this is fine now let's refresh this awesome right now we are getting the data here so now this data is getting updated here now what we need to do first first we'll implement the filter functionality because there are lot of things you can learn from this filter and the sort after that we'll be start working on the details page all right so let's start working on the Filter functionality but before that we need to update this 10 product spot right so here what we can do simply uh we'll
pass here product list. length Okay so we have three products now to start working on the filter functionality we need to take some state so we'll take here filters and set filters and this will be U state of null and also we going to take one more which will be to maintain our sort so we'll do sort and set sort And this will be US state of null all right so the first thing what we need to do for the Sorting right so we have this drop- down menu radio group so if you see that
we have this drop down menu radio group here we need to pass a value property and this value property will be our sort that what is the current sort that we have selected and here also we need to pass on value change property which will be our handle sort now this on uh like this on value Change will give you the current value and based on this you'll be able to set it so if I go here right and let's create this function handle sort so this will give you the value and let's log this
value here first and it will be easy to understand so now I'm going to open inspect let's make this one down go to console and now I'm going to select something like let's select here so okay we are getting undefined but There might be some problem so what is the problem I think we haven't passed the value property here I think that is the problem here we need to pass a value property in this one so you need to pass a value here which will be our sort item do ID so this value property we
need to pass now I think it should work so we go here and let's select right so you can see that we are getting this value property now what we can do simply it is very simple we'll just do set sort will Be this value right so you're restoring this one so now if I save it and let's go ahead select this one you can see this is selected select here this is selected something like that all right so this is about the handle sort now for filter we need to write quite a few logic
okay so first I'll create a function which will be my handle filter now this will receive two things it will receive the current sex and ID which is this one like category or brand And then you it will get the current option so here I'm going to get the gate uh section ID right and also it will receive get current option so these two things it will receive and again then I'm going to also log this one here and then I'm going to do if you see I in my every video right I usually log
all of these so I know because I always created videos from beginers point of view and I know these things can be very very tricky to for be beginners right so that Is the reason now we'll go here and then we're going to pass so I'll go to this file filter component so it will receive two things one it will receive the filter filters let's give and also set filters I don't know what is the name that we have let me check so we have set filters and filters okay and also uh this okay I
don't think we need to pass set filters let's pass this handle filter that we have created so this handle filter so I'm go here and then I'll receive this so two things it will receive and then I'm go here I'm going to pile the filters which will be my filters and I'm going to pass the handle filter which will be my handle handle filter okay so these two things now what we need to do right from our filter component we need to basically pass this so from where we need to pass so whenever we'll select
current checkbox that time we need to basically tell that which section we are clicking and which Which option basically we we are clicking here okay so let's do this on so in the checkbox what we're going to do right let's go here and here we are going to pass on we have I think on checked change or something on checked change yes and here what we going to do we are going to call this handle filter sorry again if you're getting some noise I'm I can't do anything because these people will be talking all the
time right and if you notice I how many times I need to like stop and pause like that and it's very difficult to record also but I don't have any option here we need to pass the key item which is basically our current section so this part so either it is category or brand and then we need to pass the ID which will be my option do idid okay so now let's save it and if I go here right and you can see that we already logged this current section and everything so if I select
here right you Can see we're getting category and then main if I select here we getting brand and Nike like that this is working fine right so now this part is actually done so what we need to do we need to write the main logic that how we are going to store it in our filter State okay so for this one what we're going to do right we need to do quite a few things first we need to check that whether the current index of that se is present or not so what we'll do first
we'll copy Filters so here uh what we'll do simply we'll get the filter here so we'll get the filters okay and then we'll do const index of current section okay so how we going to check it so we'll do object do keys and then we are having the uh this coffee filters do index of this will be G current section ID right so we checking whether the category or brand is present or not so here what we Going to do if this index of current section is minus one that means there is no filter is
added for that category so what we going to do we will simply do copy filters will be so first we'll destructure the copy filters and we'll do get current sorry get current get Section ID will be your get current option so this will be get current option okay so here now I'll show you what exactly we are doing so if I just come here and then log this copy Uh filters and save it and you'll understand so if I go here right and select this okay something we are getting that cannot uh convert undefined on
null to object all right copy filters okay I think we have this one null okay let's make this one like this we'll make this one empty object I think that is the reason and then we're going to D structure this one like this now I think this would work let's Go to console and let's click on man here you can see that we are getting a category which is coming as men if I go and select this we are getting brand and this is Nike so this is for the first time when you haven't added
this one but obviously this is not the thing that we need to do in the else part what we can do now here we need to check the index of current option so for example if I already select Nike and I'm clicking on addit do Nike will be always already Present right so I need to push this Addidas also in this option so now what I'm going to do I do const index of current option okay so how we're going to do this so we do copy filters and here I'm going to do get Section
ID dot index of get current option that whether this current option that we are selecting that is present or not right and if this is not present so we do index of current option if this is equal toal to minus one so what we need to do We need to push it so we can directly push it like this we do copy filters copy filters of G section ID do Post get current option else we need to remove it so we do copy filters of get Section ID do splice we'll remove this index of current
option and remove the one item right now let's save it and let's see what is happening if I go here right and refresh this page and then select this men we're getting One now see if I select here okay something is going okay now we need to set it in in our uh State sorry my bad so we need to now what we need to do so we need to do set filters will be our copy filters now we will log this filter here so we'll do filters and I'll paste it here so now let's
refresh this so we'll do category one Category 2 three see select on brand now we'll be having Brand one then brand two three four like this and if you select unselect let's say levies so now it's getting unselected you don't have anything awesome right so now this is done next thing what we need to do right whenever we'll set this one we need to set these values in our session storage so we'll do session storage or set item or filters and here I'm going to do Json stringify and I'll set this copy filters all right
now what we going to do right I think this part is done so if you notice right uh we are having this on empty object this is fine use this is null whenever refresh this page for example if these values are already selected and I I refresh this page I need to get it so that is the reason I set it in my session storage so that on page load I I'm going to extract that from our session storage so how we are going to do that right so here I'm going to take another use
effect and these are Are normal react Concepts right so on page load I'm going to set some default value for our sort so let's do sort default value as so I think we have the sort options so let's go to the sort options so default I can keep like price low to high so this will be our always sort options so this I'm going to set as a default in my page load so I'll paste it here and save it right so see what will happen if you notice right this is getting selected by by
default on page Load similarly we also need to set our filter so do set filters so here we do simply json. parts and we'll do sess storage. gate item so we already stored in our filters right so this will be either this or this will be empty object so this will be our on page load if you notice right if you see here currently we don't have anything and I'll remove this and I'll select man woman and Nike here and I'll see once I refresh this page right you'll see that Filters will automatically saved in
our state see it's already stored right but this is not selected this part we need to do but this values are coming now to select this checkbox we need to do some logic in our filters component so what is the logic that we need to do right if you go here in our filters we are passing this filters option so in our check box we need to pass a checked property so how we are going to check it we'll check these filters and then Object. keys of this filter do length if this is greater than
zero right and and so we have this filters uh sorry we have these filters of this key item key item is nothing but filters of category filters of brand that means which option I'm selecting which category or which section okay so this is my uh sorry where is that so filter filters of key item and and we need to do filters of key item Dot index of this option. ID should be greater than minus one that means if the current one is selected or not awesome so it's coming right so this is what exactly we
doing that we are doing that filters of key item filters of key item is either category or brand and then inside this we are checking whether Nike or this man and woman is present or not and for that we are writing this logic that if dot index of that option should be greater than minus one now if I Select kids and let's say refesh this page see what will happen see these are pre-selected right so it's taking from the session now this part is done but one very very interesting thing we need to do and
that is whenever we'll type something here right so let's say I'll unselect all of these and I will select on men what I want to do right I want to do something like this so it will come here category will be like men then it will be like Comma woman something like that so we need to pass it in our search par but how we are going to do that to do this one right we have a uh hook that you can use that is called use search patterns in react router Dom so that part
we are going to do in the next part that how we are going to update our search patterm and based on that how we are going to call the API with the filter patterms now once we'll pass all of these right that time we need to basically get this Information in our API site and then based on that we are going to do the filter functionality so two things we're going to do in the next video all right so let's start working on the uh that functionality the filter PMS that we are going to update
the search pams before for that see I added one more product right I thought it would be better instead of this 300 F PX F right if I make it 200 because we don't need that much space I I think this is looking Much better if you noticed right okay now what we will do right so we will take one more use effect here and here I I want to basically keep the filters as a dependency and as I already told you right that we have a hook that we can basically use so here what
I'm going to do right so we'll take one hook which is called use search params so what will happen this will give you two property one will you will get the Search params and one dispatch method which will help you to update your search patterms so this is the thing you need and if I go here and log this right search PMS save it let's open inspect if you see that you are getting this URL search params correct so what we can do simply we can simply check here if these filters and and object do
keys of these filters do length if this is greater than zero so Here I'm going to create a filter query string okay so we create a create query string so what will happen we are going to create a helper function so we create uh search params helper something like that and here we're going to pass these filters and what will happen once we create this query param we're going to set this in that set search params that hook and this will update you so we'll do URL search params and here I'm going to pass This
uh create query string now you'll notice what will happen but before that we need to create this create search param function so here only we can create we do function create search param we'll do get we'll do filters filter params let's say and what we going to do right first I'll take a query params as array and here we're going to do normal uh like for Loop so const key comma value of object do keys of these filter Params so here we need to check that if this is array so we do if array do
is array of this value that we are having because we have this multiple values right man woman something like that those thing and we are going to also check that value do length if this is greater than zero so we'll simply do const param value let's say so what we'll do we'll join it right so we'll join this value with comma so we'll get it in comma separated and then we'll do Simply query par R.P and we're going to push it something like this so we need the key right first so key will be our
key key is category or brand something like that and here what we need to do we'll use this encode URI component and here we're going to pass this param value right that's it so it will automatically automatically push it and after this what we'll do we'll return because we have multiple right we have category we Have brand so to separate from different section we we will basically join it with and so we do query params Dot and here we are going to join this one with what we're going to join this with and so that
there will be difference you'll be able to understand what exactly we are doing now if I save it right now if you see I refresh this okay this is not getting updated this part we need to check but I think we're getting we're not getting anything Is it one minute let me just do one thing right we'll do search param do2 string and let's see what we getting we're not getting anything here okay we are passing filters okay let's debug here what you're getting in this query params here okay here only we have some problem
see this will be entries not keys because we're taking both okay now I think this should work okay this is Already working so we having category man on woman and also if you see here right if I click on brand now see we are getting this and so it is basically separating both the sections and you'll be able to select multiple and if you unselect this is also working and even if I refresh this page correct let's do it so you can see that both are selected and also if you remove this refresh this page
you'll see both are selected and also this is getting updated awesome so Now this is working fine so now we need to update something in our API site because we need to add all of these in our controller right so we have Swap and then product controller so what are the things that we need to do here see the first thing we we need to basically get the category and the brand from our query so how we are going to do that so we'll do this one like this so we have request then your query
correct and here we're going to get the Category which will be let Mt we'll be getting the brand and also here we'll be receiving the sort buy and for this one we are going to keep some by default value which will be uh price low to high all right so first we'll get this then we're going to create our filter here so we'll do let filters to empty object and we'll do if this category that we are having do length if this is true so We'll do filters dot category and this will be we need
to check it where so we'll take a in here operator and then we'll do category do split so let split it with comma because this is what exactly we doing right so we are splitting with comma here so that we'll be able to check it now similarly we have to do it for brand also so paste it and instead of this I'll do brand so we do filters. brand uh will be this brand. split so This is about the filters now for sort what we'll do simply we'll take one more so we'll do sort and
then here we are going to take a switch statement and I'm going to pass the sort by that we are having and we having four values correct so you're having price low to high so we'll copy this pass it value here and for this one uh we'll do sort do price and we'll do this one as one we'll copy this and paste it four more Times and then this will be price high to low now again you can give any different name if you want it's up to you so for high to we're going to
make this one minus one then here we having title A to Z so we'll do title A to Z and here we need to filter by sorry sort by title so we'll keep this on title as one and then we are having title Z to a copy this and then we'll pass it Z to A here and this will be sort. title which will be minus one default uh in the Default what we'll do right we'll do sort do price equal to 1 that's it now when we'll filter it we need to do inster of
this find here we need to pass the filter properties because we can't get all theil all the products all the time so we'll pass the filters then we'll do dot sort so when we'll do sort right we need to pass the sort parameters that we have just now created this one and this is what exactly we Needed but this is not yet done because now we need to basically get or pass this information in our Redux St because if you remember we need to pass this in our store also or else this will not work
all right so let's go to our store okay let's go to our shopping and then this slice and if you notice here right when we are fishing we are not uh passing any value here so this we need to do it so what we can do right simply here Let's do something like this we'll do filter params and also we are going to get the sort vums correct and then we'll copy this right and what we need to do we need to create a query now why we need to create a query if you go
here right see we are getting this one from this request. query so what we'll do simply create a query how we are going to do that so we do const and we'll do query and here we Going to pass new URL search params right and here we are going to pass this filter params and here we're going to pass the sort by because this that is the key that we have used here if you see right we have sort by so we'll do sort by which will be our sort params correct and once this is
done right we need to then update this so after this G then we'll pass question mark and then we are going to pass this query that's It okay now still this is not done the reason is because we also need to pass it from our uh this UI side so you need to go to our listing and then what we going to do right let's see so we fil we are passing this we are dis dispatching this one right uh getting the list of products so what we going to do here we going to also
pass the sort and the filters as a dependency and we'll do here if this filter not equal toal to null And sorry and sort is not equal to equal to null so you're going to pass the filter params and the sort param so we'll go here so we need to pass this filter params and the S param we'll copy this and then we'll pass it here so filter params will be what our filters and sort param will be our sort that's it and this is done and we need to keep it inside this K bracket
let's save it and now what is happening we need to check right so we Loog login go to men and what I'll do right I'll go to network and then I'm going to one select this it's already working awesome now I'm going to only select woman see you're getting both see woman we are getting and let's select Nike add it as I think this brand part is not working right so this part we need to check but if I remove this woman this is working fine but what will happen if I Do sort let's do
here high to low I think it's working and if I do a to z and Z to A so it's sorting if I do high to low so we getting this one and then we getting low to high this is also working so this sorting part is working I think the brand one is not working okay Nike is also working awesome oh is it working right so we'll do Zara we having only one H&M we don't have anything right woman and H&M both We don't have anything woman has two both are Nike if I click
on Addidas then we don't have but if I click on Nike then we are having okay it's working fine awesome and if I unselect then we are getting but if I select kids that time it's not working and this is fine so when if I refresh this right so let's do this one refresh this page we are not getting anything and even if I refresh here now we are getting two awesome it's Working fine and if I let's click on Addidas now we getting Addidas one Puma Levis Zara and H&M all right and I think
the filter functionality and sorting both are working fine okay so now next thing what we need to do first we'll Implement our Details page not page we are going to open in a dialogue okay and then we are going to start working on the add to cut but I Think for now this part is actually completed so let's start working on the details functionality all right every so now let's quickly finish the details page all right so we go to product controllers and here I'm going to create one more method and this will be con
gate products by ID something like that or let's make this on gate product details so we'll do async this will request response and here we're going to Do try catch again these things are getting very repetitive if you see that so that is the reason I'm doing little like quickly what do this uh will be become I'm thinking like already so many things to do and this video is already very long okay but we don't have any of other options because I'm explaining each and everything right so here the first thing what we going to
do right from our params we are going to receive this ID And this will be pretty straightforward the reason is we just have to find the product so find we'll find the product right which will be a uh a product dot we do find by ID and here we need to pass the ID simply we'll do if the product is not present so we need to return a so we'll return a response with a status of 44 and we'll do a Json and here I'll do success will be False and here I'll do sorry so
will be false and message I will show like product not found okay or else uh we'll simply return the product that's it and as I already told you like this will be pretty simple so we'll do Jon and here we'll pass like something like we'll copy this so success will be true and we need to pass data instead of the message so we do data which will be our product that's it so this is is done now let's pass it here so to get Products details right save it and let's go to our routes so
we have a shopping routes so we'll get our get product details and now I'm going to do get this will be get and then we're going to pass the ID and this will be get product details awesome now this is done so now we need to go to our whereb store same process okay we don't have any other thing it is like same thing and here we are going to do product details and let's keep this one as Null all right and here let's copy this and we'll do Fage product details so we going to
pass the ID here right and we don't need anything and this will be our F product details we don't need query also so here we just need to pass the gate and then we need to pass the ID that's it and we going to return the uh data so now let's quickly create all of these right we need to create three more add case so we'll do here we'll copy This part from here and we'll paste it here so first thing we are going to do like f product details. pending we are going to keep
the state. is loading as through then when fet product list. fulfilled then we are going to set uh state do product details instead of product list which will be accent. payload do data remember we are passing the data correct if you go here right we are passing this data and then when this will be rejected So we make this loading as false and product details will be null and that's it so now what we'll do simply let's go to our listing and then we will go to our product tile so we'll go here and in
this div we going to take a on click right so what will do right we'll simply so one more thing we can do right we can manage these details from our parent component also so we'll pass a handle gate product details And here I'm going to pass the product. ID so this I will receive here product details and we'll go to listing page and we'll pass this handle product uh handle gate product details and then I'm going to create this functions so again the same thing so let's create here any place you going do and
this will be get current product ID and we log this get current product ID save it and also I'm going to remove this Filters for now and let's see what we're getting if I go to console and if I click here we getting the product ID right now it's pretty simple so what we can do we can just dispatch this so here what we'll do right we'll do dispatch and do fet product details and here we're going to pass the get current product ID now to check this whether this is Working or not so from
our state in product details we also get need product sorry product list we also need the product details and this I'm going to log now here so product details and let's save it so getting null and if I just click here product details which one we calling here okay let me check something we have done wrong P product details which is going Here okay this is the problem we need to give slash here now let's see okay now if I click here we're getting product details right and if I click this one we will be
getting this product details and if I go to network I think this is also getting called yes all right so now we need to open a model whenever we'll be receiving this right so I'm going to create another component so let's go to listing close everything Else and I'm going to go to the components then go to the shopping View and then I'm going to create product details product details. jsx right so what uh this component will receive right so product details uh will receive the obviously the product details that we are going to get
but first let's quickly create this component so the function this will be our product details dialogue now here I'm going to return a Dialogue uh whether we have installed this dialogue I'm not sure let me check once in our components UI I don't think we have dialog component right yeah we need to install it so let's go here and install the dialog component also okay now what we'll do right we'll import the dialogue and this will receive a open property which I will be like open Product uh we'll keep this one as open and then
we'll do set no not set this on open change which will be set open now these two only we are going to receive from our parent component so we do set open then we are going to render a dialogue content all right and here we're going to give a class name so we'll do GD we'll do GD Columns of two we'll do gap of eight for ASM we'll do padding of 12 do Max width as 90 VW for SM we'll do Max width of uh let's do 80 VW and for large you're going to do
Max with of 70 VW inside this we are going to take a div we'll take a class name and we'll do relative overflow hidden and rounded large and here we're going to render our image so image will be the product details that we are going to receive so We'll do product details okay so here we'll be having source which will be product details. image alt see this is the same thing what we have done in the product tile okay just this is some details dialogue that's it no difference okay let's make a we of of
600 height of let's do 600 and class name we're going to give aspect Square all right and also do with full And object as cover okay so now after this we are going to take another div we'll do class name we'll do grid gap of six and here we're going to render H1 and I'm going to render the product details. title and let's take a class name for this also like text 3 Excel and font extra bold okay after this we'll take a paragraph and we'll render the product Details. description so we do a class
name for this also so we do text muted foreground okay let's save it and let's see how this is looking first so for this one we need to pass all of this from our listing component and also need to use this so here I'm going to import the product details dialogue okay and then we need to handle this also right so what we can do right we'll take now again you can manage the State from this component also that is fine but I'm managing from one parent component and here we are having like like open
details dialogue and set open details dialogue which will be use state of false so now we are already getting the sorry we are already getting the product details right so what we can do simply uh we will take one use effect and we'll keep this product Details as a dependency and we'll check give this product details is not equal to equal to null so what we'll do set open details dialogue will be true means once you'll get the data back we will open the dialogue okay and now I'm going to pass this as like open
which will be open details dialogue set open uh this will be set open details dialogue and also you need to pass the product details which will be our product details let's save it and let's see how What is happening it's already coming here that is fine so if I click here see looking awesome right it's looking very clean and if I click here we are getting this now what we can do simply we'll render some button now see I'm thinking like I'm not exactly sure whether I'm going to do it or not because it depends
based on the length of this video okay if it's getting very long or else what I'm thinking I'm also thinking to implement some review functionality also Okay so for that that one I'm going to keep some placeholder for now okay but don't like think like 100% that I'm going to do that but later part once we'll complete all the basic things then we are going to implement this one so here after this right we will uh let's keep some placeholder for the review functionality also but before that we also need to render the price and
everything so we'll go to product details so we have rendered till Description right so after this right after this we'll take one more div we'll take a class name we do Flex we'll do item Center and we'll do justify between and here what we going to do right first uh we are going to render the price so here what we going to do simply take a paragraph and we'll render the product details dot price and we'll take a class name so we'll do text 3XL font bold and we'll do text primary Okay and after this
we are going to check and also one more thing we need to do again I'm forgotting this part every time that when we have a sales price that time we need to line through so we'll check here if this product details do sale price is greater than zero so I'll do a line through ORS this will be empty okay and then we're going to copy this part we needed this and here we're going to pay if this Sales price is there then only I'm going to render the sales price so do product details do sell
price or else we are not going to render this so for this sales price Let's do let's take some class name also so we do text 2 XEL font bold and here we're going to do text muted foreground save it let's see how this is looking okay it's coming very below that part we need to Check okay let me just check one more thing I think we are doing something wrong here okay gap of six is the problem right we need to remove this let's see how this is looking nope we need to check this
okay we'll check where is the problem yeah I think there is some height it's taking actually okay we have a display grid I think this part is not required or what is the problem if I remove this how it's Looking let's see yeah okay this is the problem but it's looking very weird but it's okay what we can do right we can actually make this a little uh like larger and keep this one little below that part we can do so what we can do do right we'll make this one as text 2 Xcel and
we'll do margin bottom of five Also let's give a margin top of four yeah I think this is fine okay so now after this Right uh we should have a button to add to cut and also there can be like the review functionality we can also render something like that but for now let's uh render the uh button first okay so after this div where it is ending let me check so this div so here I'm going to render a div and here I need a button and this will be add to card okay and
here we'll give some class name which will be margin top of five okay if I make this on full withd How it is looking let's see so we do with as 100% yeah I think this looking good so we add a class name here also right so we add a class name and we'll do with full okay now what we can do right after this part so after this part we can basically add the review functionality like if you have a review so that can the user can basically review this product but for now again
I'm repeating this part will Be static we are not going to do anything for now but later if we have time based on this we'll Implement that part also so we add a separator here okay and then we adding here let's keep it outside okay this is coming here I need if I add below button where it is coming not able to see that only okay this is it's coming but uh okay I got it so we give a margin bottom of five here then I think we'll be able To see okay we are getting
this part here so now we getting the separator Here and Now what we can do right we can Implement that part like where we are going to implement the comment section so we'll give a div and then we'll give a class name so we'll do Max uh Max height of uh let's give 300 PX and we'll do overflow as Auto and here I'm going to do some like something like reviews okay and then give a class name And we'll do text Excel and we'll do font bold and margin bottom of four okay and after this
uh so after this review view section what we going to do we will render another div so we do class name we do GD gap of six okay and here we are going to take another div we'll do class name we'll do flex and here we are going to do gap of four okay and now what we're going to do basically here we are going to take a up Component that you have installed and we going to do after fallback and here I'm going to render something like ASM for this one we're going to take
a class name so we'll do width as uh let's do 10 height as 10 we'll do border and now let's say wa let's how this is coming okay it's coming here now after this we'll take another D here so we do Class name and this will be grid and we'll do gap of one and inside this we're going to take one more div we'll take a class name so we do Flex item as Center and gap of two and here we're going to render the username so we'll do something like I'll write my name here
for now and then we'll keep this one as bold class name I'll keep this one as font bold okay let's save it and let's see How this is coming Okay so you can see that it's coming here now after this what we need to do we need to render the uh this command functionality okay so for this one after this we'll take one more div we'll keep this one class name as fix item Center and gap of let's say we'll keep 0.5 and now I'm going to render the star icon okay and we are going
to keep a class name for this one we'll do with as five Height as five and we'll do fill primary and now let's copy this and paste it like five times save it see we're getting this one okay and now what we going to do after this we can sorry we can render the message that user has entered so we'll take a p this is an awesome product so now we'll give a class name and we'll do text muted Foreground see all right and I think this is done so this will be the main structure
and what we can do right we can also render this part this part whatever we have done here in our uh main this component where we are rendering this which will be our main product uh rating so what we can do right so where we are rendering the price so I think let me check so this is our price section so after this we can basically take one more div and we can Take a class name and we'll do Flex item Center and gap of two and now I'm going to R render this part here
so copy this and we'll paste it here and then we'll take a span one second and we'll render the let's say 4.5 the rating of that product and we'll take a class name we do text muted foreground if I save this so we are getting this product also and for this one we take a margin top of two awesome right this is looking good Now okay so now but this part is definitely static but we are going to implement if we have time for this one all right also at the end we're going to keep
a text box so that this uh user will be able to basically uh give the comment so after this right we'll take one more D here and let's give a class name we'll do margin top of six flex and gap of two and here we're going to render input Component and we'll keep a placeholder but I I will show you like this not everyone can add a review so you need to buy that product something like that we going to do so do write a review something like that and there will be a button and
I'll do submit save it so getting this one right this is fine but we need to check one more thing and that is like if I put this on multiple times how this is Looking so we having this Flex part right so this part I'm going to copy and let's say I'll paste it two times so you can see that we're getting scroll here awesome now this part is done but we need to obviously work on this but for now the main fun is done so if I click here it's coming click this one click
here and also it's looking very very clean right it's looking awesome now this part is done the details page and also the listing page So you need to start working on the add to card functionality so that we are going to do in the next video so for add to cut we are going to click here we are going to open a Sit component and there will be a check out button we we are not going to create a separate card I don't see any point of creating a separate card page because for nowadays whenever
I'll see some very famous uh websites right so they are going in this model only so you'll have a model and then Below only you'll be able to see like suggested products and then we'll be opening a model and from there we'll be able to directly go to the checkout page so the same thing we're going to do from the next part all right so now we have implemented the details part and which is looking also very good right the model and everything so now what we need to do right we need to start working
on the carts cart component and cart Logic the first we'll start with the back end Part so we need to create the models we need to create the controllers and we need to create the routes now from this part right because all the things will be related so it will be easy to understand so first we'll go to models and I'll create card. JS so first thing uh we need mongus so I'm going to install mongus so we'll do require mongus and I want to create con cart schema this will be new mongus do schema
So in cart what we are having right so we'll be having a user ID that which user is adding the cart correct very very important so we'll have a user ID and this will be in this format so we'll have a type of this which will be mongos do schema do types right and here we're going to map it with object ID which is our user ID and now here you need to pass a r which will be our user because we'll be picking from our user ref and this required we're going to to keep
it Uh keep it as as true so this this is needed now next thing what we need we also need the items which will be our cart items so here this will be arrrow of objects and here we need the product ID and I'm going to show you that instead of passing the Complete product how we are going to map it using product ID again this product ID will be a will have a type right and which will be the same as Object ID and here you need to pass the r which will be your
product correct because from product we are going to pick it and also here we're going to do a reord which will be true so this will have a product ID and also it will have a quantity right that how many quantity we have added for that particular product so which will be a type of number and we have a reord which will be true and also here we have a mean Property you will give minimum of one and everything is done we are going to make a time stamp will be true so this will be
our schema so we need a user ID which user is adding this product let's say this user is adding currently logged in then we need the items items will have a product ID and quantity and once this is done we'll do module. exports we'll do mongos do model and here we're going to pass card and this will our uh cart Schema all right so this is the first step now we need to start working on the main controller so we have four controller right we have add to card then we have a fetching all the
products from the cart and that will be based on the user ID then deleting item from a cart and also we need to update the quantity of that cart so let's go to our so and inside so I'm going to create cart controller.js all right so the first Thing we need our all the methods we do add to cart so we do as sync request response try catch so this will be common right so I'm just quickly creating this this will be log error and here I'm going to pass race status of 500 Json so
we'll do success will be false and message will be error and now let's copy this and paste it four Times so then we having fet uh fet cart or something what we can do we'll do F card items then we'll do update update cart items or update quantity what we will give we'll give update cart item quantity okay also you'll do delete cart item delete cart item so this four we needed and then we're going to do module. export and this will be add to cut uh then we have update cart Items then we have
a delete and also you have a fet card items so four things we needed okay let's save it and let's start working on each and every method one by one and here we need to learn lot of things right and it's very very important what are the things that we are going to do now the first thing we need to import two things so first we need to import our cart model so we'll do re so we need to go to Models then we need to go to card also need the product so do product
require so we'll go to model and then we'll go to cut sorry product so these two things we needed now see for add to cut we need to get the user ID we need to get the product ID and also you need the quantity right so first we will do cons user ID we need the product ID and also you need the quantity which will be request. body all right now here we are going to check if this user ID or this not equal to product ID or sorry or this qu DD this less than
equal to zero so we going to return that race do status so here we'll do something like 400 error and we'll do dot Json and we'll do success will be false and message will be Invalid data provided okay after this what we're going to do we're going to find the product based on the product ID because when we'll be adding we need the product that which product I'm currently adding and that product has to be available here so now we'll do const product and we'll do a it and we need to do product do find
by ID correct so to find By ID and here we're going to pass the product ID that this product I'm currently adding if this product is not present so do if not equal to product then we're going to again return so return 4 not4 false and then we'll do product not found all right and after this what we going to do we need to basically check that uh first we are going to find the user ID right right and if this cart is not present so See first time whenever we'll be adding this product right
so this there is no cart for that particular user ID but next time when I'll be adding this product can be already added right and we can increase the quantity so that also you can do so how we are going to do that so first we'll find the cart so do cart and this will be AIT and we'll do cart dot find one and here we're going to pass the user ID okay and if there is no cart is already Present so we are going to create a cart right so cart will be equal to
new cart using our model and here we're going to pass our user ID noticed and then we're going to pass the items and remember we have items right see this is the method items which will be empty array because first time we will have a empty array and then we are going to pass that the item that we are adding means for for example I'm adding this woman T-shirt If this item Is adding for the first time so index will be minus one so you need to add it but next step when we'll be adding
this item is already added so we need to increase the quantity correct so now what we'll do same same thing we're going to do so we do c find current product index and this will be our how we going to do it card this card that we are having here do items this items dot find index and here we'll do Item so we do item do product ID so item can have a product ID do to string right and this has to be the ID that that product that I'm currently adding so this product so
this is equal to be the product ID that I'm currently adding this one and now what we're going to check simply that if this is minus1 or so first we need to check this is minus one right so find current product index if this is equal toal to minus1 so We'll simply do card do items dop so we going to push that product ID so push this product ID and also you push the quantity because we are ping it for the first time but if this item is already present so you need to increase the
quantity so we'll do card do items of this find current product index do quantity so this quantity will be what we need to increase it with the quantity That we are having that's it and then once everything is done so we do a it cart Dove so we're going to save it and then you're going to return this so do race do status of 200 Json so we do success will be true and what we going to return we return the data which will be our cut card sorry this will be your cart cart means
these cart items so again I'm going to repeat like first we going to get all the information from our request body And we'll check if anything is missing so we don't have provide uh valid data and then we need to find the product if product is not present in our DB we'll do product not found and then we're going to find the card if we are adding for the first time in the cart so we going to push that item or else we are going to increase the quantity that's it means if we adding this
product for the first time so quantity will be one if I'm adding 1 second it will be 2 3 4 Like that and then we're going to save it and this is done so now this will add the product uh sorry add the item into our cut so now let's start working on the fing the reason why I'm doing this part uh one by one because once we add we'll be able to rec relate like what is the logic and what is the reason behind it it will be easy to understand so let's start working
on the fetch cart items update cart quantity and also delete cart item in The next part all right so let's start working on the fet cart items right so here the first thing what we going to do first we'll get the user ID that for which user ID we are fing the cart items we'll do request. params and we'll get the user ID all right and then here we'll check if this user ID is not present so we'll return some error like user ID is required something like that so let's copy This and we'll return
user ID is required is mandatory okay now once this is done then we need to find the card for that user so find the card so do card which will be a and then we have a card dot find one so by what we are going to find it by this user ID by that use particular user ID all right and then we need to populate so now see here this populate will comes into picture so what we need To populate right we need to tell that uh for this one I need to I'll give
a path so my path is item. product ID remember we have given this reference right that I need to get the product ID B sorry I need to get the product information based on the product ID and now I'm I'll tell that what are the things I need to select means what are the things I need from this particular uh database uh for not database for that particular collection so for that each And every product right I need the product image I need the title and also I need the let's say price something like that
okay so this is done and also you can uh render the sales price correct uh if you want you can also uh get the sales price so we'll do sale price so these four things we needed now once this is done if we are not able to find the cart then also you need to to return some error so if the card is not present So I'll again return some for not four and then I'll do that card not found for for this particular user now very very very very very important I know I'm telling
it sounds funny now what you need to do right you need to find the valid card items so I'll give you very interesting thing that I'm sure very most of the YouTubers not covered this thing see when you add this card let's say you added this product into cart all right Now this item is present in your cart but at the same time the admin that created this product deleted this card item so what will happen this card is now not present in from the admin side in your database so in this case if you
not not consider that scenario so this this product is not available in your cart also so we need to basically validate this part here also so the best way to do this one we'll create one valid items constant and here I'll card Do items dot will do filter and we'll do cart item and we'll do that if this cart item not cart item this will be the product item if this product item do product ID is present then only this will be a valid cart items then we'll check if this valid items that we are
having length if this is less than the original cart items length that means some of the items can be deleted there is a possibility so then we'll just cons uh Replace this cart items with this valid items okay and then we're going to save it with AIT card dot save and this is done now what we're going to do populate the cart items so const populate cart items and here what we are going to do simply we do valid items that we are Having do map this will be item and here we are going to
return the following things so return the product ID which will be item do product ID do ID so this is the main ID object ID for that particular collection then similarly we're going to return the image so this will be item do product ID do image let's copy this we'll do title and then we'll do price we'll do sales price And also do quantity so we'll do title then we're going to do here price then we'll do sell price and we'll do quantity which will be item do quantity okay so now everything is done then
simply return race. status of 200 do Json so we'll do so what you're going to do right we return a success will be true and then we'll do return the data so in the data what we're going to return we return the Card that card we having dot document and then we're going to return the items which will be our populate cart [Music] items and this is done so this is a long process that we have done lot of things we need to check but the main interesting thing is that we need to check the
valid items and based on that we are going to populate the C cart items okay so this is about the fetching The cart items now let's do the update cart items now for update cart items also most of the things will be almost same so let me just do it from here on so first we need to get the user ID that which item I'm actually updating for particular user the product ID that which product I'm updating and the quantity so we are going to do this check here also for this for this update quantity
okay and and once this is done We are going to find the cart so L cart which will be a it cart do find one and here we are going to find with user ID right again if the card is not present we are going to return that so we'll do the same thing here copy this and we're going to return this that if the card is not present then simply return card not found then you need to get the item index that which item we are doing find current product index so lookart do items
Do find index so we'll get item so we'll do item. product ID do two string if this is equal to equal to product ID that we are having okay and here we can simply directly update this now again if this item is not present this is also very important then also you need to return that this item is currently not present in the card so you Need to basically check that also that this item is not present so we'll do a 44 and we'll do a Json which will be success will be false and message
will be card item not present all right once this is done after this we're going to update it so lookart do items of find current product index do quantity so this will be the quantity that we are receiving so this quantity is this quantity here all right and After this again we are going to save this so this will be items c. save and now again we're going to do a so we do cart. populate and we are going to populate the path which will be our items dot product ID right and also we going
to select so let's go here and let's copy the select part so we need these four things right and after that again we need to do Updated cart items so this part that we have done here this product populate cart items so we need to again populate the cart items so after this right we will do this one so this will be our Now card. items. map and this product ID will be if this item. product ID is present so here one very important check we need to do is that if this item. product ID
present then only it will be this or else this will be null same it will be the same thing we need to do it For all others also okay so do if item do image is present then only we will do this all else will do null same for item do title is present or else this will be uh like we'll do product not found then we'll do for the price and then we'll do for same for sales price and for quantity it will be item do quantity okay now once everything is done then again
we are going to return This so let's go here and we'll return the same exact same thing so data will be uh we are going to return the document with Success Through and items will be populate card items all right so this is also done so this will be our update now we need to do it for the delete right so let's start working on the delete now delete also will be almost same but we need two things so based on the user ID so we need the user ID for which user we are deleting
and also we need the product ID that which product we are deleting so let's do that in the next part all right so let's start working on the delete cart item so for delete right we need two things so first thing is that as I already told you that we need the user ID and also you need the product ID that which product I want to delete and here we'll do request dot params so this is the first step now again uh we will use the Same thing that we have used here that if we
don't have any user ID or product ID so we going to return some error and here we no need this part so we remove this all right after this what we going to do we're going to find the cart so do cart so which will be AIT cart dot find one and here we need to pass the user ID right and we'll do populate so again the same thing uh we are doing the same thing so we will copy the path from here that what are the Things that we want to populate so we'll populate
this path and also we'll select these properties okay again if the cart is not present so we're going to return error that also I think we have done somewhere so let's see okay this one copy this and we return return the error here now what you're going to do you need to filter the item that which product I want to delete so you do card Do items so this will be card. items. filter and here this will be item so item dot product ID that we are having right do ID so this IDE will be
getting from that individual product that I want to delete do two string this will be equal to equal to sorry not equal to this will be not equal to because we're filtering that product ID with the product ID that we'll be passing again don't confuse with this product ID this product ID is this one that will be Passing that okay I want to delete this product okay so now this will update and then we are going to save it so have it we'll do cut dot save so this will save this now once this is
done then we'll again populate this the same thing that we have done here so let's copy this part from here and we don't need this one anymore we only need the populate because we want to populate this thing and once This is done what we going to do we want to return the items so that part also exact thing we have done previously so we want to return this thing that we will check the product ID and everything and then we'll return that in our response we'll copy this and we'll paste it here the only
difference is that we are basically filtering that item that which item we want to delete okay and I think this is fine so product ID and everything we are Checking and one more thing I think we have done mistake we need to check the product ID not individual image and everything if the product ID present then only we want to return ORS we return null so here right we need to do this all product ID instead of checking all of this so this is uh one thing that I thought it will be uh I missed
it actually and the same thing we need to do it for here also so we're checking individual item. image and everything Right so we need to check if the product ID is present then only I want to return all of this and I think with this I think this is done so now we will go to our uh routes soop and then I'll create our cart routes. JS now let's quickly create the routes so again we need the four routes here so we'll do Express we'll do reer Express and we'll do const we need from
our controller so we'll go to our controllers we'll go to sop then cart controller so we'll do add to cart we'll do F cart items we'll do delete a cart and also we'll do update cart item quantity all right after this we're going to create our router so Lon router will be Express do router and then we're going to create All the routes we do router. poost so this one I'll keep as ADD so this will we add to cut then we have router Dot get so we'll do get and then we'll pass the user
ID because we need to get it by user ID and we'll do F all C card items then we'll copy two more times so one will be put so for put what we're going to do right we we basically need uh to update the card so we'll do update card something like that and this will Be our update cart item quantity and for delete we need both the user ID so you need the user ID and also we need the product ID that which product I want to delete all right so this is done now
we're going to do simply module. exports and we're going to do router and I think this is completed now let's go to our server.js and we're going to import it so we'll come here and then copy and paste it and this will be our shop cart Router right and we are going to import it here/ cut routes then come here and then copy and paste it and this will be s/ cart and this will be sop cart router and I think the back end part is completed now we need to go to our slices and
start working on the sof part so we have soop and then product slice I'm going to create one more folder and give this on name is cart slice and Let's do index.js now let's close everything and we're going to create our const shop cart uh we'll do shopping cart slice so this will be create slice so name I'll give the same shopping cart slice shopping cart let's give shopping cart then I'll give you initial state so here we'll do const initial state so we need the card items which will be empty and we need a
EAS loading which will be false so these two Things for now we needed now we're going to pass a reducer which will be empty for now empty object and but we need the extra reducer because we need to uh create the all the Builder use cases or add cases right so here now we are going to create four four Asin right so first will be to add then we have for delete fet and then update so let's start one by one so first all right so let's create all the Asing T so first we'll start
with export const we'll do add to Cart right so this will be create as syn tun and here we're going to give this on name is cart SL add to cart and let's create our assing function okay so here we need uh what are the things that we need we need the user ID correct we need the product ID and also we need the quantity so you need user ID we need product ID and also you need the quantity of that product that we are Going to add now here simply we'll do const response this
will be a it exos dopost and let's copy this URL from here sop slart so it will be till this part slart part and then what you need to pass we need to pass the add let me check what is the route name that we have given so we have ADD right so we'll do slash add and now we Are going to pass this this user ID the product ID and also the quantity okay and once this is done so we going to return response. data save it now we'll create for like this because we
need for edit and delete and also to get so we'll do fet cart items and this will be fet cart items now for this one we need only the user ID so we get the user ID and that's it and for this one we have get and then We need to pass the user ID so we'll do template literals and this will be get SL and then we going to pass the user ID and this will be get request and we can remove this part and this will be pretty straightforward so sof card gate and
then user ID then we are having the delete card item so do delete card item so for delete we need the user ID and the product ID right so here again If you see right we have a user ID and the product ID so this will be Let's uh convert this one to this and then we are going to pass this user ID and also we going to pass the product ID okay and we don't need to pass this here and this will be a delete method and then we having the update card quantity something
like that update card quantity okay so here for the update we are going to get the again user ID is Required product ID is required and also the quantity is required and this will be update card so copy this and we'll pass it here so this will be a put and for this one we need to pass user ID product ID and quantity and that's it so now let's create our all the cases so we do builder. add case and this will be add to cut do bending and then here we are going to get
our State so here we'll do state do e loading will be true and we're going to add one by one so we'll do add to cut. ffi so state. is loading will be false see I'm not explaining all of this because we have done multiple times the same thing again and again and this will become very repetitive so here we also get the accent and we need to do accent do payload do data now why data that also I'll show you once again so we go to the Controllers right see if you see right here
what we are passing in every case we passing a data property that is the reason so data and when this is rejected so we do state do is loading will be false and state do cart items will be mty now if you notice this same use case we need to do it for uh three more times so first we are having the add to cut okay for add to cut uh one more thing we need to do and that is I think we are getting no I Think this is fine this will be fine so
what we're going to do right the same use case we need to do it for all the use cases we'll paste it here so this will be our fet all cards. pending fet all cards. fulfilled and fet all cards. rejected similarly this we need to do it for update so here we'll do like update card quantity do pending update card quantity. fulfilled and update card quantity. rejected and the same thing We'll do it for delete also so copy this and paste it here so we'll do delete card item. pending delete card item. fulfilled delete cut
item do rejected so we need this many use cases and at the end we're going to do export default so we'll do cart shopping cart slice. reducer let's save it and now we'll go to our store and we'll import it so we'll do sop cart slice Okay so this we need to import it from SL cart slice then you'll use your sof cart which will be sof cart slice all right so now let's save it and let's see I think we are getting some error reord is not defined okay I got it I think we
need to okay see we need to do it using import so we do import from Redux toolkit save it all right so I think this is done now We need to go to this header component because on click of this we are going to open the card right so we'll go to our components let's go to components shopping View and then we having header and here if you see I think we are having this user card button remember so now what we going to do right we need to basically wrap this component so that the
seat component will open so we are going to wrap this okay so let I'll show you how we are Going to do that so the first thing let's take one s component here and then I'm going to wrap this inside this this will be the first step so let's do step by step now after this what we're going to do simply we will create two different component okay so the first one will be a cart component and then there will be a cart content where we will be storing the reusable cart items the reason is
because we need that cart Component in the checkout component also so that we don't need to write two times I'll be creating a reusable component so that we can use the same logic from two places I'll show you so here what we going to do right in the shopping view I will create a let's create a cart wrapper first okay so this will be a cart wrapper component then we will be having a cart content cart item items content okay now again it's up to you you can give any different name you want So let's
quickly create this so this will be our user card wrapper okay and let's return a div so this will be user card rapper and then we are having the user items cart items user cart items content okay so this will be the content now what we going to do right so instead of writing the logic here we are going to import that cart user cart item wrapper here so this is the first step now what we're going to do we'll go here And then we'll take one state and that is to display the cart model
we'll do open cart seat and we'll do set open cart SE which will be US state of false okay so this is the first thing now we'll take a open property here which will be open card seat and on open change we are going to make the set open card seat as false and then on click of this button we're going to take a on click and we'll make set open card seat as True so this is the first thing now if I click here it see you can see that we are already getting cut
user cut wrapper the reason is because we haven't used the seat content there so we need to use the seat content here right so here what I'm going to do right I'm going to import seat content and we're going to give a class name so I'll give ASM for as I'm going to give Max Wmd okay and here I'm going to use a seat header and I'll do your card something like that okay now let's save it and also I think no we need to do it using inside uh title so you need to import
seat title and now see if I click here right see we getting your cut and looking awesome okay now we need to render all the cart items first and the cart items we're going to Render in this cart item content component okay so here after this we will take one div and we'll take a class name we'll do margin top of eight and space y of four and here we are going to render all the card items and below this we will be having one more div and we're going to take a class name so
we'll do margin top of eight space y4 and here we're going to render one div we'll take class name we'll do Flex Justify between and we're going to render this span which is total amount let's give a class name we'll do font bold and also we going to render the total amount so let's give this one as do 1,000 something like that okay so let's see how this is looking so you see that we are getting this one and after this we will be having uh One button which will be check out and here I'm
going to use a class name of with full and also margin top I'm going to give five let's give six okay so now this is fine so now what we're going to do right first we need to uh implement this add to cut because we have done all already completed everything so first we need to implement The client side functionality on click of this we need to call the API and once this is successful we need to render those items in this sit component so let's do that part all right so let's go to our
uh product tile page now it might be thinking that so many pauses and everything see what I usually do right it's very difficult to record this long video so sometime every like some 15 or 30 minutes I need to Take a little break and then again I'll start uh recording like that because I'm doing in the real time right I'm doing that is the reason also you notice that I'm facing some issues and everything okay so now what we're going to do basically we will uh go to this button where we are having add to
cut so I'm going to add a one click here and then we will do handle add to card okay and then I'm going to pass the product. ID and this handle add To guard I'm going to receive from this because it will give you error so we need to get it from our parent component so now Shopping product title we are using in the product listing component correct product Shopping product title I think here we are receiving product title so here we are going to pass this handle add to cut and then I'm going to
create this here so before use Effect we'll use another function and I'll do handle add to cut and then we'll do get current product ID and let's log it here save it now I'll remove this log from here for now go to console then click on add to cut okay here some problem is like it's opening at the same time right this is thing like we need to so what we need to do here so we are doing it inside this We'll keep this part outside so have this card footer right this part will keep
it outside of this now now it will work because we are doing on click of this right opening now but add to cut we we will only get these IDs and everything okay this is fine so now we'll go to listing and in this handle add to cut we will just dispatch that add to card and here we need to pass three things right we need to pass the user ID product ID And also need to pass the quantity so copy all three and and then we'll pass this so user ID product ID and US
quantity but how we are going to get the user ID now that you are thinking see user ID will be able to get very easily from where from our state so we do user and then we'll do use selector then we'll do state and we'll do state. o so here we have this user user information that we already stored So here we'll get the user ID so this will be our user do ID the product ID will be this gate current product ID and quantity will be one okay so now first I will do dot
then I'll do data and then I'm going to log this data and we'll see what is coming right so let's save it refresh this page and I'm going to click on add to cut so you're getting fulfilled and in The payload you're getting success and the data and if you go to network tab this is also successful awesome now what we'll do simply once we'll get the data right we need to fetch the uh list of cart items so what we'll do we can do dispatch and we'll do fet cut items and you need to
pass the user. ID we don't need this okay data we need sorry we need to check this if the data do payload dot success if this is true then Only we want to do this okay so now we should be getting the cart item so what we can do simply uh we will do like let's log here just to check checking purpose right or else we can do one more thing we can log this part in our cart also directly so let's okay let's log here so we have cart items right and this will be
use selector State and this will be state do shop cart or what is the name that you Have given in the store so we have this sop cart so now let's log these cart items log the cart items here refresh this okay we need to do it on page load correct but but we can do it on adding so let's add this also so we should be getting two right add here so if you see right we are getting two items and we getting this product here but we are not getting let me check the
Network right we are getting some error like some error is happening here okay I got it that is the reason this is not happening so we need to check what is the error that we are receiving here it's telling cannot populate path item. product ID because it is not in your schema okay but we have added in our model right let's see so product Oh my God this is in items do product ID is it But okay let me just check it what is the problem here so everyone after spending 5 minutes the problem is
actually here we are doing item. product ID it will be items so let me just search it right I think we have done it some I think in only one place and let's search it for items I think rest of the place it's C save it and now we'll go and see right so let's go here sorry and then I'm going to let's add it one more item I'll add right this one I'll add so now see what is happening so in the network tab now I think we are getting correct data right so data
we having items and everything image price sell price and everything we're getting awesome job now I think it's working fine so now what we need to do simply so see this kind of mistake can happen but you need to know how you are able to basically debug it okay so now next thing what we need to Do we need to render the list of uh these cart items so uh what we'll do let's go to our user cart wrapper so we have created some user card rapper right so let's go here let's close everything else
it's getting confusing so many files so we'll go to the cart wrapper and then we need to render it here correct so we'll receive the cart items as a prop so we receive the cart items and these cart items I'm going to Pass from my uh the listing page because we already have the cart items here so we can go here in this where we are rendering this no I think we are doing it from here right in the listing page we don't need to do it in the listing page that is the thing so
what we can do let's cut it from here and then we can go and remove this we need to do it from the header because we're using that in header so we'll go To our uh header component okay and then I'm going to use this here so I'm going to pass it so these cut items I'm going to pass in my this user cart wrapper so it will receive the cart items and this I'll receive and then let's go to our card Trapper and let's uh basically pass it so we'll do here if this cart
items and then cart items. length greater than zero so we'll do cart items do map item and here I'm Going to call that user cart user cart items content or else this will be null so now here I'm going to pass the cart item which will be this item okay let's save it now what is happening if we click here right we not getting anything the reason is from our header component we need to dispatch that on page load so we do use effect and then we'll take dispatch and I'm going to just dispatch it
so do dispatch fetch cart items and here this will be User. ID the moment I'll save it and you'll see that you'll be getting okay still it is not coming this this is actually weird let's see what we rendering in our cart items content what we rendering okay we are getting here right we should get something okay let's go to I got it I got it okay I got it that why it's not coming that also I understood because we have cart items do items I'm pretty pretty much sure so now let's see what is
coming so we go to Console right we have uh in our header component let's give my name here for identifier it will be easy if you see right we are having the cart item do items this part so you need to pass this dot items so instead of this we'll pass this cart items and then cart cart items do items do length if this is greater than zero then we'll pass the cart items items or else this will be empty now I think this will work so now let's see if I open right so getting
three data awesome if I add one more and open here we getting four data awesome now this is working fine so what we need to do we need to start working creating the uh structur so we'll keep this one very simple so we'll go to our cart items content and here we are receiving what we'll be receiving the cart item so receive the cart item and then I'll take a div so we do a class name L Flex item Center Space X Of4 here I'm going to use the image so sorts I will use the
cart item. image alt we'll use the cart item do title right and for class name I'm going to use width of uh 20 height of 20 we'll do rounded and object cover so let's open we're getting four data okay now after this uh we'll take one more di we'll keep this on class name as Flex One here I'm going to render A3 and we'll do cart item. title let's take a class name and we'll do font extra bold awesome now I'm going to take another div and this will be class name we'll do Flex item
Center and margin top of one here I'm going to take a button and let's take a minus icon so you have a minus Icon and here I'm going to take a span which will be decrease but I'm going to keep a class name here which will be Sr only okay for this icon we'll take a class name which will be withd of four and height of four that's it and here we're going to take a variant which will be outline and size we're going to pass as icon save it and let's see how this is
Looking okay we need to also this will be Sr only and also you need to give a class name here so this one will do height of eight width of eight and we'll do rounded full okay awesome now what else we need we need one more icon right to increase so we'll copy this same thing and we'll paste it here and this will be plus also we need to give some Gap right let's give some Gap okay so this is done now in B2 in we Can also add the quantity so let's add it in
between only I think it will look nice so do span and we'll do card item dot quantity okay so we what we'll do for this one we'll add uh let's keep it like this or what we'll do I think this is fine let's give font semi bold okay this is done now after this uh what we need we need to do basically so after this button Right no after this part so here we'll add one more div we'll take a class name do Flex Flex of column and items end and after this we'll take a
paragraph and here we'll take a class name we'll do font semi bold and here we are going to do this cart item do price into cart item dot quantity right and then we'll do dot sorry sorry I need to do it here so we'll keep it inside a bracket and do two fixed of two we're getting here but here we have a trick and that is we need to basically check here if there is a cart item dot sell price if this is greater than zero right so in that case we need to take the
card item do sale price or else we need to take the cart item do price so it will automatically change because we need to take from the Cell if the item is in sell correct and after this we need to take a trash icon and here I'm going to take a class name so do cursor pointer margin top of one and here I'm going to pass the size as 20 this is to delete and I think it's done and it's looking very nice okay now if you see if I try to add one more Right
add here let's go here so getting Two if you noticed here one more thing we need to do and that is we need this is also very important we need to go to the listing page and where we are adding the cart item right so we're adding handle add to cut so here let's add some toast component also so here I'm going to add a toast and we'll do use toast and let's go to handle add to cut and here we're going to s a toast and I'll product Added product is added to cut okay
so let's add here okay and also you can open this uh model also if you want for that only you need to we need to manage some kind of global state but it's fine you can also manage that also okay so here we are getting three now what we need to do we need to basically update on click of this and also you need to start uh working on the delete so delete uh Delete delete one Will be straight forward like what you need to do you need to go to the cart items content and
here you're having this trash icon right so here we need to take on click and we'll do like handle cart item delete and here we're going to pass the cart item so now we create this method so do function and handle delete so do gate item gate card item and here we're going to do dispatch So we need to also take dispatch which will be use dispatch so we do dispatch so what you need to dispatch you need to dispatch the delete cart item and here what else we need let me just quickly check here
so you need the user ID and the product ID so we'll copy this and we'll pass it here so for user ID again we'll take the user ID from our state so the user which will be use Selector State state. o and here we need to pass the user ID which will be user. ID and product ID will be be your this get cart item dot product ID all right and here you can just save it and now let's open our console I think this should work let's open network and let's try to delete okay
it's deleted but what is the data that it's returning it's returning four data only so this Part we need to check that why it's not getting deleted properly right so something went wrong there so because it's returning the for data only okay we need to go to our controllers and we need to check the delete once what we exactly we are doing here so first we're getting all of this find cart items. filter we are actually filter in here okay but if we are filtering it should not happen this Isue all right see the isue
it's a very silly mistake so the problem is why it's not working right let me just Lo remove this log so in this cart routes you see what we are doing on delete we calling the F cart items instead of calling delete I'm pretty sure you already noticed this when I recorded what I miss it so this is one thing and then when we are populating this on delete Handler right in the delete card item we need to we are using the model we need to use This variable so it will be card. populate so
now I think this should work let's see so now let's open this okay now let's try to I think let's refresh this let's add this product first and this one okay and now open this let's go to network tabe and let's try to delete this okay now it's getting deleted right so we're getting only three if I delete this one it's also getting deleted and if I refresh this page we should get updated Data we're getting two and if I add here you can see this will be updated here so this is now is to
now we need to update this this thing this logic so this logic also will be very straightforward right so we need to call that update quantity that we have done so here we have this minus and plus so we can basically first do on click on both so we do on click so here let's create a method so we do something like handle Update quantity and we'll pass the current cart item and also pass here minus like this is for minus and then we'll do one for plus so this will be for plus now let's
create this so do function and then this will be handle update quantity so we get card item and we'll do type of accent so simply we'll dispatch we'll do update cut quantity and let's see what Are the things that we need to pass here so we need to pass three things these three things so here we pass user ID which will be our user. ID product ID which will be get current cart item. product ID and quantity what we going to do right so for quantity we will to get cart item do quantity so here
we need to basically do a check that if the type of accent is equal to equal to add so what we'll do We'll do plus one correct so we do plus one or else we'll do G cut item dot so this will be dot quantity minus one okay do then we'll do data so if data dot so if data. payload dot success if this is true so what we'll do we'll render some toast component here also so let's do it after this we do const toast so use Toast and we'll do a toast title that
card item is updated successfully okay and the same thing we do it for here also if I just copy this part and then paste it here so we'll do card item is deleted so now let's save it and let's see what is happening I refresh this page so let's go here let's try to increase okay it's doing opposite is it okay one more thing we need to do Right just a minute and that is we'll do disable here because we need to disable this right if this card item do quantity if this isal equal to
1 then I'm going to disable this you see this is disabled but this plus icon is not working why is that I think we have done what we have ADD we have using plus this will be plus awesome updated correct we do Minus now we need to update this total right so total we need to do total is pretty simple I think total we're managing in this uh that component correct in the wrapper component I believe so let's go to this component all right so we are having total I think in this component right here
okay so simply we'll take one const variable so we do total amount so let's do total cart amount which will be cart amount sorry Cart items and then cart items. length greater than zero or this will be zero so look cart items do reduce right so here what we going to do we take the sum and the current item so simply do sum plus now here one trick is that we need to basically check if this current item do sale price if this is greater than zero so we'll take current item do sale price or
else we'll take current item do price okay so this is one thing we need To check is greater than zero definitely so we'll we'll multiply this with current item dot quantity okay now we'll go here and just replace this with this total card amount out let's go here all right something is happening here total cart amount is coming object object why is that I think we haven't passed the initial amount initial value okay that is the reason here now let's Decrease this so let's add this one here this uh add to cut so I'll go
here so we getting 362 I'll delete this one now we add this see it's updating and also this is getting updated awesome so I think we have done most of the things in this page so cart is also working details is also working we also give add to cut from here so this we will do and also this filter is also working right so let's quickly do that part also I for or Else I again forgot to do that in the form details uh we need to also do the det dets for right like add
to card so that we need to do okay so in this one I'll do on click and we'll do handle add to card I think we are already doing some right let's copy it from the list I think from listing page we are doing that and add to cut here so we actually need this thing Only so we copy this and let's paste it here so we need to pass the get current product ID correct and that will be getting from product details do ID okay now first we'll take the dispatch we do con dispatch
which will be use dispatch and then we'll import the add to card and also import the Fage card details right and also you need to Import the user information so you import user from use selector state so do state. okay let's save it now let's see what we getting let's add this product the new three product we add so do click on ADD I think some matter we are getting toast is not defined awesome I know something will happen like that okay so we do toast which will be use Toast so now let's try to
add product is added if you want you can also like so like added to cart and then we'll show those improvements let's do it in the later part like if I click right I'll show some kind of like this is now added some kind of badge or something and we show the count like already added to cut something like that and here if you go here right so now we are getting five and let's open let's add to c one Again so we getting six awesome so I think from this part is also done so
now what will be the next step right what are the things that we need to do and you see this looking very kind of sophisticated right it's looking very good the page is looking awesome now we need to start working on the homepage so first we'll start with the homepage and then we need to do couple of improvements also so that I'm going to show you that what are the things That we need to do once that is done then we're going to start working on the checkout page UI okay and before check out page
we also need to work on the address page because user needs to add add their addresses so those things we're going to do but first let's implement the homepage all right all right everyone so let's start working on the homepage now before uh starting the homepage right one thing what I meant uh like what I checked is that see when I Open this details model right and if I close it and let's go to a different route and then come back you can see this is automatically opening the reason is because when we'll close this
model we need to reset this uh product details right so what we're going to do right so uh let's go to this product details component that we have created so I think we are having this product details correct and here we are receiving this product details as input Okay so what we're going to do right we will create a reducer in our store so we'll go to our product slice and you can see that we have this product details which is null so here I'll do uh set product details okay so this will give me
State and accent and here what we're going to do we do state DOT product details and I'll make this one as null for now and we no need to use this accent for now I think This is not required we'll simply just do this one like this and then I'll just export this we export const set product details which will be your spping product slice. accents that's it now what we will do simply we will go to our listing page so we have a listing page and here you can see we are getting this product
details I believe so here we having this product details right so what we going to do first let's go to this place and here You can see that we having the set open details dialogue so what we need to do simply here whenever we'll close this model this on open change right so we need to basically use this set open and also we need to dispatch that particular method so that it will make the product details as null so let's do something like this so here what we'll do sorry we'll just cut it from here
like this we'll do handle dialogue close something like that and then we will Just create a function which will be function handle dialogue close and we'll do set open will be false and then we are going to import I think dispatch we already have and then we'll do just dispatch and we'll do Set uh open what is the name that we have given set product details so we'll do set product details and we'll just call it that's it now let's save it and let's See what is happening if I open this one right it's opening
close it and if I go back and come back here you can see that it's not opening right automatically and this is working fine awesome so this is one thing I just want to uh complete now we will start with our homepage okay so let's go to our homepage and start working on the home component so for this one we already have I think home page here now let's close everything else so Here the first thing we'll create the structure so I'll remove this one from here and we'll do div we'll do a class name
we'll do Flex Flex column and we'll do mean height screen and inside this we're going to take one more div we'll make this one as relative we'll do with as full and height as let's make this one 600 PX and we'll do overflow as Hidden all right and after this right what we're going to do we'll be rendering some images so for that I just added some image in my source folder asset folder right so those I'm going to use so here let me just quickly import all of these so do image or will give
Banner one from so this will be Banner one then I'm going to import two more so one will be Banner two and then we'll be having Banner Three okay now let's create a slide so what we're going to do L slides and just simply pass this Banner one Banner two and then Banner three sorry we'll make this on Banner two and then Banner three now I'm going to just simply log map this so we'll do slide then index and here we're going to return a image so Source will be our Banner sorry slide and then
we're going to give a key Which will be my index and then also we're going to give a class name so here we are going to do this one as absolute top zero left zero width as full height as let's give this one as sorry height we need to do full because we already taken height as 600 PX uh object we look over we'll do Transition opacity and duration we do 1,000 okay let's save it okay we are getting this but I think This is fine but we need to obviously fix uh or not fix
implement the functionality all right now here what we're going to do simply after this we will take a button and here we we going to import some icon I think we have left icon this one okay so we'll take a class name width four and height as four and here I'm going to take variant which will be outline size I'm going to give this one As icon also you need to take a class name so we do class name this will be absolute we'll do top 1 by two we'll do left as four we'll do
transform and we'll do minus Translate Y of so we'll do this on y of 1 by 2 and we'll do BG white divided by 80 all right let's save it so you can see that we getting this icon here and also we'll copy this paste it here What will happen if I keep this on black let's see how this is looking I think this is okay oh I think we have in the same place that's the reason I think that's why it's not coming okay because this icon color no let's keep this one as it
is okay so here we need this one will be the right icon and here we need to change the uh the position so this will be right Four that's it let's save it so we getting both right here and here and I think this is done so obviously we need to implement the functional but the UI is done and after this what we're going to do we'll take a section and here we'll take a class name so we do py of 12 and we do BG gray 50 and here I'm going to take one more
div so we'll take a class name this I'll give container we'll do MX of Auto and PX of four inside this I'm going to take A H2 and this will be sof by category so I'll give a class name and here let's give text 3 XEL font bold text Center and margin bottom of eight okay and after this we need to create some uh these categories and the banner section so what we do right we'll use some categories I think we already have that categories the same we can use but we need to add some
icon also so let's do one thing uh we'll go to our Config and if you see see here right we have this categories or something I think we have categories map this is also we can use but I think we need to also have something like icon also we need so what we going do let's copy this from here and then I'm going to paste it and for everyone I need to give some icons so I'll give icon so let's give this one a start icon okay then for this one we will do Some some
something any icon that we can give this will be we have a baby icon then for accessories we will give the watch icon and then we have a umbrella icon okay oh sorry we need to give icon here that is the reason so now we are we are going to basically map all of these categories so do categories with icon okay so simply go here SW by Category that we have done and after this I'm going to take one more div let's take a class name we look grid we'll do greed Columns of two for
MD I'm going to do greed Columns of three and for large we're going to do greed Columns of six let's make gap of three no four and here I'm going to do categories with icon. map this will be item and here we are going to render a card card I think we have already uh Installed from the sadn and here let's give a class name so first thing I'm going to give this one as curser pointer for hover I'm going to give a shadow of large and also do a transition of Shadow now inside this
we are going to take a card content so let's take a class name so we'll do Flex Flex column item Center justify Center at P of six all right after this what we're going to do simply we will take this item that we having dot we have icon right and here we are going to pass the class name so we will do this one as width of 12 height of 12 margin B of four and text primary and after this we'll take one more span and we'll make the item do level let's make this on
Category category item okay so in the span we'll give a class name and we'll do font bold let's save it and let's see how this is looking okay you can see that it's coming like this but the main thing is that we need to add I think we don't have another uh any more right so what we can do simply we only have five on now so we make this one as five Yes and going see this is looking awesome right okay so this part is done same we need to do it for brand also
correct so for brand what we can do you can give some image also and so after this part only after this section only we will add some brand so we have some five six Brands right so that we can basically add but before that we need to do one more thing and that is we need to First implement the slider functionality so What we going to do basically we'll take some State here so we'll do const current slide Set current and slide and this will be used state of zero means the first index and then
what we going to do simply so we have a button right two button we are having so we have this yeah this button that we are having so here we need to take on click so what we going to do right simply we do Set current slide so we'll Take the previous slide and here we'll basically check previous slide so here we need to basically do minus right so we'll do previous slide minus one plus plus slides. length right and we need to keep it inside bracket then we'll basically divide our module by slides do
length so this will be for the back we are having and then what we need to do simply we need to copy this and do it for the right also so for right what we Need to do we need to basically just plus it plus one so it will be previous slide plus one module by this and once this is done then we need to change the image also here so how we are going to change it so we'll simply check here that index that we are having if this index is equal toal to current
slide in the in our state so in that case I'm going to do opacity as 100 or else I'll do opacity as let's make this one zero so let's save it and You can see now it will change now if you want to change automatically what we need to do simply we'll take use effect and we need to give a timer use effect and what we need to do simply one minute so we will do const we need to create a timer which will be set interval and here simply let's say we will just increase
this so we'll do Set current slide which will be previous slide and we'll do previous slide + one module slides do length that's it but uh Here you also need to give a timing right so timing let's say I want to change it in every 2 seconds but you need to basically clear the interval every time so here we'll do clear interval and I'll pass the timer so now let's save it and let's wait for 2 second you'll see that this will automatically changing right and this is looking awesome and even if I click it
then also it will change if I Go back then also it will change okay we the problem is happening because we've given two second only let's give this one 5 Seconds so let's refresh this and if you wait for some time if you see wait for 5 seconds see it's changing see it's working right okay now we will create one more for brand and also do the same thing here and then also we going to render some uh products here Also so let's first uh do the products part so products how we are going to
do this one see we need to just dispatch some ACC and let me just move this in top we'll keep it outside here okay and first we need to basically take a use effect and here I'm going to keep I'm going to take a dispatch so lons dispatch which will be use dispatch and then I'm going to to Just call the F all products so we'll do Fage all filtered products correct but here you need to pass the the filter it will take the filter params and also it will take the S params but for
now we don't have we don't need to do filter from this homepage right so what we can pass simply we'll pass filter params as empty and also sort params we'll keep this as that price low to high so we'll do price is low to high okay and now this will give us our product list so This we can able to take it so we'll take from our state so we use selector State and we'll do what is the name let me just check so sop products so Lo state do sop products and this will give
me product list and now let's log it here and let's see what we receiv receiving so you can see that we are getting five data awesome right so now what we can do simply map it and then We'll just render it the feature products or something okay so we will take one more section here and here what we're going to do we'll give this on a class name py of 12 and here I'm going to take one more so let's take the same thing that we have taken here this part and this will be let's
say feature products feature uh products right and so after this I we Will take one div we give a class name we'll do greed GRE Columns of one for as we'll do greed Columns of two for MD we'll do GD Columns of three and for large I'm going to do grid Columns of four and we'll do a gap of six and here we'll simply map this product list and then product least. length if greater than zero all else will do null and and here we are going to do product list do map so this will
be our Product item and what we need to return we return the shopping uh listing or something right uh let me check once Shopping product tile this part we need to check Shopping product tile and here if you noticed we are doing the handle product details and handle to cut also you need to do but if you want you can also basically hide this button but first let's do this so we'll do Shopping Product tile and we pass the product which will be our product item let's save it and let's see what is happening see
we are getting the feature products and if you want you can only S four items here that is also fine right all right but we need to basically on click of this we need to have handle it because now this will not work and also this add to card button will also not work what we can do simply we can add a view details or something like That and on click of this it will go to the listing page but this is okay but this is looking nice but before that what I want to do
I want to also implement the brand feature also here okay and before after this also there are quite a few things we need to do that I'm going to show you so here the first thing one more thing I will do right so let's go to our config so where is config here and here I'm going to copy this part from Here and then let's paste it here so for everyone I'm going to use some icon also here now obviously we don't have proper icon but that is okay if you want you can again I'm
mentioning you can also change it with uh some image you can download it from Google from their website I haven't done because these things will take so much time so here I'm going to get some brand icon right whatever so let's say I'll take This and paste it here oh sorry I need to copy this I think it is deprecated so let's copy this one this is also depricated is it all right then I think we need to use some different let me just check it I'll remove this brand and we'll just copy some random
icon here and there okay search for Cloth okay we got one copy this and paste it here then what else we'll copy this I don't know Wasing Meine and everything but yeah let's use this one Whatever We are having let's search for woman let's see if we don't have anything uh kids I don't think we have anything okay then search for product copy this One and what else let's use this one let's see what else we can use let's use this one and at the end we have one more we'll use let's say this one
anything okay so this is done okay we need to give this one as const brand with icon and we need to do it like This and we need to remove this comma here okay now what we need to do right simply we can copy the same thing and we can paste it here the only difference is that we have six I think right we have six Brands so you have 1 2 3 4 5 6 so in that case here uh we are going to do swap by brand and we'll give this one as six
and we'll give this one as brands with icon and I'll do brand item okay and this will be brand and I Think this will be done so let's see so you're getting so by category so by brand looking awesome and then the feature products and I think this will be more than enough for our shopping uh sorry our homepage okay but now the main interesting thing that we need to do on click of this we need to go to the listing page and similarly we on click of this we need to go to this listing
page but the only difference is that see when I will go to this listing page here Right if I click on men I need to show here something like category man on here so that is one thing we need to do so how we are going to do that right so two ways we can do it either whenever we will click it first we going to basically see I'll show you what we going to do it I I'm going to show you simplest way that whenever we'll click on this item I'm going to do something
like this if I click on man right I'll do here that it will go to Category so look category equal to man this is coming something like this right so let if I check here right let's say copy this and let's say if I click here now it's going to the listing and if I click here you see we're getting category men so this is what exactly we are going to do so if I copy this I'll show you and let's say if I go here and what we're going to do right so we have
this this uh IDE and level and we have This men wom kids and those things we are having so what we are going to do simply go here we have this card right we'll take on click I'll show you and then we'll do handle navigate to listing page and we'll pass this category item copy this all right so now let's create this method so we have handle navigate to category page also we'll do One more thing right so here we'll pass the uh section so this will be for category so two things will receive so
now I'm going to create this so function handle so this will get the current item and also the section okay so first thing what we do right first we'll clear our session storage whatever things that we are having okay and then or we'll do sess storage do remove item and we need to pass the key which will be our filters I Think filters only we have given here right filters okay now we'll create our filter so we do const current filter which will be what this will be the section that we are having and this
will be equal to the get current item right so if this is category it will be category equal to men something like that then we're going to do S Storage do set item and then we'll do filters and we'll do json. stringify and We'll pass the current filter now we'll just take a navigate and this will be used navigate and we'll just go to the listing page and we don't need to do anything because it will be already taken care so now do s so slop SL listing save it let's see what is happening refresh
this page click here okay we're getting object object this part we need to check sorry I got it we need to do this on do ID because we need to only pass the ID so now let's go here so now let's click here see category men if I go here again we'll be getting category woman right and if I click on this accessories category accessories same thing we need to do it for brand so for brand what we'll do again we'll C uh call the same function so we'll call this and then we'll go to
brand and just paste it here and this will be our brand and this Will be brand item and you don't have to do anything else it will automatically work now see if I click on Nike see brand Nike and even if you click here it will work refresh this page this will work if you go back and then let's say click on kids now you're getting kids so you don't have anything that is fine but if I go to this Addidas we are getting Addidas click here it's working fine awesome now I think this part
is also completed now what we need to do the Same thing we need to do it for on click of these menu items so the this also you can do using our we can need to go to our headers component correct so we have our header and then here I think now I I need to check so many code like where we are using that menu items here okay now we are having this link right so here we whatever menu items that we have created we no need to now use this Logic The path we
not path is not required basically okay so here we can basically give that it will go to the shopping homepage and this will go to the something I think this is required let's do it like this so we'll keep this one inside this right we'll do this one as for example what we'll do we'll keep this one as label or something and then we'll remove the two save it let's say how this is looking this will look like this Whatever and and then we're going to do cursor as pointer and then we'll take on click
okay and then here what we're going to do we're going to pass the same thing so do handle navigate to listing page or do function handle navigate only so look get current menu item so again the first thing when whenever we click something right we'll clear the session storage sorry not session storage we'll Remove these filters and then we'll create the current filter so do current filter so here we are going to check if this is equal to home because in the home page we don't have to do anything if this ID is equal toal
to home then this will be nothing or let's do like this if this is not home in that case what we will do simply so this will be our category right so we do category which will be Our get current menu item. ID okay or else this will be null so this is done now once this is done we need to just do it session storage do set item so we do filters and we'll do json. stringify this current filter and then we are going to again do the navigate so we do const navigate equal
to use navigate and then we'll just do navigate to get current menu item do path so this Is the path we need to go right listing do path sorry what is the [Music] problem oh okay need to pass the handle navigate and we need to pass the menu item so now let's go here and let's click on men see it's going there click on woman it's going to category woman click on kids click here footware go to accessories we are Getting all of these awesome refresh this page it will work even if you remove this
then also it will work awesome job now you can see how awesome this is looking if you click here it's going to Brand puma and then if I click on let's say Ad does we're getting one item so this part is done now what we can do right see here in this part instead of doing add to card we can do view details and on click of this we'll Navigate the user to the listing page and we'll keep this one simple or else we can do something like we can add it add this from this
add to cart also but uh let me check that what are the functionality that we have used for this so that if it is easy then we can implement it so let's go to the listing page and first we'll see that what are the things that we're passing in this component so we're passing handle gate Product details handle add to cut so we'll see what is handle at product details so this we can do so let's copy this and we'll go to the homepage and we'll just paste it here okay and we'll import the F
product details and this we need to pass it in our product component so if I go here right so let's say if I just pass this handle get product details save it now what we need to pass what else we need to pass here let's See need was handle add but let's say if I click here if this is working or not it should work okay something is going wrong I think okay handle gate product details so it should receive this one right what else we are not receiving this part I think so let's see
what we're getting in this gate current product card okay we are getting the ID but it's Not calling the API okay but from where we are calling this API that part we need to check but it should call right okay we'll see this but now we also need to do handle add to let's see what we doing in this one so you're just dispatching all of this user ID and doing this get curent okay let me just do this one then we copy this and go to our homepage we'll paste it here so import handle
add to cut and for user We need to get it from our store right so Lon user and this will be state. o so you get add to cut user get current product ID will be this one quantity one and then we need to also import the toast so do toast which will be use toast so we'll get the toast and everything and then if this is successful fetch cut items now let's pass this handle light to cut and let's see what is happening so handle add to cut which Will be handle add to cut
save it now if I open this one we have let me just delete some of the product okay these two so I'll add let's say this one product is added to cut so you able to add it see from here also right but the details is not working this part we need to check okay let me check why it is not working here I think the reason is because right I know the reason why it is not working because we are not using This details dialogue this we need to use right so we'll copy this
and then we'll go below because we need to pass the product details dialogue here and then we need to use this open dialogue and product details also need to receive so if I go right and then receive the product details here so where is product details so here so you have product details from our selector so I think that we are already using here so you're having product list and then comma Product details and now we'll create this open dialogue and set open dialogue so this part right and then we are also doing like if
this product details is not not null then only will open this one so this also we need we'll copy this and paste it here okay so now this should work okay some problem is there let's see what is the Issue something is not defined or something product details dialogue okay so this we need to import so because we need to import it and then we need to use it here so now this would work let's see see it's already coming click here press this something is oh okay I got it so many silly mistakes we
need to dispatch it I think we have commented out that part right here so we need to now remove this this would work let's see awesome see and also you'll be able To add to cut from here also see how we have done everything is connected that's it so now what we need to do simply we have so many things to do first we'll start working on the accounts page we need to add the addresses and the orders first we'll create the UI and then we'll be creating the address API for address API add address
edit delete those things and then after that we'll start working on the checkout page so let's start working On the uh account page view okay so the first thing what we need to do so if I go to this page right so here we are going to have some kind of banner image and then we'll be having two section one will be to display all the orders for the particular user and then there will be address page where user will be able to add add the address now when we'll go to check out right so
address has to be mandatory so that is the reason we are completing this module first now I'm Going to close everything else and let's go to our model because we are going to first as usual complete the back end first so inside models I'm going to create sorry so models here I'm going to create address do JS okay so now let's import mongus first this will be require mongus and here I'm going to create so we do address now from this point right creating this address controllers I'm Going to do little more faster or else
it will be difficult to uh complete other functionalities that we are going to do so we'll do new mongus do schema so here we need the user ID that which user is adding that uh uh address uh we need the address of that user right so which will also be string then we need CT now again it's up to you you can modify these fields uh whatever you like to do and this will be string in code then phone number also can be we'll Keep this one as string only and then we are going to
keep some additional notes that user can add which will be string okay and here I'm going to pass so time stamp I'm going to make this one as true now now I'm going to do module. exports this will be mongus do model and I'm going to give this one name as address and then I'm going to pass the address schema that we' have created all right so this is pretty simple so now we Will start creating our controllers so we'll go to soap and inside soap I'm going to create address uh controllers controllers.js let's make
this on controller all right so first we need four so we'll have ADD address so which will be asking request response so here we're going to take try catch so here let's log the error first and then we are going to return a 500 okay so we'll do 500. Json as usual that we have done multiple times so that is the reason I'm keeping the structure also same so that you all can basically use the same structure and it will be easy to understand so let's copy this and paste it four times right so we
have F all address right then we have edit address and then we'll be having a delete address because we need basically these Four and then we are going to do module. exports so we'll do add address then we'll do edit Address then we'll have F all address and then we'll be having the delete address four all right now let's go to our routes and inside so I'm going to create address routes.js so first thing what we need so we need the express correct so we'll do Express require Express and also we need to import all
our controllers so we do re sorry so we go to controllers soop and then address controller so we need add then we need fetch all address we need edit Address and also you need the delete address now we're going to create our route so we do router which will be our Express do router which will create all the routes or basically the route in Instance and now this will eject the method so we'll do post so here we'll have a add and here I'm going to pass the add address all right then we will be
having get or basically to fetch all the addresses so we do get and here we need to pass like the ID or user ID So based on user ID we are going to fet it right so we do fet all address then we will be having a delete so router. delete so for delete what we need to do we will be deleting based on We do delete so we'll be getting the user ID based on user ID and also based on the address ID if you want you can directly delete it using address ID also
but that is fine but we are going to do this one it will be much more cleaner like we'll first find the user and then find the address for that user and based on that we're going to delete and then next we will be having a router. putut so this will be to edit right so for edit also we going to do Update and then we are going to do user ID and then we are going to you do using address ID and here also we going to do edit address and then we going to
export it so exports and we'll export the router so basic uh setup is done so now we need to go to a server and again we need to import it correct so we'll copy this and we'll make this on a shop address router because we are doing in The shopping view right so we'll do sop SL address Route and then we are going to copy this and we'll do this one as in card we do address and this will be our sop address router save it and this is done now we have completed all the
very basic thing so now we need to go to our controllers and we can close all of this so first thing what we need so we need to import our address model correct so we'll do const address And this will be require so here we need to go to our models need to go to address so first thing what we need to check see what are the things we are going to receive right so receive user ID address City pin code phone and notes so those things we need to get so we'll get it one
by one so we do user ID address City PIN code we need phone and also need notes so this we are going to receive from Request. body and if any of this is missing so we going to return some invalid data like if user ID is not present or if not equal to address or not equal to city or not equal to pin code or not equal to phone or not equal to notes although you're keeping notes optional but I think it will be better so notes is like something like the instruction right usually in
general website what we'll do in e-commerce you'll give some kind of Notes that where is your particular address so this is similar like that so here we going to do status and we'll do a 400 and we'll do Json and I'm going to return success will be false and message will do invalid data provided okay once this is done then we're going to create our newly cre created address we'll do newly created address which will be new address so address is our model basically and here we're going to pass All of these right so we'll
pass the user ID we'll pass the address pass City we'll pass pin code we'll pass notes and what else we are also having phone and then what we need to do so we just save this right so newly created address do save so here we are going to return status 2011. Json and this will be success is now true and what we are Going to do we we are going to return the data data will be a newly created address now based on this we are going to understand that whether it is successfully or not
but it's better to return this data also because there are multiple ways you'll be able to do this this part also you have checked right so this is about the add address now then we are having the fetch address so here as I already told you that we are going to fetch by the user ID correct so first We need to get it the user ID so we do user ID and from where we'll be getting so we'll be getting from the params this part also you have done multiple times and if uh user ID
is not present so you're going to return that user ID is required and this all we can remove so return like user ID is Reid okay and then we are going to find our address so do cost address and we'll do AIT we'll do Address dot find So based on the user ID we are going to find it right and here then what we'll do so again we can also return like but you can also check it like if the address L length is zero so it return like no address found but that also you
can manage it in our front end like if there is no address we'll show no address fond but here we can simply return this uh addresses we'll do Json and we'll do success will be true and in the data we are going to pass this Address so let's make this on address list okay so this is about the fet all addresses if till this part you are continuously doing this video I I know this all will be no piece of cake because this will be pretty simple for you okay so that is the reason I
mentioned that need to practice edit address again we are going to find based on two things user ID and address ID so we need two things here right so we do const and what we are going to do so We'll be doing user ID now what exactly you address id address ID is see whenever you'll be adding a new address ID there will be a unique identifier will be created by mongodb so that will be your address ID okay so we'll do address ID so this will be received from request. params and then then again
we are going to check it like this so we copy this so if not equal to user ID or not equal to address ID okay so we are going to return user ID and address ID is required user and address ID is required all right now after this what we're going to do simply look const address and this will be aate so here we're going to do address. find one and update find one and update okay so here we are going to find it based on this ID right so this ID will be what this
will be our address ID correct sorry not add address this will Be our address ID and also here we are going to pass the user ID because we also need to pass uh find based on user ID once this is is done then we are going to get our we need to basically get our updated form data so how we are going to get it so we'll be getting from our so we get our form data from body so we do request. body and this form data will be our updated data so here after we
update this one we're going to pass This form data right and also we do a new property here so we do new will be true okay so this will automatically find the address it will update it with the sorry it will update with the latest data and then it will return you the updated address okay now here we need to check one thing that if we didn't find this address then we need to basically return that address cannot be found so here we Return race. status 44 and we'll do Json and we'll do success will
be false and message will be address not found and once this is done then we are going to return it so we do race dot status so we'll do 200 do Json so we do success will be true and data will be these address all right I think this is done now next we are having the delete again For delete also it will be exactly same okay the there is no not at all difference so what first thing again we are going to receive this user ID and address ID so we'll copy this and we'll
paste it here so again we need to check that if user ID and address ID is not present so we are going to return this is required and after this we are going to delete the address so we'll do const address so have it here we need to do address and Now we need to do find one and delete so find one and delete and here you need to again pass ID which will be your address ID So based on the address ID we are going to delete and also you need to pass the user
ID here so we pass the user ID okay and again we are going to do that if the address is not found so return address not found so after this and once this is done now this is successful so return a status of 200 do Json so what we can do We can return success is true and now we return message like uh address deleted successfully and I think all the four is done okay so now what we need to do we need to create our async T so now let's go to our API side
first we'll complete everything and then we are going to start working on the uh UI part so let's go to and then so and here I'm going to create address Slice let's create index.js so first we're going to import from our Redux toolkit so we need create slice and also you need the create as sync tun now I'm going to take one initial State here here so here we are going to do ease loading same as usual which will be false and we'll do a address list which will be mty okay so this will be
our initial State now what we're going to do create const and we'll do address slice and this will be create slice so name we'll give this one as address and we'll pass the initial State and then we're going to pass the reducers so reducer will keep empty but we need extra reducers because we need to create our Asing okay so now what are the things that we need so we need to create again once again it is the same process so the reason why I'm repeating all of this you need to practice right you don't
if you want watch this video it's not going to help you so you need to practice all of this multiple times so we going to create again four slices one will be add F edit and delete and try to implement by your own okay based on the route configuration that we have done in the Back end you need to pass all the information that is required so we'll start with our first we look export const and we'll do add new address so here we having create a sying tun and this will will be slash address
addresses slash add new address right this will be ask sync so what you receive you receive the form data the address data from our front end and here what we going to do to Const response will be AIT AOS dopost and let's copy the URL from somewhere so we have API /op right and then after this we have address so we need to open this route Also let's open this one so address and then what is the main so address and then we have ADD so the same we need to use so local 5,000 API
slop / address SL add right and here we Need to pass the form data okay that's it and then we are going to return response. data so this will be to add a new address now let's copy this and paste it four times three and four so this will be Fage all addresses so this will be identifier will change this we don't we Fage all address we need the user ID correct and then this will be gate and here we need to I believe we Need to do this on gate and then we need to
pass the user ID let me check once so we have gate and then user ID right so now we don't need to pass any form data here and this will be gate that's it now after this we need to do edit Address edit Address edit a address let's keep it like this okay so we'll do edit Address so this will be a put so for editing we need quite a few Things so we need the user ID right we need the address ID and also you need the form data so here we will again change
this one to template literals and then we will have our update so we'll do slash update and SL we're going to pass the user ID SL we're going to pass the address ID right and the rest form data will be your updated form data and this is done and then we'll be having delete Address so this will be delet delete address access. delete and for deleting also we going to receive both user ID and address ID okay so let's do this on delete and for delete I think we have user ID and address ID okay
so we'll do user ID and SL we do address ID and no need to pass this form data all right so now we have created our Four Asing T so let's quickly create our Builders so do Builder but add case so this will be add new address do pending so this will be our state and here what we'll do we'll do state DOT is loading will be true now let's copy this so this will be uh fulfilled this will be false and state. address list will be so we need to get the accent right here
so We do accent. payload do data because we are getting the data here and this will be rejected so rejected this will be false and straight dot uh address list will be empty okay so I think this will be fine now next what we are going to do for for uh like getting the data we need to do it so for fing also we need to do it right so let's copy this and then paste it here so we will Do fet all addresses. pending and this will be fet all addresses. fulfilled and here this
will be F all addresses do rejected these two now one more thing is that uh because we will be basically checking that whether the success is true or not and based on that we are going to fetch the list of addresses again so it's actually not mandatory that you need to add builder for these two also so for example delete and everything right the reason is because Once we delete address right what we are going to do we will be fetching the list of data once again so we no need to create those two if
you want you can create it but it's absolutely not required okay if there are two scenarios so see whenever you'll do say when you add a new address correct and once the adding is successful you need to F the updated addresses right so there are two ways to do that the first is once you'll save the address then call the fetching API again so that is one way the second way is instead of calling the fet API whatever data that you are getting so for example this address list you can uh update your state because
next time when user will up uh refresh the page anyway they will be getting the updated data from this fishing API correct I hope you're getting what I'm trying to say so that is the reason when we do edit and delete right for now what we going to do instead of doing manually State update We we are going to fetch this API here okay so now what we'll do simply I'll show you what what exactly I'm telling for your homework what you can do you can create this uh edit and delete cases also here but
now I'm going to just do export default add new addresses. reducer no no not add new address this will be address slice. reducer so now let's go to our store and let's copy and paste it so We'll do soop address slice so this will be address slice and we'll do soop address which will be S address slice I think this is done so let's log in okay we are getting this but now we need to start working on the UI side okay so UI in the sense first we'll create the basic structure and then we
are going to implement our uh account Functionality because we already have implemented the radi s and everything right so we just need to connect with our front end so let's do that in the next part all right so let's start working on the address uh UI right so we'll go to sop not here pages shopping View and then account right and let's close everything else so first I remove this part from here and let's return here div we'll do class name Flex Flex Column and here I'm going to take one more div which will be
class name this will be relative we do height of 300 PX width full let's make this on 350 and we'll do overflow hidden now inside this I'm going to use the image that I already added so let me just quickly import it so import image we'll do account image From so you need to go to assets and then account so here we're going to use the source which will be our account image okay and here what else we'll add a class name so class name we will do height as full width as full we'll do
object cover and we'll do object Center okay let's save it and let's see first how this is looking and then based on that yeah I think this is looking good if I make this one 300 how it's Looking yeah I think this is fine now after this right what we are going to do we can also add some more property like something like if I add a width here so let's add 1,600 and height I will add 300 and we'll add some style here sorry let's add add some style that will add a aspect ratio
of 6 in 1600 divided by 300 and we'll do object fet as cover okay so I think this is fine now I think this part is absolutely not required if I save it because I think we already have given in this part right so height is there object cover I think this is not required okay now now what we are going to do right we need to basically uh add one more component here so let me go to the components we need we need tabs component Here so let's copy this so we go to CD
client and paste it here so after this uh we'll take one div let's give a class name so we'll do container we'll do MX of Auto we'll do grid grid Columns of one gap of 8 and py of 8 inside this we'll take one more div do class name we do Flex Flex column we'll do rounded large we'll do border BG background Padding of six and Shadow as inside this we are going to use our tabs component that we have just now installed right so we'll have two tabs so first one we'll give a default
value here which will be orders okay so default value means which one will be opening for the first time on page load here we'll be having the tabs list and here we need to add our tabs trigger so we will add a value property Here which will be orders for this one and here we'll add orders and we'll copy this and paste it here and this will be our account sorry address okay and after this you need to add tab tabs content so here again you need to pass the value property so for this one
this will be orders and let's copy and paste it and this will be address right so now Whatever you will be adding here this you'll be able to see see if I add some random value right save it I refresh this page okay I think it's loading let's wait for some time all right so you can see that we getting this right so this is fine so now we need to create two component one will be for orders and one will be for address so let's go here inside our components shopping View and then I'll
Create here orders do jsx and I'm going to create one more which will be uh not account we will give this on as let's give this on address so we give address. jsx right so now let's create this so we do add address let's copy this and let's paste it here so this will be orders and now we are going to import it Here so we're going to import the orders and here I'm going to import the address okay so this is done so now the first thing uh we need to create our address view
so how this will work right so in the address view we'll be having a form simple form and then we'll be having the list of address and also we'll give permission user to add a maximum three addresses okay now it's up to you you can add some different features also but For now I'm going to give this user to add only maximum three addresses so here What I've Done Right again I already created some address form control you can see that the level which is address then City pin code phone and notes okay so now
I'm going to copy this and then we'll go to our config now again I'll share everything in code you'll be able to get it from there if you I'm pretty sure you'll also not be able to write these Things these things are very repetitive so this will be our address form controls and then go to our address page and here we are going to first create our structure so here we are going to return a card component and this place I'm going to keep a placeholder so here I'm going to render the address list okay
here and after this we will be having a card Header so here I'm going to render a card title and I'll do add new address all right after this we're going to take a card content and what we need to do we'll give us some spacing here so we do class name I'll do space y of four and make this on three so we need to render our common form you remember and for this one also you need to manage some kind of addresses here so What we'll do we'll uh take some form data and
we'll do set form data and this will be US state of initial form data right so let's make initial address form data so we create this so what we going to do we take const NL address form data so this will be address will be empty City will be empty phone will be empty PIN code and everything else will Be empty and also notes will be empty that's it so now what we're going to to do simply pass this so what we need to pass we need to form controls which will be our address form
controls that we have added here this part then we need to pass the form data which will be our form data we need to pass the set form data which will be set form data you need to pass a button text which I'll do add and also you need to pass on submit which I'll do handle uh Manage address manage address copy this and create this function here and this will be a we'll take event and we'll do event do prevent default save it see we don't have to do anything like it's automatically created everything
this is the advantage now this is done so now we have order and addresses so we'll add a new address we need to call the API and then we need to fetch it and then based On that we going to render so to render this one right what we're going to do we create one more component here which will be our address card so do address card. jsx we'll keep this one clean so that we don't have many code in one single component address card and here we're going to return some div so let's create
this component this will be very simple not D will return some card we'll show some kind of card Here and here we're going to do card header right I think it's not required let's only Ender the card content so we'll give a class name so here this will be grid uh grid and gap of four and inside this we're going to take one more div and here what we going to do right uh let's render I think we can render only the label part so we do label and we'll render the uh this address we
Receive so render address dot address because we'll be having the address INF for right so let's make this on address info okay let's copy this and paste it some three four times this will be C then this will be our pin code then this will be what else we are having phone and then we are having the notes right and we'll keep this on simple so this is what our address card will be all right now we'll Go to our address and we'll handle some of the things so first thing we are going to do
right uh so here we'll handle like is form valid or not so do e form valid so here we're going to return I think this part also you have done that object do keys of form data do map key so here we're going to do form data of key if this is not equal to equal to Mt do every item has to be true Okay so if this form is not valid so we going to check is button disable which will be if this form is not valid right so if I save it see it
is now disabled right you need to add all of these then only it will work now you can also make this on trim you can also trim this like do trim then also it will work like now this will not work so you need to give some value awesome now everything else is done so we just need to call the API And then we need to basically call Api in the sense means whatever slices that we have created correct so those we are going to call so here uh I think let's go to sop and
address slice so this edit Address delete F and add so four slices you're going to call not four slices sorry theing T and then we are going to render the list of addresses once this part is completed right then we are going to start working on the checkout page okay so let's do This in the next part all right one so let's start uh integrating with our uh front end and back end so here uh what we going to do right so let's go to our handle manage address so first thing we need so we
need a dispatch which will be use dispatch and let me close this so first we think what are the things that we need right so we need form data now we also need to pass the user ID so if I go to the model right so let's go to the Model once so we have our address model so you can see that we also have user ID that we need to pass so to get the user ID we are going to get it from from our store so do user which will be use selector state
so do state. off so now here simply we'll do dispatch so we do dispatch we'll do add new address and here we need to pass the form data as well as we need to pass the user ID which will be user do ID right because this is the ID that we Given and Dot then now we are going to Simply log this data and let's see what is happening here right so now let's open our console let's go to network first and I'll give some address like USA give some random value okay phone number I'll
give some notes now let's click on ADD it's 200 and you can see that it's added successfully awesome so now simply we'll Do if data do payload dot success this is true so what we going to do right so we need to make one more change that I'm thinking that when we are doing uh doing this full feed right because we are actually fetching the list of address again we no need to do this state. address list here we can remove this okay same thing for here so we only managing in our fet Address save
it and now here we need to First do a dispatch and we'll do Fage Fage all addresses and here what we need to pass so if I go to this fetch all address let's go there so we need the user ID so pass the user. ID right we also need to make the set form data which will be initial uh address form data now we need to check whether we are getting this or not right so we'll copy this and we'll get the address list correct and this will get from shop Address so let's copy
and see what we getting so the address list save it so let's see what we're getting in the address list go here okay we are getting empty but this part we need to check why we are getting empty oh okay I got it now why we are getting empty because we need to F it on page load also correct so that is the reason so we'll do a Dispatch and and we'll simply do a dispatch of fetch all addresses and we'll pass the user. ID now this will work let's go to console address list is
one awesome job that's it and this is done right we are getting updated and everything so whatever things that we need to add that we can add it here and now uh the first thing we are going to render it the address list here correct so what we can do right simply so Let's do one thing before where is the place that we have added this okay so let me just remove this part from here and we'll give a class name so we'll do margin bottom of five padding of three we'll do grid grid Columns
of one for ASM we do grid Columns of two for MD we'll do grid Columns of three right and for I think let's say how this is looking based on that we'll do and we'll do gap of two and here we're going to check if This address list sorry address list and an address list. length greater than zero so we're going to map it so we do address item or let's give something different single address item and we're going to call the address card and we need to pass pass the address info which will be
single address item right and if there is nothing we'll just render null so let's save it let's see what we Getting okay we getting this one but let's add some uh padding here so padding of four let's see how this is looking okay also one interesting not interesting like thing what we can do we can add this thing here so so we'll do CT and we'll do pin code we'll we do phone and we'll do notes that's it right and I think this is done so now let's see if we have added so new address
Added City I'll do USA or something pin code I'll give some random Value phone number also I'll give some random value or notes I'll give this let's add awesome that's it now what we need to do we need to add two things so we add a card footer correct and we need a button which will be to edit and we need one more button which will be to delete let's save it and let's see how this is looking so let's make this on class name we'll do this One as Flex justify between edit and delete
and we'll keep this one simple right we no need to make those things and for this card fotter we'll do padding of zero padding of zero but we'll do padding top of one padding bottom of one let's see how this is looking no I think we need to okay let's do one thing let's give a padding of one let's keep padding of two we give Three yeah padding of three I think this is fine awesome so now uh we need to start working on the edit and delete first let's implement the delete functionality because it
will be easy so here uh what we will receive we will receive on click and this will be handle delete address and we'll pass the address info and this also we going to receive here and we'll receive one more which will be handle edit So let's copy this and we're going to paste it here and this will be handle edit okay so these two we are going to create here so first one will be our function handle edit now one more thing what I'm thinking let's do one thing Let's do let's manage this edit and
man uh this uh this edit and add in one method only okay so we going I'm going to show you That how we are going to do that so first I'll create handle delete one so we'll remove this handle edit for now first let's concentrate on this delete part so we remove this and then I'm going to create handle delete address and we to get current address so what we need to do so if you delete right when we deleting we are passing this user ID and the address ID so both we need to pass
so how we are going to get the address ID let's log This here then you'll be able to understand get current address right let's save it let's open console and then click on delete handle delete is not a function we haven't passed it here sorry we need to pass handle delete address which will be handle delete address so delete so getting this ID right this is our ID this is the address ID this we need so we'll simply do here very very simple that we'll do dispatch And we'll do delete address and we'll pass the
user ID which will be user. ID and address ID which will be your get current address. ID okay now once this is done again I know you all already know the process so if this data. payload do success if this is true so we going to do dispatch and then fetch all address so we going to fetch all the addresses so this is the part I was talking about that if you're fetching Every time then you don't need to do any kind of extra thing so save it now let's see what is happening let's go
to our Network tab let's delete this one deleted awesome and this is working fine now let's add one more address some random value and let's add it's added right awesome so now this part is done now next thing we need to start working on the edit for edit what I will do right I Will take one more step which will store the current edited ID and I think this part we've already done previously so do current edited ID Uh current edited ID is fine and we Set current edited ID which will be use state of
null and here we are going to pass this Set current edited ID which will be the Set current edited ID and we are going to also pass the set form data which will be your set form data now two ways We can do that I think okay let's do one different way okay sorry again I'll do a different I think that will be better instead of passing both right what I'll do I'll pass a handle edit Address only previously what we were doing so do handle edit Address what we do right copy this and let's
go here and then uh we are going to again call it from here so we do one click and we'll call this handle edit Address and we'll pass the address info So this is the first step now we will create this so we do function handle edit get current address so here we are going to do like Set current edited ID which will be get current address. ID I hope you're getting so this current this whenever I click on this edit that time I need to save the current edited ID and also I need to
fill this form so to fill this form what we going to do simply do set form Data and here we need to pass the exact form data and what we can do simply get this I'll copy this and this will be get current address do address so the ex existing data I'm just doing this will be phone this will be PIN code and this will be notes so this will be notes this will be pin code this will be City and this will be phone let's save it now let's see what Is happening if I
click on edit right see if we click on edit this one see this changing right value is changing also when this will be edit I'll do this one edit new edit edit address I'll change this one to edit this also you need to do and this I'm pretty sure you'll be able to do it very easily right so we simply check if this current sorry we'll check if this current if this current edited ID is not equal to equal to null so we'll do edit Address or we'll do add new address okay so this is
the first step and again once again I'll copy this and then I'll pass it here that if this is edit we'll do edit or else we do add so now this will be edit this is done now when we'll edit this one what do we need to do we need to check it here this part also we have done so we'll check it here that when we are Ed edting so if this current edited ID is not equal to equal to null so we need to dispatch the edit accent so we'll do dispatch and we'll
do edit a address correct and see what are the things that we are passing we're passing three things user ID address ID and form data so we'll pass the user ID which will be our user. ID address ID this will be our current edited ID correct and form data will be your form data dot then so we'll get the data and we'll see if this data do Payload dot success if this is true so quite a few things we need to do first we need to get the updated addresses so dispatch fetch all address we'll
do Set current edited ID as null and we'll do set form data as initial form data correct or else we're going to do this on ADD so both edit and delete so first we're checking if this is not null we'll dispat this accent if this is Success we'll get the list list of address again Updated with the updated data then current edited ID null and set form data will be this now let's see now I'm going to refresh this page let's go to address and let's click on edit I'm going to make this one to
India and I'll do this on ndl let's try to edit we getting some error right okay it's not calling Anything but why is that okay what is the problem it's not triggering the API call only right okay let's see here we are checking not null edit Address this will be put okay that is the reason okay now let's see once refresh this now let's go to address and I'm going to edit this let's make this on to India and then I'm going to edit this one we are getting undefined okay oh Sorry sorry sorry okay
once again we have mistake because we need to pass the user. ID okay so that is the reason so now let's refresh this one second so we go to address now this will be automatically getting changed but if I edit this let's do uh do this on to Naple and then I'm going to do edit now this is getting changed this is also getting reseted also we can do one more thing and that is let's take a toast so do toast which will be use Toast and just like we have done so here also you
can show like toast title like address updated successfully okay and let's copy this and we'll do it here address added successfully also one more thing we need to do and that is is yes one more thing we need to do and That is here right we'll check if this address list do length uh this length greater than three so return a toast that title will be you can add Max three addresses okay and then variant I'm going to give this one as destructive and then also you need to return from here so we do return
okay now let's see once what is happening Whatever things we have done refresh this go here and now add one more address okay and now I'm going to add it address added successfully edit this to again once again India I'll do City Bangalore and now edit Address updated successfully this is updated and now what will happen if you try to add more right and then this see what will happen if add oh something is going wrong here address length is greater than three we've done that is the mistake we've Done we need to do greater
than or equal to so okay this will be greater than or equal to three right so now I think this would work let's add one more sorry paste paste paste and paste see also we'll reset this form right so we'll do set form data as initial form data initial address form data and when we are Deleting that time also add some toast that address deleted successfully that's it so now if I go back right and refresh this so we'll do let's say delete deleted successfully and add one more so here and this add add it
but if you try to add one more [Music] time see awesome right I'll do edit and we'll do napple Edited oh this time we need to do awesome this is a very interesting thing right yes so here we need to check if this is is greater than or equal to three and we need to check if this current edited ID is not uh if this is equal equal to null okay so if this current edited ID is equal equal to null then only we'll be checking this or else because or else you can't like edit
also so this is the reason right so now this Is a very very good point that notice or else I'll miss this so now we'll be able to edit this at least see address updated successfully but you'll not be able to add it so if I try to add right so now this time the edited ID is null so we'll add see now you're getting mad you can add Max 3 address but edit you can do edit yes so now this part is completed so we can add only three addresses next thing what we need
to do First uh let's go to our cart cart page once we need to do one more thing and that is we have our cart wrapper and here we are having the checkout right on click of this we need to go to the checkout page so we'll go to the checkout page so we have navigate so we go to slop SL checkout and here we need to take the navigate so Lon navigate will be our use navigate Okay so if I click here and let's say go to the checkout so it's going to the checkout
page okay so now this part is done next thing we will start working on the checkout page UI and after that we'll start working on see first what I'm thinking right we'll do one more thing and that is first I'm going to complete the orders UI page ORD UI and then we are going to open order order details model those part we are going to Implement the reason is because for this order page right the view will be same as the shopping and the admin okay sorry if you're getting any noise so for this we
are we will be having uh like same view for both shopping and admin view the only difference is for the admin view we are going to render a drop- down kind of thing that admin will be able to update the order status so that will be the only difference okay so this part we are going to create so two things we'll Create we'll create the checkout page UI and the orders page UI and after that we'll start working on the PayPal or basically creating the order so let's do this in the next part all right
everyone so first uh we are going to create the checkout layout okay so let's go to our Pages check out all right so let's go to the checkout page first now uh one more thing what we need to do right uh okay let's do one thing Uh we'll go to our components and then let let's go to header and here we are having the set open car set component and I believe we are having this user cut wrapper right so here we are having this button this Navigator check out so what we'll do right so
we'll pass this set open card it as a Prof here that will be receiving so once we'll navigate right we will basically close this so navigate and then we'll do set open card it will Be false so let's say if I go to home let's open and click here so getting the check out page awesome so now we are going to start working on the checkout layout first I'm going to take a div and we're going to take a class name and we'll do flex and flex column all right now let's take a div with
a class name we'll do relative we'll do height of 300 so we are basically going to render that same Image that we have used in the account page and we'll do overflow hidden all right so here we're going to take a image and we'll do import image from so we'll go to assets and then account so this one we're going to use we do source and this will be this image then you're going to use a class name which will be height of full with a full object cover and object Center save it so getting
this now after this we need to basically render the address because see user will be able to select address from this page also okay so we're going to take a div and we're going to take a class name and we'll do grid gried Columns of one for as we'll do greed Colum colums of two and GAP we going to do as three let's do it and margin top of five and padding of five okay and here we are going to import the address Component okay if I save it you see we are getting this address
now what we can do basically here also we can manage like we can only show two addresses that is also fine but for now let's keep it like this at least or we can do one more thing and that is let's go here so I think here we are having let's make this one Mar for MD for SM we'll do two only so I think this will show only two okay this is fine so now we are going to we render the address and here we are Going to render on the right side the cart
items okay so here we're going to take a class name Flex Flex column and gap of four and we're going to render the cart items so cart items we're going to receive so do cart items so we do use selector State and we'll do state do sop cart correct so this is what we are having the cart items here and these we're going to render it here so we'll do cart items and then cut items. length if this is greater than Zero see the number of times I I have done these things now it's like
I don't need to check the variable name and everything also so we'll do card item and here we're going to render the cart what is the name that you have given let me check I'm not exactly sure that part cart items content is the name we have user card items content okay so user card item contents and here what it will receive it will receive the card Item which will be my card item here okay let's do this on item only or else this will be null now you can also so like your cart is
empty or something but we don't have the cart is coming that means uh the variable name is different okay so let's see it I think cart list or cart items only it is okay this is weird why it is not coming okay let's log in card I think we already have Items so let's go to the checkout but but we not getting anything here this is actually weird okay let's we'll see this so let's save it or oh I think I got it I again done some mistake that I think we need to pass the
items of this card item because we have items inside of this that is the reason I'm uh like 100% sure of this I think see if I go here right we have checked Out page object and then here we having items H exactly so we need to basically do it and cut cut items do items and then cart items do items. length greater than zero so you're going to map this now it should come awesome so we're getting four cart items also let's do one thing with gap of five here okay so getting the cart
items now what we need to do we need to render our the total so we do we'll take a div And I think total we can also take it from our cart raer only I think here we have rendered the total right so we have something like this this part so we'll copy this let's see how this is looking based on that we'll do and we'll paste it here and total card amount we'll just take from here so we'll do copy this and we will paste it here so this will be our instead of cart
items cart items do items and cart item do items okay so now let's save It okay I think we I have pasted it in the wrong place sorry for that so we need to cut it from here and we need to paste it after this okay so you're getting total and what else you need to render after here we'll take one more div and we'll render the button which will be like check out with PayPal right class name we take do margin top of four and we'll do with as full But why it is not
coming full width we need to give here also okay and I think this will be our checkout page structure and you can see that this is is also looking very good right so now this checkout with PayPal will obviously be disabl until unless you'll feel all the fields and all the necessary field but I first I just want to implement this structure now this is done now next we're going to implement our orders page okay so here also we're Going to just we'll keep this one very simple and we'll just render the list of products
sorry the orders and once we click any button we are going to open a model and for the same structure we are going to use in the admin view also so let's do one thing so let's go to our orders page so this is our orders page correct now if you notice here we have two orders page we'll be having one orders for our shopping View and one for the admin view The reason again I'm repeating I'm creating separate so that it will be easy to manage so this will be our orders. jsx so here
we are shopping View and this is the admin view correct so we'll do [Music] shopping orders and this will be our admin orders all right so here we need to basically import it account in our account we importing orders right we Need to do shopping orders shopping orders and we can remove this from here okay now let's implement this here so we also install one more thing and that is we need the table so we'll keep the basic table only so we'll install this part okay so let's remove this so here again we are going
to take a card inside this we'll have a card header and then we'll be having a card Title so we'll do order history and the same thing we're going to do side by side for the admin view also and for this one it will be all orders correct because admin will be able to see all the orders see how this will be easy if I do side by side and the structure also will be same almost okay so after this we are going to take our card content and here uh we will be importing our
Table and we will be having our table header inside this table letterer you will be having the table row so do table row and here you'll be having the table header so we do table sorry not table header table head both is different table head and here we're going to give let's say we have order ID and we will also keep the date of the order so we'll do order date right and we will do order status and Order Price okay and this will be our status that's it after this we will take one more
table head so Lo table head and here we are going to do simply so what we can do right simply We'll add some span here and this will be our details but I'm not going to show this one so I'm going to do class name we do Sr only we'll do ASR Only let's see how this is looking right based on that we'll check order ID order status and Order price and this part is empty this is correct so now once the header is done we are going to take the table body so table body
and inside table body again you will be having the table row okay so this will be your table row and for each and every table row we are going to have the data and then at the End we'll be having the the details order details and on click of that order details we are going to basically render the uh the dialogue that we need to show okay so for this one uh what we'll do for now we'll keep this one very simple so let's say take a table cell and I'll give some value like one
1 2 3 4 5 6 and we'll paste it and we'll give some date let's say 27th 06 2024 then we are having the status so I'll do in process and then we are having the price so I'll do here dollar 1,000 and and the last table cell right I'm going to take a button component and I'll do View details let's see how this is looking awesome right so we having order history order ID order date status on click of this we're going to open a dialogue correct so now the same exact Same structure we
are going to use for our this admin view also so we copy this so go to admin view so after this I'm going to paste it and then I'm going to import all of these one by one so we need table we'll need table header table row table head and also you need table body and table cell okay so now let's open our Incognito or or what else we'll just log Out for now okay and let's log in with our admin account so we go to orders and let's go to our admin Pages admin View
and orders so what we'll do right simply for now inside this div so let's uh return the admin orders or what is the name that we have given I think admin orders only right okay let me import it okay oh same orders that name we have given okay let's change this one to admins Admin orders view okay so admin orders view so what is the error that we getting let's see button is not defined awesome okay so we need to do it so we'll just do uh button all right that's it so we'll keep this
on simple right so we'll have all products and orders and when click of this we're going to open the dialogue so now this part is done so Let's start working on the dialogue again for the dialogue also I'm going to keep this one both separate okay so for although the content will be exactly same but I'm going to keep this one separate that is also just for is simpling uh purposes if I will do it for myself then I'm going to create in a same page but for now if I do for this video purposes
for a beginner point of view it will be complicated so that is the reason we are going to create two Dialogue one will be for the shopping View and one will be for the admin view okay so let's do that in the next part all right everyone so let's create our order details view right so first we'll start with our admin view so here I'm going to create order details. jsx okay so let's close everything else so first thing we'll do function admin order details view so for both we are going to render some kind
of dialogue okay so we'll do Dialogue content and inside this we'll give a class name so we're going to go SM Max W and we're going to give this one as 600 PX now after this we'll take a div we'll take a class name we look breed Gap op six and here we'll take another div with a class name grid gap of two and here we are going to take another div class name Flex item Center justify Between and I'm going to take one more let's say let's take a p and this will be class
name I'll give font medium so this will be my order ID right and then after this we're going to take one label and this will be my order ID to 1 2 3 4 5 6 now how we going to show it right so to render this what we need to do is save it uh we'll go to our orders page so let's go to admin view then Orders so we have admin orders view correct now here if you noticed we have this button in the table cell correct so first I'm going to wrap this
in a dialogue and inside this I'm going to take the button view details and we need to pass the open and on open change correct so we do open open details dialogue and on open change will be set open details dialogue so now let's copy this and let's create this state here so Look on open details dialogue and set open details dialogue and this will be use state of false okay now when you click on this buttons we do on click so we're going to do set open details dialogue will be true and after this
we are going to render the details view so which will be admin orders details view let's save it so now what will Happen if I click here see we getting this one right now also if I go here right also need to give some so let's give a margin top of six okay so you're getting ordered ID now after this order ID what we're going to render we'll copy this so we're going to render the order date so we give some date here then we also going to render our status and admin can basically update
the status also right so what we're going to Do copy this and we'll do status here order status we'll keep and we'll keep this one as let's say in progress in process save it and let's see for everyone I think we know need so we'll do margin top two this will be to order ID order status in process and then we're going to render the price so let's price uh put the price here and we'll give doll 500 or whatever price okay so this is done so now we'll Have four things order ID and everything
now after this what we'll do simply we'll take a separator component and here we are going to uh render the order details so we'll take div and we'll take a class name we'll do grid gap of four all right we'll take one more div we'll take a class name we'll do grid gap of two and here we are going to render a uh let's render a div and we'll do like Order details okay so for this one also we do a class name of font medium so we getting order details in the order details we
will basically render the our items so what are the items that user has already uh ordered so we'll take UL we'll take a class name we'll to Greed gap of three and uh what else we going to do so we'll keep it like this GD gap of three and then here we are Going to take the Ali so here we'll do class name we'll do Flex item Center and justify between okay so here we are going to render the product name so lose span let's say product one and also we going to render the price
so which will be let's say 100 product one and the price okay let's increase this is looking very bad all right so after this we are going to render all the products like This and then once this part is done so we are going to take the similar thing and we'll enter the shipping information or the address basically and we'll take this part here grid gap of two and then we're going to take the shpping info or the address info so we do shpping info so here what we're going to render we'll be rendering the
address information correct so simply we'll take Some D we'll take a class name we'll do grid gap of 0.5 okay and we'll do text muted foreground and here we are going to render the customer name so let's say joho or basically the username we'll render the address so we'll render the address here we'll render the city pin code phone number so Lo City pin Code phone and also you're going to render the notes so this will be the sapping info that's it and what else we need I think we also need to render some payment
info right how much payment the customer I think that we have already showing here if if reir then we are going to add some more details here I think for now this will be fine and at the end we need one thing and that is we Need another section you'll understand what I'm doing so we do common form and here I'm going to pass the form controls so here what are the things we'll pass right let's go to our config and let's copy one of these controls that we have so let's copy the select so
this one so I'm going to copy this part from here and let's paste it here right so we'll give this on name as level will be status we'll do order Status and this will be our status component select so this will be like in process this will be uh what else in sipping okay this will be like like rejected in process and what else we will do we'll do pending once okay first time it will be like let's say want to do pending or something that we do so we'll do pending so this will be
pending and also you need obviously we need the delivered Okay so this will be our form status and now I'm going to create a status one so do con status uh no sorry we'll do forms data and set form data and this will be use state of initial form data so here I'm going to take const initial form data which will be our status will be empty Okay that's it so here I'm going to pass the form data which will be form data and set form data will be set form data and then we're going
to do a button text which will be update order status correct also you need to on submit which will be handle update status so these things we have already created beforehand it will be easy so function handle status we'll do event so that we can do the payment part which I Know everyone basically love to do in piece so once we'll complete all of this save it and let's see what we getting see we're getting update status order status pending rejected and everything and update from status and we are getting this one this is looking
also pretty good the same thing exact same thing we are going to do in the order details for our saping view also right so we're going to create order details here also so do order details. Jsx so similarly this one this will be a shopping order details view so do function we'll do shopping order details view again we are going to return the same thing I'm not going to write exact thing because we'll be using same only for this one we don't have any update status option that is the only difference so remove this okay
and then I'm going to obviously import all of this so you need dialogue content we need Label what else we need we need separate I think that's it now let's go to our shopping page in the uh where is that account right and here we are having this order shopping orders and here we are doing this view details correct so here we need to take this dialogue and here I'm going to pass it here and then we we going to import the shopping details order details view so here again we'll do open which will be
Open details dialogue and on open change will be set open details dialogue so we'll create this to const open details dialogue comma set open details dialog and this will be use state of false and then on click of this button we are going to show this so we do on click so we do set open details dialog will be true let's save it and let's see what Exactly we are getting so for this one we need to basically go to the sing Let Me pause it I think you'll get some noise all right so now
let's log out once and let's log into the shopping View and let's see what we getting so let's go to the account and if I click on this view details we are getting this one right so order details we'll be able to see but we'll can't do any action here and I think almost every page is done but Obviously there will be a part two as I already told you that we are going to do some advanc medium level of features but first we need to implement the payment and then we are going to start
working on those things okay so let's start working on the payment part from the next uh part basically the creating orders and everything all right so for payment uh we are going to use PayPal right so before starting right I want to discuss Some of the things that you need to have the first thing is that you need to have a Sandbox uh test accounts and for that you need the access to the PayPal developer dashboard so how you are going to get it see for to access this one you also need to have a
PayPal account if you have a PayPal account you need to go to this developer. paypal.com and then you can go to/ dashboard now here the first thing if I go right on this app and credentials so let's go here you'll See that once if you already have a PayPal dashboard there will be a default application that is created already and here you'll be getting the client ID and the secret ID from here but if you want you will be able to also create a new app from here so if you do create app right so
here you need to basically give the name of the app platform and then you'll be able to select like which account you need to uh test and also very very important you can see that Currently it is in the sandbox mode if if you want to do this on live you need to change it here okay now one more thing I need to discuss that when let's say for example very very important let's say we using this damid uh demo app here and you're using this client ID and secret ID and if you go to
this demo app you'll see that there will be a Sandbox account info because you are a seller means you are selling the product if you use the same email and the Password it will not work okay so it will give you error like you will not be able to login or basically buy products using your seller credentials so how you're going to do this so first you need to create the app the second of uh step is you need to go to the sandbox accounts very very important so once you go to the sandbox accounts
here you can basically create a dumy account and once you'll create any personal account if you notice that we have a I have a Business account and I have a personal account and if I now log in using this personal account then I'll be able to basically buy product or do the testing and for this one again it will be in the test account so it will not be a real transaction or anything right so this is one very important thing I want to mention and for this one we are going to use this PayPal
rest SDK but before that we need to do lot of things now so we'll start one by one Okay and the first thing what I'm going to do we'll start with creating our model and we'll create our order. JS now let's do step by step okay because I'm pretty much sure that I also will get some error here and it is actually not an issue we we are going to fix it so here we're going to do const order schema and I'm going to do new mongus do schema now we need lot of things here
okay first thing We need a user ID which will be a string then we need the card items right and here I'm going to do this on right uh something like so let's do like this uh we will pass the only the cart items here we don't need to pass any cart ID or something so in the items what we going to pass right we will pass the ID of that item so each and every product ID basically let's give this one name as product ID which will be a string right we'll pass the title
of the Product uh which will also be a string and we'll pass the image of thect product which will be a string we'll pass the price of the product which will be a string and also we pass the sale price of that product which will be a string so this will be our cart items so we have product ID we have title we have image price and sale price okay this thing next we are having the address so we'll have address and in the address what we are going to do we will pass the Address
uh ID uh which will be we'll pass as stream okay we'll pass the address which will be string and let's make this one name as address info right so this will be string then we'll pass the CT which will be a string we'll pass the PIN code string phone number will keep this one as string and also we have a notes right so this also we going to pass as string so this for address we need this one then we need our order Status which will ALS will be a string what else we need we
also need a payment method which will be string right then we need the payment status that whether the payment is successful or not this also will be a string then we need the total amount so total amount we are going to do this one as number and also we going to do a created uh order date we'll do order date so we'll do order date which Will will be a date and what else we need uh we'll do order update date so if we are updating something then we are going to updates we do order
update update order update date we'll do order update date order update date which also will be a date and we're going to pass payment ID so payment ID we are going to receive basically ORS uh will pass pass some dummy value or we are going to also pass the payer ID okay So this also will be a string so these many things we needed here so we need user ID we need the card items that what are the cards that are present we need the you address info we need the order status we also have
the user ID already and we need the payment method payment status total amount order date order update date payment method and payer ID all right so now we are going to export this and and okay one more thing we need to add here right so we need to also Pass the quantity that how many quantity is basically where uh that user is buying for that particular product so now we'll do module. exports and we'll do mongos do model and we'll pass the order and then we'll pass the order schema that's it so now this is
done next thing what we're going to do right we need to install this package so let's go here let's copy this and then I'll open another terminal here let's go to our server folder and then Paste it here so first we need to create a configuration for our PayPal okay so what we're going to do we already have a helper function here so here I'm going to create uh let's create something like we'll give PayPal sorry so we do paypal. Js so here we'll do const PayPal and this will be require so you need the
PayPal rest SDK and after this we'll do PayPal do configure so here you need to pass the mode right so mode we are going to do this on as sandbox then we need to pass the client ID and also you need to pass the client secret ID now again don't use this obviously I'm not going to push all these changes we're going to also change all of this to our envirment file but for now let's use it from here so I'll go to app and Creed in sales let's use some right so click on this
demo app I Already created it's very simple so you just need to create it and then from here you'll get the client ID so copy this and then you also need to use the secret key and then you will copy this here okay so this will create our configuration and then we'll do module. exports and we're going to export the PayPal so this is done so now what we need to do we need to create our controller correct so what are the Things how this process will work let me just explain first see when we
will click on this button right it will basically we are going to call a create order controller what this create order controller will do so so this will create a payment Jon that PayPal requires and then PayPal will create a create method and there we need to basically pass that payment information or basically all the information the transaction the amount and the Description redirect URL and everything so once you'll do that it will basically generate a re approval URL if if there is approval URL that means your payment is actually successful so in that case
what will happen you will be getting a payment ID and also be getting a payer ID if you are getting both so what we are going to do we are we are going to redirect that user to a PayPal return page or basically Payment Processing page whatever you can name and in that Processing page we are going to again call it another method which will capture the payment so one will be create payment and one will be capture payment so in the capture payment what we are going to do we in the create payment method
we will already save that order in our database but the only difference is the order status will be pending just notice this one carefully and the order status will be also pending once you the capture payment is Successful that means Paypal payment is successful we are going to change that payment status from pending to completed and if the payment is completed then only that order will be basically will be able to uh save that particular not save that particular order we'll be able to process that order but if the payment status is not completed then
that order will be considered as a failure okay so this is what we're going to do now first thing we will create our Controller and here inside s I'm going to create let's create order controller. JS now we'll do step by step here so we'll create const create order this will be ask sync request response and here we'll take a try catch so here we're going to log error and return is 500 false and message will show error uh let's so some error occurred okay and also we need one more which will be to capture
the payment so we do capture payment something like that we do capture payment okay and then I'm going to do module do exports so we'll do create order and then we'll do capture payment both okay so now what we are going to do right what what what here we will do in This method we going to save that order in our database in this method we are going to check that whether this order is successful or Not by what by this pay Paypal payment information that if the payment is successful then only so here in
inside this try now we going to get all the information okay we need the user ID then we need the cart items we need the address info correct then we'll need the ordered Status then we have the payment status let me just copy this and then we'll remove from here directly so paste it here so you need payment status okay and then we'll remove this this is just a shortcut okay now we'll just cut it from here and then we'll paste it here then this we are going to get it from where we'll be getting
from request do body correct so these all the Things we are going to receive now what we need to do basically we need to create a payment Json and that payment Json will help us to create our Paypal payment instance so do c we give something like this create payment Json now let's do this on uh step by step so we need to pass a intent here which will be sell we need to pass a pair so we need to basically give the payment method Which will be payment method so here we are going to
do this one as PayPal right so this will be PayPal now after this what we need to do we need to give redirect URL we'll do redirect URLs so here we need to give a return URL and also we need to give a cancel URL so let's copy from here and we are going to paste it here so for this one right we will go to Shop and then PayPal return page correct and for this one we'll go to sop and then payal cancel page okay so we given an intent we given a pair we
given redirect URI now we need to give the transactions Okay so here this will be array and here we need to pass the item list item list so item list is nothing but inside this we need to pass the items that what are the items that user is actually bought so items will be the Scart items that we are having right card item so we'll map it so do item and here we are going to basically return the name so what will be the name name will be our item that we are having do title
that is our name name right because we have a product title so after this we'll pass aqq soq will be our item. product ID so if you see right we have this product ID okay and after this we're going to pass the Price so for this one uh what we will do right we having price and sales price both so what we need to do we will do one thing from the front end will manage we'll see right if the sales price is greater than zero so instead of passing the price we are going to
pass the sales price into this price so we only need only one okay so we'll keep only price here so here I'm going to do item uh we'll do item do price and then we'll do two fixed of two okay so this is done Next we do a currency currency I'm going to do USD and also you're going to pass the quantity so quantity will be item do quantity so this will be our item list and then inside this we have items after this right so after this item list we are going to pass a
amount so amount again we are going to pass a currency here which will be USD and we are going to pass the total which will be total amount that we Are having dot to fixt two Okay and then at the end we're going to pass a description uh okay and we'll give some description I think here we can give any data so this will create our payment Json right now once we'll create this payment Json so you we need to basically create the or initiate the Paypal payment so for this one we need to import
our PayPal so we do const PayPal will be require so we need To go to our helpers and then we need to go to PayPal so here and also we need we need our order also order schema so you'll import order so we'll go to model so here we need to go to models and then we'll go to our order okay so here we'll create PayPal that we are having sorry not this PayPal dot payment see do create so this will give you this create method here you need to pass this create payment Json that
you have created and now this will give you a call back so here we'll do we'll check the error or the payment if this is successful or not okay payment in for whatever okay so here what we going to do simply if there are any error so let's log this error first and then we are going to return race. status of 500 dojon success false and message will do uh error while creating Paypal payment okay So this will be RoR else if it is successful so we create our new new order so we do newly
newly created order which will be new order that from our schema and then we need to pass lot of things like whatever things that we are having here now some things we need to make a change now if you notice right we have a user ID that we are going to pass cart items address info order status we're going to pass from our front end we'll Pass this on as uh pending payment method will pass whatever payment status also will pass pending right and or total amount will pass order date will pass order update date
these both will be today's date payment ID will pass empty and pay uh ID also we going to pass here all right so after this we as I already told you that we'll get approval link so here we'll do approval link or Let's do this on URL and here we'll have this payment info correct this payment info I'm talking about this payment info that will be receiving so this payment info will give you a links property so we do do links and here we're going to find so what we're going to find right so we
find the link whether we are having or not so what this link will have right so this will have a approval URL so we'll do approval so the approval URL so if this Uh this payment input present this particular approval URL that means your payment uh is actually successful so now what will happen this will give you hrf that we are going to get so now what I'll do I'll simply do raise status of 2011 and Json and here I'm going to pass success as true and we are going to pass this approval URL this
is very very important and also we'll pass order ID so order ID we need to pass it so order ID will be this newly created order that We have created this will give us what this will give us ID right so this will give us ID so this ID we going to return now if I just repeat once again whatever we have done so first we are getting all of this from our information and then we are creating this payment J and with intent pairer redirect URLs transaction we have item list then we have items
items we are basically mapping all this amount we passing the total and description some dummy description then We creating main payment instance with this Json and we will be getting a call back with this payment info this payment info consist of this approval URL right and this we are going to return now one more thing is that when we'll do this one right again I'm repeating that we need to make order status as pending and payment method also sorry payment status as as also ending so these two things we need to do so this will
create our order but this the order will not be Successful okay so this will only create the order now to make this one successful what we are going to do right for now I will not do this one I think it will be difficult to understand first let's quickly create this routes and after that once we'll create the order right uh this create order is successful then I'm going to uh create this capture payment method or else I know it will be tricky to understand basically so let's go to our Routes and I'll create inside
so I'll create order routes.js okay now let's copy from some places like we don't need to because we still have lot of things to do so here I'm going to take from reer and I'll go to our controllers then we'll go to sop then we'll go to our order controller so we have our create payment method create Order sorry and here I'm going to create our router so do const router this will be express. router and then I'm going to do router. poost so this will be create and here I'm going to pass the create
order and then we're going to do module. exports this will be our router okay so this will be our router now we'll go to our Ser uh server and I'm going to import it so let's do sop order router and we Need to get it from our order routes okay and now we'll do app.use so/ API slop SL order okay and then I'm going to pass the shop order router okay so sop and then order so this part is done so now next thing what we need to do we need to create our uh slices
correct now one more thing we need to do right we need to create some couple of Pages also so that also uh we are going to create but first we need to check whether the redirect is working or not redirect in the sense means whenever we'll click on this PayPal button right that time it is working or not so for this one uh we'll go to our slices let's go to our soop and then I'll create order slice do JS oh sorry sorry we need we are creating a folder right we do order slice and
inside this I'll create Index.js okay so now let's create this one so first we'll do const and uh here uh first we'll create our initial state so do initial state so here what we will keep here so first we keep our approval e right you remember we'll get the approval ordl which I'll keep as null I'll do e loading as false right I will also get uh what else we get order order I'll keep as null okay for now we'll keep These three if record we are going to add more things here now we will
create so const we'll give this one as order we'll do shop shopping order slice so here I'll do create slice okay let me first import it here so we do import from Redux toolkit so we'll do create slice so here I'm going to give this name as uh what we'll do right we'll do shopping order slice okay and we going to pass the initial State we'll pass the reducer for now pass empty and we're going to pass extra reducers uh this we need so we'll do Builder and we're going to add our cases okay so
now first uh let's export it so do export default do shopping slice. reducer so let's go here and I'm going to import it so do so order slice so we'll do order slice okay so we do sop order which will be sop order Slice all right now here we need to create our uh Asing tons right okay let's create it here first thing we need export const and we'll do create new order so this will be our create sync tun so we'll give this on name as order slash create new order this is our identifier
and then we'll take asnc and here what we'll receive right we'll receive a order data right or form data what we'll give this one name as order data Now we'll do const response will be a it xus dopost and let's copy the URL from somewhere so we need till shop till this part we need and we'll post it here and after this we'll have order and remember we'll have create Also let's verify one second so we have create and then we have a order so here we'll have 5,000 SL order SL create and then what
we need to pass Here we will basically pass our order data okay and then we're going to return response. data so these will we first create new order now we are going to create this in our case so we'll do Builder do add case so we'll do create new order. pending State and then so first thing we'll do state DOT is loading as true and let's copy this and paste it two more times so this will be Fulfilled and this will be rejected so for rejected we'll make this one as false only and state DOT
uh approval URL will be null and state. order will be also null but when this is fulfilled that time we'll make this one as false state do approval URL will be so we need to get the approval URL right so we'll get it from our approval URL that we are passing here so from this this see approv and we having the order ID right So and also one more thing I need to do I think let's make this on order ID only it will be easy to understand okay search for order yeah we'll do order
ID so this will be our accents we get our accent here so we'll have accent. payload dot uh let's copy it from here what you're passing approval URL okay and let's copy this paste it here and this will be state. order ID which will be accent. pay. order ID okay So we save this order ID now this part is done so we need to start working on the front end so from Front End side what are the things you need to do first see first uh we need all the information right first you need the
cart items you are having here we need the address info so for address what we will do we will keep some kind of uh button here that select address and whenever we'll select that address we need to store that that this address Is currently we need to deliver basically okay so we need some kind of uh method here so that on click of this we'll be able to select that address so what we are going to do right we will keep some kind of button okay on top select address or something and then whenever we
select this address we'll get this ID and we are going to store this information so for this one I'm going to now close all of this okay close all and then we'll go to our front End part we'll go to our checkout page and I believe we are passing this address here now if you notice right we need so many data so let's go to our controller once again because it's absolutely required to go there and we need to get like what are the things we need to pass see so many things we have right
so we copy all these and now notice what I'm doing first so first is we have a uh button right so on click of this we need to Initiate so for this one what we going to do we need to basically first again I told you that when we'll do initiate this one for the first time that time some of the data we need to keep it as static right this is very very important actually so what I'll do let's take a on click this part I'm going to do little slow so do handle uh
initiate we'll do initiate right Paypal payment and I'll create this function Here so function okay let me just paste it this one and then we'll copy it from here so we need to create our order data right so we do const order data and we we will basically pass all this but how we are going to get all this I'll show you so we cut it from here we'll pass it again step by step we need to do so user ID we'll get it from where we'll get from our user Au right so we'll do
this one As user do ID cart items we'll get from here but we need to again check that what are the things things we need to pass in our cart items so for this one we'll go to our model and we'll see like what are the things we need product ID title image price and quantity so these things will copy and here I'm going to map these cart items and then so cart items has to be Length greater than zero so we don't need to check this so do do map so do item or let's
do card single cut item and we need to pass all these so first we have a product ID now here okay let me first log this and see what we getting here right so log these cart items or else it will be very difficult I'm going to first comment out this part here and let's see what you're getting in the Cart items console so getting card items Arrow of two and then here we are having no not this one I think here we are having object see we are having items and inside this we are
having all this right so that is the reason so we have done good thing that we have checked it so we need to do cart items do items do map right so product ID will be single cut item do product ID so we do single cut item Dot product product ID similarly we'll do single card item do title right we are having title then we having the sales price and also the price and quantity also we are having so image we are going to pass the image then we are going to pass the title now
here again also we check if the sale price is greater than zero so we pass the single item sale price or else we'll Pass single item dot single cut item do price and then we're going to pass the single card item. quantity okay so these will be our cart items then we having the address info now again address info we need to complete order status will be pending as I already told you payment method font now we will keep it like this like PayPal or something payment status also will be pending right total amount now
total amount we can pass it here this Total cart amount so let's uh do it like this we'll cut it from here and then we'll paste it on top of it and we'll pass this total cut amount here so do total cut amount okay order date we'll pass the new date and then same for order update date you pass the new date payment ID will pass empty and payer ID also will pass empty the only thing that is pending and that is we need the address info so for Address info we need to manage some
kind of state or else we don't have any option right so what we'll do right we'll manage a state here like const in our checkout page okay so do current selected address I'll do Set current selected address and the this will be US state of null now these two things we are going to pass so Set current selected address we are going to pass in our Address here okay and let's go to our address component so here we are going to receive this Set current selected address so what we will do right we have a
address card component here if you see right we have address card so we're going to pass this here so we do Set current selected address we'll pass it here and we'll go to address card and we'll receive it here see step by step I'm doing don't get confused and Then on click of this card right whenever I'll click on this card I'm going to pass this Set current selected address and here I'm going to pass this address info. ID so if this is present then only I'll will do it or else I'll keep this one
as null okay okay so now we'll get the ID or let's do one thing let's instead of doing ID we'll pass the whole address in for it will be easy if I save this right so from a check out page we pass this Address to address card and then we getting this one so if I log this current address right log this current address here let's see what we're getting we're getting null but if I click here you can see we are getting this current address which is India kolata if I click here we getting
this current address so now what we can do simp we'll make this on much like better like we'll keep some button and everything but for now do it like This so that we need to check first so here we'll take and then we'll see what are the things we need to pass so we have the address ID and address and everything so we'll pass it here so this will be current selected address dot so we will have a ID here if you see right so this will be our ID then current selected address do address
current select Ed address do City current selected address do pin code current selected address. phone and Current selected address do notes all this is done and now I'm going to log this order data here and we'll see what we getting so if you see right if I click here let's see what other the things we getting so we get address info inside this we got all the information we got card items we got order data order status pending payer ID this is empty payment Method is Paypal payment status is spending total amount is this one
and user ID is also there awesome so now everything is done so now we need to initiate the payment okay so how we are going to initiate the payment first so we need to pass all this information in our create order uh slice that we have created correct so here what we're going to do right will dispatch okay we need to get get some dispatch here so we do here Const dispatch which will be use dispatch and we'll do dispatch and we'll to create order new order and here we need to pass the order data
I'm not sure whether this will work or not but let's see what is happening because I'm pretty sure we'll get some kind of error but that's okay then only be able to fix it so now I'm going to save it and I'll give some identify right we'll give my name here so that we'll be able to See see this is how actually I also do my coding and everything all right so now let's click here and let's see what what is happening so I'll give my name here so that you'll be able to understand so
let's click on check out with PayPal oh wow okay this is awesome I didn't know this will work like in one go now you see we are getting success and approval ORD oh wow awesome and Order ID is also there success is also True awesome so now we'll see like if I also was stunned how this worked okay so we'll do what is the data. payload right so data. payload dot success if this is true so what we need to do right so here uh we will keep one variable and now from this point it
will become very interesting and you need to know these things so I'll do write e is payment start something like that anything you can use say is payment Start which will be U state of sorry U state of false and here I will keep this one like so set is payment start will be true else we'll make this one as false only okay now we also need to get the approval URL because we already getting it here see approval URL we already getting right so we'll get it simply from our states we do const approval
URL and then we'll do use selector and we'll do state state do sop order right and what what will happen if approval URL is present see if approval URL is present we need to navigate or basically we need to get out from our application and we need to go to that URL okay this is the important thing so we'll check if this approval URL is present right so simply do window. location. Href and this will go to this approval URL save it now you can see what is happening see we are getting through this pay
with PayPal right now the point is what will happen if this is successful I'll show you one more thing see if this is successful if you notice that we have given this 5 173 sop and then PayPal return so we need to create this page so that it will go to this Page right so let's quickly create this and after that we are going to see so for that I'm going to go to our shop and then let's create our uh what we keep right PayPal return so PayPal return. jsx and also we need to
do PayPal cancel but for now let's keep PayPal return so we'll do PayPal return page and I'll just render something here we'll just render PayPal page okay save it and now what we Going to do we need we need to go to our app.jsx then we need to go to our shopping View and we need to create one more here so we'll do route so we'll do path so it will be PayPal return correct and element will be this page PayPal return return page let's save it now see if I now I'll go here right
and again I'll go to my testing tools sandbox accounts and I click on this personal One first I need to log in let me login okay let's go to my personal account and now what I'll do right simply I think there is a option okay let's from here we need to copy this and I'm going to paste this testing account and also the password and now let's click on login let's see what is happening if there are any error that we need to check but we should not get it see now we are getting awesome
right so You're already getting so from your PayPal or Visa credit card you'll be able to pay once I'll do continue to review order right let's click here so it payment will be successful and see it's going to the PayPal return page okay I think we we are already logged in I think the token is uh already cleared I think not cleared expired so let me do the same process once again so we'll go to our checkout page then we'll click on check out with PayPal see it's going to this page click on continue with
review order so it's going to the see PayPal return page now if you notice see what we having we having payment ID and what else we having see if I go right side right we having a payer ID awesome right so now we'll be able to pass all of this means your payment is successful so in this case we need to call that uh capture payment method I told you right we have a two one is create payment and one is Capture payment so now in this payment we are going to do what we are
going to re uh basically process the payment and if the payment is processed we are going to update the order status so you have this order status and the payment status both will be order status will be what confirmed and payment status will be paid something like that okay so that part we are going to do in the next part all right everyone so let's start working on the capture payment part but Before that uh one thing we need to add and actually apologies for that the reason is because we need to add one more
thing in our model okay uh so what I thought we need to add the cart ID also the reason is because once the payment is successful right we need to remove those cart items from our cart so that is the reason we need to part pass cart ID here also and this is also important okay so this cart ID we will receive in our Controller so let's go here it will be very simple change only so first we'll receive this card ID here in our from our request. body and these we are going to save
only in our database that's it okay so this is one change and then from our checkout page we need to pass this cart ID here here so we'll pass this cart ID so cart ID will be this cart items that we are having right this will give us the ID okay so this will be your card ID so this also you need to pass all right so this is one more thing and now what we going to do so we'll uh start working on the capture payment part so let's go there so here first thing
uh we will get three things so first we need to get the payment ID the payer ID and also the order ID but how are going to get the order ID now you might think like because we will be we will be moving out And then coming back so order ID will not be saved in our uh state so for that we need to do a little trick and that is in our state uh sorry in our slice right where we are getting this see we are getting this order ID when this is fulfilled so
here I'm going to just do session storage. set item and I'll do current order ID okay and I'll do json. stringify this uh this uh accent. payload do order ID this I'll save it in my session storage Okay now in here so three things we are going to receive as I already told you from a request. body so receive the payment ID we receive the payer ID and also we receive the order ID think all right and now I'm going to find order so first do const order so AIT because we've already saved that order
in our database right so we do order dot find by ID and here I'm going to pass the order ID so if the order is not present so return race. status. 44. Json so here success will be false and message will be order cannot be found okay now what we'll do once you get the order here so let's do this on late so here I'm going to just update the order so we'll do order do payment status we're having right so we have order. payment status so I'll do order do Payment status as paid and
we'll do order dot uh what are the the things we need to update we have order. order status so we'll do order do order status is now confirmed the order is now confirmed and also you need to pass order. payment ID right which will be our payment ID that we are receiving this payment ID and we'll do order. payer ID which will be our payer ID okay and then we are going to save This order so have it order do save now once we do this we also need to do one more thing and that
is we need to basically get the cart item now how we are going to get the cart item so from this order only we will be basically getting the cart item right so we also need to uh drop that so const get cart item get cart ID let's do so this will be this order Dot we are having the cart ID right and we'll do const cart which Will be aate and then we are going to get our cart model so first we'll get that we'll copy this we'll do cart and we'll do model and
this will be card now we will do have it do card find by ID find by ID and delete and here we'll do this card ID we will get okay or we can directly we no need to get this cart ID right so we can directly delete this we'll do a cart. find by ID and delete so we'll delete this and then you'll Save it and then we're going to do re. status so we're going to pass 200 do Json so we're going to pass a success as true and then we're going to pass message
which will be order confirmed and we're going to also pass a data which will be our order lot of things we have done but this is actually required okay so now I think all of this is completed so we're going to pass the capture Payment and this one we are going to pass in our routes so let's go to our routes so we'll go to our routes now I'll create one more so this will be capture and this will be our capture order capture payment all right so now we will go to our slice and
I'll create one more here okay so we'll do capture order capture payment let's do capture Payment so we we'll do here capture and here we need to get uh three things right we what are the things that we need we need the payment ID payer ID and Order ID three things we'll copy these three and also okay uh let's pass it here only and then I'm going to pass it here this three okay so capture payment this is done so now what will happen once we will go to this PayPal return page here We need
to do some logic because as I already told you right that once we'll go there we'll be able to get extract the values from that so what I mean by that so let's click here one second we'll go there and we'll see so if I do continue to review order right you'll see it is going to the PayPal return page and you see from here we'll be able to get all of this so let's do that all right so let's uh start working On this so first thing what I want to do here right so
uh let's render a card component here first and here I'm going to render a card header and then I'm going to render a card title and here I'm going to do something like processing payment please wait right so let's save it and let's see how this is looking all right I think this is fine now what we need to do basically we can Make this one look little a little nicer that is also okay and let's see if we have any component related to this that we can basically use but I don't think we have
something like that we need to create here yeah I think yeah I think let's SK it like this the main thing is that we need to start working on the functionality so first I'm going to take dispatch which will be use Dispatch right and here also we need to get location which will be use location now we need to basically get the params right so we'll get the search Pam so how we'll get it so we do new URL search params and here we need to pass this location do search right and now I'm going
to get the payment ID and the payer ID so Lon payment ID so this will params doget and if you noticed here right we are having this see we having this payment ID so copy this and we'll Get it here similarly we do const we'll do pair ID which will be params dog and this will be our P ID if you notice right we have a pairer ID this one so this also will receive now what you're going to do take a use effect and we are going to keep this payment ID this payer ID
as a dependency okay and also keep this dispatch now what we need to do simply we'll check here if this payment ID and then this payer ID both are present so we are going to get our current order ID from where we stored in our session storage remember here current order ID right so do const gate current order ID which will be Json do Parts we'll do s storage. get item and this will be get current order ID now what we need to do simply we'll do dispatch and we are going to dispatch this capture
payment and we need to pass Three things right we need to pass the payment ID payer ID and Order ID so we'll pass the payment ID the pairer ID and the order ID will be our so let's give this name as order ID only so this three things dot then so you're going to get data now simply check that if this data. payload do success if this is true so what we going to do first we do S Storage dot uh remove item and I'm going to Remove this current order ID we no need and
then we are going to do window do location. href and this will go to/ shop SL payment success page okay so this will go to the payment success page so now I'll go to home and we need to start everything from scratch and let's see and before that we also need to create a payment success page so I'll go to my shopping View and here I'm going to create a Payment success. jsx so to create this so we'll do payment payment uh we'll keep payment success uh page okay and we'll return a d later we
are going to change the UI we'll do payment successful something like that save it now let's go to our app.jsx and I'm going to use the same so we'll do payment success do Payment success page all right so now let's save it and let's see what is happening from scratch so first we will go to our check check out then click on continue with PayPal so it's coming here now let's click on continue to review it's coming here awesome go here you don't have anything in the card nice job now see this is done right
so payment is now successful so now what will happen we Will change the UI and also there will be a button like view orders something like that and then the user will we go to the orders page or basically this uh my accounts page here we are going to render all the orders and this is done so now we need to uh look uh or basically make changes in this page payment successful so that it will look nice if you want you instead of creating a different page you can show it in kind of some
kind of model and everything That will also work it up up to you okay so now uh let's quickly create the order apis that we need to create to get the order details and also the order list and and that we need to basically convert it not convert we need to replace it here so let's start working on that part all right so although we have completed the order function but two validation multiple validation we need to do right the first thing is that if there is no item we need to disable This the second
thing is that whenever uh we didn't select any of the address we need to show some kind of error or we need to make this one as disabl right these two things is very important also we are going to show some kind of loader whenever we'll click this one so how we going to do that right so all three I'm going to do here so first uh let's go to our checkout page and I'll close everything else so here you can see that we are having this current selected Address so if this is null right
and if you're trying to click on this button we need to basically show this so here we can simply do something like this let's say if this current selected address if this is null correct so so what we are going to do we render a toast so that user will be able to understand that okay this is the mistake that we have done we need to select something so here we'll do like toast right so we'll do toast and we'll Do s uh not success this will be title uh please select one address to proceed
right and also we going to keep a variant which will be destructive and then we need to return it from here okay so now let's say if I try to click here right see please select one address similarly uh if we don't have anything in the cart right so that also you need to check both will check here so if here only we will check that if cart Items. lengthlength is so why I'm not disabling because user will not understand why the button is disabled so it's always better to show some kind of message so
please add some your card is empty so so your your card is empty please add items to proceed same thing okay so now let's say if you click here your card is empty but if I go here in the let's say main section add this one And now I'll go to check out but if I still try to click here right you need to select one address right this is very important okay so this is one thing I just also we can do some kind of improvement like we can select this one that also I
will do but first let's uh complete the order functionality means order page and everything okay so uh we will what we are going to do simply let's go to our order controllers and here I'm I'm going to Create two more methods one will be get all orders by user which will be as sync request response so we do try catch so here I'm going to copy this paste it here and we'll do get order details get order Det details okay so first thing uh we need to get our user ID here so we'll get our
User ID which will be request. params and then we're going to find the order so the const orders which will be AIT order do find and here we are going to pass this user ID because we have we have added user ID right yes so if this 's length is zero so we are going to return return race. status of for not4 do Json do success will be false and Message will be no orders found okay orders we just simply return this the status of 200 do Json we do success as true and message not
message we're going to return the data which will be our orders so these orders okay so this will be a get all orders by user ID then we have get order details now these also will be exactly same so copy this instead of user ID we are going to Get the ID of that particular order right and then we will do const let's copy this part here so we do const order and we'll do const order find by ID and then we're going to pass this ID here and if not order right so we're going
to pass order not found order not not found okay and then we're going to Simply return it so we do same thing again why will write we copy This and we'll do order okay this is done so now let's pass it so get all orders by user and get order details all right so now let's go to our route so we do get all order by user and get all details so both will be get right so this will be let's give this on name as order SL order SL list and then we going to
pass the user ID and this will be details and then we're going to Pass the ID so for this one this will be gate all orders by user and this will be G order details that's it so I think this is done so now let's go to our slice and not here we need to go to slice ordered slice and we need to create two more before that also you need to create one which will be our order list and also order details which will Be null okay so now let's create two more Asing tun
so I'm going to copy this paste it two times so we'll we'll do this one as get all orders by user let's do user ID and we'll do get order details okay so for this one this will be slash order SL list and then user ID we need to pass Okay so let's do this on template literals and here we are going to Receive the ID or the user ID which we need to pass it here okay we don't need to do any of this and we can make this one x.g also you need to
change the identifier sorry I think we haven't changed the identifier for this right okay we need to change it capture payment okay so this is done next thing for these details I think we have done details and then ID so this will be almost same so we copy this from here Paste it instead of this will be having details sorry this will be details this will be ID and here we are going to get the ID okay we can remove this part and this also will be dat all right so I think this is done
we have order details and Order list so now let's create this uh add cases so copy this paste it three times so this will be get all orders by user ID pending st. is loading will be true for this one This will be fulfilled so state. is loading will be false and state do order list will be accent okay acction we need to take so this will be accent. payload do data okay and when this is rejected so that time this will be false and Order list will be empt ar so this is done next
uh what you're going to do is copy this and paste it one again so this will Be our get order details pending get order details. fulfilled and get order details. rejected so here we just need to do order details instead of that and this will be null that's it so now I think we have done this so what we need to do we need to go to our orders page right so we have our account page then we have our shopping orders and then here we are going to call this So you're having this order
history and everything right here so we'll do const we'll do dispatch equal to use dispatch also we need the ID so we'll get the ID from our selector so we'll use selector do state and we'll do here state do o so use effect and here I'm going to pass this dispatch and we'll do Dispatch get all order orders by user ID and here I'm going to pass the user do ID right so now this should get the orders and then we going to get the order list so we do order list and this will be
from our sop order reducer and we'll see what you're getting in this order list now we'll be having so many orders because there can be some dummy orders that we have created for testing right so that is the reason so let's see what is happening if I go to inspect go to consult let's go to our account see we're getting so many orders right here so we are having see we are having order status then payer ID and everything for some we don't have so what we need to do right for now okay we I'm
going to so what I'll do right I'm going to render all this but I'm going to delete from our database Because we don't need that time we have done because some of the orders obviously will fail and everything because we were doing testing that time but this is okay we are getting the order details that is actually okay so now what I'm going to do right is order what are the things that order ID we are having order ID order date we are having so this is our order date and then we having the ordered
status which is currently sorry not this one Which is confirmed you can see then we are having the price total amount what else we can render for now I think we can render this and then on click of view details we're going to render the other other things correct so what we'll do simply here we are having the table row correct so I'm going to wrap this order list and and Order list do length if this is greater than zero so I'll do order list. map do order item and now here I'm going to wrap
this ORS we going to render null and now here we are going to render like order item. ID correct then for date what I'll do right I'll just uh render this part so I'm going to split it with t for the date so we do order item sorry order item dot we having the order date so we'll do order item. order date and then I'll do this on a split with t and then I'm going to take the first Item okay then we having the order status so we'll render the order item do order status
and also the total price so we do order item dot total price so now let's save it so you can see okay I think total amount we have not total price right so we have total amount all right so now we are getting all of this so here we having only one confirmed right you can see we can also Give some kind of badge here see I'm not sure how this will look but let's see how this is looking I think we have added this badge component in some place right so let's see where we
have added here I think we have added badge okay so I'm going to use this and we'll see how this is looking okay so we have ordered status correct and if I just do a badge here let's See okay this is not looking that much bad but I'll give a class name here we'll do a let's give a padding of four uh let's keep padding of two now we'll do PX of uh no py of we do one and PX of will do 3 okay for confirmed we can give some green background for this one
so so that also add I think it will look good so here right we'll check if this order Item do order status if this is equal toal to confirmed then I'll do a BG of let's give this one green or else we do bgf black awesome this is looking good right so now you can see we are getting all this now on click of this we need to F the order details and then I I think this will be done see for admin view again I'm mentioning this part will be exactly Same because for admin
what will happen right we'll be able to fetch all the details all the orders from from all the users and then we'll be able to update the status so let's do that in the next part all right so now we will start working on the details okay so details will be now what we're going to do right instead of opening this model directly first we are going to fetch it and then once we'll get the data back that time we are going to se it so we have this Button right here uh there is some
button okay this one so here instead of doing this directly now what I'm going to do right so we'll do handle Fage order details we need the ID right so we need the ID correct so we need the ID here and we'll do order item. ID okay so we'll get this we handle Fage order details so let's do it here so do function handle order details we do G ID right so we'll do dispatch so we'll do Get order details and here we need to pass the order ID so which will be my gate ID
right so this we are going to fetch it now we what will happen we will be getting the order details from here right so you get the order details so sorry if you're getting noise I can't do anything these people are very annoying actually my friends okay these people will be talking so much so here uh we'll be getting the order details now and Then what we'll do right if we'll check here that if this order details is not null then only we are going to open that so do if order details is not equal
to equal to null then only I'll do set open dialogue this will be true okay let's save it now let's see what is happening I'll open our inspect let's go to network and now I'm going to open this one click here see now it's opening right and you will be getting all the Information now we will be getting our order details right but one more thing we need to do when we'll close this right that time we need to basically uh reset this so how we are going to do that so for this one uh
we have this handset on okay let's do one thing um we will do one thing okay we need to do this one I think this is important so we'll go to our slice and here I'm going to create one reducer and this will be set order uh details Okay and uh this will be we'll take State and accent although this is actually not required so what will do right we'll do or let's make this one reset order details so we do state do order details will be null we actually don't need this one and this
reset order details what I'm going to do I'm going to pass it here so we do export const and this will be reset order details which will be shopping order slice. accents Okay now when I will go to this model okay something is happening here uh okay let's do one thing we need to go to this uh dialogue where is that in this dialogue so we'll go here and then not here okay uh we have some component right shopping order details view sorry I'm checking that one okay here what we're going to do right we
have a dialog content but not here where We need to do this on open change here we need to do it so here we are going to basically make set open this will be false and then we'll do dispatch and I'll do reset order details okay so I'm going to reset this order details every time I'll close this now let's save it now let's see if I now refresh this page uh we'll be getting this now let's click here opening now close and if I click here now it will be opening close and even if
I just change it and then Come back then also it will be getting this okay so now we are getting all of these we need to now change all data in our order detail space let me pause for some time I think these people will be talking so much and after sometime I'll again resume and start that all right so let's render the order details now so what we going to do so first uh we will pass this order details in the shopping order details view as a prop okay let's save it and now let's
go Here and then we'll receive it here so the first we have the order ID so let's uh I think we have already logged this here right we have order details log here so let's see what we getting in this order details so open console so we do order details which is null now let's click any order details so let's click this one so you can see that we are getting all this so we have I So let's render it so we do order details do ID then we have the order date so order dat
again we can split it and then we can s it so we'll do here Order details do order date do split with so we do do split with t and then we'll do zero then we have the price which will be our total price right so we'll do order details do total amount then we having the order status Okay so for order status we'll render this order status here so we'll do order details. order status for this one also let's render this batch component that we have rendered right so we have this order details sorry
this badge here so let's copy this and I'm going to render it inside this level so paste it here so do if this order details do order status if this is confirmed we Will show this or else this will be background of uh black and let's remove this part from here and also you need to import this patch component so let's save it and let's see so you can see that we are getting order status order date order price and Order sta is now confirmed after this we also need to render some more thing and
that is what else we can render okay so first thing let's render the cart items so in the cart items we'll keep This one simple rendering this product uh name or basically the title of the product which will be this one and also let's render the quantity along with the price so here we are having this order details we are having this e and here I'm going to this so order details dot so we have the cart items so cart items and then order details do cart items. length is greater than zero so we'll do
order details dot cart items. map so L item And then we're going to render this AI or else this will be null obviously there has to be some product but still let's give this okay so you paste it in the wrong place so here now here I'm going to r at the item do title so do item do title and this will be item of price so item do price okay and also after this if I Let's uh render the quantity also here so look quantity so let's how this is looking Okay we need to
remove this one okay and if this is looking little weird this one we can also give like title uh this okay let's see how this is looking I'll give this one product name or title let's give this one as quantity and this one as price all right then we having the shpping info for shpping info you already have the address info so this we are going to render so we will take the name so name will be What our username right so we can take this from our user so we do const user which will
be use selector of state and we'll do state DOT o and then we are going to render the username so we'll do here username user do username name so here address address will be ordered State details. address info dot address let's copy this and paste it here same here phone and also in notes now we're going To change this so this will be notes this will be phone this will be PIN code and this will be City okay and after this have we rendered anything else I think we don't have anything else but what we
can render right after this uh we can render this uh payment method and payment status and total total amount I think we already have done so let's do one thing right so after this part where we render the total amount so have this total amount Rate so here we are going to render this uh payment method and payment status so we'll do payment method so payment method is this one so here we're going to do this one as payment method and this will be payment method and this will be our payment status okay we don't
need this one and this will be payment status payment status will be paid right or It's spending payment status and this is done now you can see this is looking fine if I open any other let's open this so we getting this let's open this one we getting this let's open any other we're getting now two here this is fine these all things we can manage if you want to do you can keep create some table also here but first we need to see whether order date uh ID price total price or the order price
payment method payment status order Status order details and saping info and I think this will be more than enough now what will be the next thing so next thing the same thing we are going to render in our admin view also if you remember right so what we'll do simply we'll copy the same component and we'll render here the only difference is we'll be having that uh this select option right where we'll be able to update the status of this particular order so let's start working on that part so let's copy This here and I'm
going to open incognito so here I'm going to log in with my admin user so we have products and we have orders so here also you need to do the same things that whatever we have done in the admin view correct so let's go to the admin view we'll go to orders and we'll go to the order details now for the admin view what we'll do right we'll create uh same controller but we will manage it in our Admin admin part so here we have this order controller where we are getting get all order by
user if you noticed here right for admin view what we going to do we'll be getting all the orders from all the users so that will be the only difference so what we can do simply uh so let's go to our admin View and I'm going to create here one more which will be uh let's give this one as order controller.js now instead of rewriting the same thing because we have still lot Of things to do I'm going to copy most of the things now okay and the reason why I'm copying because it's not a
different code so that you'll not understand I'm copying the exact same code okay whatever we've written so the only thing is that I'm not rewriting the same thing again and again so do require and we need to get our order first so we'll go to model and then we'll go to order so this will be get all orders of all Users and here we don't need any user ID I hope you're getting because we need to get all the order right that's it so no orders found this will return or else we going to return
all the orders and this will be pretty simple now here I'll do module. exports and this will be get all orders of all users okay now let's go to our routes and here in the admin I'm going to create one more this will be order Routes.js sorry not jsx this will be JS so now let's go to our sop View and let's go to order routes and let's copy this part and I'm going to paste it here so only difference is we need to get it from our admin view so we go to admin and
then order controller right and here I'm going to get it get all orders of all users so here what we going to do so we will have router. post this not required capture is not required gate so Gate I'm going to do this one orders orders and this will be get all orders of all users okay that's it so this is the only route we need for now now let's go to our server.js and I'm going to create one more and this will be for our admin so this will be admin order router and this
will be from our admin and then we need to go to order routes all right now we will copy this And this will be our admin SL order this will be our order and also let's do one thing let's do this on get okay so orders and then get order and then get or let's make this on orders and this will be admin orders router okay so this is we need for our admin view we will be fetching all the data now one more thing we need to do we need to also do it for
get by ID right now one thing I want to show you Here and that is if you notice right let's go to this admin order controller soft view if you see that gate order details the gate order details part will be exactly same for admin View and for the shopping view now here you can do one thing like either you can do use the same thing okay but in this case I don't think it will be better because we are managing different folder for both admin and shopping right it's absolutely fine to use the same
but I'm going to copy The exact same thing and we'll use the order details for the uh for different ino for the admin users so I'm going to copy this and then I'm going to go here and then the only change what I'll do right you do get order details for admin I hope you're getting and here again we need to find the ID of that particular product and we're going to pass it and then we will go to our routes and then we'll sorry we'll paste it here and We'll do details and we'll pass
the ID because we need to get it by ID right and we'll get order details for admin so these two will be for our admin users and there will be one more and that is to update the status but before that we need to go to our Redux and then we need to create one more which is so let's go to our store and then we'll go to admin and here I'm going to create ERS order Slice okay and there we need to create our file so we'll do order slice and we'll do index.js so
let's quickly create this one close others so we do const we'll do admin order slice now also like side by side I'm going to open the order slice from the shopping shopping view also okay so that we can reuse some of the things we don't need to write now here okay first I'm going to copy this So we need the this and also we need the axio so we'll do here create slice I'm going to give the name as the same admin ordered slice and also let's create our initial state so we do initial state
so here we will be having the order list orders list I think and the order details both okay and then we're going to have a reducers which will be empty object and also we need to buy the initial State now I'm going to create our extra Reducers Builder and now let's export this so we export default admin order slice. reducer now let's go to our index and then I'm going to copy this and paste it here and this will be our admin order slice correct and we need to get it from our admin folder so
we do admin order slice and let's do this one admin Order and this will be admin order slice okay so we have Au then we have admin products and also then we have shoping products so now what we need to do we need to basically create our assing T now I'm not going to create this because we have the similar thing here this thing and also this gate order details both will be exactly same so let's copy this and only we need to change the URL here so I'm going to paste it and this Will
be get all orders for admin and I'm going to give the same name here and we don't need to pass anything the reason is because we don't need to pass any user ID we need to get all the all the uh orders for all the users so we go to admin API / admin orders so have API SL admin SL orders and then we need to do get right I think something like that we are having so we having the G right okay so this is the only Change save it and then we'll be having
gate order details for admin here we need to pass the ID and here again we have API SL admin slash orders slash details and then ID so here we'll be getting the uh the gate order details again okay so this is done so now what we going to do okay let's let's paste it on top here so now let's quickly create the Builder so for Builder also again it will be exactly Same so you copy all this so we need to copy the gate order details from here so let's copy this part so here this
part we need so we'll do here Builder dot so paste it here so do Builder do add case so this will be get all orders for admin uh pending state do is loading will be true get all orders. admin. ffi state. order list will be accent. pad. Dat see it is exactly same now this will be get all orders get order details for admin this will get order details and this will be also get order details so these all the things that we need so now we need to go to our admin View and we
need to fetch the list of orders and we need to render if you want again I'm repeating you can reuse this logic you can use the same exact same component but but because we're managing two different view I I thought it would Be better to manage in of creating those all logic in one single component so first let's render it and then after that we are going to start working on that update status functionality all right so let's implement the UI now for the admin view so we will go to this orders page right and
here the first thing uh what we'll do we need to get this order list and the order details both so we go to order uh this admin view so first we'll take this two using Use selector we'll do state and we'll do state DOT we'll do admin order because that is our redu set name and here I'm going to get the order orders list I think let's copy it from here Order list and Order details okay then on page load so take dispatch and here we're going to again do use effect and on page load
I'm going to do a dispatch to the API calls we do dispatch and you do get all orders for admin and Here we don't need to pass anything right so this will give us all the orders created by all users so if I log here Order list and let's see what is happening see we are getting 19 orders okay so you'll be getting for all the all the users here okay whatever users have created all the orders so now what we need to do so let's go to our orders page and then this part I'm
going to copy because this part will be exactly same here in inside table body right so I'll copy this part from here this is from the shopping View and inside this in the table body I'm going to paste it so I'll paste it here but we need to change some of the things like the first thing is that we need to import this batch component and then we also need to for now I'm going to hide all this or let's comment it out because we don't have created these methods right and now here instead of
the shopping orders detail View we need to do admin order details view correct now let's save it and let's see what we getting so you can see that we're getting all the orders here awesome okay now obviously this will not work so now we need to F the details API call and then we need to open the model and main thing we need to work on the update the status for that particular order so here again what we'll do we'll basically uncomment this on button click we need to fetch so we uncomment this One and
create this method here so we do function we do get ID and simply we do dispatch and get order details for admin and here we need to pass this ID gate ID okay so this will give us the order details so if I now log this order details right so this will be let's log here Order details let's open inspect go to console so this will be null for for the first time and let's click on any order Details see we are getting the details okay so now what we'll do simply we'll take one more
use effect and we'll do now that if so we give this order details if this order details is not null then only we will do set open details dialogue will be true okay instead of doing this one directly also if you remember whenever we'll close this model we need to reset this order details in our state and to do this one What we'll do we'll create one reducer you remember we have done this one for the order uh shopping view also so we'll do we'll create a reset order details so this will be a function
and here what we'll do simply we'll take our state and we'll do state DOT order details will be null and I'm going to pass this in our accent so we'll do xort const or reset order details this will be admin order SLI do Reducer okay so now when you'll close this means on open change here in this part so we need to close this model and also we need to reset this now to reset this order details we need to get it from the admin view don't get confused shopping View for the shopping one this
will be from the admin view okay so now this part is done so we need to render our admin details view for the admin details view the structure will be again exactly same okay the only Difference is we are having this this uh this part here right which will be to update the order details if I go here right and let's say open anything like let's open this one so you're getting this part so only this part will be separate but rest of the things will be same but for the admin view we're also going
to render the payment ID and payer ID okay so what we'll do let's go to our order details for this View and I'm going to copy this part for now so this Grid and GAP six this part because this will be again same if I go here right in the let's go to our admin view okay not this part we need to call copy this grid to let me let me check so first it will receive the order details as a prop so I think we are already receiving or not no and then uh we
are going to copy this grid Gap two part which will be this part Here and then after that we are having this grid Gap four part and also this part this both copy this and then we'll paste it here the only difference is we need to not difference we need to also import this badge component okay now if I save this let's see what is happening we are getting some error I think probably something we haven't imported let's see user is not defined correct so you Need to get the user so Lon user user this
will be use selector State state. o so you can see that we are getting this if I close and then let's open for this one we are getting this one and then you'll be getting this part also like to update the status and everything all right so I think this part is done now let's start working on the API route for this updating the order status and once you'll update the Status uh because we will be updating based on the ID so it will automatically reflect in both the places it will reflect here in the
admin View and also it will reflect in the in our uh this shopping view so let's do that in the next part all right so let's uh implement the update order functionality so first we'll create our controller so we'll do update order status and this will be ask sync request Response so do a try catch and let's log it here okay so first thing we need the ID of that product so we do const ID which will be request Dot params and also we need the order status so we do order status which will be
request. body all right so first we need to find the order right so we'll do the same thing that if order is not found so order cannot be found and then here what We'll do simply we'll do have it so do order do find by ID and update so pass the ID and then we'll pass the order status and then we're going to just return rise. status of 200. Json we do success will be true and message will be order status is updated successfully then we're going to pass this update order Status okay now let's
go to our order routes so we'll get our update order status and then we'll do a put and this will do update and we'll get the ID right so this will be the order ID and I make not explaining all this because we have done like I think 100 times we have done these things now okay so now what we need to do simply go to our order slice and then we'll create one more here which will be to update the status We'll copy this we'll paste it here the only difference this will be get
order details no this will be update order status okay so use the same and this will receive the ID so let's do one thing it will receive the ID and also it will receive the order status correct and here we need to do this on as put so this will be order SL update not details and then we need to pass our order Status that's it so this is done so now this should update the status but we need to check it that what is happening so copy this and now we are going to go
to our orders admin view then we need to go to our order detail and here you can see that we are having this button that we have created so here we are having this onsubmit which is handle update status so here what we're going to do we'll get the form data so first let's log this Form data here and we'll see what is happening save it and now let's open console and let's click here and here I'm going to go below okay let's do this one on the right and let's click on let's see in
process and update so you're getting status which is in process correct so now what we need to do simply we will get the status look con and we'll get status from our form Data and we'll just dispat here so do const dispatch which will be use selector State and we'll do state DOT so we have admin order oh sorry sorry what we doing not this we need to do this use dispatch so here we need to pass dispatch now we also need the order ID here so order ID will be able to get it easily
from this order details. ID so we'll do update order status and here we need to pass the ID so let's see what Are the things we need to pass we need to pass the ID and order status we'll copy this so This ID will be our order details. ID and order status will be our status then we'll do dot then and we'll see what we're getting in the data whether this is working or not so log here the data and I'll give 1 2 3 so let's save it and let's do 1 2 3 and
I'll make this one to in process let's update so getting Fulfilled and you can see order status is updated successfully now once this is successful what we need to do right we'll close this so we can close this model uh or we can update we need to obviously update this so once if this is successful what we'll do right if data do payload not payload do success if this is true so here we are going to dispatch so we do get order details for admin right so this will do and then we going to pass
this order Details. ID and also we do set form data will be initial form data so we just want to check what is happening here so let's save it okay so now let's refresh this and let's add do this one here open this one and let's try this one to in process update see it's going to the in process if I change this one to let's say delivered it's getting delivered right but here it is not getting updated So that is the reason I told you that now that time when we'll close this model right
that time also you need to F the list of orders to get the updated data so that we can do also so if this is successful right what we can do simply we'll do dispatch and we'll do get all orders for admin and this is only what we need to do if I now save this right and see what will happen so first I refresh this so here we'll be getting delivered Now let's say if I click here just to check and I'll do rejected and update it so rejected and see here also you're getting
rejected and this is done even if I try to go to the shopping View and let's say refresh this page let's login let's go to account see here also it's getting updated to rejected correct now what we going do obviously for rejected we can show some kind of red color or something right so that also we can do right uh so for that What we going to do simply let's go to our badge component so here only we can check if this is confirm this or else if this is rejected so do or else if
this is rejected then we'll do BG rate let's say 600 or else it will be like this okay sorry this will be here it will be this so now let's copy this part here okay so I'll copy this and we are going To use this in all the places so we have order details then we have orders also so here also you're using badge component so here okay so we need to we'll paste it here and this will be order item in order details so this is one thing and we we have done this one
for admin view okay let's see so you're getting rejected here also you're getting rejected also uh we need to do the same for our Shopping view so we'll go to our shopping view let's go to our orders and then we'll have our badge component here so let's paste it here first and also we're going to paste it in our order details of shopping view so here also you'll be having the badge component so here and this will be order details okay see if you click here you're getting for admin and also let's say for this
one I'm going to update This one to again rejected update rejected here you're getting rejected awesome now one more thing we need to do for the admin view let's go here and then when we are updating right will show some kind of toast not here we need to do it outside sorry my bad okay here so this will be equal to use toast and we'll show here Order updated so we do order status we can also render this uh message because we Are rendering the message right see it will work so we'll do if I
do message right let's save it let's see what is happening so if I go here and let's I'll do in sipping see we are getting it updated successful right let's open and let's update to rejected rejected and this is also getting updated awesome job so now this part is also done now what we are going To do now now I already told you right we have a part two kind of thing where we'll be doing some extra features and some bug fixes that we need to do so there are quite a few things we need
to fix and also some features we are going to add from this part also remember we have this dashboard now here we are not going to do much because main thing was basically our okay here one more thing we need to do see it's opening automatically right so here also we need To do when we'll close this right we need to reset this so what we going to do simply so for this one I think we are already doing I'm not sure why it is coming let's go to order and when we are closing this
you're already doing say reset order details but whether this is happening here every time yes it is happening and the reason is I think because order details is actually present so that is the reason so if we go to the order Details view let's go to the order details view let's log this order details go to console see order details is actually there so that is the problem so open this and close it oh it's not getting reseted this is actually weird okay let's go here let's see whether this is coming here or not so
we'll do reset order Details save it okay if I now open this and now I close it oh it's not coming here this is actually weird all right so the reason is I think here we are doing something wrong so it's not coming here but we have exported actually oh this will be accents that is the reason now this would work let's see so if I now open this let's update to in sipping okay now let's go here come back Now it's working all right so now I think this part is also done now let's
work uh start start working on extra features that we are going to implement okay again I mentioned that dashboard we not going to do anything we'll just render some orders here some recent orders or some pending orders and some like completed orders in card view but this is also not that much important before that we need to do quite a few features that we are going to implement From the next part all right everyone so now we have completed most of the things now let's I'll show you that what are the things that we are
going to do right so first we'll start with this uh fix and that is if you notice right will go to this homepage we don't have any options where we will be able to go to the all products page correct so we need to add one more menu item and there it will go to the products page so we'll do start uh simple things first and then We'll move to the other things so let's go to our config index and then I'm going to create one more here and let's give this our name as so
this will be products and this will be products and it will go to the listing page okay so let's save it and now if you see if I go here right if you see it's going to category products the reason is because we've added that logic so we need to fix it and I show you one More uh fix that we need to do and that is if I go to men see we getting category men and if I go to woman see it's not updating the reason is because we need to refresh this page
every time we we'll go from one page to another page the reason is it's not working because we are already currently in in the shopping uh listing page but in our header component we have written this logic so if I go to the shopping View and then let's go to header right so Have this see we are navigating but if we are already in that listing page how we are going to do navigate right so we need to update this so this part is the first fix that we need to do so how we going
to fix it so first thing is that we need to basically check that if this current menu item is not home and if this get current menu item. is not equal to equal to products because for products also we need to we don't need to do this one so this will be a first Fix so if I save it right so for products it will work if I go to home and then let's go to products it see going to the listing page and we don't have any filter applied so this is the first fix
but if I try to go to men see it's not working right so to fix this what we going to do simply we will take our location so we do const and we'll do location which will be use location so what this does this will give us the path name so in the path name we'll be Able to see whether currently we're in this page or not if we are already in this page we need to update it so how we going to check it will check here that if this location. path name do includes
if this includes already listing that means we currently already in the listing page and and so here we are going to check that if this current filter that we having is not equal to equal to null so in that case what we will do we will simply take our search SE PMS so we need to update the search PMS right this we already discussed so how we are going to do that so we need to take our search PS and we'll do set search params and this will be use St sorry use search params right
so here we need to update it so how we are going to do that so here we'll do set search params will be new URL search params and here we're going to pass it like this so we pass it This will be category so this will go to the category and it will be this gate current menu item. ID or else it will navigate so let's save it now see if I go to home let's go to product now let's go to men see this is updated but still we are not getting this data is
not getting updated if I go to woman this Omen is updated kids footware accessories if I go to products it's going to the listing page but this is not getting updated the reason is Because in our listing page also we need to fix it so if I go to my listing page let's go to our Pages shopping View and the listing page you'll see that we have added this logic here that on page load we are going to update it so you can see here we are updating on page load we setting the filter and
the sort but we don't have any dependency so now what dependency we need to give Whenever there is a change in this search param we need to basically update it okay so How how we going to do this so first we'll do const and here how we going to get it basically so you need to get it from your search pams correct so to get it from search pams here we already have the search pams so we'll take category search param and this will be your search pams dog and you need to pass the category
key and this key is this key here we are having this category okay and this Category search fors you need to pass as a dependency here and if you save this right now see it's working if I go to woman this is also changing go to kids go to footware accessories and if I go to products it's going giving you all the all the pages sorry all the products men it's working if also will be able to change it from here right and this is working fine if I go to home and then let's directly
go to accessories see this is updated and go To footware this is is updated so now this is number one fix that we need to do and this is very important now next thing what we are going to do we haven't done one very very important point and that is you remember in the admin view we have total stock of a product now let's say this product has a stock of 10 items available now there are two user is already bought 10 items and now I'm trying to have like buy this product once again so
it should give some kind Of error right that you can't buy this product this is out of stock so that is one thing we need to do the second thing let's say again uh we have for example we have a product stock of 10 quantity and we are adding this product to the cart so we need to check that how much product is left in our stock let's say five is left so if I try to add this one five times so it should work the moment I'll add this one to six means I'll increase
it should give you that you can Only add five items in your in this uh cart for this particular product and also I'm going to show some kind of banner is that uh only five items left only 10 items left something like that so that logic we need to do here we need to do in the product Details page and also we need to do in our cart page where we'll do this plus and minus so let's do this one in the next part all right so let's implement the out of stock functionality but the
the point is How we are going to implement see when we will give a order right so let's say uh this product this product I'm adding to the cart and I'm buying let's say two quantity so when the order is successful so remember we have one method right capture payment if you remember if we are doing this one continuously you know that we have one method which called capture payment correct so this one so here what we need to do basically when this method is successful right so Let's close everything else see here we are
doing payment is confirmed so when this is confirmed is user already paid so what we need to do whatever user actually buy bought for this particular product the quantity let's say five quantity so you need to minus that quantity from the existing total stock I hope you're getting so let's say this product has a 50 quantity in our admin panel and then user bought 10 quantity so we need to update 50 Minus 10 it will it should be the total stock would be now 40 so this is what we need to do here so what
we can do simply first thing we need to get our product schema okay so I'll copy this p past it here we'll do product and we will do here let's go to the model and we need product so now after this pair ID see remember we already have the cart items correct so this order has a cart item so From these cart items we'll be able to get the product ID so what we need to do right we'll do we'll do just simply a for Loop and we'll do let item of card Dot and if
you see here we have this cart sorry not cart we have order so we have order dot if you see right we have this cart items see these cart items and here we first we'll get the product so this product will be AIT so we need to find it right so we do product Dot and we'll do find by ID and what we need to pass so we need to pass the item this item that we are having having product ID because each and every will have a product ID if you see right so now
this will give you the product what we need to do first if this product is not found we'll do if not equal to product so we're going to return some error so return race. status of 44. Json we'll do a success as false and we'll do message so we'll do something like not enough stock for this product right and here we're going to do so take a template literals and we'll pass this product that we finding do title because each and every product will have a title okay or else if this is not the case
so we're going to get the product stock so we need to update the product stock so Do product this product that we are having do total stock so what we going to do we do minus and from where we need to minus it from the cart item quantity so each and everyone will have a quantity right so we'll do item do quantity I hope you're getting so we're updating the total stock from how much the user already ordered and then we'll do have it and we're going to just save it so do product. Save okay
and this is done now let's save it so how we going to check it right so we will go to a listing page first so let's go to listing page and let's do step by step so go to listing page and let's log here the product list okay so I'm going to log this one here okay save it now see what we getting we'll do inspect let's go below and we'll go to console so we're getting Arrow now what I'm going to do right let's order this product here new product we are having okay so
this new product we'll see how much this product has quantity total stock is 20 all right so let's add this product into our card okay so I'll add one 2 3 4 5 so it has 20 in stock right so let's go to our checkout page and let's click this and let's click on continue with PayPal so it will go here let's click on Continue okay there are some problem we need to do let's do try once again continue so Payment Processing payment successful awesome now if I go to products page what will happen we
should have 15 stock let's go there and now if I go to the last product right see total stop is 15 awesome right so now this is working so what we need to do we need to basically update this Some of the things okay so the first thing is that uh here right if any product is less than or less than or equal to five quantity or less than 10 quantity I'll do then I'll show like only 10 items left and then if any product has only zero in total stocks I'll show out of stock
and then I'll make this button disabled okay so this is the this is the first thing we need to do so first uh we'll go to our so which page Here and here we are showing this badge sale right so first thing here we'll do if so leave this product dot total stock so if this total stock is equal equal to zero so we'll s some badge like out of stock or else if this is less than 10 so here we are going to render like only 10 items Left not 10 items left so we
need to R Ender something like uh we'll take template literals I'll do only and then I'll do product dot total stock items left and I'll do for this one I'll do out of stock okay save it and if the product is out of stock then we we need to also disable the add to cut so here I'll do if this product do total stock is equal toal to Zero so I'm going to render this button or else will render this and I'm going to remove this part from here you can also do instead of doing
like this you can inside also you can do it and I'll remove this and I'll do out of stock and here we'll do opacity of 65 60 and I'll do this one as cursor not allowed save it now see how we are going to taste it first we'll taste it here okay so I'm going to close This let's add this so we have 15 nems left so we do 1 2 3 4 5 6 so added six now six we have here let's select this check out with P so now let's click on continue to
review order Payment Processing payment successful see what will happen if I go to products page see only nine items left right now what we are going to do let's add nine items see now we can't add 10 items definitely see if I try to Add nine items it should work the moment I add one Moree we need to show like only nine items you can add but that function we haven't implemented so that we are going to do for now I'll just simply add nine items only so I'll do 1 2 3 4 5 6
7 8 9 okay so go here we have 9 check out select this continue with PayPal click here so you're getting payment ID and payment is successful let's go here out Of stock awesome okay so now this part is done so out of stock is done what will be the next step Next Step what we need to do that part like you can see right here only we are getting only nine items left for this one only five item left so if I try to add here more than five items we need to show some
kind of error that you can add only five items also we need to when this is out of stock right we need to also render it here in The Details page the same thing We need to do it here also so if I if I have any items added in the card we need to basically so that you can add only five items or something like that so that part we are going to do in the next part all right everyone so now uh let's Implement that but before that we will do one more thing
right as I already told you that we need to also add that logic here in this Details page so let's go to our product details and here we are having the add To cut right so here so here also we'll do the same thing that if this product details do total stock is equal equal to zero sorry not zero then in that case we're going to render that button that out of stock or else we render this and we're going to remove this from here so this will be out of stock and we'll do this
on opacity 0.60 and cards are not allowed all right so this is done now Let's Implement that functionality like for example if this item is only five left and we try to add it so you'll get that like you can only add five items for this particular product so for this one we need to go to again the listing page I'll close everything else and we have this handle add to cut right and here we need to basically do the logic so how we going to do that first we need to check that how many
items are already added in our cart for this particular Item so how we are going to do that we'll get our uh cart items right from our state so let's take it here so do const cart items this will be equal to use selector of state so this will be state DOT so you have sof cart right that is our name and here we'll basically get the cart items so if I now let's say log this right here so let's log this cart items let's see what we getting so let's open our console And I'm
going to remove this now let's add this one so you can see that we will be getting the cart items here what is the line number 87 okay so first time you can see this is empty if I try to add one more time you will be getting this 87 and then you are having this items so here you'll be able to check it that whether this item is already added or not so first now let me remove It so now simply we'll do let get cart items so this will be this cart items do
items or else empty array and here we'll do if this get cut items do length if this is true so in that case we'll do const index of current item and this will be get cut items. find index so we'll get the item and here we'll do item do product ID that we are having this has to be equal to equal to get current product ID which is this one that means you able to Understand that whether this item is already added or not and if this index is greater than minus one right so what
we're going to do I think we don't need to check this because this has to be there if it is there so we'll get the quantity so we do get quantity and this will be get cut items of this index of current item quantity and after this we will simply check and also let's do like this if this item is added then only we'll do if Index of current item is greater than minus one then only we'll do this so we do get quantity and here we're going to check again that if this gate quantity
+ one if this is greater than the current stock of this particular product so what we're going to do right from this handle add to cut so here in this single product tile we'll go here and we're having this handle add to cut here I'm going to pass product. ID and Also I'm going to pass product do total stock so that we'll receive the total stock there okay so now what will happen I'm going to receive one more here which will be the gate total stock so if the plus one is greater than the gate
total stock that means what you'll not be able to add it right so only uh that much item you can add so do toast and we'll do title and title what I'll do like uh we'll do something like this Only this gate quantity quantity can be added for this item also we're going to give a variant which will be destructive and now obviously we need to return okay so here from here we'll return it inside this after this we'll return from here now let's see what is happening now if I go here right try to
add it so add okay I think we are getting some Error for sure or it's not working what is happening here okay I think there is some Network problem okay let me just change this one okay now I think this should work okay so now this is product is added let's see how many product we are having two I'll add three four and now I'll add five now see what will happen if I add one only five quantity can be added see if I try to Sorry if I try to add one more time you'll
be getting the same so here you'll be having only five correct now the same logic we need to implement ment here also on click of this plus icon and also on click of this add to cut now to click of this add to cut it is pretty simple we need to use the same logic so we'll go to the product details and if you see we are having this handle add to cut right so here also we going to pass the product Details do total stock right and then we are going to receive this so
we are I think we are passing it from here okay so here also you need to do the same thing so first we will get our cart items so we'll get it here okay and then we'll do the same logic whatever we have done here so copy this copy this part from here and here we are also going to Receive gate total stock so here I'll paste it now see what we've done so we've done again cart items then we'll do get card items. fine index has to be item. product ID if this is greater
than minus one so we going to check the quantity and then we'll return this one so if I now save this right and let's say I'll open this product only five items I'll add see we are getting here also the same logic but if we try to go here and let's say remove one and Then try to add let me close this so I'll add this is added now try to add one more time only five quantity can be added same logic we need to do it for this plus icon also so for this one
we need to go to our cart page cart items content see here we're having handle update quantity so here also you need to do the exact same thing so first again we will Take our cart items right and then we will check here if this type of accent is equal to equal to plus I remember we have given this one as plus only right so plus then only we need to check it so that time what we will check we'll check the exact same thing whatever we've done here copy this and we'll paste it here
now again first we'll get the cart items now index of cart item will be get cart Items. index this has to be this gate cut item we are having this do product ID the only difference will be it will be the product ID so here we need to do this one get cart item do product ID and then we'll be getting the index index is greater than minus one so we will be basically checking the same logic so let's do it plus and let's see what is happening if we do plus okay something is happening
here some problem I think some error let's See get total stock is not defined all right we also need to pass the gate total stock right so here uh we will have this cart item gate cut item will have the quantity I believe yes this one so you need to check the get cut items. quantity instead of total stock so first uh let's see we are getting here the gate quantity But no here we need to basically get the total stock of that particular product okay so how we are going to do that so we
can do something like this first we need to basically get our list of products so first we'll get the list of products okay so do con we do products list I believe we have product list so let's see here we have product list so we copy this and then we'll paste it here so we need we'll have the product List now here we need to basically get the this index okay so first we'll get index from here that what is the current stock of that particular product so look const get total stock which will be
this has to be this products list do find index so here we'll have the product so this has to be product do ID should be equal to equal to this gate cut item do product ID so this will be gate cut item dot product ID so this will give me the current product index okay so get Let's do this one get current product index and this will be index of current cart item let's change this logic so now here what will happen this current get current product index will give us the index of the product
and from there we'll be able to get the total stock so lons now get total stock and this will be product list of this gate current product index do total stock okay so here we'll be getting the gate total stock from the list of Products now what we need to do simply so now I'll check if this index of current card item is greater than one so you'll get the current quantity that is added in the cart so to get cart item of index of current cart item do quantity and if this is greater than
get total stock then we'll not be able to add it so only difference is that we need to get the current product stock here so now let's see what is happening if I go here and let's open this click on plus Okay I think we are able to add it some problem is there and this should not happen this part we need to check something is I think we have also rning but I think something is going wrong here so what we are doing let me first check one by one so if this is equal
to plus so it will come here do length index of current card item and get current product so product. ID will be get current item. product ID so we'll log here okay let's log This so to get current product index and get total stock and let's log it here also for now I'm going to basically okay let's do one thing oh sorry let's go to the card and delete this I'll go to products let's open this one no sorry let's add this one and now I'll go to console let's open our cart and here if
I try to add here right let's see what is happening we try to Add so we're getting four and then we are getting undefined so this we are not getting oh how it will work it will be total stock that is the problem not get total stock so it will be total stock now I think this would work let's see so three 4 5 okay awesome now it is working that will not be able to add it only five items can be added for this now let's say if I try to add this one this
part product is added now let's go here let's try to add 2 3 4 5 6 7 8 Nine only nine item can be added only five item can be added awesome see the only difference don't get confused the only difference what we are doing right first we need to get the gate current cart item why we need to get the gate current cut item because we need to get this quantity how much quantity is added second we need to get the total stock of this product so to get this only we have done this
extra steps so basically we're getting the G current product and from There we are getting the total stock and then we're seeing if this item is already added in the card so get the quantity so means get this five or nine and then we'll check if this 5 + 1 which is six if this is greater than the total stock which is already available for this product that time we're going to basically return this error okay so this part is done now what else we need to do I think almost everything is completed so we
are only seeing only nine items Left out of stock we have also implemented it here right in this page also I think if I try to let's say go here and add this one we're getting this also so now next thing what we going to do right we will be implementing our search page so in the search page you'll be able to search using anything like title let's say description uh category or brand and then based on that we are going to render the data so let's do that in the next part all right everyone
So let's uh uh Implement our search feature okay so first again once again we'll start with scratch and we'll create our controller first so because in this case we don't need to create our model because we already have our product model so let's go to soap and then I'll create not here so we need to go to our controllers so inside soap I'm going to create search Controller.js so let's quickly create so do const search products which will be as sync request response so we'll do try catch and here I'm going to log error and
we'll return raise. status of 500. Json success fals and message will be error all right let's export this module Do exports and this will be our search products so here we basically need our product right because we need to find it from our products so we'll do require and we'll go to model and let's go to product so how we are going to do that see for whenever we do search right we will search specifically for keyword the reason because we already have a category filter we also Al have a sort and Everything is working
fine right so here we will receive a search keyword so we give search keyword or let's give this on keyword only so do keyword and this will be request. params okay now here we need to basically check or validate that if this param is uh sorry if this keyword is if this is not string so you're going to return return error so do if not keyword or if this type of keyword is not equal equal to string so you're going to Return race do status of 400. Json so we'll do success false and we're going
to return a message that keyword is required and must be a must be in string format so this is the first thing and then uh what we're going to do after this we'll create our Rex so we'll do Rex so this will be our new RX expression and here simply pass the keyword and we need to pass the I so This is for your case sensitive okay this is the reason we passing here and based on this RX because we're already passing the keyword that we'll be typing we need to filter or basically create our
query so lons create search query so here we need to take a curly bracket and here we'll do or or means it will either check from the fields that we will be mentioning here so you'll pass a title so title will be our Rex right then we'll copy this then we'll paste it here four times so this I'll do let's say we are having description then we are having the category and then we having the brand now if you want you can also create others also it's up to you modify it based on your convenience
and after this we do con products or we'll do search results and this will be Our AIT so we do product. find and we need to pass this create search query that we have created that's it and then we're going to return raise do status of 200. Json so we'll do success will be two and message will be not message we need to pass the data so we do data which will be our search results sorry search product search Results all right and I think this is done so now let's save it and we need
to now import it or create our route all right so let's create our uh this model not model the routes so we will go to our shop and I'll create search routes.js so let's copy it somewhere I think we don't need to write everything so paste it here and Then we need the search controller okay and we'll do what is the name we have given search products so here what you need to pass right we'll do this one as so you need to pass the keyword because the keyword we are going to receive from our
param if you noticed here right this one so we'll pass here get and then we'll do keyword and we'll pass here search products and this is done so now let's Go to our server and we're going to import it first so we do soap search router and this will be from our search routes and here we are going to do app.use so we'll do API sl/ search and we're going to pass it all right so this part is done now we'll go to our slice and let's go to our sop and then I'm I'm going
to create here Search slice and let's create index.js so let's goly create so do con search slice and here we are going to first import it so do import something from so we do Redux toolkit and here we are going to do create slice so we're going to give a name so name I'm going to this one as same search slice and we'll pass initial state so what we need in initial State We need a EAS loading which will be false and also we need a search results which will be also empty okay now here
we need a reducer but for now I'll keep this one as empty and we need extra reducers so which will be Builder and here we're going to do builder. add case so we'll do here we need to create our casing tun so let me just copy it from somewhere so anything we can copy let's say this gate we'll copy This and we'll paste it here and this will be your get search results so what we receive we receive the keyword because keyword we need to pass and we need to go to search AP slop search
and then we need to pass this keyword here okay so this part is done now also you need to give here get search results so get search results dot not not okay we need to import a sing T So this do Pending so here we are going to get our State and we're going to do state do is loading will be true let's copy this and paste it two times so this will be fulfilled which will be false and state do search results will be your accent. pad. data so do accent which will be accent.
payload do data all right and now for this one also for rejected what we'll do so we do rejected and here we going to do this One as false and this will be empty so this will be our search slice and now I'm going to do export const sorry export default we'll do search slice. reducer and this part is completed so now what we need to do we'll import it here first so we'll copy this and paste it here and we'll do soop search slice and we'll do search slice and we'll do soop Search which
will be the search slice all right so now we need to basically create our search page also we need to create this okay I think we are logged out let me log in also add one more here that will be a search so what we can do right we you can also add it here like search on the right side that is also fine it's up to you but I'll add it here like search or something so uh what we can do simply let's go to Our config and here I'm going to add right it's
add at the end copy this and we'll do this one a search search and this will go to s/ search so I think we'll be having one more search now we need to First create the page because in the shopping view we don't have the search page so we'll create a search page so we do search do jsx and then let's quickly create this So we do function search I'll return div and we'll do search products uh let's make this search products so now we will go to our app.jsx and we need to definitely import
it so we will go to our shop View and here I'm going to add one more which will be my search page so this will be my search and this will be the search Products save it so now let's see if I click here and is going to the search page okay I think we need to we need to change this one okay but why this is all right I got it I got it the reason is because we also need to Whit list this in our header component so let's go to our header and
we need to also do not equal to search this should not be equal to search also so now this would work let's go to Home search it will be in the search page all right so now I'm going to create our structure okay so let's take div so we'll take a class name we'll do container MX Auto MD PX of 6 PX of 4 and py of 8 inside this we will take one more div we'll do a class name we'll do Flex justify Center margin bottom of Eight here we'll take one more div we'll
take class name we'll do width of full Flex item Center and here I'm going to render our input so do input and let's give some placeholder we'll give like search products let's say how this is looking first so we getting this one also we can give some class name like padding of we'll do PX of six not PX let's do a py of 8 or let's do six okay and after this we're going to take a button either we can take it on button or let's keep it on on search only I think that is
also fine so we'll do on search only and then what we're going to do right we'll take sub this we'll take one more div and here I'm going to render the search results here okay so now first we need To handle this input correct so we'll do const so we'll do keyword we'll do keyword and set keyword and this will be U state of empty and here I'm going to give uh we'll give a value which will be my keyword and so let's give a name name will be like Keyword and also you're going to
give one change which will be event and we'll do set keyword will be event. Target do value all right every so now once we'll set this right so we'll take a use effect and here we are going to check so we'll keep this uh this keyword as a dependency and we'll check if this keyword uh andent keyword. trim if this is not equal toal to empty and keyword. trim do length is equal toal to sorry if this is uh we'll keep this one greater Than three then we are going to dispatch that but before that
we also need to create our search params so for that again we'll take out search params and set search params and this will be equal to use State not use State this will be use search params and here we'll take a set timeout and we'll keep like 1,000 seconds sorry not 1,000 milliseconds and then we going to do set search PMS will be new URL search patters and here we going to pass this keyword right will be equal to this keyword that we are having also we also need to get our search results right so
do search results which will be equal to use selector and we'll do state and we'll do state DOT so we have sop search right and also you're going to take our dispatch Lon Dispatch which will be equal to use dispatch so now I'm going to dispatch this so do dispatch and I'll do get search results and here we we need to pass the keyword which will be this keyword now let's log this search results save it let's see what is happening so I'll search for title see we are getting something here and here we are
getting the sorry what is the thing that whether this is getting called or not let's see Okay I don't see any API getting called right so let's see what is happening here okay axio you need to imput see this is the issue every time I do this mistake right I don't know why so here we need to do let's say title so you're getting something so let's do a product see we are getting data here right so we getting five data awesome so now we are going to Render it so let's do it so we'll
do search results Also let's give a class name for this one so we do grid grid Columns of one for as we'll do GED Columns of two for MD we'll do grid call Columns of three and for large we'll do GD Columns of four and we'll do gap of five so here we're going to check if the search results and then search results. Length so we'll do search results sorry search results. map so do item and here we're going to do write The Shopping product tile or else this will be null or we'll do like
H1 and we'll do no result found and let's give a class name here so we do text 5xl font extra Bol and we'll do product which will be item so now we be getting this right you can see and let's search for Zara see we getting late awesome now one more thing we need to do whenever we'll have less than three right this one this will be less than three we will basically or not less than three for example when this will be empty that time we are going to basically reset this so to do
this one what we'll do we'll create a reducer and we'll do reset search results right and this will be State and we'll do state DOT search result will be empty and we'll pass it here so we do export const set reset search results will be search s. accents okay so here what I'll do simply we'll do something like this so here we'll do use effect and here we can we can basically keep it or we can do here also no need to do there and we'll do else if this is less than three so we'll
do dispatch and We'll do reset search results okay so if this is less than three then we going to reset it and then okay this one will be key keyword so let's do one thing and also we going to do sorry we are going to use this one here so let's see what is happening so if I go to there and then let's go to here now keyboard is fine this now what we will do right simply okay why this is coming like this Because okay I have kept it inside this div right we need
to keep it outside okay I got it so what we'll do simply we'll do like this cut it from here and we'll render it here if not equal to search results do length then we'll render this or else this will be null and here we are going to basically map it we don't need to give the Condition anymore so now let's do this we'll do Zara so get one result and we'll do Nike we're getting two if I remove this we are getting no result found awesome and now if you want from here also you'll
be able to do this on click it will open the details model and also hand add to cut that also you can do so for that one right we need to pass two things here that we have done we need to pass the handle uh this get product Details and also you need to pass handle add to cut right so let's do this one we'll go to the list page so we have the list page here okay and then what we're going to do we'll copy this handle add to cut functionality that we have done
so let's copy this we'll go to search and we'll create this handle add to cart but we need to import some of the things Right first we need the cart items so we'll copy this and we'll get the cart items and this will get from shop cart we also need the toast which will be use toast what else we need and here we also need we need to dispatch something right we need this F cart items also add to cart I think this will be fine and now Let's pass this add to cut here let's
see what is happening and then based on that we'll see right so let's save it so search for let's say Zara let's add here okay I think we are getting some error user is not defined okay this this again the same thing we have okay let me just paste it one more time and this will be state. o and this will be User okay so now let's search for Zara let's add product is added so from here also you'll be able to add also we'll go to the listing page we need to do one more
thing and that is we need to import this uh product details dialogue here if you want to render this details dialogue also right so we'll just render it here after this and create this open details dialogue and set open details dialogue so we'll do const this will be open details dialogue and set set open Details dialogue which will be equal to use state of false also we need to get the product details so product details we'll get from so do product details we'll get it from from sof products right so these two things we need
to do and in the listing page we also need to dispatch the product details so I think we are doing some dispatch product details let me See so this part right product details so you need to copy this and let's go here and we'll paste it right and then uh what else we need to pass we need to pass one more thing right here in the Shopping product tile we need to pass the handle gate product details yes so this is the thing that we need this handle get product details we need so we copy
This and we'll paste it here and then handle gate product details so we'll do F product details we'll get and handle gate product details this we have done two times so that's I'm not explaining multiple times you have the same so here we need to pass handle get product details and you need to pass it now see this will work see if I close this right let's do Zara click here see from here and you'll Be able to add it from here also from everywhere you will be able to do so let's 90 two Let's
Do products we getting five so this is also Done Right awesome so now almost everything we have completed now what else we left we left one very interesting thing and that is I know you all are waiting for and that is the review functionality so let's implement the review functionality after this all right everyone so let's start working on The review functionality now this part we are going to do step by step okay so I'm going to close everything and first we need to uh so there are quite a few things we need to do
and we need to modify some things also but before that first uh what we'll do right first we'll complete this review functionality here on the details page so user will be able to add a review okay and then we are going to render it here so first let's complete this part so here uh first Let's go to our model and here I'm going to create let's give this one name as review. JS okay so let's create this one so L const product review schema so let's import mongus so this will beire mongus so this will
be new mongus do schema and here what are the things that we need right so we need the Product ID that which product we are basically giving the review so this will be string we need the user ID which also will be a string all right then we need need the username which also I'll keep this on as string we need the message or review message let's keep this on review message and also we need the review value so this can be from 1 to five and let's give the name uh sorry let's pass the
time stamp as True so this will be our schema that we need now next thing okay so this will be number let's export this so we'll do module. exports and this will be mongus do model and this one I'll give this one as product review and we'll give this one as product review schema so this is done next we need to create our controllers so now here actually we need to do some things right We need to understand like how we are going to manage the review part so let's create our product review controller.js okay
so first thing we'll create two methods so one will be add product review so this will be request response so we take a try catch so log here error and then we'll Do race. status of 500. Json so this will be success will be false and message will show error okay and we need also our gate reviews right so we'll copy this paste it here and this will be get product reviews awesome so these two things and then we going to do module. exports so we need to do add product review and then then we
have get product Reviews okay now let's uh start working on the ad product now first we need all the things that whatever we are having here so we need the product ID username user user ID review message and review value so let's take all of this const this will be request. body and so here we need all of these so let's copy from here one by one okay so you need product ID we need user ID we need Username we need review message also you need review value right so this is done the second thing
what we're going to do first we need to find the order now why we need to find the order right because we can only allow user to review those products those products the user already bought previously for example let's say I'm a user and I'm currently logged in in my account and I bought this t-t on let's say two days back then only I'll be able To add a review or else like any user can come and then can review right and that should not happen like that so only the user they have actually bought
this product they can only review it so to do this one we need to First find the order right so how we are going to basically do it so we are going to find it using our order schema in our order schema we have our user ID so if you go here right let's go to our order schema you can see that we having user ID then we are Having the cart items. product ID so from here we'll be able to understand like whether the user bought that product or not and also we need to
check one more thing can you guess we need to also check the the order status was confirmed or not correct because if the order is not confirmed then they can they should not be able to add that review so these three things we are going to check so here I'm going to just do const Order and this will be for that I think we need our order schema so let me just import it so const order so this will be require then we need to go to our models and then we need to go to
our order right also need our review product review schema and also you need our product schema so we need product and this will be product I believe and then we have our product Review because we need to stored our review right and this will be our product no sorry I think we have given review that's it so these three things we need so now I'll do AIT order and so we going to do find one and here what we are going to pass right first we'll pass our user ID and then here we are going
to do cart items dot this product ID so because each and every cart items has a product ID this has to be equal to product ID And also you're going to pass if the order status that we are having if this is confirmed or not so look confirmed so then only you'll be able to understand whether the user actually bought this product previously or not if this is false so we are going to Simply return that something like race. status return return a 43 because this will be a forbidden uh request so here we're going
to do success will be false and we'll do Message like uh you need to purchase product to review it right that's it and then what we are going to do we are going to check if there is any existing review or not so if us are already given any existing review they will not be able to add one more review so do now check const check existing review okay so here again we are going To do a it so from where we are going to get it so we're going to get it from this product
review schema because in this product review schema we are going to find it like find one and then we are going to pass this product ID that we are having so based on this product ID and also we going to pass the user ID I I don't know why it's very slow the S is giving very slow here maybe my laptop is slow and here if this is true right if this existing user uh this check Existing user is true so that means we're going to return a 400 so return race. status of 400 do
Json and this will be success we are going to to return false and we'll do message like use you already already reviewed this product right and then we are going to create our new review so do const new review and this will be AIT we'll do Product review so here we are going to basically do uh sorry not a we doing new because we need to create right and here we going to pass all these so let's go and copy this all these properties that we are having right we need to pass all these and
we'll pass it here so this will create and then we're going to save it so we have it new Review do save now can you guess what we need to do if you can guess it I like congrats see when we'll update any product review right you remember here in this schema the product schema we don't have any review property but if you want to dis uh display the review here and as well as in this page also so what we need to do we need to update our product schema and we need to add
one more property for this individual product that that will Be review and to update that review what we need to do we need to whenever let's say I'm adding for this woman t-shirt the review here when I'll update this one right so I need to also update the review property for this particular product which will be my average review so I need to calculate average review here right so first we'll find all the reviews for this product that is having so have it and we'll do product Review. find and we'll pass the product ID okay
so based on this product ID you'll be able to see then we'll do const total reviews length which will be reviews do length and then we're going to do const average review and this will be we simply do review do reduce so we need to calculate the Average right so we'll do sum and we'll do review item or something whatever we can give and what we going to do simply we do sum plus here we'll do review item see it's very slow then this will give me review value remember we have this review value property
right and then what we'll do so this will give us and divide it by I'll divide by total review so what this will give you total reviews length so this will give me the average review Okay and now what I need to do I need to basically update my product schema see that is the reason I imported this product because we need to individually update the review here obviously now this will not work I'm going to show you why but obviously we need to we need this step so now we do a it product Dot
and I'll do find by ID and update so here we're going to pass a product ID and here we need to also pass the average review so we pass the average Review as a property here okay and this is done so now what we're going to do at the end we're going to return Ras do status of 200 I'm uh like 2011 I'm also repeating one more thing like if this part is not able you are not able to understand try to see this part multiple times because once you'll see that you'll see all the
dots are connected and each and everything is actually interconnected there is nothing like I have done new if you're uh like uh Seeing this video from first and data will our new review so at the end we're going to return the new review whatever we have created okay so this will be our add review add product review scheme uh controller now to get it uh so we are going to get it based on the product ID so const so we do product ID and this will be request do params so do const reviews and this
will be AIT product review because we need to get based on The product right so we do product review. find and here we're going to pass the product ID because this product ID we're going to get and then we are going to Simply return it so let's copy it from here paste it here and I'm going to pass a 200 and data will be my reviews and I think that's it so this will be my product review controller now I'm going to go to my routes and let's keep create our Review routes.js now let's go
here and let's copy from here instead of rewriting and I'm going to paste it here so this we need from our review controller so do slash so your product review and this will give me add product review and get product reviews so for adding what we need to do we give this one as add this will be post and this will be add product review and let's copy this paste it here So this will be gate and here what I'm going to do so do review SL and we need to basically pass the product ID
right and this will be getting from body that is fine so we do product ID and this will be get product reviews if you don't notice right it's very slow okay whatever let's go to server and let's copy this here so we do sop review router and this will be from SL so we'll Do review routes and let's go here let's use this so app.use SL API slop SL review and here we need to pass this sop review router so this part is done all right so now we need to basically go to so first
uh okay uh let's go to our slices and let's start working on the slice part so inside so I'm going to create one more folder I'm going to give This one as review slice and I'll create index.js okay so let's quickly create this so first I'm going to import it so do import from so we do Redux toolkit so we do create slice okay let me I don't know what is happening it's very slow create aing tang and now I'm going to create solons review slice so this will be create Slice so we'll pass a
name which will be my review slice I'll pass initial State pass a reducer which will be empty and also we need to buy the extra reducer because we need to create our Builders now here I'm going to create so do const initial state so this will be my ease loading will be false and we'll do reviews Review reviews will keep will be empty are so now let's create the so do builder. add case all right so here what we need we need to create the Asing T also so let me just copy it from here
so we'll copy this so we need to do two times because we have two methods one will be for get and one will be for post so we'll do add new Review or we'll do add review so this will be access. poost this will be review and then this will be add correct and here also we need to pass the data so we pass the data here that we going to receive here so this will be our add part that's it and then we'll be having gate reviews so this will be gate reviews and here
we need to basically pass The ID product ID right so this will be the ID and we are going to receive it that's it so now I'm going to do first for uh so let's do this one for G reviews. pending so we get state so we do state DOT e loading will be true let's copy this paste it three times sorry two times and we'll do fulfilled and this will be rejected so here this will be False and we need to basically get the accent so here what we'll do simply we'll do state DOT
reviews will be accent. payload do data correct and this you have already done multiple times copy this and we'll paste it here so this will be false and for failed it will be empty AR now again we no need to do anything for the page reviews because uh sorry ad review because once the ad review is successful we are going to call is get Reviews this logic we have already discussed if you want to manipulate the state here then you can create those add cases also so this will be review slice. reducer now let's go
to our store and here I'm going to import it so let's import it here so we do s review slice so this will be from uh review slice and here I'm going to do sop review so this will be sop review slice all right lot of things we have Done so now uh we need to start working on the review part okay so we need to go to the details page definitely so first we'll go to The Details page and here the first thing what we are going to create right we need to create a
rating component and that we're going to create inside this common because that will be common component so here I'm going to create a star rating. GSX okay and now let's close everything else for now so we'll do function so we Do star rating okay component and here simply we'll return because we'll have a value from 1 2 3 4 and five right so we simply map it so do star and here what we going to return we'll return a button and then here what we'll do so I think we are using some variant one minute
I think we are using some size equal to Icon or something right so here we're going to copy this to variant ghost and Size icon or let's use variant outline so we use variant outline and also I'm going to use size equal to Icon okay that's it now inside this I'm going to basically render the star icon from this icon package and here for now we are also going to receive some property here okay but for now let's keep it like this what we need to do Simply we need to go to our Details page
right because we need to manage some of the things so we'll go to our Details page and if you remember we have this we click here right we have this WR review component so we need to go to that place so if you see right below so here so what we are going to do simply here we'll take a margin top of 10 and we'll render a label here and I'm going to do write a Review okay inside after this we're going to take a div so we'll take a class name we'll do flex and
uh let's skip it like this and I'm going to render the star rating component let's save it and let's see what is coming here okay you can see it's coming like this we need to give the styling and everything but first of all we need to give a uh this Flex column here Okay so you're getting this and after this we'll be having the input and the button but now first thing we will go to our start rating component and we need to give some styling for this we give a class name for this so
here I'm going to use padding of two we'll do rounded full okay we'll do Transition colors now what we need to do right here So for of a say save it and let's see how this is looking you can see that it's coming like this so this will receive two things the first thing it will receive a rating component or basically the current rating component let's say if the current rating component is three so these three will be selected something like that so it will receive the rating component and now what we'll check right here
if the star that we are having which is the Current star or current index you can say not index the value this value if this current star is less than or equal to the rating property that we are having so in that case we're going to give some color here so let's give a text yellow which will be basically selected of 500 and on Hover I'm going to give a BG of black so this is first thing or else what we're going to do here we'll do text as Black right hover I'm going to give
BG primary and on Hover I'm going to give text primary foreground so you can see this is coming right on this is okay now also we will need to give something in our icon also here so we give a class name so here also we are going to give so let's give a width of six height of six and here also we going to check the same thing if the star current star is less than or equal to Rating then in that case we'll do fill yellow 500 ORS we do f as black see okay
so now see what will happen right if I go here and let's say I'll pass a rating value of three and save it see these three are selected now all right now this is done so now I'm going to for now I'm remove this now we need to take some state to manage This input so I'm going to take a name so this will be my review message remember so this is fine and value also I'm going to give although you haven't taken I'm going to take it review message and on change so here I'm
going to do a on change and this will be event so this will be set review message which will be event. target. value okay so now let's take this state here so will go up and I'm going to take it here let's Take it at top so do const review message set review message and this will be US state of Mt so this is first thing the second thing what we're going to do we also need to do a uh handle review sorry not handle review we basically need to manage the current review property right
current review property means whenever we will basically click on this review we need to basically get the current value so For this one we will receive one more property here which will be like handle rating change and here what we're going to do simply we'll take on click on this button and here we're going to pass this if this handle on change sorry handle rating CH is there so we are going to basically pass the handle rating change of this star the current value or else this will be null so here I'm going to do
handle rating Change right and this one we are going to pass it from our component so here what we're going to do let's do something like this we'll take one more so L const rating and we'll do set rating and this will be uh we'll give this one as use state of let's give this one as uh zero right and then sorry this will be rating and then we are going to create this so do function handle rating change So we do not here let's create here so function handle rating change and here I'm going
to do set rating which will be get rating so from this where get rating will be coming this will be coming as a input here because we are passing this star okay so now let's go here and then I'm going to pass it as a prop so I'm going to pass this rating as a rating and I'll pass handle rating change as handle rating change now let's go here and let's Click okay something is going wrong here is it let me check what is the problem okay let's see what we getting in this rating component
this is actually weird but we are passing the handle rating change right let's log here get rating what is coming here I think we have done something wrong here See we are doing this part that is the reason now this will work see okay so now this is fine so this is working fine see all are selected if you selected only this part is selected also if we want we can do something like this so we'll go here in this product details where we're rendering the star rating so here I'm going to give a gap
of let's give a gap of two let's see how This is looking based on that no it's looking weird let's give a gap of 0.5 sorry let's close it and if I give one how it will look okay so now this is fine so once we'll save it so we also need to get the review value correct so here we'll pass a disable property that if this uh review message. trim if this is equal to equal to empty So right then it will be disable see now we are getting this one right we need to
fill some value and after this we also need to take an on click so this will be handle add review so now let's go there and let's create this Sol function handle add review so what we'll do we already have I think dispatch so we are going to dispatch it right so dispatch so we need to dispatch all the Properties that we need to pass so we need to pass quite a few things correct so here we uh dispatch add review and we need to pass the product ID and everything let me just copy it
from there in my model so we'll go here and let's copy all this because we need all this and we'll pass it here so product ID will be our product details that we are having do ID user ID will be user. ID this will be User do user us name right then review message will be our review message and review value will be our what rating that's it and then dot then we are going to again log this and we'll see what we getting in this data and let's save it so now let's open our
inspect let's go to console and okay so I'm going to give a five star and let's see I'll give awesome let's go To our Network Tab and let's try to click on submit okay this is actually not calling that API is it uh I know what I've done wrong I know you all will be laughing so the problem is I think I haven't installed axio I'm 100% s let me just check once I think I haven't in I see I know right so let's see so okay this will refresh definitely so now Let's do it
like this open and I'll do I'll give a five and I'll do awesome let's add we are getting for V so I think we haven't you need to purchase okay so now if there are any error we are getting so I think let's see in our console so we are getting rejected and we getting a payload is undefined and we are getting a error and in The Meta what we getting if you notice right we have rejected Value everything but that is fine the main point is now I need to check that which product I
bought previously so let's try with this one I first need to check the property okay and also when you'll close this we need to reset this this is also very important so let's go to first let's first complete this one because handle dialog close here we need to reset this we do set rating will be zero and set review message will be [Music] empty so we close it open it so now we don't have anything let's give five and I'll give awesome and now I'm going to do submit we are getting a okay still it
is saying you need to buy all right so what I'll do let me just buy a product let's refresh this I think I already bought it something is going wrong here I'm not Sure let me let me buy this one this test two add this let's go here okay let's delete this so do test two I'll select this go to check out with PayPal let's copy this paste it now click on continue okay so this is done now I already bought it right so if I go to my let's say account I already have confirmed
here so now let's go to here let's open this if we got error here Then I think we have some problem in our controller that we need to check but now I'll do five star and I'll do awesome I submit see okay we are getting error and then there is some problem so the problem is that you you need to buy it need to purchase this product yeah I know already that there is some issue so you need to check let's go over there sorry we have our product review controller and problem is coming here
so let's let's check what is coming Here also we need to check what we passing in our payload so passing product ID review message review value user ID and username okay everything is correct only now let's log it here the order so let's save it and then I'll open this one let's go to server and let's try to submit we're getting null here if you notice right so so what is the problem Here all right everyone see the problem is after spending some time see we are passing this data as a form of object which
is wrong so here we just need to pass the data or basically let's give this on name as form data so it will be easy to understand so this form data we're passing here right so that is the reason we are having that particular issue now let's do the whole process once again so what I'll do right let's buy these products I'm going to add this One product is added let's go to checkout Let's uh click here continue with PayPal copy this now let's to continue to review order okay so now I think we have
this product already reviewed now let's go open this so now let's go to network okay and let's give a f and I'll do awesome let's submit Awesome okay so now we are getting the data so this is is working fine so what we going to do so if this is successful so this logic we have done in the product details that uh where is this this one that if data. payload do success if this is true so we need to again fetch the list of products so we do F dispatch gate reviews and here we
need to basically pass the ID so we do product details. ID and also we render a toast Like title that review added successfully okay now let's save it so now we need to get the reviews so we'll get it easily so we'll do reviews from our estate for this product right now also on page load we need to get it but that I'm going to show you how we're going to do that so we'll do s review page load how we are going to do It right so when you'll open this model that time we
need to check if this product details is available or not so we'll do use effect and we'll keep this product details as a dependency right and then we'll see if this product details is not null then I'm going to dispatch this get reviews so then only I'll get the reviews and I'll pass the product details. ID okay and now let's log this reviews For this product and let's see what you're getting save it so let's close it this will not work now I'm going to open this okay we are getting empty that is weird actually
but if I go to network that time it should call right let's see what is happening here okay this is I think we have done something wrong again let's go There see we have to do this on review so now let's see what is happening now let's open this let's go to console and now I'm going to open this one we are getting one review right that's it now we are going to replace it we don't need all this Dy data so what we will do simply we will go here what is that uh this
part right we are having this G one GID gap of one no no no not This part here this part we need to we need to replace so here I'm going to do reviews sorry reviews and then reviews. length greater than zero so we're going to do reviews do map we'll do review item and then we are going to ORS we'll do we'll render no reviews or something right so we do no reviews and here we are going to basically copy this and then we'll paste it here and we're going to change it so First
of all we don't need this as this will be what this will be this username and then first letter I will take okay so I'll do review item do username and then we'll do first letter that's it and we'll do two upper case and here also we'll do review item. username so do review item do username and here we don't need to render this anymore we'll render the Star rating component correct and what will be the rating value rating value will be this product rating that we have given this review value right so this will
be review item do review value and we can remove all this and this will be the review message so do review item do review message that's it now we can remove both from here and let's see what is happening save It see we getting one right now I'm going to open let's copy this from here I'm going to open it paste it now let's log in with a different user sign up go to products and I'll buy the same product okay I think we already have I already there are some is there okay let me
do one thing I'll go to register I'll give one more suam 4 no let's give John John One do John
[email protected] 1 2 3 4 5 6 sign up so we'll do John one and then we'll do 1 2 3 4 5 6 sign in go to products so okay I will add add this one to cut let's go to check out we need to add a new address we'll add here only then we'll add it then we'll select and click on Continue with check uh PayPal so let's give our dummy information here so I'm
going to copy this and then we'll copy this one and login click on continue to review order successful now let's go to our account page see we are getting confirmed and details and everything now we'll go to this product and I'll add a fourstar and we'll do Review from John good okay let's submit this see we getting this also you need to reset this once we separate that I'm going to do so now we are getting three and then what we'll do simply we'll go here and then I'm going to close and open this product
once again so you're getting from John one right so now we need to do that so once we save this right so let's go there so once we'll save this we we need to reset this So do set rating will be zero and set view message will be empty because we need to reset those two things all right remember we need to do one more thing so whatever reviews that we'll be receiving we need to calculate the average correct and that I don't want to write any more logic so we already have some logic in
our uh review uh this controller let me pause it all right so in our product review right you remember we have this we have return this logic to calculate The average I'm going to use the same so what I'll do right I'll copy this part from here go to product details and then I'm going to R uh basically calculate it average review this total reviews will be these reviews that we having do length and here we're going to do if this length is greater than zero then only I'm going to do it so do reviews
and then reviews. length greater than zero or else I'm going to do this one as zero and this aage review I'm going to Pass it here okay so now what we'll do simply uh we have this component so here I'm going to call the star rating component and we'll pass the rating which will be our average review and we can remove this from here save it see also this value also you can change like value will be this average review that we are having okay let's make this one two fixed of two That's it awesome
job now let's open one if we don't have I think this will have five this also have five this has only one okay this I think I tested all this all right so now the review functionality is completed now I will give you one homework for you so you remember when we updated the order right so we added this like for this particular product schema we also add to need to add that uh review value and based on that you need to update so There is one way of doing this second way I will show
you one more thing when we are doing this uh product controller we are having right so in the product controller when we fetching the list of products here what you can do you can basically get all the reviews okay and then based on the products you can basically return the reviews and then here what you can do whatever ID this product is having you can basically match it from the review product ID Because both will match right and from there we'll be basically getting the review for this particular product but that is optional but the
main thing is that here the product review is basically completed now next thing we need to do quite a few improvements okay the first thing is that I'll show you if you see that if I try to go to the homepage see what is happening right see this is a not problem but this this page doesn't exist right so we need to fix This so how we going to fix it right so let me show you so first uh we need to go to our app.jsx so as I already told you right that we will
be having a part two where we'll be doing some kind of improvements and modification and those things so here uh inside this right I'm going to add one more route okay and this in this route I'm going to give a path which will be slash and in the element here what I'm going to do so I'll copy this and pass it uh this check O and I don't want to pass anything here now I need to write some logic in my check o component so what I'm going to check right so here first I'll check
that if the locus and that currently we having in path name is equal to equal to SL means if in this page and then what I'm going to do if the user is not authenticated so what I'll do I'll redirect the user to the login page I hope you're getting right else what I'll do based on My role I'm going to redirect so if the user role is admin it will go to the admin page or else it will go to the shopping page so this is one thing and if I now save this now
see what will happen see it's going to the shopping homepage and that makes sense because if I now log out and try to access the homepage see it will be going to the going to this Au login page and if you just now log in and then try to go to this Page you will be in the shopping homepage okay so this is one thing and if I now log out and log in with my admin user sign in and try to go to the homepage you will be going into the admin dashboard page okay
so this is one interesting uh not interesting like one thing I want to do the second thing is that I want to do one more thing and that is let's go to our uh so here I want to show some kind of item like how many cart items that we Are having so that is another thing we need to do so to do this one we will basically go to our components header and then we having the cart icon here right so let me minimize this one a little bit so here we are having the
cart icon and here we having the user cut so what I can do right here the first thing I give a class name for this button and I'll give this one as relative and here I'm going to let's add Anywhere like I add a span and I'll give this one as so you're having card items dot items do length okay save it so let's see what we getting not sure if we are getting anything here or not or I added in the wrong place I added in the seat component I got it so I need
to also add it one minute but it should come right here let me check so if I go Here so button and then okay what is the problem here correct these items cannot be found so that is the reason I've given this but it's not coming any okay let me just add one item here let's see what is happening okay now we are getting because we don't have anything right okay I got it so here I'll do like either this or I'll dis uh render zero here okay so now if I just go here and
delete This so we'll be getting zero so now let's do one thing so let's see how we can make this one correct so we'll give a class name so we'll give absolute and we'll do top zero and we'll do write zero okay and we will do text Excel let's do uh small only top let's make this one I'll do in minus let's do like - 8 BX let's see let's do Five okay and right also I'll do 2px okay and we'll do font extra bold let's make this one bold only okay I think this is
fine let's add it so two items three items and this is getting updated because we have the items right so we have only four items not the quantity so this is correct next thing I want to also want to do one more thing and that is is let's go to check out and here I want to show some kind of loader and also you need to show the Selection this is also very important so for this one we need to go to the address card and the first thing here I'm going to give a class
name sorry we'll do class name I first I'll give here cser pointer so that is the first thing we need to give here and also here we're going to do something like this so we'll do here uh we'll do selected ID so this we are going to pass from our parent component And we will do here that if so or not here let's do it in the card content so here I'm going to do if if this selected ID that we are having is equal to equal to address info do ID so I'm going to
show some kind of what we'll do right uh we'll do a border let's do a border black what else we'll do empty let's see how this is happening what is happening Here so if I just now go to the checkout page let's go to our checkout page because we need to pass it from there checkout page and then from here we are going to pass that so we passing this address right so we'll pass the selected so let's go to the first go to address so this will also receive this selected ID okay and this
I'm going to pass in my address card so do selected ID will be selected ID and here now I'm going to Pass the selected ID which will be current selected address save it okay okay we are not getting anything but let's see what is happening here so first we'll go to our address card and we'll log this here so do console.log we do selected ID and we'll do address info do ID both we'll check I don't think we have address info. ID right I think we are having so we are having this both are same
right All right so here now what we'll do right so we'll simply check with this selected selected ID do ID equal to equal to this address info. ID okay so this thing we are going to do and I think let's see here what how it's looking if I give border red 700 here save it okay we getting like this so we'll simply do this so we'll do if this selected ID dot ID if this is equal to equal to address info do ID so if this is the case we'll do border red let's do 900
or else I'll do border black okay let's do once so select this one so you can see we're getting this one and also uh what we can do we'll give this one as border let's do 4 PX or let's do uh 12 PX we change this one uh it's looking very weird let's do only 4 PX okay I think this is not bad okay so This will give also you're going to show some kind of loader in this checkout button so that is also very important so to do this one right what we going to
do let's go to our check out page shopping view checkout page you see we have this one one state we have here if you remember is payment start so when this payment will start right we'll show some kind of like processing payment or something like that so L payment start this is true we do Processing Paypal payment or else will render this one right see what will happen if let's delete some of the items and let's say I'll select this one and let's click here see processing we are showing and then we'll be moving to
this one awesome right okay so let's complete this order also See once let's click here so payment is successful now for this payment successful also we'll give some uh little styling we don't need to give more but what about this uh payment return we have done right this part at least so we'll do this one sorry copy this and we'll do use the same here also and then uh what we're going to do right uh we here we'll render some kind of class Name and we'll do text for Excel let's import all this okay and
we need to do here payment successful successful right and then after this we will render a [Music] button and we'll do view orders okay and then we will take on click so use navigate and we'll do on click and let's do a navigate to/ sof Slash account also we will give a class name so do margin top of five okay for this one we give a class name p of let's give 10 right and for this one for this class header will give a p of zero right so it's going to this page awesome so
I think we have almost completed everything one more thing we want to do that is also very interesting search page and everything is also Working right so let's check once yes so everything is working fine so we need to complete our admin dashboard now here we are not going to do much so I I thought it will be interesting right if we will implement this header image we manage from our admin page so let's try to implement this one in the next part all right everyone so let's finish this with this one interesting feature that
we are going to do right so in this Dashboard say you can do lot of things like you can render the latest products or latest orders and based on that you can manage but here what I'm going to do uh we will be having this thing so on click of this you're getting this upload image right so in the dashboard we'll be able to upload some images and those images will be rendering in this homepage so that we can basically manage what to show here so for this one right let's close everything else and I'm
Going to go to the admin view let's go to dashboard and now also you need to open the okay 1 minute let's go first we'll go to the dashboard page I'll close everything else and also we going to open our products page because some of the things we're going to reuse okay now let's go here in our model and we going to create one more model which will be I'll keep this on Sorry so here I'm going to give this one as for example model and then we'll give featur features okay so we do feature
do JS so now let's quickly import it so do mongus equal to require mongus and this will be very simple for now at least we'll do feature schema which will be new mongus do schema and here we don't need to pass anything we'll be only having our image which Will be a string and here we're going to pass a time stamp will be true now we do module. export so we'll do mongos do model and we'll do here feature and we'll pass the feature schema okay save it now let's go to our admin controller and
I'll do feature controller.js okay so first we need our feature model so feature will be require so we'll go to our Model and then we are going to go to our feature feature now let's create so const add feature image so this will be as sync request response we do try catch so we do log this error and after this we going to Simply do race okay let's copy this instead of writing I think this will become very Boarding we'll copy this paste it here and the same thing I'm going to do it for get
feature images so look get feature images okay so here what we'll do simply get our image so Lon get image and this I'll get from request. body and simply we just need to save it okay so L const and let's go here let's go to our products controller so you can see that we are doing this newly created product so we Do const what we'll give like we'll give feature we do feature images so do new feature right and here I'm going to pass this image and then we are going to Simply do a it
see how slow this is we do feature images do save and then at then we're going to do race. status of 2011. Json so we'll do success will be true And data will be this feature images okay so for this one this will be more than enough and for G this will be also very very simple we don't need to give any condition or anything so we'll just get it so get images we do images and this will be AIT so we'll do feature because we have given this name right so we have feature dot
Find and then we'll simply return it copy this and we'll do this one as 200 this will be true sorry this will be true and here we are going to pass the data which will be our images that's it and here we'll do module. exports so we'll do add feature image and we'll do gate feature Images and I think that's it it now here in this case right see this add feature image we going to use in the admin view the gate feature image we're going to use in the client view so for this one
we're going to add some common route okay so this is just to give you idea that you'll be able to create some of the common route also that will be used from in both the places so here I'm going to create let's give this one name as common and I'm going to give this one As feature routes.js and let's copy it from some place and we'll paste it here so here we will do I think this part we have added in the admin view let's I think we have done some mistake let's do one thing
let's create this controller also in the common so we do common and then I'm going to move this feature controllers into this common folder Okay so that we'll basically import it from there so here what I'll do so I'll do SL CL and I'll do common and I'll do then feature controller and here we'll be having our add feature image and get featured images so for this one we'll do add simple and for get it will be get this will be pretty simple that's it so now let's save it and now we'll go to our
server.js and let's import it here so I'm going to import it so what I'll give name right we do common feature router and here I'm going to import it so do routes common and then I'm going to import it from feature routers then here we'll copy this and we'll paste it so this will be API / common SL feature okay and I'm going to give this on Common feature router that's it so now what we need to do the cloudinary upload function it is already completed we have already done in the uh while adding the
product so you're going to save that image Cloud inary will get the URL and we'll save it once we'll save it we'll come to this homepage and we are going to F this images and based on that we will'll show it okay so now what I'll do I'll go to the dashboard let's go to the product First and here are some of the things that we need see the first thing we need this image URL the uploaded image URL and image loading State all three things so I'm going to copy this see I'm not writing
all this okay this will take so much time again this is video is already very long and here what I'll do simply so the first thing is that we need to import that product image upload right so here we are passing all this I Copy this and I'll simply pass it here so let's give H1 and I'll give this one upload feature images and then paste it here okay so we we will basically EAS edit mode we'll remove this for now we comment it out and we are having all this data so also we need
to import it so now let's save it let's see how it is looking okay so you're getting this on Upload image and this I think we can remove this part also for now okay so on click of this we'll be able to select images so what we going to do if you go to this component right I'm pretty sure we have already handled all this like it will basically see what will happen it will upload and then it will give you the uploaded image URL so we don't have to do anything so that is the
advantage of managing all this in this common component so what will Happen in this uploaded image ordl you will be basically getting it see if I now log log this one right but the problem one more thing we need to check and that is that where we are calling this API so here what we are doing in this uploaded image URL whether we are calling that API here or not in this parent component so if you see right here we are having this this image let me check where we are using this Uploaded image URL
see here we using that image we are passing okay so in that case this uploaded image URL we should be getting here for sure okay so now I'll do we'll check this what we getting go to console paste it here and now I'll open this and let's basically save this one so we do [Music] open we should get this I think this size will be little more see we already Got the E awesome right so now once we'll get this e so we can basically uh once we'll get this Ur we're going to call that
API okay so what we'll simply do we do or let's do one more thing we can do one more thing we can keep one more button here that upload I think that will be much better so we'll do button and we'll do upload and then uh let's save it let's see how this is looking Okay and I think this is in between because we given this styling I think there see we have MX Auto that is the reason it's coming like this okay this also we going to handle so in our image upload component I
think we have this uh class name here right so what we going to do simply we will rewrite this class name right so what we going to do basically we'll do some some prop we'll pass here so let's do something like This that is full is custom styling something like that this is true so in that case we'll do with as full okay or else I think with full is already there we don't have to do anything and if this is custom styling then we are going to keep it empty or else we'll keep it
like this MX aut and everything so if I now get this custom styling and I'll keep this one as false by default save it and from our Dashboard I'm going to pass this one as true see now we're getting full width and also we'll give some class name here we'll do margin top of five and width as full okay so now on click of upload we are going to upload that image so do on click so do handle upload feature image that's it and now what we'll do simply we'll do function handle upload feature image
and What we'll do simply we'll take our dispatch so con dispatch and we'll do use dispatch and here what we're going to do we do dispatch and what is the name that we have given we also need to create our slices right that we haven't done okay so let's quickly create the slices also so in the store I'm going to create one Common and let's give this on name as sorry where we have created okay common and then inside this I'm going to create let's give this one name as common slice and we'll create index.js
so now uh I'm going to use some other already created okay not going to write everything from scratch so let's copy all this and paste it here now we'll change Something like first we have the E loading and we have the feature image list okay so we'll do this on get feature images so this will be we'll keep it like this and this will be a.get so this will be API SL common slash feature and then we'll do SLG and this will give you the updated data all right so after this we'll create one more
which will be to add right so we add feature image so we'll give the same name so This will be post and here we'll get the image right and what we're going to do simply so this will be I think feature SL add and we're going to pass the image okay so let's save it so now this will be our common slice and name will be common slice we don't need this part here so extra reducer will do get feature images. pending get feature images. fulfilled here this will be our feature Image list and this
will be dot sorry get feature images do rejected so featured images will be empty and here we are going to do this one is common slice okay so now let's go to our store and let's import it so we'll do common feature slice so this will be from common slice index I think we can do only common slice so we look common Feature right we look common feature which will be common feature slice so now okay let's login First once again so what we going to do right so first uh let's go to our dashboard
component and now we are going to basically call that what is the name uh add feature image okay so we do add feature image and we're going to pass the uploaded image definitely and we'll Do dot then we'll do data and I'm going to log the data and we'll see what is happening whether we getting any error or anything let's save it and let's upload let's upload uh which image we can do we can do this one let's do this one open so this is uploaded now we'll click on upload we're getting 500 all right
Some error occurred but what is the error feature image is not feature images is not defined okay I think in the controller we are getting some error let's go there okay we given features images that is the reason okay we do feature images now let's save it now let's try one more time okay let's refresh this now let's upload this One now let's click on upload so we're getting 200 and we're getting the data but here we are not getting the data back okay 1 minute no I think okay this is fine this is okay
we need to check what we're getting in this uh this images list so we have this images list right feature images list so this copy this and here I'm going to get it so let's do this in con feature images list this will be equal To use selector and state we'll do state DOT uh common feature right we have given that is the name that we have given common common feature so do this on common feature and then on page load we're going to call this so use effect and I'll do dispatch and I'll do
dispatch of we'll do get feature images and now let's log this feature images List save it what is happening let's give some command here see we are not getting the URL that is extremely weird actually I thought that something we have done wrong here again okay let's see I don't think we are getting this image here right let's see what we getting in this image okay okay let's see this one first so let's open once and then upload let's say this One open now we'll do load see we are getting undefined why is that why
we are getting undefined oh my God man don't tell me like I have I have forgot to import the AOS is it I don't think then I think something we are doing wrong here okay okay this will be in the object I think this is the problem is it let's see I'm not exactly not able to get it my mind is Now not working okay After doing this many things now let's open this one let's see open and now I'm going to do upload go to console now we are getting the URL but if I
refresh this page okay for third one we are getting ordl now okay some something was wrong in there because this I always get like I'll do some mistake like because we need to pass as a object right so we need to this is a single property so we Need to wrap inside C brackets so now we are getting this image so this image we are going to basically call from our you uh like homepage and we are going to render it okay so let's do that in the next part see what I've done right I
just deleted those two that incorrect data we added so now let's try to add one more and we'll see how so for now we'll be getting only one if I refas right we're getting only one now let's add some more so I'll add this One and let's try to upload I think this is successful and now I'll be getting the data right and if I let's go here also one more thing we need to do after this is successful right once the adding adding is successful that time also we'll fet it just like we have
done so do if data do payload dot success if this is true so we are going to F this okay so now here we don't actually not That much important to render the image but let's do it I just want to show because in the admin view it's not important but you can do one thing like you can also implement the delete functionality like you'll be able to delete the image I'm not doing that because we have done multiple times just create a delete controller and try to delete that image that's it so here what
I'm going to do right I will just map this feature image List so we'll do feature image list sorry feature image list and Dot length if this greater than zero so we'll map this so we do feature image item and here let's do one thing let's render a div all else will do null and here we don't need to do anything for now we'll just render the image and I'll just render the sours which will be my featured image item dot I think we are having Image save it I think we are getting something right
we are having image uh let's refresh this I think we need to give some styling here so let's copy from this uh product tile that we have created in the products right we have some styling uh admin product tile and here what I'll do I'll simply copy this part whatever we've done and let's go to our dashboard and we'll paste it here the Only difference is I'll change this Source here to these sorts okay and let's remove this from here okay but the E image e is not coming okay so this will feature image item
see we getting the image right but that is fine but let's give a class name so we'll do Flex Flex of column gap of four and we margin top of five so I just want to check whether this is working or not now we don't have To do anything here we will go to our homepage right so let's go to our shop and then home and here I'm going to dispatch that so because we need to render it in the homepage correct that is the main idea so we'll go to our home and let's take
this state here in our home I know this is becoming complicated and I already told you that this will not be that much simple project right and then we are going to dispatch it correct and we need to import this one So now what we'll do right here we have slides so instead of slides we need to do this on feature image list and then feature image list. length greater than zero so we do feature image list or else we will show null so let's save it and I don't know what will happen let's go
there okay let's close this okay let's refresh this okay Source will be slide do image that is the reason it's Not coming see now we'll be able to manage it from here see also we can change this one to let's say 3,000 so let's refresh this okay now let's add one more image so we'll go here and then we'll image this one sorry add this one upload so this is added here now let's Go here and refresh this page so now it should have three see okay so I'll add some more okay so that it
will look nice okay let me just we can also reset this that is also fine once we'll submit right we need to reset this one okay let's do the that also because we need to reset this image file and uploaded image URL set image file will be null and set uploaded image URL will be empty so now let's refresh this one Second we'll open and then let's add one more add this one upload so this is added and if you now go here and refresh this so now you'll be having two 3 4 and that
should be one more okay let's uh decrease the timing here I'll make this on 10 seconds oh sorry so let's change but we not getting that updated One is it okay let's say how many we are getting here so we'll do feature image list save it so we are getting Arrow of four here but here how many we are having we having five four only but why that image is not coming let's see what we we are doing here oh I got it this is the problem this will not required right why we need This
slides because here we need to do this one now feature image list do L that is the problem same for this one and same for this one and where else we are using here also now let's save it see now we are getting all the images so that was a big mistake actually and this is looking good right right okay and I think with this we have actually completed all the things right And see how this is looking so now I think that's all for this particular video now what do you think comment down and
let me know I'll also create a separate video actually for this and also let me just change this one to two 3 seconds so let's refresh this so let's wait for some time let's see what is happening okay now I think again some other problem is there everyone so the problem is because See here we are writing the timer right uh so the timer we need to run every time whenever there is a change in the feature image list do length so pass this as a dependency now I think this will work so now let's
uh refresh this and now let's wait for some time see it will automatically change see now it's changing it will go to the next image next like this okay so now this is done so with this we have completed all the Thing I'll share all the source code and everything in the description now you might think I one questions I know you all will think what is the where is the deployment so for that one I'm going to create a separate video after some like two days only till till that time you will get so
much time to complete this video only and I'll also show you how you can deploy this project both in versal and also using render so with this uh that's all and if you Like this video give a like comment down and please subscribe to my channel I will see you in my next video till then good luck and peace





![432hz [Tree of Life] Open all doors of abundance, remove all barriers, attract prosperous luck](https://img.youtube.com/vi/jQWeQOajzmY/maxresdefault.jpg)




![Hands-On Power BI Tutorial 📊Beginner to Pro [Full Course] ⚡](https://img.youtube.com/vi/5X5LWcLtkzg/maxresdefault.jpg)