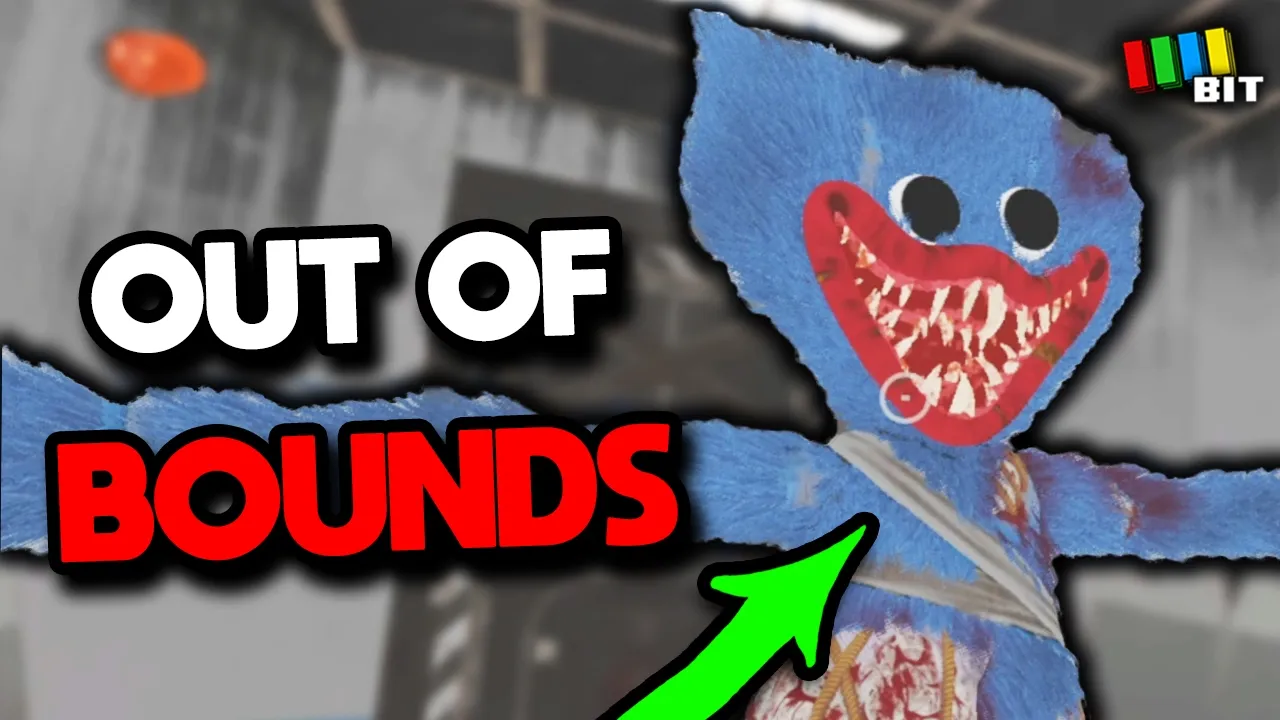
[Music] hey guys and welcome back to another lost bits video right here on tetrabit gaming the series where we explore the unused altered and unseen content in gaming there are few certain things in life but a plethora of unused content in an indie horror game is one of those poppy Play Time chapter 4 is out and much like its predecessors it's looking like it's going to have a treasure Trove of content for us to explore here once again looking like it'll be a multipart Banger of a series this video we'll be starting things off by
exploring various Secrets found out of bounds in the areas that you normally play through so Chuck some Play-Doh on that like button below it's time to check out some poppy playtime chapter 4 lost bits all right so we'll be doing our out of bounds exploration from The Game's front to back so we start things off on the lift that takes us down after the events of chapter 3 now if you watched my video on chapter 3 you may remember that by doing a trick or taking the camera up at the end we could see that
despite these sound effects kissy Missy is totally just chilling up here well if you were hoping for any chapter 3 leftovers here I'm sorry to say that if we take the camera way up in this tunnel here there's just a whole bunch of nothing at the top which isn't too surprising as there's no way the player was ever meant to get way up here but despite this when viewing this tunnel from a distance it was honestly pretty cool to see just how massive this Elevator Shaft really is with respect to the rest of the area
here then moving on to the control area down here for the most part the devs kept things pretty clean well as far as out of bounds things go one interesting thing here at least to me was to see how the developers created the cave effect here when viewed in normal play the player is given the illusion that the cave here is much bigger than it really is as in reality this is actually just a few planes of 2D textures just offset from each other basic but it definitely works pretty well next we move on to
the toy graveyard mountains just before the prison section unfortunately there's nothing crazy hidden in the mountains of toys and some may have doubted that these carts here weren't Berry as they're all face down but if we take the camera underneath we can confirm that these are indeed the fella now whether or not one of these is the berry that the player sends off in Chapter 2 is certainly Up For Debate but my personal head Cannon says yes and actually I lied there is something interesting in one of the mountains of toys here so normally As
you move up this section a furry arm will flail before it then dies out and at first glance this appears to be an arm of a yellow version of Huggy wuggy well things get even more interesting in as if we take the camera Under the Mountain here we can see that this is actually kissy Miss's model and the devs used her for this short animation here and as you can see kissy is stretched out quite a bit as it looks like she's striking Michael Jackson's leaning pose from Smooth Criminal and honestly I thought it was
pretty crazy that this is what they did to make this arm effect later in this area normally the prison goes into lockdown as you approach the entrance and this causes the massive main door to close shut and although you can partially see what's inside from a distance before the door closes you don't ever normally get a chance to have a better look initially we can see a bunch of chairs that are outside the secondary gate here and inside that we can see more chairs some desks a bulletin board and more and then the rest of
the room doesn't actually have a back wall so you can just see out of bounds from here too and although the contents themselves of this room aren't all that interesting I think there's a decent amount of environmental storytelling here that's missed as we can see that all of these chairs are thrown here to barricade these doors to obviously try to keep out the monsters that were trying to get in of course normally prisons try to keep what's inside from getting out instead of keeping outside elements from getting in so just thought this was a cool
little detail that's not really shown to the player after this we get to the train station area if you were ever curious if there was anything hiding in the other jail cell Cube things although textured inside there's a whole lot of nothing else so really here only the cell with the most visceral disturbing environmental storytelling in the series so far and the one you enter actually have any other models inside of them oh also in this area out of bounds a bit closer to the cave area there's actually a misplaced model of a bed that
seems to have a long default textured pole attached to it now into the prison we go and I just made a short covering this a few days ago and although not unused or anything Limon the lemon actually returns in chapter 4 here and can be found a bit in the distance to the right after you enter the back rooms area after prying these planks off here for the uninitiated lemon is a secret lemon left hidden in the game by the developers as a little Easter egg so I was really happy to see this goofball make
a return this chapter this time with a smile and some eyes anyways lemons aside back to the outof bounds stuff near where the player is able to get another red hand under the floor we can actually find our first bit of floating developer text of this video as we can see it just below this battery socket indicating that it's used to turn off one or more of the hand scanners above and then something similar is actually seen on the other side of this hallway under the floor too only this time with a power puzzle panel
thing and here one of the developers left explicit instructions to not delete this as it's keeping the hand scanner above in an unpowered state so if you ever wonder why on this series some objects may be left out of bounds by the developers it's either a they just forgot about it or B it's actually tied to some important function in the game also in this same hallway under the floor we can find a duplicate of the catnap toy vo that gets munched on by the critters as you first enter this hallway and here we can
see that it's just constantly looping the animation of the raspberry jam gushing out of it and as you've likely noticed by now here we can also see numerous pairs of The Nightmare Critters that come out to attack you after you grab the red hand now it may not seem all that crazy that these are loaded under the floor before they're called in the game but this actually seems to be one of the few instances where they're loaded in like this as in later sections where they appear or even earlier ones like at the prison entrance
they aren't seen like this and then lastly for this section just behind this wall in the lower area where you have to escape the red gas here there is just a lone pipe section chilling here in the void next onto the warden's office entrance area just before it we can once again actually see another object out of bounds that had some functionality related to the hand scanners and this time we actually have two objects here the prison officer badge that's seen before and inside the warden's office as well as this green cylinder here so I'm
not sure which of these is the one that's needed could be both also this may be patched by the time you're watching this video but interestingly enough some of the objects in this room would actually deload during normal gameplay allowing you to see out of bounds with ease and last up here there's actually data left over in the game for various developer notes throughout this chapter most of them just indicate things like where triggers for popups should be placed like at the start to teach the player controls or some context for what was planned to
be added to a section later in development other times though there are some more interesting things like here for example there's actually a note linking to some sort of developer document now before you go pausing the video to type this URL into your browsers I already tried and it just leads to a Confluence page which is basically a workspace site which I guess the devs were using to collaborate and unfortunately its password protected yeah sucks for us I guess but I'm not surprised at all that they don't want random people snooping around in there anyways
now onto the containment Zone initially we can actually see yarnaby just chilling on the side of itself cell but as we approach ynab's model actually goes under the floor before before he then jumps out of the cell towards the player and after that animation is done he will loop around back right to where he started out after this are of course the various rooms where yarnaby stalks the player and there are several instances here where ynab's model is loaded in in the door where he appears out of initially there's one in this area out of
bounds then there's one just floating here looking all nice and happy and then yet another one that's not as friendly and this one here appears to be the version of yarnaby that chases you down this hallway and similarly there's also a model of doy above this area that's the one that helps you out here also for this hallway I don't know about you guys but I definitely thought that these boxes were something more important since they have the handprint on them but outside of this room I don't think they're ever seen again in this chapter
and if you were wondering what's inside of these boxes since you go through this room so fast since it is a Chase sequence each of them actually contains a battery next up for this area there's also a set of doy's Arms from his monster form including one doing an okay hand gesture at first I thought these were unused until I remembered they do end up being used in the sequence with doy demolishing pianosaurus aka the most wasted character in the series like seriously there was a whole teaser trailer for pianosaurus a catchy as hell jingle
as well as a cutout here all for the fella to have like 5 Seconds of screen time anyways after doy bust him up which looks way less frightening with the lighting disabled these hands and pianosaurus actually remain out of bounds here with pianosaurus ending up all mangled but one of the hands is still doing the okay hand gesture here the first instance I thought it was just a coincidence but this second time is making me think that this was left like this on purpose then after loading into the next segment two of the doy's monster
hands actually still remain way out of bounds here but now they're just flattened out and then further down in the distance there are two more doughy hands this time in the regular form and I can't really recall any instance where either of these sets of hands were used in the game then next although not out of bounds in this section where doy is peeking his head through a door as he waits for you looking through the door we can see that the way he's standing if you want to call it that is all messed up
with the way his feet are positioned and honestly I thought this looked pretty funny next before doy gloops through these bars in the next cave section we can actually see that him in his Bridge form is actually already loaded in under the floor here and if we progress after doy jumps down we can see how the bridge form model just awkwardly floats up to where it needs to go and while all of this this is going on far under the map we can find the doy that jumped down that's now all stretched out awkwardly like
this then interestingly enough way before even getting to the next bit the second circular Bridge pad form of doy is loaded in there right away next we get to the prison Recreation yard area and although there's nothing really here out of bounds if you were ever wondering what happens to doy after he gloops through the wall here instead of the model just dis appearing doy kind of just chills here for a while as he talks in the next area just before dropping down to the Gear maze puzzle room to the left there's a large empty
room where we can see a sideways floating model of doy striking a te- pose while holding a battery and this is actually the model that's used when doy hands the player a battery below and I don't know I thought this was just pretty cool to see after this is the section leading up to the safe haven and here we can see another red Dev note with another locked URL and going forward we can peep the hallway where kissy Missy grabs the player to help us hide from the Prototype that walks along after now when playing
this chapter the first time I absolutely thought that there was a full 3D model of the Prototype used for this cutscene but as it turns out if we take the camera closer and disable lighting we can see that the Prototype here is actually just a 2d effect that's project ejected onto the wall eventually after moving most of it will deload only leaving this small chunk behind honestly this absolutely blew me away when I first saw this so kudos to the devs for making this effect look so convincing then before getting to the main Safe Haven
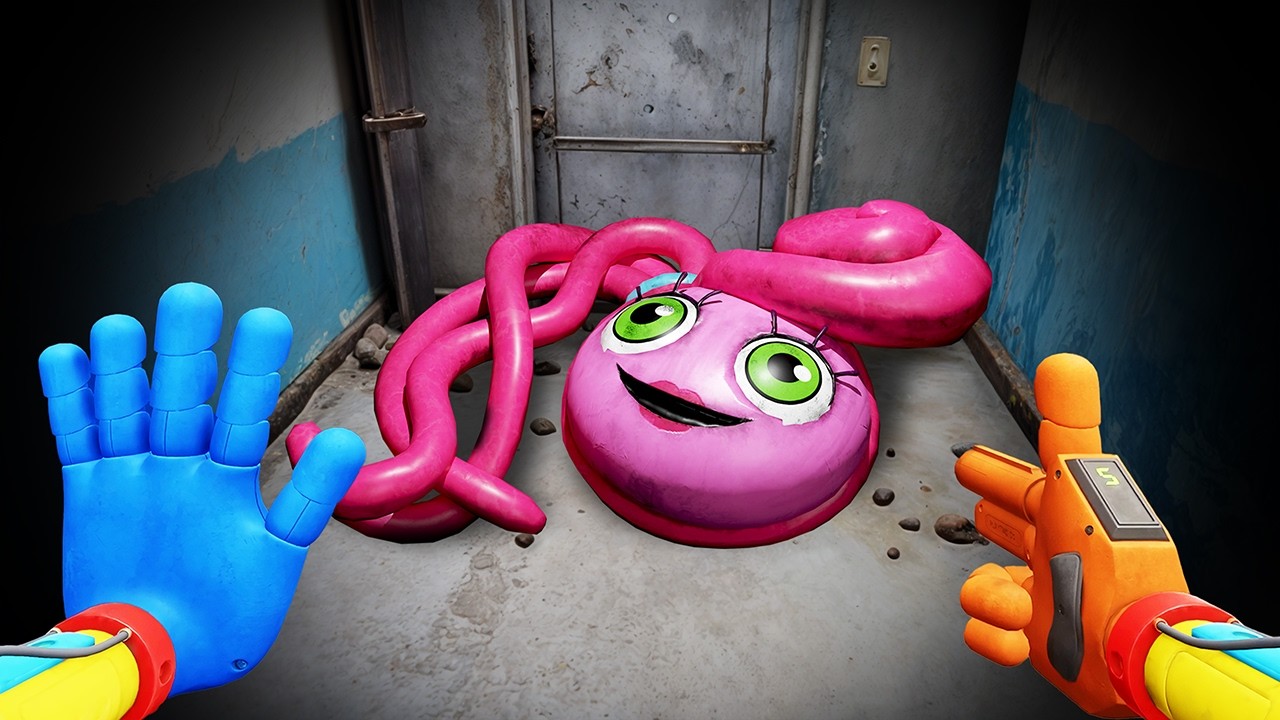
area I saw this model of a small mommy long legs in this Locker here and it got me thinking whether this was a living thing or just a toy I get that the devs probably did didn't want to animate every single character in this area and I guess it's implied that all the toys here are supposed to be living things but the ones that are just static like Mommy longlegs here or PJ pug aill up here it's honestly hard to tell and if they are living things why is this mommy longlegs hiding in this Locker
like this especially since this is so hard to see under normal lighting conditions anyways tangent over now onto the safe haven we got a lot to unpack here for starters there's another battery socket under the floor here just below the power generator there's no accompanying text this time but like the one we saw earlier I'm assuming this is related to powering the hand scanner above it on the generator next although you can kind of see into it from the main room there's actually a normally inaccessible area in the safe haven here and it's the storage
room now for whatever reason there's just an invisible ible wall that blocks it here every time you visit this area so you're never normally allowed in there but the intended way of getting in there was for the player to open up this vent here to then crawl in there on their second visit through the safe haven here now you can actually still pull off a part of the vent covering here but then you can't pull off the second layer so if you were ever wondering why you can randomly pull this off and it seems to
make a ramp that should lead into the vent that's why but if we take the camera into this room we can see that it was meant to be a Cozy Lounge area of sorts as we can find a few characters just hanging out here like this mini kissy Missy here casually reading a book and speaking of books not unused or anything since I believe you can also see these at the little shop area in Safe Haven but these books here are pretty interesting they all feature some cool artwork of various series characters and this one
even used as an asset from Project playtime what's extra interesting is that all the names on these books are actually current or X devs just with the first letters of their first and last name switched around for example Jeth s is Seth Jones paa maresato is Micah preat from zamination and you get the idea just thought these were a cool little Easter egg the devs put in the game and there are a lot of these books in this Lounge room but yeah overall a super cozy little room and I just think it's it's pretty strange
that the devs were seemingly so close to implementing this room only to seal it off with an invisible wall and janky second vent covering no less next one of the most striking parts of the safe haven here are of course the art murals on the walls and there are actually a few chunks of it that are never normally visible to the player as they're blocked off by some other objects like this tarp and then just above here normally you can only see the word he but behind this be we can see that the full message
here is actually he is everywhere and then we can see the arrows pointing to the eyes here obviously representing the doctor now next up for this area we got to get to the dev comments left in here as they actually reveal even more cut things from this area namely that there were actually plans for this chapter to have side quests and several of them at that revealed in this note for the Player's first first visit to the safe haven they could have completed three optional side quests one retrieving some sort of book for doy two
getting a seemingly scrapped character named Izzy a birthday cake and then three burning some Rosemary to honor the dead presumably at the poppy alter area here and that's not all as there's actually another note here indicating that there would have been two more side quests planned that would have been seen on the second visit here one side quest where you'd have to pose for another seemingly scrapped character named ed as he'd I guess draw a portrait of you as well as a final side quest where you'd have to help kicken chicken get his revenge in
some currently unkknown way so yeah before the toys here were just given a generic numbered name it looks like some if not all of them would have actually had unique names it's honestly pretty disappointing to learn that there was once so much more to this area than what we got now sure this area is awesome and adds a lot to the lore and story but I think it could have been much more and it's sort of funny to me that these side quests were considered as they seem to have involved at least maybe some sort
of backtracking which is something the developers prevent you from doing basically throughout this entire chapter here but yeah even if these were just small side quests I think they would have went a long way in developing some of the characters here and I think these would have made the player more attached to them making it that much more impactful when the safe haven becomes less safe later on now there's a bit more for the safe haven when you revisit it the second and third time so we'll come back to that later next we got the
sewers and if going through this tunnel from the safe haven to get there felt janky to you there's actually a good reason why basically there's a portal that instantly takes you from the upper section here to the lower area closing closer to the sewers and thankfully the coloring is a bit different here with the lighting disabled so you can exactly see where this tunnel splits and when viewed from the side it's pretty trippy as we can see the perspective of the area where you teleport to from up top here revealing just how this Dev trick
was done now the sewer area didn't really have much of note except for another cool layered background effect that's used here to create the illusion of the cave are being much bigger so now we go all the way to the Wastewater Plant where first we can actually find a hand scanner under the floor just beneath where the power puzzle panel is near the door here indicating that it looks like initially the player was just going to hand scan in there before the whole Minecart power puzzle was added then next in the no man's land area
it was honestly pretty Barren out of bounds just like the section is normally in the game now now apparently yarnaby was supposed to spawn in here and it might be patched by the time you watch this but when I first played through this on release despite there being numerous gaps that the player was seemingly supposed to hide in I never had yarnaby or anything else chase me at all until the final segment and speaking of which being the second most underutilized character in this chapter I got to say the final Chase with yarnaby was quite
underwhelming but after yarnaby catches fire and falls into the void we can natur follow him and find a nice stretched out chain with yarnaby on the bottom all mangled with his front legs going through his face also another interesting thing that happened to me in my first playthrough is that ynab's model actually respawned behind me after I reloaded the checkpoint after his demise he was just chilling there doing his thing so in my head Cannon yarnaby is still alive now unfortunately there's not all too much interesting to see in most of the areas leading up
to the doctor's headquarters sure it was cool to see the operating area maze from a distance and have a closer look at the creatures in their cages or Boba chops under the floor here but yeah nothing all too crazy well I guess one interesting thing to see in this Mor Grom is just how far off the grab pack hand is from the body bag that it's supposed to be seen getting shot out from in my first playthrough I straight up thought this blue hand was a glitch as it seemed to have just originated from nothing
anyways things get a bit spicier as we get to the docs HQ as first although we've mostly been seeing Secrets under the floor here just above the room there's actually a developer test note being just that then after getting to the top of the elevator here there's a note for there to be a trigger here that would start to play a sound effect of Belle's tolling to be a call back to the doctor's monologue as you ride up the elevator for who does that well now but unfortunately I played through this again and listened pretty
closely and it seems like this idea didn't make it into the Final Cut nor did this only one path forward line that was planned to have been added by Eric true one of the devs although the maze area with all the robots didn't really have anything crazy going back to the doctor there are two more interesting Dev notes Here one indicating the plans for what would happen as you first enter this room and then secondly hidden behind all the monitors is another note indicating the plans for the death sequence which although in a different order
seems to have been implemented just as planned now on the second visit to Safe Haven you get to go through this shipping area and here we can see a note indicating that the purpose of the back part of this room is just for optional lore drops now it's plural here but in the final game all that's there is just a VHS tape and a TV to play it in well that and I guess there's these boxy boo boxes here that are supposed to maybe have some lore implications I guess and although they lack any Collision
if we take the camera inside we can see that boxy is actually fully modeled inside here similar to how he was in Project playtime now I have to believe that there must have been some sort of plans for foxy here to pop out as an Easter egg or something since he's modeled in like this but yeah unfortunately there's no intera ability that's normally offered to the player with these models at all in the final release of this chapter next we go on to the foundation area and aside from seeing the cave maze from a distance
the only other interesting thing I found here was a pair of nightmare Critters under the floor near the control room in the gas area now in my playthrough of this chapter no Critters bond in this room so either there were once plans to have some of them in here as well or these are for the cave area where you find the explosives just before this room or in the room after where a few of them do pop out now back to the third and final visit to the safe haven with a lighting disabled we can
see that doy in his monster form was actually loaded and visible in the back in the shipping area as soon as I got here I don't think I was able to see this in my first first playthrough so not really sure why this ended up happening here this time also while the cut scene with doy here was going on I found another version of him in his monster form hiding not far underneath the floor and then after leaving this area and going up the elevator we can take a look at how doy tries to pull
it down which is never normally visible and then taking the camera back to the main Safe Haven room I was able to see normal doy chilling here once again again as his animation seemingly reset under all the rubble even after it fell and now lastly we get to the final boss area where just before heading in there's actually an unseen computer monitor just underneath the console here and after heading inside unfortunately there's not much to see here except for getting a closer look at these building things that are seen above here and in case you
were wondering yes these actually do have Collision so you can even walk on these railings if you can manage to get up here and then for the last battery socket hidden out of bounds just beneath the area that you get to after you get through the main part of do's boss battle there's another one of these that once again was used to limit the hand scanners above I guess how they're kept powered off until you get close enough an interesting way to do this for sure but hey if it works it works and now last
up for this video we of course have the ending sequence where first we have the cut scene with poppy and Kissy where one of the least surprising plot twists gets revealed during this cut scene when poppy runs away to avoid being trapped back in her case once again she runs off into the vent here and if we follow to see where she goes we can see that basically immediately after getting out of the player's normal view she just instantly disappears then after this as the floor beneath the player collapses and Kissy tries to grab the
player before her arm gets ripped off if we take the camera back up we can see that the devs like stuffed kissy into the vent here so just like the Cliffhanger we got at the end of chapter 3 until we see an actual onscreen kissy Missy death I think she'll still be alive in future chapters although now with one less limb it seems and speaking of which it looks like the arm that you see after falling isn't actually a unique model as when we do go back to the main kissy model up here we can
see that this is actually from this model but it's just stretched out all the way down there making her arm up here look pretty weird and then finally we get to the poppy flower growing room leading up to the science lab area of the Playtime company Factory that I guess we'll be visiting in chapter 5 or maybe not since the player ends up getting Bamboozled as OG Huggy wuggy approaches Us in another crazy Cliffhanger so so of course I had to try and get a closer look at Huggy here and although it's not anything you
can't normally see it was nice to get up and close to the fella and have a better look at his model and what else is interesting is that right after huggy's jump scare here he actually teleports into the room where the player gets locked in and he will strike a solid t- pose now normally it happens for only like a second before it cuts to the credits but if I pause the game we can actually get a better look at the T posing fella here in all his damaged glory and damaged he sure is as
he's missing a hand and if we look under this here wound dressing we can see that there's even a whole chunk of him that's gone now too which was pretty unnerving to see honestly I always had a hunch that the main mascot of the series had to have a return to the game since he's only seen for a few minutes in the first chapter so yeah I was really pumped to see him here and I look forward to seeing what his role ends up being in chapter 5 and with that my friends wraps up this
first part covering chapter 4 and I hope you enjoyed like I said we got lots more to go through including various unused levels left over in the game so stay tuned for more videos in the near future and be sure to subscribe and hit the notification Bell to be notified as soon as they're up till then though check out some of my other poppy playtime videos and as always thank you all so much for stopping by today and I will see you in a bit [Music]
![CUT CONTENT in Poppy Playtime Chapter 4 | LOST BITS [TetraBitGaming]](https://img.youtube.com/vi/lKUIHYTMBo0/maxresdefault.jpg)
![Exploring Unused EARLY MAPS in Poppy Playtime Chapter 4 | LOST BITS [TetraBitGaming]](https://img.youtube.com/vi/DF9DWKQC7cs/maxresdefault.jpg)


![Poppy Playtime Chapter 3 Unused Beta Maps | LOST BITS [TetraBitGaming]](https://img.youtube.com/vi/JmvwvReOSNU/maxresdefault.jpg)