In this video I'm going to give you some smartphone film making tips that will completely transform how you shoot using your smartphone I'm going to show you everything from the basics all the way up to more Advanced Techniques so that by the end of this video you'll have all the knowledge that you need to confidently go out and shoot professionall looking videos using your smartphone this is the ultimate crash Course in smartphone film making we're going to start by covering the basics then look at beginner versus Pro when it comes to cinema IC b-roll we're
then going to cover gimbal tips professional smartphone film making as well as how to fake drone shots and capture solo b-roll so everything is covered now let's start with 10 crucial tips when it comes to mobile videography camera angles try to avoid shooting at eye level this is the most common angle that people use and It's not particularly exciting so make your footage Stand Out by mixing up your camera angles try lowering your camera to get it close to the ground this will instantly create a much more interesting perspective just look at the difference between
these two shots try shots pointing down top down shots are a great way to make your footage Stand Out Try shots pointing up this is an often overlooked angle that delivers incredibly dramatic Results okay tip number two camera movement okay try to keep your camera movement as smooth and as steady as possible generally this is going to give you the most professional look also keep your movement consistent and meaningful are you pushing your camera forward bringing your audience into a scene maybe you're lifting your camera up to reveal your location or maybe you're pulling your
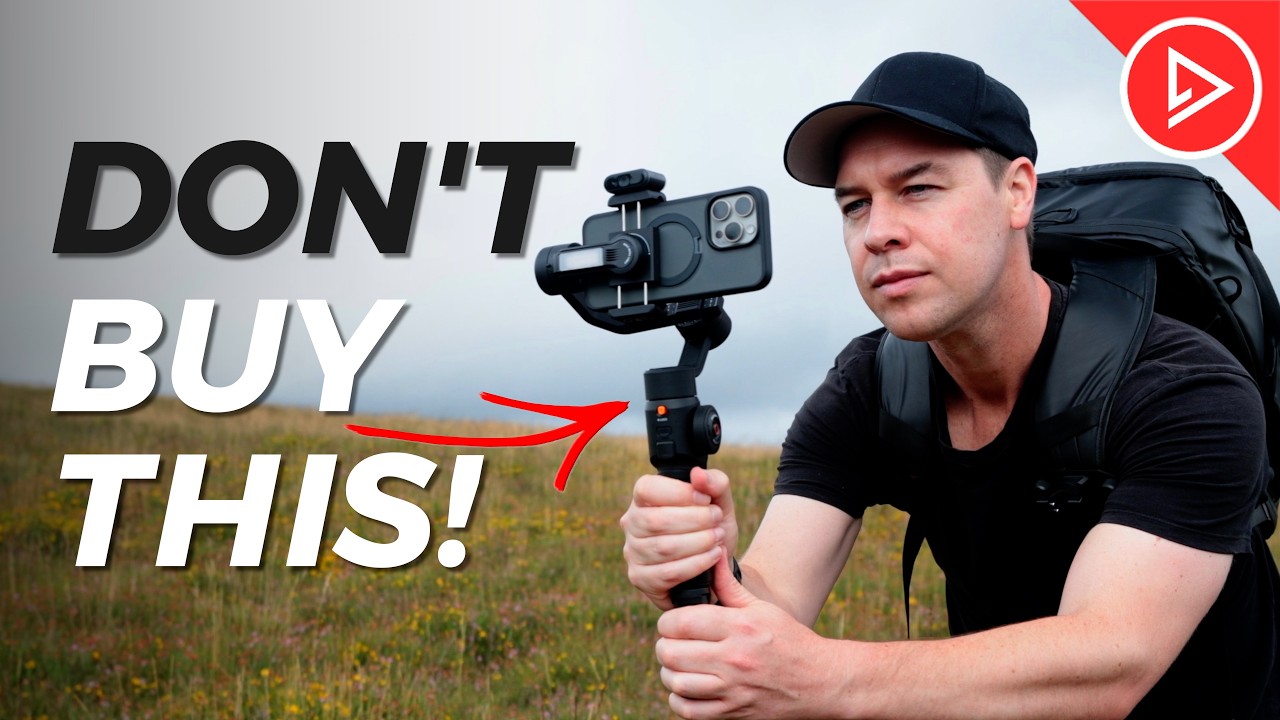
camera back to end a scene however you move your camera think about The story that you're trying to tell and the information that you want to give to your audience tip number three accessories now if you're still struggling to get nice smooth shots when shooting handheld then don't worry because there are plenty of accessories out there to help a gimbal is a great way to easily capture nice smooth shots a gimbal will have modes and features that are much harder to replicate handheld this one for example has a Built-in extension pole to help capture more
cinematic movement so I'm able to replicate Crane and drone shots which really help raise the production value of my footage or if you're looking for a more handheld look then a cage like this one here is a great option it allows you to take your hands off your camera while shooting plus offers the ability to add access iies like a microphone or a light also lenses and filters are another great way to level up your videos these Will help minimize glare and Reflections they'll also help enhance colors now don't get me wrong it's totally possible
to capture great looking footage without all of these accessories but quite often they come in extremely handy and they allow you to capture those shots much quicker and easier as always all accessories used in this video will be linked in the description below okay tip number four slow motion slow motion is by far one of the best ways to make your Footage stand out not only does it help smooth out your footage particularly when shooting handheld but it also allows your audience to take in more information take these crashing waves for example this shot looks
okay but now let's shoot it again this time in slow motion I'm switching to 120 frames per second and this is the result a shot that plays at 25% speed it allows the audience to take in more information to appreciate the shot it makes the moment Clearer and more dramatic it can also help set mood or a tone plenty of creative ways that you can use slow motion to help make your footage Stand Out be sure to experiment okay tip number five lenses now depending on your phone you may or may not have different lens
options this one for example has three lenses we've got the standard lens this is the lens that most people use we've got the ultrawide lens now we can see even more of this landscape and a Telephoto lens now we can zoom right in on this Coastline and capture things we wouldn't normally see so if if you have these options then be sure to use them if your phone doesn't have these lenses then go old school if you want to shot closer up then get closer if you want to shot from further away then just pull
back the most important part here is that you're capturing a good variety of shots nice closeup detailed shots mid shots and wide shots that's what's going To keep your footage interesting and your viewers engaged tip number six music and sound effects the difference simply adding music and sound effects can make to your footage is huge take this shot here for example it looks okay but the audio is terrible so I'm going to swap out this horrible wind noise with something a little less distracting add a soft layer of music and add a sound of some
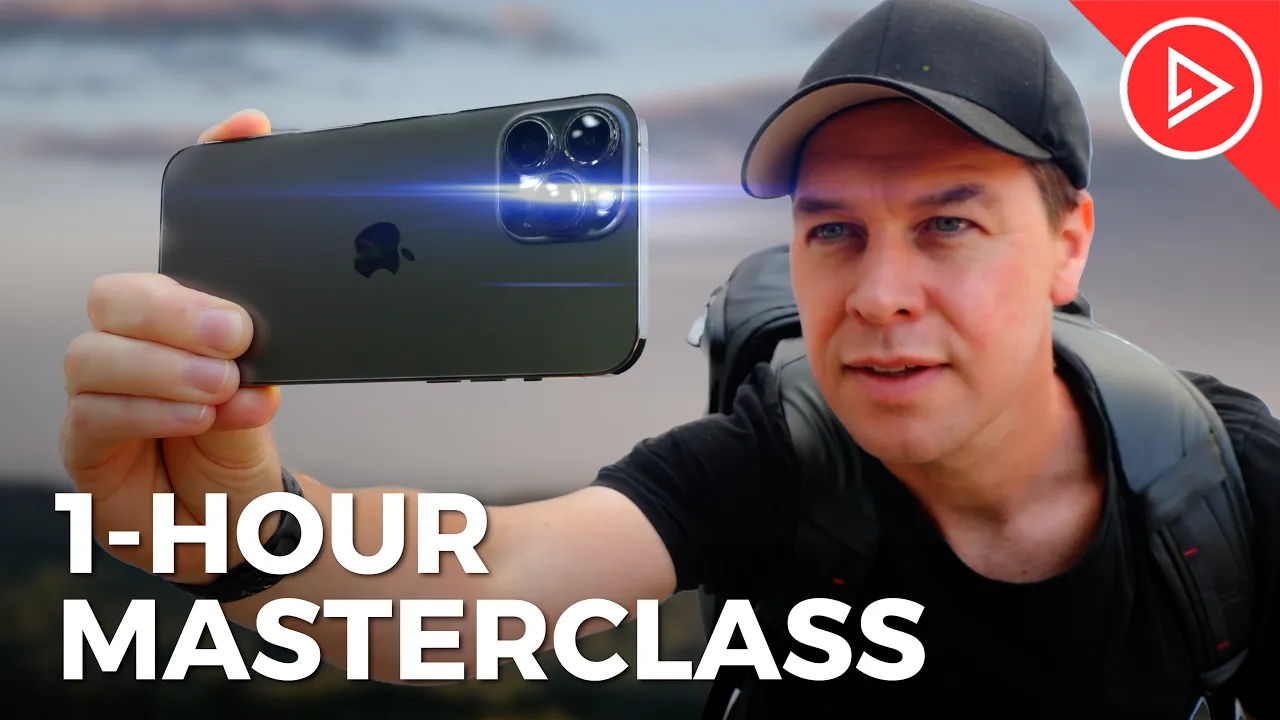
waves crashing let's take a [Music] listen much better by simply adding music and sound effects to that shot we completely changed the feel and the mood okay let's talk about camera phone features because depending on what phone you have will depend on what features you have this phone for example the iPhone 13 Pro Max has cinematic mode this will allow me to select my focal point and it will then blur out the background to give it a much more filmic Look this mode replicates a shallow depth of field not something usually associated with smartphone footage
so a great way to increase the production value of my footage we also have time-lapse mode this is another great way to add movement to your shots it's important that you keep your camera nice and still for this I don't have a tripod with me today so I'm going to attach my phone to my gimbal rest it against my camera bag and hit record this is the Result also try walking with your camera in time-lapse mode this will create a moving time-lapse or hyperlapse as it's known I've got an entire video dedicated to shooting hyperlapses
I will link it below okay let's talk about color grading because color grading is one of the best ways to stylize your footage most smartphones shoot in a very similar picture profile it's usually quite saturated and the colors are boosted but we can change that by adding a color Grade we could go dark and Moody we could go bright and colorful again experimentation is key do what works best for you and your footage play around with contrast white balance saturation personally I use my own custom Lots as these are specifically designed for smartphone footage I
can just drag these on and with the click of a button add any of these presets to my edit giving each one a different style and this saves me a ton of time I will Link my smartphone luck pack in the description below okay number nine camera apps let's talk about camera apps because this is important now when first starting out your phone's native camera app will be more than enough for what you need the app is simplistic it's easy to use and delivers great results but for some of you particularly those of you that
are taking things a bit more seriously you might need more control over your camera settings so this is Where a professional camera app comes in you can find these on the App Store some are free some you have to pay for the moment app is free so let's go with that one for now okay with the app open we now have full access to our camera controls and we can manually adjust all of our settings I can change the iso shutter speed white balance I can then lock in all of these settings and this will
give my footage a much more consistent look okay tip number 10 get Creative just try and have fun when you shoot look for ways to capture shots that are unique or unusual think about creative ways to make your footage stand out use transitions look for interesting angles and perspectives experiment with different styles of shooting and editing look for locations that an audience would enjoy seeing and use elements within your environment to help tell a story combine all of this with music sound effects and color grading so those Were 10 basic tips to improve your mobile
videography but how can we improve on this well the aim of this video is to get you shooting much more professionally but what's the difference between a beginner versus a pro well let's head out on location and shoot two sequences the first will be how a beginner or someone just starting out might capture that location including all of the mistakes they might make and the second sequence Will be sh how someone with a lot more experience or a professional would shoot that exact same sequence we're going to be thinking about camera movement angles framing composition
and at the end edit both of those sequences with music color grading in sound effects and compare the results and hopefully this will give you a really good understanding as to why one sequence looks much better than the other now the UK has had a lot of rain recently and as you can see this part of The land has completely flooded it's a total bulk rather disgusting not very interesting is exactly what a beginner might say whereas I see this as an opportunity to be more creative and get much more Dynamic shots this bog this
flooded patch of land is actually creating a really nice reflection to the untrained eye it's an ugly bog but with a bit of creativity we can make our footage look much more interesting here's how a beginner might shoot this Bog this bog is disgusting and I have no idea why I'm here they may just point their camera down like this not a particularly flattering angle and yeah I would agree with the beginner this bug does not look good but look let's use this water to our advantage to capture some much more creative looking shots now
look here's a little trick for you okay now what you'll notice is that with smartphones the lenses are normally in one of the Corners so for this we want to spin our camera around cuz I want to try and get my lens as close as I can to the water I'm also going to select slow motion for this I'm going to use the wide angle lens so we're in slow motion 120 frames per second we've got our lens nice and close to the water just going to tap to lock focus and exposure I'm going to
hit record and I'm going to lean as far as I can over this water with my lens nice and close to the water and I'm going to Pull back like that [Music] now was that the best shot in the world no of course it wasn't but it was a lot better than shooting it at eye level and looking down at least we used this water to our advantage and Tred to get much more creative with our footage now a lot of the techniques that I'm teaching you today all come down to mindset and just thinking
differently when you're out on A shoot a beginner sees a flooded patch of land a disgusting bog whereas someone who's professional and experienced sees a creative opportunity now a beginner might look at this tree and think well I want to capture all of the tree in this shot so again at eye level I'm going to point my camera down and then tilt up to show the top of the tree like this so what do we do to make this shot more interesting and how can we keep our audience engaged well we could start by Getting
much more creative with our camera angles and movement this time I'm going to get nice and close to the tree I'm going to point my camera up and then pull down whilst rotating the camera let's take a [Music] look another fantastic spot here just looking out with this incredible view across dartmore I really want to include this in the sequence now this is what a beginner might do okay so I've got my Standard lens I'm not going to lock focus and exposure but I just want to show off this location so I'm going to hit
record and I'm going to go for a classic pan this is the go-to beginner maneuver just a pan from left to right now there's nothing wrong with a pan they're just not they're not great it's they do look a little bit amateur you don't see them often in Hollywood feature films the reason being that when you pan a pan the camera doesn't move it Just stays on one axis so it goes Left Right a tilt up and down whereas in cinema in feature films the camera tends to move it's either pushing forward it's pulling back
it's sliding left right it's on a jib a crane getting lifted up whereas a pan it's basic and it feels amateur not knocking pans there is a time and a place for them but just not today now for me a pan isn't going to quite cut it for this shot I really want the sequence to feel cinematic I want it To feel like these shots belong in a Hollywood film for me I want to try and replicate a gimbal movement a smooth smooth pushforward shot that shows off this landscape so I'm going to select my
wide angle lens that way I'm instantly going to see more of this environment I'm going to tap the screen to lock focus and exposure as always I'm going to hit record and start walking forwards and as long as I walk nice and steady holding my phone with two hands I get a Nice stable shot with the right technique and image stabilization of course you're able to replicate a camera move very similar to something shot on a gimbal shall depth of field now it's really important when shooting any sequence that you get a good variety of
shots you want nice big wide shots medium shots and closeups now for this shot I want to get a nice closeup shot of this grass with the background in nice soft focus take this shot here for Example I haven't locked my focus or exposure see how the camera is unable to determine what I want to focus on see how it's focusing on the grass in the foreground and then to the background so on and so forth not what we want but there's a very simple trick to giving your videos that blurry background look here's what
we're going to do I'm going to Simply tap and hold to lock focus and exposure on this grass in the foreground and hit record I can now move my camera And I know that the camera will remain locked on this grass this will really help give your footage a much more professional look creative mindset okay I think it's really important to talk about having a creative and positive mindset when it comes to film making and video production a mistake I often see beginners make is that they'll set limitations on not only themselves but also the
equipment that they're using don't feel that just because you're Shooting on a smartphone you can't give your footage a more high-end look it's totally possible to make your footage look cinematic and professional with the right mindset and a few accessories now if you've been watching this channel for a while you'll know that I'm a big fan of the gimbal lightstand combo this super easy to use and relatively cheap setup is a great way to give your footage that Hollywood look watch feature films and pay close attention to The way in which the camera moves then
find ways to replicate that movement using your smartphone this will instantly take your footage from beginner to Pro I've got plenty of videos on this channel dedicated to cinematic camera tricks I will link them below Sunset shots now behind me here I've got two Dart M ponies and this incredible Sunset that I'd love to feature in the end shot to this sequence the end shot it's such an important one It's really important that I get this right please don't go anywhere now here is how a beginner might capture this endot okay we've got this beautiful
sunset I'm going to get nice and close to these ponies back towards the Sun that way the sun is hitting my focal point and lighting it up I know this seems logical but just wait for the pro version I also want both ponies in this shot so I'm just going to quickly pan from one to the other like this now what Was wrong with this shot let's break it down okay again it's shot at eye level not particularly exciting very ordinary no real thought has gone into camera movement the footage is shaky and difficult to
watch the Pan from one pony to the other seems aggressive and the shot isn't framed particularly well now let's look at the pro version of this shot this time I'm going to get low to the ground and give this shot a much more interesting perspective I'm also Going to shoot towards the sun this time and put my focal points between myself and the sun this will instantly create a more high contrast look giving my focal point this beautiful silhouette as well as giving my shot these incredible sunf flares let's see a couple more examples don't
worry these things are nice and friendly who's your good boy okay let's try a basic orbit shot I'm just going to orbit my camera around to the left again shooting into the sun this not only Gives the shot more depth but also allows our focal point to reveal the Sun as we move our camera this is the wide shot let's try one more same camera movement only this time a bit closer using the standard lens again a much better shot especially when you start to edit all of these clips together okay now it would be
absolutely criminal for me not to get this shot whilst I'm here the sun isn't going to last long I want to make the most of it And grab another potential endot pushing forward across this landscape yes this is exactly what I'm looking for a smooth push forward this shot has think smooth camera movement Wildlife the sunset this shot really shows off the landscape and would be a great way to end this sequence Okay so we've now captured all the footage needed to create two b-roll sequences let's start off by looking at the beginner b-roll sequence
[Music] [Music] [Music] [Applause] [Music] now obviously that edit was packed full of mistak but hopefully you are able to easily identify them now let's see how that beginner Boll sequence compares to the pro [Music] [Music] [Music] [Music] okay so hopefully you'll agree that that second b-roll sequence was much better than the first if learning how to shoot a cinematic sequence like this is something that you're interested in then I have a 2-hour course that shows you exactly how the course is perfect if you're just starting out I show you not only how to capture all
of your footage but then very importantly give you a step-by-step guide for editing all of That footage into a short cinematic sequence with music color grading and sound effects the course also includes my two most popular lot packs to easily help you color grade your footage as well as give you access to a private Facebook group where you can share your edits for feedback from both myself as well as other community members I will link the course below along with more information Okay so we've covered 10 tips for shooting using a smartphone as Well as
compare the difference between a beginner versus Pro but how else can we improve the look of our smartphone videos well one way is to use a gimbal this is really going to help those of you that struggle to get smooth shots when shooting handheld so let's cover the basics okay tip number one make sure your gimbal is balanced correctly if your gimbal isn't balanced correctly then quite simply you're just not going to be able to capture the best footage Possible how you balance your gimbal will vary from Brand to Brand so it's definitely worth putting
in that extra time to read the manual watch the YouTube tutorial and make sure everything is balanced as it should be okay tip number two use a wide angle lens this will make a huge difference when first starting out just look at the difference between these two shots this shot here has been shot using a standard lens and this shot here with a wideangle Lens this is the same shot just shot using a different lens although I'm walking at the exact same speed in the exact same place in both shots there is a much greater
sense of movement with the wideangle shot because we can see more and there are much more elements moving within the frame now depending on your phone you may or may not have a wide-angle lens this one here the iPhone 11 for example has one built in but your phone may not if that's the case then I Highly recommend getting one you can pick these up relatively cheap and they just screw on to the front of your phone this will make a huge difference to your footage and is a crucial part of shooting much more cinematic
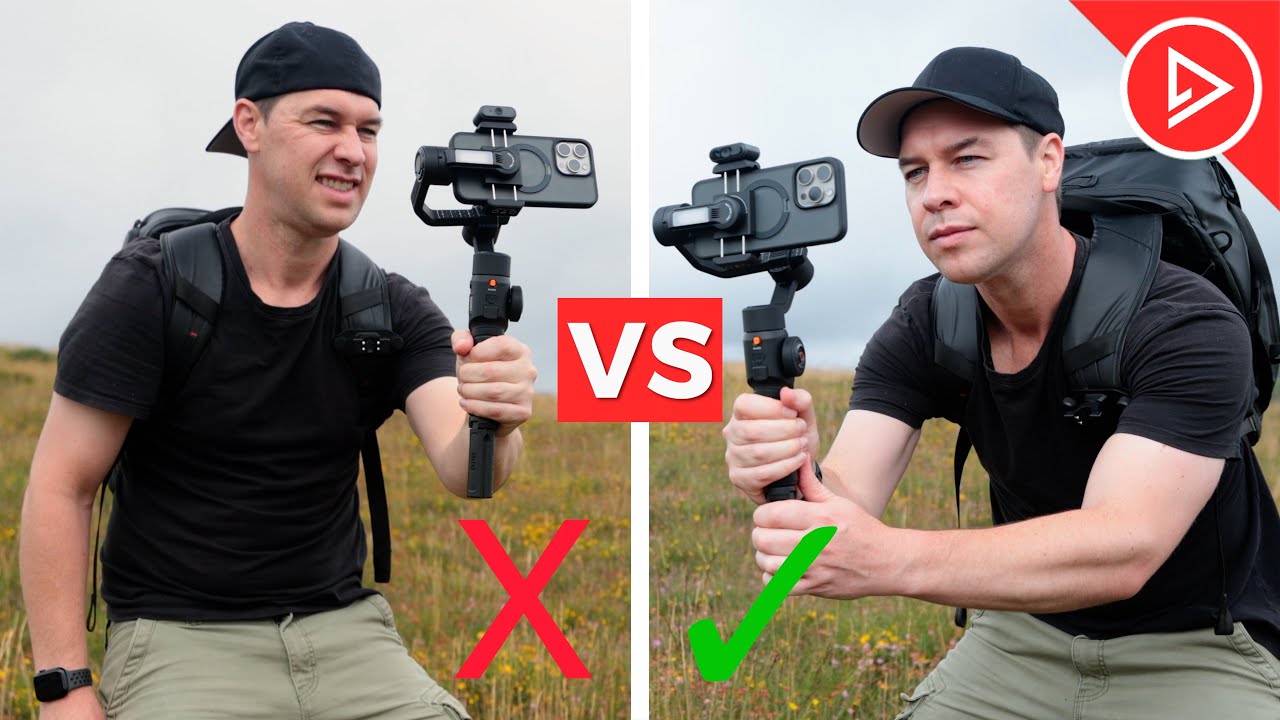
video I will link some in the description below okay tip number three learn the basics first now if you're new to the world of smartphone gimbals then I highly recommend learning the basics first don't go trying to create really complex Camera movements straight out of the gate I've got three videos dedicated to mastering basic gimbal movements make life easy on yourself learn these first I will link them in the description below okay number four hold your gimbal with two hands now there will always be times where holding a gimbal with just one hand will be
more comfortable and work best usually when shooting more of a creative or unusual shot but for your basic camera movement your push forward Your pull back orbit having two hands on your gimbal will give you the steadiest shot number five learn the ninja walk the textbook way to walk with a gimbal is with your knees slightly bent walking heel toe heel toe this will help reduce the impact of your feet hitting the ground when walking which will ultimately transfer up your body down your arms and onto your gimbal number six look at your screen not
where you're going Framing and composition is one of The most important parts to any good shot and the only way you're going to nail this is to look at what you're shooting it might be tempting to look up and you can briefly but try to keep your eyes locked on your screen as much as possible this will help give you the best composition throughout your shot have a test run before each shot check your pathway for any trip hazards and then commit to that shot looking at your screen okay tip number seven lock your Focus
and exposure once you've decided on your shot or focal point tap and hold your screen to lock off your focus and exposure the last thing you want is an exposure change halfway through your shot just look at these two shots for example this first one is in auto mode see the exposure change this looks ugly because your camera is in control you want to be in control of your camera tap and hold that screen lock off your focus and exposure and just like that no Exposure change halfway through your shot much more professional looking okay
tip number eight you don't need to walk most beginners assume that you need to walk in order to capture good gimbal shots but this simply isn't the case try using your arms and upper body to move your camera you'll be surprised with what results you can get take this push forward for example this was shot by simply leaning with my upper body also just using your arms will allow you to Fit your gimbal through tighter spaces so you can get much more creative with your shots okay tip number nine use grids to keep your framing
okay most phones will have the option to enable grids on the camera and this will m massively help with framing your shot now if your phone doesn't have the option to enable grids then I recommend shooting via an app like filmic Pro or moment I will link them in the description below okay tip number 10 Consistent movement now this is one of the biggest mistakes I see people make when first starting out their camera movement isn't consistent for example if you're doing a push forward try to keep your camera moving at the same speed throughout
your shot try to avoid changing speeds and un of course this is intentional changing your speed midot will create juddery camera movements defeating the purpose of using a gimbal also make sure all of your movement is Consistent for example maybe you're doing a tilt down push forward make sure that your tilt down movement is consistent as well as your push forward movement so learn how to control your movements for the best results possible okay tip number 11 dedicate one shot per clip okay now now I know through experience that it's really tempting when first starting
out to just hit record and shoot everything all in one long shot we're going to shoot this path Then the grass and then up to this building and your camera movement is all over the place without any real thought going into your camera movement instead take what would ordinarily be one Long messy shot and break it down into individual Clips with a dedicated camera movement for each clip so you could start with a nice push forward of the path then a slider shot of the grass and how about a push forward tilt up to reveal
the building piecing these three Clips together in the edit will result in a much more professional looking finish okay so those were some gimbal tips to get you started but what are some go-to gimbal moves to have in your film making Arsenal well here are 10 to get you started starting with gimbal move number one it's a classic the push forward a nice easy one to start to just point your gimbal forwards and walk at a nice consistent Pace Pro tip here okay maybe don't do this on a really windy Day on an uneven surface
next to a cliff Edge like I did it really makes things harder than it needs to be if you're just starting out then practice on a nice flat level surface nonetheless a great shot that helps set the scene and can really help establish your location the crane shot okay next up is the crane shot another easy one this one and will add huge production value to to your footage simply Crouch down with your camera close to the ground use something In the foreground lock off your gimbal to your focal point and slowly stand up this
shot mimics a crane or a jip shot and is a camera move that is used in many Hollywood films the fly through very unusual this one but still nice and easy to pull off find a gap that your phone and gimbal will fit through the tighter the better and carefully push your camera through it no need to walk with this shot just use your arms and upper body to create the movement pull Your camera back out smoothly and you've instantly bagged yourself two shots at once the slider Dolly great for giving your shot a bit
of life and movement this one simply find something in the foreground and move your camera horizontally to either the left or the right keep your focal point in the background to combine depth and interest in your shot the fake drone shot no need for a drone with this one just walk towards a cliff Edge doing a Push forward but this time reach and stretch your gimbal out over the cliff Edge this shot mimics a drone looks epic and is perfect for revealing a beautiful landscape or location quick disclaimer I take no responsibility for anyone who
walks off the edge of a cliff Safety First folks the push forward tilt takes a bit of practice this one we're going to push forward only this time we're going to tilt our camera up this shot is perfect for capturing tall buildings or Anything that you can't quite fit in a traditional shot as it allows the audience to look up and see all of your focal point okay bonus tip when shooting with a mobile phone always ensure that you lock off your focus and exposure by tapping and holding your focal point like this the last
thing you want during a shot is an exposure change this will really make your footage look amateur the flyby for this we're going to move our camera very closely past something In the foreground this shot creates a much greater sense of movement and gives the illusion that your camera is moving much faster than it actually is the slider pan foreground is crucial with this one and when done correctly can make for a much more interesting shot we're going to move our camera horizontally whilst adding a slight pan to create a combination of camera movement you
can also combine a jib shot to your pan to take this maneuver to the Next level but might take a little bit more practice the pullback okay another super easy one this one simply frame your shot and walk backwards check for any uneven ground or trip hazards and you've just scored yourself a perfect ending shot to your videos the crane reveal for this we're going to combine the push forward and crane shot whilst also using foreground to reveal our focal point now we're definitely edging on intermediate and advanced level Maneuvers here but if you've completed
the other camera moves then you're absolutely ready for this one so those were 10 gimbal moves as individual clips now let's edit that footage together to create a sequence using music sound effects and color grading [Music] okay so if you've made it this far into the video you are doing really well you've already improved how you will shoot videos using your phone from this Point onwards but we're really only gming over the basics so far so let's dive into some more Pro tips when it comes to mobile videography starting with professional camera apps now do
you need a professional camera app to shoot greatl looking video No in fact if you're just starting out then the native camera app is what I would recommend but for those of you that are looking for a more professional look then a camera app is the way to go shooting video with a Professional camera app will give you increased control over your camera settings settings like Focus exposure ISO and shutter speed which are all crucial factors when it comes to shooting professional looking video having the ability to lock in your settings will give you a
much more consistent look an app also provides Advanced features such as focus peaking histograms all of these will help you achieve more professional looking Results Pro Camera apps also have the ability to shoot in raw format and this gives you much more flexibility in the edit especially when it comes to color grading all of these factors combined can result in a much more polished professional looking video by far the best two smartphone camera apps are the moment app and filmic pro I will link both in the description below gimbals one of my favorite smartphone film
making accessories is a gimbal if you're Struggling to get nice smooth shots handheld then a gimbal is massively going to help a smartphone gimbal will help stabilize your footage by using Motors to counteract any Shake resulting in smoother more stable footage this can be especially useful for shooting on the go like when walking or running smartphone gimbals also come with additional features such as panning and tilting controls plus the ability to switch between portrate and landscape Mode by using a smartphone gimbal you can achieve professional looking steady video that would otherwise be difficult to capture
hand held my biggest tip for buying a gimbal is just to make sure that you get one with three axis not two a good tilt axis is what will help you mimic Hollywood camera movements like a crane shot for example where the camera starts low to the ground and then Rises up gimbals can vary in price I will link both Pro and budget options in the Description below lenses and filters now this phone already has three lenses so why on Earth would you need any more and what would adding filters to these lenses actually do
well let me show you a few examples starting with an anamorphic lens now for those that don't know an anamorphic lens is a special type of lens that allows you to capture wider aspect raos resulting in a much more cinematic look with black bars on the top and the bottom of frame animal Lenses work by squeezing the image horizontally and then desqueeze it in post- production to restore the aspect ratio and this creates a unique look that is often used in big Hollywood feature films anamorphic lenses are also a great way to create lens flares
when bright lights are in your scene giving your smartphone videos a much more stylized look this is a Blue Streak filter perfect for a Sci-Fi or action film you've got gold streak filters for A more natural or warmer feel definitely worth experimenting with these lenses if you haven't already also filters are another great tool when it comes to shooting professional video especially on a sunny day like today an ND or neutral density filter will reduce the amount of light entering the lens a bit like putting sunglasses on your smartphone and this can be especially useful
in bright light conditions where you want to control the exposure and Prevent ugly looking Overexposed shots like this by using an ND filter you can achieve smoother more professional looking footage by using a slower shutter speed and this is another great way to make your footage look more cinematic there are a ton of different filters and lenses you can add to your smartphone I will link some of my favorites below number four audio good sounding audio is crucial for professional sounding video these tiny Microphones that come built into your smartphone are okay if you're up
nice and close like on a phone call for example but from any distance further away they suck take this shot here for example I'm currently recording the audio using my smartphone's internal microphone and you can probably hear me okay there might be a bit of wind but as soon as I step further away from the camera it's much harder to hear my voice so what's the solution well the solution Is a wireless microphone like this one here simply Clips onto your collar like this and we now have clean crisp wireless audio going directly into our
smartphone and I can now stand much further away from the camera and you can still hear me nice and clearly this setup is perfect for documentary style filming interviews or anytime you want to record someone talking to the camera especially if they're further away never underestimate the power of great Sounding audio in your videos and this includes music and sound effects music helps set the tone and the mood to your videos it can enhance emotion and help keep your audience engaged take this gimbal shot here for example no music or sound effects just raw audio
yeah not great now here's that exact same shot only this time I'm going to add a layer of cinematic music and some sound effects so much better much more cinematic and Professional sounding and the key to this is simply having a library of music and sound effects you can dip into whenever needed okay number six lighting now the best light for shooting video is often soft and diffused light because this helps prevent harsh Shadows a bit like the ones I've got on my face right now midday light when the sun is high in the sky
can be harsh and create strong Shadows so shooting early in the morning late in the day or when the sun is low On the horizon is often best you can either use the sun to light your subject or try shooting towards the sun to create silhouettes lens flares and high contrast footage remember to expose each shot for the highlights or the brightest part of the image not the darkest try to avoid shots with lots of blown out and Overexposed areas like this keeping detail in your highlights is what will help give you a much more
professional look number seven grips cages and cases Now shooting video completely handheld on a phone can be difficult at times because there's not too much to hold on to without any kind of cage or case if I were to drop this phone there really isn't much to protected so this is where cases cages and grips come in let me show you one of my favorite setups and that's this case with this grip the case goes on the phone like this and the grip Clips on like this and it's now much easier to hold when shooting
video but But what I love about this grip in particular is that it also has a cold shoe mount for attaching a more professional microphone you can attach a tripod the grip folds down and extends for low down shots you can mimic crane Shots by starting low and lifting High it has a shutter button so you don't need to keep pressing record on your phone you can also change the position of this button it has a ton of other mounting options plus the case allows You to magnetically attach lenses and filters so a really useful
bit of kit for smartphone film making there are many options out there when it comes to attaching accessories to your smartphone which option is best for you will depend on your project some cases are smaller and more discreet others are bigger and will give you more options for mounting number eight color grading okay let's talk about color grading because this is one of the best ways to help stylize Your normal boring everyday smartphone footage smartphone video tends to be highly saturated colors are boosted so color grading will give you a much more stylized look you
can manually adjust the colors to best suit the mood or feel that you're going for although this will take a bit more time and skill or if you're looking for quick results then using Color grading presets or Luts are a great option Luts will save you time color grading your footage from scratch And can really help speed up your workflow when first starting out I have a free L that you can download and experiment with below as well as many other lck packs to help speed up your color grading process okay let's talk about budget
film making and how you can get Hollywood stuff sty shots using your smartphone and a couple of cheap accessories let me show you how you can fake drone shots using your phone now you're only going to need a few things To pull this off number one a smartphone number two a smartphone Gimbal and number three a light stand okay so this technique is really simple we're just going to take our light stand then we're going to take our smartphone Gimbal and we're going to screw it to the top of our light stand like this we're
then going to take our smartphone and we're going to attach it to our gimbal like this and that's it balance your Gimbal and you're good to go so how Does it work well let's start with the basics the push forward extend the light stand as far as it will go and start walking forwards a nice steady and consistent Pace as usual this will help keep your shots nice and smooth now Framing and composition is most likely going to be your toughest challenge with this setup because you're not going to be able to see what you're
shooting keep an eye on where you're walking but also on your phone to make sure it's facing In the right direction I mostly shoot using the wide angle lens at 60 frames per second is this helps me frame my focal point and gives me the option to slow the footage down in the edit this definitely replicates that smooth elevated movement that is usually associated with drone shots yes you're not going to get the height of a drone with this but often you don't need to this would work great for Real Estate videos for example a
perfect way to set The scene now you don't always need to shoot with the camera facing forwards you can also shoot to the side this creates an epic Dolly like shot that can really help take your footage to the next level also the closer you get to an object the faster it feels the camera is moving you get a much greater sense of movement take this shot here for example the left hand side of the frame is moving close to this wall so everything feels like it's moving quickly whereas The right hand side of frame
is not and things feel like they are moving slower now that's not to say that shooting out in a wide open space isn't going to look epic because it is just remember to experiment and do what works best for you the pullback reveal I love this shot using this setup frame your focal point and walk backwards this shot is great for revealing a location and from this height really adds to the production value of your footage you can of course Shoot this going forwards and reverse the clip however if you've got anything moving in your
shot this might give the game away Shadows seeing the shadows of your light standing camera will really look Na and completely distract from what otherwise would have been a usable shot pay close attention to your light source and avoid Shadows at all costs okay so now you know how to fake a drone shot using your phone how can we actually put all of this into practice Well let's look at 10 fake drone shots to help level up your video production these shots are perfect for short films YouTube videos or any type of content where you
want someone to look epic now let's kick things off with the easiest shot of them all the fake drone for this I'm going to cue my subject to start walking forwards then with my light stand fully extended and my camera at an elevated position I'm going to follow I'm going to keep about 10 steps behind My subject trying to keep them in the center of frame with my movement smooth and consistent now with the camera moving smoothly at an elevated position like this we get what looks like a drone shot this is a great easy
way to replicate drone-like footage particularly for those of you that can't or don't know how to fly a drone okay shot number two the mega jib again nice and easy this one we're going to start with our camera low to the ground light Stand fully extended QR subject to walk forwards and lift we're going to keep lifting our camera as high as it will go as our subject walks off into the distance this movement replicates a drone taking off or a mega jib Crane style movement a very cinematic shot this one often used in big
Hollywood feature films as the shot the reverse of this would be the jib down this time I'm going to start with my camera high up in these branches and bring my camera down As my subject walks towards me this shot works well as an establisher because it reveals both character and location this movement and framing also help give your footage depth and Pace okay number three the flyby we're going to start with our camera nice and low to the ground for this one push forward whilst our subject walks towards us I'm going to keep my
camera nice and low push through this grass and then lift up and fly by my sub subject as I pass I'm going to keep Lifting as high as my camera will go this is a great shot to add more Pace to your footage the camera being this low to the ground helps emphasize the movement this shot is not only great for establishing a character but also reveals and shows off the location so those were just a few basic shots but now let's step things up and get a little bit more creative number four the through
the legs for this I'm going to start with my camera extended as high as It will go and push forward and then going to slowly bring my camera down whilst my subject Walks from left to right I'm going to keep moving forward and push my camera straight through my subject's legs skill timing and a bit of luck required for this shot we got it on our third attempt with the first two shots hitting the ground and feet let take a look camera starts high up at an elevated position pushing forward camera starts to come down
and through the legs We then keep pushing forward and lift shot five the follow jib reveal with your camera nice and to the ground push forward and follow your subject from behind walk a good 10 steps then cue your subject to stop keep pushing forward whilst you lift your camera up and over their head to reveal the location let's take a look camera pushing forward we're following our subject again the movement is emphasized being this low to the ground we lift up And reveal the location here's another example camera pushing forward low to the ground
subject stops camera keeps pushing forward up and over such a great shot this one it really does tick a lot of boxes great way of establishing a character we've got cinematic Movement we lift up and reveal this location an absolute must for your film making Arsenal shot number six the hero reveal with my subject high up on these rocks I'm going to start with my camera low And then lift up to reveal him from the feet up a great way of introducing a character this shot it creates Intrigue we've got cinematic movement and with a
bit of timing and Direction it can really help tell a story with all of these shots be sure to experiment with focal lengths and lenses I usually use the wide angle lens for these shots but here's the same shot only this time using the standard lens I actually prefer this one as we're a little closer To our subject for the reveal shot Seven the top down for this you'll need to get your camera high up above your subject's head looking down I'm going to use this giant wall be careful with this one only attempt it
if you are confident it is safe to do so I'm now going to follow my subject camera pointing down and try to replicate a drone flying above his head whilst also trying to keep him in frame the best I can I'm going to keep following all the way until he reaches The top a classic top down drone like shot this one great to sprinkle into a sequence and adds a really nice and unusual perspective to your films and videos number eight the tracking drone for this we're going to track our subject from the side starting
with our camera nice and low to the ground we're then going to lift our camera up as they climb to a more elevated position keeping them in frame and tracking them as they go very hard to pull this shot Off without a crane on tracks or a drone this is another great shot to reveal both character and location camera tracks alongside our subject and then lifts up as they climb to a more elevated position shot number nine the fly through for this I want to replicate a drone flying through a tight Gap I'm going to
start with my camera pushed through this window high up and then pull down and back as my subject climbs Through the window the shot starts by showing off the location then pulls down and back through the window subject climbs through and we continue pulling back a nice surprise element to this shot to help keep your audience engaged shot number 10 the transition one of my absolute favorites this one but we're going to need two shots to pull it off shot one the idea with this is to start on a completely black frame I'm going to
get my camera nice and close to the Front of Chris's lens to achieve this I'm now going to pull back and lift up to reveal this location I'm going to pull back and lift my camera as high as it will go the shot should look something like this we start on a black frame camera pulls back and lifts up to reveal this location okay shot number two we're going to do exactly the same only this time at a completely different location camera starts nice and close to Chris and his camera pulls back and Lifts up
we now have two very similar Clips but at two very different locations this is everything we need to create this transition now with a little bit of editing we can reverse shot number one add a speed ramp and and cut to shot number two at a completely different location a great creative transition to add much more interest to your footage so we now have all of our music and sound effects for the final sequence so now let's edit all of this Footage together and see the results [Music] [Music] [Music] so what did you think hopefully
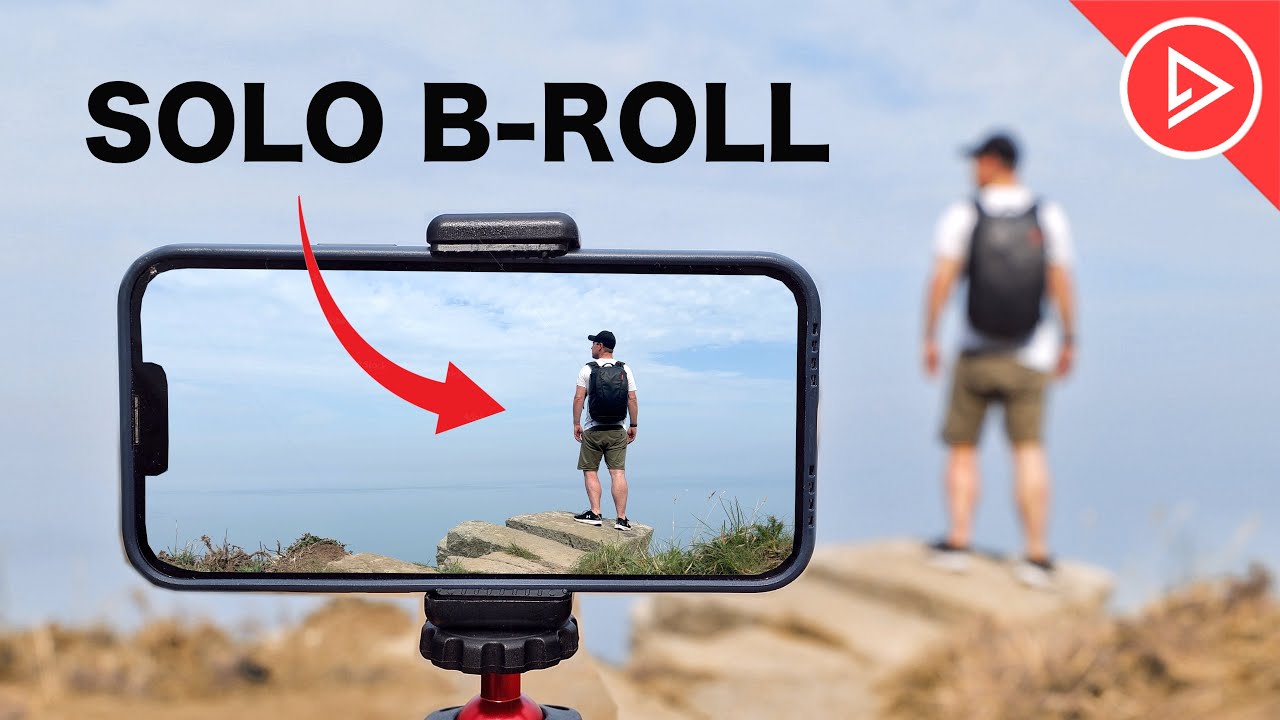
you can now see how by simply combining your smartphone with a couple of accessories you're able to capture much more cinematic and creative looking shots but what if you're not interested in capturing shots of other people what if you need to capture shots of yourself But you don't have anyone to help there are many scenarios while you might need to capture some solo b-roll maybe you're a travel filmmaker a content creator or someone that makes YouTube videos but just doesn't have the budget for a camera operator if any of this sounds like you then here
is how you can capture shots of yourself using a smartphone now the quickest and easiest way to capture a shot of yourself is to Simply lean your phone against something Within your environment I'm going to frame my shot and hit record now it's just a simple case of walking through the frame to capture your shot but there is a problem with this technique because having to rely on leaning your phone against things will limit what camera angles you can shoot and as you can see with this shot here the phone wasn't even secure it slipped
down and ruined the shot so if you want to massively improve the look of your shots and make Life a whole lot easier then be sure to grab yourself a mini tripod and phone holder like this one here make sure it's one with a ball head like this so that you can easily adjust your shot and level Your Horizon okay so now that we have our phone on a mini tripod this shot becomes a whole lot easier not only is the phone higher off the ground creating a much better looking perspective but we can now
easily adjust our shot and lock everything in so that It's nice and steady okay so let's try the shot again only this time with some cinematic music and color [Music] grading now another quick tip here is that you obviously have to walk back and get your phone after each of these shots so why not make the most of it why not grab a shot of yourself walking back this way you've got two shots for the price of one and double the options in the edit also whilst we're on the Subject of walking through the frame
in film making having a person walk in the same direction across each shot is really important for maintaining visual continuity for example if I cut a shot from me walking from left to right to right to left this can feel jarring and confusing to the audience also walking from left to right feels like the person is going somewhere whereas having them walk from right to left feels like they're coming back similar to a shot of Someone walking away from the camera compared to them walking towards the camera so think about your shot and plan each
movement with this in mind before you hit record now as with any good b-roll sequence capturing a good variety of shots is crucial so think about different camera angles shoot at different focal lengths now the beauty of these mini tripods is that you can pretty much attach them anywhere try shots where the camera is higher off the Ground and the focus is more on the landscape rather than you this is a great way to show off your location try shots that are high up looking down or why not get really creative and put your phone
on the ground pointing up and walk over it having a good mix of camera angles is what's going to make your footage stand out and keep your audience engaged you could for example cut from a nice wide shot as you walk across the beach to a tight close-up shot of your Foot as it crunches down onto the Pebbles or try a shot where the foreground is in Focus as you walk through the frame in the the background in soft focus you can achieve this look by putting your hand in front of the camera and locking
focus on it by tapping and holding on the screen now when you take your hand away the focus will remain locked on the foreground the more diverse your selection of shots the more intriguing your footage and final Edit will be now with all of these shots being static shots your Framing and composition is going to be more important than ever this is what's going to make them Stand Out think about the rule of thirds symmetry leading lines this is how to improve your shots with zero budget no fancy camera accessories required just knowledge you can
be at the best location in the world but if you're framing is off it's going to look terrible Okay so we've covered some Simple and basic ways to capture solo b-roll now let's step things up now up until now all of these shots have been static shots and if we want this sequence to feel like someone else has filmed it then we're going to need to add some camera movement a quick easy way to add movement to a static shot is to Simply zoom in in the edit but technically this isn't camera movement we're just
zooming in so how can we add more camera movement to this sequence on A budget how can we make this sequence look much more interesting well one way is to use cutaway shots a cutaway shot refers to an additional shot or series of shots that are inserted into the sequence to provide context enhanced storytelling and in this case help add more movement to our footage rather than every shot having you in it which would just get predictable and tedious try cutting away to shots of your location to help tell a story an orbit shot of
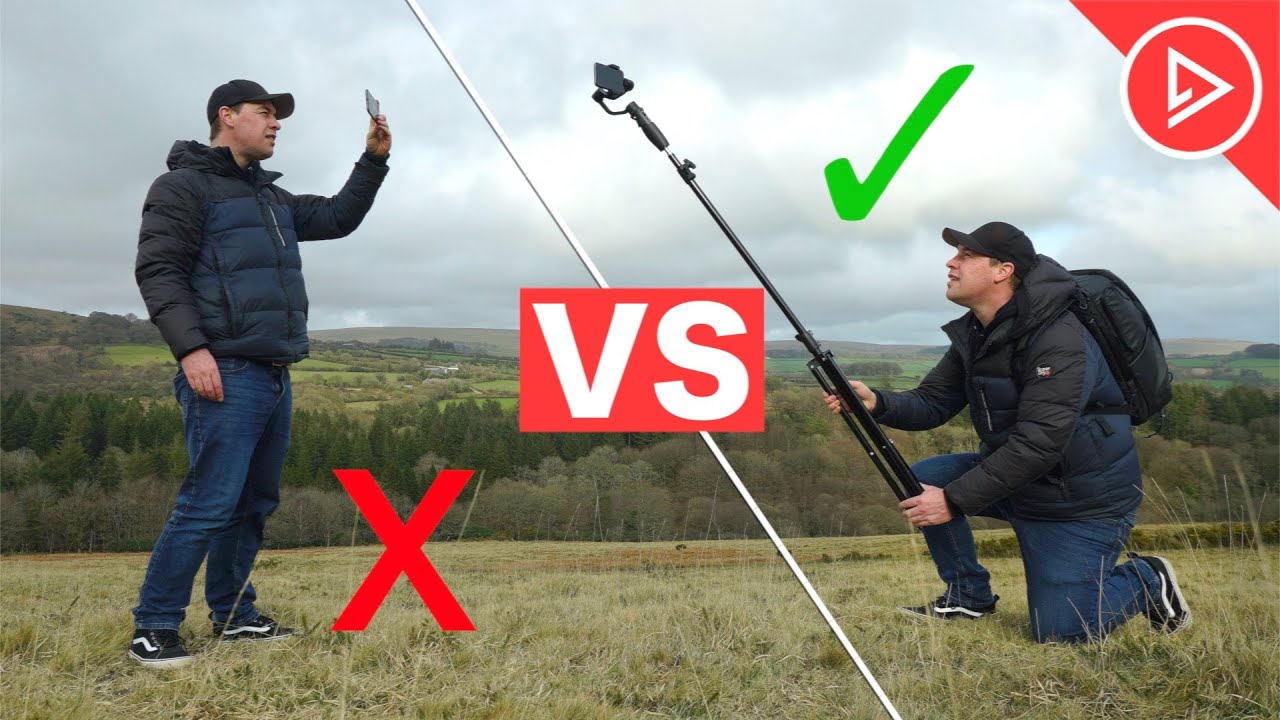
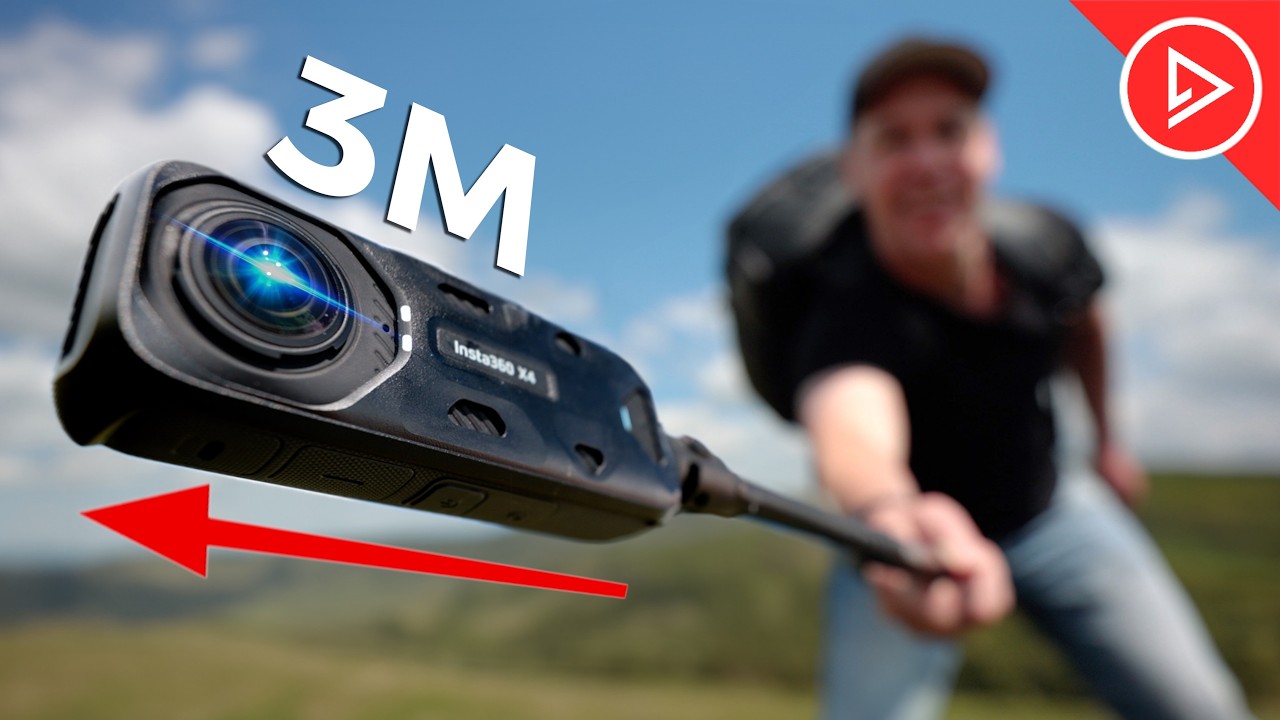
This sign for example splicing these shots into the final edit will help add more interest variety and perspective to your sequence now another budget friendly way to add more movement to these shots is to use a mini extension pole like this one here an extension pole will allow you to hold your camera out in front of you you could get low down and track your feet as you walk you could hold it out to the side and then orbit the camera around as you walk you Could track from the side or from behind all of
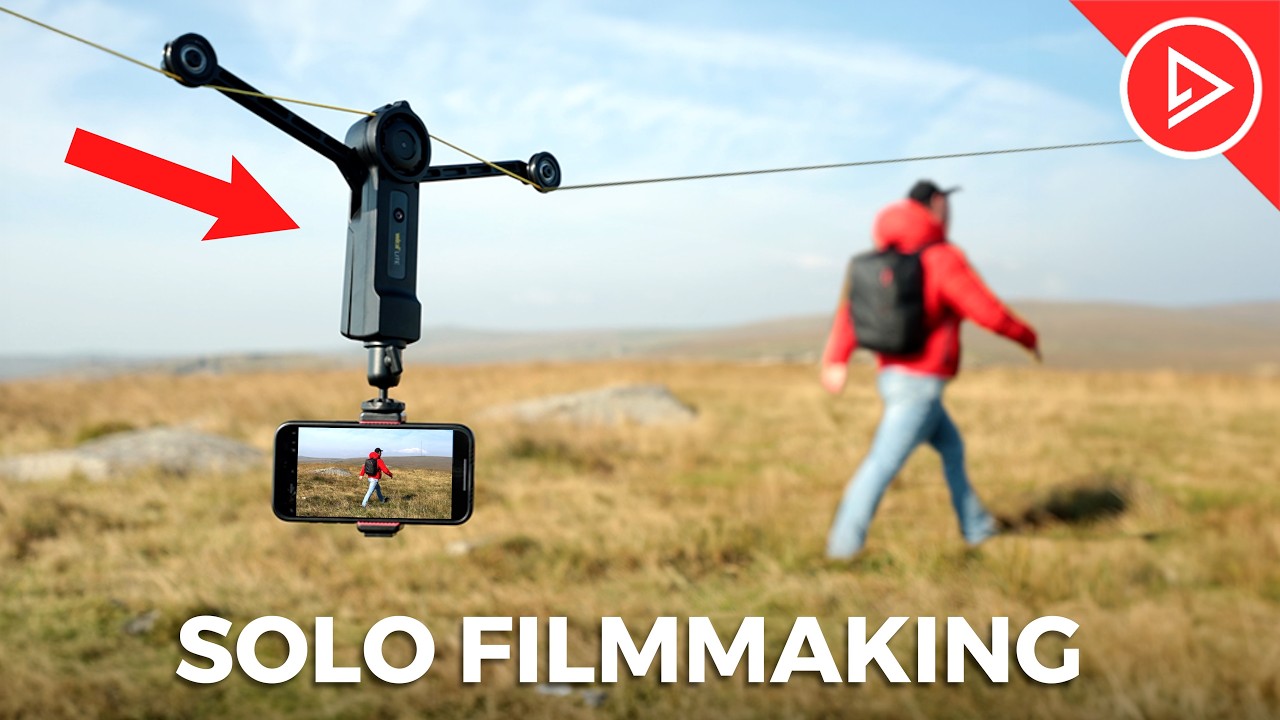
these shots are going to add camera movement and increase production value now as great as these shots are I think an experienced filmmaker would know that these shots are being shot using some kind of an extension pole or selfie stick so how can you capture true camera movement shots of yourself without having to operate or hold the camera well by far one of the best ways is to use a smartphone gimbal with AI Tracking like this one here this tiny little device that fits easily in your pocket unfolds to become your own personal camera operator
now utilizing it Advanced AI tracking software I can have the gimbal lock on and track me pretty much wherever I go and this is true camera movement this camera is actually panning and tilting as I walk through the frame simply reposition the gimbal to link one shot to another and just like that you've now got an Unmanned camera that is following your every move keeping you in the center of frame as you go okay now whilst we're on the subject of tools to help shoot solo b-roll this next one is a complete Game Cher this
is an electric zip line for your smartphone and the result results you can get with this thing are incredible let me quickly show you how this thing works so we've got this yellow line or string and I'm going to tie one end to something secure this Branch on this tree should do nicely and I'm going to tie the other end to this tree here now quick disclaim it here okay don't go doing this using a tree hanging off the side of a cliff like I'm doing here I had very limited options at this location and
I did it as safely as I could I'm going to unravel all of this line and attach the other end to this tree here here I'm going to pull the line nice and tight I'm going to attach the zip line as well as my smartphone Now using this tiny remote I can now move the camera up and down this line allowing me to capture shots with my smartphone that just aren't possible any other way okay so let's start with the camera at this end towards the edge of the cliff and I'm going to Traverse up
this hill and try to time it so that just as I get to the top the camera flies past me let's take a look [Music] and what I really love about this setup Is that you can capture multiple shots without having to move the line for example I could point the camera downwards and capture the ultimate topown shot or I could turn the camera to face the other way for a completely new perspective there are many creative ways that you can use this zip line these are just a few examples also Pro tip here if
you're going to do this don't do this walking through a bunch of brambles like I just did because it doesn't end well okay so now that you've seen what this thing is capable of and how it works let's Capture One More Shot for the final sequence I'm going to tie one end of the line around this rock yes I'm terrible at tying knots but as long as it's safe I don't really care I'm going to unravel the line all the way down the cliff like this and tie the other end to this rock here we
now have a line going from here all the way up to here and for This shot I'm simply going to make my way back up this Cliff whilst the camera follows now some of you might be asking why not just use a drone for this and the quick answer is that this is much more precise it's much quieter requires less skill and it's much safer don't need to worry about propeller blades whizzing past my face so perfect for shooting solo b-roll okay so with the sun setting I would say I've probably got about an Hour
of daylight left so I'm going to grab a few more shots using all of the techniques that I've shown you so far I'm going to grab a few more shots using the AI gimbal the extension pole and some simple static shots using the mini tripod I've also been incredibly lucky this evening because we have a beautiful sunset helping create a much softer more cinematic light okay so now that we have all of our shots on our timeline edited into a short sequence we've added music And sound effects now let's see what this solo b-roll sequence
looks like [Music] well congratulations if you have made it this far you now have all the knowledge that you need to go out and shoot professional looking videos using your smartphone if you found this video useful do let me know by giving it the old thumbs up and if you'd like to learn more about shooting cinematic videos using your phone then be sure to check Out my mobile videography course in the description below but that's it from me thanks for watching and I will see you in the next video [Music] hey