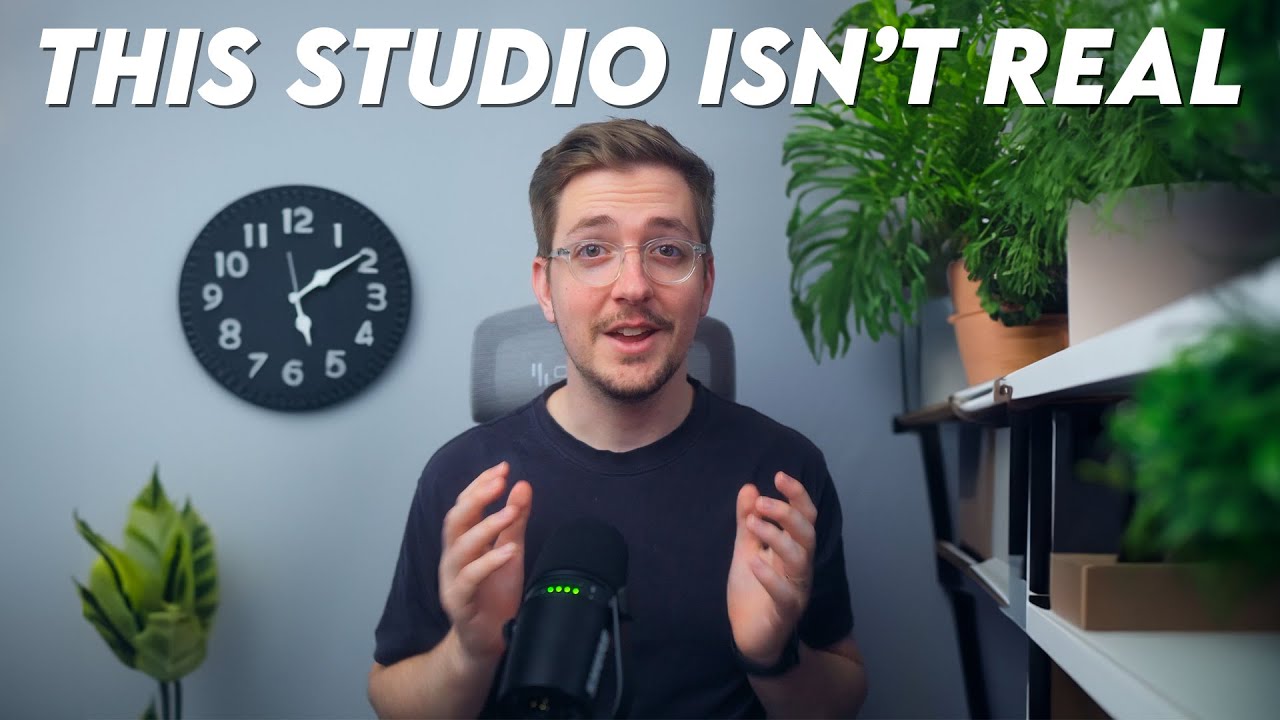
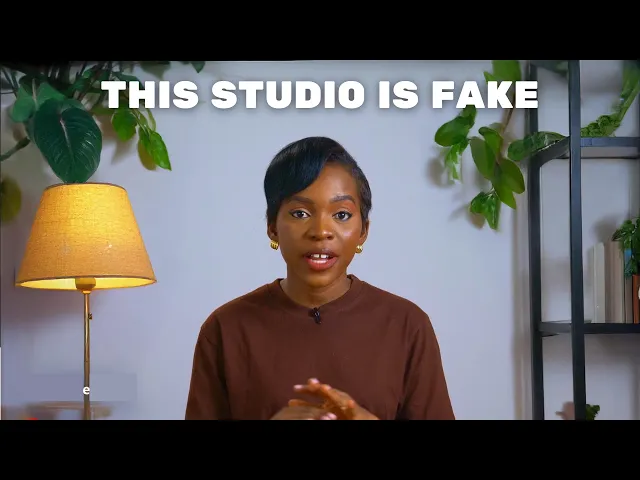
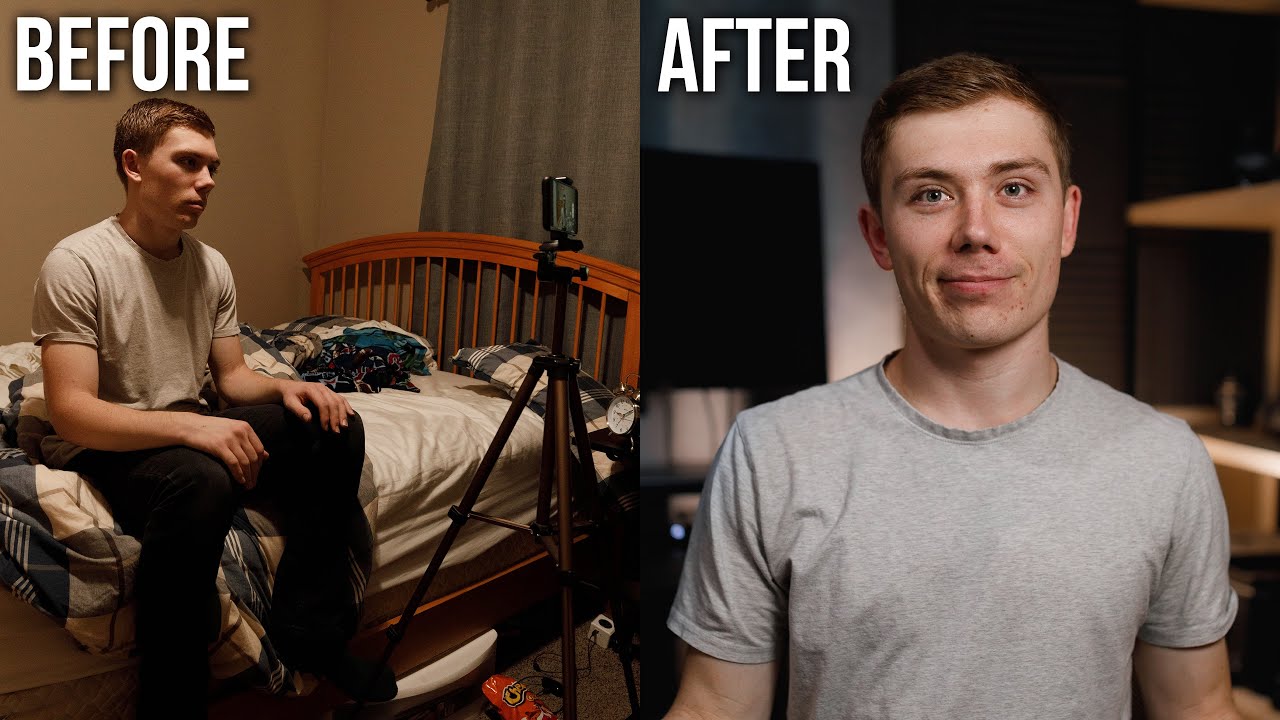
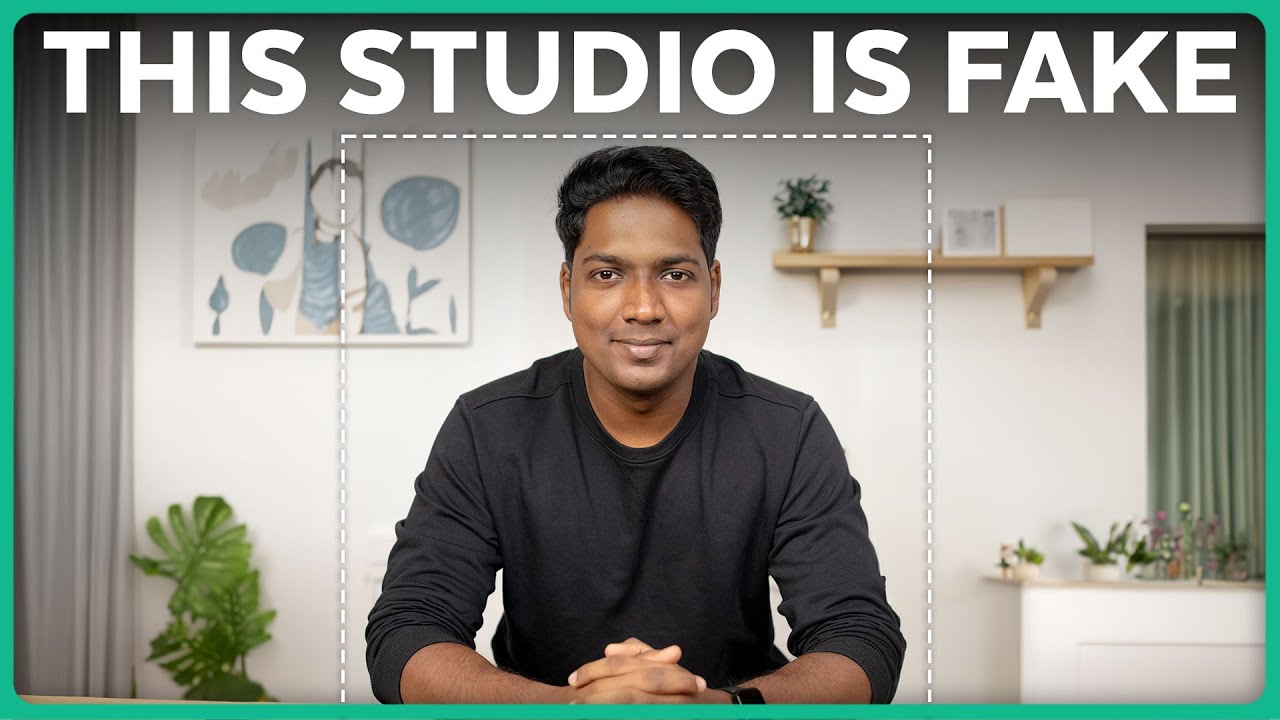
would you believe me if I told you that everything you see around me is fake it is this is what my YouTube Studio background actually look like and in this video I will show you how you can transform your boring backgrounds into a fake but professional YouTube background like this this and this the best part is you can make as many backgrounds as you want for free using Ai and they look 100% real it only takes four simple steps and can be achieved using any video editing app or software you have so let's get started
all right the first thing you'll need to do is record your video because you'll actually use screenshots from your video to create your background all you need to do is find a good spot in your house with good lighting to shoot if you don't have enough lighting just sit near a window or go outside to record also make sure that you're filming against a plain wall or a simple background because there is too much clutter behind you it makes it really hard or difficult to get a clean realistic looking background like this later on so
it's important for you to get this shot right then make sure you're using a tripod when you're shooting to keep your camera or your phone steady if your camera moves while you're recording it makes it extremely difficult to edit your background later on so make sure you're using a tripod also try to capture medium shots when you're recording this means the camera should capture you from your waist to the top of your head leaving a little space above your head this is important because during editing you might need to zoom in or adjust the shot
just a little bit so if it's too close it might be tricky to fix things later on lastly try not to move too much when you're recording a little head movement or hand movement is fine but avoid moving too much because as you can see it can mess up the background when you're editing much later so keep your motions and movements small and in front of your body while you're filming after shooting your video there is one more important step to getting that realistic background you see in professional videos it's a step that many people
Overlook but trust me it's going to save you tons of time later and you can use any video editing app or software to do this step as well for this tutorial you can use cap cut because it still has free features and it's super popular with content creators but don't worry you can follow these exact same steps in any video editing software or app like Da Vinci resolve Premiere Pro iMovie fimora or anyone you prefer first import your raw footage into your preferred video editing software or app and then do all the basic edits that
you normally do to your video like cutting out any mistakes awkward pauses or silence then tighten up the pacing so your video flows nice nicely and color grade your video to make it look more polished and professional you can definitely skip this part if you don't normally color grade your videos but once you've added the background you won't be able to make simple basic Corrections like removing the silence and color grading as well without messing up the background so make sure that you do all these basic edits before moving to the next step now once
you've done the basic edit grab a screenshot from the best frame in your video and save it for later now this is where things get really exciting because this is where you get to create your 100% realistic background that makes your videos look like they were shot in a professional YouTube studio and it's actually super easy so let me walk you through the process step by step now that you have your screenshot head over to firefly.com to create that realistic background that blends perfectly with your video Adobe Firefly offers a tools like AI art creation
text image generation templates and so much more but for this video we're going to be using the generative fuel tool so click on that and then hit upload image to import the screenshot you saved earlier after uploading your image if you need to adjust the position of your image you can do this by using the pan tool at the top left corner to move it around next click insert then add and use the brush tool to select the edges of of your image make sure to leave a little space between your selection and yourself to
allow for movement this is key in making the final result look absolutely natural if you accidentally select a part you don't want just click subtract to clean it up once you've outlined the edges scroll down and paste a prompt describing the kind of background you want for your video I have included some example prompts in the description so check them out feel free to copy them and paste them in the prompt box then click generate the AI will give you three different background options to choose from if none of them work for you just click
more to generate additional choices if you're still not happy with the results you've gotten after a few tries then what you need to do is tweak the prompted bit to be more specific and try it again until you find the perfect background when you find one that you like just click keep and then download to save that image to your phone or your computer now it's time to blend your new background with your video but be careful cuz one small mistake here can totally mess up the final look but don't worry I'll guide you through
this process step by step so let's get right into it first go back to your video editing software or app and import the background you have just downloaded place it on the timeline and extend the duration by dragging it to match the length of your video once you've done that drag the main video on top of the background so it's an overlay at this point you might notice that your background isn't really showing behind you but it's okay because this is where the masking tool comes in what you want to do is select your main
video then go to the mask option and choose the rectangle mask now adjust the rectangle until it fits your video perfectly and reveals the background behind it then scroll down and increase the feather setting to around five this is going to help create that smooth seamless blend between your original video and the fake background making it look like your video was actually filmed in a professional YouTube studio now note that if you use the free version of Adobe Firefly there will be an adobe logo in the corner of your background to get rid of this
you have a couple of options the first way is to select all your Clips then turn them into a compound clip or Nest then scale the video till the logo goes off screen this is why I recommended earlier that you shoot your video in medium shots so when you scale it it's not too close up another way to hide the Adobe logo will be to cover their logo with your own logo or text overlay once you've made all these adjustments you are set and you can export your video then show off that professional new look
as I mentioned earlier you can achieve these same results with most video editing softwares or app so even if you do not use cap carts let me know in the comment section what video editing software or app you use and I will give you the specific settings you need to get the same result also remember that creating professional video backgrounds is just one part of the equation to actually grow as a social media content creator you need to master everything from finding the right content ideas that people actually want to watch to scripting shooting and
editing your videos like a so if you're ready to level up your content creation and video editing skills join my free content creation Community by clicking the link in the description and I'll help you create better content every week see you in the next video


![I Replaced ALL my ADOBE APPS with these [free or cheaper] Alternatives!](https://img.youtube.com/vi/5EfqHg49kMk/maxresdefault.jpg)