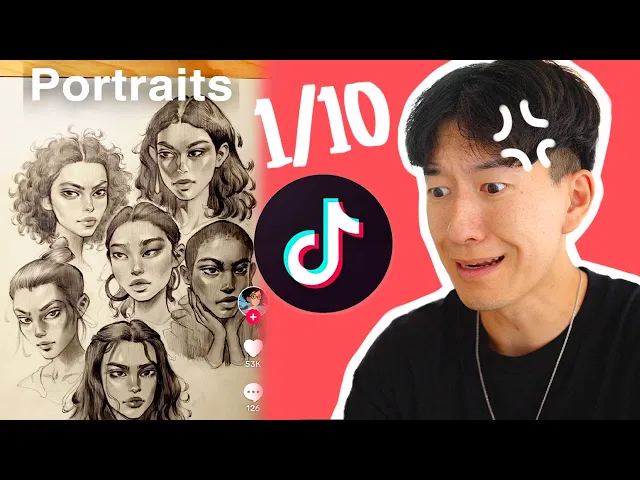
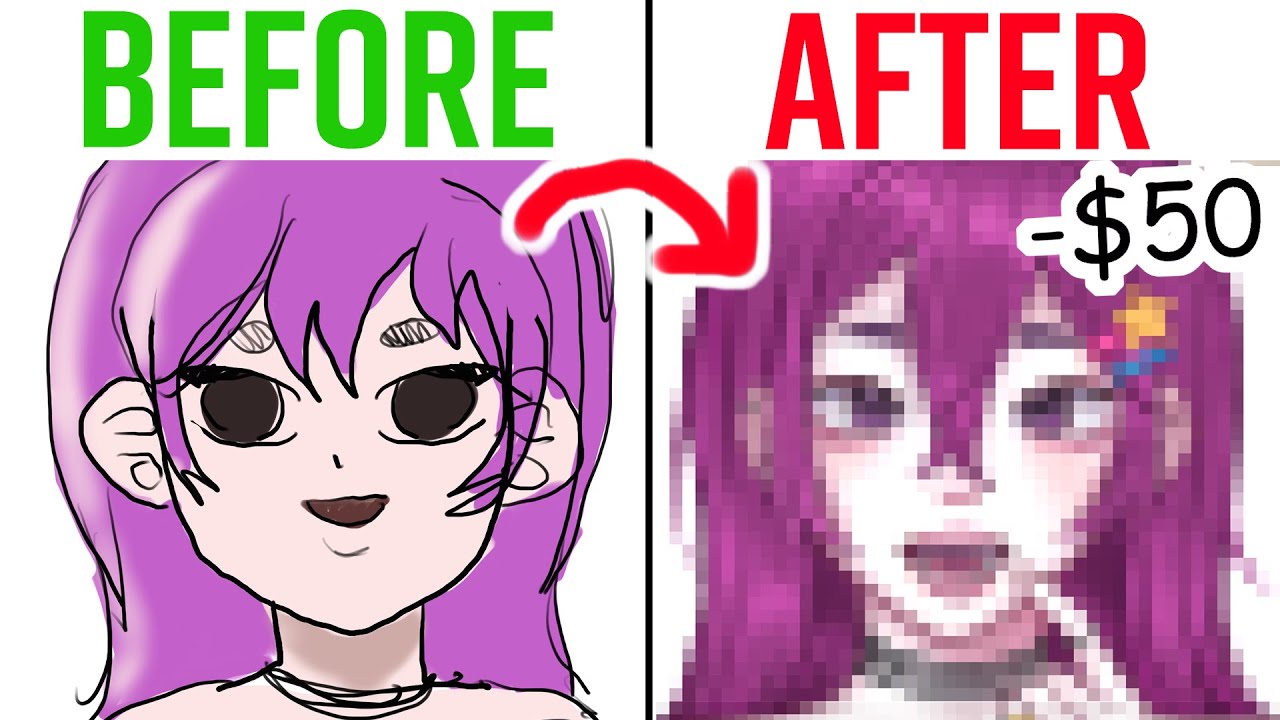
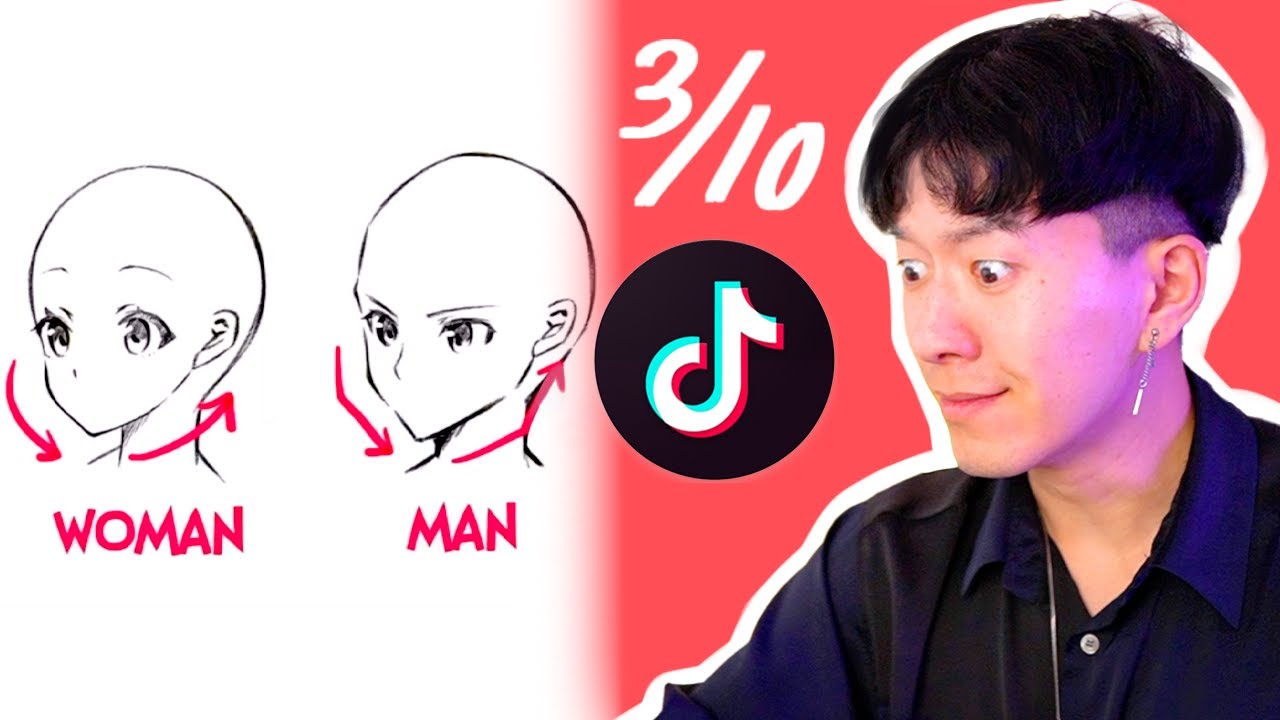
apparently it's round to have good posture now all right I'm going to do the rest of this video like this 10 out of 10 wait a minute you look so nice today all right I'm sorry for touching you all right put on your seat belt guys we're going to be taking a look at some art tutorials on Tik Tok stop trying eyes from a 34 perspective like this to be honest this has to be one of the hardest angles to draw eyes from like just look at these eyes they don't really look that bad but
they don't really look that good either so instead you're going to want to do this start off with a slightly curved line for the top of the eye then instead of doing the full shape of the eye what you're going to want to do is use a straight line for the far side of the eye you have to remember that the eye wraps around the face so from this angle we don't see the far corner of the eye much this is very good for those wondering why you don't see the full shape of the eye
when you're viewing from this angle it's because the eyeball is round and your eyelids are going to naturally wrap around the round shape of this eyeball so as you turn your head you see less of the far side of the eye which is why gets a little bit more squished it's smaller like your brain 10 out of 10 people in the comments are saying those are two different angles stop it seek medical assistance yes the angle is not a perfect one toone match but the lesson still applies okay don't be so technical don't be so
anal some things are not meant to go stop it and then there's this what pencil do you use what pencil I want one please what pencil do you use for drawing what kind of paper is that it's not the tools guys it's the artist I you know what but I should make a video roasting these Tik Tok comments cuz y'all have been getting away with these for far too long how I shade portraits first shade the face using a light pencil Tob smudge it erase the highlights and use triangular shape to it okay make the
outline sketch [Music] oh that was it that was it hatching technique for the Final Touch why do I feel like from here to here we might have missed a step or two seven out of 10 so this is a traditional fivepoint perspective drawing and this is the kind I thought there were only three a POV drawing I do more often which actually isn't a five-point perspective drawing I only really utilize four Vanishing points and I omit the top one I'm going to show you how to do a fivepoint perspective and then how to do a
fourpoint perspective to start your fivepoint draw across with a vertical and horizontal line the same length the middle point is your central vanishing point the top and bottom are your Zenith and nater advantaging points respectively and the left and right are your left and right Vanishing points then draw a circle all the way around so you're telling me top and bottom is called Zenith and Darth Vader and left and right is just called left and right what the draw radiating lines from the center vanishing point and then draw arcs from the top to the bottom
vanishing point to the right and left of the center line similarly draw arcs from the left to the right vanishing point above and below the Horizon that's your grid from here it's fairly easy to plug in your space just use the grid lines as cues for what Direction your lines should go that's so sick I mean I've done fisheye perspective before but this is the first time that I'm actually learning about the more technical side of it and when I make a POV sketch I omit the top vanishing point instead I make a horizon that's
actually a little bit longer than the vertical Center Line I draw the same radiating lines from the center vanishing point then I draw arcs from the left vanishing point to the right above and below the Horizon but instead of arcs from the top vanishing point to the bottom vanishing point I draw an upside down umbrella so it's sort of open-ended at the top oh and then plug in the information the visual information the same as before using the grid as a guide the difference now though is that after omitting that top vanishing point I have
a much more Dynamic space it feels like the space is sort of zooming out to meet the viewer and you really feel immersed almost enveloped in that space it's a much more Dynamic perspective in my opinion so that's why I do my POV drawings the way that I do your POV drawings are nuts you Paul hon you are a Nutty Nutty man you are absolutely full of nut look at this oh fantastic 10 out of 10 well gosh darn it guys Tik tok's on a roll today how can we make this drawing Less in need
of criticism this drawing comes to us by way of Marley heart emoticon Kenton she is sort of stuck on how to improve and that her art needs some criticism I'm going to go ahead and deconstruct this face and we're going to go ahead and draw that ey line if we assume that our nose should be about halfway between the eyes and the chin and the mouth halfway again we'll see that the lower two facial features are quite low not only that but the eyes are a little bit too close together if we trace a line
up from the corner of each nostril it should hit the inside of the eye we can see it hits the inner eye as opposed to this Outer Edge so I'm going to pause that right there before I lose this thought but I think this is doing too much if you're looking for proportions find the hairline the brow line the nose and the chin and as soon as you have those you're going to have the three most important portions of the face and on a normal person those three sections are going to be equal in length
but if you wanted to stylize your characters you could also expand the length of certain portions to make them look more exaggerated all right so here I've normalized the facial features just a little bit while maintaining that unique facial structure I've also introduced a positive canl tilt so this I think is a problem with people correcting people's art without a reference and I'm guilty of this St but we've all learned I think the shape of the eyes was fine if you wanted to really just bring things back into proportion the only thing I would is
just move the eyebrows and the eyes down a little bit so that the three equal portions of the face are relatively proportional but again this is hard to do without a reference cuz you don't know what the original person looked like I don't think it's necessary to make the eyes rounded instead of keeping the original shape because at this point you're just changing the style you Sim does artifi her when your style is so recognizable that you become a verb yo today you draw with me so grab a sheet and a pen and let's go
so today we're going to draw a skeleton skull and you'll see it's kind of super simple to draw so getting started is easy we start to make a rect angle in perspective and then the two is that a box visible faces you will separate them equally with lines that's how it is then we just draw a kind of circle inside the box and another on the side that will serve us roughly as a marker for the skull then we make another one above and then we just draw this line which passes right in the middle
and after that you will place the two small lines which will be used to place the jaw for the moment we get that and we're going to move on to Serious jumps there I added a few small shadows and then you do the eyes try to give a depth effect because that we made ahead of three car faces after you go to the cheekbones and the top of the skull I hope it's clear enough what I'm showing and now we're tackling the jawline remember to draw the line to separate to know where do we place
the teeth here and then you are just going to place a line above a line below and then there is only to draw the teeth hop hop hop hop hop nickel and now we have about finished the drawing it's not bad but you see here's the skull of my enemy and what happened to your jaw okay technical difficulties just comparing the two if you're looking at a skull from a 3/4 angle like this you see this jaw bone right here unless you're built like a Lego minifigure your jaw doesn't go that far back okay so
on this skull if you just push the jaw forward a little bit you're going to have a nearly perfect skull and that was a pretty good process for having started with a box eight out of 10 how I draw fire in case you guys were wondering how to draw fire draw a shape LOL great great start erase the edges with circle-- likee shapes okay so this is a method of reduction I like that darken the tips in this case they use an orange color okay that's good some brighter color inside this is very very important
for getting that glowing look in a flame and then brighter inside plus slightly darker edges okay good little fiery things to make it look alive good overlay with red/ orange SL yellow as preferred very very good and optional blue overlay that's interesting this is great this is very reliable whenever you want to draw something that's glowing just make it bright as possible on the inside and make it fade out this final slide is so interesting to me because blue and orange are complimentary colors and by adding a blue glow what you're doing is you're adding
a complimentary color that creates even more contrast so it makes that Center Point look like it's growing even more just an interesting color theory concept if you want to learn more about color theory I have a tutorial on just that topic on my patreon this month for all the babies we got another one of these guys art tips for drawing part three uh good this one means to pay attention to your perspectives and stop running from your hand responsibilities beginner mistake right traps important remember that apparently it's wrong to have good posture now all right
I'm going to do the rest of this video like this 10 out of 10 it's one thing to know how to draw a building from scratch on an open plane of nothing but what if you want to integrate it within a landscape in a dynamic way well let's look at a Riverside and what do you know a water mill coexisting with natural forces allowing you to construct such Marvelous Mechanical structures another one is a narrow Valley well how about we bridge the gap with a building a top Like A Roadside Tavern or in this case
a bridge toop Saloon and with the winds flowing steady through this Valley how about adding a windmill or two okay maybe one more a rock face fairly Bland you might think but what's this an inner structure carved inside and out as a hall of Wonders this is so good man I love the creativity here how to cross hatch like these instead of like [Music] this drawing the outlines first basic guidelines of the face Contours oh I see what you're doing here all right she looks a little bit like a zombie here but you know what
it's the thought that counts now I've seen this contour-based cross-hatching technique before which is very cool and when it's applied correctly like on the eyes here it's really fantastic basically this just means that if you look at a surface like this you want to trace your hatches based on the curvature of that surface so any round surfaces like the side of my face here you're going to cross-hatch this way and not the other way really cool execution could have been better but eight out of 10 good job most people fail to turn their rough sketch
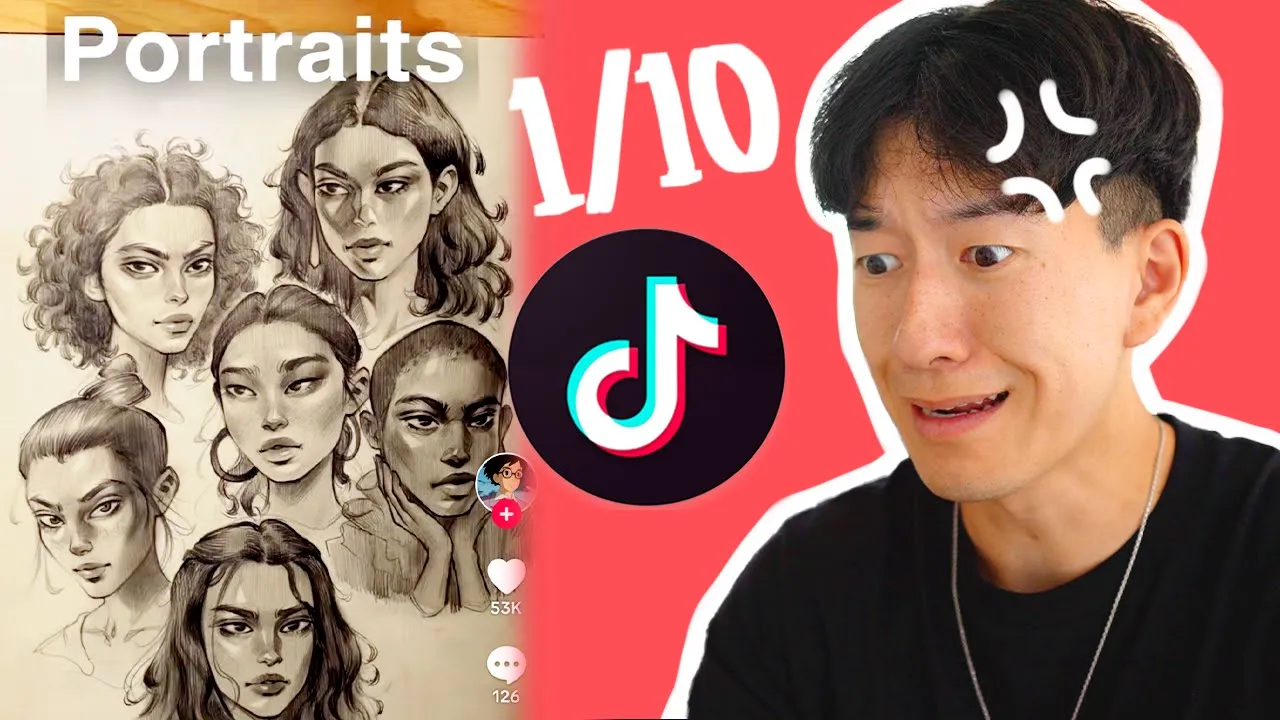
into a realistic portrait for one simple reason they don't realize that we can't see outlines on human faces so your sketch will keep changing this is why from now on we need to work on the portrait as a whole and not just individual features like the ice shading your portrait as volume to the sketch which then makes your mistakes obvious and easy to fix and if you struggle to shade your B corre correctly edit your reference to black and white then start by shading the darkest areas which add contrast so that your drawing doesn't look
flat I use soft pencils without pressing hard and only later I start using harder pencils to add smoothness to the face and for the hair shape your eraser like this so you can make sharp highlights which look like individual hairs jeez that looks good so she makes a really good point about not being able to see people in outlines I mean any sketch you draw is going to consist of lines but those lines are going to start taking on a different look when you start adding volume and shading to them so I guess just to
mirror this point I also want to add that you don't want to be too tied down to your sketches don't get emotionally attached to those lines keep them nice and light because when you're shading on paper they're going to be changing all the time good job8 out of 10 how to color skin anime okay do that and don't draw black people what the you're adding Brown oh oh oh dear oh where's this going the bottom one looks better what are we talking about here what what not going to lie I thought you were talking about
black people at first you had me in the first half for that I'm going to give you a one out of 10 why would you dive straight into a drawing with pen I get asked this question all the time while I'm working on location because normally starting with a pencil is how you avoid making mistakes right but the way I see it is that there are two values the first is accuracy which has to do with how realistic your drawing looks good compared to real life but the second is story which has to do with
your interpretation of what it's like to be there in person so today I'm on 42nd Street standing in front of the library and there's the shuffle of the to be there in person so today I'm on 42nd Street standing in front of the library and there's this Shuffle of the street that I'm trying to compete against and so in a way working with my mistakes rather than trying to hide all of them is going to add a sense of authenticity it's going to say hey I was actually here and I just went for it and
it's this quality that I love sharing the most with other people because it adds a flexibility as to what it means to capture an event a location or an experience in the end your work doesn't necessarily need to be perfect it just needs to be honest oh I love it you take that message you take your ear holes and you shove it in there all right it doesn't need to be perfect it just needs to be honest just be authentic you know what in fact it's impossible not to make any mistakes in your work unless
you're like a a art God I make mistakes in my work all the time none of it is perfect but that's what makes your work Uniquely Yours all right so own up to that make mistakes like Bob Ross once said happy little accidents all right and if you made it all the way here thank you for going on this adventure with me to the depths of Tik Tok we've had some really good tutorials today surprisingly so to the Tik Tock creators good job guys keep it up and to you guys watching this video if you
have yet to subscribe subscribe oh jeez what are you waiting for you want to end up like this cuz I'll make it happen that's it check out my patreon for monthly tutorials and process videos and I also have a bunch of wallpapers on there for you guys to make your phones look uh Sam does artified caught a cold guys I've been trying to recover from a cold for the last week that last video that I put up was shot like 3 weeks ago cuz I've been out that cold just took me headlocked me gave me
an elbow to the face and just y'all stay safe stay healthy out there all right