All right, everyone. Welcome to this amazing course I have prepared for you. What I have done here today has truly never been done before. This video is a comprehensive course on YouTube automation, Tik Tok automation, where I will even include how you can make money with affiliate marketing without putting extra work. If you actually manage to focus and watch this video all the way through, you will have everything you Need to start your first successful automated content business. Before we start, there's something I have to say. I haven't seen anyone release something for free that's
even close to the level I've created for you. So, before we even start, please make sure to like this video and subscribe to the channel. Consider it my fee for the course. I have been into the faceless content for a year now, launching different YouTube automation channels, Tik Tok accounts, Instagram pages for affiliate marketing, and I have been making more than $10,000 per month for the last year, which has completely changed my life. Today I decided to put together all the knowledge I gained on this wild journey into a comprehensive course so this knowledge reaches
a wider audience. Seriously, if you take the time to watch this video entirely, you will absolutely master the art of content automation across multiple platforms, even if you Are already in this field or a complete beginner. In this video, I will show you different types of automated content strategies so you can finally start your online business or generate new ideas for your existing online business. No more excuses. This course is 100% free and I will be teaching you everything from A to Z. Here's exactly what you will learn. First, I'll show you how to create
automated YouTube videos that can generate passive income while you sleep. Then we'll dive into Tik Tok automation strategies that are currently bringing in thousands of dollars for creators who know the system. Next, I'll reveal my top affiliate marketing tricks that turn your automated content into a sales machine. I know it sounds like a lot, but there is even more into the course, including also all the AI tools that I use. All right, I don't know about you, but I'm excited to get started with this course. I truly hope that you appreciate The amount of work
it took me to put this all together. For the best viewing experience, I've gathered all the tools in a master document. Feel free to grab it. I'll publish this document in my free Telegram channel with the link down below. Also, since we are here, I've created a private Telegram community where I share daily methods and tools that go way deeper than what I can cover in these videos. Inside, you'll find step-by-step guides, exclusive AI Prompts, and real-time updates on what's actually working right now. If you are not serious about building a profitable YouTube channel, then
this isn't for you. But if you are, then click the first link in the description to join us. But just a heads up, we're only accepting new members until April 28th, after which I'll be focusing more on helping those already inside. Okay, enough talking. Are you ready? Let's go. Chapter one, passive income with Historical content. All right, guys. What if I told you that someone is making over $5,000 a month using nothing but free AI tools? And get this, they've only posted 11 videos in one whole year and have gained over 170,000 subscribers. They don't
even upload weekly or daily. Yet, their videos are still getting millions of views and generating passive income every single day. Imagine uploading a video today and a year later it's still paying your Bills. That's why in this video, I'm going to show you exactly how they do it step by step. And by the end, you'll have everything you need to start making money using AI today. This YouTube channel called Beginning to Now is leveraging AI to automate content creation in a way that most people overlook. They didn't rush and post 11 videos in their first
month. Instead, they took their time, releasing content strategically throughout the year. Yet, Those videos continue to trend, bringing in views and income long after being uploaded. Today, I'm going to show you exactly how to replicate this success. From finding viral video ideas to creating AI generated scripts, visuals, and narration, all without needing to be on camera. We are going to do this in six steps. On step five, I'll share a tip that will be game-changing for this niche. So, make sure you watch the whole video to get the full information. The First step is finding
high retention video ideas using AI. To do this, we train Chad GPT to act as our personal YouTube script writer. Start by visiting the beginning to now channel and picking their most viral video. We open one random video. You can choose the one that is most viral in case if there are any strategies that made the video viral. And then once you open the video, you click this share button here and copy the link. Now from this link, we Are going to transcribe the video. And for that, we are going to use a tool called
Turboscribe. You log in with your email and you have three free daily transcriptions to do which is more than enough for what we need. Go to the dashboard and click transcribe file. Click this link button here. Now paste the link on this space here and click import. Once you click import, it will import the video. So now we need to press transcribe. And in a couple of Minutes it will give us the transcription. It gave us a 30inut transcription which is more than enough to teach chat GPT script writing. Now we move to the second
step which is generating viral video scripts and AI image prompts. We have to copy the script and go to chat GPT and write I need you to analyze this script and then paste the script. Hit enter. ChatGpt gives us explanations of why this video could go viral. It breaks down the video And it knows that we need to include AI visuals to create this video. This is all we need to teach chat GPT to write engaging scripts for our videos. Now we need to write great. Now that you have analyzed it, I believe you are
capable to give me three viral video ideas to create a YouTube video of the same kind as you have analyzed. ChatGpt will give us three viral YouTube ideas about engaging historical storytelling style from the analyzed script. Now, based on The channel we are breaking down, three ideas can cover like three months because we want this channel to be more kind of passive income where we don't do that much work on it. And it brings $5,000 monthly to our bank account. That's $60,000 per year doing little work. But if you want to make more video ideas,
then just write, "I need more video ideas of these viral YouTube videos." And Chad GPT will give you more ideas. But for me, we are going to stick To this right now and I'll show you how we get the script and prompts to generate AI images. We are going to go with the first idea and we will write great. Now for the first idea, then copy the first idea title and paste it down here and continue writing this. I need you to write me a full YouTube video script about this topic. And after you write
the script, write me an exact prompt to generate images that represent each scene individually. Make the Prompts detailed so we get realistic results. Amazing. ChatGpt has given us the perfect breakdown of a script that we can use to create our first video on this niche. For each scene, it recommends the prompt to generate the visuals. And then we have the narrator part. This is very well organized and easy to use. Down here, you see that it has given us more image prompt generations for the scenes where the prompts are more detailed. That's a Great job
from chat GPT. Now the second step is done. We need to move to the third step which is very important. The third step is where we need to create the AI generated narration. For this we are going to use 11 Labs. This is the best tool so far to generate voice. There are a lot of narrators that we can use, but to be quicker, I'll use just a random one here without doing too much research just so I can demonstrate to you guys how it works. I'll use this one Called Adam Stone. We need to
add it and then press use to use this voice as our voice generator. Now go back to ChatGpt and copy each phrase like this and paste it on 11 Labs. Do this for all the scenes that ChatGpt gave us. And once you have pasted your script, press generate and boom, you have got the voice for your video. In the 13th century, a storm swept across Asia. Faster than the Romans, deadlier than the Vikings. Great. Now download it and Let's go to the next step. Step four is where we generate the images from the scene prompts
ChatGpt gave us. The tool that we are going to use for this one is Leonardo AI. Let's go to Leonardo AI and click here image creation. Make sure that you have selected the 16x9 aspect ratio for YouTube. Then let's go to chat GPT and copy the first prompt. And then go back to Leonardo AI and paste it on the prompt section. Click generate and boom, we got our first images. Now we Need to do the same for each prompt. Go to Chad GPT, copy the next prompt and go to Leonardo to generate it. Do this
for all the prompts. You can also tweak some prompts to get the results that you want, but most of the time AI gets it right. If you need more prompts for more scenes, you can also ask ChatGpt to write you a prompt for the scene that you need the generation. Now that the images are ready, we go to step five where we learn about this game-changing Secret. In this step, we are going to generate the images into videos. For that, we are going to use a tool that is great for these imagetovideo generations, and it's
called Hilu AI. For all the tools that I'm using on this video, you can find the links in the description. On your way down, don't forget to leave a like and a subscribe. Now, once you open Hilu, it will ask you to sign in with your email. You need to do that and then it will give you free Generations daily. Once you are in, then click on create. Now, it has sent you to the page where we can generate the video animations from the images. Click on image to video and upload your first image. We
also need the prompt to give Hilu more context. Or you can either write a prompt yourself like Mongolian tribe riding horses in sunset. Or you can go to Leonardo AI and press this plus button here to copy the prompt we used earlier. Here is the difference Between generations with the actual prompt and the prompt I wrote. Sometimes it gets it right, sometimes not. Try finding the way that works best for you. Anyway, now we need to add all the images and the prompts to Hilu to generate our videos. I'm going to add one by one.
And we can generate up to three videos at once with free version and with paid version we can do up to five videos at once. Now once we have generated our video clips we need To download them all and move to step six. Step six is where we bring everything together from the videos we generated and the voice narrator. To do that we are going to use an editor that is free and is very userfriendly. It's called Cap Cut. Open Cap Cut and hit create new project. Import the narrator voice and the footage we generated.
First, add the voice on the timeline and cut all the space between sentences to make the video less boring and more Attractive. This will help in the long run to have better retention, which mean more money for you. Then add the first video generation, put it right where it fits with the voice, and then add the next one to make it more attractive and dynamic. We can add zoom in and zoom out. For this, let's scale the video in and then slowly have it zoom out as the narrator talks. Let's do the same for the
third scene and then continue adding all of them one by one and scale fit in The best way. Then let's add transition for each scene so it makes that transition between clips smoother. I like this one called black fade for myself. Now let's go to Pixabay to find free royalty music. Go to music section and let's search for documentary music. Let's check some of them [Music] out. Okay, this one should work fine. You can spend yourself more time searching or explore other sites with Music, but this is one good free option. Now let's go back
to Cap Cut to import the music and put it on the video too. Once you are done, you can click export and export the video on 1080 or 2K and the video is done. Let's check it out. In the 13th century, a storm swept across Asia, faster than the Romans, deadlier than the Vikings, and more feared than any empire before. The Mongols, led by the ruthless and brilliant Genghish Khn, would rise from The harsh steps of Mongolia to conquer the largest land empire the world has ever known. Pretty good. Yeah, I think people would like
to watch something like that. If you think the same, then let me know in the comments. I hope this gave you a clear image of how to create these videos in the best and fastest way. And hopefully you are convinced to start your YouTube journey. Chapter 2, creating viral videos for futuristic interior. This channel is making big Money with YouTube monetization by creating these easy to make videos. I made these videos using tools that offer free generations daily. I'll show you their strategy so you can see how it works. This niche is not oversaturated like
the niches with animals for example. But most people have no idea how to create content like this. They don't have any 3D modeling or animation skills. They don't know where to start and they think it's way too complicated. Well, even if you are a total beginner trying this for the first time, then this video is going to break down in the simplest way how you can make similar content using AI tools. Most of the income for this page comes from ad revenue, but they also have different types of income from just this channel. By following
a structured content strategy, you can explore similar opportunities in this niche. And along the way, I'll reveal a powerful Technique to improve viewer engagement and retention that no one else is talking about. Something that can take this niche to the next level by helping to get good retention and high chose to view rate. I know you might be tempted to skip ahead and start right away, but trust me, stay patient. I always get straight to the point, and if you watch the full video, you'll gain all the crucial steps. We are going to break this
into four easy steps. To get the Full information, you will have to watch the four steps carefully because important insights are given in all the steps. So, be patient. Step one is the step where we need to generate the prompts that will generate us the images we need. To do that, we need to teach chat GPT to write these prompts for us. For this, we need some already existing images. You can find them online or just go to midjourney and on the search bar right crystal kitchen island. It will Show us a ton of images
generated by AI which we can use to generate a specific style. I am going to use this image for myself. And now I'm going to upload it to chat GPT and write this prompt. Generate a detailed prompt for creating this image that I have provided. Try to make the prompt clear and rich with visual details to inspire accurate image creation and realistic visualization. Don't include text. I added the don't include text part because my image has Some text. But if your sample doesn't then it's not necessary to add that part. Hit enter. Now chat GPT
has given us the detailed prompt to generate an original AI created image inspired by the style and composition. To do that we need to copy the prompt and go to an image generator like Leonardo AI or Midjourney which brings us to the second step which is generating the images. I'm going to show you both tools to see which one gives us better generations. Leonardo has free daily credits which can help you in the beginning until you start making money and maybe after that you can invest in midjourney which is $10 per month but for my
opinion it's worth the price since the quality it's way better. Anyway, let's go first to Leonardo AI and go to image creation on the style. Choose Fenix 1.0 for better quality and set the ratio to 9 to6 for the vertical short format. Now let's copy the prompt on chat GPT and paste it On the prompt section on Leonardo AI and boom, here are the results. Not bad for a free generation. With a little modifications on the prompt, you can get even better results. Now, let's check midjourney. Go to midjourney and on the prompt section, paste
the prompt and also add the- arx6 to get the format for shorts. Hit enter and boom. Now, the results on midjourney are way better for the first prompt compared to Leonardo AI. But we need to test more prompts to See the big difference. And to do that, let's go back to chat gpt and we need to write create 10 more prompts. Taking inspiration from the above prompt, ChatGpt has given us 10 prompts that we can use to generate more images that are on the same style. Each prompt is unique and different from the other one,
which is what we need to create our video. Now, let's try adding some of these to Leonardo AI. I'm going to copy each one and go paste it on the prompt section in Leonardo AI. These are some of the results from Leonardo. They look pretty good. We are again going to try also Midjourney just to get the idea of both tools so you can come up with a decision if you want to go with MidJourney or Leonardo AI. I'm going to copy each prompt and paste it on prompt section on midjourney. Also add the 9x6
for the ratio and repeat it for all the prompts. The results from midjourney are way better and for myself I would go with Midjourney in this case. It's generating exactly what we need. Now once you have decided which tool to use and have generated the images, it's time to download them because we are going to move to step three. Step three is where we are going to animate these images. There are a lot of tools we can use for this like runway, pa, luma, hilu, clingai and for this one we are going to choose clingai.
If you're searching for the best AI tool to transform images Into videos, Cling AI is hands down the top choice right now. Here's how to use it. Head over to Cling AI's homepage and navigate to AI videos image to video. You'll see three key features. Elements, a brand new tool for generating consistent characters across multiple scenes. Effect, ideal for stylized video generation, but we'll skip this for now. We need to go to frames. This is perfect for smooth, highquality AI animations. Next, upload your image and write this Prompt. Lens rotating. This will add the movement
of the camera as we need it. To make your video stand out, increase the creativity slightly to 0.7. This adds uniqueness and a more dynamic look. Pro tip: higher creativity can introduce slight distortion, but it also leads to more visually striking videos. If you haven't done so far, please hit the subscribe button now to support what I'm doing and to allow me to continue doing it and bringing more and more value to This community. Anyway, let's go back to the video. Now, for best results, select professional mode to maximize quality. Set the duration to 5
seconds for AI shorts. If you're making cinematic content, go for 10 seconds instead. Once everything is set up, hit generate and within minutes, you'll have an impressive AI generated video ready to go. Let's check some of the results. Pretty impressive, right now. Let me walk you through the video so you Can see just how good the quality from Cling AI really is. It's really worth it. With these AI generated clips and smart editing, you can create videos that not only hold viewers attention till the end of the video, but also boost your chose to view
rate. These metrics are the key metrics that decide if your videos will go viral or not. To do that, we need first to start with a strong clip, which will make the viewer not scroll away. Then introduce high Engaging videos to keep the viewers engaged to the video until the end to get a higher retention rate. Now, I'm going to show you how to do that on the next step, which is step four. In step four, I'm going to show you how we need to put the clips together on an editor to get the best
results that we possibly can in this niche. For this part, I'm going to use a free tool that anyone can use. Even if you are a beginner, as I said in the beginning, you can still use This tool because it's free and it's userfriendly. Now, let's open Cap Cut and hit create project. Now, before we start adding the clips to the timeline, we need to find the best music for this because it's very important to have a successful video with high retention rate. We need to find a music first because we need to match the
clips to the beat. So, whenever we have a beat, we switch the clip. This method doesn't leave the audience to get bored by Watching the video and they follow with both senses, watching and hearing it. This is a technique that helped people be more engaged to the video. For free royalty music, we can use Pixabay. There are a ton of music we can use for free, but if you want to step it up, you can use any paid tool like Epidemic Sound, Art List, etc. Anyway, I'm going to show you how to use Pixabay. Now,
for these videos, what I prefer is to use an instrument that is calm and goes with The nature of the video, like the violin. Let's go to Pixabay, chose the section for music, and search violin. It will show you the music that is made using violin as instrument. Let's listen to some of them. [Music] Okay, this one sounds perfect for the video we want to make. Let's download it. And now go back to Cap Cut. Let's upload all the footage together with the music. Now add the music in the Timeline. And let's change the ratio
of the video to 9 by6 for the short format. Let's add the first clip and listen until the beat repeats. Now once the beat hit like here, let's cut the video there and add the next clip and see how good it matches. Amazing, right? Let's do the same for the next clip. Now, something that we need to be careful to is that we cannot have the camera move in the same direction in both clips like we have Here. That will create a feel of repetition, which is also a cause to make the viewer skip. What
we need to do, though, is just reverse the clip. So, the camera moves in reverse and it will look like it's moving to another direction. It's that simple. Now, let's add the rest of the clips and then adjust the music to the length of the video. Then, you can choose if you want to add some text on the video or not. That's up to you. And once you are done And have set all the clips, we just need to click export and export the video on 1080 or 2K. And these are the results. [Music] [Music]
Looking good. Yeah, I hope this video made you think about exploring YouTube as a creative opportunity because this can be a rewarding experience. If not, then check this other video I have prepared for you to see if it's a better fit for you. Chapter 3, $700 per day by Promoting products with AI shorts. If I told you clicking a single button could pay you $70 right now and repeating that 10 times in a day could earn you over $700, would you believe me? Well, it's 100% true, completely free, and it's available in every country in
the world. So, it's important if you actually like this video. To get started, the first thing you need to do is watch this video carefully. I'm breaking it down step by step. And trust me, you don't want to Miss even a second. First, head over to ChatGpt and type in this prompt. Give me 50 most popular ancient story ideas for social media. Hit enter and watch the magic happen. Instantly you'll get tons of fresh high demand content ideas that is popular and the best ancient story ideas for social media. You can see here very interesting
ancient story ideas like Achilles wrath in the Trojan War or the 12 labors of Hercules. They are all great topics to help you make money Online with the method that I'm going to show you. And don't worry, you don't need to make the videos yourself or show your face, use a camera, record your voice over, anything because I'm going to show you the tool that will do all this work for you. So, if you follow every step that I'm showing you today, you will have all the info to start making $70 per click. Now, if
you check this channel called Stellar Sagas, they make ancient story content and have Grown their channel to over 400,000 subscribers with just 51 videos. And according to SocialBlade, they are making around $1,000 per month only from adi revenue. Now, this is good, but we are not here only for that. They have another source of income from this YouTube channel that is making them from $5,000 to $10,000 a month. Now, you might be asking yourself, how is that possible and how can we make that kind of money? Well, all is thanks to this Link they have
here, which leads to their video creation and editing course. If we click this link, it will direct us to their course where you can see pretty much all the details of what they offer. And they are selling it for $129. They just need 10 people to buy this daily. And they are making $1,000 per day. And that is not impossible since according to SocialBlade, they are getting more than 10,000 viewers per day on their channel. So, they only need a Couple of people to buy this course and they make a ton of money. Now, we
don't need to create all this. We don't need to create a course ourselves or create something new. We don't even have to create these videos about ancient history ourselves. Now, we have step two. Let me introduce you to an AI tool that will create the entire video for you. The tool is called Clipwise AI. All you need to do is click the first link in the description below to sign up for Free. This tool is going to make the stunning ancient history videos for us with a simple text prompt in 3 minutes. We just need
to paste the topics we generate in chat GPT and it will generate us similar videos to this channel that is printing money. I'll show you how to make videos like this using clipwise. But first we need to go to chat GPT. Here we have generated our topic that we are going to use to create our videos. But before that there is one More step. We need to ask chatgpt to narrate these stories as we are watching a video. So what we need to do is for example this one called the love story of Cleopatra and
Mark Anthony. I just write to chat GPT narrate the love story of Cleopatra and Mark Anthony as if I'm watching it in a video and hit enter. ChatGpt will start narrating the story for you. Next, let's go to Clipwise again. If you haven't registered yet, then click the link in the description And log in using your email. Once you have logged in, this is what your dashboard would look like. We have different type of content that we can create here. We have AI viral where we can create viral videos generated by AI which is the
one that we are going to use. We also have AI host where we have a commentary avatar. We have quiz videos where we can prepare quiz videos. We have Reddit stories where you can get stories from Reddit and show them with a Gaming background. And also business videos where you can create more commercial video types. For now, we are going to stay on AI viral. You can select the language here. I'm going to choose English since I want to target audience that speaks English. Then we can set the duration of the video. We can choose
from 30 seconds to 90 seconds. I'm going to choose 60 seconds for these type of videos. Next, we have additional settings that have tone where We can choose the tone of the video style where you can choose if the video is an explanatory or storytelling video and the type of audience that you want to reach. Now, we need to copy and paste the generation from chat GPT. Go to chat GPT and copy the narration that chat GPT did for us. Make sure to copy only the paragraphs. We don't need these extra parts where the scenes
are explained. So, let's copy all these paragraphs and paste them in the prompt section on Clipwise. After we are done with the prompt, we need to select the visual theme. Click view all and will open a tab with all the themes. But due to the nature of the content we want to produce, I'm going to select cinematic. Then we need to click generate which will bring us to this tab where we can select the voice over. Click view all to see all the voices that are available here. Also, you can clone your voice. Once you
choose the voice, then we just Choose no avatar on the video since we are not going to use one. If we scroll down now, we will see the image generated for our paragraphs. And the good thing is that if we click this edit button here, you can change the script, regenerate the image or upload one from your device. Then we just need to click next on the bottom of this page and it will send us to another page where we can pick the background music we want to use for this video. You can either Select
the music yourself or just let the AI do it for you. I'll leave it up to AI to select the best music for our video. Then next, you can upload your brand logo and choose the place where you want it to be showed. You can choose the caption style here and also an overlay effect style. After you are done selecting your preferences, then let's select next. And Clipwise will generate the final video for us in just 3 to 5 minutes. The video is over. Let's check It out. In ancient Egypt, where the sands whispered, Cleopatra
and Mark Anony's love story began echoing through time with passion and tragedy. The video looks great. Clipwise did an amazing job generating this video. If you want to change something, then you can hit edit and change anything you want. Now, just download this video and upload it to your YouTube channel. You just need to repeat this process to create daily videos using Clipwise tool and you will Soon achieve what Stellar Sagas has achieved. Just keep being consistent. Now, the third step is to promote an affiliate link to your YouTube channel. Just as Stellar Sagas that
is selling their course, you don't need to create a course. You can use a method that I will show you now. Go to Clipwise homepage and click on this part here where it says affiliate and it will take you to their affiliate page. You can see here that you can earn up to $3,412 annually per new referral you get. You can receive 30% recurring revenue monthly by promoting Clipwise. As a beginner affiliate, you can earn more than $2,000 annually if by the end of the year you have 24 active referrals. Growing affiliate, where you can
earn more than $5,000 annually, if by the end of the year you have 36 active referrals. Power affiliate, where you can earn more than $17,000 annually if by the end of the year you have 60 Active referrals. This projection is for beginners only because you can easily make more than 100 active referrals if you follow the method I'm showing you. The good thing about promoting this tool is that users will keep using Clipwise tool to create amazing videos for their YouTube channel. And for this exact reason, they will keep using Clipwise subscription for years to
come, which means we will keep getting this commission on the recurring basis every Year. So, if your referrals just buy the creator plan, it costs $39 per month. And you get 30% of that, which is $11, which means if you get 100 referrals per month, you can get $1,100 per month. But if they buy the yearly plan, which includes 60% off, they will pay just $235 annually. and you will earn 30% of that, which is $70. Sound good to you? Well, yes. It's pretty awesome. You just need to promote this affiliate offer once by copying
and pasting it to your YouTube channel. And you will keep getting $70 again and again in recurring revenue in autopilot. To get started, just click start earning today and it will open this page where you need to go and sign up. Next, enter your full name, email, create a password for your account, and also affiliate ID for your account. Check the box and just press start now. It will direct you to the dashboard where you need to add your billing detail and payment methods. Once You are done on the left you have offer settings where
you can go to offer list where it will show you clipwise affiliate program and you can just copy the link from there where it will send you to this page and you can copy the link that you are going to promote and now it's time to add it to the description of your YouTube channel. So anytime someone click the link and subscribes to Clipwise you will be rewarded for that. This tool is the best To create this kind of videos. That's why I'm subscribed to them and using their services which help me get more and
more money through their affiliate program. Again, the link is on the description to check out Clipwise. If this doesn't get you to start your YouTube journey, then check out this other video that will show you how you can make money with YouTube automations. Chapter 4, earn $15,000 per month with Faceless Animations videos. In the Beginning of last year, I got introduced to YouTube automations. And unless you have been living under a rock for the past year, you too have probably heard of YouTube automation. I run several faceless YouTube accounts that are earning me over $10,000
every month from ad revenue alone. And I'm not mentioning other methods that I have found to monetize these channels. Now, after watching this video, you will have all the info and tools you need to start Making at least $10,000 a month from YouTube. It's not that hard, but you still need to not skip any steps so you can fully get the whole information. So, as always, step one is to find the right niche. But for this video, I have already done the research and found the perfect niche with no competition. In the past four months,
this channel posting faceless short videos has earned over $37,000 only in the last month. They have Published only 16 videos and have gained over 700,000 subscribers. Just check this out. Last week on Wednesday, they got over 45 million views only on one day. Let me repeat that. Only on one day. Now, what they do is they make AI videos of a disabled duck helping other animals in need. These videos are so cute and the audience just can't get enough of it. And I'm going to show you step by step how to make these videos for
free using AI. This niche, it's new, So you better start as soon as you watch this whole video. But don't forget, you need to watch the whole video to get the full information and start printing money. And if you really find this video helpful, then please say something nice about me in the comments. All right, so the first step is to generate the idea. For that, we are going to use chat GPT. But just before we start writing on ChatGpt, let's get some screenshots of the current videos just to give ChatGpt An example. Go to
this channel and get some screenshots out of it. Let's do just this one here. This is the screenshot that I got. Now, let's go to chat GPT and upload that image. Then write this text. I have attached a picture for you as an example. Go to this topic and write me 10 seed prompt like this. A disabled duckling helps his puppy friend. Now, chat GPT writes 10 great ideas. And that's it. Now, it's time to generate the images. And for That, we are going to use Leonardo AI. You have the link on the description. Click
it and log in with your email. This tool gives free fast tokens daily for us to use and generate images which I found pretty amazing. Then let's go to image creation and start copying and pasting all the prompts that chat GPT gave us. Don't be discouraged if the first images are not perfect. Small changes on the prompt can make huge differences. So make sure you test Little changes on the prompt yourself to make the images better. Now we have the next exciting step. We need to turn these images into video. For that we have a
ton of options like pika, clingai, runway, luma, hiloop. But for this we are going to go with hilu. We have free generations from this tool and the generations are of high quality. But for myself, I have already subscribed to one of their plans since I need it to run my other channels and it has Unlimited generations. Anyway, let's now click on create where we can upload the images and also we need to add the prompt too. You can go to Leonardo AI and press this plus icon and get the enhanced prompt that Leonardo has created
for each image and this will help Hilu generate better videos. With the free version, you can upload up to three videos at the same time. And with a paid version, you can create up to five videos at the same time. This is Really fun. And don't forget, the more you practice, the better results you will get. Once the video generations are done, you need to download all of them and put them together on an editor. There are a lot of tools that we can use, but the one I use the most and it's free is
Cap Cut. This tool allows you to create amazing videos by adding cool effects, transition, text, etc. And it's very userfriendly. It's easy to work on it. If you're still here watching, then Congrats because you are almost ready to start making your videos and have the chance to make at least $10,000 per month. But make sure you stick till the end because I'm going to share a trick in the end that addresses the monetization. Now, let's open Cap Cut and click create new project. Add them on the time frame. Set the ratio to 9 to6 so
it fits the shorts format. Adjust the scale of all clips. Now, to make the video more dynamic and to tell the story Better, you have the chance to add effects to the video. I'll let that for you to explore more and check what works for your videos and what doesn't. Now what is really necessary is the transitions. We need to make a smooth transition between clips. And for that I like the black fade transition. Add it in between the clips and click apply to all to add it to all the clips. Now after you have
fixed everything in terms of the footage. Another important part Is the audio. We need to add relevant sounds like the sound of the duck or the sound of the dog or the cat. We also need to add an emotional background music. For this we can go to Pixabay, a tool that has free royalty sound effects and music that we can use to create our videos. Then we can go to music section and write for example emotional music. Let's listen to this. That's pretty cool. We are going to download that one. Now we can go to
Sound effects and check for sounds of the duck, cat, and whatever is relevant to our video. After we have downloaded everything we need, then we need to add them all on the timeline and put everything where it needs to be. Once you have edited the whole video, then click export and export it on 1080 or 2K and the video is ready to be [Music] published. [Applause] [Music] [Applause] [Music] [Applause] Pretty cool, right? Comment down below if you think the same. Amazing results. These videos, as you can see, are very eye-catching. The best part is that
it was very, very easy to create. If this video didn't get you to take action and start your YouTube shorts channel, then check this other video that can help you Start printing money. Chapter 5, Animal Rescue Viral Videos. This YouTube channel is pulling in some truly mind-blowing numbers. This channel, launched just last September, has already racked up more than 200 million views and over 500,000 subscribers. Yes, you read that right, 200 million views in just a few months. Even more impressive is the potential income. According to SocialBlade, this channel is making around $160,000 a month
just from YouTube ads. That's not even counting sponsorships or other monetization methods. And it takes only a couple of minutes to make these videos. What's their secret? They're creating animal rescue videos using AI. These videos tell heartwarming stories of injured animals being saved and cared for, which instantly capture viewers attention. The emotional connection makes it nearly impossible to skip these videos, leading to millions of views per Upload. A few years ago, this niche would be almost impossible to make since you would need to have 3D artist, VFX artist, editors to make just one single video,
and it would take more than a month to create one short story. And let's face it, hiring professionals like that super expensive. But here is the gamecher. With today's AI tools, you can create these videos easily without spending a fortune. In fact, this video you are watching right now, it took me Just a few minutes to make and it cost me nothing. Sounds too good to be true. Stick around and I'll show you exactly how to make these AI videos for free. So, everything starts with an idea. If you feel stuck here, don't worry because
I have prepared a document with prompts that will help you generate unlimited ideas about videos like this using AI tools like ChatGpt. You have the Google doc link on the description where you can go and find the prompts that I have Prepared for you. Open chat GPT and paste the first prompt there. It will generate 10 different stories for you and you can regenerate until you find a story that you are happy with. Once you do find it, then you will need to go to the doc again and copy the prompt generator and paste it
on chat GPT and replace the part where it says insert story here with the name of the video you want to generate. Nice. This was quick. Now we need to use these prompts To generate the images. And for this, there are a ton of tools that we can use like midjourney, Leonardo AI, etc. But one that has great consistency across different scenes. And the best thing, it's free. It's pick lumen. You can generate as many times as you want by tweaking the prompt. And it takes only a couple of seconds to generate the images. This
is super fast. And to be honest, all these benefits and it's free. This is a game changer. Now, let's Go to Piclum and sing in with your Gmail. Then let's head over to create. These images that you see here, I create with the first prompt. Now, let's add the second prompt. And to keep the same scene and characters and add the dog interacting with the polar bear. You paste the second prompt here. Press the setting button and then here where it says random. Change it to fixed. And now we need the seed number. That's easy
to find. We need to select that image that We want to keep consistency off. And here is the seed number. We just need to copy it and close this popup. Now simply paste it and hit generate to generate the next batch of images. It only takes a few seconds to do this. It's crazy simple. And if this doesn't motivate you to start your own faceless channel, I don't know what will. So, if you are motivated, comment down below now telling me that you are motivated. The results are crazy good and can easily Pass for the
real thing. And great job from Pikmen for the consistency on the environment and the characters. Now, you need to repeat this process for the rest of the prompts to generate all the images needed. Keep in mind to tweak a little the prompts so you can generate the best images. AI is not always right. Once you have the images ready, it's time for us to animate them. For this, there are also a ton of tools that we can use, but you are free to use any That works for you. But for this video, we are going
to be using Hilu since it has free credits and the generations are crazy good. I mean, check out this one for example. Yeah, I like this tool a lot. Now, let's upload our image and use the same prompt we used to generate the image. You can get the prompt back from PLU. Just click the image you are going to generate, copy the prompt and paste it on Hilu prompt section. Free users Can run up to three generations at the same time. So, go on and upload the next image. Also, don't forget the prompt. So, once
you have generated all the video clips, it's time to put them together on an editor and also edit the sound. These videos are simple to edit, so you can use any type of editor, but for myself, I'm going to use Cap Cut since it's free. So, let's go with that. The first step is to import your video clips into Cap Cut. Add the first clip Into the timeline. But remember that AI video generators aren't perfect, and sometimes there can be some mistakes that we need to cut out. Even with a decent clip, you might notice
some flaws. Simply cut out those parts and review the result. Next, let's bring in the second clip. If there is any issue, make necessary adjustments. Repeat this process for all the clips, trimming and arranging them until your video is complete. The length depends if you want To make a long form or short form, as well as the ratio. If you want to make a short form content, then 30 seconds to 1 minute is enough. If you want to make longer content, then 2 to 3 minute video of this content is perfect. Once your clips are
in order, it's time to add transitions. Head over to the transitions tab and select your favorite. I would suggest something simple for this kind of content. Drag it between your clips. You can add other Transitions if you like, but for consistency, you can apply the same one across all clips. Sound effects are very important in making these videos engaging. The best free page for sound effects is Pixabay. Here you can find sounds that match the scenes in your video. The background sound is especially important. Let's choose a soft wind for this video since it goes
with the scene. [Music] Then you need to look for specific sounds like those for the polar bear, the dog, and even the footsteps of the rescue team. Other tool that is good for sound effects is 11 Labs where you can create sound effects yourself with just a prompt. Check this [Music] out. Sounds amazing, right? If you want to step up your game, then you can try 11 Labs 2. Link is in the description. Anyway, once you have your sound Effects, import them into Cap Cut. Go through your video and place each sound effect in the
appropriate spots, adjusting the duration as needed. For instance, you can repeat the dog sound in places where it's needed, or divide the walking sound to perfectly sync with the visuals. Continue adjusting the audio until you're happy with the result. Make sure to add the wind sound effect in the background, lowering the volume slightly so it remains subtle. Finally, trim it to match the length of your video. Once everything is ready, export your video in 1080p or 2K resolution. And that's it. You're done. [Music] movement. If you like what you saw and want to start working
on this, then like this video and say something nice to me on the comments. But if this didn't convince you to start your YouTube journey today, then check out this other niche breakdown that I have done for You. Chapter six, create realistic AI avatars. One of the most frequent questions that I got from you guys is how do I make my realistic AI avatar? It's not about how it talks, but also the hand movement and facial expressions. That's why in this video, I'm going to show you the steps I use to create my avatar using
only free AI tools. This video is going to be quick but with full information. So, make sure you watch the whole video to get the Full information. I don't think anyone has shown you guys how to get these realistic AI avatars and most importantly using only free AI tools. This can be used to create avatars for YouTube videos like storytelling avatar, podcast avatar, reaction avatar, etc. To make it simpler for you, I'm going to break this in three simple steps. This way you are going to get the full blueprint to generate your first realistic avatar.
The first step is the Step where we need to create the avatar. If you don't have the avatar ready, then you need to create one. For this, I'm going to use Leonardo AI, which offers free daily generations. I already have the prompt for the avatar, but below this video, I have prepared for you a prompt that you can use to generate any type of avatar that you want. Just fill the parts that need to be filled with the specifics that you want your avatar to be. Once you have your prompt ready, Add it on prompt
section on Leonardo AI and hit generate. Here are the generations that I got. They look pretty good. I'll choose this one to show you now how I animated and lip sync it. The next step is animating the avatar. Let's go to clingai to animate our image. Upload your image and on prompt section, write the woman talking and explaining something in a static camera. Then put creativity to 0.7 for better results. So change the duration to 10 seconds and Hit generate. These are the results that I got. It looks amazing. Download it. And now let's go
to the third and final step. Lip sync it. For this we are going to use a tool called Dream Face. Let's go to Dreamface. Press try now. Then log in with your email. Let's upload your video animation from Cling AI. And then we need to create the voice that we want to use for this. I'll use 11 Labs. I'll select a female voice and write a text that will turn into voice. Now upload The audio, too. With the free version, you can generate up to 30 second clips, which is amazing. Hit generate and let's see
what we got. In this video, I'm going to be showing you how you can create your realistic avatar using only free tools. This can be used to create avatars for YouTube videos like storytelling avatar, podcast avatar, reaction avatar, etc. Amazing. Now you can get 10 daily free generations, but you can also subscribe to one of their Plans for annual payments or weekly payments. This is all you need to start making your AI avatar. Chapter 7, viral stick figure videos. All of you have already seen these kinds of videos. These channels are making millions of views
by doing simple videos and getting thousands of subscribers with only a few posts. This video got 3.1 million views, while others are making also thousands and thousands of views and earning an estimate of $12,000 per month by Creating these simple videos. But most people don't know how to create content like this and don't have any animation skills. In this video, I'll show you the easiest way to create these videos. And along the way, I'll reveal a game-changing secret that can take this niche to the next level. I haven't seen anyone else doing this, so you
definitely don't want to miss it. I know you might be tempted to skip ahead and start right away, but trust me, stay Patient. I always get straight to the point. And by watching the full video, you'll gain all the crucial steps along with the exclusive secret that no one else is sharing. This channel creates simple handdrawn stick figure videos. And that's exactly what we'll be following, too. But we are going to add something more to this to take this to a next level. Yes, you heard that right. I'll walk you through the best free tools
that will help you create these YouTube videos while saving you thousands in the process. I've spent a lot of time researching the top tools that anyone can use, whether you're a complete beginner or have no prior experience. Also, a lot of you have asked me how I make my AI avatar this realistic. In the description, I have attached a link where you can go and check out how I do this. Anyway, let's go to creating your first video on this niche. To generate these videos, we are Going to go through six simple steps. The fifth
step is the one that is going to change the game for this niche. So, I highly recommend you don't skip any part. The first step is to teach chat GPT exactly what we want to create so that it can do all the hard work for us. To do this, find some publicly available stick figure drawings to use as inspiration in chat GPT. You can check the description for resources I recommend where you can also find a Little script to add to chat GPT. Head over to chatgpt upload the screenshots and write. I need you to
analyze these images that I have attached and also analyze the script that is behind these images. This is the script. Then paste the script right after your message. This will help chat GPT understand the style, structure and flow of the video so it can generate something similar for you. ChatGpt will analyze the images and the script and will give you details of What it has analyzed. Now we go to step two which is generating the script and the prompts to generate the images for each scene. Now we go to chat GPT again and write great
now I need you to write me a five-minute motivation story similar to what you have analyzed and write me prompts to generate exactly the same images as you have analyzed. First write me the story then provide the prompts for each scene and chat GPT will provide us with a whole script for our Video. Now we have step three where we need to generate the voice from the script that we got from chat GPT. For this step, we'll be using 11 Labs, an excellent tool with a wide variety of voice styles to choose from. To keep
things moving quickly, I'll select a random voice for demonstration purposes. This way, we won't spend too much time picking the perfect voice right now. However, I recommend taking some time to explore and find the voice that suits Your project best. With a bit of research, you can discover the ideal voice style that enhances your video's impact. Let's use this one called Bill Oxley. Press use here, and let's paste the script on here. We need to take these parts between the scene and paste them on 11 Labs. Once you have the whole script pasted, click generate
and it will generate the voice for our video. John had big dreams. He wanted to be successful. He Wanted to live the life he had always imagined. This is sounding great. Now we move on to step four, generating the images for each scene. Earlier we had chat GPT create prompts for the images. So now all we need to do is copy those prompts and use them in either Leonardo AI or Midjourney to generate our visuals. Personally, I prefer Midjourney because of its superior quality and faster speed. I don't mind paying $10 for the results I
get as the difference In quality is worth it. However, if you're looking for a free alternative, Leonardo AI is a great option to consider. Now, let's head over to MidJourney and search for something related to what we need like stick drawing. Midjourney will pull up a variety of previous generations that other users have created, which we can use as references to maintain a consistent style. There are tons of options to explore, and you can refine Your search with different keywords for better results. But for this example, I'll go with this particular style since it matches
what I want. Next, we go back to chat GPT, copy the first prompt, and paste it into MidJourney's prompt section. At the end of the prompt, add double-16x9 to ensure we get the correct YouTube aspect ratio. Now, we simply drag and drop our selected reference image into the prompt section and click on the paperclip icon. This tells MidJourney to copy the style of the attached image. Hit enter and boom, here are the results. Pretty good. This is exactly what I was looking for. Uh, now we just need to repeat the process for the rest of
the images. Copy the prompt, go to midjourney, and paste it. A useful tip, you can simply select the R916 aspect ratio and reuse images from the previous generation to speed up the process. Repeat this for all the remaining images until you have Everything you need for this project. Now, it's time for step five, and this is where things get game-changing. Right now, everyone creating this type of content is just copying one another. And yes, they're seeing success. I won't deny that. But this next step is something nobody is doing. While everyone is just doing still
images of these handdrawing sticks, we're going to animate these images. There are a ton of AI animation tools available, including Pika, Clingai, Luma, Runway, and Hilu. For this tutorial, I'll be using Hilu because of its great quality and the fact that it provides free daily credits to generate videos. Let's dive in. Now, once you have downloaded the images, go to Hilu. The link for Hilu and all the tools I have used are in the description. Join with your email and you will get free credits to generate videos. Go to create, then choose image to video.
Upload the first image and we Also need to add the prompt. Go to midjourney again or chat GPT and copy the prompt to paste it on the prompt section on Hilu. Hit generate. With the free version, you can do up to three generations at once. With a paid subscription, you can do up to five, but the generations are pretty quick, so no worries on that. Now, we need to do this for all our images. Upload them on Halo, hit generate, then repeat. Once the animations are ready, review them to see If they look good. For
me, it's perfect. But when I check the script, I see that there is something that I would like to add here. For example, when it says he wanted to live the life he had always imagined, wealth, freedom, happiness. I would like to create three images representing wealth, freedom, and happiness. This will also show you how you can continue generating images. If you still need more to complete your story, it's very simple. Just go to Chatgpt and write something like this for scene one, the dream. We need three more prompt generations to generate handdrawn stick images
for wealth, freedom, happiness. Write me the prompts to match the other images I have generated. Great. It gave us quickly three prompts that we can use. Now we need to copy the prompt again. Go to midjourney, paste it, add the 916 and the image style reference. Hit generate. And boom, we have the three images Generated. Let's add them to Hilu also. So we can generate the videos. Now all the generations I need for this test video are ready. Let's download them all and move to the next step. This is the final step. Step six. Here
is the time to put together the voice and videos that we generated into an editor. We have a ton of options for that, but the best one that is free is Cap Cut. Again, link for everything is on the description. So, hit that subscribe and Like button on your way down to the description. So, let's open Cap Cut and let's press create new project. Import the voice and the videos we generated. Add the voice on the time frame and cut all the pauses between sentences on the voice so it doesn't get boring after you have
fixed the voice. Now, let's add the generations. The videos start with a presentation of John. So, we need to add this one here and also add an arrow and the name John pointed to the character. For the arrows, the best way to find free PGs to use is Pixabay. Let's go to Pixabay. Press illustrations and write arrow. It will find us a ton of arrow PGs that we can use. Let's download this one. Add it on Cap Cut and let's create a text so we can write the name John and point it to the character.
Once that is done, let's add the rest of the footage to match with what the voice is saying. Take your time here to do it right so the video has a good flow and doesn't Bore the audience. This will help you in the long run to have a better retention rate and better RPM, which means more money for you. Once you have set everything together, hit export and export it on 1080 or 2K resolution. The video is done. Let's check it out. John had big dreams. He wanted to be successful. He wanted to live the
life he had always imagined, wealth, freedom, happiness. He could see himself standing at the top, victorious, waving his flag Of success. But there was one problem. John was lazy. He knew exactly what he needed to do. Yet, he procrastinated. He'd sit there scrolling endlessly, telling himself, "I'll start tomorrow, but tomorrow never came." Every night, he would feel guilt creeping in. Pretty good. Yeah, I think people would like to watch something like that. I hope this gave you a clear image of how to create this videos in the best and fastest way and hopefully you are
convinced to start Your YouTube journey. Chapter 8, viral POV videos. Hey there. Today I'm incredibly excited to share something that's absolutely crushing it on social media right now. AIP POV videos that are generating millions of views in just days. I'm going to break down exactly how to create these viral masterpieces step by step. And trust me, this is information you don't want to miss since the tools that I'm going to use, they all offer free generations. Before we Dive in, let me tell you why this is such a massive opportunity right now. POV videos are
dominating platforms like Tik Tok and Instagram. But surprisingly, very few creators are maximizing their potential on YouTube shorts. This means there's a huge opportunity for you to step in and claim your piece of this incredibly profitable niche. I'm going to show you how to make some of the most popular ones that I found. The best part is that people think this is too hard to Create, but actually I'm going to show you the best and easiest way you can create these viral videos by giving you the best prompts you can use to generate different POV
content. Also, in this video, I'll be sharing secret tips with you so you can get the full potential of this niche. So, make sure you watch the whole video. I'm going to break this into four easy steps which will make it easier for you to follow. Let's start with the first and most crucial step, Creating perfect POV images. I'm going to show you my exact process that consistently delivers amazing results. On the link in the description, I have attached the exact prompts to generate this angel in heaven POV video. Now, in the end, I'll show
you how you can turn these prompts into different prompt ideas, which can be limitless, and you can create daily videos without having to worry about ideas. First, copy the first prompt and Head over to Leonardo AI. Now, here's where most creators make their first mistake. They just input basic prompts and hope for the best, but I'm going to share my secret sauce with you. When creating your images in Leonardo AI, always set your aspect ratio to 9x6. This is crucial for shorts format. For better results, select classic mode and go to model and choose Fenix
1.0. Paste the prompt on the prompt generator and hit generate. And boom, here we have Generated our first image that we are going to use. The results are amazing and the best part is that you can do this with free tokens that Leonardo offers. It offers around 150 tokens daily, which are enough. But for quality purposes, I'm going to try Midjourney 2 since this is my favorite tool to generate images. Let's see which one delivers better quality. Let's go to MidJourney. Paste the prompt on the prompt section and also in the end Add- to get
that vertical format. Hit enter and boom. Actually, I think Leonardo AI was more accurate than midjourney on this part. The bloom and accuracy of the feats and the environment. I believe Leonardo AI won this battle. Let's continue with Leonardo AI. And here's a game-changing hack for you. Go to this icon here for image guidance, then image to image, and upload your preferred generation. Set the strength to 0.20. Why we do this is To give the same effect and feel to all our generations so the video has the same flow where we don't get some generations
to be warm and bloomy and some to be cold and meaningless. Now let's copy the second prompt and test it out. And here it is exactly what we need. Let's do the same for the rest of our prompts. Moving on to the second step, animation. Trust me, no one would like to see still images. It's very boring and even sound effects cannot Make it look good. Let's just do a comparison to see the still image and animated image so we get the full understanding of this. See, very boring without the animation. This is where Cling
AI comes in. And trust me, this tool is absolutely magical. We need to take the generated images and upload them to Cling AI. Now, here's where most people go wrong. They use the default settings. Instead, here's what you need to do. Go Back to chat GPT and let's upload our images first and then write this prompt. Give me an animation prompt for image to video AI called cling AI to achieve a POV effect. The scene is an angel that just woke up and subtly stretching and twitching his legs. And here we got the perfect prompt
to use for Cling AI. Now let's copy the prompt. Go to Cling AI and let's upload our image and the prompt we got from Chat GPT. Set the creativity to 0.7 for better results and Hit generate. And boom, here is our first generation. Pretty amazing. Now we need to do the same for the next one. Upload the image on chat GPT and ask to write a prompt to generate the video animation. And boom. Here is the next video. Do this for all your images. And once the animations are ready, download them. And let's move to
the next step. Sound design. Let's talk about it because this is what separates good content from great content. We're using Pixabay. For our heavenly POV example, we want ethereal choir sounds, soft wind effects, and maybe some distant bell tones. Go to Pixabay. Search for music about heaven and choose the best one that you prefer. Then select sound effects and search for example yawn since in the beginning we have someone laying in bed and waking up. Also would like to add some bird chirping. We can search for holy choir and all the other parts that we
need to complete our Scenes. When it comes to timing your sound effects, precision is key. Make sure every sound matches perfectly with your visuals. If there's movement in your scene, the audio should reflect that movement exactly. This synchronization is what creates that professional cinematic feel that viewers love. Now the last step to complete our video, editing the video on Cap Cut. This is where everything comes together. First, upload everything you generated In Cap Cut. Then we need to maintain that 916 aspect ratio throughout your entire video. Then let's add all the footage into the timeline
as per order we have planned. Then we need to fix the audio. Add everything we downloaded where it belongs to create the perfect feel. Then we can add some smooth transition between clips. I like this one called black fade. Add it here and then apply it to all. We can play a little bit with scaling. For example, For the first clip, since it's a more static one, we can do a zoom in like this. Great. Once the video is ready, hit export and export it on 2K. And here are the results. [Music] [Applause] [Music] [Laughter]
[Music] looking good. Yeah. If you think the same, let me know in the comments. Now, Let's talk about monetization because views are great, but we're here to make money, right? Here's my proven strategy. Post consistently. Aim for two videos daily. This might seem like a lot, but with the workflow I've shown you, it's totally manageable. Chapter nine, Tik Tok cute animal videos. Tik Tok is literally a cheat code for any kind of business. I don't care what you do. How do you intend to escape the matrix? Whatever. Posting content will change Your life. And in
this video, I'm going to give you a niche that can literally change your life since it has almost no competition. All you need to do is just try it out as soon as possible. People can't get enough of these videos. They are super cute and keep getting millions and millions of views. This is very rare and interesting niche to make money on creator reward program. But it can also be used to be published on Instagram and YouTube shorts where you can maximize Your earnings. Let's look at this channel which is making thousands of dollars using
six simple methods in a niche with almost no competition. Creating videos like these is super easy all thanks to AI. The best part, just a few videos can make your account really popular. Each video on this channel gets millions of views. Most of us can tell that these videos are made with AI. But a lot of people think these videos are real, which is also good for engagement Because with lots of comments and reactions on every post, Tik Tok's algorithm keeps pushing these videos to more and more people. Now, imagine your own channel blowing up
like this with just a handful of videos. Sounds amazing, right? Stick around till the end because I'll break down for you the steps to generate even better videos and start making money. The first and most important part is coming up with the perfect image prompts. Don't worry Though, I've got you covered. The whole idea of this niche is to combine relaxation with cute animals. These videos create calm and happy scenes featuring adorable animals in fun or whimsical settings. People love watching cute animals, especially when they're doing silly or funny things. It's a perfect fit for
the wellness and mindfulness trend, making viewers feel good. The first step is creating the perfect prompt using ChatGpt. So, first We need to take some screenshots of these images from already existing videos. These are the screenshots that I took to generate the images that I want. And then I go to chat GPT and write write 13 prompts to generate images of cute animals playing underwater and being very happy. The prompt quality should be the same as the images attached. We do 13 prompts if we want to create a 1 minute long video so we can
monetize it on creator rewards program. Then I attach the images that we took as screenshots and hit enter. This is how quickly chat GPT comes up with 13 prompts for our images. We can always modify or change any prompt that we don't like, but for now we are going to stick with these that we have. Then I use Midjourney to generate these images. For myself, I like Midjourney better because I think the quality is much better compared to the rest. So you can pay a monthly $10 plan for this or you Can go to Leonardo
AI where you can get some daily free generations. But now let's get back to MidJourney and let's copy and paste the prompts from ChatGpt. I do it one by one. And don't forget to add- so you get the Tik Tok vertical ratio. [Music] Now that generations are done, we go and download them one by one. This one is pretty cute. So, let's go ahead and download them all. Now that we have the generated images ready, it's time to bring them to life. For this, I use a video generator AI. There are plenty of great options
like Runway, Pika, Cling, and a newer one called Hilu. For this example, I'll use Hyo. This tool offers one day of free unlimited access for new users where you can do unlimited generations and the results are amazing. No weird glitches or distortions. All we need to do is upload the generated images, copy and Paste the prompts again here, and wait for the videos to be generated. Sometimes it can take a few minutes to generate when a lot of people are using the tool at the same time in the free version. The good thing is we
can put up to three prompts in cute. This will take some time. So, let's fast forward to the results. So, the generations are done. Let's download them and have a quick look how everything is looking. These are pretty great. Now that we have Everything ready, it's time to put it all together. For this, I use a simple video editing app like Cap Cut. It's userfriendly and works great for projects like this. Let's click create project and we open the work viewport. Now, let's import our clips we downloaded and then put them all in the timeline.
Now, we need to find some cute music or viral one that goes with the style of the video that we made. And after you Have found it, you just import it into Cap Cup and add it on the timeline. Now, it's time to add some transitions. For myself, I always prefer the black fade. So, I'm going to add this one. After we have done this, let's export it and the video will be ready to be published. Let's check it out. [Music] Yeah, I like it a lot. Do you like it too? Let me know down
in the comment. There are multiple methods that you can make money out of this content. Only on Tik Tok you can make money from creator reward program, affiliate marketing, Tik Tok shop, etc. And imagine if you start publishing these on Instagram and YouTube too. That will increase the revenue for sure. Chapter 10. Viral football videos. You've probably seen those viral Messi versus Ronaldo videos blowing up on platforms like Instagram, Tik Tok, and YouTube Shorts. These Videos have millions of views. For example, this video on Instagram hit over 100 million views, while others are pulling in
similar numbers with significant income potential. Ever wondered how these videos are made? They look complicated, right? Well, guess what? They're actually easy to create. And I'm going to show you how it can be done using AI tools that offer free daily generations. Stick around and I'll not only show you how to make these Viral videos, but also share a strategy that can help you monetize this niche and boost your views even more. In this video, I'll walk you through exactly how to create viral videos just like those Messy Vers Ronaldo ones using free AI tools.
And by the end, you'll have a strategy that can potentially bring you income from these viral videos. You've probably scrolled through your feed and come across one of these videos. They catch your attention, right? The funny Banter, the competition, something about them just grabs attention. Well, I used to think these types of videos were hard to make and needed advanced tools. But after doing some research, I found out it's actually way simpler than I thought. I was just doom scrolling on my phone when one of these Messi versus Ronaldo videos popped up. I was instantly
hooked. I went to the page looking for more of these videos and thinking of ways how these were created. At first, I thought they were way too advanced to replicate, but after doing some deep research, I realized the process is much simpler than I thought. And today, I'll share that process with you in four simple steps. I've spent a lot of time testing different AI tools to find the best ones for generating these videos. After experimenting, I found that there are some tools that work way better than others, especially for creating realistic images of Characters
like Messi and Ronaldo. In this video, I'm going to show you the ones I use. The first step in creating your video is generating your story. You'll need a good narrative to base your video on. For this, we're going to use chat GPT to generate a story. I've created a prompt you can copy paste from the description below. This will create a story along with all the necessary prompts to generate your images. You can tweak the prompt for different Variations of the story. Chad GPT generated a story called the ultimate barber battle. Messi versus Ronaldo.
It breaks down the scenes for us and gives us all the prompts for generating the images which takes us to step two. Step two is the step where we generate the images. For this, I recommend using tools like Idog, Midjourney, or Leonardo AI. I found that ideog works best for generating realistic images of characters like Messi and Ronaldo. Copy The prompts from chat GPT and paste them into uh ideoggram. Change the ratio to 9 to6 for the vertical format. Hit generate and within seconds you'll have your images. The first one is pretty legit. The generations
look very realistic and it's something that we can work with. Now repeat this for the rest of your prompts. Download the images and move to step three. Now that you have your images, it's time to turn them into a video. There are a lot of free tools Available for this like clingy, pika, and runway. For this tutorial, I'll use Hilu, but feel free to experiment with others. Go to Hilu, log in, and click on create. Upload your first image and paste the prompt from chat GPT. You can also apply camera movements using the built-in feature.
Hit generate. Wait a few minutes for the video to render and repeat the process for the remaining images. Once you have all your clips, move on to step four. After you have all Your clips ready, it's time to put everything together in a video editor like Cap Cut. Open Cap Cut and start a new project. Import your clips and arrange them on the timeline. Set the video ratio to 9 by6 for shorts. Next, add some background music. You can find free tracks on Pixabay. Look for something upbeat or funny that fits the vibe of your
video. Add sound effects such as Messi and Ronaldo's voices. Turn it or sounds Related to the barbershop theme of the video. To make transitions smoother, I like to use the black fade transition between clips. Once everything's in place, hit export and you're good to go. Let's check the [Music] results. me. Wo! Wo! Okay, great. You're almost there. But wait, before you start uploading your videos, there's one last secret I want to share that will help You go viral even faster. Stick around. By now, you should have everything you need to create viral videos using free
AI tools. But remember, the secret to getting these videos to go viral is consistency and optimization. If you follow this strategy and stay dedicated, you'll start seeing results. If you're not using these tools yet, you're definitely missing out on one of the most effective ways to generate viral content without spending a dime. Imagine Creating videos that get millions of views with very little effort. That could be you. After mastering this process, you'll be able to consistently produce viral content in a profitable niche. The more you create, the more potential you have to scale up and
start earning income from your videos. Now, something that many of you have asked me is how I make my avatar this realistic. I have prepared for you the ultimate guide on how to create super realistic Avatar like mine using free tools. It can be used for anything. It makes the characters move while talking, lip syncing very accurate. People use it to create their content avatars like podcasts avatars, reaction avatars, storytelling avatars, etc. If it interests you, I have attached a link on description. So, feel free to go and check it out and learn how you
can make similar avatars using free AI tools. If you found this helpful and want me to go Deeper into any part of this process, comment AI below and I'll make a follow-up video showing you tips to maximize your viral potential. Congratulations. You now know how to create viral videos using free AI tools. I'm excited to see what you create. Don't forget to subscribe for more tips and tricks on how to make your videos go viral. If you want to see how I used AI to copy a new viral niche, check out this video to see
how I did it. If You've watched this far, I can tell you're one of those who are actually serious about building your AI YouTube business. What I've shown you in this video is something I normally only share in my private Telegram. So, if you want more strategies like this, but daily, be sure to click the link in the description to join before it completely closes on April 28th. And after April 28th, I'm turning even more attention to the members inside. And what we're Building together could completely transform how you generate income online. This isn't something
you'll want to look back on and regret missing. If you found this valuable, please hit the like button. It helps me know you want more content like this. And don't forget to subscribe for more untapped niche opportunities. Thanks for watching and I'll see you in the next
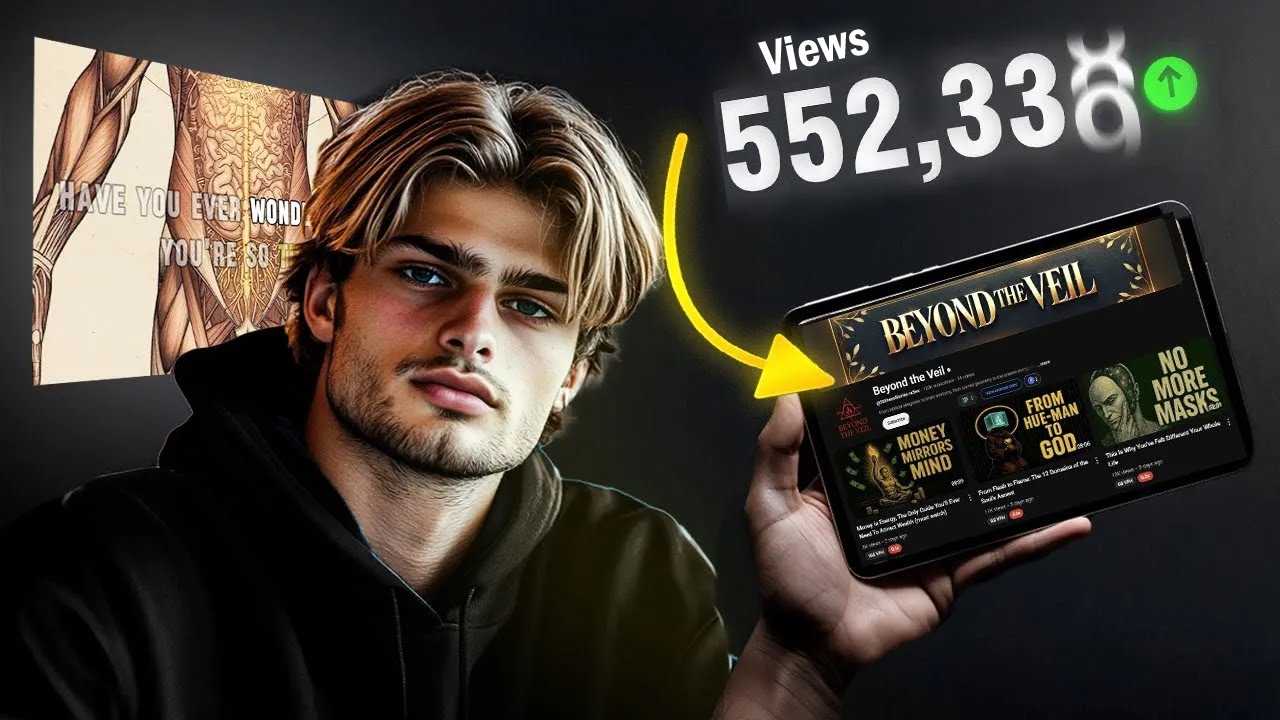
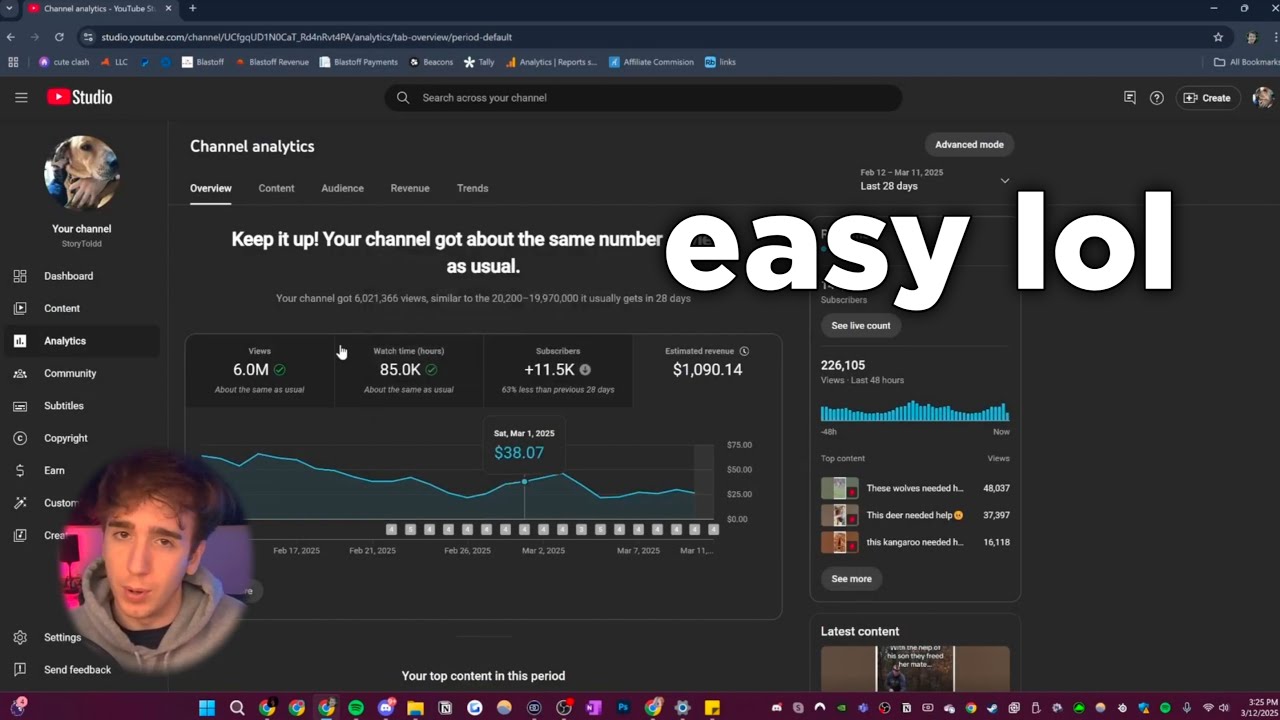

![🎯 90-Day YouTube Automation Challenge: From 0 to Monetized [Let’s Do This Together]](https://img.youtube.com/vi/W0AGWRYGflk/maxresdefault.jpg)

![How to start a faceless YouTube channel with AI [1 HOUR COURSE]](https://img.youtube.com/vi/FI9lM_5xhzA/maxresdefault.jpg)