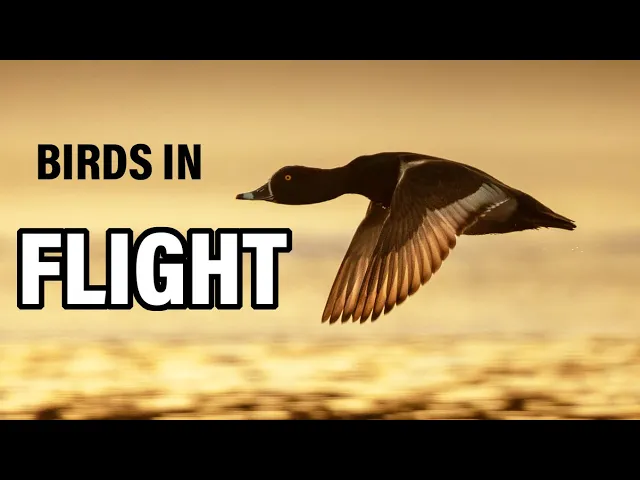
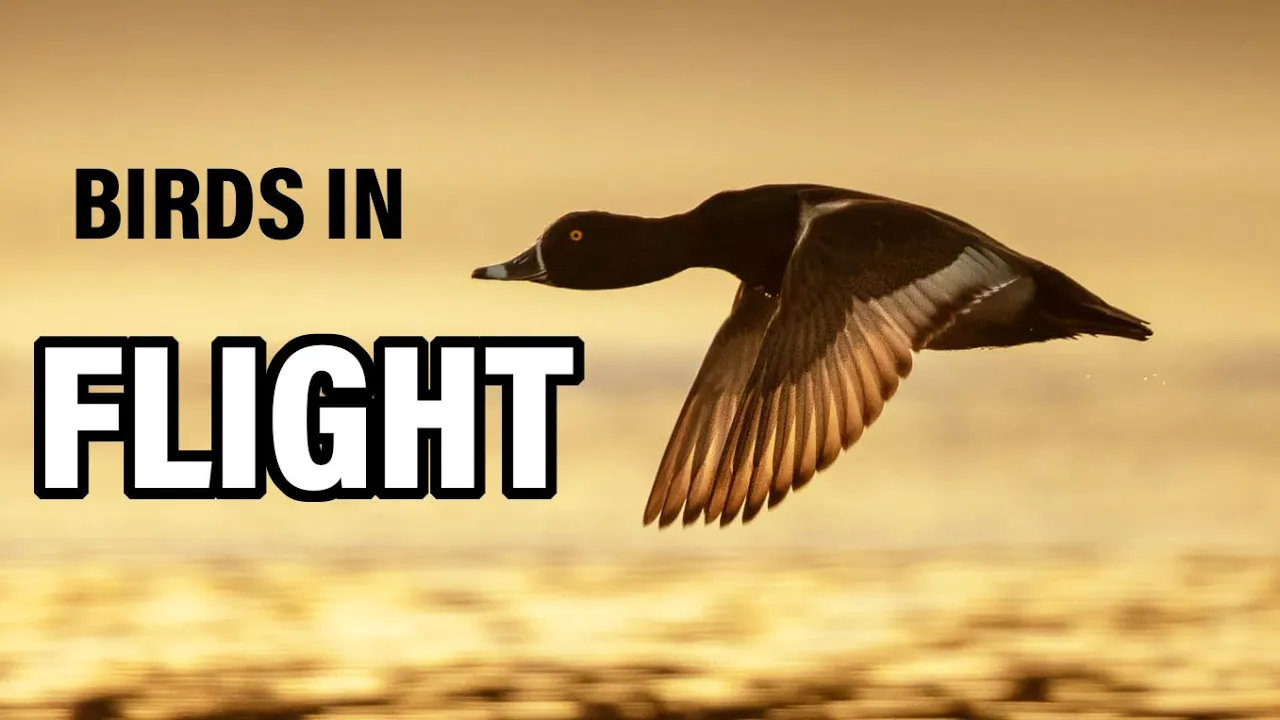
welcome everyone to a new video in this video I'm going to be teaching you my top tips for photographing birds in Flight I'm going to teach you the top settings techniques Behavior tips and artistic tips to help you make the best out of getting birds in Flight photography because I really enjoy photographing birds in Flight I've taken lots of photographs in the past the flying birds I photographed slower flying birds that are easier to photograph like the bigger birds like owls herons and geese I've also photographed faster flying birds like ducks and birds of prey
getting into the faster and more erratic flying birds like turns and sandpipers and finally the fastest animal on the planet the peregrine falcon in full dive at over 200 kilometers per hour I'm going to take everything that I've learned by photographing these birds and put it into a video for you to really up your game in photographing birds in flight and finally I'll be putting my own tips to the test by going on a boat tour with a friend to photograph puffins and razor bills puffins are amongst the most difficult Birds to photograph because they
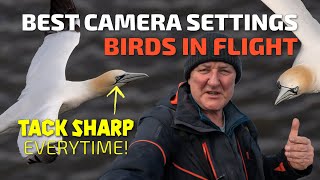
fly at over 90 kilometers per hour and you're on a moving boat I'll be joined by another YouTuber that I'll be introducing later in the video while I'm lucky to be shooting with a 500 F4 a lot of the time I also have a 100 to 400. let's put this one aside for now because this is more likely something like what you're shooting with let's start off by talking about settings it's really important for birds in Flight that you've got the right settings that are optimized for photographing moving targets the first thing you have to
do is put your camera in AFC for auto focus continuous on Canon that's called AI Servo that's opposed to one shot where one shot freezes the focus point at a certain point these targets are going to be moving closer and farther away on a continuous basis you need the autofocus to track those so you have to put your camera on AI Servo and Canon AFC in Nikon and Sony the next decision to make is how many Focus points to use most cameras can go from having one Center focus points to maybe 7 20 or 60
Focus points as a rule you would use a single Focus point for unmoving targets and many Focus points for moving targets because it's just too difficult to keep that one Center focus Point focused on a moving bird at The Other Extreme if you use too many Focus points my experience is that you've got too many opportunities to capture other things in the frame at the edge of the frame also cameras will take longer to make all the calculations necessary to calculate whether or not something's in focus in all these Focus points if it's trying to
do them all at the same time my experience is that you want to use a small number of focus points focused in the center add as many as you need to be able to keep birds focused in that area but no more your autofocus will be more responsive and have less opportunity to capture other things that you didn't want in the photo this might be using the center 5 Focus points and across maybe a Center Nine by three by three pattern or maybe a little bit larger with 15 or 20 points on Canon cameras I've
always enjoyed using the nine Center focus points in a three by three pattern that's always worked well for me it's fast responsive and also it's just enough Focus points to have one of them always on my target modern mirrorless cameras also have eye Auto detect or 3D tracking this also works very well I actually we have my camera set up with back button focus with two back buttons one set for traditional zones one's for eye tracking you can find a video about that on my channel the next big decision is how much shutter speed to
use this is an important decision because you need just enough shutter speed to freeze the action but you don't want to use more than you need because you don't want to unnecessarily have a high ISO an important thing to remember is there's usually an inverse relationship between the size of birds and the speed of their flight larger birds fly more slowly and can get away with less shutter speed smaller birds usually fly more quickly and more erratically and hence need more shutter speed larger birds like geese owls and herons you can usually get away with
one one thousandth or 1 12 50th of a second medium-sized birds like ducks and birds of prey may be one two thousandth or one twenty five hundredth of a second fast birds or small erratic birds like turns or sandpipers you might want to try one thirty two hundredth of a second and if you've got enough light for hummingbirds and peregrine falcons one four thousandth of a second might be a good shutter speed the good news on this is that the best poses for photos which are the wings all the way up or all the way
down require less shutter speed than freezing the wing halfway down the next decision to make is whether or not to shoot in shutter priority aperture priority or in manual I would say that both shutter priority and manual are both great options for shooting birds in flight but that aperture priority is not that's because in aperture priority the camera is choosing the shutter speed for you and there's no way for the camera to know how much shutter speed is needed to freeze your action my personal favorite is to shoot in manual with auto ISO I then
use exposure compensation to tweak the exposure based on the available light the next decision you need to make is what aperture to set your lens at now I'm very fortunate with this 500 F4 it is at its maximum sharpness at F4 shot wide open because many camera lenses benefit and sharpness by being stopped down a bit you may want to experiment with stopping down your lens a bit even when shooting birds in flight I have a whole video on maximizing the sharpness of your bird photos you can check that out in my playlists another benefit
of stopping down your lens a little bit is that there's a greater chance that the bird will be in focus when shooting birds in Flight I advocate putting your camera in the mode that will allow the greatest number of shots per second my R5 and my R6 will shoot 12 frames per second with a mechanical shutter it sounds like this now some cameras after shooting continuously for a few seconds will start bogging down because the camera is not able to write all the photos to the card quickly enough in this case you should shoot in
short bursts that will give more time to the camera to write the photos to the card and give you some room in case something really interesting happens now some lenses also have what's called a focus limiter this is a switch on the lens that allows the camera to reduce its area of focus by a certain amount improving the odds that it will be able to focus quickly on something in this particular lens there are two settings either the full range of the lens or three meters to Infinity I only use the focus limiter if I'm
very very confident that I'll be able to find Targets within that range exclusively one of the more controversial areas about settings for lenses is whether or not you should leave image stabilization on when shooting birds in flight at high shutter speeds my experience of talking to other photographers shooting other brands tells me that the answer to this question is brand dependent for me shooting Canon I've never found it a problem to shoot at very high shutter speeds with image stabilization on I'm still able to get sharp photos for my friends that shoot Nikon they tell
me that over one two thousandth of a second they find they get sharper photos by turning the image stabilization off you'll have to test this with your own lens camera combination or talk to your friends who shoot similar Brands another lens setting is stabilizer modes my Canon lenses have three stabilization modes mode one is stabilization in every axis to help center the object in the frame and keep it steady mode 2 is called the panning mode this is what you use for birds in Flight that means that when you're tracking a subject the lens will
only try to stabilize up and down and not try to stabilize left or right that's because if I'm moving from right to left here and the lens is trying to stabilize on the same plane it would try to keep stabilizing backwards what is actual movement across the frame mode 3 turns it all off and only turns it on when you press the shutter button in my case I don't use it I try to answer all the questions in the comments section below if you still got a question put it in the comments below and I'll
try to give you an answer another setting that's available on many cameras with your autofocus modes is how quickly you want it to pick up on new subjects entering the frame review and how sticky do you want the autofocus system to be to that object this will be too comprehensive to cover for all the different camera brands and all the available settings but there's at least two available parameters that you want to consider number one is how quickly do you want to pick up on a new subject entering the frame review or entering in front
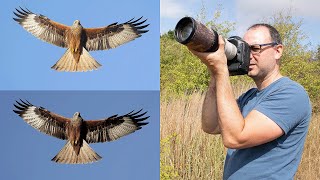
of the focus points in this photograph of a northern harrier passing behind some Alders I was lucky that the camera stuck to the bird the next parameter is whether or not you want the camera to be very predictive of where the bird will be next if the bird was photographed here here here and here do you want the focus point to jump to there for the next photo my final tip on settings is to have those birds in Flight settings for your walk around settings that is while you're walking around looking for targets have your
bird in Flight settings ready something flies by or you flush a bird you're ready to shoot after it okay that's enough for settings let's talk about techniques out in the field number one you want to go to a location where the sun is at your back and your targets are well illuminated you want a day with lots of sunlight so you can have lots of shutter speed without your ISO being too high when you're picking a location to go shoot birds in Flight the cleaner the background and the farther away from the background your target
is the easier it will be for your camera to pick it up and not be focusing on the background if your flying bird is right in front of brush or trees it'll be very difficult for your camera to pick it up from the background that being said if the background is several hundred yards distant it'll be much easier for your camera to pick up the bird rather than the background my next tips are around panning technique it's really important for you to have good technique as you pan to follow the birds I have a whole
video on taking sharper bird photos you can find those in my playlist you should have a look at that if you want more detail but here's the quick version your elbows need to be tucked into your body to stabilize the lens you can't be flying out on the sides you need to be turned slightly to the right of your Target and put your eyebrow against the back of the camera the next part is very important is that for your panning technique you need to be panning by moving your whole upper body not by moving your
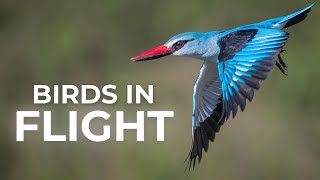
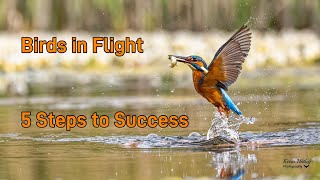
arms this is clearly the most stable way of following the bird the next tip is to pre-focus your camera to improve the odds that can pick up incoming targets if the birds are flying 30 meters away from you pre-focus on the ground or an object 30 meters away while waiting for the targets to show up in this photo of a kingfisher that I wanted to get landing on a tree I pre-focused on the tree so that I was close to where the bird would appear before focusing on the bird remember that when you're following birds
with your panning technique it's not good enough to have the bird anywhere in the frame of you you really need to put the bird in the center of the frame or off to the right or left of the frame and follow it so that it stays in the same place within the field of view that will give you better sharper photos sometimes finding the bird quickly in the field of view can be a challenge one tip for a big lens like this 500 F4 is that it has a hood with a little bit of a
screw in knob that I used to screw in the hood you can use the knob as a sight by putting your eye above your camera pointing the knob at your Target and then when you put it into the field of view you have a much better chance that the bird is already in the viewfinder okay let's move on to some Behavior tips that'll help you really increase your keeper rate number one is that if you've got a bird that you think is ready to take off frame the bird slightly downwind in your frame that is
point the camera slightly upwind from their location Birds especially large birds need the added lift of going into the wind the same as airplanes to take off and to land so if you're photographing a goose in the water you think it will take off point slightly upwind from the bird that way the bird will fly into your open frame following that tip about wind direction put the wind at your back that way birds that take off or fly into you or land will be doing it into your direction you'll be photographing the fronts of the
birds making much better photos here are some examples of birds taking off or Landing directly in my direction because I had the wind at my back Sometimes the best shot comes from Birds during takeoff not yet really flying there's a few tips to get this right number one Birds taking off flap their wings faster than when they're just flying by so you need a little bit more shutter speed to freeze the wings at takeoff than you do rather than just gliding by also there are signs that birds might be ready to take off that'll help
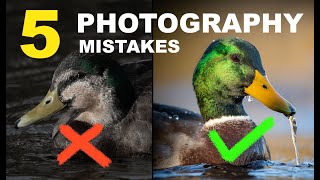
you get ready and get your shutter speed up that includes pooping right before taking off especially large birds like owls and Ospreys and egrets and herons tend to be very jittery in the last few seconds right before they take off finally let's talk about some artistic tips to make prettier photos when photographing Birds whenever possible I tried to find areas where I'll have the land as the background rather than the blue sky this is just personal preference this is something you need to experiment with your own do you like the ocean beyond your birds see
like a sky behind your birds I personally find a land background has more colors a little bit more Dynamic now this is not always easy to find you need to find areas where the birds are flying fairly low to be able to get that dark land background another tip to take more artistic photos is to find eye level shots this is a similar challenge to having the land as a background you need to find low flying birds when you're photographing flying birds you don't always need to fill the frame with the bird it's often nice
to leave a little bit of room for composition and cropping around the bird when you are cropping your photos try to leave a little bit more room in front of the bird rather than behind the bird that gives you the impression of having some room for the bird to fly into in the photo here I'll give you some examples of how to give that amount of room in cropping in my experience having the bird in the exact center of the frame is not always the prettiest way to compose your photo one of the things I
like to do when photographing flying birds is put them a little bit back in the frame that way they have a little bit more room to fly into I find that if I put the bird in the center of the frame they have a way of moving forward in the framing eventually I'll lose them out of the front of the photo here's an example of me losing the bird moving forward in the frame now here's an example of me keeping the bird in the back of the frame always having a little bit of room to
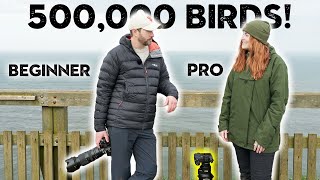
fly into now we're going to put these to the test on a boat tour in Cape Breton Nova Scotia looking for puffins razor bills MERS gillemots and other alcids these are really difficult targets puffins fly at over 90 kilometers an hour that's over 50 miles an hour and will really put my skills to the task given you're trying to do this on a moving boat I'm going to be joined by another YouTuber Gavin Hardcastle who goes by photo Tripper that's spelled with an F I'll put a link to his channel in my show notes below
we're going to have a little bit of a banter before we go in the boat he's a seriously funny guy so Gavin we're out here gonna go uh get some Puffin photos sea parrots sea parrots is the technical term I'm gonna I'm gonna Dazzle you today with my my knowledge of oh really yeah but these these uh say parrots Gavin's an amazing landscape photographer by the way who's got a channel called photo Tripper spelled with an app I'll put it in the show notes below and his newest Endeavor is the brave task of of renovating
a church into a home in rural Nova Scotia that'll be Hardcastle Towers you'll have to check that out and now he's going to dazzle me with his uh Wildlife photography knowledge I thought he was a landscape guy well I mean you've got a diversify diversify oh they're gonna cut that too let's talk about settings here I'm gonna be using like 500 millimeter F4 lens on my Canon R5 for shutter speed I'm probably gonna put this on the 130 200th of a second puffins are really really fast Flyers they go 55 miles an hour that's 90
kilometers an hour so I'm gonna put my shutter speed at uh 1 3 200th of a second in terms of my aperture I'm going to shoot the lens probably wide open which is F4 if the birds are really close I might stop it down to F5 or F 5.6 that way I'll have a little bit deeper depth of field and and I'll have more of the bird in Focus but to be honest if I can get the head in Focus if the wings are out of focus on the edges I'm not particularly worried about it
in terms of my ISO I'm going to be shooting on auto ISO I find that's the best technique for me is to shoot in manual with auto ISO and I'll have my finger on the exposure compensation dial to compensate for Under and Over exposures uh I've got my camera set on AI Servo that's AFC on Nikon and Sony in terms of continuous Focus so it tracks and the focus changes as the subject moves I also have my camera on high speed frame rate so I'm going to be shooting 12 frames per second with the mechanical
shutter if I'm shooting a lot of flying objects I'll also put my image stabilization on my lens on mode 2. foreign [Music] here are some of the best Keepers on my trip I was able to get some puffins with some food in their mouth I got some puffins with the islands behind the bird rather than the sky I got some great razor Bill shots I find these razor belts are amongst the prettiest of these birds and I got some black yellow Mark shots with a sand Lance in its mouth which really makes for a dramatic
photo I really appreciate the time you've given me to watch my video If you like this type of content please like And subscribe and hit the notification Bell so you can see more videos I've also got all kinds of other videos on my playlist on my Channel about back button Focus taking sharper bird photos an introduction to bird photography I hope I've given you the tips to go out in your very next outing and take better bird and flight photos [Music] thank you [Music]