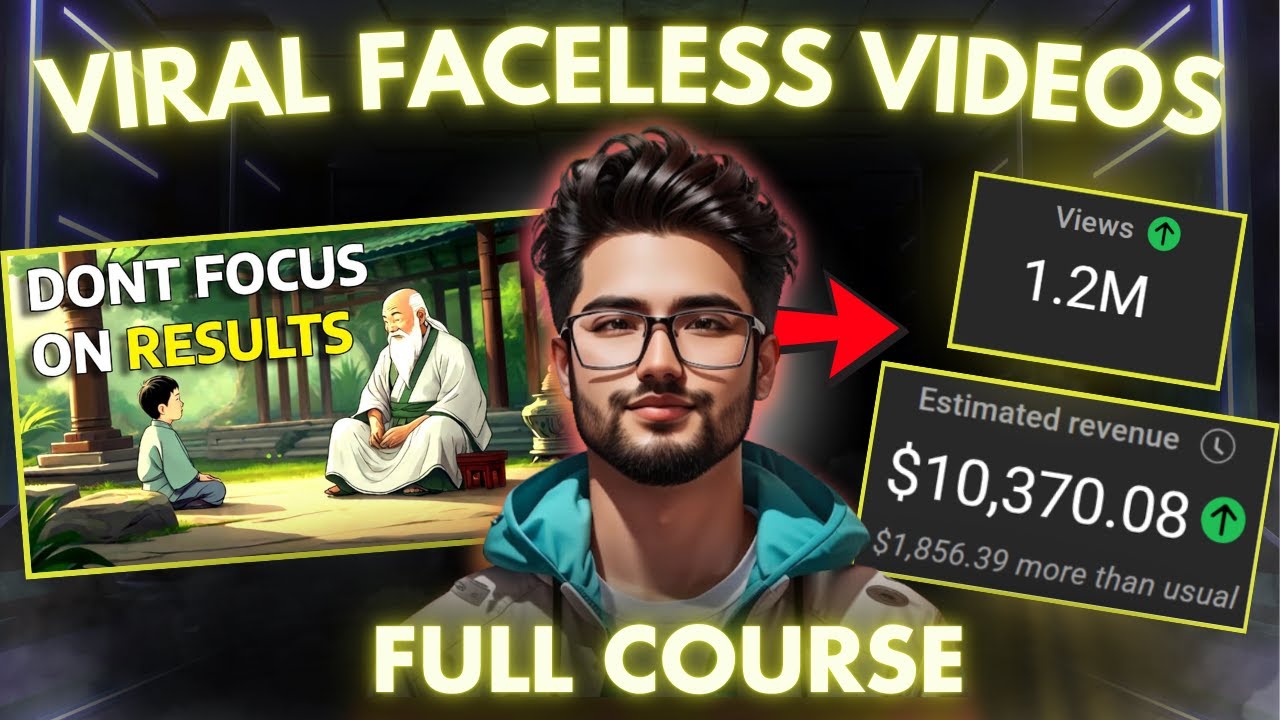
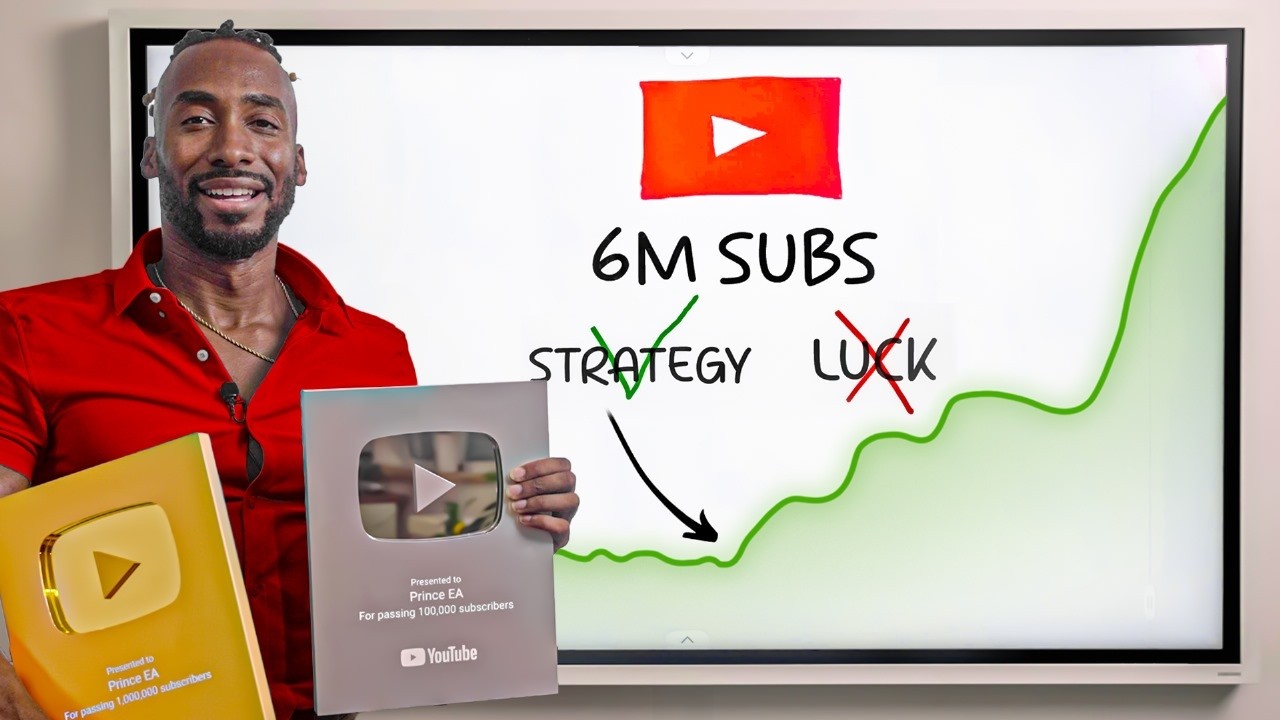
Picture this the channel you've poured your heart and soul into finally going viral I want that for you let's be real guys your channel deserves so much more than this the late nights the endless edits the constant grind it's exhausting when the results don't reflect the effort and just like me you've probably seen a bunch of courses promising to make you a YouTube automation Guru but it's all a big buzz and you end up Wasting your precious time on some sponsored video that only benefits the sponsor and the Creator a few months ago decided to
start this AI Channel despite the influx of competitors and a little over 2 months later the channel reached monetization fast forward 3 months later and the channel has finally hit its second milestone so to show my appreciation I decided to put together all the knowledge I have gained on this wild journey into this master class the One I wish existed when I was getting started and just so you know nothing in this video is sponsored this is purely my own research my personal experience and my genuine goal to give you the best possible information to
help you get started or level up if you're struggling with YouTube automation if you stick around to the end of this video you'll walk away with everything you need to build a successful faceless Channel first off I'm going to show you how you Can find a faceless Niche then I'll walk you through some of the most trending faceless niches you can dive into right now and still strike gold after that we'll get into branding your Channel with your very own avatar just like you see on some of these popular channels then we'll dive into one
of my personal favorites the wh if niche I'll show you exactly how to create videos in this space and right after we'll explore the old movie trailer Niche which is blowing Up on YouTube right now next I'll take you step by step through creating viral historical documentaries and then we'll get into making simple explainer videos using canva and cap cut once we're done with that I'll show you how to create some epic storytelling videos like the ones you see on Bible in a nutshell from there we'll shift gears and learn how to create animal fact
videos similar to what's trending on this channel then I'll take you through creating Aid Driven comparison videos think comparing countries objects and more we're also going to dive into making AI generated anime shorts and I'll even show you how to create those viral stick figure animations that are all over social media as a bonus I'll take you through an entire course on editing with cap cut before we wrap up we'll get into thumbnail creation where I'll show you how to design some of the most popular thumbnails completely from scratch I Know this video is going
to be longer than usual so I'll be including timestamps throughout so you can easily jump to any part that interests you most but before we dive in I want to quickly tell you about a couple of other things I've got going on first up I've created a free Discord Channel where you can find all the resources from my videos plus a community of like-minded people who are either running their own YouTube automation channels or thinking about Starting one it's a great place to connect share ideas and get support and second for those of you who
are looking for more Hands-On help with your YouTube Journey I've got something special I'm mentoring 10 people for 6 weeks straight you'll get get 24/7 access to DM me even after the 6 weeks are up on top of that you'll get bi-weekly 1hour group calls plus weekly one-onone calls with me where I'll personally guide you through your YouTube automation Journey all this For a onetime fee of $297 for the first batch only and just a heads up the price will go up after the first batch so if you're interested now's the perfect time to jump
in the links will be down in the description now let's get started chapter one Niche selection all right let's pick things off with how to find a trending Niche on your own it's super simple first open up an incognito window on Chrome and head over to YouTube the reason we're using Incognito is to avoid YouTube's algorithm from giving us personalized recommendations this way you'll get a cleaner view of what's truly trending now the first thing you want to do is change your location settings to your preferred area for this example let's pick the United States
once you've done that head over to the trending section take your time to scroll through some of the most popular videos right now and keep an eye on for niches that seem Interesting to you when you stumble upon a niche that grabs your attention the next step is to check if smaller channels in that space are doing well a great sign is finding a relatively new channel that's pulling in hundreds of thousands of views on their videos that's your cue the niche is likely worth a deeper dive you can repeat this process as many times
as needed until you land on something that genuinely excites you chapter 2 trending niches Choosing the wrong or right Niche on YouTube can make the difference between a Channel with 6 100 videos but only 150 subscribers and another with only 20 videos but 150,000 subscribers that's a thousand times the subscribers with just a fraction of the total number of videos if you're an unknowing YouTuber you might think this is unfair you put in the same amount of effort and time if not more yet the other guy gets more views and already bought that new car
He's been teasing while you can't even hit the first 1,000 subscriber Mark to get monetized however the truth is far simpler than you might think you just may be in the wrong Niche here's the thing the majority of YouTube channels fail and it's not because their videos are that much worse than others most of the time it's simply because these creators chose the wrong Niche so to make things easier I've spent the past few days and nights diving deep into Research to uncover 15 of the most profitable faceless niches that you can start right now
and still strike gold because of the number of niches I won't be creating demos of each of these videos but I'll do my best to show you exactly what you need to create your own so let's dive in the first on our list is history just take a look at your recommendations and you'll notice some of these viral history shorts channels like Stellar sagas and history bypass Are getting millions of views making such videos the best part about these kinds of videos is that you can easily create them using AI you can use chat GPT
for the script by pasting a simple prompt once you're done simply head over to 11 laabs and generate the voice over next you need to create the images feel free to use your preferred image generator but I recommend Leonardo AI or idiogram if you're on on a budget and GPT Plus or mid Journey if you've got a Few bucks to spare once everything is ready you can put them all together using cap cut oh and if you need consistent images for this style of video or want a detailed breakdown feel free to check out this
video I made about how you can create some pretty badass history shorts the second is health and wellness it's a niche that will always be relevant on YouTube the best part about it is the various monetization sources for this Niche like Affiliate marketing selling Health courses and sponsorship from Health brands to truly stand out you can even consider some of these sub nishes channels like this one are killing it in creating faceless videos in this Niche you simply need to grab some stock footage from any of your favorite sites add a voiceover from 11 Labs
or any other text to speech platform and then top it off with decent editing take a look at some of the videos in the niche And you'll be surprised by how simple the videos are next on the list we have ai ai is gaining momentum lately and channels like these keep blowing up and gaining massive following within their first year the part about this is that the niche is still trending now despite the recent competition but newer channels can still find their place by creating a sub Niche for themselves or simply choose one of the
existing sub nishes like focusing on teaching how to Make AI videos for Tik Tok Instagram YouTube shorts or simply testing out new AI tools or just AI news the possibilities are endless in this Niche and I've outlined the whole process for creating a faceless Channel like mine in this video most of these channels have an avatar so you can create one using any of the popular AI image generators and create the lip movement using tools like haen or did for the voiceover you can choose a character from 11 Labs Voice library and that's pretty much
all you need for The Branding like in my case next on the list is the movie explainer Niche these are some of the most popular videos not only on YouTube but also on Instagram and Tik Tok successful channels in this Niche are making thousands of dollars each month oh and if you're worried about whether such content can be monetized check this out you just need to follow YouTube policies to avoid violations to create Such videos you first need to look for movies with high IMDB ratings then you can ask chat GPT to create a script
for a specific scene in the movie make sure you don't provide any spoilers for the entire movie as that could land your channel in trouble now you need to create a voiceover with your favorite text to speech tool and don't forget to download the movie or just the scene to avoid any copyright issues make sure you only use 5c Clips Max when editing next On our list is storytelling with AI people love storytelling videos and channels like this have proven what viewers think about using AI generated videos for storytelling the best part is that these
videos are enjoyable to watch for both adults and kids their scripts are mostly based on folktales biblical stories or any interesting stories you can think about to create these videos you first need to generate your script using chat GPT then generate the images With your favorite AI image generator to create the animation you can use tools like Runway ml or Luma dream machine you also need a voice over so you can paste your script inside 11 labs and hit the generate button finally you can put everything together using cap cut feel free to check out
this detailed video I made on creating videos for this Niche next is using this popular video style for comedy stick figure animations are some of the most outstanding videos on Any social media platform they're short and funny making them very difficult to skip quite frankly the numbers on these videos can be difficult to believe unfortunately creating this style of video requires a bit of expertise you need to put in a bit of hard work but it's honestly worth all that effort when you look at these jaw-dropping numbers to make it easier I've created a playlist
where I teach everything you need to know to create your very own Stick fig animations including how you can create your very own characters the best part is that you can do this with completely free tools simply grab your phone or laptop and you're good to go with this Niche next on our list is the what if Niche what if aliens exist or what if the dinosaurs never went extinct these hyp thetical questions have crossed our minds and it's always intriguing when you see videos about them this is what makes this style of Video a
huge magnet and this channel is dominating the niche you don't need to be an expert in any field to create these kinds of videos chat GPT can do most of the hard work for you from idea generation to script writing chat GPT is your best asset in this Niche it can even create the images for your story if you're on any of the paid plans to make things easier you can check out this detailed tutorial I made on creating this St style of video next we have pet And animal videos we've seen videos like these
all over social media and what's interesting is that channels like this one are simply printing money posting these animal videos videos like this will continue to be funny and cute so this Niche is one you definitely don't want to miss you don't even need to resign yourself to using other people's animal videos alone you can create funny or cute videos of your own pet and people are going to love it no need to Show your face or anything like that next on our list is quizzes and riddles this style of video is quite simple and
channels like these are killing it with these unbelievable numbers what's more interesting is that this works for both short and long form content keep in mind that the quizzes need to be intriguing and the presentation should also be engaging to create these videos you simply need to ask chat GPT to give you a list of compound words separate them And also include emojis finally put them into a table and instruct GPT to include the voiceover you can now use canva to create the rest of the video I won't be going into into details for this
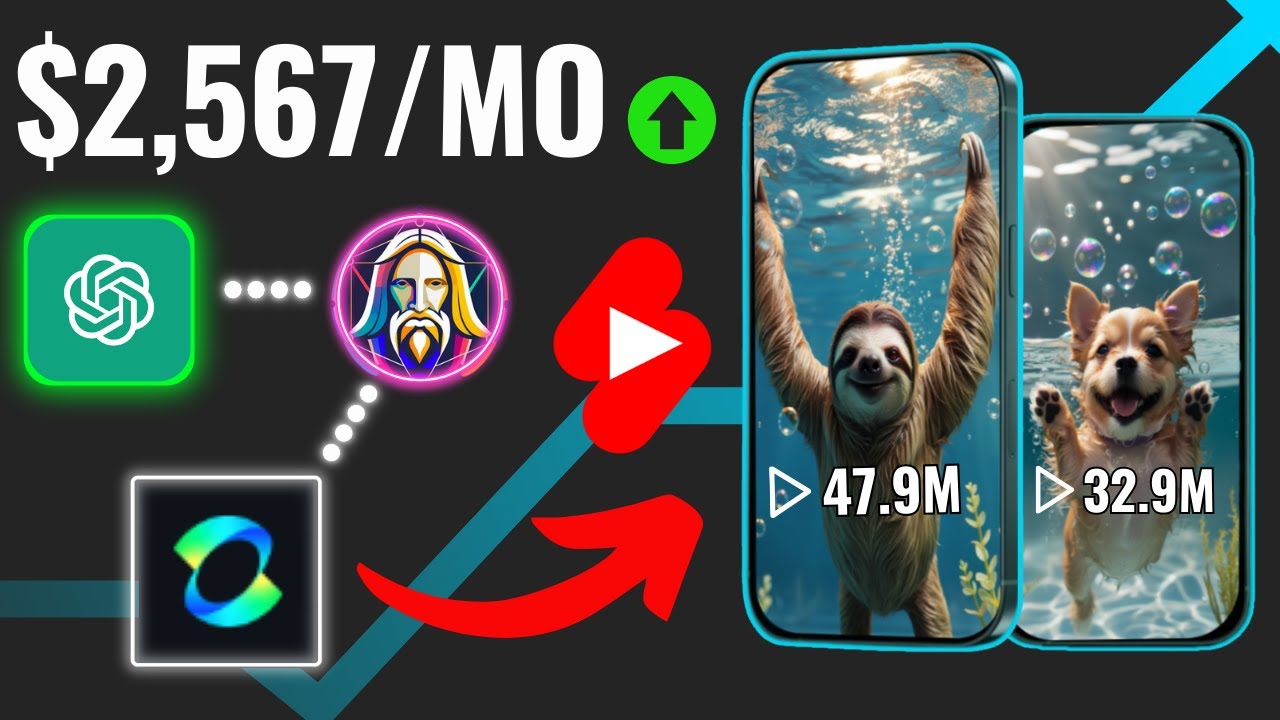
video but feel free to let me know in the comment section if you want me to make a dedicated video on creating this style of video next on our list is Animal Facts Niche channels like this one are simply creating videos about real and extinct animals and just look at some of The views they're getting and what's more interesting is that these videos are quite easy to make no need to worry about consistent characters or even animating your images keep in mind that animating your images for these videos would definitely help you stand out but
that isn't very necessary so you can simply ask chat GPT to give you some intriguing topics about any or a specific animal once you have it all you need to do is generate a short story About that particular animal you can finally ask for a few prompts that you can use to generate your images feel free to use your favorite image generator at this stage but once you're done you can generate the voice over with 11 labs and edit the final video and cap cut and just in case you want to animate the images you
can use any of these popular AI video generators I already have a full tutorial on creating videos for this Niche so feel free to Check it out next on our list is one I like to call imaginative photography and this may be the easiest style of video to create on this list it doesn't even require a voiceover this channel is doing great in this Niche and all they're doing is taking countries states or even car brands and reimagining them as Disney characters Transformers and more they use chat GPT to generate the descriptions for the characters
and then proceed to create the images using mid Journey or any fre AI tool this video covers the whole process of creating these kinds of videos so feel free to check it out for a more detailed tutorial next we have animal stories I'm sure we've all seen these viral animal videos all over social media the best part is that this doesn't only apply to cats channels like these are blowing up from creating these viral videos the videos are short Punchy and Visually appealing couple this with some Perfectly catchy soundtracks and you have a viral video
you can ask chat GPT for a storyline but I suggest using your imagin ination to come up with a wild and intriguing Story Once you have it you can generate prompts for creating your scenes and characters I won't be going into detail in this video but feel free to check out this dedicated one I made on creating this style of video What's even more interesting is that you can create these videos using completely Free AI tools now let's move on to the next Niche which is stoicism this Niche simply involves creating motivational and inspirational videos
based on Ancient Greek and Roman philosophies channels like these are pulling in these crazy numbers creating such videos the best part about this Niche is that the videos are very easy to create you only need a script AI generated images of muscular ancient Greek statues and finally a deep male voiceover I haven't Made a video about this Niche but there are plenty of tutorials all over YouTube next we have the scary stories Niche channels like these are killing it in this Niche and the most difficult part of the whole process is coming up with scary
stories which can be solved with AI that said I don't recommend using AI to generate these stories but can give you some good ideas that you can modify once you have your idea all that's left is to create the voice over using text To speech tools like 11 labs and also generate images for the video you may not even need consistent images for most stories so feel free to use any free image generator then you can move on to cap cut for the editing I don't have a dedicated video for this Niche so feel free
to add a comment if you want me to create one you can also try a simple search as I believe a few creators have made videos on this topic finally we have an anime motivation this Niche is Quite popular and very lucrative if Done Right some people simply use clips from existing anime to create their stories and sometimes end up getting penalized but why use someone else's copyrighted content when you can create your own it's the age of AI people and you can create some very cool anime shorts with the right tools fortunately I've already
created a detailed video on this Niche so you can check it out but to sum it up you simply need to create the images and Animate them with your favorite AI tools then finally put everything together using cap cut you'll be surprised to see some of your results looking considerably better than some of the anime you can find on the market keep in mind that the right Niche isn't the only deciding factor when it comes to success on YouTube consistency valuable content good editing and more playkey rolles but if you don't know anything about editing
I got something for you simply check out This video on editing with cap cut thank you and see you in the next one chapter 3 Channel branding the first thing you need to do is come up with the look of the character you need something unique and memorable so feel free to use your imagination once we've decided on the character background and other details we can go to chat GPT and ask it to create a prompt for generating our image chat GPT is great at generating such images so I recommend using it if you Have
a GPT Plus subscription for free users you can paste The Prompt into ideogram or Leonardo AI to generate the image however it can be quite frustrating to create an avatar with those tools so another tool that you can use is co-pilot or Bing image creator it's free and runs on di so you get similar results to GPT plus subscribers the only issue is that free users only get images with square aspect ratio so to fix this we'll download our image and Head over to Adobe Firefly next we can select generative expand and upload our image
now let's choose widescreen option from the expand tab in the sidebar one thing you should know is that Firefly typically adds a water mark at the bottom so let's make room at the bottom before we begin the process all of these options look great so let's select one and download the last step here is to remove the Firefly logo at the bottom so let's drop our new image inside Adobe Image resizer select YouTube from the dropdown and then choose our aspect ratio now we can drag our image until the logo is no longer visible once
everything looks good we can go ahead and hit download our image is ready but we need to animate it for free users I recommend hen but for paid users did produces some of the best results in the industry we'll be testing both tools but first let's generate our dummy script with chat GPT You can use any dummy script but I'm only doing this to avoid this weird scenario where the Avatar's lips are closed when our voice narration is still ongoing so we'll give this command to chat GPT and grab this script without any punctuation now
let's test this out with haen we'll choose Avatar and upload our photo Avatar next we'll select it and choose our video format in this case we're creating a landscape style our script is a bit too long so let's Shorten it a bit and choose a random voice character finally we can hit submit and wait for our video to be ready check out the result imagine a world where the sky is always a brilliant shade of blue with clouds that stretch across the Horizon like cotton candy and The Sun Shines down with a warmth that wraps
around you like a cozy blanket this looks great but we'll need to get rid of this annoying Watermark but first let's download our video free Users can only download 720p resolution which isn't that great but we'll fix that later if you encounter this issue where the download button doesn't seem to be working simply choose customize then hit the play button and finally download for paid users I recommend using did let's head over there and create our video next we need to upload our image and make sure it's selected we'll leave the emotions and movements at
natural and paste our script I'm Using a free account so I need to reduce the number of words to 10 choose a voice and then proceed with the video generation Our video is ready within a few seconds both of these tools are pretty cool so you can choose one depending on your budget and how well they can animate your specific Avatar we need to remove the watermark from the video we generated with haen so we'll head over to one two three apps and choose this icon next we'll upload our Downloaded video and draw a rectangle
to cover the entire Watermark as you can see the tool isn't perfect but it's done a pretty awesome job removing the watermark now we can go ahead and download our video we also need to increase the resolution of our video so let's drop it into vmake and wait for it to do its magic our high resolution video is ready within a few minutes chapter 4 how to create whatif Style videos check out this video imagine Waking up one morning ready to tackle your to-do list only to find out there's nothing to do zip NADA not
because you've become a productivity Guru but because AI has swooped in and taken over your job and not just yours everyone's welcome to a world where artificial intelligence runs the show let's paint the picture AI isn't just some annoying coworker who never takes a sick day no AI has become the ultimate employee never needing lunch breaks sleep or Those suspiciously long bathroom breaks from flipping burgers to performing heart surgery AI does it all and it does it perfectly without the water cooler gossip now you're probably wondering what happens when everyone's out of work guess what
this entire video was crafted using AI tools yep even the ideas the visuals the narration all AI powered and here's the kicker there's very little competition in this Whata if style of videos the biggest channel in this Niche Has over 8 million sub subscribers with their top video racking up 25 million views now if you take a peek at Social blade you'll see this channel is not just thriving it's practically printing money so if you're ready to dive into content creation and stand out you're in the right place stick with me until the end and
I'll hand you the keys to create some killer Whata if videos ready to dive in let's do this first things first the script now we could do the lazy Thing and swipe a transcript from one of these videos using this Nifty Google Chrome extension then let chat GPT work its paraphrasing magic but where's the fun in that instead let's get creative and whip up something totally unique using AI this Niche is all about pushing boundaries so don't be afraid to think outside the box head over to chat GPT and ask it for some killer video
topics take a look at these pretty cool right you can keep generating more until you Find one that speaks to you once you've got your topic ask chat GPT to craft a 10,000 character script but don't just settle for any script make sure it's packed with humor storytelling and creative flare we want to keep our audience glued to the screen so let's make every word count this script looks solid so let's move on to generating some top-notch visuals we're going to need about 30 detailed prompts for our stories images you can use tools like Ideogram
or Leonardo AI if you're on a budget but if you've got a few bucks to spare the premium image generators are where the magic really happens I'll walk you through generating images in both Leonardo Ai and GPT plus let's kick things off with Leonardo AI copy one of your prompts and head over to their image generation tool you'll want to choose a preset and aspect ratio that fits your vision then paste The Prompt don't be afraid to tweak it for a Close-up shot or any other specifics you have in mind click that generate button and
voila you've got your image not quite what you wanted no worries rinse and repeat until you're satisfied if you're using GPT plus the process is just as simple paste your prompt include your aspect ratio and make sure to specify that you want a close-up shot check out the results if it's good fantastic if not tweak and try again until it's just right with your images In hand it's time to animate them we'll be be using Runway ml a tool that's been blowing my mind with its New Gen 3 Alpha but if you're looking for Alternatives
lumad dream machine is another solid choice for now though let's stick with Runway ml's free version select image to video choose this model and upload your image we want our scenes to be Snappy so 5 Seconds should do the trick and watch as the AI Works its magic Pro tip if you're using the free version try Generating videos around 2:00 p.m. eastern time unless you want to face this problem check out this awesome result rinse and rep rep for your other images but we'll speed things up and Skip ahead next up the voiceover we're using
11 labs for this but feel free to explore other options copy your script paste it into the text field and a quick tip keep it under 700 characters at a time to avoid any weird voiceover glitches now choose your voice you could Go with a popular choice but if you want something truly unique dig into the voice Library I've even curated a collection of awesome voices to make your life easier pick your character hit generate and voila you've got your yourself a killer voiceover now let's move on to finding the background music if you've got
a few bucks to spare there are some amazing premium collections out there but if you're on a budget YouTube's audio library has got your Back next we'll put everything together using cap cut start by importing your files and adding the voice over to the timeline remove any silences to keep the video engaging and then arrange the clips according to the story's flow this might take some time so I'll speed up this part don't forget to shorten Clips where necessary once the clips are in place it's time to add transitions stick to simple transitions to avoid
overwhelming movement in the video add a Few Transitions and then find sound effects for both Transitions and clips like a moving electric car if you can't find the right sound effect head over to pixabay to grab one adjust the sound effect by shortening it and increasing the fade on both ends for the bathroom scene add a flushing sound effect and lower its volume slightly then add a sound effect to the helicopter scene and adjust its duration the video is shaping up well so let's apply a filter you can Use your favorite filter but for this
demo we'll go with the clear filter extend it to the end of the video we won't add animations since the clips are already well animated but you can add them if you include images let's generate captions next and choose a template of your preference I prefer adding an animation changing the font and adding a shadow to the text adjust the blurriness if needed but this setup looks pretty good our video currently Has the runway Watermark which we'll remove later there's also a minor issue with the caption that I'll quickly fix finally add background music and
lower its volume export the video at 1080p resolution to remove the watermark go to one two 3 apps and select the appropriate option import the video and draw a rectangle around the watermark the tool may not be perfect but it should do a decent job of hiding the logo export the modified video keep in Mind that free users can only export the video at 720p resolution to get a high resolution version simply import the video into vmake and wait for it to do its magic within a few minutes your highresolution video will be ready if
you enjoy creating videos with AI be sure to check out this other video for more tips and tricks chapter 5 how to create viral old movie trailers in a distant realm where dwarves and elves walk the land and danger lurks at every Turn a small Hobbit embarks on the adventure of a lifetime meet Frodo baggin an unlikely hero with a heart of gold and a ring that's anything but when his uncle Bilbo hands down a shiny trinket Frodo quickly discovers its No Ordinary piece of jewelry it's the one ring crafted by the dark lord Sauron
a malevolent force with a plan to cloak the world in darkness and it's up to Frodo to destroy it but Frodo isn't facing this Peril alone enter the Fellowship a band of Brave companions there's Aragorn a mysterious Ranger with a hidden Royal lineage legalis the elf with flawless aim and even better hair gimle the fierce dwarf proving that size isn't everything Boromir a noble Warrior who ambition may be his undoing and of course Frodo's trusty Shire friends Sam wise Mary and Pippen always on the lookout for their next meal and let's not forget Gandalf the
wise old wizard with plenty of magic up his sleeve Together they'll cross dangerous lands filled with Orcs goblins and the occasional cave troll their mission to destroy the one ring in the fires of Mount Doom buried deep in enemy territory I'm sure you've seen these intriguing trailers Making Waves all over social media channels like these are taking brand new movies or classic TV shows and and giving them a 1950s super Panavision movie Style with the help of AI and what's really fascinating Is that people can't seem to get enough of them if you're not convinced
just check out this channel that's posted literally one video and it's already on track for monetization then there's this other one blowing up with these jaw-dropping numbers even on their newest videos now here's the best part you can do this yourself and it doesn't have to cost a dime yep you don't need to empty your wallet to make these kinds of videos in fact I'll show you how to Pull this off using both free and paid tools we'll go step by step starting with how to create a script for the trailer then we'll dive into
two easy methods to generate some great image prompts for your story once we've got our prompts ready there are two different ways we can create the videos the first option is to generate images either with free or paid tools and animate them the second option just generate the video directly using simple Prompts after that we'll move on to the voiceover and of course find the perfect background music to give your trailer that cinematic Edge I'll even show you how to edit the voiceover to give it that CL classic megaphone style sound and we'll finish by
compiling everything in cap cut so let's Jump Right In the first thing we're going to do is create the script for our video for this demo we'll make a short trailer for Lord of the Rings precious to do this we'll head over to chat GPT and ask for a voiceover narration in that iconic 1950 style if you want to feature specific characters in The narration you can include those details too and just like that our script scrip is ready in seconds now it's time to create the prompts that'll help us generate our images there are
two ways you can go about this the first method is super simple just ask GPT to Give you 20 prompts and don't forget to specify the image style I'll be leaving the full prompt down in the video description for you this method works like a charm but sometimes you want the images to be closer to the original scenes from the story in that case here's what you do go through your story and identify the specific scenes you need visuals for once you've done that head over to Google find the scene or character you're after and
download the Image now the fun part upload the image to chat GPT and ask it to create a prompt based on that scene or character in just a few seconds you'll have a simple prompt that'll recreate something similar but in the style you're aiming for we'll test this method first with mid Journey before moving on to other free tools so go ahead and copy that final prompt while mid journey is my go-to for highquality images in this style you're free to use DOL e or any Other premium image generator that you like since I've already
set up a private on Mid journey we'll head there start with for/ imag and paste The Prompt we just copied let's clean up the prompt a little by moving the image style to the beginning and this looks good so let's generate that image take a look at these results not bad but we need our character to face the camera for that dramatic effect so back to chat GPT we go to make some tweaks to The Prompt now That we have our updated version we'll copy it go back to Mid journey and start another image generation
paste the new prompt adjust the same details as before and hit enter check out these results it's looking so much better and the image style is spoton for what we're going for let's give it another shot but this time with gandal we'll quickly grab an image of him from Google upload it to chat GPT for a new prompt and follow the same steps back to Mid Journey type the Command paste The Prompt tweak it and let's see what we get these images look good but I think we can push them a little further so let's
regenerate and see what we get now these are looking way better and we can definitely use any of these for our story we'll go with the bottom left in image so let's select u3 to enlarge that one to save time we won't go through all the images for every scene but just know that the process is pretty similar for each one Next let's explore how to create these images using some free tools we'll try out both Leonardo Ai and ideogram first up Leonardo AI the first thing you'll want to do is choose your preferred preset
then we'll select the right aspect ratio and paste our prompt of course you can make any adjustments to the prompt before hitting generate now check out the results not bad at all but you can always tweak the settings until you're happy with what you get now let's Move on to ideogram and see what it gives us the results here are also really solid again feel free to play around with the prompt if you're looking for something specific or just want to fine-tune the results with our images ready it's time to bring them to Life by
animating them you can use any image to video generator you like but I recommend Luma dream machine or Runway ml personally I prefer Runway ml because free users get some credits to generate Videos which is super convenient so let's dive into Runway ml first hit this button to start make sure your preferred model is selected upload your image and add the same prompt you used for generating the image let's go with 5 Seconds for the video duration and start generating now if you're using the free version you might hit an error here and there but
with a couple more tries it should get going if you're planning to get into this Niche seriously I'd Recommend investing in a paid video generator for ease and reliability that said there are still free options and I'll show you one right after this step it's currently free but it'll like move to a paid model soon the clips we've made so far look great so let's try it out with our second image we'll upload the image add the prompt and wait for the final results this one turned out well too I'll skip over the rest of
the scenes for now and move on to generating Videos straight from text next the tool will be using is called Minx it's a text to video generator that's been Making Waves lately if you want to dive deeper into how it works check out this video their website isn't in English but no worries just use your browser's translate feature to navigate once you're there simply hit this button to start and paste your prompt you can tweak The Prompt however you like and when you're ready hit create to start Generating your video from what I've seen the
video generation usually takes about 5 minutes or so all right our video is ready check out the result it looks super cool the character's subtle movements the smooth panning camera everything looks spot-on I'll skip ahead and generate one for our second character now this one is just as impressive if not more so the environment the way the character moves the outfit it's all looking sharp and The best part I didn't even need to regenerate any scenes now that our Clips are done the next step is creating the voice over for this we'll be using 11
Labs but feel free to use any text to speech tool you prefer the first thing we need to do is head back to chat GPT and copy our narration one tip if you want the voiceover to sound smooth paste the text in batches of under 700 characters personally I like to keep it under 500 characters but 700 works fine Too once you've got your text ready you can browse through the voices on 11 Labs or search their huge library of voice options I've made a video listing my favorite English voices from their Library so feel
free to check that out if you're curious now let's generate the voiceover before we move on to editing we need some epic background music for the trailer there are three easy ways to find copyright free tracks the first and simplest is to grab one from YouTube's Audio library the second way to get your background music is by using either a paid music library like epidemic sound or free platforms like chosi or pixabay these platforms offer tons of copyright free soundtracks that you can use without any legal worries the third option is using AI music generators
to create your own soundtrack just make sure to select instrumental then include a description like epic orchestral music and maybe even mention the movie title To guide the AI most of these tools have free tiers for users but they often don't cover commercial use so once your channel starts making money I recommend paying for the tool to avoid any potential legal issues down the line now before we jump into cap cut to pull everything together together we need to edit our voice over if you've watched similar videos you'll notice the narration usually sounds like it's
coming from an old radio or megaphone I'll show you two ways to achieve that effect first up is with Premier Pro start by importing the voiceover files into a new project and dropping them into your timeline then go to effects search for parametric equalizer and drop it onto your first track next head to effect controls click edit for the effect and choose the preset that gives you that old radio Sound after that go back to effects search for a single band compressor and apply it to the same Track click edit on that effect select the
appropriate preset and then adjust the output gain to 16 now to save time you can copy these effects and paste them onto any other voiceover tracks you have just make sure the parametric equalizer is applied before the single band compressor for each track once all your voiceovers are set go to file and Export media since we only want the audio turn off the video track and select MP3 hit export and your modified Voiceover is good to go if you don't have Premier Pro no worries you can do this with audacity which is completely free to
download simply drag the voice over into the app and make sure it's selected then head to effect choose filter curve EQ from here and select the radio preset from the options you can tweak the graph if needed but once you're happy export the file in MP3 format and you're all set the final step is editing the video first import all Your files into cap cut and drop the voice over onto the timeline AI generated voice can sometimes have long pauses so let's go ahead and cut those out aligning the tracks so that the narration flows
smoothly once that's done you can start arranging the clips according to how the story unfolds crop the clips as needed and enlarge others for emphasis to save time I'll quickly Breeze through this part now for some finishing touches you might want to add One of these filters to see what works best for your video we'll use this one dragging it across the entire video to give it that vintage feel one thing I like to add for extra Flav is a grainy texture so let's drop in a grain effect and change the blend mode to color
Dodge or screen for that cool retro Vibe this looks great so let's go ahead and duplicate it a few times to cover the video here's an optional step but I've noticed that a lot of these retro Style Videos include a top and bottom border effect it's super easy to do just grab a black background image position it at the top of the video then duplicate it and do the same for the bottom I'll leave every one of these files and prompts in the resource channel of my Discord server link will be in the description and
on my channel page if you want to animate the border so that it appears gradually here's how select the clip add a horizontal mask then set A key frame move forward a second or two and drag the mask to create the effect let's play it back yep that looks awesome you can repeat this process for the top border as well the last step before you export the file is to add the background music decrease the volume and trim it finally the video can be exported at 1080p resolution if you end up with a watermark on
your video you can easily remove it just head over to one two 3 apps and select their Watermark removal tool upload your video and then simply draw a rectangle around the watermark the tool isn't perfect but it does a pretty decent job in most cases once you're happy with the results all that's left is to export your video and you're good to go and there you have it if you're into this Niche you'll definitely want to check out some other amazing niches that are trending on YouTube right now watch this video and let me know
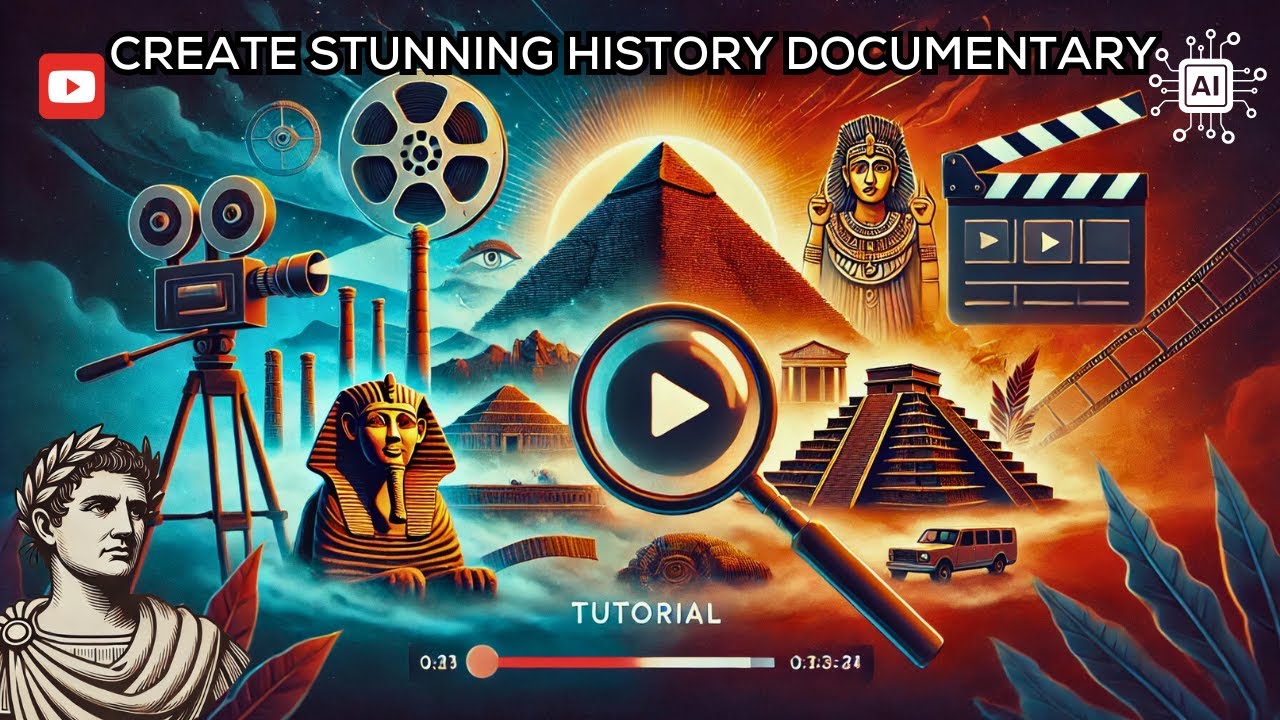
your thoughts in the Comments chapter 6 how to create historical documentaries okay so this historical documentary Channel only has a handful of videos but somehow has over 11 million views with more than 100,000 subscribers and a quick look at Social blade shows they're already making over $3,000 each month which is insane so in this video I'm going to take you on a step-by-step journey to create your own captivating historical documentary videos and help you level them up like This in the dawn of humanity our ancestors roamed the African savanas these early hominins such as Australopithecus
were among the first to walk upright they lived in small groups relying on their environment for food and shelter with the development of simple tools these early humans began to shape their world the ability to create and use tools marked a significant leap in our Evolution Paving the way for future advancements around 1.8 million Years ago a new species homo erectus emerged and embarked on a remarkable Journey they migrated Out of Africa spreading across Europe and Asia this period of exploration and adaptation laid the foundation for the spread of human civilization one of the best
things about the historical documentary Niche is that it's considered Evergreen people will always be fascinated by history which means your content can continue to attract viewers for years to Come and guess what you can do it all without ever showing your faith we'll kick things off by generating our script using chat GPT then create compelling voiceovers next we'll generate stunning images bring them to life with animations and select the perfect background music finally we'll piece everything together in cap cut and enhance the resolution of our videos so let's get started for this demonstration we will
be creating a video about the History of human civilization to get started we'll give chat GPT the command to generate a 2,000-word documentary on our topic as you can see chat GPT has created our narration for each scene now we need the full narration for our voiceover so let's go ahead and grab that finally let's ask chat GPT to create three or more prompts for each scene to make our image generation easier with our script in hand it's time to generate the voiceover for our Narration we'll start by copying our narration from chat GPT and
heading over to 11 Labs while 11 Labs isn't entirely free their generous free monthly plan offers plenty to get you started you can choose from a a variety of available voiceovers or explore the thousands of voices in their extensive voice library to make things even simpler I recommend checking out my detailed video where I sift through over 2,000 English voice characters to highlight my top picks This will save you time and help you find the perfect voice for your documentary for this demonstration we'll be using Adam a popular voice on social media keep in mind
that longer scripts can sometimes sound weird so I recommend pasting shorter sections at a time around 500 characters per generation works well for me though some suggest up to 700 characters with our voiceover ready it's time to move on to the visuals in this demonstration I'll show You both free and paid methods for creating images in the case of free users I recommend Leonardo AI or Microsoft co-pilot to generate your images for those using Leonardo AI start by selecting the Leonardo lightning preset and choosing your preferred aspect ratio in our case 16x9 for our long
form video next copy the prompts we generated from chat GPT and paste them individually into Leonardo AI the initial results are promising but feel Free to tweak the prompts and explore other presets like the anime style if that suits your documentary's aesthetic for co-pilot users head over to the designer and paste your prompt the images generated here look fantastic so let's create a few more however note that co-pilot provides Square aspect ratio images for free users since we need landscape style images for our long form video we'll use Adobe Firefly's generative expand feature upload your
Image to Firefly select expand and then choose widescreen keep in mind that Firefly typically adds their Watermark at the bottom left side so let's use the handles to extend that side of our image now let's hit generate and check out the final results all three options look fantastic so we'll pick one and download it the last step is to remove Firefly's Watermark we'll head over to Adobe image resizer and import our image now let's select YouTube and choose the Appropriate aspect ratio we can drag our image until the Firefly logo is no longer visible once
everything looks perfect our landscape style image is ready for download for paid users we'll be using doll e however feel free to use your preferred image generator let's paste our prompt and include the aspect ratio the image looks great but let's grab a close-up view we'll repeat this process until all of our images have successfully been generated the next Step is to animate our images for that we will be using Luma dream machine keep in mind that Luma dream machine isn't completely free but they do offer 30 free Generations monthly unfortunately it can be quite
slow for free users so I recommend paying for the tool if possible alternatively you can create multiple accounts and run additional Generations like I did now let's upload our image and include the prompt we use to generate it we can also add our Preferred action and then wait for our video to be ready our short video looks great so we'll repeat this process for the rest of our images before we move on to editing we need to find the perfect soundtrack for our documentary we can ask chat GPT to help us identify the best types
of music that will enhance our documentaries atmosphere as you can see chat GPT has provided us with a detailed list of genres to consider for each scene let's start with the first Recommendation epic orchestral and see how it complements our visuals for free users I recommend grabbing a few tracks from the YouTube audio library or visiting breaking copyright to select the genre you need choose a track that is free to use on YouTube and always remember to credit the artist to avoid any issues for paid users looking to elevate their documentary I recommend using sunno
to create custom soundtracks the service is reasonably Priced and you can simply select instrumental and paste your copied text these music generators are excellent for creating soundtracks making them perfect for videos like ours now it's time to edit our video Let's app Cut and import our Clips voiceovers and soundtrack first we'll add our voiceover to the timeline and arrange the clips to match the flow of our story depending on the narration we may need to shorten some clips and speed others up as necessary To maintain a smooth and engaging narrative next we need to add
some transitions let's choose simple transitions to avoid adding too much motion to the video alternatively we can pick one consistent transition and apply it to all our Clips we'll also select a filter and drag it to cover the entire timeline for a cohesive look finally let's find some effects that perfectly complement individual clips and apply them to enhance the visual appeal next We'll grab our background music drop it into the timeline and decrease the overall volume to ensure it doesn't overpower the narration I realized I neglected to add sound effects so let's find some suitable
ones and add them to the timeline as well before we export our video Let's generate our captions we'll select an animation style and change the font to Coma axis our text isn't very clear so let's add a shadow for better readability and position the Captions properly our video is looking great so let's go ahead and Export it in 720p resolution the final step is to increase the resolution of our video to do this we'll head over to vmake video enhancer and upload our video now we just need to wait for vmake to finish its magic
and our high resolution video is ready anyway I hope you found this demonstration helpful if you did please consider subscribing to the channel and don't forget to smash that like button Thank you and see you in the next one chapter 7 storytelling with AI okay so I created this short video using AI a long long time ago in Egypt there was a baby named Moses he was born at a time when things were hard for his people all baby boys from the Israelites must be taken away where's the baby bring him out right now I
want him now I won't let that happen to my baby I have a brave plan I'll Place Moses among the reads along the Nile River and see what Happens what a cute baby I will take him home this entire video wased with AI tools and the best part is that videos like this are great for storytelling take a look at this channel that uses AI to create Bible stories raking in hundreds of thousands of views per video but it doesn't stop there this approach works wonders for any kind of story imaginable so in this video
I'm going to show you exactly how you can tell engaging stories like these using AI Tools but before we get into that thank you for 1,000 plus subscribers your support has been incredible now let's continue with the video first things first let's create a script for our video for this demonstration I'm going to use this video as a template so let's quickly extract the transcript using the YouTube summary with chat GPT and Claude Google Chrome extension as you can see the extension has given me a full transcript of the video so I'll go ahead And
copy it to gener our script I'll ask chat GPT to create a story of Moses using the transcript next we'll break down our story into different character lines to make narrating easier we'll also include prompts to generate close-up images for each scene with our prompts ready it's time to bring our characters to life consistency is key so let's begin by creating detailed descriptions of our characters let's kick things off with the Pharaoh now I'll have chat GPT generate a description for an ancient pharaoh and create a prompt based on that description remember free users can't
generate images with chat GPT so I'll demonstrate this separately for plus users we'll search for the consistent character GPT and click this button now we will follow the prompt add a name for our character and also paste the description we copied as you can see we've generated an Initial image of our Pharaoh so we can go ahead and include some actions and background details our new pharoh appears more muscular than the first attempt so let's try again this new image looks similar to the previous one so let's try one more looks like the original image
was the only slightly odd one but the others maintain their consistency to save time I will skip the other characters and scenes for free users I'm going to show you a simple Trick to get consistent characters from Dolly let's start by creating a consistent character for Moses's mother first we need to craft a detailed description of her we'll follow a similar process as we did for the pharoh earlier since GPT 40 is available for free let's proceed with selecting the same reliable character GPT we used earlier the first thing we're going to do here is
to paste this command I will include it in the video description it's A simple instruction that also prevents the GPT from attempting to create an image which isn't possible on the free plan we can follow a similar process as before and paste our character description as you can see the GPT has generated a prompt for us to use now let's open Microsoft co-pilot and paste our new prompt into the designer our initial character has been generated next let's refine her with an action using prompts from GPT as you can see Our updated character closely resembles
the original we'll continue this process to ensure consistency across all scenes featuring our character as you can see co-pilot has generated images in a square aspect ratio to fit our needs we'll switch over to Adobe Firefly using the generative fill feature we'll upload our image and then expand it to widescreen Dimensions Firefly adds a logo at the bottom so we'll leave room for that before we generate our image Our image looks good so let's download one and import it into Adobe image resizer let's select YouTube dimensions and drag our image making sure that the Firefly
logo is no longer visible now we can go ahead and download our image the next step is to generate our voiceovers we'll start by copying the character lines we prepared earlier and paste them into 11 Labs our first narration is that of our narrator so let's choose a voice from the library to find the right voice For your narration check out my full video where I go over the 2,000 plus voices in the library to select my favorites let's select a character and generate our voiceover all that is left is to repeat this process for
our other characters now that our voiceovers are set we can go ahead and animate our images depending on how you want your video to look I can recommend two main tools the first one is Luma dream machine and the Second is imersity AI this AI tool can enhance your images with depth creating a 3D video video effect like this example while it doesn't animate characters directly and free users may have watermarks on their videos it can still produce impressive results like this Zoom effect the primary tool we're going to be focusing on is Luma dream
machine it's a premium application that gives users 30 free Generations each month but this AI produces some of the Best results I've seen on the market take a look at this video it generated it's almost lifelike despite a few minor glitches in the hand and this was only my second attempt just imagine the potential with a bit more refinement let's go ahead and upload this image of a guard barging into someone's home quick tip for better results you should always include a version of The Prompt that you use to generate the image in addition to
the Actions that you want the character to be performing The Generation can also be very slow sometimes as the tool is in high demand at the moment however I've found that traffic tends to be lower around midnight eastern time making it an ideal window for quicker processing but if you have the budget I can absolutely say it's worth every penny our video doesn't look bad so we can proceed to The Next Step but before that if any of the videos look like this clip Of our narrator we can drop it into cap cut and trim
The Unwanted section then we'll duplicate the clip and apply a reverse effect to seamlessly extend its duration without disrupting the flow the next step is to create the lip sync for our videos for paid tools I recommend a lip sync tool called sync Labs let's create a project and upload our audio and video files we can select our preferred model and then generate our lip synced video a long long time ago in Egypt there was a baby named Moses our character's lips are moving quite well but it's a pain to get rid of the huge
Watermark so let's use another tool for our lip sync the tool we'll be using is Pika so let's head over to their website and upload our video we will select the lip sync option and upload our audio file to start generating the lip sync video there was a baby named Moses although there's a p logo at the bottom we can address that with blurring in Post- production it's time to start our final editing in cap cut let's drag our video clips and audio into our timeline and arrange them according to the flow of our story
we will also add some Transitions and sound effects to make the overall video engaging next we can generate the caption and add some animations and effects or simply save time with one of these cool templates the Pico Watermark is still showing on this clip so let's duplicate it add a Blur effect to the top layer and finally add a mask to it this doesn't get rid of the watermark but it can blur the region for background music let's grab one from YouTube's audio library to avoid any copyright issues We'll add it to our timeline and
decrease the volume the video looks good so we can go ahead and Export it in 720p the last step is to increase the resolution of our video for that we'll go to tensor pick and add our exported video next let's select 400% Ultra and enhance our video our 4K resolution video is now ready for download you can achieve even better results than this if you spend a little more time refining your stories and visuals and as you can see this doesn't only apply to paid users that said free users will need a lot of patience
with lumad dream machine as Generations can sometimes take far longer than you can imagine anyway I hope you found this video helpful if you did please consider Subscribing sharing and liking your thoughts matter too so feel free to leave a comment below thank you and see you in the next one chapter 8 animal fact shorts check out this channel that launched less than a year ago and already boasts around 130,000 subscribers they're crushing it with short form content and some of their videos are racking up millions of views to create videos like these the first
step is scripting there are two ways to Go about it first up let's head over to chat GPT and ask it to generate five intriguing topics about any animal for this example let's go with the Megalodon once we have our topics we can dive into creating a short story around one of them the second approach involves using the YouTube summary with chat GPT and Claude Google Chrome extension pick one of the animal facts videos then modify the URL by replacing shorts with video use the extension to extract the Transcript from the video and then paraphrase
it with chat GPT depending on the story we can ask chat GPT to create prompts for generating the necessary images now that the story is ready it's time to create our images first let's copy our initial prompt and head to our preferred third image generator for free users I recommend using Leonardo AI we can choose the Leonardo lightning preset and adjust the image Dimensions to a 9x6 aspect ratio then we will paste our Prompts to generate the images these look great so we can continue generating the rest of the images to match the progression of
our story if you want these prompts you can find them in the resource section of my Discord channel the link is in the video description and my channel page if you have the budget I highly recommend using mid Journey for these images as you can see the results are simply stunning to create images like this one start by typing forward SL Imag and then paste The Prompt add double hyphen AR Space 9 by 16 to set the aspect ratio once the images are generated we can choose our preferred one by clicking the corresponding button U1
for the top left image U2 for the top right u3 for the bottom left and u four for the bottom right feel free to upscale these images if you'd like but the current resolution is already great for shorts so let's go ahead and download them most of these videos rely On static images but we can make ours Stand Out by animating them for this we'll use Luma dream machine I recommend subscribing to one of their tiers as the free version can be quite slow trust me I know the frustration I typically spend at least 6
hours waiting for a task to complete but if you're willing to wait the results can be pretty amazing alternatively you can check out morph Studio or pix firste which may still be free depending on when you're watching This tutorial let's go back to dream machine and upload our images we'll also include a description of our image as well as our preferred action if necessary the final videos look pretty impressive next let's create the voice over for our narration we'll copy our script and paste it into 11 labs for the voice character let's use Adam which
is a very popular voice on social media and proceed with our generation for background music we can easily pick A track from YouTube's audio library however if you want a truly epic soundtrack I recommend checking out epidemic sound the final step is to compile the video so let's import our clips and drop the voiceover inside the timeline we'll take out any pauses and silences and arrange the video clips according to the flow of the story AI generated videos can be slow so let's speed up some of these clips and also add animations to places where
we're Using images now we need to grab some Transitions and drop them between our Clips feel free to use your preferred transitions or select one and apply it to your entire video we'll also add some cool effects and also apply a filter to our videos next let's generate our captions choose one of these templates and apply the Kamika AIS font the last step before exporting our video is to add our background music lower the volume and trim any unnecessary sections Now we can go ahead and Export our video and there you have it the final
result the Megalodon a colossal shark vanished around 2.6 million years ago however in 2022 an intriguing Discovery was made off the coast of Australia scientists aiming to study marine life used Nets and unexpectedly hauled in hundreds of shark teeth including those from great whites and mako sharks among these were teeth that seemed to belong to a shark possibly related to the Megalodon Raising questions about what could have devoured all these sharks rewind to the 1960s near the Great Barrier Reef where men aboard an 86t boat anchored to fix their engine to their astonishment they spotted
a massive shark swimming alongside their vessel certain it wasn't a whale they believed the shark matched the size of their entire boat chapter n comparison shorts just take a look at this channel that has blown up from creating this unique style of content The best part it doesn't even require a voiceover they simply take countries and months and reimagine them visually as superhero characters Transformers Kaiju and more this approach isn't limited to short form content either some of their long form videos already have hundreds of thousands of views to test this out we're going to
try recreating a video of countries as Transformers let's head over to chat GPT and ask it to generate a prompt for creating one of these Countries as a Transformer I spent hours testing images with Dolly Leonardo Ai and mid Journey ultimately I settled on Mid Journey because their images fit better with this style of video so let's head over to Mid journey and paste our prompt first type forward SL imagine and then paste our prompt next include our desired aspect ratio and hit enter look at the amazing results we're getting here check out the ones
I've generated for Nigeria Norway and Egypt to create The prompts for these other countries I simply returned to our prompts page and typed the name of the next country and as you can see chat GPT has created unique prompts that can be used to generate our images to level this up we can upload our images into Luma dream machine and create exciting videos like these now let's put everything together in cap cut we'll start by arranging our Clips on the timeline next let's add a text field and include the name of the Country for the
images we'll quickly go to emojipedia and search for the country's flag now we can copy and paste it into our text field we'll repeat this process for the other countries and add our preferred transitions between the clips let's also apply one of these cool filters to enhance the overall look of our video to reduce the duration of our video we can create a compound clip and speed it up slightly the final step is to add our background music and here's Our final [Music] result chapter 10 AI generated anime shorts all right so lately I've been
noticing a big Trend where creators use anime clips with an AI voiceover to share motivational life lessons and these videos are getting millions of views and guess what they're making serious money too imagine earning between $77,000 and $122,000 in just one month from these captivating shorts but wait there's a Twist these successful channels aren't just grabbing random anime clips using copyrighted material can get your account banned faster than you can say kamahamaha instead they're crafting unique original characters and bringing them to life with AI and that's where AI Trend steps in in this video I'm
going to reveal the secrets to creating your own stunning Anime shorts using Cutting Edge AI tools and as a bonus I'll even show you a simple trick to increase video scenes from the typical 4 seconds to make them longer so let's get started first thing we're going to do is create our script for that I'm going to paste this prompt inside chat GPT generate an engaging video script on the topic of motivational quotes or life lessons keep it simple and easily understandable aim for a duration of around 1 minute I will Be using a man
stuck at C who finds an island and is eventually rescued to represent the visuals as you can see chat GPT has created a motivational story with scenes and narration let's extract only the narration so we can use it for our voice over and also ask chat GPT to create prompts that we can use to generate our images now that our prompts are done we can move on to creating our voiceover for that we will be using 11lb so let's copy our narration from chat GPT and paste it inside 11 laabs text to speech we can
choose a voice from the available list or search for one from The Voice Library if you want to find out the best voice characters in 11 Labs voice Library I will be leaving a link to a video in the description where I go through the 2,000 plus English voice characters to select the best from each category now back to our voice over for this demonstration we will be selecting adom which is a very popular voice on Social media finally let's hit generate speech to get our voice over now that we have our voice over the
next step is to create our videos for that there are various ways we can go about it we can either choose to create a video using a popular video generator like Pika or create and animate images I personally prefer the second option simply because it gives a lot more control over the look of the character and the scene if you have a paid subscription to any of The premium image generation tools feel feel free to use them for this part but for this video we will be using Leonardo AI for our images and more so
let's pick the Leonardo anime fine-tuned model and paste our generated prompts from chat GPT feel free to tweak the prompts if necessary to get your desired results these images look great so let's try and animate this one for the first try I'm going to take down the motion to four and then generate the video keep in mind That you only get 150 tokens for the free account while these videos cost 25 so creating the animation here may not be ideal for free users but that shouldn't be a problem as I will be using a free
video creator as well now let's take a look at our video this doesn't look bad but our character isn't moving at all let's try again but this time I will increase the motion to the maximum we have a lot of motion here but our character is still not moving I'm Sure a few tries and modifications to the image prompt could help but I prefer to use a different tool to animate our images but before that we need to finish creating the images for our other scenes to save time I won't be going through that so
let's move on to our video generation tool the tool I'll be using is hyper aai it's completely free and produces some of the best results on the market as you can see we can use it to create videos from text prompts or Simply animate our images but for this demonstration we will only be focusing on animating the images we created with Leonardo AI so let's choose that and upload our image now we will increase the duration into 4 seconds and hit create to generate our video keep in mind that this can take a few minutes
and we may need to regenerate our video a few times to get the desired results the result for this one looks great on our first try as you can see the video Gives a sense of the Boat Moving and our character is moving along while also moving his body this is quite impressive so we will repeat this process with our other images if any of your Generations look weird like this one simply hit regenerate to generate create a new video now that our videos are ready let's put everything together in cap cut we'll import our
videos and voiceover and drop them into the timeline making sure our videos are arranged according To the flow of our story as you can see our voice over is slightly longer than our video so we need to adjust them appropriately in this case I want to increase the duration of our last video to make up for the few seconds of extra voiceover this is where the trick I hinted at earlier comes in handy instead of Simply duplicating our scene we are going to reverse the clip and create an illusion of continuation as you can see
our video looks like an 8-second scene Without any breaks now let's add some transitions to our Clips by selecting Transitions and then dropping our preferred transition between our Clips we will also select the transition and hit apply to all to apply this transition to the rest of our Clips next we need to add captions to our video so for that we will select text autoc captions and finally hit generate let's add some animations and effects to our captions to make them easy to read Finally we will choose one of these filters and extend it to
the end of our timeline our short video is ready but before we export it let's add a background music for that we can simply go to pixabay and download a royalty-free track alternatively we can download one from YouTube's audio library but that's only if we're posting our video on YouTube now that we have our background music let's add it to our timeline and also decrease the volume Our video is now ready to be exported the final step is to increase the resolution of our video this may not be necessary in the case of shorts but
you may want to do this for long form content so let's drop our video into vmake and wait for it to do its magic once it's done we simply need to hit download and our video is ready if you enjoyed this video please subscribe to this Channel and don't forget to hit the like button now let's take a look at our Anime life can feel like an Endless Sea where we drift aimlessly hoping for a glimmer of hope hope is like that distant Island barely visible but always there waiting for us to find it when
the going gets tough remember the words of Winston Churchill If You're Going Through Hell keep going finding Solid Ground in the midst of chaos reminds us that every challenge is temporary as confucious said it does not matter how slowly you go as long as you Do not stop every small step counts sometimes it's about making the most of what we have and sending out signals of Hope and resilience remember the best way to predict your future is to create it your efforts will eventually be rewarded keep believing keep striving and never lose hope your island
of success is just over the horizon stay inspired stay strong chapter 11 stick figure animations all right guys let's take a Look at how you can create a simple stick figure animation like this one ever wanted to create those viral stick figure animations but have zero drawing skills well buckle up because I'm about to show you how to do it no art degree required and if you're anything like me you've probably watched a ton of these videos eagerly thinking this is it I'm about to become the Picasso of stick figures then bam they all end
up using Adobe Express and let's be real the Results are uh less than impressive not to mention those videos get fewer views than a potato peeling tutorial but fear not I've spent spent several coffee fueled nights cracking the code for us non- artists and guess what it's not rocket science in fact my first attempt wasn't half bad and I can confidently say it was made without shedding a single tear and here's the kicker you don't have to dip into your savings to make these animations you don't even Need to know how to draw by the
end of this video you'll have everything you need to create viral stick animations so stick around pun totally intended and don't forget to smash those like And subscribe buttons If you find this helpful just a heads up though this isn't some magical oneclick process it's going to take a little effort so let's dive in first things first you need an idea now sure you could ask chat GPT for a script but trust me the gold mine of Humor in these animations comes from your own brain watch a few viral animations to get the juices flowing
some of these creators are literally making videos about a stick figure tripping over its own foot and people can't get enough once your genius idea strikes it's time to script it out don't overthink it keep it fun short and Punchy after that head over to a text to speech tool for the voiceover I personally recommend 11 Labs their Voices are very realistic and they give you 10,000 free characters monthly just slap that script in there pick a voice you like maybe one that sounds a little dramatic for comedic effect and boom voice over done now
comes the fun part creating the animation itself Don't Panic if your drawing skills peaked in kindergarten I'm in the same boat so I'll be showing you a few tricks we're going to use an app called Crea it's open source and you can run it on your Phone tablet or PC next we need to set the scene for this demo I'll create something super simple a living room with a couch and maybe a fridge here's the thing I don't know how to draw a couch but here's the hack instead of sketching from scratch we're going to
find a basic line drawing online head over to your favorite free Vector website and search for sofa line drawing the key is finding images that are simple enough for our stick figure Vibe Some images are paid so don't forget to filter by free ones pick something you like and download it all right you've got your vector file but we need a PNG format so let's head over to photo P it's like a free version of Photoshop go ahead import your vector file notice how it doesn't have a background layer that's perfect no need to mess
with anything here just export it as a PNG and boom we've got our sofa ready to go next up let's grab our fridge same Process search download and as you'll see this one has a colored background we're not about that life so we're importing this into photo as well now here's the fun part turn off that pesky background layer and while you're at it feel free to play around with the colors want to make the shadow of funky color or remove it completely go wild once everything's looking good export your fridge as a PNG and
you're ready to move on now time to fire up Crea we're Creating a new document with a resolution of 1920x 1080 a nice standard size for animations first things first let's set up the room don't worry it's way easier than it sounds grab the rectangle tool and set the size to something reasonable draw out your rectangle then switch tools to draw two simple lines for the walls finally we'll use the polygon tool to add a door on one side see easy peasy but wait we're not done yet time to add some color Select the paint
bucket tool choose your favorite shade and click to fill in the areas once that's looking good we can bring in our sofa and fridge drag and drop the sofa in resize it to fit the room and feel free to change up the color if you're feeling creative do the same for the fridge before you know it the scene's already starting to look pretty good now comes the fun part creating our character look I'll be honest my stick figure drawing skills Leave a lot to be desired so we're taking a shortcut head over to VY where
you'll find tons of sticks figure options for this demo we're going to use a slightly modified version of one of Rico animation's characters don't worry I'll drop all the assets including these images in the resource channel of my Discord server the links in the description and also on my channel page want to give your stick figure a bit of flare you can totally add some clothes Just grab a simple outfit from our trusty image sources drop it onto the character and adjust it to fit we'll use the brush tool to blend the legs into the
pants it's already looking good want to go the extra mile you can add a bow tie maybe throw in some funky colors and make it your own for this demo though we're going to keep things simple no clothes I'll add a splash of color to the stick figure and remove the arms and legs don't worry we'll add them back Later when we're ready to animate but for now removing them will save us a lot of erasing and redrawing when we're repositioning the character now it's time for the big moment animating switch over to the animation
window in cre once you're there right click and add a new frame all right quick disclaimer I'm no animation expert in fact this is my very first attempt at creating these kinds of animations so don't be afraid to play around with the features in the app Experimentation is key if I can do this trust me you can too now when it comes to creating a new frame for your character it's as simple as duplicating the previous one and shifting things around a bit watch as I switch between these frames you'll see the subtle differences that
bring our little stick figure to life Pro tip turn on the onion skin feature sounds fancy but all it does is show you the previous and upcoming frames making it way easier to Draw the next part but since I'm no van GA I'll be using some clever tricks to get the job done I want the character to look like he's entering from behind the wall his full body won't be showing yet so I'll move the character's frame forward to save myself some time and headaches I've already made images of the feet and legs I'll grab
the foot first drag it into the scene and position it so it looks like the character is just entering for the first Frame I'll duplicate it erase part of it and voila it now looks like our character is stepping into the room from outside in the next frame we'll move that foot forward just a bit bring in the leg image and adjust the position but here's a trick since we don't want the leg visible in the first frame we'll simply erase it as you can see the leg's a little long here so we'll duplicate the
frame and clean it up then we'll do the same with the arm bringing it in so It pops into view easy right now for the head we want it to gradually appear as if our character is peeking in I'll go to the character layer drag the frame back to where we want the head revealed to start and slowly duplicate and reposition it to make it look like the head is creeping in using the onion skin will help you position things more smoothly once that's done we'll start moving the hands as well we don't stop there
let's shift the eyes a little too I'll erase the old eyes and draw new ones with the brush tool just make sure you've got the right size and color then click where you want the eyes to go as you can see you don't need to be a master artist to create something cool we're just repositioning and erasing things here and there as we move forward we'll continue adjusting the character's body arms and legs and to make it look like our character is bending their knee simple just shorten the leg reposition It and use the brush
tool to connect the dots easy as that all right time to speed things up a bit as we finish up the movement now let's tackle the next challenge how to make our stick figure speak I tried creating some lip movement myself and honestly the result wasn't half bad but we need something a bit more presentable so I went ahead and created a few different versions of the character with various lip movement Styles let's import the first one we Only need the mouth here so let's clean up the rest once that's done we'll reposition the mouth
and and align it with the character since we only want this particular lip movement to last a few frames we'll adjust the duration here now we'll repeat the process with the other lip movement Styles I created and check it out the result actually looks pretty decent for a first attempt at animating lip movement this could almost pass as a good animation so if You're sitting there thinking you can't do this trust me if I can do it anyone can now if you want to add a voice over to your animation it's super easy just hit
this button upload your file and boom instant voiceover all right guys let's take a look at how you can create a simple stick figure an however there's one tiny issue with this tool there's not a lot of flexibility when it comes to editing or repositioning the Voiceover within the animation itself my recommendation use this tool to do the animation and then jump over to something like cap cut to add and fine-tune your voiceover if you need to change the length of your animation you can tweak the frames per second and the duration right here once
you're happy with everything it's time to render the animation just go over over here and hit render animation choose export as video and select your preferred file format Hit this button and voila your animation is ready now if you're curious about how I built this faceless Channel make sure to check out this video where I go over everything you need to create a monetizable faceless Channel chapter 12 video editing with cap cut all right so if you've been following me from the beginning you already know I'm no professional video editor seriously just take a peek
at my earliest videos they speak volumes those first attempts were Well let's just say they had room for improvement but fast forward a few months and I can confidently say my editing game has leveled up significantly so in this video I'm going to pull back the curtain and show you exactly how I edit videos like the one you're watching right now and here's the best part we'll be using cap cut which is absolutely free on both mobile and desktop so let's Jump Right In First we'll take a quick tour of cap Cuts Interface I'll start
by dropping a video of my avatar into the timeline one cool thing about cap cut is that it automatically sets the aspect ratio based on your first clip which is super convenient but don't worry you can always manually adjust the aspect ratio to fit your desired screen size for YouTube videos we'll stick with the 16x9 aspect ratio while for shorts and Tik Tok Style videos the 9x6 ratio is perfect now we can easily resize the Footage accordingly there's also a handy icon to enlarge the player which comes in really useful alternatively we can pinch the
trackpad to zoom in or out on the right sidebar we can scale any selected video or image to any preferred size and here's a pro tip to use key frames to create a smooth Zoom effect just click the diamond icon at the point where you want the image to start increasing in size then move forward to where you want it to be the largest now You can easily increase or decrease the size of your video and cap cut will automatically add the key frames for you watch as our video starts to scale up at the
first key frame and maxes out at the second to make this transition even smoother right click the clip and select show key frame animation then select each key frame and change the joint into a curve let's do the same for the other key frame and see how it looks now check out that Zoom effect much smoother right Just remember if you move the key frames after adding the curves you might need to tweak them a bit to keep everything looking seamless no worries though just go back and use the handles to adjust the curves as
you can see our Zoom animation is working perfectly now once we're done we can hide the key frame animation and we can also remove the zoom effect simply by selecting the key frame and hitting the delete key easy peasy now let's dive into cap Cuts Remove background feature this tool is pretty powerful sometimes a little too powerful as you can see from this example it completely removed everything including the laptop leaving only the person in case you're working with a green screen or a colored background I recommend using the chroma key instead the auto removal
tool might not give you the best results in those cases let's use the Color Picker tool to select the color we want to remove and adjust the Intensity see how easy that was now we can overlay this on top of another video seamlessly whereas before the green screen was blocking the background if a video is too slow we can quickly change the speed from the right side bar or simply place the cursor at the top corner of the clip where the small shape appears and use it to speed up or Slow Down the video simple
and efficient as you can see the speed indicator at the right sidebar also moves as we drag the Clip now let's dive into the audio this clip already has an audio track so we can select it and head over to the audio settings here we can increase or decrease the volume to our liking watch as the audio bars move up or down with each adjustment plus we have the option to extract the audio from the clip and modify it separately this gives us even more control over our sound one thing to keep in mind is
that the golden tips at the top of the Audio Waves indicate that The sound is a bit too loud at those points I'll delete this and show you a cool trick if needed we can always recover the audio we extracted from the clip like this now let's move on to animations cap cut offers a variety of options inanimations out animations and combo animations that include both there's a whole bunch of animations to choose from and the best part is that we can adjust the duration to fit our needs perfectly take this half-second slideup Animation for
example we can extend it to 4 seconds or even longer just like this the same goes for out animations as you can see cap cut displays both the inanimations and the selected out animations duration we can tweak the out animation and watch as the arrow on the clip changes to reflect the new duration this visual cue is super helpful in pinpointing exactly where these animations should occur making our editing process smoother and more Precise now let let's check out the combo animations these animations are incredibly flexible allowing us to apply them at the beginning middle
end or even throughout the entire video the line at the bottom of the clip shows exactly where the animation is taking place always make sure to play back and see how it looks because some animations might not work well in the middle of a clip and the best part all of this is completely free and capcut so feel free To experiment and get creative with your edits the last tool on the right sidebar is the adjustment panel unfortunately I typically refrain from using those since I prefer the use of filters now let's dive into some
of the free stock materials available in cap cut we can grab any of these and use them as a background great for when we need a cool backdrop to Showcase a list or highlight something special cap cut also offers a library of royalty-free Music that we can use as background tracks plus there's an impressive collection of sound effects just search for the effect we want and select from the available options adding text is a breeze too as we can choose our preferred color and font or pick from a range of presets and effects we can
even animate the text to make it more Dynamic and we can't forget the stickers cap cut provides a wide variety of stickers perfect for illustrations and adding a Bit of fun to videos there are so many to choose from so make sure to click the star button next to your favorites for easy access now let's check out one of my favorite features effects the free version of cap cut includes some pretty cool effects that we can simply drag and drop onto to our timeline experimenting with these can really Elevate the video's look and feel as
you can see the effect applies to everything beneath it but if you want to apply the effect only To a specific clip like my avatar you can drop the effect directly onto that clip notice how the effect doesn't impact the clips below or above my avatar plus there are plenty of settings for each effect that you can customize to your liking in case we click off a clip and need to edit the effect later we just need to rightclick that clip and select effect the settings will reappear and we can tweak them as needed keep
in mind that You can add multiple effects to your clip or project but be cautious too many effects can make your video hard to watch now let's explore transitions there are plenty to choose from so let's go ahead and drop one between our Clips like this we can also adjust the duration making transitions longer or shorter based on preference next let's generate captions for our video when I first started using cap cut I manually created captions for my first few videos Which was time consuming but now we can simply generate our captions and then customize
them add a preset stroke or background effect to our captions and even change the color to make the text stand out we can add a shadow and adjust these settings for better visibility we can also choose an effect from the list and add our preferred animation style to the caption or simply select one of these cool templates and use the handles to resize our Captions next let's explore the available filters this this is all about personal preference and the look we want for our video so we can drop a filter onto our timeline and extend
it to fit the length of our video as you can see from here clicking a filter provides a preview of how it looks on our clip before applying it the last thing here is adjustment but I prefer simply using the filters now that we've covered the basics of cap cut let's edit a real Video for this demonstration we'll be using one of my earlier videos in addition to a quick recording of the chat GPT 40 announcement page I just made since I already have the audio files from that video I'll import them along with my
avatar and the screen recording into cap cut first We'll add the Avatar to the timeline as you can see the project has automatically taken the Avatar's 16x9 aspect ratio so there's no need to change that then We'll trim the video since the character lowers its head quite a bit at the beginning next we need to delete the existing voice over for the Avatar now let's add some effects to our character the spark effect is one of my favorites so I'll add it to the clip usually I just use that and darken the background a bit
with a filter but for this demonstration We'll add another effect the scanning effect which I've used a few times in my videos will also play Around with the settings to decrease the intensity next let's apply a filter to our clip we can select the clip and adjust the filter's intensity or delete it entirely the same goes for the effects now let's preview our video it's looking pretty good we can make any necessary adjustments to get the desired result the next step is to add our voice over we'll increase the volume since the voice for this
character is quite low And play it a few times to ensure the volume is just right without being too loud now let's listen to the audio to identify the best place to add some stock videos but before we look for our stock videos we'll crop the Avatar clip at this point and add our main footage which is the screen recording scale it to fit the frame and trim any unnecessary Parts at the beginning now we can add a transition between these two clips and play the video If we want the Avatar's face to show at
a specific point in the narration we simply need to copy the clip and paste it there as you can see it's now covering up the screen recording so we need to trim it there are two ways we can do this the first option is to select the clip and hit the trim icon then use the handles to select the desired shape and hit confirm once we're satisfied with the result we can further decrease the size and drag it to the Desired spot as you can see this doesn't look bad and all the effects are still
present now let's try the second option the second approach is to add a rectangular mask to the clip and use the handles to select the preferred section one thing to note is that dragging the selected section moves the mask not the footage itself to move the footage click away from the mask or simply select basic now we can drag the clip without affecting The mask if we want to adjust the mask again we simply need to select mask and move it around as needed the biggest advantage of using a mask is that we can around
the corners like this which looks pretty cool now that the resizing is complete we can go ahead and add some animations while we can use a combo animation I typically prefer using In-N-Out animations this looks great so let's move forward with the rest of our editing but before that I realized that We neglected to add an animation to our Avatar at the beginning so let's select one of these combo effects this Zoom effect looks pretty cool so let's go with that now let's play back our voiceover and see what needs to be done next free
for users this model I think we can add a stock video for this section where it says free for users but before that let's split the clip here to make room for our stock footage for stock videos we can head over to pixabay Or pixels and search for any keyword in this case we want something related to free make use of either of these two platforms as they have a wide range of freestock footage for Content creators this one looks all right so let's go ahead and download it just a quick tip some of these
videos are in portrait aspect ratio and might not be ideal for landscape videos since our video has a landscape aspect ratio we'll select this one and proceed with the download let's Not forget to like the video before we return to cap cut now we can drag the stock video and drop it between the two clips let's resize it to fit the canvas and add a transition if the stock video is a bit slow we can increase the speed here and trim it to the desired length let's also add a transition between the Clips to ensure
smooth continuity we want to highlight something here so we'll freeze the frame and resize it to the duration we want it frozen next We'll grab a sticker drop it above the frame and adjust the duration this looks good so let's move on instead of highlighting we might want to use the zoom effect in some cases we can achieve this with animations or key frames let's try animations first select the frame or video go to animations choose zoom in under out animation and adjust the duration as needed as you can see this gets the job done
nicely unfortunately we have limited Control over the size of the zoom when using animations which is where key frames come in handy we can add a key frame exactly where we want the zoom effect to begin move to the point where we want the zoom effect to end and then scale our video to the desired size if you don't like the current position you can easily move the key frames to different points on the clip let's also smooth out the animation a bit using these curves now our Zoom effect looks Smooth let's listen to our
prog ress so far and continue with our editing new GPT 4 is able to create astounding images we can add a stock video here to represent outstanding images let's head over to pexels or pixabay and search for an image or video collage since I've already downloaded one I'll simply import it into cap cut and place it here we'll scale the video to fit our canvas and add a transition if necessary we can also copy our Avatar paste it and resize It to our desired duration this doesn't look too bad we can repeat this process where
necessary throughout the rest of the video another important element we need to add is our background music I recommend grabbing a track from YouTube's audio library to avoid any copyright issues I'll be adding a list of my favorite tracks from this library to the channel resource category of my Discord server you can find the link in the description of this video and also On my channel page before we add our background music let's generate our captions depending on your personal preference you can select one of these templates or add animations to your captions if you
want a single word effect like the one I'm using you can select this bounce out animation we can also enhance our captions with various effects and change the font as you can see the caption isn't too visible on some of these backgrounds so we can add A shadow effect to improve visibility for sections where the subtitle could disrupt The View we can simply delete those captions now let's add our background music and adjust the volume we want the volume to be a bit louder at the beginning then decrease considerably when we dive into the main
topic to achieve this we'll add a key frame at the point where we want the volume to start lowering move forward a bit and reduce it to our preferred level at the End of our demonstration We'll add another key frame move forward and then increase the volume slightly now let's check out our full video Chad GPT has released their newest and most advanced model which they call GPT 40 and it's free for users this model gives free users access to some great features which were only available to plus and team subscribers just like GPT 4
the new GPT 40 is able to create astounding images which got me excited about the Possibility of this feature becoming available to free users this looks pretty cool but you can achieve even better results with a bit more time spent on editing I hope this short demonstration was helpful if you enjoyed this video please subscribe to the channel and don't forget to hit the like button thank you and see you in the next one chapter 13 how to create viral thumbnails okay so I've recreated these popular thumbnail Styles in some of my Previous YouTube videos
and today I'm going to show you how to create every single one of them using Photoshop but if you don't have access to photoshop feel free to use photop to achieve the same results it's a free web-based Photoshop alternative with similar features as a bonus I'll also be leaving these templates and files in the resource channel of my Discord server the link will be in the description and on my Channel page so let's get started First style we're going to create is this popular graph thumbnail let's head over to photoshop and create a 1920x 1080
document I like to unlock my background by simply hitting this icon or just double click the layer and then hit okay we'll start with the graph so let's hit this icon and add a gradient now let's click here and select our colors we'll use black for this side and select something lighter for the other side if you find that the color doesn't Change simply click here and increase the opacity now everything looks great so we can go ahead and hit okay here our graph will be increasing so let's tilt the angle slightly feel free to
play around with this but 100 seems to get the job done for me we'll also hit dither and then finally okay next we'll pick this pen tool and draw our preferred graph make sure the graph goes all the way to the end and then goes around the bottom here to the beginning Once we're done we can go down here and add a solid color feel free to choose your preferred color for the graph now we're going to choose the path selection tool add a stroke and set the stroke width to something like 30 let's also
go to the stroke options and choose rounded corners and caps now we need to duplicate our layer for that we can select the layer and use the shortcut control J for Windows or command J for Mac alternatively you can drag the layer While holding down the option key on Mac or the ALT key on Windows to create a new copy of the layer now for the top layer make sure the path selection tool is still selected and then remove the fill by selecting this we'll do the same with the bottom layer except the stroke will
be removed instead let's also change the stroke color for our top layer something lighter should help differentiate both layers our line looks too big so let's decrease the size to 12 Feel free to use whichever size you prefer it looks good now so let's rightclick our top layer and then select blending options now we can add a drop shadow and change the color to something darker we also need to add an outer glow so let's choose our color and play around with these settings our drop shadow color doesn't fit very well so let's change the
color before we save these options in case you want to modify the graph points make sure the direct Selection tool is selected and then click and drag the points you want to change keep in mind that you'll need to do the same for both layers you can also change the colors by changing the fill color for the second layer and the stroke color for the top layer the drop shadow and outer glow will also need to be changed to match our color so we need to rightclick our top layer select blending options and then modify
the settings our graph looks good now so Let's go ahead and bring in our Avatar if you don't already have an avatar with the transparent background we can do that with Photoshop simply drop the image inside our project and double click it now let's unlock our layer here and use the magic wand tool and quick selection tools to remove the background another way to remove the background is to rasterize our layer and then use the same magic wand tool and quick selection tools to remove the background this Works perfectly but I prefer something simpler with
AI so let's drop our Avatar inside Adobe background remover and wait for it to do its magic as you can see it's done a pretty good job moving our background we can download and import it into Photoshop our image looks good but let's add a bit of brightness to our Avatar we'll go to adjustments and add a curve our Avatar looks brighter but so does our graph which isn't ideal to fix this we can put the cursor between the Curve layer and our Avatar while holding the option key on a Mac or ALT key on
Windows click between these two layers to create a clipping mask as you can see our Avatar is the only thing that's still Bright Now another way of doing this is to Simply rightclick the Curve layer and then select create clipping mask feel free to play around with the curves till you get your desired look we need to create the rectangles at the top so let's create them by selecting the Rectangle tool and then drawing our preferred rectangle let's also duplicate the rectangle layer and reshape them to fit our reference image we need to change the
color for this one so let's select the layer go to appearance and then choose our fill color there's a white line in the middle here so let's add a line and resize it we need to add a text so let's choose our type tool and change the color to white now we can proceed with our text and also select Our preferred font let's also duplicate this change the text color and resize it we need to add a green circle so let's choose our color here and then select the ellipse tool now we can draw our
Circle by holding the shift key this looks good but we're missing the arrow sign for that we'll go to flaton and search for our icon the best part about these icons is that we can change the color right here so let's change this one to White download and import it into Our project we'll resize and position it inside our Circle finally we can add a drop shadow to the arrow to make it better stand out we need to duplicate these layers but first let's add an eye icon to our views text we'll grab one from
Flat Aon and position it now we can go ahead and duplicate our text layers move them to the right side and modify them appropriately we'll grab a clock from flaton as well and position it here finally we'll bring in our green circle And arrow sign the last step here is to add a line here so we'll draw one and change the blending mode to soft light feel free to test these out and pick your preference but once you're happy with it you can duplicate the layer and move it upwards the line looks too prominent here
so we can reduce the opacity and also do the same for the other one this doesn't look bad so we can go ahead and Export our image as a JPEG next is this style of thumbnail Inspired by Bible in a nutshell the first step to creating this thumbnail is to create the respective images we go to chat GP and give it a command to generate a prompt for us key points to highlight in this prompt is the characteristics of the character we also want a Pixar Animation style image a close-up shot and a side view
of the character the character's background isn't needed so let's use a white one feel free to generate your images here If you have a GPT Plus subscription but free users can use a tool like idiogram or Leonardo AI we'll use the same process to generate prompts for all other images in this thumbnail these images look great so we can go ahead and remove the white background from our characters we'll drop our image inside Adobe background remover and wait for it to do its magic our image without the background is ready so let's create a new
project inside Photoshop the first Thing we'll do here is to import our background now we can bring in our first character and change the orientation so that he faces this Direction Let's also expand and rotate it slightly now we'll bring in our second image and expand it slightly there's a bit of an issue here with the staff so let's rasterize the layer choose the magic tool and then select this area now we can go ahead and hit delete on the keyboard we want to add a bit of glow to our characters so Let's rightclick the
layer and choose blending options now we can add an outer glow and choose our preferred color let's repeat the same thing with our other character as well and finally bring in our Avatar we'll scale it up slightly and position it making sure the laptop is hidden the background should be slightly blurry so let's select the layer go to filter blur and then gaussian blur we don't want it to be too blurry so this looks all right let's Brighten our Avatar a bit by adding a curve and also make sure the curve only affects the Avatar
by creating a clipping mask finally We'll add a drop shadow and change the color to white feel free to make any changes here but we can go ahead and Export our image as a JPEG I'm sure you've seen this thumbnail style all over YouTube so let's try recreating them first thing we need is a background image we'll head over to idiogram Ai and create something Simple now we can create our new document and import the image next let's bring in our Avatar and any other images for this demonstration we'll be using the images we generated
for the previous thumbnail let's scale down our images move them to the left side of our Avatar and also add a bit of rotation now we need to add a bit of glow to the images so let's rightclick the layer select blending options and either add an outer glow or a stroke feel free to choose Based on the look you're going for but for this demonstration we'll be using an outer glow with this color we also need to repeat this with our second layer and also scale down our images a bit more now let's grab
the rectangle tool make sure fill is empty and then add a stroke next we can draw our rectangle and use the properties panel to decrease the size of our stroke like this and add some rounded corners I'll be locking the background and Avatar to avoid moving Them when making a selection our rectangle needs to be positioned here and tilted slightly keep in mind that this is all based on your personal preference so feel free to make any changes you desire now we can go ahead and add our text using the type tool and also scale
and reposition it appropriately we need to add views so let's duplicate our text layer by using the shortcut control J for Windows or command J for mac and also position it We also need to add this green circle so let's select the ellipse tool make sure the stroke is off and then select the fill color we want now we'll draw our Circle while holding down the shift key for the arrow we'll head over to flaton grab one and drop it inside our project we could have changed the color of the arrow directly inside flaton but
we're going to try doing that inside Photoshop we simply need to go to blending options select color overlay and finally change The color to white simple as that now let's rotate it and position it inside our green circle I'm also going to add a dark rectangle on top of our background image and then reduce the opacity slightly the next step is to add the arrow at the top so let's import one change the color to white and reposition it where we want it we want it behind our Avatar so let's move the layer Behind These
images this looks good but we want to add a bit of glow so let's go To blending options and add an outer glow feel free to choose your preferred color to go with the theme of your thumbnail this looks good so let's add our text here resize it appropriately and go to blending options our background seems a bit distracting behind our text so let's add a drop shadow choose black and play around with the size this looks better but we're going to add a slight outer glow to our text feel free to make it brighter
Depending on your personal preference in case you want to curve the text you simply need to doubleclick it choose this icon and then select Arc now you can use this slider to choose how much you want your text to bend our image looks good but we can brighten up our Avatar a bit by adding a curve this looks good so we can create a clipping mask we can go ahead and Export this but I'm going to bring in a YouTube icon resize it and then play around a bit With the blending options this looks all
right so we can go ahead and Export it as a JPEG the last thumbnail we're going to create is this money style so let's create our new document and import our preferred background feel free to use whichever background you like but we'll be using the same background from our last thumbnail to make everything easier to follow I'm going to hide our new background now we can go ahead and import our Avatar next we'll import our Pile of money resize it and add a hue saturation from the adjustment tab we want our money to be green
so we'll select that here increase the saturation and finally decrease the lightness let's make sure our Hue saturation only affects the money by creating a clipping mask you can choose it from the rightclick menu or click between these two layers while holding the option key on a Mac or ALT key on on Windows we need to duplicate this so let's create a Group by clicking this and then double click to rename it to create the duplicate we simply need to hold the option key on Mac or the ALT key on Windows then drag the folder
above or below to create a copy let's try this a few more times and also lock the first three in place now we can move this one behind our Avatar rotate and scale it slightly make another copy move it to the other side and rotate it as well now let's turn on our background image and Check out the results so far this looks good but let's blur our background slightly by going to filter blur and finally gausian blur we can choose how blurry we want the image to be but this looks all right now let's
lock the background in place to avoid moving it we need to add some Shadows to make our character look like he's really inside this pile so let's go down here and add a hue saturation we need to apply it only to our image so let's Create a clipping mask go to properties and decrease the lightness now make sure this mask is selected and then hit the command plus I on the keyboard for Mac or control plus I on Windows to invert it now take the brush tool select soft round from here and make sure the
opacity is set to 100% and flow is set to something like this then set the color to white and start painting here this creates some kind of Shadow effect we'll repeat this process for the pile Of money behind our Avatar as you can see this looks considerably better we can also brighten our Avatar a bit by adding a curve let's also add a bit of outer glow by right-clicking our Avatar then we'll select blending options and finally outer glow feel free to choose your preferred color play around with the size opacity and spread this looks
all right so go ahead and click okay now we need to add our text so let's select the type tool and draw our text box Let's type in our text scale it slightly and move it behind our Avatar feel free to choose your preferred text color from here but we'll keep the white color for this demonstration we can also add a bit of outer glow and drop shadow to our text in case you decide to change your colors simply select the mask and then choose your preferred colors you'll need to repeat this for every one
of these this looks all right so let's add our dollar text and scale it we'll also Import our YouTube logo scale it add an outer glow and drop shadow let's also change the color for our text and play around with these blending options feel free to use your preferred settings here the last step here is to add the curved dashed lines between the logo and dollar sign for that we'll create this shape with the ellipse tool now we'll remove the fill and add a stroke with our preferred color let's also choose four for the stroke
size and change it into Dashed lines we also need to round the edges so we'll select these feel free to use the settings here to fine-tune the gaps and the length next we can choose the lasso tool draw a shape around the parts we want to keep and finally hit this mask icon let's move this behind our character and change the color we can use the gradient and angle to make the beginning of our line slightly red and the ending white finally let's change change the dollar sign to White And then export our thumbnail this
looks great but you can grab inspiration for other thumbnails editing and even script writing from these awesome channels chapter 14 how to create explainer videos all right so imagine this a one-year-old Channel that's already making more than $155,000 each month from ads alone and what's even more impressive is that these are some of the easiest videos you can ever make it doesn't require you to show your face or Any fancy editing and can be done with completely free tools think this sounds too good to be true check out this Channel with a logo that looks
like it was drawn by my 5-year-old niece but somehow has over 500,000 subscribers from just a handful of videos and what's even more interesting is that none of their videos except the most recent ones has anything less than 200,000 views all this channel is doing is just creating simple explainer videos on any Interesting or trending topics oh and when I say simple I mean this kind of simple know out of this world level animations and effects that the rest of us are constantly trying to achieve but somehow they're getting comments like these no sponsors no
intros just straight to the point simple and quick if only more videos were like this this is the best Channel I've ever found thanks algorithm God and if you doubt that a channel like this can be Monetized think again the only thing you need in this Niche is an interesting video idea an AI voiceover generator and some very basic canva or cap cut editing skills yes it's that simple and I'm going to make it even simpler by showing you the exact steps you need to create your own explainer channel we'll do everything from scripting to
editing our first explainer video together by the end of this video you'll have everything you need to succeed in this space we'll First take a look at how we can create this style of video using canva and for those who want to level it up with some effects and animations we'll create one in cap cut as well as a bonus I'll even show you how to get access to the icons they used in the video will be modeling keep in mind that you can find the resources for this and all of my videos in the
resource category on my Discord server the link will be in the description or on the channel page I Only ask that you stick with me till the end and also hit the like And subscribe buttons If you find the video helpful so let's get started the first thing we're going to do is to create our script for that I'll show you two methods using chat GPT we'll head over to chat GPT and ask it to generate some political ideologies now we need a brief description for each of these ideologies so let's go ahead and generate
that as well this looks good and we can Definitely use it for our video now let's take a look at the second method this isn't recommended but for this demonstration we're going to grab the transcript from this video let's first install the YouTube summary with GPT and Claude Google Chrome extension and then go back to our selected video now we just need to hit this button and the extension will grab the full transcript from the video now let's copy the transcript and ask chat GPT to Paraphrase it I recommend just using this transcript as inspiration
or for some pointers instead of Simply paraphrasing another video we need it in a narration form so we can give that command as well the next step is to create our voice over so let's copy part of our script and paste it into the text to speech keep in mind that longer script Generations can sound weird so I typically do a maximum of 500 characters per generation we can select one of These voices but I prefer something from The Voice Library ordinarily we could test out a few voices from here but I already have a
cheatbook here so I'll quickly choose a voice character and add it on 11 Labs let's go ahead and generate our voice over now that we have our voice over we can begin the video editing to show how easy it is to make these videos we're first going to create it using canva and then follow up with cap cut so let's go to canva and create A blank 1920x1080 video the first thing we're going to do here is ADD our voice over canva has a wide array of stock Graphics so we don't need to leave the
app for a majority of our images since the icons from the video we're modeling look good let's go to the same website and grab them we'll select the ideologies category and use the browser search to easily find conservatism which is our first ideology let's open the first one In a new tab and see this image looks good so let's go ahead and download it next we'll search for socialism and open this one the image looks good but we'll have to remove the background make sure that you credit this website if you decide to use their
images one of our images has a background so let's remove it canvas Pro users can easily remove background from images but free users like myself will need to use pixel cut background remover simply drop the image And wait for the software to do its magic as you can see pixel cut has done a great job with this image now let's go back to canva and import our images we'll arrange them based on our narration and add our text we need to change the font so let's choose comic Sands duplicate the text a few times and
modify them appropriately let's change the duration of our first page so so it aligns perfectly with the narration this looks good so let's copy its contents to A new page and make sure the duration of the new page also aligns with our narration we need to add a transition between these two pages so let's select this one and check out our result this transition won't be visible at this point since we haven't done anything different on our second page what we're going to do now is to group everything on this page and then scale it
till only these two ideologies are left on the screen let's also group the contents on Our first page as well next we will create a new page add the image for our first ideology and then the title the best thing about canva is that we get access to a bunch of Graphics even for free users let's add this oval shape scale it and change the color to Red we also need to add a line so let's grab one and change both the weight and color now let's duplicate the page and remove these shapes from the
previous page we'll make sure the duration aligns with Our narration and duplicate the page a second time the only thing we're going to do on this slide is to add this word and modify the page duration now we simply need to duplicate our page again delete these and find some cool graphics that align with our narration the rest of our video on canva will follow this same process so let's go ahead and recreate this inside cap cut the first thing we're going to do is to import our voice over and the images we'll be using
For our ideologies we'll drop the voiceover into our timeline and change the aspect ratio of our project to 16x9 next let's grab a white background from the stock materials and add it to our timeline now I'll quickly arrange our images for the first scene the background makes it difficult to scale some of our elements so let's replace it with a green one for now much better better we'll add our text and choose comic Sands font here now we can scale And duplicate the text for our other ideologies our images and text need to align with
our voice over so let's select them all and decrease their duration we'll need to also create a compound clip now it's time to scale our image at the beginning so let's add a keyframe move forward a bit and then scale the clip till only two of our ideologies remain this video doesn't need anything complicated so we won't be adding any fancy animations and effects Just as we did in canva We'll add our image here and include the title for the shapes we can grab them from the available stickers but these are already animated so what
we can do is to go to these two websites vcy and flaton for simple shapes like a line or a circle I personally prefer flaton it's simple and you can change the colors directly before downloading we can also do this with vecy but that would require using a third tool like Photoshop or photop for Those who don't know about photop it's a free online Photoshop alternative with similar features and interface let's drop our image and simply add an overlay with our preferred color simple as that all that's left is to export the image as a
PNG file now let's import our new images into cap cut and arrange them appropriately for our other images we'll go back to vcy and download what we need always make sure that you've selected PNG format to make things easier all That's left is to go back to cap cut and add any new images to the story repeat this process according to the flow of our story till our video is ready for export we'll select 2K or 4K resolution and this is our final result conservatism in the world of conservatism the past is treasured and Traditional
Values are the Cornerstone of society here the nuclear family is upheld as the ideal organized religion is revered the military is respected and Property rights are fiercely protected this Niche isn't saturated and as you can see you don't need to be an experienced Editor to create these videos the tools and techniques we've covered are accessible to everyone making it easy for you to start creating content right away however remember that adding your own unique touch can help you stand out from the competition whether it's through your style humor or a fresh perspective anyway if you
Enjoyed this tutorial please subscribe to this Channel and don't forget to check out some of my other videos like this one where I talk about some pretty cool viral niches or this other video where I list some of the top AI tools every content creator should know about thank you and see you in the next one