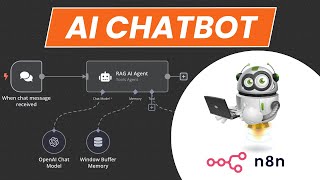
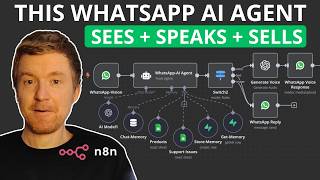
welcome back to Let's automated with Robin where we look at Ai and automation for non techies and today we're going to be tackling WhatsApp right now you're looking at the n8n canvas and we've got a WhatsApp trigger node and we have a WhatsApp business Cloud node on the other side so today I'm going to walk you through how we can actually send messages from WhatsApp into our n8n do something with the information in the middle between between our two WhatsApp nodes and send the reply back again let's just have a quick look I've actually got
this set up right now let's see what this looks like I'm going to open up my WhatsApp here and I'm just going to send a quick message here going um hi can you explain NN in a short paragraph and let's just see what we get back from this so I'm just sent this message now over to n8n and I've got a reply okay here's a short paragraph etc etc so I want to walk you through exactly how we are going to do that now it starts with getting our credentials set up so why don't I
go ahead and I'm going to actually create a brand in fact I'm let me I'm going to actually use the same canvas here just to keep this simple so we're going to create a brand new setup here so I'm just going to rebuild this workflow on this top section of of the canvas so the first thing we need is a WhatsApp trigger so I'm going to come over here and just type in WhatsApp and I've got whatsa what'sapp business Cloud under triggers I want to trigger on an incoming message so uh we're going to click
on that and uh let's just click out of that so we can arrange this a little bit and there is our trigger I'm yeah there's my trigger now we need to connect up to some credentials here we need to have the a I connection between n8n and meta who's the company that owns Facebook they also own WhatsApp they also own Instagram we need to be able to talk to them but this is going to trigger on messages coming in we have some other options here but this is the this is the the the what we
want messages coming in but now we need to get some credentials now I've got some credentials in here but I'm going to start from scratch on how to do that so let's just open this up and go create new credential and we are going to need a client ID and we are going to need a c secret now if You' watched any of the videos we've done already on connecting up to Facebook or to Instagram you'll know that working with meta is not so easy so follow along let's see what we can do let's just
rename this credential in the meantime let's just call it tutorial so I'm doing this live with you now so you'll see the mistakes the whats and all let's see how we go so I'm just going to save that of course it's giving us errors now so let's go and get our client ID and our client Secret so we need to head over to this domain here developers. face.com head over to that in fact if you've watched any of our previous videos on how to connect to Facebook or Instagram from NN we've covered a lot of
this already so you might be familiar with this I'm going to click here into my apps you will of course need a Facebook account etc etc I'm going to make the assumptions you have that and I've got a couple of apps set up but we are going to need a a meta app in order to be able to get our credentials so we're going to start with a brand new app so follow along with me here so we're going to go create app okay I'm going to skip past this because it doesn't really give us
any options and let's just call this tutorial for now I will come back and delete this in a moment okay I can use that my email address there so that's the name of our app now we are wanting to access WhatsApp and these use cases that they're offering here none of them include WhatsApp from what I can see so we're going to go straight down to other here click that click next okay now we want to create a business app so select that option CLE click next and here we have our details now we've got
the option to add a business portfolio here I'm not going to do it yet but I will tell you that you will require a verified business portfolio for this to work it is a requirement of mattera so um I'll get to that in a moment so let's just skip past this but you will need a business portfolio that is verified so let's go ahead and create app in the meantime okay you'll need to log into your log into your Facebook I just realized I can't talk and type my password at the same time so I
had to pause there all right so it's logging in now it's setting up the app and we now have our app we're in the tutorial app you can see here we have an app ID etc etc so now we want to add products to our app now if you you may have a pre-existing app already you may have connected already to Instagram for example if you followed some of our earlier videos or to uh Facebook uh etc etc in which case you can use an an app you have already and just add the WhatsApp integration
to it but as we're starting this a as a brand new app I'm just going to hit click here and add WhatsApp so we'll hit set up here it's busy adding the WhatsApp integration to our app and you'll notice now on the left hand menu we have this option for WhatsApp quick start okay now it's asking us here it's telling us that in order to access the WhatsApp business platform API which is what we need to do we need to go we need to have a business portfolio now I have several humanoid buiz is my
main business so I've I've selected that already so you'll need to have this set up now I'm not going to dive into how you do that here that's a meta function so just go and Google um um business portfolio and meta and uh and I'm sure there's a ton of videos on YouTube on how to do this um but hopefully you have this already okay and when we set this up we will receive a WhatsApp test number and we'll be able to send messages to maximum of five phone numbers that's what we we'll be working
with this for this tutorial but of course you will be able to access not access you will be able to add a dedicated phone number and take this out of out of testing which is where we'll be into production but uh that'll make more sense as we work through this anyway for now I'm just going to click continue and we'll be taking to this quick start screen so you can see here business verification is ticked my business is verified now as I say you will need a verified business with mattera in order for this to
happen if you don't have that and um it's this is not going to work and it does involve um some configuration and perhaps even uploading some business registration docs and the like so um yeah you you might need to jump through those Hoops if you haven't done this already all right okay but let's jump down to the left hand side here well actually before I do that let's go back over to n8n it's been a little while since we have looked at that screen and um and what are we looking for here we're looking for
a client ID and a client secret this is what we're after it's the o or API client ID client Secret by the way if you click open docs here Ann will walk you through how to do this as well so let's start by looking for for a client ID and a client secret so we're going to come back over here and where we get that is actually it's the client ID and the client secret of the app so here just under app settings you can come through to basic and once the page has loaded it
should give us a client ID they call it app ID here but this is the client ID so I'm just going to copy that head back over to here pop that in there come back to my developer account here then app secret I'm going to show this app secret you just click on show I'll delete it after this tutorial just so that it stays secure uh and we'll come back here and we'll put in client secret and then uh we can save it it's going to check those credentials and we have connection tested successfully fantastic
so this is now working we have a connection a WhatsApp o API connection between meta and NN amazing so let's close that and make sure you've selected the right credentials which we have done and there it is that is done at the moment okay so now the next step we need to take care of here is we need if I come back this we need a WhatsApp business Cloud it's kind of odd but we actually have two different sets of credentials this is to capture the incoming message coming in from WhatsApp so imagine someone's on
your business website and you've got a WhatsApp uh number on your business website that they can text and they can send a WhatsApp to it'll come in this this is what will capture that incoming message when we want to reply though and send a reply back to that person we're going to need this WhatsApp business Cloud node so let's have a look at that WhatsApp business cloud and we want to send a message so we're going to choose that let's just graag this up here as well put it over here now we need to set
up the credentials for this slightly different on how we do that so let's click into that and again I have some credentials already set up you can see how I was learning how it all works but we're going to go and cck uh click on create credential and uh let's also just rename this so we can know what is what fantastic okay so we need an access token and a business account ID this is a little bit more complicated but to get this access token and business count ID we need to head back over to
our meta development account we were here this is when we were setting up our uh chat incoming um trigger so now we're going to go on to Whatsapp here we're going to go to API setup I'll wait for it to load okay so we're going to need to get a access token now you can see here we've been given a test number this is the number we're going to work with at the moment test number um this will swap out you'll Swap this out to your main WhatsApp number once you take this into production but
for the sake of the tutorial I'm going to sit with this test number they'll do exactly the same thing we have a test number and we have a WhatsApp business account ID and if you notice I'll copy that and if I go back over to Here There It Is business account ID so that is the the ID we're going to work with so we still need this access token though but at least we've got that for now okay then we're going to need a select a recipient phone number now when you take this into production
you'll be able to set up your workflow that whatever number sends a message to this number you know whatever the incoming number is the recipient's number it'll just reply back to that number but in a testing environment which is where we are now we need to add a select a recipient number so I've got a couple of test ones set up here you're allowed up to five so you can click on manage phone number list here you can add in a number um it is going to I've run out of numbers to test I can't
show you but once you add phone number put in the phone number put in your own phone number it'll send you a code on WhatsApp and then you just get take take that code and come back and type it into the next screen that'll appear here and you'll have that recipient phone number as part of this list so for now I'm just going to click my own number and it's being added not that we needed to do that but you know there's the there's the number okay so you're with me so far we've got our
business account ID but now we need to gener generate an access token so let's go and click this now before I click this I'm going to explain what's going to happen this is now going to open up Facebook as it were or another interface where I'm giving permission for this app this app called tutorial to access my uh meta accounts so I'm linking the two together that's what's happening here so I'm going to click generate access token all right so here we are hopefully you can still see this continueous Robin Tindle that's me so we're
going to continue and I've been doing some testing in prepping for this video so I've got a couple of accounts that are already set up here you this will just have one you'll have one test WhatsApp business account available to you um so you'll just select the one that's that's available to you there um I believe my one is ending in 774 let's hope that works um so I'll select that I'll select all of just that I know that they're they're all going to work um this is because I've just been playing around so it's
developed a couple of test WhatsApp business accounts for me so uh we'll hit continue 774 is that one I think it is and save and got it it is connected up so now it's given me an Access token so I'm going to copy that access token head back over to nhn put this access token in there and I was right there we go it ended in 774 so this is the access token associated with that business count ID I'm going to hit save and there we go I've got green access so this looks to still
be this looks to be working so I'm not going to save those credentials so now we have credentials for things coming in and we have credentials for things going out right so messages coming in we can grab hold of that message and we can send an instant reply which we'll do in the moment or we can grab that message do something with it and we're going to set up a little AI agent to do this for us and then send the reply back out here so let's um let's go and send a little a little
test in here I'm just going to I just want to I want to create confusion here so I'm just going to deactivate that now if I send a WhatsApp message to this number here I'm back in my meta dashboard if I send a number to that which I've already saved into my WhatsApp I should get a response on um inside my N1 let's hold thumbs and uh let's see if that happens so first of all let me save my changes okay so that's all that's all good to go let's head over to Whatsapp here and
there's that number of 555 I've been doing some testing in it as you can see so I'm just going to uh type in uh hello and let's see what okay now I'm not expecting to get any reply here because we haven't configured anything up yet so let's uh go back into my n8n I'm going to jump because we've got this live by the way I did skip that step I had made this live um so if I go into my executions I should see an execution here that's coming in there we go you can see
I've just gone into my executions I've only got one node that's a trigger node so I click into that and let me click into Json you here is my message that says come in I said hello and there's the message okay so let's I'm if you haven't if I haven't shown this before this is a neat little trick just you know if you're depending what you're seeing here click into Json hover over here this little copy icon will pop up grab hold of that just copy that then we're going to go back into the editor
we can open this up and we hit this little pencil icon and then we can actually paste in Sample data it's a way to get around having to use um test web and things like that uh so now we have this data in here but let's have a quick look at this data because something I did learn is WhatsApp sends messages with all kinds of messages all kinds of different statuses and one message triggers a whole bunch of action and WhatsApp but we actually only want to respond to uh outputs you know messages that come
in that actually contain this messages array this section here sometimes we'll have status updates and just general kind of um housekeeping type messages that are coming in from WhatsApp that we don't want to react to um so we just want to react if something if this messages section if this messages array this is an array of data we've got a heading and then we've got some nested data done inside it that's called an array so that's why I've got this if node over here so I want to check I want to make sure that this
that this messages array actually exists so how do we do that you just see me grab a um grab an if node I've just dragged messages in there and we want to just go into array and we want to make sure it exist simple as that does this exist hope that makes sense we just trying to filter out all the other information that that WhatsApp often sends that we don't want to be responding to we don't want the workflow to be firing on so I'm just going to hit test setup and this should give us
a true response there it is so now coming out of the true branch is the result we're after now the next step here would be to you know insert something like an AI agent uh to you know process and give us a sensible response but let's just check if this is working first so I'm just going to go in here and this is I'm just clicking now into my WhatsApp business cloud and let's just put this is by the way you can see I've connected with a credential the the resources uh message I'm sending it
uh the sender phone number is because I've connected with these credentials it's already given me that test number and the re re's phone number um well I'm actually just going to drag in here you can see it here this is the recipient's phone number here now so it's pulling in my phone number now if you pull in someone else's phone number that you haven't added to let show you what I mean if you haven't added this number into this this managed phone number list it won't work this is because we're in a testing environment now
to add your own telephone number to this um computer is this bugging out here so wake up you can um go ahead and use your own phone number which is subject to limits and you have the option here to add phone number and you can go and create and add a add a dedicated number as I say we're just using the test number for now um and take this live and once that's done I believe any number uh you don't have to nominate that number anybody's number it will reply to but for now I hope
that makes sense we're using our dedicated uh the nominated reply number I should say so that means we need to make sure that that same number is listed here which it is that's the number I've just sent from so we've got that and now we can type in a message body here so we go hey there so if I hit test setup now all right that looks like we've sent a reply let's head back to my WhatsApp and there we go I've got a reply I said hello and I got a reply back saying hey
there so let's try that again let's go hi and uh if I I believe believe I've got this set up quick properly ah I should be getting a a hey there response back let's go see what happened there uh here you seeing it wats and all let's see I didn't hit the save button so I don't believe ah that wasn't set up so I've hit the save button let's go back and try that again and let's go uh hi hit enter and there's my response hey there're coming back so you can see now we actually
have the WhatsApp credentials working we've set it up we're able to send a message to our business number this is being simulated by our test number at the moment and getting the getting the data in and I'm able to get a response brilliant fantastic but let's take this a step further now of course you can do anything here I'm just going to break this connection you could do all kinds of work here you could uh use one of the appify tools to scrape Google Maps you could do all kinds of things between here and uh
turn this into a very powerful bot um but let's go ahead and just put a simple AI agent here just to give something that's working so I'm just going to put in here I'm just going to type in AI agent I'm going to grab an agent uh tools agent will do the job that's absolutely fine [Music] um yep take y that's fine we can take from the previous node no I'm just going to keep this really simple for now so we have an AI agent I'm just going to pop that in there I need to
assign a chat model uh we've got a dedicated video on actually setting up these AI agents so I'm going to go through this quickly but let's just use um anyone we've got here I'm going to use open I open AI I'm going to connect to credential and uh choose a model the mini is fine so that's fine right there and let's add some memory uh again I'm going through this very very quickly we do have a dedicated um we do have a dedicated uh video on this let's just okay so actually I see I needed
to do something clever here WhatsApp trigger Jason I needed the WhatsApp ID so it knows what message to relate it to so let's just uh we've got a pinned item in here let's see what we've got coming in uh I'm just going to double check my work before so we're actually defining below and we want the text body okay so I'm coming back in here we want the prompt must be defined below and the prompt actually is going to be the message that's coming in so this message here was hello there we go all right
making sense that's our prompt now obviously this is very simple um and uh let's just click test set up I expect it to fail because I haven't set anything up properly yet but that gives us some data to work with um we want the we want to take from the WhatsApp trigger we want the Json context WhatsApp ID so I'm just going to copy this and this actually is called whats sub trigger one that's called whatsup trigger so it's going to be a slightly different name I'm this is the name of the node getting slightly
technical here and but we're going to Define below we want this going to pop that in make it an expression want that to be a one so what is this this is looking at the WhatsApp trigger one it's looking at the item Json called contacts and it's looking for the W ID it's looking for that WhatsApp ID so let me show you what I mean here we have got WhatsApp ID there it is it is in the WhatsApp trigger one Json contacts WhatsApp ID and that's the number that it's pulling through okay so let's see
that looks good to me now uh this looks good to me so let's try that again again I'm just going to H push play here now we can see our agent working and it sent a response out and we want our recipient's phone number to pull through and it hasn't pulled through here why do I know this because it's bright red it's not working so let me delete that out let's go back now to our WhatsApp trigger and we can look for our um we can look for the telephone number we can drag that in
there and there we've got the number and if i h test setup now I've got a response so I've built this with you guys now a little bit technical I just wanted to show you something in the middle here that we can work with we've essentially just got a message coming in we're checking that it's a message we want to we want want to respond to and not some of the the other kind of more technical message that WhatsApp sends along with these other messages we're using the open AI chat model to create a response
and we're using some windows buffer memory you could not have this you could delete this out it would still work then you wouldn't have to worry about that technicality but then the agent would have no memory now this is not really useful in a WhatsApp sense whatsapp's got its own baked in meta AI that you can use you don't need to build your own one um and of course you can use chat GPT Gemini all these tools that don't require this but what I'm trying to illustrate here is the between the two WhatsApp nodes you
can put in any kind of functionality and do things with the data build a clever bot that's going to do some work for you that could be a multi-step bot in fact next week will be diving into exactly how to do that and building some more sophistication in there but for now you need to know how to connect up WhatsApp and just pass information from WhatsApp and back into WhatsApp again and I've given a little bit of memory so that this actually can work and to get the memory to work I've had to pull in
the WhatsApp ID this is so it knows the thread how I can identify which chat it's responding to so that's working now for us and that's it it's great let's let's go and ask it a slightly more sophisticated ated question let's go back to Whatsapp one thing I want to remember is there is a there is a character limit here in fact I prefer telegram it's a lot Freer with this but WhatsApp obviously has critical mass a lot of people using it so then WhatsApp makes more sense but there are so many limitations with WhatsApp
that telegram doesn't have so definitely I'd recommend using telegram if you can if you can rather than WhatsApp because I think there's a 4,000 character limit in here so sometimes if if an AI generates more than 4,000 characters you're going to have trouble pushing that response back into into what so there are some limitations here but often you know just the just how many people are using Whatsapp makes it the tool of choice even though its limitations are there but let's go back to this and let's ask the same question again I'm going to uh
here we go I asked this question earlier hi can you explain N8 in a short paragraph so I'm just going to copy that paste that oh let's try that again uh copy so I'm asking the same question let's hit enter all right so now we should have if I have saved everything and it is working correctly we should get a response okay we got a response hey there why did we get a response hey there well we forgot to go and change the hardcoded reply message we put in place let's go back here and if
we go back into this you'll see I had that text body there was hey there so let's delete that and let's go and uh go into our agent and we're just going to pull in the output I believe that now should give us the response we want uh I'm saving that so essentially what the output from the AI agent The Prompt going into the agent is is what we'll type in WhatsApp and then the response from the agent will come back to us in WhatsApp so let's try that again uh can I just paste that
H enter and let's see let's see it's going to take a little while there we go congrats guys you now have a working n8n WhatsApp integration a very quick summary you're going to need a WhatsApp trigger you need a WhatsApp output to get both of those going you need you're going to need to access into um developers Facebook and generate a token and get the um API sorry the app a app ID and the app secret from here and go and update your credentials in there once you've got those credentials set up you need to
add in an little if node just to act as a filter uh you could possibly use the filter node as well just so you're not getting 20 Mees 20 items coming in here and it's responding to all 20 only responded wanted to respond to actual messages and then do something with it we just run a quick agent and send a reply so I hope that makes sense uh if you want to grab this workflow straightforward you can copy it straight off the screen but jump into our community there is all the details in the description
below this video as always like And subscribe and hit the bell I sound like every other YouTuber out there when I say that actually it's a bit cringeworthy but we we're putting out good data we believe we hope uh once a week so if you want to know about that jump onto that but otherwise jump into our community where uh a walkthrough of how to do this and the actual Json that you can download for this will be available to you plus a host of other uh AI automations we've already built and a whole bunch
of extras we've got some Fenty prompts in there yeah we've really got some fantastic value in our community and right now we're running a special for the first 100 members if you're a Founder you get in there for $10 $10 a month for Life you'll NE the price will never go up once you go past 100 members it will increase those so get cracking jump into the community join us there and we'd love to hear from you in the comments if you're liking what you see us let us know until then signing out I'll see
you next week adios