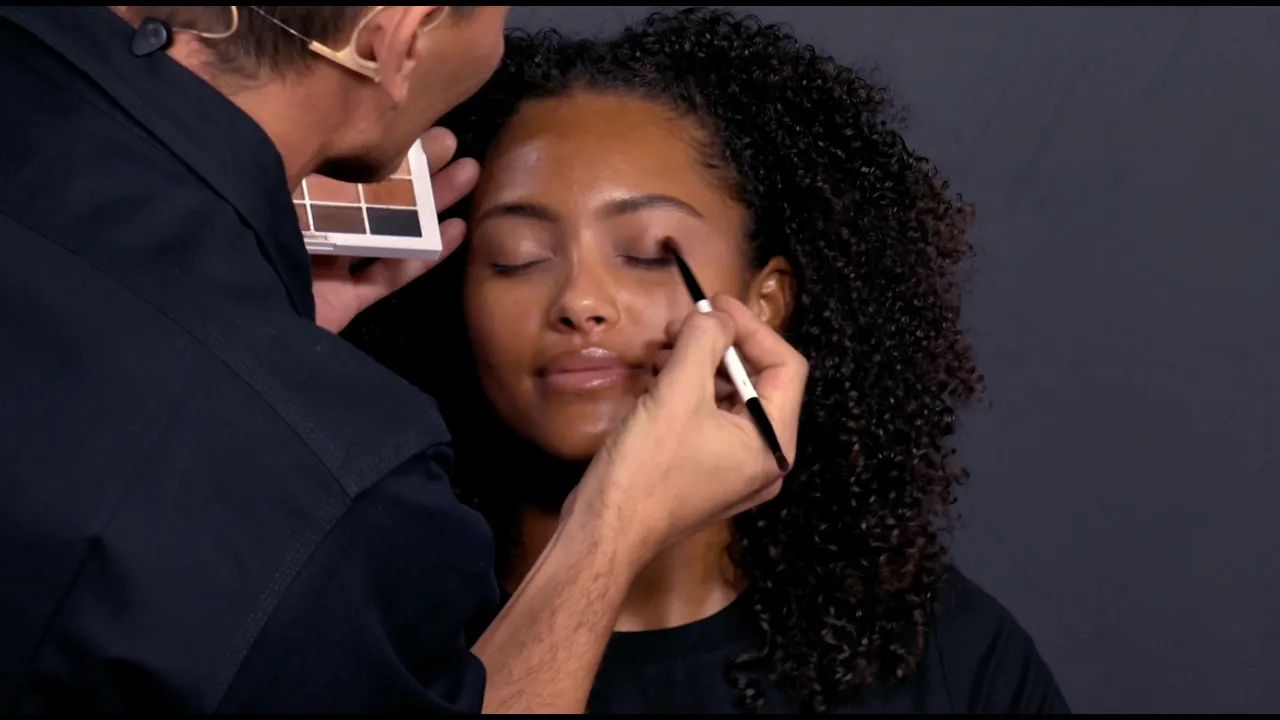
are you guys ready to have some fun I'm going to get started we have prepped a couple of things we have prepped brows already off stage and I prepped her eyelids off stage and just a little bit of mascara which I'll go over again later I'm going to take a little bit of shade number two of the new soft blur setting powder and I'm going to just apply some setting powder on the lids before we go in with shadows so I'm just blending that concealer this is the ef1 brush which also it works as a
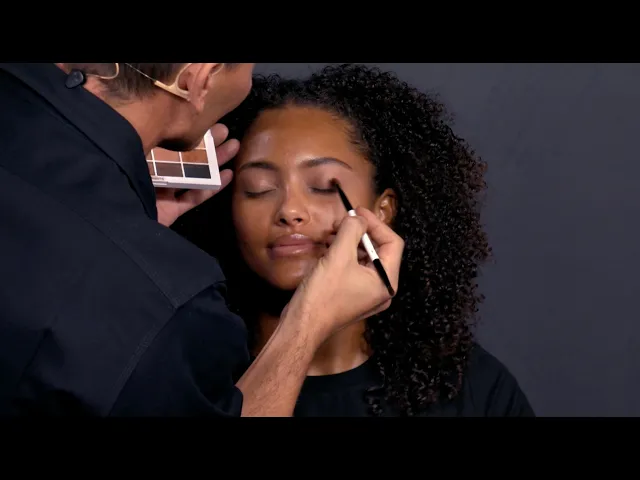
great concealer brush okay now I'm going in with the shade number two of the soft set soft blur setting powder very very little I don't want to add too much texture or too much weight onto the lid prior to applying um the ey eyeshadows all right so I'm going to take a little bit of shade eight and then shade 10 just two Browns you'll notice throughout that I mix everything it's very rare that I just use one color I always mix colors um so I'm going to start out on the outer corner and this is
our new brush that came out with the neutrals it's the E6 and I'm just going to deposit some of the color onto the outer corner now I want to lift this and and and Pull It outwards but I'm not going to apply the shadow there I'm going to pull it out into there and that's how you're going to get the most seamless um effect so I'm taking now the F3 brush and I'm just going to start buffing out the edges a little bit and then I'm going to start pushing it out into the direction that
I want and that could be either straight or that could be slightly upward right and you'll notice I like to do makeup in an upward um fashion and then I'm going to drag out again just a little bit you want to do small bits at a time you don't want to deposit too much because it's really difficult to remove things start to get messy throughout the application if you're constantly having to remove so just start with a little bit you can always add more and open your eyes and I like to also apply with the
eyes open sometimes because that's how you're going to live your life right with your eyes open so it always makes more sense now I'm taking the smaller end of the brush and I'm just going to add it looks straight for me just going to kind of add right on top of that crease right there this is going to further Define and then as I get out to that outer corner I'm sort of connecting it to this area here that I've been pulling out so I'm going to blend that crease in now a little bit and
then a little bit later once I apply concealer and powder and everything I'm then going to go in onto the bottom eye as well so shade eight and shade 10 and deposit the color right there and then always obviously remember that wherever you are initially depositing the first color the first bit of pigment and color with the brush is going to be the area that is darkest or that you want it to be the darkest so I definitely don't want it to be darkest here I'm depositing it here and then I'm pulling it out so
that it gradually goes softer and I'm going to now take shade eight a little bit of seven as well and I'm going to take this fluffy brush now and I'm going to apply just a wash you see I like to put it on the hand first to remove the bulk of the product I'm just going to take a wash now there's a bone right here and right here right you can feel it with the hands this is a very overlooked area that people don't put Shadow on but this area here is one of my favorite
places to apply Shadow because it makes the overall look very cohesive it also anchors the eyes onto the face so that it doesn't look like there's just two kind of floating eyes on the face and then later on if you choose to Contour your nose you would then connect this into the nose Contour what shade would I use for someone that has a lighter skin tone I would probably go in the same yeah yeah I still use I always mix uh a couple of Shades but I would definitely go in with this you know if
they're extremely light I would go and probably with shade four all right so this is my favorite shade of brown this is the perfect brown it's called um and I'm going to go in not so perfect right because we're going to do a smokey eye so Smokey means you can smoke it out after so you don't have to stress about it being too perfect um close your eye for me I'm going to start out by going slightly on the into the lashes right but you'll notice that I don't like to go thick with the line
on the lid unless someone has like really large lid space because I don't like to lose the lid space so the thicker that you go with a line here the smaller the eyes will become open and so I want to kind of keep as much of that lid space as possible so now I'm going to go ahead and I have her look down and I'm going to lift it up and I'm going to go into those lashes and into that Inner Room of the eye and this gives a really beautiful definition especially when it's photographed
now I'm taking that little brush on the other end I'm just going to very softly and gently smoke it out a bit this is all going to connect now this and the outer Shadow and then the shadow that I apply on the bottom of the eyes later it will all connect you'll see now also if someone has um smaller eyes let's say smaller than her or eyes that you want to really pull apart more you don't want to put liner in here because really anything dark in there is going to really bring those eyes closer
together and then flipping this pencil and if you struggle with um liquid liners I know as an artist sometimes liquid liner really is is more timec consuming right you need Q-tips and you need remover and you got to perfect it um a way that you can get more symmetrical liner is by using this little brush you can line into the corner and then just as I pulled out before the eyeshadow you can do the same thing with this pencil by just dragging out that liner into the shape that you like and then you can perfect
it later i' like to again have her look straight so that I know exactly where to take this up to I'm just going to take it up a tiny bit right in here there's not one rule for all hooded eyes but it depends on how hooded it is it depends um on the look that you're going for but generally hooded eyes I would never apply liner with their eyes closed I would always make sure that the eyes are completely straight so that that liner is going to go straight because you're going to have to go
over some skin with eyes so it is definitely more challenging when you're lining hooded eyes look up for me I'm going to go along the inner Rim now and definitely into the lashes as well a little bit this is brown this called the perfect brown I definitely prefer to use Brown I do use black at times as as well but I usually will do brown first and then go in with black after the lashes usually to see because again I'm restraining I'm trying to hold back as much as possible to see how natural I can
get this makeup so I'm going to take just a tiny bit of shade number two to highlight with this matte shade and I'm going to apply it just at the very very highest point of the brow I'm not going to drag it all the way down especially if it's like a shimmer you don't want to drag it all the way down because what you're going to do is you're going to really bring the eye down this way because anything that's light and shiny or light with a highlight is going to that's where the eye is
going to go so you want to keep it right here in the very highest port part part and not in here okay I'm probably not allowed to tell you guys this but these are two new shades we're doing shade extensions of the surreal skin foundation so they're coming out with lots of 05s um which I'm really excited about so I'm going to try yeah there's lots of great neutrals and Golden Tones so I'm going to uh mix 17.5 and 18.5 five um and I'm using the our very popular F4 brush all right so I'm just
taking a little bit now I always like to put it on my hand just to get that first layer on the hand and then I always like to start right into the this area here so the center of the face and then I like to bring it outwards when you are applying a foundation it's also important to try to have a sort of self-restraint right to try to restrain yourself or edit yourself because it's it's almost easier to go in with a heavy of Foundation right CU it's just quicker you can just go in and
cover the whole face with a heavy Foundation it's harder to go in with a softer foundation and then use concealer and powder and and you know becoming more detailed and more more perfect with it so what I'm doing now is sort of I'm pressing it onto the skin but I'm also kind of pulling it outward a little bit I'm not dragging this onto the skin um so I'm just pressing it in but as I get now to the outer corners of the face so the hairline the perimeter of the face you don't want to use
very any product in that area does anyone know why there's several reasons one is that everyone's forehead mostly everyone's forehead um and even this area here is always going to be a little bit darker than the center of the face right because the Sun hits you here so you're never going to be just one tone this area is always going to be darker so if I'm taking her main shade which is this color and I'm putting it up here it's not going to be a good look it's going to be a little bit too light
and too pale um also the other reason is the hair is there so you want to keep the hair neat you don't want to get the hair with product in it and the other reason is that you will be putting um if you choose to sculpt or softly sculpt you you know you'll put bronzer there you'll put Contour there and so you don't want to layer too many unnecessary things and then I always like take the leftover as well and just kind of hit a little bit on the neck just taking a clean sponge stamp
and I'm just tapping a little bit just to really press everything in but the other reason is to remove that very very top layer and then as I'm buffing it in I'm softening it this is going to be like one more pressing to remove the top layer again mixing two colors I'm going to go in with 340 so this is the ef1 brush and I'm just going to rub this in here and I'm going to start to apply just right here a little bit now you notice I'm not going all the way up to the
lashes because I'm going to be smoking that area out when you go up I sometimes I do go up all the way with the concealer but that's if I want to make someone's eyes very almondy and and more um sort of more pulled out and we're just putting like almost a veil of color over this it's very very light the amount that I'm putting on so letting that dry just a little bit and just putting the tiniest bit right there tiniest bit right there tiniest bit right there now I'm going to take our concealer brush
this is the F5 and I'm going to start just pressing and melting it into the skin and now I have a little space right there to where I can comfortably blend without worrying that it's getting so close to the eye and then someone asked just before like what about for an event right you mean you're talking about like just a full Full Beat right for that um I would still do this technique but I would do the first layer blend it and then you take a step back and see does she need more can she
handle more and then that's when you go in with a little bit more when I'm working on set the way that I prep the skin is I'll take a wipe first and just kind of really wipe the face I feel like it gives a little exfoliation um and cleanses the skin and I just go in with a moisturizer um I don't really I'm not big on primers I have never really been big on primers I have used them before for me I like a moisturized base because I like to use powders I'm going to take
now the foundation brush and this has already a little bit of foundation on it and I used this throughout the whole application to buff all the edges out of everything that I'm doing so I just did concealer and now I'm going to buff the edges out marry it into the foundation I like to use both brush and puff okay I'm going to go in first on the complexion using shade four now with the brush obviously it's going to go on super super light before I go on with the puff I am just going to go
into these little areas that maybe I don't want to put the puff into too much cuz the puff is always going to go on heavier all right so we're going to take now a little bit and again remember I like to start always here and this is the area also that gets the most oily and so I like to put that first amount right there and also if you notice I'm not going going on like incredibly heavy with this I'm just going first a little bit light right cuz we're going to test it out a
little bit and see do I recommend using powder for dry skin if necessary you know I if it's so extremely dry that you that you don't need it then I would say no but powder generally makeup without powder is it's hard because it really is not going to last guys um powder really helps the makeup to last beautifully what I recommend for mature skin in terms of what we just talked about creases remember there's nothing you can do about creases they are not going to be removed by makeup the only thing that can remove creases
is surgery or tapes or things like that so if you see that the makeup is getting into creases and making someone look older you have to use less you know you have to play around with the formulas one thing is not going to work on every single person so they always have to be adjusted according to the the face or the issues that you're working with and so maybe some skin or some faces are going to require you to use a foundation maybe that is a little bit a little bit more um a little bit
less lightweight right so it has a little bit more coverage but then you use less powder and then maybe that formula works right for that client or for that particular person's skin this is the F3 brush so this is the shade number two it's a little bit lighter and I'm going to go first with just a little wash with the brush first so now that I've went in with the softer application with the brush just to kind of season it a bit I'm going to go in now with the puff I want to start sculpting
a little bit this is the enhancers SC soft sculpt transforming skin enhancers this is the shade medium dark and this is the shade dark and of course I'm going to always apply this on the hand I'll never go directly to the skin without without first putting on a tissue or without first putting it on my hand so I'm coating the brush very evenly making sure it's nice and sheer and even and then I'm going to go I like always do it first right there because that's the area that I want it to be darkest and
I'm using the smaller end right then I flip and I take it and I buff by pressing in to make sure that your brush hairs are evenly coated and that's another reason why I'm doing this is that I'm making sure that every hair on this brush is evenly coated because if there's a few hairs that are not that's going to show on here and so you're going to have a little missing spot there a little bit right here not putting it so much under but rather kind of hitting that hitting that bone right here the
jaw and the chin so that some of it's coming up I think it's very common now to where if this was a few years ago people would have been like how are you putting cream over powder I've always put cream over powder and the the reason why that's how I actually design this product when I'm sculpting I like grip because I don't like to put a product on and have it sliding all over and because I like to use loose powder I wanted a product that was sheer and that was emolient enough to where when
I apply it over powder it will grip the powder and make the powder look more natural um you know that being said you don't have to do it this way you can also use just a regular powder Contour or bronzer this technique here actually enables me to use less powder bronzer later because it sort of will go on now and it's going to create create a beautiful tone and then I'm going to go in now with the cheeks typically is the darkest is going to be here again towards the hairline so I like to First
apply that little bit there and then just kind of press you notice I'm not dragging this product I'm just pressing so that it applies softly and evenly my favorite launch this year probably the powders I mean I've been waiting because it's so hard for me to work without powders that I was dying to come out with powder but it wasn't ready yet and so when the powders launched this year I was like a big like a you know releasee off of me because I've been waiting patiently the self- setting concealer yeah there are definitely times
that you can use it with no powder but if you're doing like a full glam makeup you want to definitely use powder you don't want to just use the concealer and then the more that you use as well the more powder you're going to need so if you're using very little bit of that concealer you're not you're going to need less powder if you're using more of that concealer you're probably going to need more powder so medium dark and dark and this is the powder brush F2 this is a matte bronzer so there's no Shimmer
in this I'm going to put just a tiny bit making sure that all of the the hairs are lightly coated and this is going to Now set as well that enhancer that we applied earlier and it's going to further sculpt and bronze I used under the ey shade number two first and then I mixed Shades number two and four and I put that all over my main inspiration when I was very young and started in makeup was Kevin oan was my was my number one always because Kevin Kevin at that time you know the Transformations
and the books and I used to take the subway to work when I was working at Sephora and I would I would spend all my time reading magazines or reading Kevin's books and I used to learn so much um while I was in in the subway reading those books and it was a it was more than makeup too though it was his story and it was a it was an example to me that I can also there's someone else that achieved this this huge level of success that I really wanted to for my family and
and he was someone that I looked up to because he was doing that at that time and and he was really the only one that was at that sort of level and so I really really looked up to that and it it was a huge inspiration to me you know I'm going to use both already come on is that even a question all right so I'm taking the smaller side of the F4 all right so I'm just again this is very very very similar formula to the skin enhancer same idea you put it on over
the powder and it makes the powder and the cheeks look so healthy and I'll give you these shade names the brighter one is from the brights collection that we recently launched and then this is from the OG collection this is just peachy and this one is papaya pop well I like for almost everyone Peach and pink are always my favorites and I used to always mix for many years Peach and pink I'm just taking a little bit of the Loose Powder now and buffing the edges um it's been in the works for a long time
but I'm I'm I am very picky with mascara cuz I like very I like mascaras that apply super clean and that are very easy to build and that are very easy to separate and I always wipe the wand a little bit to get that excess off remember I said I like it very clean um cuz I I prefer to build than to apply so much at the at the beginning I want to marry now these two um the top and bottom just a little bit so I'm going to go in with a small side of
the new brush the new eye shadow Shadow brush double-sided so I'm going to just go in Touching those lashes rubbing it into that liner that we applied earlier um no I never use eyelash primer just mascara curl mascara and then lashes and then I'm going into shade 10 so connect in here and then go in here all right I'm going to start lips a little bit so I'm going to start out with um with Travis it's a little deeper and I'm going to be giving the lip lift but more so on the top lip not
the bottom so much because the bottom here I'm just going to focus on proportion more here so typically I would overline the top Center lip going down into the natural lip line as we go into the outer corners and I would do the same on the bottom but because I want to just slightly enhance the upper lip and not so much the bottom I'm going to sort of do like a half lip lift I'm just going to go just slightly up above and just so you know the lip lift what that does um and what
this does here that smokiness under the eye that we applied is it sort of gives the look of sort of shortening the face because as we age everything lengthens right and so the lip lift is going to shorten the distance between the nose and here Pro it gives the look of youthfulness and then this little smokiness on the bottom here that we take right to that first very first line that conceals that first line but it also shortens or gives the appearance that it's shortening from here to here which also so gives it look of
a more youthful look and then we're going to take now and line not so much under or overlining I meant but we're going to go into her natural lip line here oh I don't have just one I've been into um it's like I go through like for one month I love this and for one month I love something else right now I've been using a lot of Rich mauve um lip liner I've been using a lot of Kate and Aaron lipstick from the Ultras suede collection or flat iron from the super satin collection um Bronx
baby from the super satin collection and then to be honest any of the moisture glow because they're also sheer and so I'm going in now with spice chai and using this little handy brush on the other end and just blending into the center okay I'm going to just take a little bit of the powder blush this is creamy Peach and I'm just going to pop a little bit the cheek smile okay this this is the shade honey glow and has a nice caramel honey vibe to it which kind of will look really nice with this
look I would I would definitely normally take a lighter one for the center I'm going to go in now one final bit of the loose powder and we're going to set it and taking a little bit of powder okay now let me spray this is the soft um setting spray number one piece of Life of advice that I can give oh my God I could do a whole master class on that I would say at the end of the day probably the most important thing is something my mom used to tell me when I was
younger is that you just have to be a good person and that no matter what's going on in your life um and this this goes for makeup artists as well who are working with clients um your decisions that you make today are going to affect things down the line like many years down the line and my life and my lived experience is definitely proof of that um and so you want to just always be a good person and make decisions based off you know you know having a good heart and and doing the right thing
um and Karma will then do its job and bring all of that back to you so um I would say if I had to choose just one thing I would probably say that because it supersedes everything else is just be a good person and and be grateful live life with gratitude even if you're having a terrible day because that terrible day will teach you something so that's what I would say thank you guys thank you so much [Music]