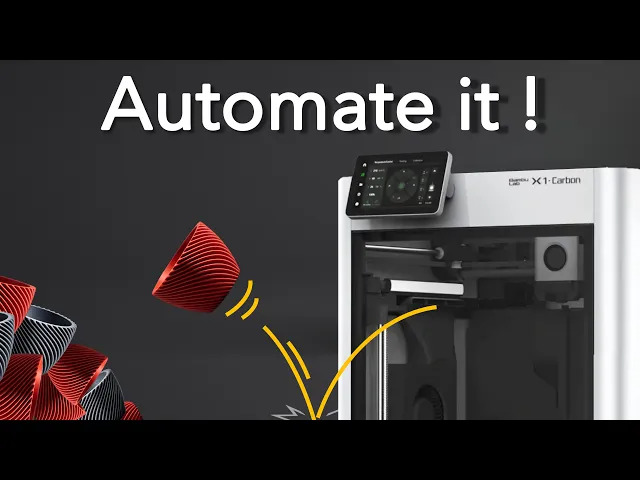
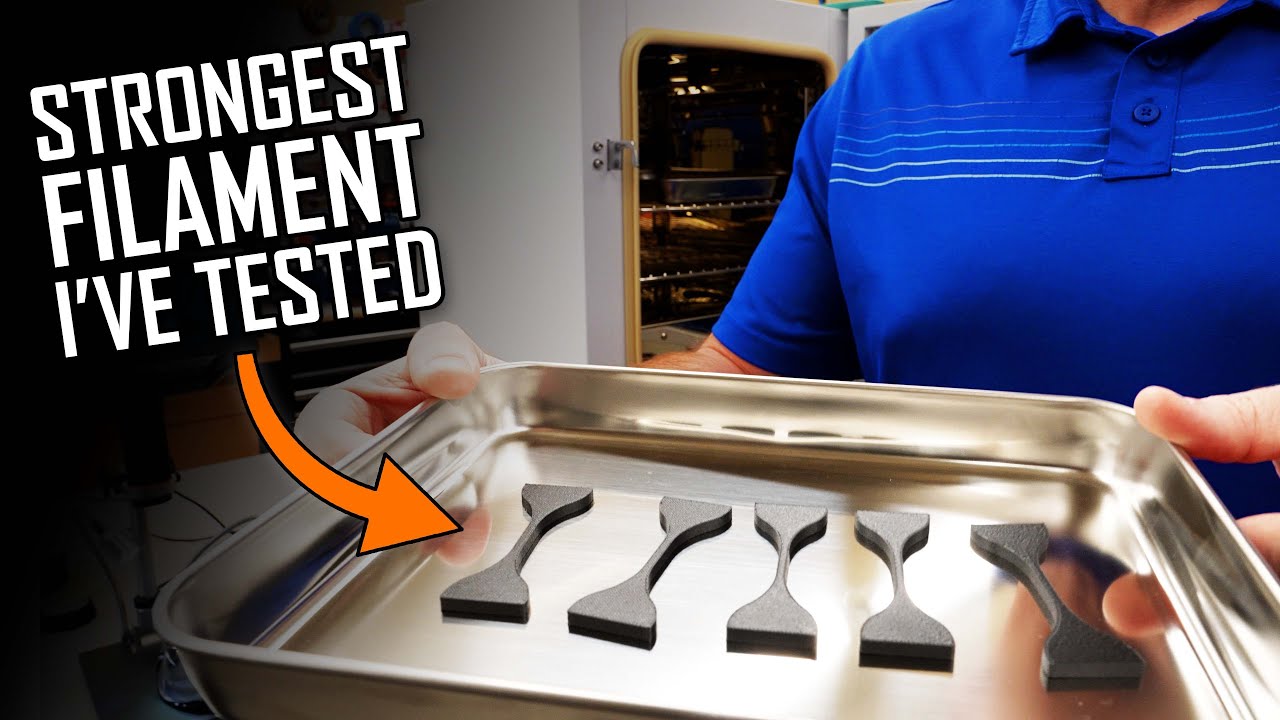
do you want to automate your bamboo lab P1 or X1 printer in a simple and effective way using only your slicer and stock Parts great because in this video I will share all my secrets for successful print automation this includes things like how to fix the purge line issue safe ejection sequences for small and big Parts how to Loop prints and many more tips and tricks I have learned by Auto printing this e cup more than 4,000 Times Printing through day and night without picking off parts or restarting files let's get started the basic print automation principle is always the same we have a start sequence printing the model the ejection phase and looping everything to start again all in the shape of one basic G-Code file we will begin with a startup sequence if you have ever started a G-Code file from your SD card you notice that your printer does not ask whether you want to level your beted or do the lighter calibration it just does it all like a naughty little Rebel which in our case is unnecessary it also takes a total of 7 minutes which can be optimized to modify the start sequence in bamboo Studio click on printer settings and go to the machine gcode tab to copy the start gcode this interface is horrible so let's copy all of that into a new text file and open it with your favorite text editor like notepad++ we will briefly go over what to comment out and add for the X1 and P1 all modified files are also Al downloadable below but roughly understanding these G-Code Parts is important so don't skip it hit the pause button when needed we will start by disabling the unnecessary first layer skin by adding a semicolon in front of each line in notpad Plus+ you can multiply your cursor by pressing shift alt and down arrow perfect next we can disable the filament perge if you want to use your AMS then leave this part in if not you can comment Out Lines 91 to 102 I prefer turning that violent plastic pooping off because we don't use the scanner for the filament calibration checking its Clarity is useless so out it goes the P1 of course doesn't have this G-Code part onto the bed leveling you really only have to do this when you move your printer or change the bed sheet if you uncheck bed leveling with a 3mf file the printer will still do a single leveling move in the middle of the build plate by commenting the whole B leveling part out this is lost so let's add it back in using the g28 command for the P1 we have to add a G1 move command with the printer Center coordinates x128 and Y 128 in the line above we also want to disable the nozzle heating to prevent any unnecessary nozzle leaking we will add this back later the resonance frequency check is also only needed occasionally and sadly it has to leave us as well I rarely do these basic calibrations but if you feel the need I recommend doing them directly through the printers menu next up is the Annoying nozzle load line which is also useless for us has to go find a new home one thing I always do is reducing the Z offset to add more first layer Squish and adhesion setting it to 0. 08 mm works best for me we definitely don't want to do the K value calibration so let's comment out a huge chunk of code from line 33 to 642 comment outline 646 to 648 as well to make sure no old calibration parameters get saved to reduce unnecessary nozzle oozing we will split the heat up command into two first is the m19 command to wait for the nozzle to heat up to the first layer temperature minus 20° the print head will start moving right after this with the following M14 command the nozzle will heat up to full temperature during the first movements I promise this will make sense in a minute the final thing left is the perch line which is important to build up nozzle pressure for a clean print start but annoyingly doesn't get pushed off with a print we will comment this out and solve this issue later now I know this was a lot of information to take in but you of course only have to do these changes once just copy your new start g code or my downloadable code back into bambo studio and then save the new start sequence in the printer's profile this time I will let my German creativity run wild and give it a fitting name perfect effect the new startup does only the essential commands like homing and cleaning the nozzle it also only takes around 1 minute and 40 seconds to complete awesome when you first try out your new code use an old build plate plus nozzle and keep your fingers on the off switch in case something goes wrong I'm definitely not speaking out of experience because I have never damaged anything during the testing let's continue before we start with the print here's a little bonus tip for the filaments settings with the door open anyways you can reduce the chamber fan speed for the printer to be more quiet here you can also add custom K values with the m900 command let's continue with the model printing if you like that detailed type of content so far hit that like button subscribe or leave a comment below let's finally print the E cup model with a new startup sequence and take a closer look at the beginning of the print as you can see the missing perge line leads to an unclean print start now you could say that you don't care but producing prints with a bottom that looks like this will book you a ticket straight to 3D printing jail let's add something I call an in model perge to fix this first we will move the eup to the front for an easy push off this is the eup file we optimized in the last video which already has quite a few of these yellow modifiers we will add another one by right clicking on the model then add modifier and selecting the cylinder shape start resizing it to the size of your first layer and around 0 . 6 mm height move it to the center of your print and 0.
3 mm Z height click on the modifier and add walls until you get a short first line in the middle of the egg cup for this model around five volts are perfect this first short Extrusion is exactly the result we want we will talk about other model shapes later now we want to export the sliced model as a G-Code file by clicking on file export and Export G-Code now just save the file and open it with your text editor to add the in model perch scroll all the way down to around line 1,70 and go to the first G1 Extrusion command we will leave the coordinates as they are but replace the Extrusion length by around 3 mm to push out extra filament and increase the initial nozzle pressure let's save and print the G-Code file directly from the SD card this is what our in model Purge looks like now that was actually a 3. 6 mm Extrusion for demonstration purposes with bad filament that leaks a little if this happens don't worry it's usually all gone by the end of the first layer taking another look at the bottom of the eup shows that even this overe Extrusion would still pass as an okay print bottom if you get this Extrusion number right like somewhere around 3 mm for this filament and print the start will look clean and the underside of the print looks like something even 3D printing Jesus would approve of but what if you just can't get a first small Extrusion for your model in my experience that's rarely the case should it still happen for example with a waste mode print where we can only have one wall that starts like this we can add a little sacrifice structure just right click on your model go to add part and add a cube resize it into a small stick with around 0. 4 mm height then move the little guy to around 0.
2 mm height and the approximate start position of your print it can help to select the model and paint the seam at the newly added part to enforce the correct starting position we now again have a first short Extrusion for our in model Purge the little helper piece will get pushed off with a waist and after the print we just take our pliers snip the little helper off and use our lighter to smooth the cut out you can barely see it on the finished product and no one ever complained about it to me it's a bit of postprocessing but it takes less than 10 seconds and works reliably as usual all of my designs shown in this video are downloadable below a commercial print license is also available on my thanks page overall the in model perge works great for me and I had zero clocks using it over thousands of prints now on to the ejection phase all you need for this is the Pei sheet that came with your printer Pei sheets self-release the part when it's cool down sufficiently which is essential for safe ejection let's modify the ngg code and add a push off sequence that is efficient and most importantly safe like earlier we copy the ngg code into a new file this this time everything will be the same for the X1 and P1 printer we will start by commenting out line 38 to 47 this whole part just makes the bed go down a little after a print which is unnecessary for us let's indicate that the cooldown part is starting and add the M400 command to make sure all print movement is done before continuing with other commands now on to the cooldown one thing I see all the time is people just adding a G4 weight command here this is dangerous and inefficient what if your print room temperature varies during the day or Seasons your printer will either wait too long or in the worst case wait too little and just crash into the still adhering part don't do it we will instead add a m190 command to wait for the printer to reach the target bed temperature well what's the right temperature for my print to self-release that's something you have to try out once just print the model and then use one of your fingers to gently push the part at different temperatures until you can easily release it for my filament that is around 22 to 25° C if you try this command with a bamboo printer you will notice that the printer will start moving anyways if it hasn't reached the target temperature in 90 seconds to solve that we just copy and paste it 40 times for a total maximum weight time of 60 Minutes my genius is frightening by now you might wonder why I wrote m190 S18 when the target temperature is 22° similar to the weight time the printer will accept the command as finished around 3 to 4° before reaching the target so S8 here equals around 21 to 22° C now let's add a small detail to make cooling down more efficient before the cool down command we want to move the bed all the way up to 1 mm with the G1 move command careful this only works with tall prints when the top cover is off and the AMS is set to the side for those who forget to do this we add the m17 Z 0.