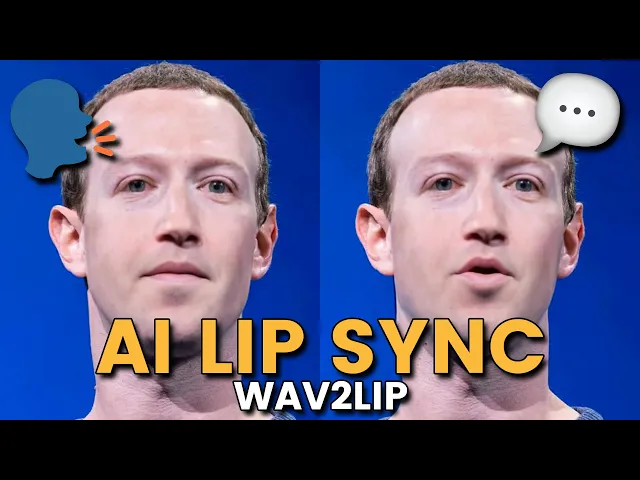
this is what today's lip sync technology looks like wild times we live in so make sure to subscribe to Mike if you want to make a video just like that one will stick around in this video I'm going to show you two different ways that you can make AI generated lips sync videos for whatever kind of project you're working on the first is going to be through an online service and the other option I'll show you today is how you can install it locally on your machine so you can use this as many times as you want for free and even implement it into some of your workflows if you want to use it in like a coding project so enough talk let's get into it to start off with the free version you're going to want to come over to this site called sync laabs doso now from my understanding they just released their website so there isn't a lot you can do on it but I've been playing around with the lip sync generation and it's actually really good and like I mentioned they have a great free plan so you can just click on get started here and like I said it's a very barebones platform you can see I already have one here but once you're inside you're going to come up to playground and then once you're over on the playground we can select an audio file for this example I just went over to 11 labs and had it generate a tongue twister in the style of Rachel's voice then after you have your audio you're going to want to also import a video I just have this 10-second video here of Elon Musk literally it's just a picture of him stretched out for 10 seconds and then once you have both your files in Just click on submit doesn't quite work for images right now but I'm sure that'll be a feature they're going to work on soon that took about like 3 or 4 minutes but once it's finished it'll show up here and then we have our video amidst algorithms artificial agile and Adept and autonomous AI its actions always kept it's not too bad now obviously you can hell it is artificial it doesn't look quite right but this technology is evolving rapidly I wouldn't be surprised if about a year from now all the little kinks of this kind of stuff is figured out and we have pretty accurate deep fake voice cloning stuff like this that's completely free to use this one looks like it used 11 credits and took 12 seconds to make which meant that I deducted 12 credits from my total 300 if you only need a couple videos this is a great service to check out but you can buy more credits if you need them if you really need to use just an image another option that I like to use is called called gooey AI on their lip sync feature for this one it's the same thing but from my experience the results just aren't quite as good we'll input our picture and we'll add our audio and we'll submit it once again they do give you some free credits to use up front but after you use up all of them you are going to have to pay for it and this is the video came up with amidst algorithms artificial agile and Adept and autonomous AI so you can see the lips definitely move but it has this kind of artifact here which I don't like and it pixelated his face completely like I said it's not the best but it's free if you need to use just an image and an audio and make a quick AI lip sync video but if you're looking for more of a long-term solution I got you covered too I'm going to show you how to install Wave 2 lip which is actually the open source code that actually made this exact same video here you can see if you go to this person's GitHub page and scroll down they actually have an API which is the same website we checked out so I assume they're also using this wave to LIT process here as well I will mention though it's not as good as the API version from the website but the stuff you can generate on your local machine is pretty decent I'll have a link to the GitHub down in the description below but once you're over here you're going to want to install this GitHub repository somewhere on your computer if you don't have if you don't have anything installed if you don't have get installed you can either download the zip file or what we'll do is we'll grab the link here then we'll come into VSS code and then we'll type in get clone and then the repository and click on enter and then once we have our wave to lip file here we'll type in CD wave to lip and what this will do is that'll put us inside the folder of our wave to lip directory here if you head back over to the GitHub page we are going to need a couple more things you're going to have to have at least python 3. 6 installed if you don't have it you can install it off the python website and you're also going to have to get ffmpeg it's kind of like a giant python library that you can use to actually edit videos with python there's so much cool stuff you can do with this and wave top takes advantage of this functionality by transforming the images and putting it into a video I might do a video more on this later but you're just going to want to come and install the latest version here I already have installed on my computer so I'll skip that step then once you have Python and FFM Peg then we'll install the requirements in the txt folder so we can copy this function over we'll come back into vs code here we'll paste in the function and click enter this will do its thing and download everything you need for wave to live so I already have most of it so I didn't really have to install anything and it gave me this err here but honestly I just ignored it then we're going to need two more things first we're going to need our pre-trained face detection model which we can get from this link here it'll be something along the lines of S3 FD which stands for S3 face detection it should be a PT file and we'll go into our wave to lip folder and we'll go into our face detection folder our detection folder and the sfd folder and then we'll put this file inside the sfd folder once we have that file saved we'll come down and we'll pick our model if you want you can actually train your own models with this but it can take up to like 1 or 2 days if you don't have that good of a computer I tried to do it and it took like 10 hours so I wouldn't recommend it unless you need a more robust solution so what you can do is install one of the pre-trained models from this table here and we're only going to be looking at the first two as these two are kind of like templates for you to train a model on so you can pick between wave to lip or wave to lip Gan personally I've been getting better results with wave to lip Gan just because it looks a little bit better and honestly the accuracy is pretty much the same so we'll come over to so we'll click on the link here for the model this will take us to a download page where we can download the wave to liip g. pth we'll download this file we'll put it in our wave to liip file and we'll put this in our check points folder click on Save while that's downloading we can come back over to the GitHub page and what we'll do is we'll copy this command here for the python script what I like to do is I like to make a new text file here we'll call it new script.
txt and I'll paste in the function and this will let us edit our python function before we put it inside of the terminal here so we need to add in our three variables that is the checkpoint here the video and the audio source so I'll drag my audio that I have and I'll put it in my wave to LIT folder and then I'll also drag my Elon video that I have and put it in the wave to lip folder so now you can see I have these two files inside my folder then we'll come back over to new script and we'll replace this video. mpp4 here with Elon video. MP4 and we'll replace this in audio Source here with audio.
MP3 and then for checkpoint we'll put in checkpoints SL wave2 lipore g. pth so this is basically saying is go inside the checkpoints folder which is right here and then use the wave to lipore again.