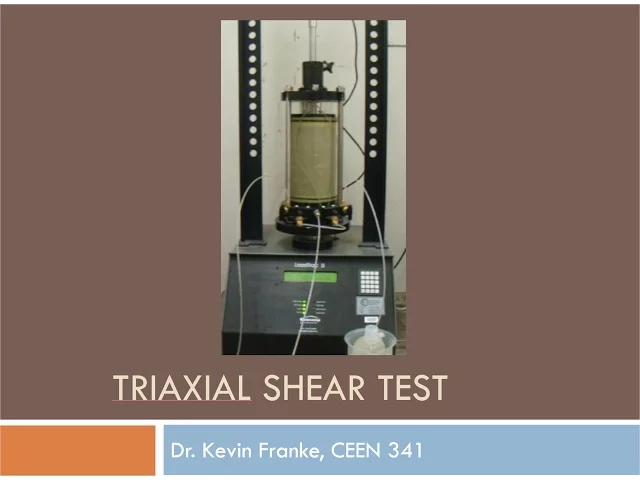
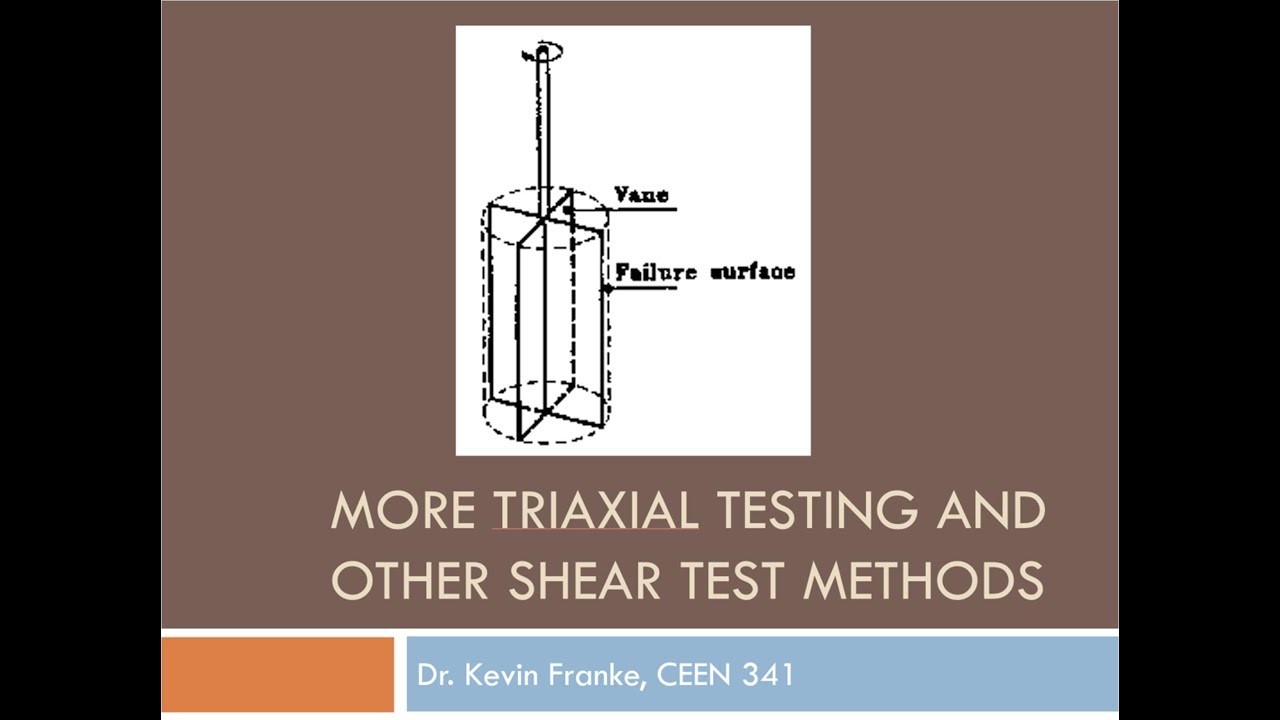
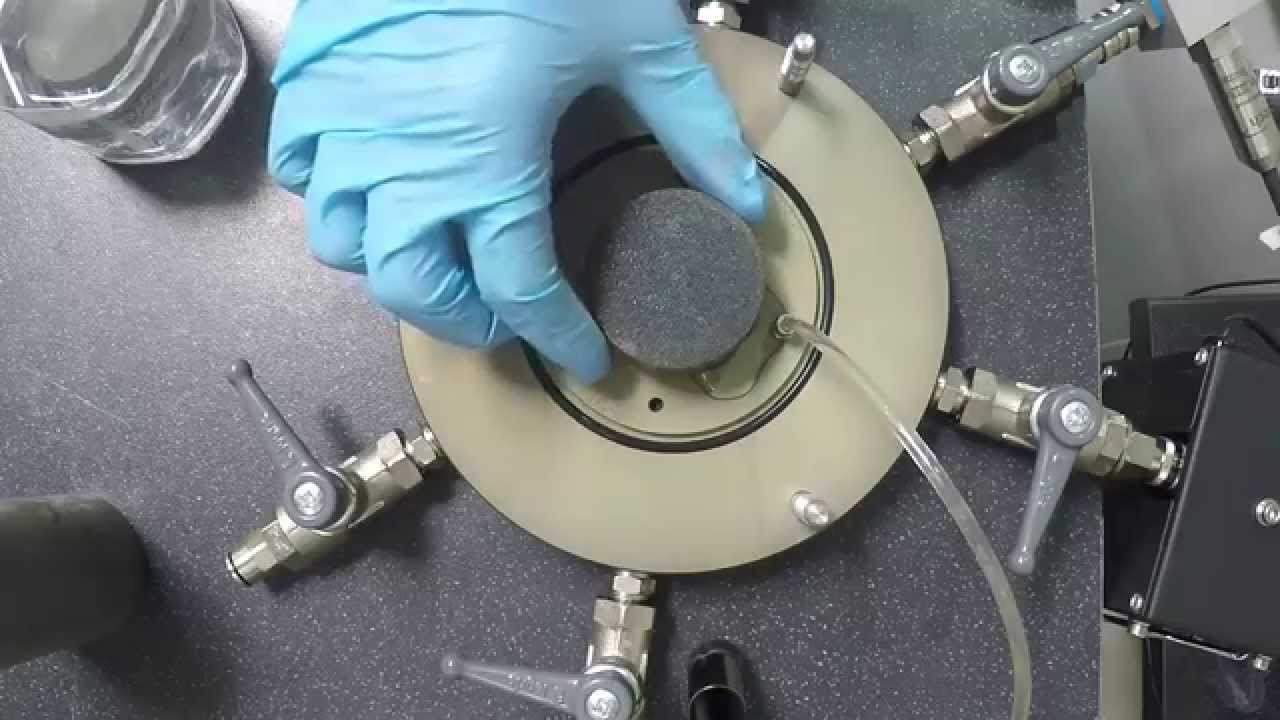
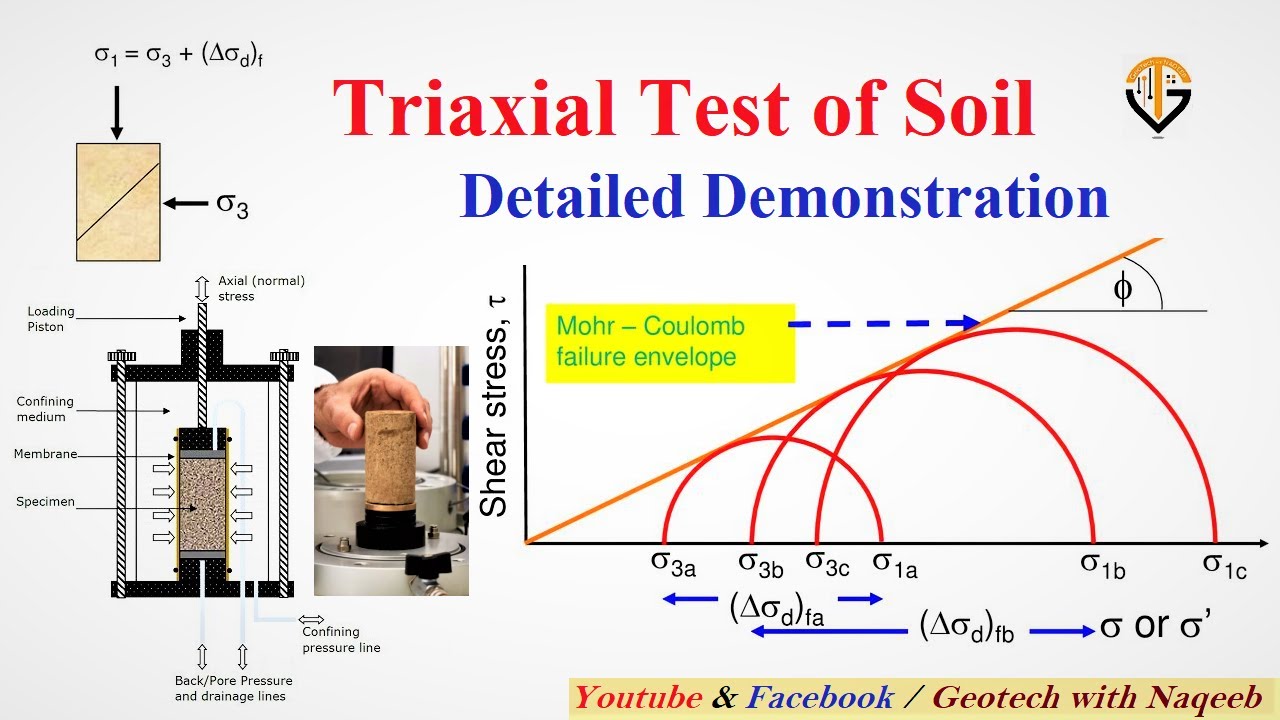
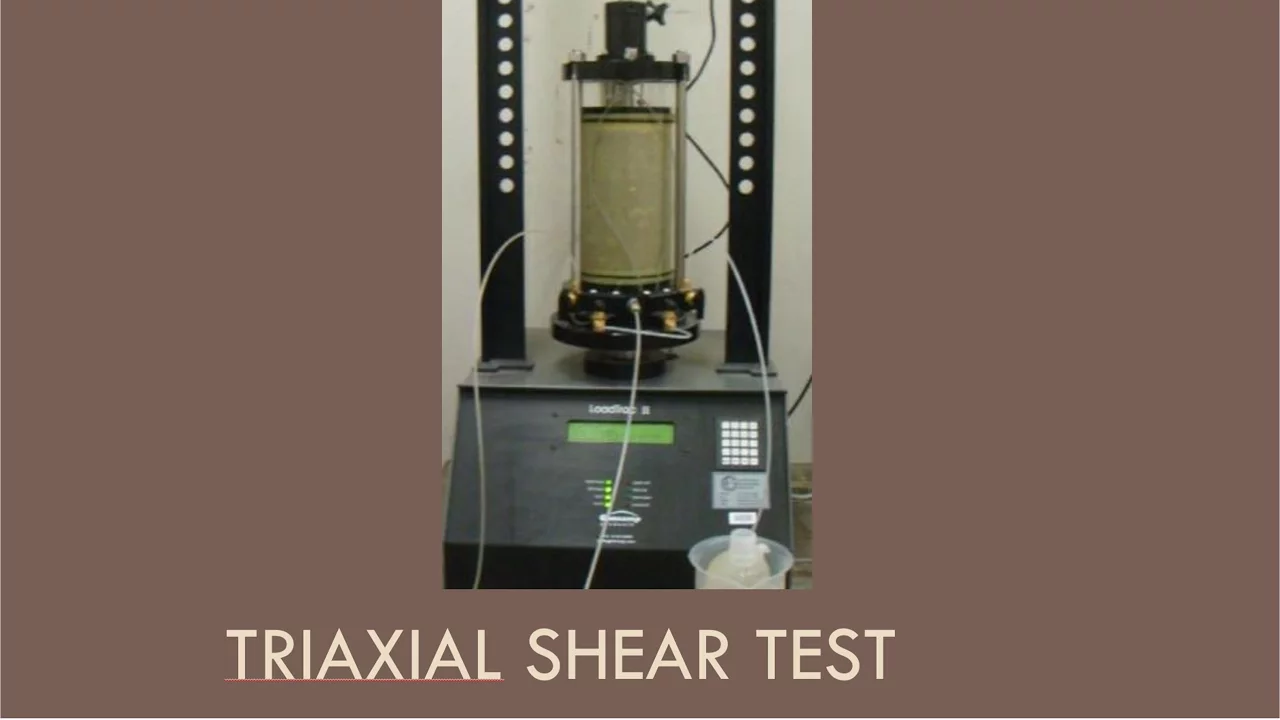
good morning my friends today we are going to talk about some more laboratory shear strength testing I'm going to introduce you to one of my favorite laboratory shear strength test called the tri-axial shear desk now I know that probably each and every one of you has gone down into the soils lab through your lab sections and at one point or another looked at this device that you're seeing right here this picture of and wondered what in the world is that thing and that thing is a tri-axial shear test device and it's what we are going
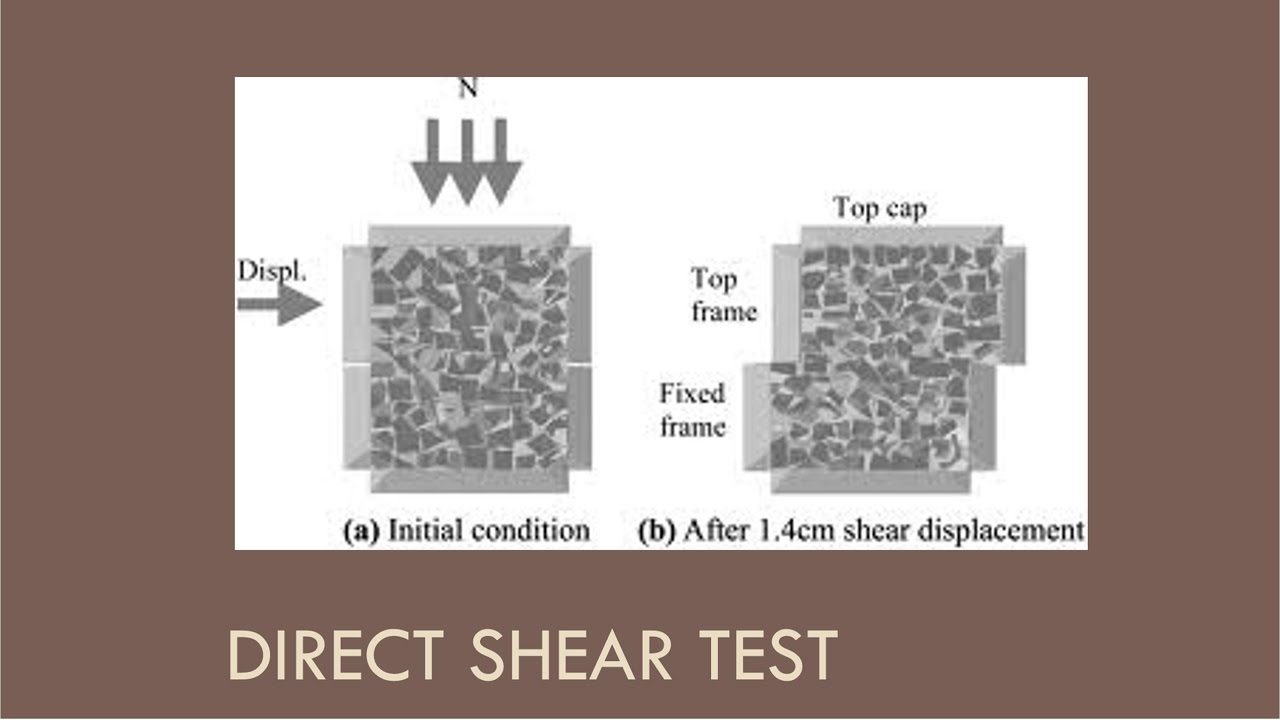
to talk about today the tri-axial shear test device has a lot of advantages that we'll discuss but for some background let's get in and just review a little bit about the direct shear test it would call if I look at a cross-section the direct shear test if I look at it maybe a still box and I take a cross-section to the still box and then so it's hollow and we fill the thing up with sand so for me yellow always means sand there we go so I fill this thing up with sand and then what
ends up happening is you know this base is fixed usually and then we have a mechanism that's going to pull the top you also have a mechanism that applies a confining stress to the top so that we stressed the sand in the vertical direction and then as we start pulling what's eventually going to start happening is we're going to develop a shear plane through the sand where eventually this upper portion of the test is going to start sliding relative to this lower portion and the whole point being that we want to develop points along the
failure envelope so that we can get the friction angle see that's the the whole reason we do a direct shear test now we've talked about a couple of problems with the direct shear test but I want to re-emphasize a few of them so here's here's this sand right as I'm outlining it right here and the whole idea is this sand is really supposed to try to mimic some soil element that's in the ground so we are applying a vertical stress that's good it but that's about all that is good because after that that you know
the element that's in the ground it's going to have some horizontal stresses acting on it too but do you see any horizontal stresses being applied to the soil in this test not really I mean we're applying a shear stress but that's not the same thing as a horizontal confining stress and so there is no horizontal confining stress being applied to this soil sample so we don't have any of that going on in addition if I load this soil sample up a whole bunch we learn from Mohr Coulomb theory that a failure plane is going to
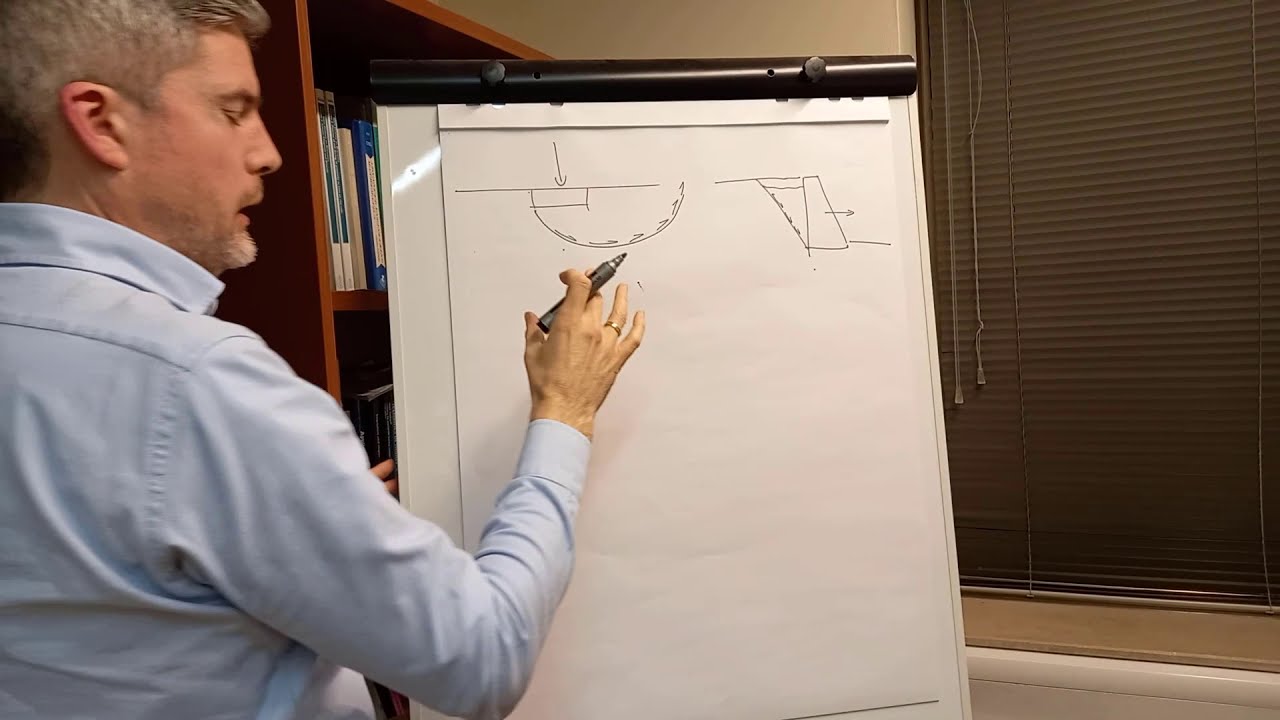
try to develop that's going to be equal to 45 degrees plus C divided by 2 but this angle right here of this failure plane it is completely flat it's completely horizontal so the fact of the matter is that soil doesn't like to fail in a horizontal plane on its own in fact it never does except at the very bottom of like if I have a slope stability failure there's going to be a portion at the bottom of this rotational failure that isn't in or that is failing in a horizontal plane but that's about it everywhere
else is going to be inclined or even approaching vertical like up here so the final thing is we do know that there's going to be shear stress along this plane but what about up here in the corners is there shear stress or down in these corners of their shear stress in the soil and in those parts of the test and if the answer of course is no so what we have is non uniform stress distribution throughout our soil sample in the direct shear test so these are problems that can be eliminated if we do a
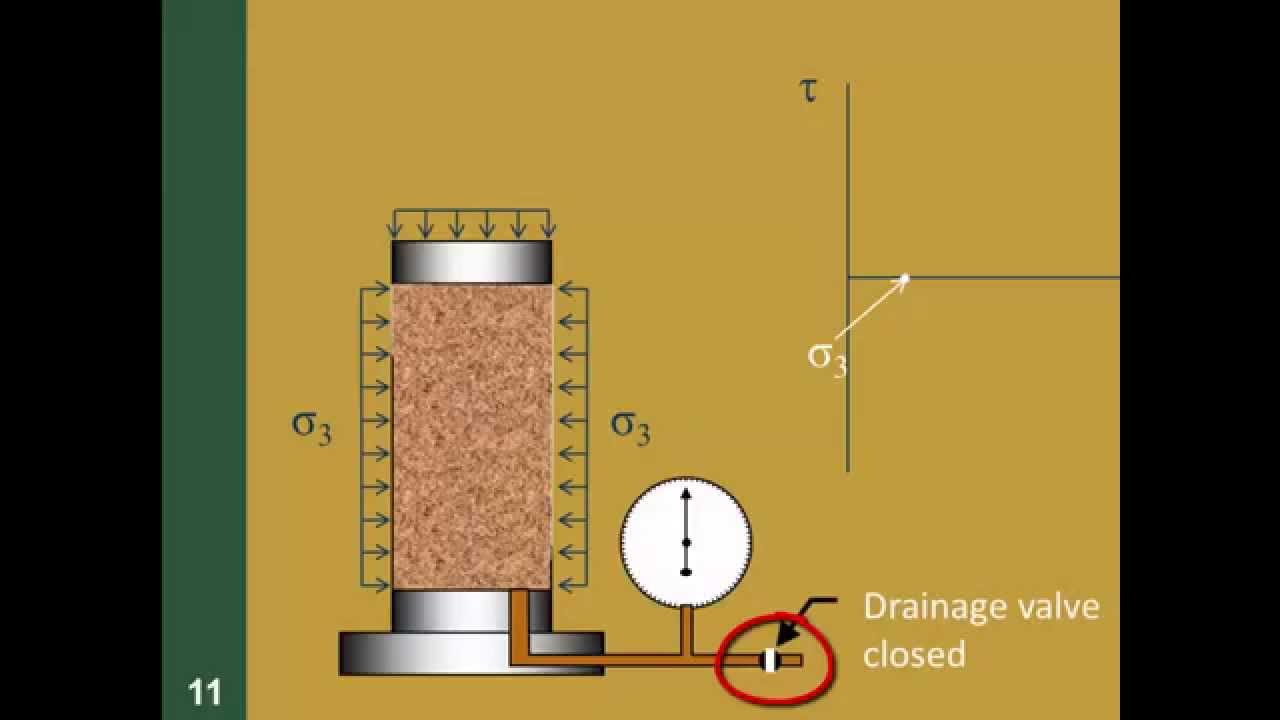
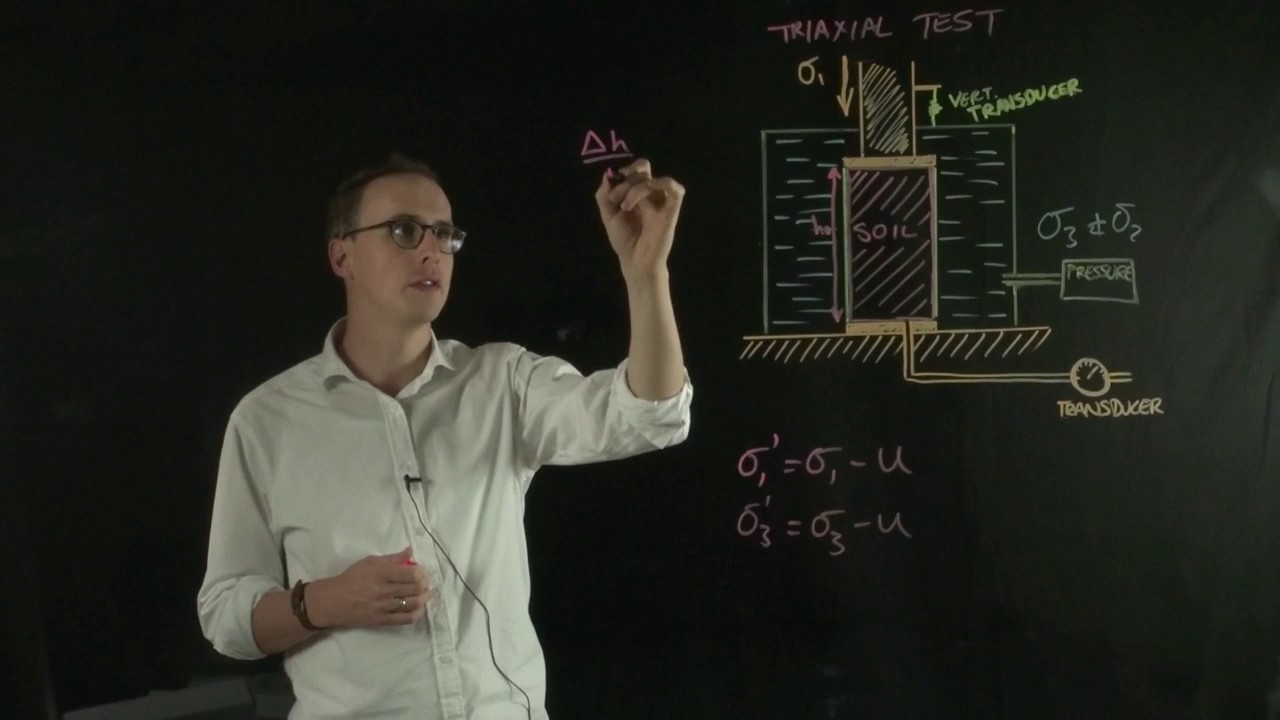
tri-axial shear test so here's a little diagram or a sketch of what the tri-axial shear test looks like and the whole reason that we have a tri-axial shear test is so that we have greater control over the confining stresses and the stresses that we use to load our soil and simulate the induced stresses that we as engineers are going to apply in a field so what we end up having here let me change my color the soil sample fits inside a closed chamber and a closed chamber is filled with water that completely surrounds the soil
okay and then what happens is we have actually let me change that to red we have on the cap of the soil we have essentially what we call the RAM or the actuator I like to name the RAM if it sounds like a medieval torture device or something bring out the RAM sorry so we apply the RAM to the soil and once the soil gets situated and set we start to squish it with an axial load and we start to measure its shear strength now the soil itself is sitting inside a closed membrane so it's
not like it's just free to unravel and be eroded down into the water it's completely confined by this membrane and and so all it feels is pressure from the surrounding water but it doesn't necessarily feel the water itself what's really cool is that we really have one system inside the soil and we have a second system outside the soil so we can control the pore pressures and what's going on in this system that have it be completely separate from the pore pressures and things going on the system inside the membrane and so water can leave
through the drains as it wants to or it can come in through the drains if it's always trying to dilate and expand the pore volume in it and so the soil is free to kind of do that and then of course this axial low that we're going to apply this is going to mimic or simulate the induced stress so the cell pressure this is supposed to this is the gauge of course but the cell pressure is supposed to mimic the geostatic stresses that are in the ground already so at the end of the day really
what we're after folks is to try to get the soil to feel as comfortable as possible to trick it as if it's back in the ground and everything's okay and the whole sampling and extraction from the ground and transportation alive was just a bad nightmare but it wasn't real that's what we're trying to trick the soil into doing so that we can measure its actual behavior so again the cell applies the pressure we have these induced stresses now we're going to call these induced stresses delta-sigma or a lot of Engineers use sigma d to imply
deviatoric stress or deviator stress so if you see either those terms we're referring to the RAM okay so if we do a free body diagram of the soil we can show you kind of what's going on with just arrows now the tri-axial test is going to have two stages the first stage is what we call the consolidation stage so here's my soil sample patient excuse me in the consolidation stage what we're going to do is we're going to apply our stress uniformly all around the soil from the water that's outside the membrane and we can
pressurize that water to the point where it's going to squeeze our soil sample and push water out of the void space in the soil and try to get it to shrink and it's in its volume by definition that is consolidation so what we do then is the first stage is we try to consolidate the soil to the stresses we think that it was feeling in the ground it's geostatic stresses so in terms of these arrows we're going to call these sigma3 because they're going to be the minor stresses and when we first apply these stresses
from the water it's the same stress all the way around the soil because it's hydrostatic and thus we say sigma3 is all the way around our soil sample now in stage 2 this is the shearing portion of the test and this is what we're going to try to mimic the induced stresses so we're going to need to add the additional stress from the RAM and the summation of that Ram stress plus the hydrostatic stress that was confining the soil in the cell anyway that summation is now what we call Sigma one or the principle or
the maximum principle stress and the stress from the water on the side of the soil sample hasn't changed and so that still remains sigma3 so just as review in stage one we have just the cell pressure and then we're going to imitate the geostatic stresses in stage number two we have the cell pressure plus the ram I can't help myself I'm sorry the loading ramp and this is going to imitate the induced stresses being applied to the soil so I'm going to introduce you to three types of tri-axial tests we're going to talk about two
of them today in this lecture and the first test is what we call a consolidated drained test now the names of these tri-axial tests are very important because they tell us what we're going to do in the first stage in a second stage the first word and the name is what's going on in the first stage and the second name in the or the second word of the name is what's going on in the second stage and they're describing what we're going to do with the drains that are leading into the soil inside the membrane
so in a consolidated drained test here's what's going to happen we prepare our sample oh let me just show you we have here a plot of time on the x axis and we have pore pressure inside the soil sample okay so what's going on here and in this amount of time this is just going to be sample preparation getting everything inside the membrane getting things squared once we get it inside the membrane we flood the cell we lock it off and then we crank the pressure on the cell when we crank the pressure on the
cell if we're watching a poor pressure gauge during the entire early portion of the test it should be your round zero and when we crank that cell pressure just as we learned about in consolidation or primary consolidation theory when those cell pressure squishes that soil the first thing that's going to push back or the thing that's going to take that new stress that we just applied it's going to be the pore pressure pore pressure is going to take it all so we're going to see a immediate huge spike in the pore pressure in the soil
and so what's going to happen though is that water is going to want to get squeezed out it's if we keep the drains open going into the soil sample the water is going to exit through the drains and as the water begins to exit the pore pressure is going to go down down down down down down down as that's happening the soil is consolidated meaning that the effective stress and sort of that disappeared that the infective stress is going up and the volume is going down because we're pushing water out of our soil sample and
eventually we're going to get to the point where we still have our cell pressure applied but our excess pore pressure is back down to zero and it's at that point right there that we say now that the soil is bearing the load the effective stress is increased and is now taking all that initial total stress that we applied through our cell pressure once we get to that point now we're ready to go on to stage two so when I say consolidated what that means is that the drains are open during the first stage so that
the soil can consolidate its volume can change and it's effective stress can increase okay that's stage one now we're ready for stage two during by the way Freebody diagrams this represents stage one meaning that we apply our sigma3 from the cell our poor pressure is always going to be equal to zero which means that we're not ever changing this sigma3 that we're applying to our soil sample and then our change in pore pressure the goal is that at the end of stage one that that pore pressure is going to equal zero and it's not going
to change it's going to constantly be equaling zero we're gonna have a flat line here by the end of stage one okay now during stage two we're going to apply the deviator stress we're going to take that ram and we're going to start squishing our soil now here's the key usually when you start sharing soil shearing soil has the same effect the consolidation does it tries to reduce the void space in the soil if it's a contracted soil and squeeze water out conversely if it's a dilated soil on the soil will try to grow into
void space and try to suck water in so when you shear a soil during shear stage you want to get some weird pore pressure effects but and the second stage because this is a consolidated drain test we're going to leave the drains open which means that as we are sharing it with the RAM if water wants to push out of the soil it can if water wants to suck in to the soil because of dilation it can the point is that the drains are open and that's why we call it a drain test so if
the drains are open then we would expect the pore pressure to remain at zero during the entire portion of the shearing test until the end of the test when a failure plane will develop in a soil and the soil is essentially filled so the whole goal of consolidated drain test so we need to shear the soil at a slow enough rate that the water that wants to get out can get out and that water wants that wants to come in can come in to the soil our goal is to keep the excess pore water pressure
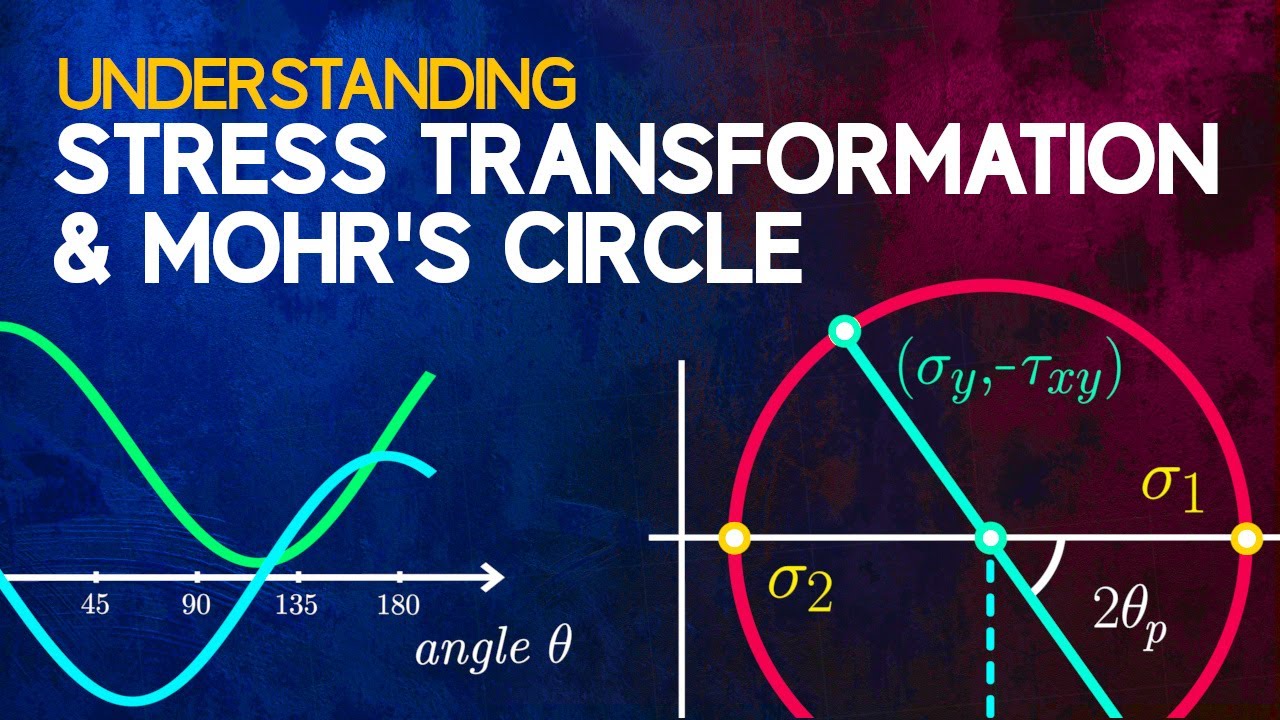
equal to zero during the entire shearing portion of the test so that's a consolidated drained test so let's do a little cartooning to show you how that would work let's say okay here's my clay specimen I get everything put into the membrane everything's ready to go and now we're going to go ahead and apply the cell pressure and as we apply that cell pressure immediately we we can say then that if we're going to plot you know more circle from this thing we can say all right I don't have a circle per se because all
of the stresses on the top and on the side they all are equal to one another they're all equal to sigma3 so my Mohr circle is actually just a point it says like it's like a Mohr's point okay so once my soil consolidates then I'm going to apply the deviatoric stress but I'm going to leave the drains open so as I start applying the deviatoric stress what's going to happen is the deviatoric stress is going to increase the stress on the top of my soil but the stress on the side of my soil is going
to remain this so we're going to start to develop a more circle where the upper stress here is the maximum principle stress representing the stress on a top of my soil sample so that circle as we increase the deviator stress more and more and more the circles is going to get bigger and bigger and bigger applying to my soil now eventually what's going to happen is we're going to develop a shear plane a shear plane will develop in the soil and that's the point where we say ok the soil failed so let's say then that
this deviatoric stress plus the cell pressure is going to equal that combination of stresses right there that's going to be my sigma1 at failure when you see a little F there that means that's a failure and that's going to be sigma3 at failure so then we would assume that this this guy right here is the Mohr circle that must be touching the failure envelope so I know that my failure envelope has to be tangent to that circle so if we're testing a sand we know that the cohesion is certainly going to be equal to zero
but here's something that's interesting if we're doing a drained test and we're not allowing pore pressure effects to occur even if we have a clay quite often cohesion is also going to equal zero why is that because cohesion really is it's more a phenomenon that's related to pore pressure and if I don't allow pore pressure to build in the soil and quite often my cohesion even in clays are going to be equal to or very close to zero so I would then say as we indicated before that's going to be my maximum principle stress of
failure and then as we did before we could find the pole for this particular Mohr circle and the pole is going to be right there and if we take this failure line and just transfer it up to the pole that failure line is not coincidentally going to touch more circle right at the point of tangency where our Mohr circle touches the failure envelope so thus we know that those are the stresses acting on this plane right there and those are the stresses that cause failure to occur so the consolidated drain test is going to give
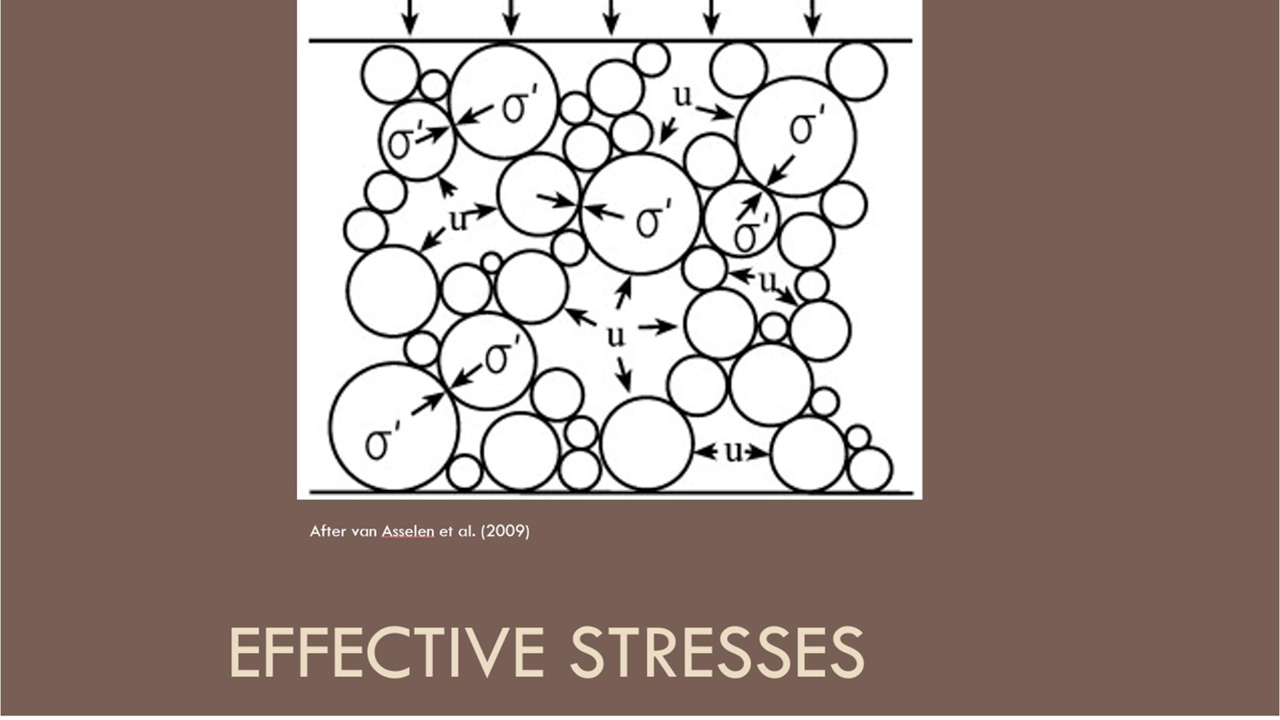
us what we call the effective strength of the soil and what does that mean well what that means is that this goes back to this equation the effective stress equals total stress minus pore pressure total stress is what we apply to the soil through the room but if pore pressure equals zero then that means that the only thing RIT that's resisting that applied stress is effective stress so that's why we call this an effective stress test or an effective strength test or in other words a drained test that's drained because the excess pore pressure is
always equal to zero in this test this failure envelope then that's produced from this corresponds to the what we call the effective stress or the drain failure envelope and we distinguish this by this term right here do you see how this fee has a little apostrophe there like the effective stress does so whenever you see C prime that means that it's the drain failure envelope that it it represents the shear strength of the soil when the soil has had enough time to drain and there's no pore pressure effects that are messing with the strength that
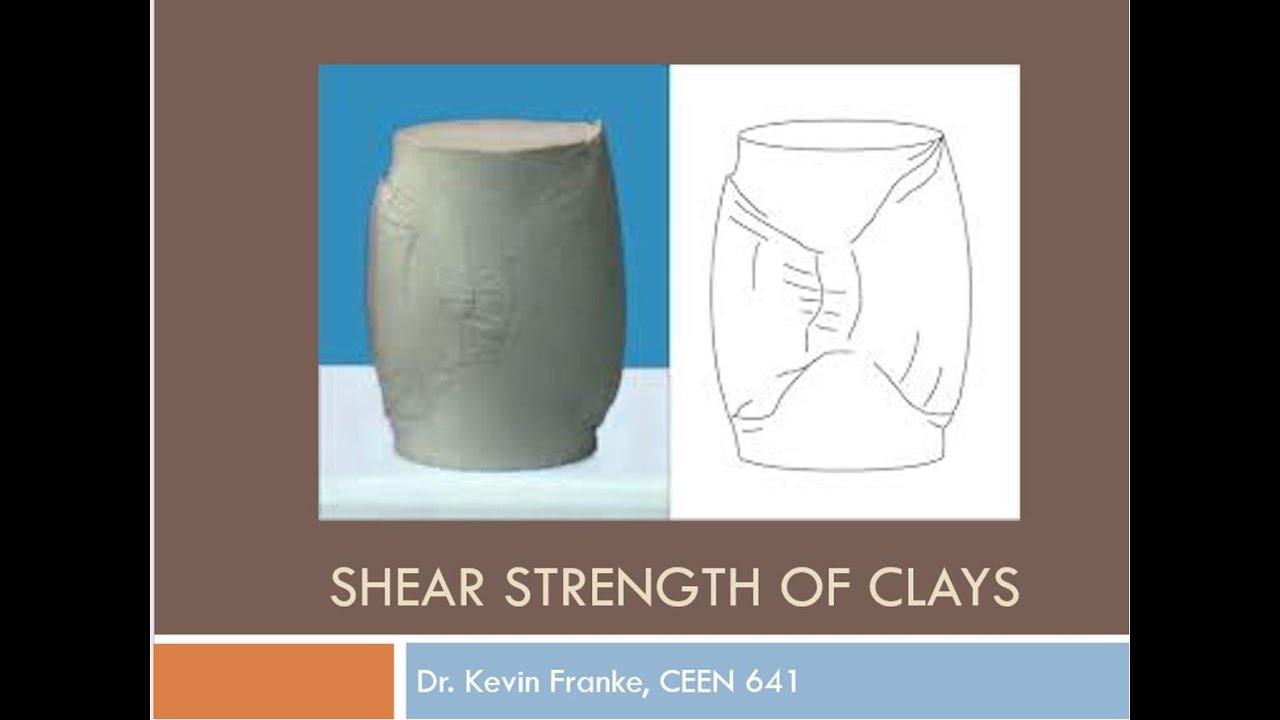
the strength that you're measuring is the inter particle shear strength of the soil that's what this friction angle means so here's a cool little picture I thought you might enjoy this is a picture of a test of clay that was performed in a consolidated drained tri-axial test and you start to see failure bands right you can see a failure band right there but isn't it cool that you also see a an inverse failure band at the same angle and they're crossing right in the middle of the soil that tells you that we're getting uniform shear
stress load and through the whole soil which you remember when we talked about the direct shear test we had stress concentrations right at the boundary but the stresses in the corner weren't the same as the stresses were in the middle of the soil that's not the case with the tri-axial shear test we get uniform stresses throughout the soil profile okay the next the second of the tri-axial test I want to introduce you to is called the consolidated undrained so again consolidated refers to stage one of the test that's a goofy-looking one stage one of the
test and the undrained refers to stage two of the desk and we call it CU for short so here's how this is going to work again like before we're going to have our sample prep period where we get the soil inside the membrane and get everything ready once it's ready to go we fill the cell and then we crank the pressure on the cell and like before the pore pressure inside our soil but in soil it's in the membrane takes that load but we leave the drains open during stage 1 which means that the water
can squeeze out as water squeezes out pore pressure goes down effective stress goes up and volume goes down because it consolidates okay once we get down to zero pore pressure that means effective stress is equal to the total stress that we just applied from our cell and we get ready for Stage two now here's the difference between the last one we talked about in the Cu test Stage two we're dealing with undrained conditions which means we're going to close the drain a couple things happen when we close the drink first of all pore pressures will
not equal zero they can be positive it can be negative but the point is pore pressure is going to start doing some wacky stuff the second thing is that the volume has to maintain constant so the change in volume is going to equal zero why can't the volume change any more well we close the drain the way that the soil volume changes is it pushes water out of the voids but if we close the drains water can't leave the soil anymore and so the volume of the soil is going to remain constant but what's going
to start changing now are the stresses that the soil feels because of these pore pressure effects so once we start shearing a soil with the drains and the valves closed the pore pressure effects are going to start going wacky if they start going positive that means that we're going to have a contracted soil it's contractive meaning the soil is trying to push water out the water is trying to get out but it's jammed up against the closed drains it has nowhere to go so the water pushes back and so we get positive pore pressures conversely
if I see pore pressures that do something like this and go negative negative pore pressures mean I have a dilated soil dilated meaning that the soil is trying to expand its volume it's trying to get the void space to get bigger and the only way the void space can get bigger is if it sucks more water into it but the drains are closed so it can't so it creates a vacuum inside the soil and we get this negative pore pressure now what types of soils are generally involved or what types of soils are generally contractive
so these are going to be like loose cohesionless soils so like sands and gravels those are going to be contracted also normally consolidated clays are going to be contracted conversely soils that are dilated are going to be like dense cohesionless soils or over consolidated clays those are soils that are going to demonstrate dilated behavior and negative pore pressures so that's how the test is going to look in terms of pore pressure effects that that we can measure now the Cu test is useful because we can get two different failure envelopes the first failure envelope oops
let me erase all this stuff looks like I've got some additional notes popping up that you guys want to see okay we talked about consolidation or contraction contraction painting and dilation okay the first failure envelope is what we call the undrained failure envelope or this is also known as the total stress failure envelope same thing remember what we said was that effective stress equals total stress minus pore pressure okay now if we could change this around we can say total stress is going to equal effective stress plus pore pressure if there's pore pressure effects in
there then the effective stress is only going to be taking part of the load and the pore pressure is going to be taking the other part of it and that's the reason we call it a total stress test there's pore pressure effects still in there so this envelope still includes the effects of excess pore pressures acting on the soil and this is going to represent the sole behavior when the soil is still adjusting to a new induced shear stress so like say in construction if I go and I and I humph a big pile of
still on top of the soil the soil is immediately going to fill that new stress and the soil is going to try to either contract or dilate but it hasn't actually completed it yet so in that period where it is trying to dilate and contract there are pore pressure effects these types of pore pressure effects in the soil and for that brief period the soils is acting in an undrained manner and so if we're interested in predicting the soil shear strength at that precise moment then we're going to use the undrained failure envelope the second
one though is what the drain failure envelope this is the same one we've had before this is the effective stress failure envelope like what we got from the consolidated drained test as before this envelope is the one that has the C prime has no excess pore pressure effects and they were saying that the effective stress is equal to the total stress but how are we going to get that envelope from this test because we do have pore pressure effects ah good question well the answer is effective stress equals total stress minus pore pressure if I
know my total stress because I applied it and if I know my pore pressures because I'm measuring them then I can correct my calculations to subtract out the pore pressures and get the equivalent effective stresses as if no pore pressures were actually present in the soil so doing that that's how I can get the drain failure envelope so what I'm trying to tell you folks is that the Cu test gives you two tests it's like doing two tests in one we do we get a an undrained failure envelope and we also get the drain failure
envelope so let me show you in terms of a little cartoon how the Cu test is going to go down here's our clay sample like before we get it prepared in the membrane we put it in a cell we flood the cell and we pressurize the cell and we leave the drains open and allow the soil to consolidate and once it consolidates that gives us our point on our tau Sigma access like we had before and we wait until pore pressure equals zero now once pore pressure equals zero we're going to close the drains we're
going to close the drain and lock in the volume in that soil and then we're going to apply the deviatoric stress the deviator the ramp and as we do that the deviatoric stress is going to increase but at the same time we're going to be measuring using a pore pressure transducer the change in the pore pressure that occurs now if I plot just the total stresses okay so these are just going to be the stresses that I'm applying to my soil so the cell pressure and the deviatoric stress as before I'm going to eventually end
up with a circle well the circle is going to get bigger and bigger and bigger and bigger as it did before until then so I'm going to get a circle when we have a failure plane developed in the soil that's going to be our total stress circle okay but at well and then we're going to say that the undrained failure envelope or fee T the T stands for total stress okay that that's going to be the failure envelope that governs this behavior remember this is our total stress Mohr circle now if we correct Mohr circle
for the pore pressure that we measured what we're going to do is we're going to like shift this whole circle over and we're just going to shift it by the amount of pore pressure that we measured because remember effective stress equals total stress minus pore pressure total stress is this circle right there this pore pressure is the change in pore pressure that we're going to subtract from our total stress so the effective stress is going to be this circle right here so all we're doing is we're shifting our circles and once I have the effective
stress circle this circle that I'm highlighting right here this circle is going to represent excess pore pressure equals zero in other words the effective stress equals the total stress and so what that means then is if I draw a failure envelope that's tangent to this circle this is going to be the same failure envelope that we got from the CD the consolidated drain test where we have fee prime so this is what I mean by the two different failure envelopes we get from the same soil this failure envelope represents the soil Wow it's dream this
failure envelope represents the soil after it's trained and depending I mean you know and I know that this concept may be challenging for you students to try to grasp right away but but think about it this way we're not just designing the embankment or the building to stay standing after it's constructed and we walk away on 20 years later we don't want it to fall down while we're constructing it either right and if soil shear strength is governed by the effective stress of the soil well the effective stress is governed by the pore pressure therefore
if my soil is experiencing funky pore pressures whether that's from consolidation or from shearing those can mess with my effective stress and dust mess with my soil shear strength so we may want to account for the period in the soils existent where it is experiencing drain and it has those pore pressure effects in there that's why we have to failure envelopes now interestingly enough the failure plane that develops in the clay is going to be the same failure plane that corresponds to the drain or the effective stress failure envelope it's not going to be this
one right here do you see how that slope angle is different it's a little more shallow okay that failure plane is a fault again if I can't write today let's write again it is a fault failure plane from the total stress circle so just ignore it we don't have to worry about it the one that's real comes from the effective stress circle and that is because soil is governed by effective stress okay so what's the moral of this story the presence of excess pore-water pressure is the only difference between the drained and the undrained envelopes
is that that this one is still draining this one is finished draining it's the only difference why those circles change and shift think of it this way when I apply my load this is what my soil initially feels and then it starts moving towards this circle and once it reaches that circle that's where it's going to stay so let's look at a couple of examples here's some if we're dealing with same where we know that the cohesion is roughly going to be equal to zero then we would expect our failure envelopes to look like this
so here's my drain failure envelope here's my undrained or my total stress failure envelope and thus the total stress failure envelope corresponds to this circle right here and the effective stress failure envelope corresponds to this circle right here which means that in order to get from total stress to or undrained to drain that everything had to move to the left and remember our equation write that effective stress equals total stress minus pore pressure so if I'm moving to the left and reducing my number that means that my pore pressures were positive I have positive pore
pressure so everything moves to the left now if I had a dense sand if I had a dense sand what I'd be saying is that poor pressure would be a negative value so if I have a negative value and I subtract a negative then I actually get a positive so if I have a negative pore pressure what's going to happen is my drain failure envelope is actually my drained Mohr circle is actually going to move to the right of my undrained and my what's going to happen is if my circles over here to the right
and that's my drain then my drain failure envelope may actually be lower then my undrained philony failure envelope and that makes sense if you think about it if my soil has a vacuum going on inside of it that's artificially increasing my effective stress then my soil shear strength is going to be artificially increased temporarily as well until the vacuum goes away and then my effective stress comes back down to normal and in normal eyes itself so what am I trying to say here is that the change in pore pressure is going to be positive for
loose sands and if it's positive then my my drained Mohr circle is going to move to the left from my undrained now if I have a dilated soil my change in pore pressure is going to be negative when I subtract a negative number I get a positive so that means that my drained Mohr circle is going to move to the right of my undrained Mohr circle so that would be like for a dense and for Clay's things are a little more complicated because we have the pre consolidation pressure we have to worry about and remember
when we said for a direct let's go to the whiteboard for when we did a direct shear test on a clay and I showed you that given the pre-consolidation pressure that that the if I add stress is greater than the pre-consolidation pressure I'm going to have one particular friction angle such that if I extended it out it would roughly go through the origin but once I test that pressure's less than the pre-consolidation pressure it's like my failure envelope changes the slope of it changes and we get we end up with some if cohesion in the
soil right same idea what we see is if I perform if I perform a CU tri-axial test at stresses that are less than the pre-consolidation stress so the soil is overconsolidated remember OC clays are dilated which means that my change in pore pressure is negative which means that my drain circle is going to move to the right from my undrained circle so you can see that's why the drain circle here is to the right of the undrained circle now if I run my test at confining cell pressures and consolidated a confining pressure is greater than
the pre-consolidation stress I make my soil normally consolidated so it's not over consolidated anymore and normally consolidated clays tend to be contractive which means that my change in pore pressure during an undrained test is going to be positive so if I subtract a positive number I would expect then that my drain circle shown here is going to be to the left of my undoing circle shown here so if I'm testing my clay when it's normally consolidated I expect it to be contractive and my if my drained friction angle will be higher than my undrained friction
angle if I'm testing my soil when it's over consolidated then I expect it to be opposite I expect my undrained friction angle to be or my undrained friction envelope engine to be a greater than or above my drained failure envelope you see how they have a crossing point right there so not that I want you guys to you know drastically grasp and understand this concept we'll talk more about this when we get into advance oil mechanics and 6:41 but but I want you to kind of see that that depending on whether or not we're over
consolidated or normally consolidated the soil changes its behavior from contractive dilated just it's the same clay the only thing that changes is how we consolidate it and confine it in the tri-axial test so I'm not going to walk through this example with you but I want you to take some time pause the presentation and walk through this solution the solution they're giving you a soil sample here and with all the pressures that they're applying and what they're asking for is the consolidated undrained angle of resistance so this is going to be the total friction angle
and in the drain friction angle that's the same thing as saying fee prime so pause the presentation go through and see how they solve this and remember it's a saturated sand so we can go ahead and assume that C is going to be equal to zero and that's why you see all of these feather envelopes going through the origin there okay so that's all I have for this lecture I know that this is a lot to swallow folks so don't be shy to watch the presentation a few times or to go back through the concepts
or things that I talked about that may be confusing to you and and don't don't be shocked or shy if by the way you're feeling a little overwhelmed or or you have a headache because I'm trying to explain the idea of pore pressures to you pore pressure effects and soils are very complex and they are complicated and you have to chew on them for a while and think about them to understand the difference between contraction and dilation pore pressure effects and those kinds of things so if you're feeling a little overwhelmed don't fret everybody does
you're fine just think about it and digest on the things we talked about here and as you do the homework assignment I hopefully understanding will start to kick in but I appreciate your guys's attention have a wonderful day and I'll see you in the next lecture