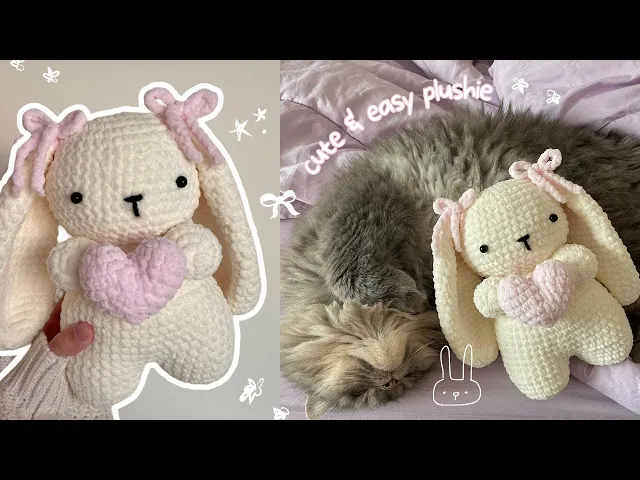
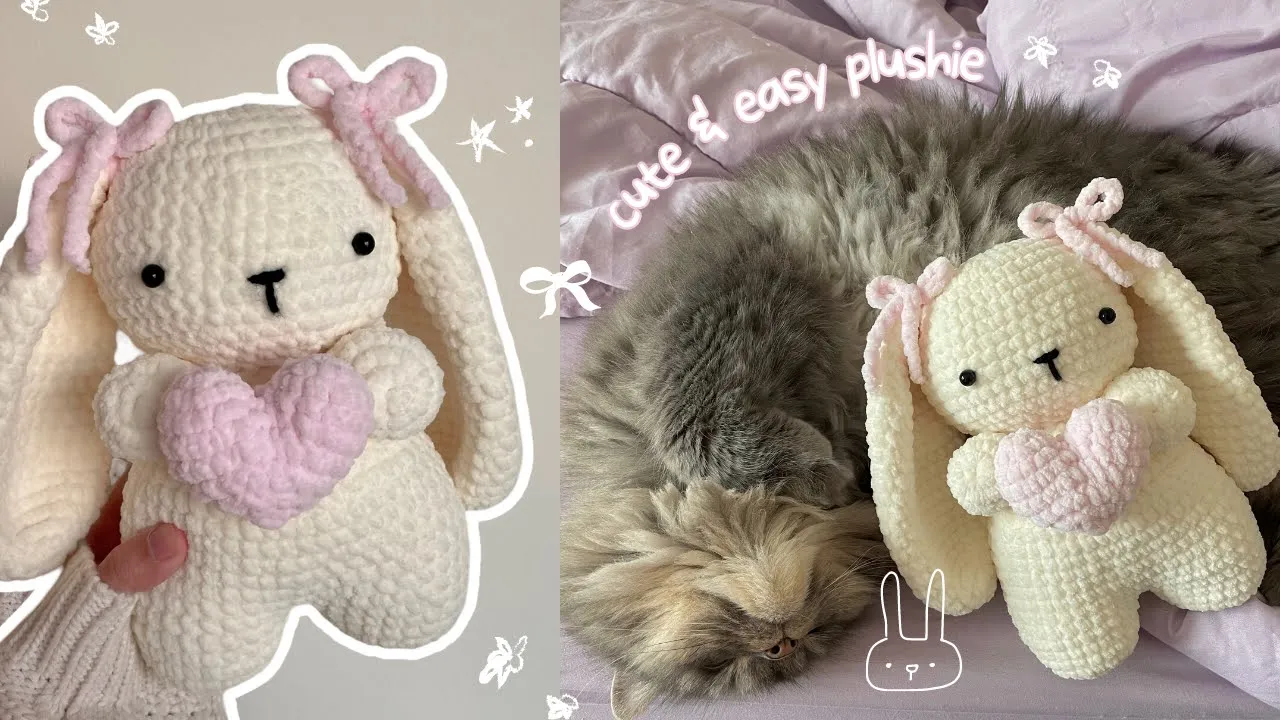
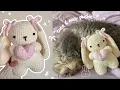
foreign things my cats have taken over my workspace again so I thought that this is the perfect time to go over some important things you have to know before making the bunny starting off with materials you can use any kind of yarn fluffy or cotton or acrylic I have a bunch of my favorite Yarns plus the ones I used in this video on my Amazon storefront you can find the link in the description box next you can you can use any hook size that's appropriate for the yarn you're using I'm going to use a 4.5
millimeter hook then you're going to need a plastic needle a stitch marker or you could use a bobby pin like I did and safety eyes lastly you're going to need stuffing try sitting on an old cushion I used to get stuffing from so you definitely don't need to go out and get stuffing just cut a hole in an old pillow or cushion and use the stuffing from inside there Lily's absolutely not tolerating me today they look so peaceful but we have to get started now if this is your first time making a plushie please watch
my previous guide to amigurumi video before you try making the bunny trust me it'll help you understand how amigurumi works and you'll be able to make any plushie afterwards I've linked the video I'm talking about in the description box please go through it if you're confused you're just gonna make a regular slip knot and remember this will give you the exact same result as a magic ring and then you're going to chain four one two three four and then you're going to insert your hook into your very first chain over there once you've got your
hook through that very first chain you made you're going to slip stitch so grab this Loop and slide it through both loops on your hook making a circle now you're going to stretch your chains you're going to find that you made you have a little circle in between your chains and this circle that's made in between your chains is going to be your magic ring so when you're inserting your stitches make sure you insert them into this circle over here inside your circle or your magic ring you're going to be inserting eight single crochets and
that's going to be round one I'm going to insert my first single crochet and then I'm going to mark my first single crochet with a bobby pin or a stitch marker just so I know where the beginning and end of my rounds are and we're going to be using our bobby pin or stitch marker to Mark the first Stitch of every round so there I've marked my first single crochet now I have to insert seven more single crochets to make a total of eight to single crochet you're going to insert your hook I'm just going
to work over this end pull up a loop then yarn over and pull through both Loops that's two three there I've got eight single crochets inside my circle I'm just going to take the end and I'm just gonna pull it a little bit tight just to make everything pull itself closer together otherwise you're gonna have a really big circle over here now we're going to start round two our next round always starts from the Stitch where your stitch marker is or your bobby pin so in that very first Stitch we're going to insert two single
crochets so insert your hook where your bobby pin was now I'm working with fluffy yarn so it might be really hard to see my stitches if you're an absolute beginner I would not recommend using fluffy yarn and instead working with regular yarn first then I'm going to take my bobby pin and I'm just gonna Mark that Stitch again so now I've marked the first Stitch that I did to start round two now in that same place where we just did our first single crochet you have to insert another single crochet because our pattern for round
two is two single crochets in every Stitch so we did our first in the next Stitch we're going to insert two single crochets as well one two whenever we insert two single crochets in the same Stitch that's called an increase so from now on whenever I say increase that means that I'm going to be inserting two single crochets in the same Stitch just gonna show you guys one more time to make it even clearer this is one stitch in this one stitch I'm gonna put two single crochets so I'm going to insert my hook in
that Stitch one single crochet and then in that same Stitch where I just worked a single crochet I'm going to put another single crochet and you're gonna do this all around the round Stitch count is incredibly important for a mikurumi plushie so please make sure you count how many stitches you have at the end of each round starting from the one where your bobby pin is one two three four five six seven eight nine ten eleven twelve thirteen fourteen fifteen sixteen since I've got 16 the right Stitch count I can move on to my next
round for round three we're going to be following a pattern of one single crochet and then an increase so in the very first Stitch you're going to do one single crochet and then you're going to mark it with the bobby pin so that you know where the beginning and end of your rounds are and then an increase so an increase is just two single crochets in the same Stitch so I did one and in that same Stitch I'm gonna do another now remember you're going to go into the next Stitch and you're going to repeat
the pattern which is one single crochet and then an increase so one single crochet and then an increase so we're gonna do one single crochet and then in the next Stitch we're going to do an increase which means that we're going to insert two single crochets in the same Stitch all right we're going to repeat the pattern all the way around now we're done with round three I've counted to make sure I have the right Stitch count and I do so I'm going to move on to round four and remove my bobby pin and our
pattern is going to be two single crochets and then an increase so in the very first Stitch we're going to do one single crochet we're gonna mark it with a bobby pin or a stitch marker now since our pattern is two single crochets and then an increase we have to do one single crochet in the next Stitch another single crochet and then in the next Stitch we're going to do an increase which is two single crochets in the same Stitch we're going to repeat this all the way around in the next Stitch one single crochet
in the next Stitch one single crochet in the next Stitch and increase so you're going to repeat this pattern of two single crochets and then an increase all the way around one two and then an increase when you're done in our next round our pattern is going to be the same it's just going to increase by one single crochet so as you go along your pattern is going to be the exact same just the number of single crochets you do before an increase will go up by one so that means in our next round we're
going to do three single crochets and then an increase every time you start around remember to do your first single crochet and then Mark it with a bobby pin and remember that this first single crochet counts as the start of your pattern so this is already one as part of your three single crochets you're gonna you already did one now you're gonna do two then in the next Stitch you're going to do three and then in the next Stitch you're going to do an increase and this is how you're gonna go all around so again
one two three and then an increase and there you go now you know how to follow the pattern so you can go to the link in the description box head to the free pattern and follow the rest of the rounds for the bunny's head once you're done with the increase section which makes the size of your bunny's head remember that you can customize the size of this bunny by following my guide to mikurumi video which explains how to adjust the size and shows you three different parts if you haven't watched that already I highly recommend
that you do so because it makes understanding amigurumi patterns and making your own so much easier so for repeat rounds what you're going to do is you're just going to insert one single crochet in every Stitch and just like always you always always have to mark your first single crochet of the round with a bobby pin please don't forget to do this because we're working in continuous rounds and then you just go around the round inserting just one single crochet in each Stitch and this is how you do repeat rounds I like calling them repeat
rounds because the total number of stitches in each round stays the exact same so you're just repeating the same round again and again to build the size that you want for the head so do as many rounds as it says in the pattern and then I'm going to show you how to do the decreases remember it's just one single crochet in each stitch for these rounds there's no increases no decreases yet [Music] thank you [Music] my cat decided that this would be the perfect time to nap on my Rick desk so I'm just going to
be showing you how to do the decrease rounds while he's napping since I don't want to disturb him to do the decrease rounds we're going to be following the exact same pattern as the increased rounds but instead of doing increases we're going to do something called an invisible decrease and don't worry I'm going to show you how so once again we're going to start our new round by inserting a single crochet oh he's up and then in that very first single crochet you're going to be inserting your bobby pin so never stop marking the first
Stitch of your round now our pattern is going to be five single crochets and then a decrease so we have our first single crochet here and then we're going to do four more so that we have a total of five single crochets before we do our invisible decrease three three four five now here's how you're going to do your invisible decrease your Stitch Has Two Loops it has this front Loop over here and it has a back Loop over there you're going to grab on to only one of the loops just the front one like
that then you're gonna push your hook downwards and you're going to grab the front Loop of the Stitch that's next to it like that so now you should have three loops on your hook like this you're going to yarn over pull through the two loops and then you're going to complete the single crochet by yarning over and pulling through both the loops on your hook and then you're going to repeat the pattern all the way around so once again we have to do five single crochets and then we can do an invisible decrease so one
four and now we do an invisible decrease so you grab on to just one Loop push your hook down grab on to the loop in the second into the Stitch that's next to it yarn over pull through two and then yarn over pull through two making your invisible decrease now remember you've already worked through these stitches so when you start your pattern again make sure you work into the next Stitch and not the Stitch that you've just done you're decreasing and repeat this all the way around and there we go this is how you're going
to do an invisible decrease now go ahead and follow the pattern that's Linked In the description box it's the exact same thing as what you were doing here just instead of an increase you're doing the invisible decrease that I showed you [Music] hey [Music] now we're going to be making the body and we're going to start off by making the feet first you're going to start off with the magic ring or if you don't want to use a magic ring you can use my slip knot and then chain method which is what I'm going to
do here I found that this works best for fluffy yarn because I'm able to better control my stitches I don't know if that makes sense but again just go with whatever your preferences so I just made a slip knot and I chained four and I just slip stitch into that first chain like what I did in the beginning and I'm going to be working all my stitches into the circle in the middle so round one is going to have eight single crochets into the circle that you made or the magic ring whatever you're working with
don't forget to Mark the first Stitch of your round so from now on all the steps all the patterns are going to be the exact same it's just going to have a different Stitch count different round count but apart from that it's the exact same steps that we've been doing for the head what we're going to do for the body if you feel confident that you'll be able to do this by just reading the pattern go ahead and do that I've put in some time stamps into the written pattern as well for some parts that
you might need to watch the video for so you can just use the pattern to crochet the bunny and anytime you get confused you can look at the time stamp that I've put there for reference and then refer back to the video whenever you want to my goal is to help you guys become confident in making your own amiguro me stuff toy so do challenge yourself and let me know in the comments how you did there we've got our round one we're going to start round two and again similar patterns in round two we're going
to do an increase in every single stitch oops so an increases two single crochets in the same Stitch after doing your first single crochet don't forget to mark it and then in that same place where you just did your single crochet you're going to do another single crochet to make your increase and now go ahead and just do an increase in every Stitch until you have a total of 16 stitches in your second round we're starting round three our pattern is going to be one single crochet and then an increase so again we're gonna do
one single crochet Mark our first single crochet with a stitch marker and then an increase in the next Stitch now we're going to repeat this pattern all the way around just like we've been doing in the previous steps we've got the size that we want for our legs now we're going to do repeat rounds so this is where you just do one single crochet in each Stitch marking your first Stitch of the round just go ahead and insert one single crochet in each Stitch to build some length for the legs now in these rounds we're
not increasing the size we're not increasing it this way we're increasing it upwards so we're giving it some length and there you've got your first leg now we can fasten this off I'm gonna go into the place where your bobby pin was and you're gonna slip stitch like that and then you're gonna pull just cut it off now we're gonna make the other leg following the same exact steps once you've made your second leg this is what you should have now I'm going to show you how to join these two together you're just going to
take the Stitch where you have your bobby pin you're going to remove your bobby pin and you're going to line This stitch up with the one where you had your slip stitch so just try to line them you're going to go into where your slip stitch is in the other leg just push it through and then you're gonna make another slip stitch just to join these two together and now you're going to work all the way around so you're going to skip the stitch for your slip stitches let me bring it closer so you're gonna
skip this that's for your slip stitches and you're going to go into the next round and now we're going to do repeat rounds so you're just gonna go round and round doing one single crochet in each Stitch remember to please keep count so I've done three so far I did three I'm just gonna Mark that very first single crochet I did so I know that this is the end of my first round basically and that is your slip stitch so it's not going to count remember to keep count because in total as you go around
over here and when you come back here you should have a total of 48 stitches all right so look I'm back over here you've got your previous single crochet on this one and then you've got your slip stitch I'm just going to single crochet into this over here and then we're gonna single crochet into the next Stitch over here so that's your slip stitch and where your previous single crochet was we're going to ignore that and we're gonna go here and single crochet and this is going to join our two pieces together remember to keep
count since we had 24 stitches here and 24 stitches here together we should have 48 so starting from where your bobby pin is until you come back over here it should be 48. now go ahead and insert one single crochet in all of these stitches so I've got 47 until here since I made it back I'm gonna do 48 in that single crochet then we're gonna skip this slip stitch and we're gonna work into where our bobby pin is starting our next round so I've got 48 and still here and I'm going to start my
next round here where my bobby pin just was so same concept as before you're always going to Mark the first Stitch of the round which is going to be this one and now go ahead and just do repeat rounds until you have the size that you want for the body and then we're going to do some decreases so you're just going to keep doing one single crochet in each Stitch round and round so you're gonna go all the way around and then start a new round and yeah that's it look I'm just going round and
round even through these stitches over here you don't have to worry about skipping any stitches because we already made our Stitch count to 48 so just go ahead and insert one single crochet in each Stitch like normal you don't have to worry about skipping any slip stitches or anything because we already made our base round previously so you just go all the way around it's completely normal to have a little hole over here what you can do is you can sew it together at the end or you can just leave it I usually just leave
it it's not that noticeable but if it's bothering you just take a plastic needle and thread and just sew it together once you're done doing your repeat rounds we're going to do the decrease rounds now for this we're going to be repeating the pattern that we did for the increases but instead of an increase you're gonna do a decrease so our pattern for this round is going to be four single crochets and then to decrease so again you do your first single crochet of the round and you mark it just like always now our pattern
is four single crochets and then a decrease so I've got one two three four and now we're going to make an invisible decrease in the next two stitches so you're going to grab on to one Loop push your hook down grab on to one Loop in the other Stitch you can use your fingers to guide your hook and then you're gonna pull your yarn through two loops and then yarn over pull through two Loops making an invisible decrease let's do this again remember you've already done your decrease here so you're going to work into the
next Stitch we're gonna do four single crochets one and then we're going to do an invisible decrease we grab onto one Loop of the Stitch then the other loop of the Stitch yarn over pull through two yarn over pull through two and now you repeat this pattern all the way around and then you can follow the pattern for the other decrease rounds the same exact thing you do your single crochets and then you do an invisible decrease to end your work you're just going to slip stitch into the place where your bobby pin or stitch
marker is and then you can cut so I'm just going to go there and I'm just gonna make a Slough Stitch you're gonna do this every time you want to basically fasten off and then you can just cut pull tight in I've attached it to a plastic needle now I'm going to sew everything on you have to make sure to line up your stitches to the ones on the head you should have the exact same Stitch count so I was struggling with the Fluffy yarn so I went ahead and I got some regular yarn acrylic
yarn attached to my plastic needle I'm just going to continue where I left off my yarn completely broke so I'm just going to start from here you're going to grab on to the stitch in the body and a stitch on the head you're going to slide your needle through just going to pull a long string I think this is going to be enough to get me all the way around so I'm just going to tie a little knot to secure it all right now I can keep going so again you're just going to grab onto
one stitch in the body and one stitch on the head with your needle make sure you're gentle with it I'm so scared my needle is going to break from how much force I'm applying and then you just pull and this is how you're going to attach your head to your body once you're done following the pattern for the hands we are going to single crochet it closed or slip stitch it closed so what you're going to do is you're just going to remove your bobby pin and you're going to fold it so that your working
yarn is at the end of the tail like this then you're going to turn your work and then you can insert your hook through one stitch and the stitch on the other side as well like that and then you're just gonna slip stitch and do this again insert your hook through the through both the stitches and slip stitch what we're doing is we're just going to close it up but before you close it up fully make sure you leave a bit of space so you can stuff some stuffing inside put it to puff up the
hand part of it so only put some on like this puffy part over here and flatten it out but don't put any over here because we want this part to be flat and closed up like this and once you've got your stuffing inside just continue slip stitching your work we're done it's your work you're just gonna pull it through and leave the tail so that you can sew the piece on to make the heart the steps are the exact same you're just going to follow the pattern and make two of these little things the exact
same way the exact same thing you did for the legs it's just a smaller version of it in my first round I'm inserting six single crochets rather than the eight that we usually insert so because we want a smaller piece for the heart that's where we're starting off with less chains in the first round but the other steps are the exact same you're still going to mark your first round your first Stitch of the round it's just the number that's different yes it's going to be extremely hard trying to get into your first Stitch since
we have a smaller number of stitches in the first round it makes it really hard to go into the first one I've been putting in so much force that I actually cracked in Nails I'm gonna have to cut all of them um but yeah it's completely normal just bear with it and try to get your hook through that first Stitch and this is what you should have now we're going to be joining them together so you're just gonna slip stitch into the place where your bobby pin was then you're going to attach them together so
you're just going to insert you're gonna go over here that's where your slip stitch is where you fastened off in your previous round you're gonna go here into the next Stitch and you're just going to make a single crochet that is your first single crochet off the round so you're going to get your bobby pin and you're just gonna mark it so once the once the Stitch and at the end you should have a total of 24 because we've got 12 here and 12 here so all together that would be 24. since this is my
slip stitch sorry since that's my slip stitch I am going to skip it and I'm going to go into this one over here I have no idea where my camera isn't focusing so over here I'm just gonna do my next single crochet I'm going to skip the slip stitch go on to the other Circle piece and do my single crochet so when I reached over here I had 12 and now I'm starting the other 12 over there so I'm doing my last single crochet my 24th single crochet over here and then we're going to start
our next round we are going to skip this because that is a slip stitch and not an actual Stitch this is our first Stitch of the round so I'm gonna move my Bobby pen and insert my hook into there I'm gonna do a repeat round so it's just going to be one single crochet in each Stitch again don't forget to mark this and I'll go ahead and follow the rest of the pattern for the heart which is the exact same as the other steps we've been doing in your last round before you do the round
that has only increases in it so in this last one over here you're not going to do any single crochets you're just going to directly do decreases all the way around to close up your heart I am struggling more than usual today but I just wanted to show you that working with fuzzy yarn can be difficult no matter how experienced you are so please take it slow all right now before I do decreases all the way around without any single crochets I'm going to add my stuffing when you're done you're just gonna cut tighten this
and then you can take your end and you can just tuck it into the back into any hole just push the end in to attach the heart to the hands all I'm doing is I use my needle and I've been through both pieces like this making sure that I like how it adjusts and then I'm just gonna take the yarn and I'm going to make a little knot for that to attach both pieces together make sure that you're attaching it on the back of the heart so that this knot isn't visible from the front and
I'm going to repeat the same step I'm going to attach it on the other side and then I'm going to sew on my hands I'm going to sew them onto the body so here's how I'm sewing on the hands I've just got my plastic needle and once again I'm just sliding my hook sorry my needle through the Stitch of the arm and then through the body so I can attach the piece together and then tightening it so you're going to continue doing this and as I keep going I keep adjusting my bunny to make sure
that I am sewing it in a place where it makes sense I'm so sorry I've suddenly started getting a sore throat sorry for myself if my waist started sounding weird um and you're just gonna keep going until the end so you reach here then I'm going to show you how to cross the ball just pull everything nice and tight take one last look make sure everything is how you want it to be and then you're just going to tie a knot to secure I'm not an expert at sewing or weaving so if my explanations don't
make sense please don't hesitate to find another more in-depth tutorial that's specifically for sewing sorry but I'm really not that much help in this department oops all right once that's done you're just gonna cut and then you can use your hook to push this through any hole just to hide your ends and then you'll be done with this step so once you're all done following the pattern for the air what we're gonna do is we're going to so you should have something that looks like a circle right you've got a circle ball you're just gonna
fold it over here we're gonna flatten it out you're just gonna press and just turn it into an ear like this and now we're going to be just closing it up so to close it up you're just going to remove your bobby pin and you're going to turn your work this way now you're going to insert your hook through the stitches on this end and the stitches on the other end so you're going to grab onto this and the stitch on the other side and then you're going to single crochet then you're going to repeat
this into the next Stitch so again I'm going through this Stitch and this Stitch over there both of them like that and just single crochet and what this is going to do is it's going to fold and connect your work so that you have this ear shape and there you go you're all done with the ear now what you can do is you can just fasten off by just pulling and cutting and then you can sew this onto your bunny's head I'm going to sew this on so I'm just going to go through the ear
and the Stitch that I want to attach it to so I'm just going to pull my needle through and if I like the placement of it if I think that that looks good I'm just going to tie a knot over here it's going to secure my ear in place now I'm going to take I'm just going to take my needle and I'm going to push it through one stitch and then through the other basically just attaching this into place and pulling and you're going to do this until your ear is attached to your bunny's head
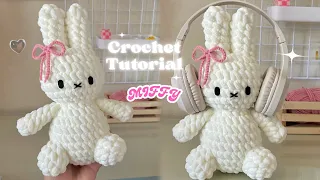
so make the bow I'm just going to take my pink yarn and I'm going to bring it under my bunny's ear and just tie a regular bow so I'm just going to make a knot and then I'm going to make a bow and then I'm just going to adjust the bow until I like how it looks on my bunny and then once you're done with that you can just cut off these extra ends