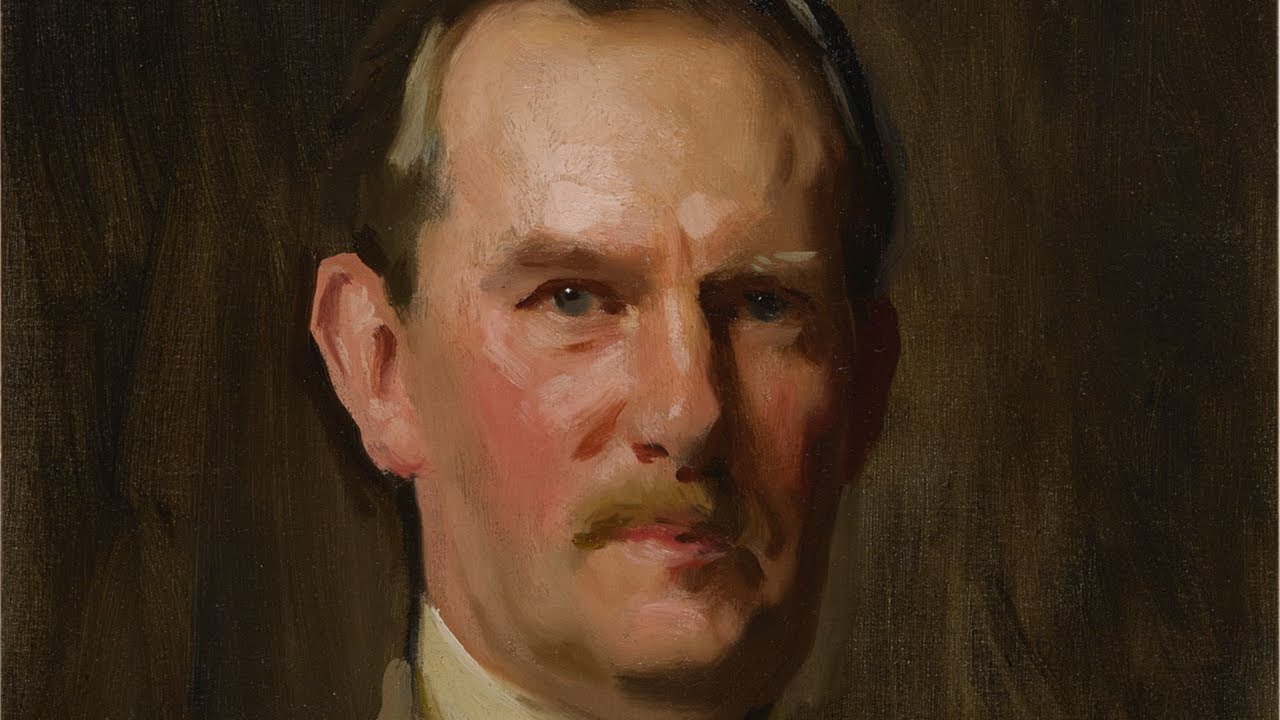
if you can really control and choose the right edges in your painting you're going to be well on your way to becoming an advanced painter all right welcome if you're new to the channel my name is Chris fornito and I help thousands of students every single month get better at painting through my online courses and tutorials that simplify the oil painting process and today we're going to be talking about edges now I've heard a lot of great painters say that one of the telltale signs of an advanced painter are are their edges so we have
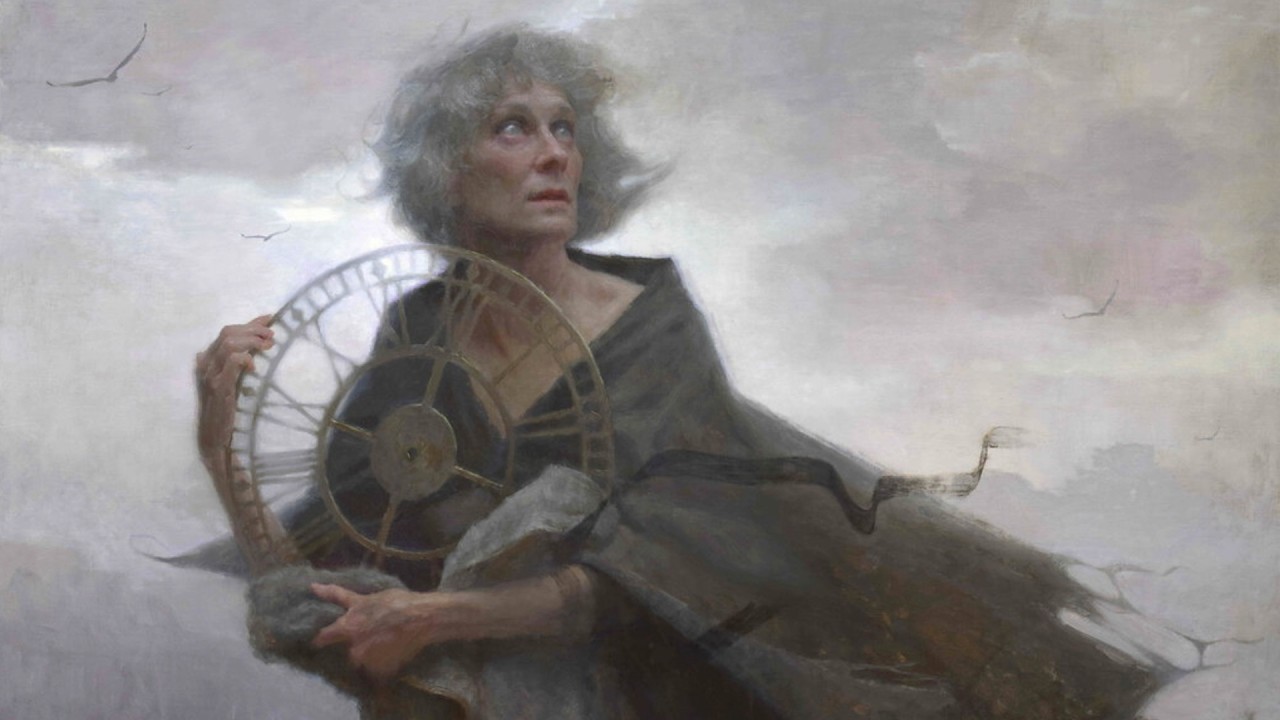
a portrait from John Singer Sergeant here and I just want to point out how he utilized edges now I like to think of there being three main kind of edges there's a hard Edge there's a soft Edge and there's a broken Edge and when I say A Hard Edge I mean this right here look at that bold stroke and look how hard the edge of that line is and it just really solidifies like that turn turn of the brow bone into there and just that harsh plain change right there it just it reads very strongly
opposed to say a soft Edge which you could say is you know right here in the mustache about how he let his brush go into the wet paint that was already there I don't know maybe that was dry I mean it could be looks a little bit of a dry stroke there but either way it kind of feathers and it it fades away and just Blends right there into the background uh you can see that a lot of times with hair like look at the hairline a lot of times I see in student portraits the
hairline is like very straight and it looks like their hair was painted on but here you can see a lot of soft edges happening from the skin to the hair which helps create that illusion of hair so you know another hard Edge right there and just using a variety of edges helps you portray the subject better and a lot of times I see in students work all the edges are hard and a lot of times that's because they're working from photos in which all the edges you know are hard like you can see the edge
of everything so if you're wondering like how do I see different edges key is to squint your eyes and you'll lose certain edges and a lot of times if you paint it that way you're going to be better off but let's take a look at another example here's a great painting from Sil bow and I just want to zoom in on this cat here all right so in this cat look look at how much all the edges kind of mesh into one another like that's his pant leg that's the fur and they kind of meshed
together I feel like there's a lot of wet and to wet paint happening you know with this paw here and the shadow even the shapes that make up the face just a lot of soft edges which really sells the fluffiness and the fur you know of the cat opposed to say some edges like in here in the hand to portray that knuckle real strong or even better in the coat right here really strong crisp Edge that helps Define that feel in the the texture of it and the the structure and sturdiness of this fabric opposed
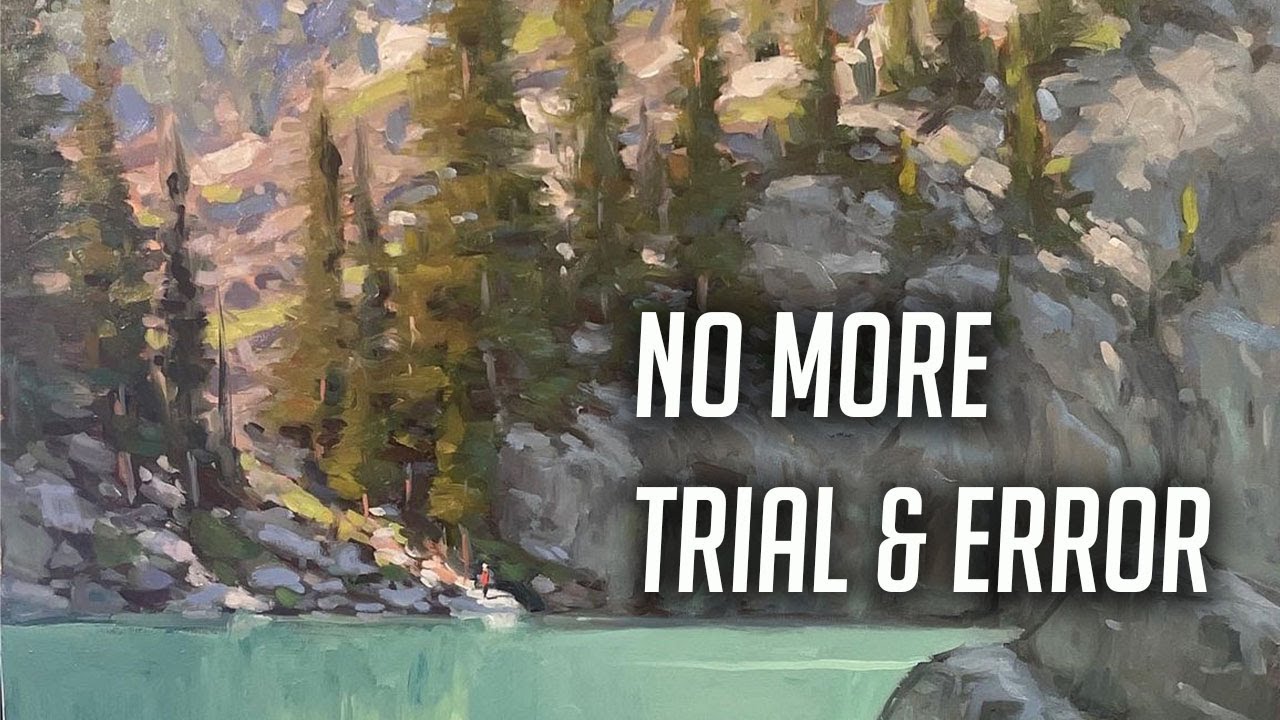
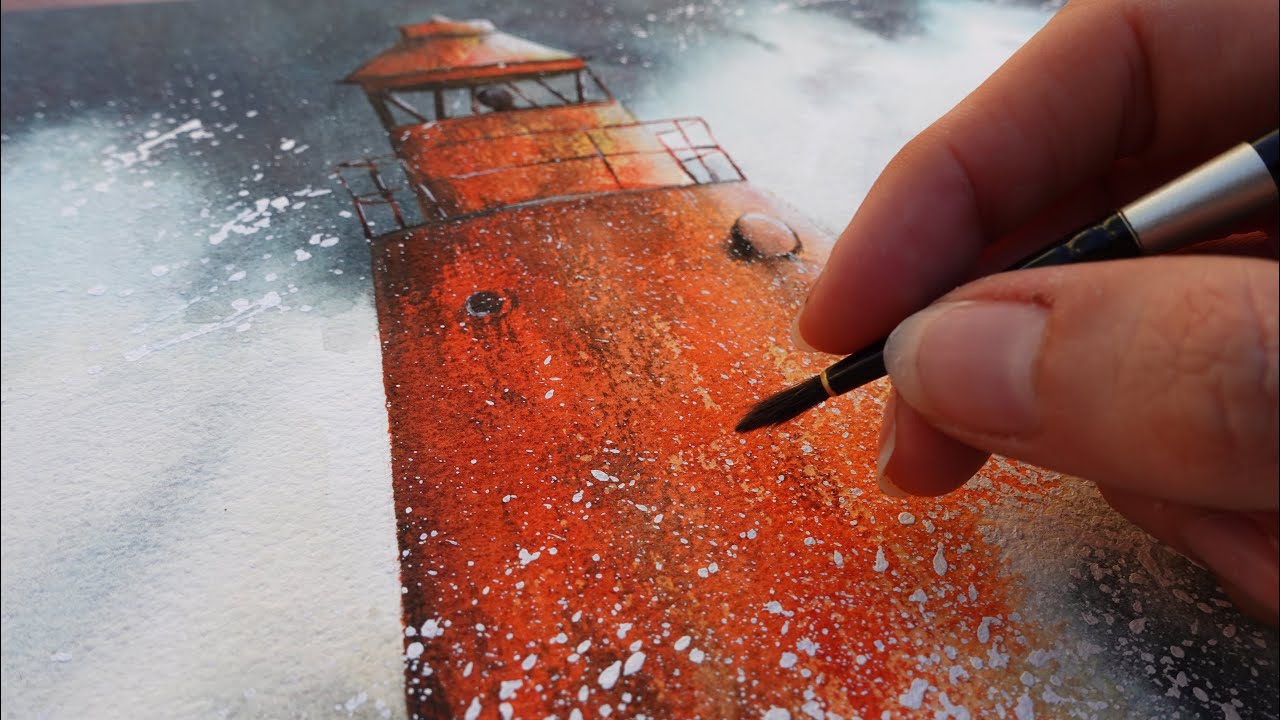
to the light fluffiness of the cat all right now let's take a look at a painter who's actually still alive this is uh Patrick o krinski if you haven't checked out his YouTube channel highly suggested he also has a great extremely valuable patreon page if you're looking for plain air tutorials I don't think anybody does it better than him he's really good and does these awesome ocean paintings these wave paintings but as far as edges go something I like to point out that I see a lot of times students kind of miss the mark on
his horizon line because you see the horizon line a lot of times students will let's make that horizon line like very crisp and sharp but look how he's made this horizon line a little softer he's let it blend a little bit into the sky there because it's very far away and doing that's going to help it sit back there opposed to say like the crest of this wave right here it's a pretty crisp Edge and it just really gives the sense of the peak of that wave uh right there I mean you can just find
great work with edges all throughout this you know the white foam like he's got these distinct shapes of white foam in the wave but you can see the outsides of it they blend in to the color of the wave just a little bit just to give it that foamy feel to it so always be thinking about your your edges all right now I'm going to talk about this painting that I did here for a patreon tutorial which by the way if you're not a patron highly suggest sign it up if you're looking to add some
structure to your learning add purpose to your learning and be a part of a great positive painting Community I highly suggest checking out uh my patreon page you'll find this tutorial and literally hundreds of others there's also painting paths again to add some structure uh to your learning if you want to know like what to paint first what to paint second what to paint third to progressively get better at a certain subject there's also tons of painting exercises to really fine-tune your skills and there's the private Facebook group where you can interact with things close
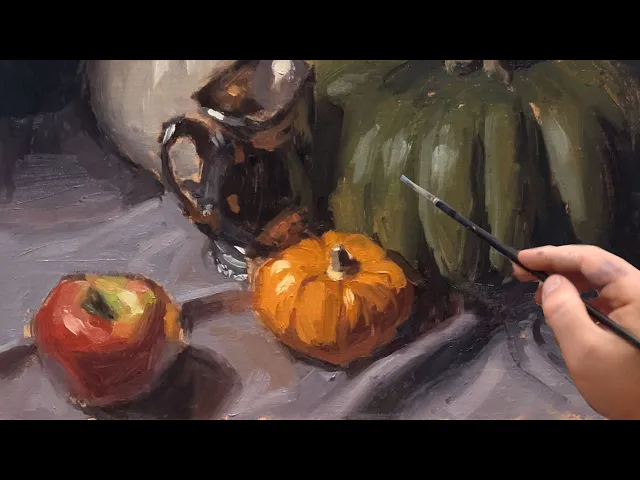
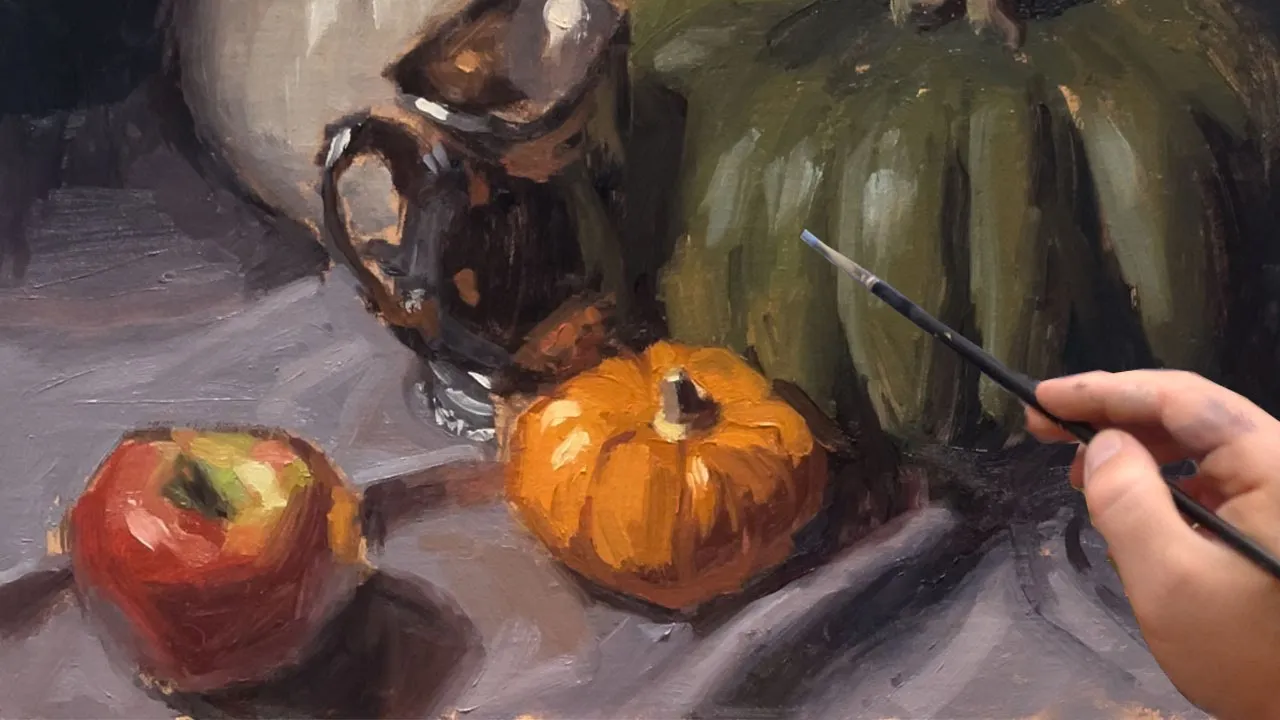
to a thousand other uh students learning to paint and just like you so if you want to check that out there's a link to it in the description of this video so first I'm just going to point out the different edges in this painting and then I'm going to explain exactly how I got these different edges with the paint so make sure to stick around so let's just take a look at like this pumpkin in the back here the kind of Fades into the dark and you can see I have that happen in the pumpkin
here there's not like a very hard crisp Edge to define the pumpkin like I wanted to lose it into the dark there on the sides same with like this pumpkin here there's definitely like a form like almost like a hot dog type form or a cylinder type form uh to these ridges in the pumpkin in order to do that I have to go from a dark to slightly lighter to kind of the lightest part there but you can see there's certain times where there's like a hard Edge like right here and some of the times
it's a soft Edge it's a soft transition like right here or you know there's a soft edge with this highlight here it's not like a hard crisp Edge same with like this Apple down here uh you see a lot of soft edges like right here where that purple is being reflected from the ground right there same on this side and just the transition from light to dark here you can see here got a soft Edge opposed to say uh this metal Little Teapot type thing um still soft edges like in here but once I get
these bright highlights I'm not afraid to have a sharp edge and that's what's going to really help kind of sell the reflective nature of that metal again soft edges like in the wrinkles here soft transition from uh light to dark a lot of times with like reflected light like you see a little bit of orange reflected in there I will you know brush that orange paint into the wet purple paint that's down there uh same right here you see I worked in some orange paint into the green and just had that soft Edge right there
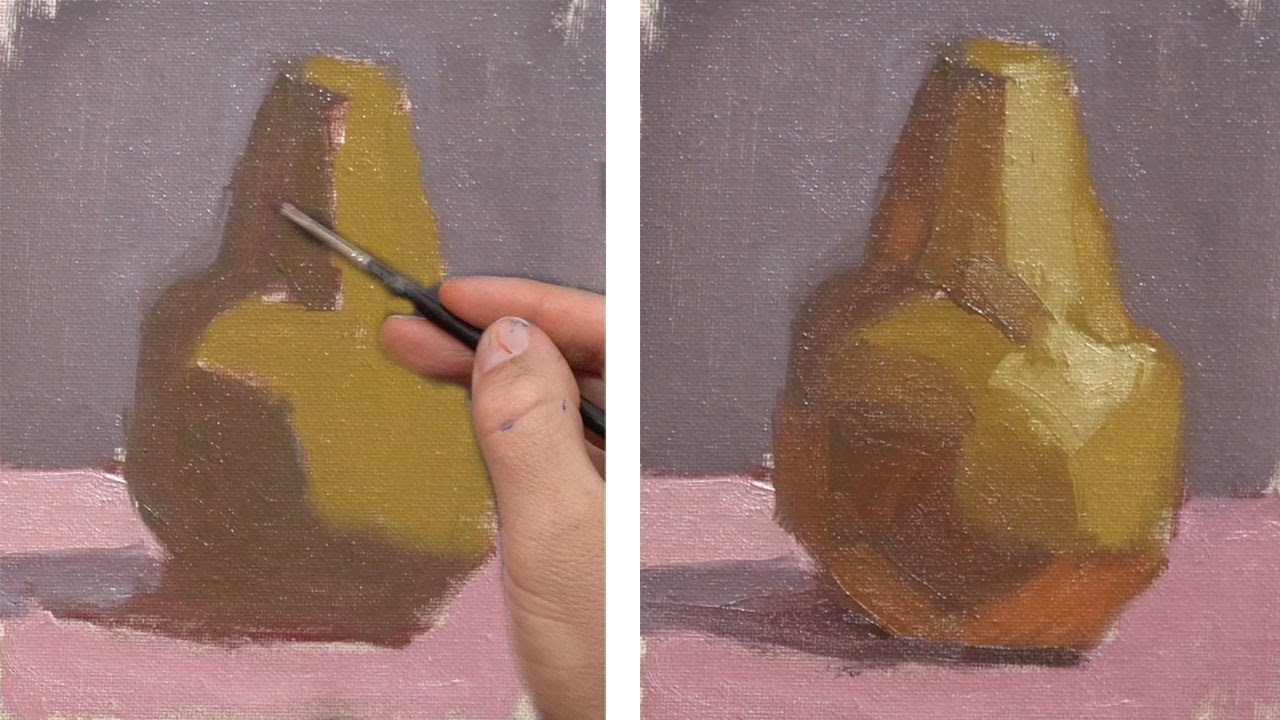
but like if you look at the stem here there's a harsh Edge right there from light to Shadow and that helps give that stem that like sturdy strong wood you know structure to it so I was want to kind of kind of Point those things out but now let's talk specifically about this Apple so here are the stages of painting the apple and what I did first was I just blocked out light and dark and when you have an apple like this it that's different colors there's kind of the more of the yellow area and
then more of the red area I still block it out light and Shadow I just make sure that I map out the color like pretty broadly like I know like you see like bits of bread there and there you can always go back and like kind of put that in but just squinting my eyes this is kind of just the yellow area and this is you know the red area so when I map that out I make sure to do that and you see yellow red light Shadow so that's just what I'm trying to get
first and then here I start working in other colors that I see like I said there was that reflected light that kind of purplish color being reflected in the bottom and so I put that in but I work in wet to wet paint and make it a soft you know uh transition soft Edge and like my brush pressure I'm not like putting a lot of pressure on the brush that's something to also pay attention to is how how much pressure you're putting on your brush CU When I put this in like I want that paint
to work into the red paint That's underneath so it kind of Blends together and gets that effect uh same thing up here like I started putting in the Reds there also started putting in a slightly lighter value to start giving it more form and then by the time I get here you know I've added even stronger Strokes that's another thing is as you're building your painting I always say work thin to thick another way of putting it is a lot of times at the beginning of the painting say like this first stage here I'm moving
the paint you see the paint's kind of thinner uh it's not transparent but I'm moving the paint kind of pushing it along whereas by the end here I I like to think that I'm applying the paint like I laid down this stroke right here almost as if I was laying down a sticker and I want to leave it there uh so that's what you see by the end here just laying down certain color notes again trying to keep it in the correct value uh that I'm doing but always paying attention to edges not a lot
of harsh edges here this is kind of the only main one right there but you see a lot of these are blending together and they're soft because just color changes um not necessarily uh value changes all the time also not afraid to kind of lose edges down here in the shadows because look at the photo you it's it's hard to tell I mean again it's a photo so you can I know you can see that but if you're looking at this and you squint your eyes you you'd lose that so don't be afraid to paint
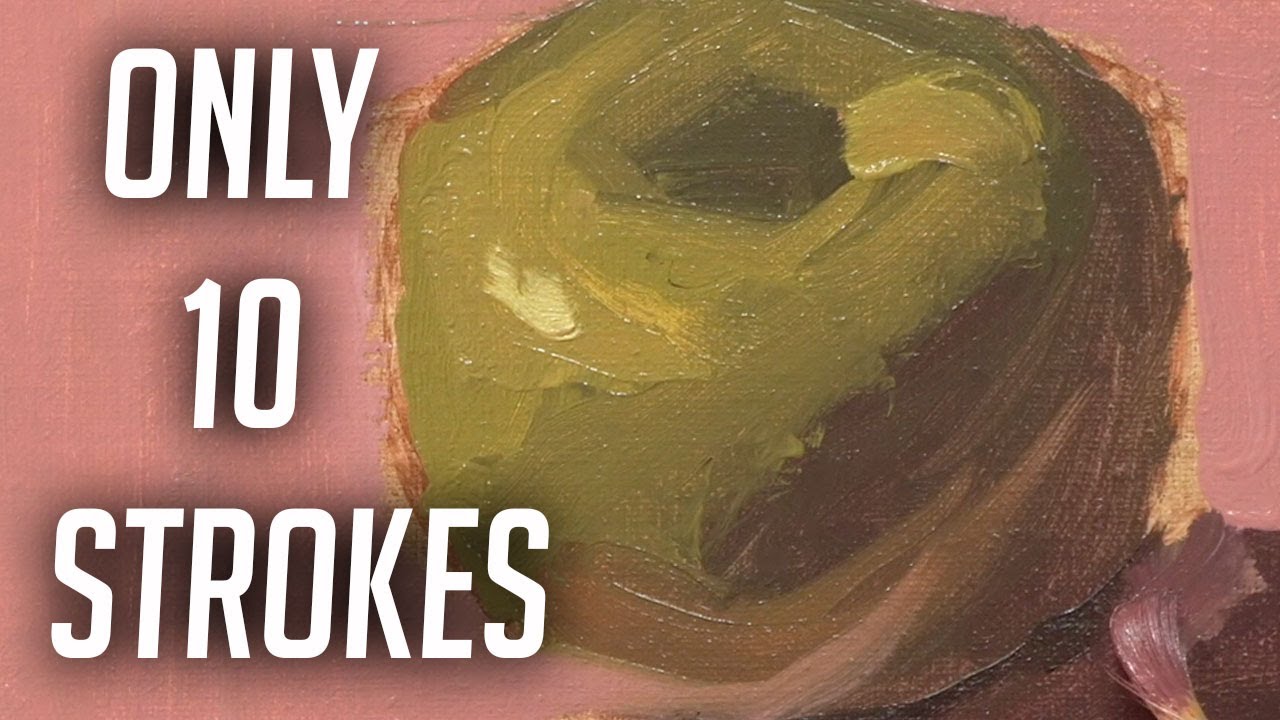
it that way U but let's look at the green pumpkin now and the stages of that all right so I got the green pumpkin I still just mapped it out with light and dark you know we got all light here I did notice like a color shift in here got a little cooler towards the stem there so I made that color change but it's very soft you know it's not like a there's no real harsh line right here and in this one this is where I start to build more values and you can see I'm
starting to kind of carve out those ridges in the pumpkin but I I don't need it to be super dominant right now you know I'm I'm working wet into wet paint and letting these color and value shifts kind of blend together and then by the time I get here there are certain areas like right here and right here where I do want that harsh Edge but again working wet and wet paint utilizing soft edges same with like the brightest coolest highlights here kind of put like when I lay those Strokes down I'm wanting them to
blend into the paint that's already there to a certain degree again like same with the the orange reflected light there so a lot of times uh when I'm building a painting or like right here where I'm just working on this one subject in the painting I start loose I start with a lot of colors and values kind of mixing together and then as I go I start carving it out more and I start getting more specific and probably more harsh with my edges and kind of dialing in things more crisp where I want so kind
of think about this like starting out very loose and sporadic and as you go you dial in dial in dial in dial in dial in and the cool thing about that is if you want to paint loose you can choose where you want to stop you know some people like to dial it in a lot in a lot of places and some like to you know leave it alone like once they hit a certain point so that going to be up to you but let's take a look at how I did the the metal piece
in this all right so here I really leaned into working uh dark to light and just pretty much mapped out the whole thing with a dark and then progressively found lighter and lighter values like this is still a pretty dark value but it's you know it's lighter than this so I worked that in uh again wanting it to be soft and wanting it to blend into that dark paint a certain amount you know I always thinking about you start big and you work small you're kind of stacking shapes in a way and then by here
you know I put in this is like reflected Orange from the pumpkin you know put that in not super strong letting it blend in you know softer edges around there and when I got to the light Parts here not afraid of you know some crisp edges uh in here again soft transition and a lot of painted metal is just getting the values right and making sure you establish the dark's dark enough so when you put these brightest highlights they're really going to pop a lot of times I see students will you know not map out
this dark enough and so when they put in the lights they don't seem that light another thing to kind of point out is right here this soft edge of this green reflecting from the pumpkin and also just this lost Edge from where the metal starts and where the pumpkin starts and you kind of lose that you know establish that that right there uh you can see in this one I wasn't afraid to just kind of bring this into the pumpkin and just kind of see it all as one big shape knowing if I wanted to
later I could add in shapes adding colors and values to separate them if I wanted to all right so I hope this video helped you figure out edges I know edges was a thing that I struggled with a lot uh when I was first learning and I I just couldn't like wrap my head around and I didn't know exactly what people were talking about when they're talking about edges but again probably the thing that's going to help you out the most is squint your eyes you know if you're looking at some like Chris like what
are you talking about losing edges like I see the edge of this and I see the edge of that it's like squin your eyes and really think of shapes not objects and I think that will help you out a lot if you have any questions as always please leave them in the comment section I love seeing them they help me make videos if you want to see the full version of this tutorial it is on my patreon page which is linked in the description below I'm Chris foro here telling you to go get painting