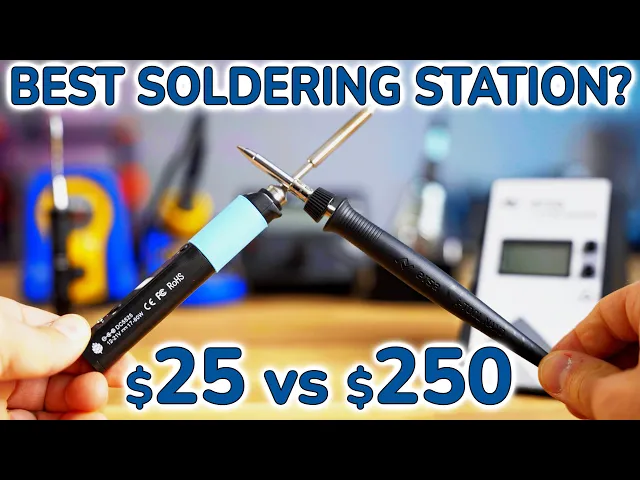
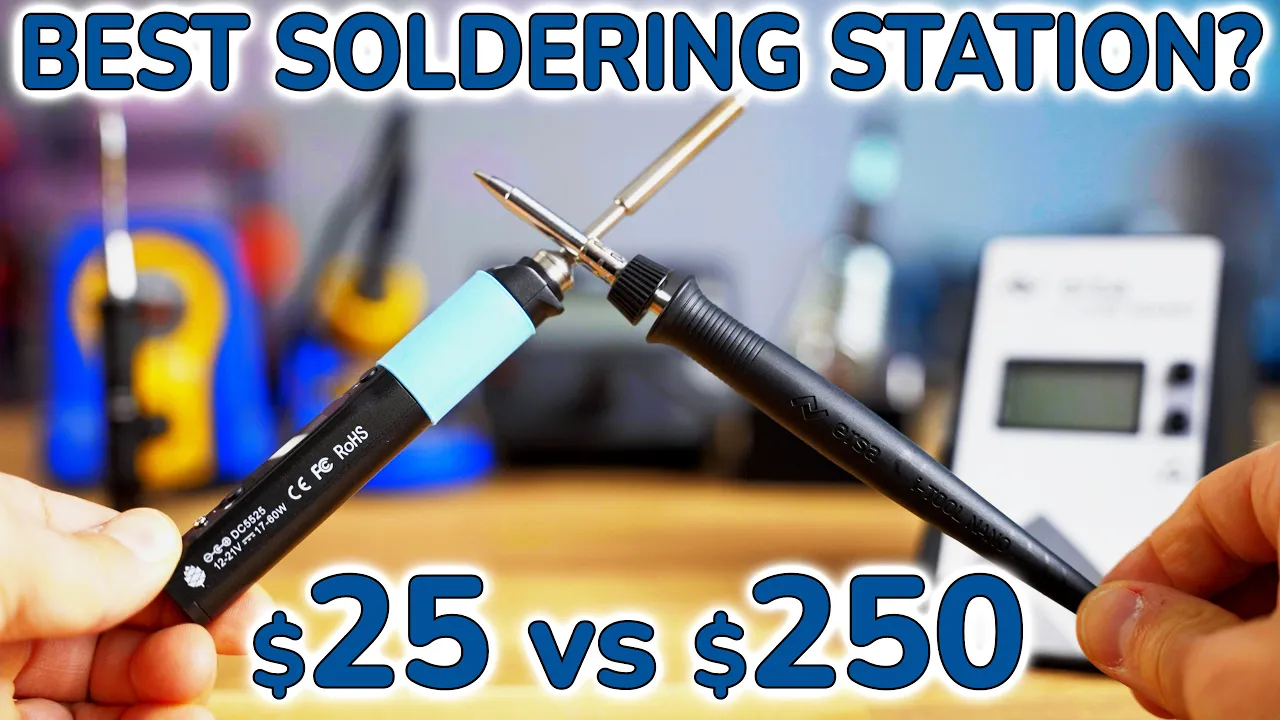
When you’re building or working on a 3D printer, most of the time you won’t need to solder anything. But once you start using your machine for projects, there will come a time in every maker’s life when you will need to solder a couple of things. So what are the differences between a $25 soldering iron and a nearly 200€ soldering station and is it ever worth spending that much more?
We’ll take a look at three different soldering stations, two USB-powered soldering irons, and the no-name station that I’ve been using for the last decade. We’ll test how fast they heat up, what jobs you can use them for and we’ll find out which one is the best. Right after a message from today’s sponsor, Openbuilds!
OpenBuilds makes it easy to design and build stuff that moves, from 3D printers over laser cutters to CNC routers. Of course they’ve got all the parts for building a motion system with high-quality, genuine V-slot profiles and the V-wheels, but they’ve also got their own all-in-one CNC controller with the Black Box, running GRBL firmware, and a matching CNC interface with Bluetooth, Wifi and USB-C. Thumbs up for using a proper USB connector!
And if you want to get milling or routing right away, you can grab their RoütER11, which has a wide, actively regulated RPM range and already comes with a standard ER11 collet system. Right now, you can get 10% off on the entire store using code Tom10 - so check them out at Openbuildspartstore. com OpenBuilds makes it easy to design and build stuff that moves, from 3D printers over laser cutters to CNC routers.
With their open-source robotics hardware, the OpenBuilds V-slot and V-wheels have become the de-facto standard for affordable 3D printers, and if you get genuine parts from the OpenBuilds part store, you’re going to get them in really good quality, too. They carry everything you need from router bits over complete linear axis or whole machine kits to all the individual components if you want to spec the hardware yourself. Check out the OpenBuilds Part Store and get started on your next project today!
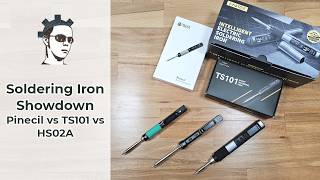
The soldering irons and stations I’ll be comparing today come in at a wide range of prices, but they’re the ones that you all suggested on Twitter when I asked which ones I should test. So starting at the cheapest end, we have the Pinecil, coming in at only $25, but after shipping, imports and fees I paid closer to 40€ until I could hold it in my hands. In the box you get the main soldering iron handle and a single standard tip.
The Pinecil “Reaches operating temperature in 12 seconds. Support for on-demand rapid boost feature. ” We’re going to test that.
The Pinecil is made in China. Next up, we have the Miniware TS80P. In the box you get the body and a standard tip, as well as a USB-C cable, power supply, and grounding wire kit.
The Miniware sells for about 120€. The Miniware is made in China. Next, the Hakko FX-888D.
This is a very popular soldering station combo among makers and it comes in at 125€. In the box, you get the iron itself, an iron holder, a sponge and curly brass wiper as well as the main station. The Hakko is made in Malaysia.
Next, we have the Weller WE 1010, which is also a set of an iron and a base station, and this one is the education kit. So you also get a spool of solder, flush cutters and an extra tip in addition to the usual set of the iron, an iron holder and the base station. Just the basic set costs 145€.
The Weller is designed and engineered in Germany and made in Mexico. And topping off the range for this test, we have the Ersa i-Con Nano. You also get the iron itself, which is already connected to the base station, as well as an iron holder.
Usually the Ersa sells for around 195€, but currently the best offer is 210€. The Ersa is made in Germany. So before we take a closer look at each of these setups, I should do the disclosure: The Miniware, Weller and Ersa were provided to me free of charge by Sainsmart, Weller and Ersa respectively, with the option to keep for myself or give away to a Makerspace after testing.
As always, no money changed hands and none of the companies get any influence in this video whatsoever. I bought the Pinecil, Hakko and my old soldering station with my own money. So you may notice that these aren’t exactly all comparable.
They differ in price, concept and power, but I also want to find out where the limits of each solution lie. The Pinecil comes very bare-bone and you will need to provide your own USB-C cable and charger or an up to 21V power supply, and depending on which power supply you get, the iron will have between 17 and 60W of usable output power. There is a limited compatibility list on the website, but it ran at 17W with the power supply I use for my camera, about 30W with this powerbank and the full 60W using my Huawei laptop charger.
Pine also sell a compatible power supply for $25 plus shipping, fees, and imports. The Miniware comes with a power supply that allows it to have its full 30W of power, the Hakko has 65W, the Weller is 70W, and the Ersa is 80 or 68 (so close) watts depending where exactly you end up looking. My old station is 80W, supposedly, but I don’t quite believe that.
There is also the difference that the Pinecil and the Miniware use what’s called “active tips”, which are assemblies where the tip itself, as well as the heater and temperature sensor are a single part, while the Hakko, Weller and Ersa use separate heaters that you slide the tip over. Supposedly an “active tip” corrects faster for external disturbances like a PCB or component lead wicking away heat. Also, companies like Hakko, Weller and Ersa have a huge range of different stations with different features.
These are already from the lower end of their range, and you can get even more basic setups from them, as well as super-high-end kits that would be used in an assembly line. So with those differences and the price gap in mind, let’s have a closer look at these soldering solutions. the Pinecils body is made from all plastic and it has this rubber sleeve at the front which does slide around it is slightly taller than it is wide but for gripping that is fine for my hands there are two locking screws in the front where you can secure the tip otherwise it is very easy to slide out by hand there is also another screw in the back which allows you to connect a grounding lead and that has a low impedance connection up to the tip the main user interface is through this tiny oled screen on the body itself you get two buttons to navigate the entire mini structure as well as to set temperature as you're using the iron itself the operating system that is running on the 32-bit processor inside the soldering iron is Ralim’s iron os but there are several open source alternatives available the included tip is the standard pencil style but you can get sets of four tips with four different styles for another 25 the same as the iron itself which means after imports taxes fees and all that it's going to be about 40 euros for a set of four tips the ts80p has an all aluminum body it has this ejector sleeve at the front that i guess helps you to get hot iron tips out quickly the tips use a headphone jack which just slots into the body there is no locking screws or anything but this is quite secure as is just like on the Pinecil the back has a small m2 screw where you can connect the included spiral cable to ground the entire iron the body as well as the power input has a low impedance connection to the tip the ts80p has the same tiny oled screen as the Pinecil but this one runs a proprietary firmware which is a lot simpler to use but not quite as pretty however you can flash the same iron os to this iron that is running on the pine sole the ts 80 piece tip looks quite fragile with this very thin tube section in the back here these tips are available with couple different tip options however you always have to buy this entire thing just like with the Pinecil and these tips are fairly expensive one of these tips costs about 22 plus shipping handling imports and fees on aliexpress or 30 to 40 euros if i buy it directly from amazon the components on the hakko are a mix of materials the solar iron holder is all metal this is all cast metal as well as the solder insert it has a little rubber thing in here which i honestly don't know what it does because it doesn't touch anything the solder iron itself is a plastic handle with a nice molded looking rubber grip which is easy to slide off though and you can actually see my old cheap iron is basically a straight up clone off the original hakka one the tips are interchangeable as well the tips on the hakko are directly connected to the ground input on the plug so these are straight up grounded um the handle also i was able to measure a roughly 100 mega ohm resistance to ground as well so this is a ever so slightly conductive esd safe plastic the station's main body is all plastic it has a small led screen in the front the power cable is fixed but the iron can be removed with this non-locking connector in the front because the Hakko only has this three digit led screen in the front and two buttons using it and going through the deeper menus is a bit cryptic so you will need to consult the manual for some of the more advanced functions however adjusting the temperature is fairly easy you just go in here and you can adjust every digit by itself which i think is what you're going to be using most of the time so that's good at least the tips and the hakko are quite easy to replace but since this is an all metal construction you will need to use a tool to undo this nut as it does quite hot if the tip has been heated to temperature genuine replacement tips are about 6 0 60 and in case you're wondering about dollar prices just replace that with dollars they're about the same alternatively you can also grab cheap third-party tips but i don't know how good the quality of those are i've gotten lucky with a couple on my no name iron but i wouldn't use them if you already have a good soldering station like this and at six and a half euros for a genuine tip like it's a it's a real no-brainer getting the genuine ones overall the hakko feels quite basic especially with the small led screen but it is all very solid this is all metal the soldering iron itself feels very good and it is a fairly slim main station so it's not going to take up all that much space on your desk the iron on the vela is very confidently made too it's got a very slim base profile but then this nice comfortable squishy almost foam like grip at the front which is almost a bit too large for my small hands but that is just down to personal preference it does have a bit of an edge back here where the cable enters the tips are replaced with the same mechanism as on the Hakko but this one has a plastic nut so this one is always comfortable to touch even when the tip itself is all the way heated up and then this tip just drops out with a bit of effort just like on the other stations the tip on the Weller is grounded as well with a low resistance the base station says it is esd safe but i couldn't measure a resistance between or i couldn't measure conductivity between the handle and ground the iron holder on the velar is quite basic it's got this spring mechanism here which you know gets your eye on to bounce around there are a couple spots for replacement tips on the side and it does come with a sponge that you do need to wet before use but no space for any of the brass curly wiper stuff that for example the Hakko and the Ersa come with the bass station itself is very minimalistic it has a rather large screen which unfortunately is not backlit so it can be a bit hard to read under non-perfect conditions however it is super easy to use you can adjust the temperature with the buttons over here or you can go through the three mini settings with this button down here standby time temperature offset and celsius or fahrenheit and that's it a soldering station i don't think needs to do much more than this and this mini system is pretty much perfect for what it needs to do placement tips for the Weller are available in any shape and size you'd like and they're about six euros a bit over six euros each the Ersa is quite interesting because it is the fanciest one of the bunch it does have a very techy angular playful design almost that unfortunately i think it's going to look very dated very soon it's got a very like 2010 aesthetic to it already but technically it is actually quite nice so starting with the handle itself look at how small this thing is so with my hands this fits pretty much perfectly and coincidentally it is a very similar shape to the ts80p i you know there might be some inspiration there it's also got a very short stick out at the tip comparing that to the Weller you're working much closer to where you're actually gripping the tool so you have very precise control over where you're positioning the tip with your hand this is all plastic there is no rubber cushioning at the front which honestly is fine and the same as on the vela there is the plastic nut that allows you to remove the tip very easily the Ersa’s iron holder is quite interesting too because the entire thing is made of rubber there is this ceramic insert so as you're sliding the iron in and you might be touching the tip to it you're not going to burn it this sleeve on the Weller is plastic and on the Hakko it's metal there is some of this brass shaving wool included but no watery sponge and i prefer it this way and then on the back here this is where you can store your tips so either you can slide them over over these brass rods or i guess you can also stick them like this the base station again has a display that is not illuminated so you have to look at it at the right angle setting temperature is very easy to do you just press up or down and then for some of the more advanced settings you have to hold both buttons and you get to calibration or to standby delay if you need any more advanced settings you have a micro sd slot on the side where you can i guess store a configuration file too and just change everything you'd like the tips are available in various shapes and sizes for about eight and a half to ten euros each but since the tip is actually getting snapped into this nut right here which you have to press it out of every time you want to switch the tip and that is quite hard to do and i guess a burn risk if it's hot i would recommend getting a couple of these nuts and like spacers as an extra you can get them for about five and a half Euros each and then you can just leave them on your preferred tips and just swap them as a unit Next up, let’s do some actual tests with these stations.
We’ll test how fast each iron heats by first seeing what it's reading from its tip and then checking if the reported temperature is accurate by testing how fast it can actually start to melt solder after powering up. Then, we’ll see which wire gauge each of the irons can tin. We’ll also test how much energy each iron can introduce into a solder joint by measuring how far it can heat up a large copper plane in 30 seconds.
Lastly, we’ll test how fast we can swap a hot iron tip in the middle of a soldering job. I’ve been using lead-free solder for over a decade and I’ve never looked back to the old days of using leaded solder. Lead-free solder is a bit less forgiving on bad equipment and bad technique, so not only will it actually force you to learn good technique, but in these tests, it’ll nicely show the differences between each setup.
Always use proper ventilation, and that is not just blowing the solder fumes aways, but actually either filtering them or venting them outside. I’m doing both for these tests. Let’s start with the heatup times.
I’m measuring the time between powering up the iron and it reaching 350°C according to its sensor. The Pinecil saves the last set temperature and only requires the cable to be plugged in and one button press to start heating. It reaches temperature after just 12 seconds.
The Miniware does not remember the last temperature and it needs to be set manually each time. It takes 21 seconds to reach temperature. The Hakko only requires the power switch to be flipped, but it is the slowest yet at just over 35 seconds.
The Weller only requires the power switch to be flipped, but is even slower at over 46 seconds. The Ersa goes through a lengthy startup process, but still reaches temperature in only a bit over 14 seconds total and is only beaten by the Pinecil. My old soldering station reaches temperature after only 13 seconds and moves into second place.
But can we trust these numbers and does the temperature on the display actually match the temperature of the tip? I’ve pre-tinned all the tips with my favorite solder wire to make sure they can quickly wet and melt and fresh solder we get in contact with the tip. The Pinecil starts off with only an impressive 15 seconds until it can melt solder.
The Miniware requires the extra step of setting the temperature, but is still ready for use after just 22 seconds. The Hakko has a much larger and heavier tip, and it takes 30 seconds until it can melt solder. The Weller is not far behind and takes 33 seconds until it can melt solder.
The Ersa is very quick to heat up and only takes 11 seconds until it melts solder. Very impressive! And my old soldering station reports that it’s up to temperature after just 13 seconds, but it takes a full 54 seconds until it can actually melt solder.
So the Pinecil and my old station actually report to be at temperature even before they can melt solder. All the other stations are ready to use right around the time they display reaching 350°C. The Ersa is the quickest one at just 11 seconds, the Pinecil at 15, Miniware at 22, Hakko at 30 and the Weller at 33.
Next, let’s see which stranded wire gauge these irons can tin. I’ve prepared equal 10cm long bits of 2. 5, 4, and 6mm² wire, stripped 12mm off the ends and twisted the strands.
We’ll see which of these gauges each iron can tin, and we’ll cut off the test at 60 seconds. For this test, I’m using the solder supplied by Weller, as I’m running short on the solder I usually use, made by Felder. The Pinecil has no problem tinning the 2.
5mm² wire. The Pinecil also has no problem tinning the 4mm² cable. The Pinecil struggles with the 6mm² wire and only manages to tin one corner.
The Miniware breezes right through the 2. 5 and 4mm² wire, but only tins one side of the 6mm² wire. The Hakko easily tins the 2.
5 and 4mm² wires and finishes tinning the 6mm² wire right at 60 seconds. The Weller tins the 2. 5 and 4mm wires with ease and finishes tinning the 6mm² wire in under 45 seconds.
The Ersa has no problems at all with the 2. 5, 4 and 6mm² wires and finishes each one in under 30 seconds. My old soldering station is already struggling with the 2,5mm² wire.
All these tests were done with the irons set to 350°C and usually I set my old station to the maximum 450°C to get any work done. However, the higher peak temperature increases tip wear and the amount of fumes kicked up into the air from the flux, so this isn’t really that should be recommended. Overall, none of the soldering setups had any problems with the 2.
5 or 4mm² wires, but only the soldering stations managed to tin the 6mm² wire as well. The Ersa did so very quickly and probably has quite a bit of headroom left. Next, I tested how much heat each iron can introduce into a difficult solder joint.
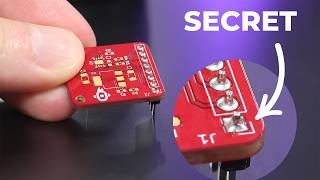
This PCB uses thicker 2oz copper and has a large ground plane at the back, both of which will try to wick away heat from the solder joint. I’ll heat up one of the solder pads and measure how much the copper fill rises in temperature with my thermal camera. For the soldering stations, I’ll also test this with a larger tip that should be able to store more heat and also more easily transfer the heat into the PCB.
I’ll stop each test right at 30 seconds. The Pinecil starts off with a very solid performance and manages to heat up the copper fill to 90°C in 30 seconds. The Miniware has a much smaller tip and only half the power, but it still manages to heat up the copper to about 80°C.
The Hakko ties for first place with the Pinecil and manages to heat to 90°C with the pencil tip and about 100°C with the larger half-round or bevel tip. The Weller pulls into the lead by heating to 92°C with the standard tip and about 102°C with the half-round tip. The Ersa delivers very impressive performance by heating to 96°C with the standard pencil tip and 106°C with a larger chisel tip.
My old station barely manages to heat the copper past 40°C with both the standard pic and a larger half-round tip. Overall, all the new solder setups I’m testing today delivered good performance. The Miniware drops off a bit due to its lower wattage, while the Ersa definitely delivers the highest amount of heat into a solder joint.
For the last test, let’s see how quickly I can swap a tip without letting it cool off completely first. This is most likely not how you’re supposed to swap tips, but I can guarantee that almost nobody will be patiently waiting for their tip to have completely cooled off before they swap them. The Pinecil has two extra locking screws on the top and bottom, but then you can simply pull out the tip with pliers and insert a new one.
This takes a total of 17 seconds. The Miniware has no locking mechanism and even features an ejector collet. However, the Miniware firmware crashes after inserting the new tip and restarts, requiring you to set the temperature again.
Even with the firmware reboot, a tip swap only takes 20 seconds. The Hakko has a metal sleeve and nut that get hot during use. You need to use pliers or gloves to unscrew it when the iron is still hot.
The tip then simply slides off and you can install a new one and tighten the collar. The Hakko is the slowest yet, and it took me 33 seconds to complete. The Weller has a plastic nut with the collar that doesn’t get as hot during use, so you can use your bare fingers to unscrew it.
The tip can be pulled out and a new one inserted. The Weller pulls into second place at just 19 seconds. The Ersa also has a plastic nut that is very easy to remove.
However, it seems that the tip is actually jammed on the heater now. The tip already felt weird installing it before this test while it was still cold, and on closer inspection it seems like the coating on the tip might have flaked off and wedged itself into the very thin gap between the heater and the tip. When changing tips on the Ersa, you always have to push out the tip from this metal collar, so hot swaps are not the best idea in the first place, and usually people end up buying a couple extra nuts and collars to just leave permanently attached to their tips.
Here are a couple of things I noticed or learned during the tests. While there is some documentation on the IronOS firmware that runs on the Pinecil, the Pinecil itself has no manual. For the TS80P, Miniware include only a very incomplete manual, and a full manual is only available for the previous-generation TS80, but not thisTS80P.
I believe they are quite similar, though, but in either case you have to find that manual yourself, it is also not included in the box. The cryptic abbreviations in the menu are explained in there; for example, if you want the iron to start up with a temperature other than 300°C, you have to explicitly set that in the menu. Honestly, I wouldn’t have figured that out.
The Miniware and the Pinecil have an accelerometer and wake up from their sleep function simply by picking up the iron. The Hakko, Weller and Ersa require you to push a button on the station to wake up. The Miniware also sometimes crashes and reboots when you pick it up to wake it from standby.
Lastly, the Ersa has no rubber feet under the station, so it very easily slides around on a table. So which of these Irons would I recommend? They each have unique features that none of the others can provide, but overall, my favorites are the Pinecil and the Weller.
The Pinecil is very cheap, and even after adding a suitable power supply, is still by far the most affordable option in the bunch. It performs very well, and is almost, but not quite comparable to the much larger Hakko. I think in a lot of cases, the Pinecil will be a perfectly suitable option.
The Miniware TS80P is better made than the Pinecil, but its high base price, ridiculously expensive tips and the buggy firmware make the Pinecil a universally better choice than the TS80P. Also, what’s the point of having a 32-bit processor in a soldering iron when the software running on it isn’t any good? The Hakko FX-888D is alright, but its soldering performance is at the bottom of the bunch of the actual soldering stations and the tedious LED display menu isn’t doing it any favors, either.
The Weller WE1010 is actually the least flashy one of these stations, and I like it a lot for that. The hardware is well-made, robust and most importantly, it’s incredibly easy to use. The Ersa i-Con Nano is probably the hardest one to judge, and I like that it’s trying to be not just another soldering station.
It is definitely, by far, the best performing soldering setup on this table, but I can’t shake the feeling that it’s trying to do too many things at once, and in the process ends up forgetting what’s important to actually make a good product. So I hope you enjoyed this not-very-3D-printing-related video, I had a lot of fun making it, doing something different every now and then really helps to get those creative juices flowing. Obviously, shoutout to Project Farm for the inspiration for the video style, all these videos are viewer-supported, so maybe consider grabbing a YouTube membership, check out Patreon, or just like, subscribe, share, that’s always appreciated, too.
Thank you for watching, keep on making and I’ll see you in the next one.