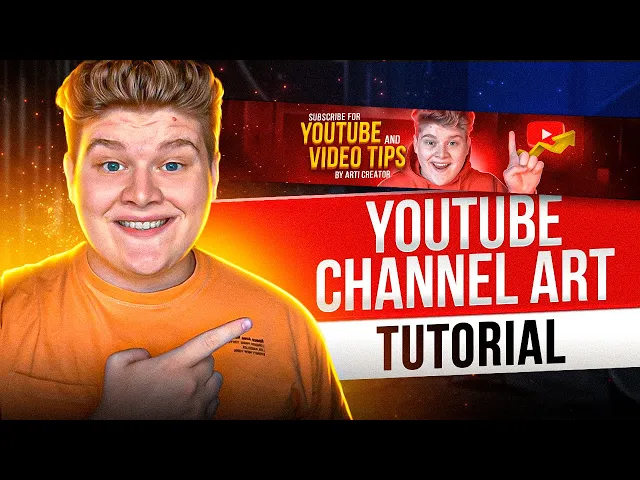
today i'm gonna take you through the process of making a youtube banner for your youtube channel we are gonna use photoshop to make the same style of banner you've seen right now i'll take you through that even a beginner would understand i'm also gonna show you how to make the same style of banner in the free software so you don't need to pay for photoshop if you don't already have it hey what's up and welcome back to my channel my name is other creator and i help content creators and entrepreneurs grow on youtube my last video about how to make this same style of thumbnails like these banners got more than 300 000 views that's why i got more than 10 000 subscribers now that's insane guys just thank you that's a sign for me that you guys like designs like this and i guess you like this banner style too and also i got my new sound behind me wow look at that i'm so excited to get back on youtube so let's go your youtube channel banner is like a face of your channel this is what people see when they first go to your channel and are deciding whether or not to subscribe our goal is to make a good looking banner that will generate for you a lot of new subscribers the first software i'm gonna use is photoshop but if you don't have photoshop you don't need to buy it in the next part of this lesson i'm gonna show you how to make the same banner in the free software called photo p basically is the same software as photoshop but free before we start i want to show you my new pack of five pre-made youtube banners in the same style [Music] basically these are files with pre-made youtube banners that you can customize for your channel by adding your own titles photos and logo and by changing fonts and colors to get your own unique youtube channel banner also in this pack i share websites where i get copyright free images photos and other design assets by the way this pack includes extended video tutorials on how to customize these binders in photoshop and also in the free software if you don't have photoshop you can use these templates too if you don't want to spend your time making this banner from scratch check out the link below to get five pre-made youtube banner templates in this super cool unique style and now let's go back to our lesson the first thing to do is open photoshop but what size should your banner be on the youtube website you can see the mention and to make it easier for you i made the free psd file for photoshop and photo p with dimensions that would best help you design and organize the space on your youtube channel banner the link in the description download it and let's get started once you download this template as i said the link for this template down below in the description we can start just open this psd file and this is what you're gonna see to make easier to understand these borders for tablet desktop and so on you need to go to the view and press on extras to see all these lines it's gonna help you manage your titles photos so it does not go over these borders so guys i just uploaded new photoshop 2022 so let's start first thing you need to do is to make a new layer it can be done right here just click on it now new layer is down next thing is to select the selection tool rectangular mark key two and just select this area like that once this area is selected you need to go and find this tool called paint bucket tool then you need to go to the color and choose some gray color and just press on this layer like that about this layer is gray now let's unselect deselect this area and now let's select the same area but on the downside okay select then go to the bucket tool and just press on it that's right and let's deselect this and also guys to make it easier just use control plus air or common plus air on mac to make visible these it's gonna help you again to manage designs and not go over these borders if you want to show or hide these lines you need to go again to the view and extras and just pressing it and press again if you want to show them okay this area in the middle kind of distract me so let's hide it by new layer just create a new layer place it under this layer and just go again to the backend tool let's make this layer black okay and just make it like that wow it's done and now let's use our photo let's choose my photo right here okay pow okay okay and resize this photo just click and hold and make it smaller like that and now to select me on this photo let's go to this thing right here quick selection tool make sure this layer with the photo is selected and then just go and press on select subject okay object is selected then just go and press on this icon add a layer mask wow your object is selected look at this magic by the way you can scale like that by holding alt or option on mac and using will on your mouse and let's scale our photo by pressing ctrl plus t on the nose and common plus t on that just make it bigger like that and let's place this layer under this layer so yeah yeah that looks good let's hide these borders for now extras and just press on yeah okay make it invisible next thing is to add some text and let's type some title okay youtube youtube okay you cannot see text right now because it's black to make it white or any color you want just double click on it and color overlay and make it for now white okay okay then you can copy and paste the same layer and type in another title video tips okay let's like these areas so it's not moving around and this area too okay it's gonna be easier for me to make designs when everything is locked and also make this youtube banner template locked too and now you can select objects like that or maybe this photo like that let's lock our photo for now too select these text also you can select text by holding ctrl or comment on mac and just selecting text layers or any layers you want like that let's select our text and scale it up to scale it up you need to press on ctrl t or command t on mac and just scale it with your mouse so how to change the phone select these layers if they're not selected and then go on t press on it then you need to go somewhere right here and find fun basically just type in fonts you like my case is this one by the way in my pack with five pre-med banners i give you all fonts you need so you can just download them from my website and start making your unique design and now let's make our text a little bit cooler before we do this let's make it a bit closer then select again two layers with the text and press on ctrl c or ctrl plus comment on mac hold ctrl or command on mac and just use your mouse to arrange the text and let's move around this one like that now let's copy this layer with youtube you can just copy and paste like you usually do like ctrl c plus ctrl b or command c plus comma b on mac make this new text a little bit smaller using ctrl plus t or column plus c on mac let's do this like that now let's change these text to subscribe for and just copy this layer ctrl c ctrl v and just place it somewhere around here by rd creator it's gonna be and all right all right alright and let's select all the text somewhere right here closer when these layers are selected let's make a group to make it easier to manage all the layers inside the project so press ctrl plus g on windows and common plus g on mac okay let's call this group text and now i want to take a look at these borders again view and extras okay and to make it in the middle let's unlock our photo and select this and just make it in the middle okay okay alright alright and now let's add a background image you can use google search to find some images but i'm gonna use freepik in that case these are also free images but copyright free usually i just searching for interior design in your case it could be whatever you want it's gonna be background image and it's not gonna be seen so much so you can choose whatever picture you like i already have one i have my picture right here let's edit and let's scale this image on the whole screen enter to place it and let's place it under our photo okay let's hide these borders view and extras now let's go to the filter right here then go to blur and gaussian blur the radius should be around three so okay now our background image is quite blurred next thing to do is go to this panel right here and choose levels okay let's add it and use these to set up exposure on your photo to make it quite darker and next thing to do is go to the same place and choose gradient map okay next thing is go right here gradient map and click on this thing let's make this one right here black and this one right here kind of blue like that okay okay and now let's design our text let's go right here open this text layer let's choose youtube in this window you need to go right here and add gradient overlay and now let's make gradient like from orange orange okay to yellow yellow yellow yellow alright alright alright okay you can move this and see oh we have color overlay okay to see results with gradient overlay you need to turn off this color overlay okay now we see now let's go back to gradient overlay and let's make this marker a little bit right here okay let's make the color kind of red okay depth on 1000 and size on 10 and the angle right here is 11. right here you need to choose normal most important thing to make gloss contour like that let's make screen on zero and make this shadow mode on thirteen again depth one thousand percent size ten soften zero angle ninety right here is eleven lost control like that highlight mode screen opacity 0 and shadow mode opacity on 13 next thing you need to add is inner shadow it can be right here in my case i already have it inner shadow let's make this white color blend mode on overlay right here angle on 135. let's make distance on zero choke on 100 and the size on two pixels oh by the way make it 100 opacity you see oh let's make it bigger to see okay all right let's make it two okay it looks cool now let's add drop shadow if you don't have it it can be right here let's add drop shadow let's change our distance to 6 and our angle to 90.
okay all right and change the color to this one like that okay all right let's change blend mode on normal and opacity on one hundred percent let's make the size zero and distance a little bit smaller like four and of course let's change the contour type on this one right here okay wow look at that and just press ok and let's add the same effect to video tips too what you need to do is just go to this effect and press on alt or option on mac and just press and hold and just move these effects to video tips like that you have it and right now guys let's start to make our glow effect so if your photo is not perfectly selected by this quick selection tool you can always change it you can see right here is not perfect white background right my finger it's not okay you can always make a quick selection quite better i'm gonna leave a link down below in the description for a quick tutorial that will help you make selection process a little bit easier and quite better in my case it's almost perfectly selected let's just delete these few pixels by just going selecting this layer and going to the eraser tool by the way you need to press on this layer not this this one to delete pixels you don't need to have on your photo make it like that i'm not going to be clearing these all and finding any white pixels from the background for now it's okay for me now another tip let's go to this layer and double click on the mask like that okay alright so in your case you can place with these settings like smooth it can make your image smoother you can also use radius in my case it's don't need it you can see it so let's make radius on zero and just press okay by the way contrast is gonna make it more you see so in my case i'm just gonna press okay and let's choose this layer and now let's choose filter camera row filter okay this camera roll filter is made to make your photo quite better okay let's make contrast a little bit like that exposure a bit like that highlights okay all right and the thing i like the most it's detail window okay let's add sharpening noise reduction a bit now let's go to the color mixer let's add saturation let's add a bit oranges situation to orange color basically if you do banner in this style your photo should pop it should be really colorful your banner should be super duper colorful and bright so that's what we do here anyway let's press ok basically all the settings based on your photo but i like to add saturation i like to add contrast sharpness and things of that nature to make photo bright and super cool now let's make a background light uh let's create a new layer like that make it black with the back tool like that let's change the overlay to the screen now let's create another layer like that right mouse button click and choose create clipping mask next thing to do is go right here and create a gradient map one more time let's go and create a clipping mask go to this color okay let's make a gradient just click somewhere right here and right here let's make this quite blue like that make it a bit darker and this one a bit lighter like that basically this could be any color you want but right here it should be dark right here it should be a bit lighter super light and white okay and now you need to press on this layer between these two choose the brush tool right here make it white like that fall on 100 opacity on 100 and hardness should be zero percent and just paint some background light control plus z or common plus z to undo things undo actions like you made it like that okay it's not right ctrl z add some background also you can use eraser tool to erase light or make it a bit softer let's add smoothing on like 30 and just erase some things and now over the layer with your photo let's add a new layer let's make this layer with the bracket tool let's make it black all right all right all right let's change overlay settings to screen let's create another layer and create a clipping mask and now using option or alt on mac just drag and drop gradient map above this layer like that and right mouse button click and create clipping mask and now guys the moment you've been waiting for let's start making this glow effect around my photo okay for the start you need to click on this brush tool then go to this one and make hardness on 100 size on 5 pixels opacity 100 flow 100 smoothing could be like 16 okay let's make our extras invisible and now you need to choose this layer not this layer but this one layer right here choose the white color and start making lines like that around your photo if you made something wrong like like this you need to just press on ctrl z or comma z on mac to undo action and now you need to go right here and choose this tool smudge2 okay let's make hardness on zero size can be like 15 pixels basically what smudge tool do is making this effect kind of more natural like it's real light this can take you some time to perfect this but once you learn it it's going to be easier and easier every time you do this now you can continue using brush and smudge tool to make this glow epic also you can play with the settings for the brush tool for some places with the hair you can make it like three pixels so basically five pixels good for everything and three pixels good for hair also eraser tool will help you to erase something like maybe you don't like this use the razor tool then go again to smudge two and make it different [Music] our glow effect is down but there's one more way to make it looks even better all you need to do is to make another layer like that just add it then you need to hold alt or option on mac and just drag and drop your mask to this layer right here now this layer now have the same mask as a photo let's make a brush tool a bit bigger like that and hardness on like 19. now you can add glow effect like that also you can paint it in the same place where you done already like here not like that okay all right now let's add some details i have an arrow right here let's edit all right all right all right let's place this arrow somewhere around here now let's add a youtube icon oh it's so big okay let's make it small maybe rotate it a bit also guys if you ever need some icon you can just google it like a youtube icon you need to go to the images then you need to go to the tools and choose color and transparent almost all of these photos gonna be in png format which means you don't need to remove the background of the photo it's going to be invisible like here you can see the next place for icons is going to be flatikon.