In my last video, I showed you how to use Cloud Code to create any NADN workflow you want. And today, I'm going to show you how to take that same workflow and turn it into a SAS product using Cloud Code. I'm talking front end, backend, authentication, databases, payments, all while talking about security and infrastructure. But the most important part of this video isn't that automation, and it's not even the Final SAS product. What's important is the framework I'm giving you so you can go from idea to deployed app consistently and reliably using cloud code. So
instead of just throwing a giant prompt at claude and praying we get a good output, I'm going to show you a structured process that gives you control and I'm going to show you a brand new tool that I've been using recently that completely changes how I use cloud code. So this is going to be a Dense lesson. We cover a ton of fundamentals about app building along the way. So, let's just get started. So, here's how I'm going to run this video today. First, I'm going to give you an overview explaining where we're starting from,
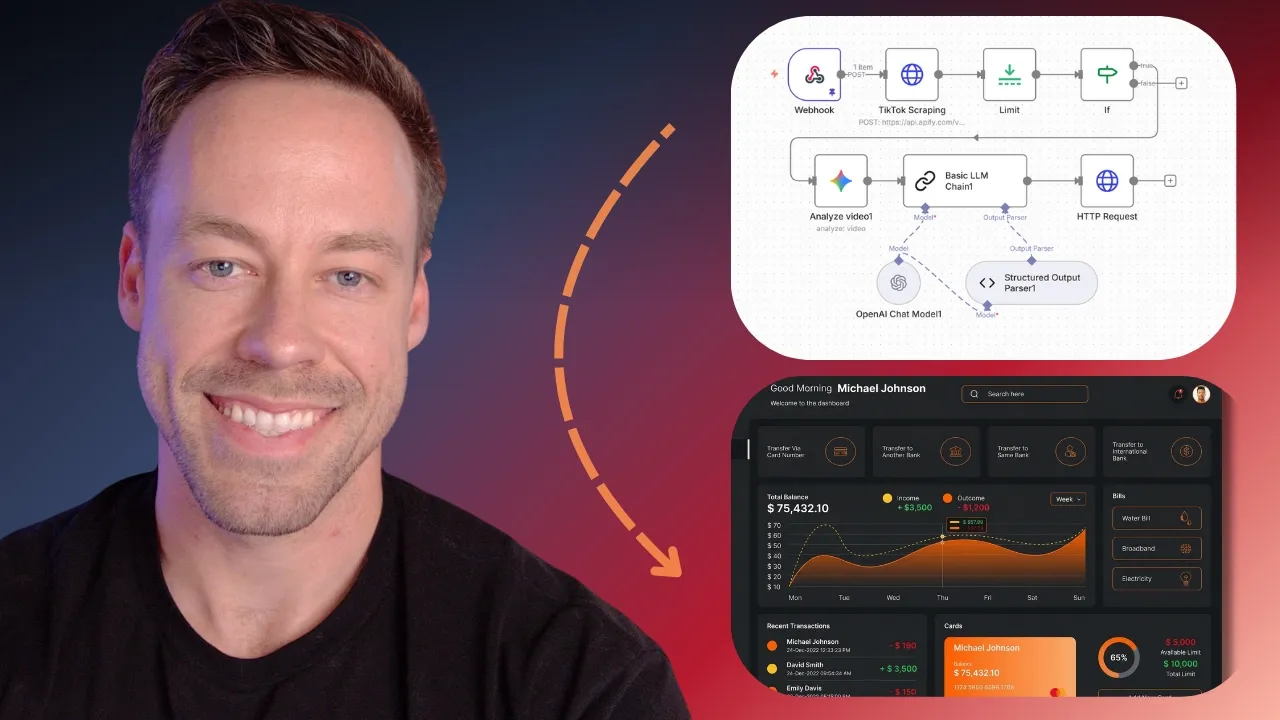
where we're headed, and what sort of the stepping stones are going to be along that journey. Secondly, I'm going to go through the assumptions, what I assume you already know-wise, as well as resources to go to if you aren't as spun Up already, as you should be. Third, we're actually going to dive through everything step by step from planning to deployment, so you can follow along and execute the exact same things I am. So overview, what are we actually doing? Well, this video is somewhat of a continuation of my previous video where we created an
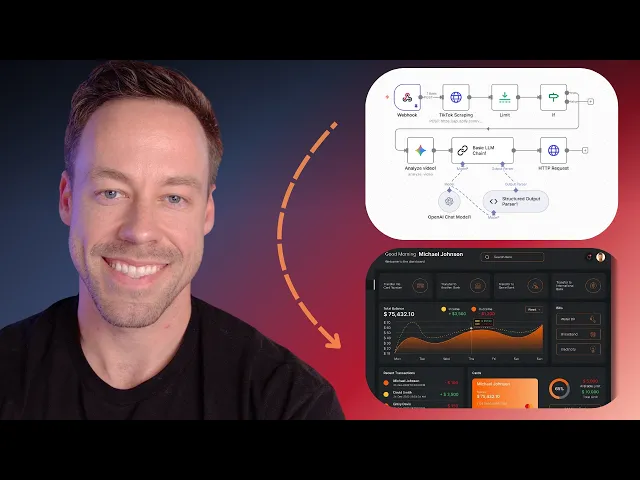
NAND workflow using claude code in the NAN MCP. The workflow we created is essentially the same one you see here and it's a food logging Automation. So you can either tell this application through text or through voice what you have eaten. It's then going to send that to AI. It's going to create an estimate of what you ate, what the macro breakdown was, and then send that information back. Right? So, it's a food logging application and we're going to take this NADN workflow and we're going to turn it into a SAS product. And the end
result is going to look like this. We're going to turn it into a Full-blown SAS web app. Landing page, analytics, logging, payments, databases, authentication, the full works. Along the way, I'm going to introduce you to the GSD, the get done framework, which has frankly completely changed how I use Cloud Code over the last few days. So, that's the journey we're going on. Now, what are the assumptions? Well, assumption one is that you have this NAND workflow if you want to follow along. If you do not have this workflow, I'm going to link down below in
the comments. Head to the free school, just once you're inside there, search the name for whatever this video is called and you'll find this workflow there so you can download it and follow along. Second assumption is that you have some idea of what the heck is going on in Claude Code. If you've never used Cloud Code before, check the link above and in the description. It's my beginner guide to cloud code. It'll get you spun up. So, now that you have a vague understanding of what you're going to be learning today, let's start at the
beginning, which is the planning phase. Because while we have our workflow and while we have an idea of kind of what we want, we want to get way more specific. And to do that, we're actually going to step outside of Claude Code and we are going to head to Claude itself, the actual chatbot. And this is where we're going to create our product requirements Document, our PRD. A PRD is just a document that explains what the heck we're trying to build and then all the technical specifications around it. Now, we're doing this outside of Claude
code to have like a clear delineation between our planning and our execution phase. But the idea is that we are going to talk to Claude and I'm going to give you a special prompt to use with Claude to help create this in order to generate this PRD. And we will then take this PRD, this document into Claude code which explains what we're trying to build. So, we can actually create the app and we're not starting from zero and we're not just hoping Claude fills in the gaps. Now, I've been scrolling along this whole time. There's
a lot going on here. Why is that? Well, because there's a lot that goes into an app, right? As I kind of alluded to at the beginning, we need to talk about frontends. We need to talk about backends. We need to talk About authentication. We need to talk about security. We need to talk about databases. We need to talk about payments. And the scary thing about all this is that you person who probably isn't technical. you didn't grow up as a software developer, has no idea a what any of those things mean or b what
the answers to any of those questions should be. And this is where this planning prompt comes in. Again, I'm giving this to you. It's going to be inside the free School. And the idea is you take this prompt, you make a custom GBT from it, or you just dump it into Gemini or Claude. And then you have a conversation with AI about what you're trying trying to create. Because this prompt is telling AI, hey, here's sort of some default text stack ideas. here's some default answers, but really it's meant to walk you through the process.
So, even if you have no idea what any of this stuff is, it's going to explain it To you and it's going to actually let you make some decisions if you have some decisions in mind. This is super important and I can't stress this enough because if you actually want to get good at building things, it's not enough. It really isn't enough to just go into Cloud Code and just say, "Hey, it's a black box. It does what it does. I don't care. I'm not a coder." That's fine. You aren't a coder and you probably
never will be. But you still need to view Yourself as a software engineer, as an app architect. You need to understand the fundamentals. You really do. You need to understand what makes an app an app. What is a front end? What is a back end? Right? How do these interact? And this prompt is just the first step in sort of understanding that you're going to get it over time. But you really need to be curious about these things. And so, you're going to take that prompt, you're going to head to Claude, and you Are just
going to give it a stream of consciousness about what it is you're trying to build. What I highlighted here is exactly that. I literally just opened up a microphone and just blabbed away for like five minutes explaining what I wanted. You can go as deep as you want with this. You can give it screenshots of the type of UI design you want. You can ask it questions, right? And it's going to come back with questions, right? Because this is a back and forth. And after that back and forth, it's eventually going to give you this,
right? The the output, the build prompt. And that build prompt is what we see right here. And we're then going to take that into Claude Code. And that's how we're going to start the build process. So, we got our product requirements document. We had our back and forth with Claude. We have a pretty good understanding of what it is we're trying to build and what the technical Specifications should look like. Now, it's time to actually build this bad boy. Now, usually what we would do, we just head to Claude Code. We would just put it
on plan mode. We give it our document. We just let it go to work. Instead, in this video, I'm going to introduce you to the GSD repo, the get done, because this actually is a brilliant way for building applications with cloud code from scratch. So, what the heck am I even talking about? I keep Talking about this, the get done repo. So, I'm going put a link to it down below in the description, but what this is is it is essentially a context engineering/orchestration layer that lives on top of cloud code. And big picture what
this does is it is like planning mode on steroids and it also allows us to deal with the context rot problem inside of cloud code. So uh Chase what the heck is context rot and why should I care about that? Well Context rot is the idea that as we use up more and more of a large language models context window in clause case 200,000 tokens the efficiency the efficacy of those tokens over time goes down. What does that mean? It means the longer you use the large language model within the same context window, the worse
it gets. Now, this is a problem that Claude and Anthropic already understand and they attempt to combat it using autoco compacting. The idea is as You use up more and more of the context window when you have about 40 tokens less, it's actually going to start a new conversation with essentially a new summary of what you've already done and pass it onto the next window. So, you can kind of start where you left off but with more tokens. And while this works, we can do better, which is where GSD comes in. So, how the heck
does GSD work? Well, first we start an idea. So, we spit up a new project and we explain What we're trying to build. Luckily for us, we just did all that and we have a pretty robust plan that we can start with right away. From there, it then creates a road map and comes up with phases. So, it takes our idea, breaks it out into distinct phases, and within each phase, it breaks that down into a number of distinct tasks. Now, this is great for planning, but this is really where we deal with a context
rot problem because for each task, it opens up a new Sub agent and each sub aent has a fresh 200,000 context window. That way, we aren't dealing with context rod at all as we attack each task. If you compare that normally with cloud code, it instead is using its full window to attack essentially everything at once. And again, while it does attempt to combat that rot with autocompacting, this gets around that entirely. although it does come at a cost and we'll talk about that later. It then goes through And knocks out each task step by
step. It commits after every single task completion. It makes sure it has built-in testing. So each phase use the human goes in and confirms things are working. And overall it gives us a sustainable repeatable way to create SAS products from an idea to a deployed app. And this is the framework we're going to use inside of Cloud Code today. A lot of it will make more sense as we go through it step by step, but again I think it's Just really cool. This was at under 500 stars yesterday. It's almost at 700. A really clever
um elegant framework. And so to install this, all you're going to do is you're going to copy this, right? MPX get done. And then you're just going to open up your terminal and you're going to paste that in there and it will install it. Once you do that, you can spin up another terminal and just open up cloud. So to start, I'm going to make sure my NAN MCP server is Connected. And after I do that, I'm just going to do forward slashgsd new project. It's then going to ask you what do you want to
build. I just wrote below as a write up of what I want to build. The NAND workflow in question is already in the codebase. You can see it over here on the left, right? We only have two files in here. And then I just pasted in that PRD that we created inside of Claude. And then I'm just going to let it go to work. Now, it's Going to ask you a number of questions during this phase, like if you could only nail one thing perfectly, what it would be. Just answer truthfully. It's trying to figure
out what your priorities really are. It's also going to ask you how do you want to work interactively or yellow. Understand if you go yellow, it's still going to ask for your approval when you go through certain phases and certain steps. So don't think it's just going to go nuts And you're going to have no interaction whatsoever. So for this we're just going to go yolo. For depth we'll do standard. So once it finishes this step, you'll see it says project initialize and then it created a project.md file. Now you can find the project MD
file over here on the lefth hand side under the planning section. And if we click on it and you'll see this right here. This is what is our sort of source of truth for what it is we're actually building. This Is similar to the PRD but it's been edited to be sort of like cloud code specific. But again goes through everything including like hey here are the key decisions we need to make here's some of the constraints it talks about schemas context out of scope all this stuff but this is what cloud code's going to
be looking at whenever it asks hey what exactly are we building again right this is similar to a cloud MD file and the next thing you'll see it says Hey here's what's next up we need to create the road map and it's also going to tell you hey first do slash clear to create a fresh context window so again this kind of goes into that context rot thing every single time we do a new step what we're going to do is it's going to give us the new command. So in this case, create road map.
So I'm going to copy it and then we're going to clear the context window. That way we have the full context window scope to actually Attack this next problem. So I do clear, I paste in the new command, GSD create road map, and it's going to get to work. And that cadence of execute a step, get the new command, clear the context window, start the new step. That's kind of how it's going to go for the rest of this video, right? execute, clear, execute. Every single point on the road map when we need to do
something else, we want every token at our disposal. Now, the road map, and that's what we're Looking at here, is a breakdown of how we're actually going to execute this build. So, in our case, it's broken it down into seven phases. You can see right, we have the foundation, the database, the meal logging, everything down to the polish. And then we'll break down each phase with key deliverables it needs to execute on. And then it even looks at like, hey, do we need to do research? Do we need to like use our web search tools
to like actually find out Information about these things? But again, this is a document that Claude can always take a look at and see, hey, what do I need to build and what has already been built? And speaking of that, we have the state document. And this is even more specific as to like where we are progress-wise. And this also gives you some like velocity indicators, aka how long is all this taking? But taken together the project, the road map and the state, this is all About context. So no matter where you are in the
project or whether you stop in the middle of it, you come back weeks later, Claude always knows where it is and where it's going. And you combine that with the fact that hey, we're using sub agents every step of the way for full context window. We have a very very like robust system for builds. So now we can move on to phase one, which is where cloud code is going to build the foundation, which is the next.js JS set Up the design system in the component library. So the command that we will be using first
is GSD plan phase 1. So I'm just going to copy this, paste it, and then again I'm going to clear the context window. Paste the command and it's going to go to work. So you're probably asking why are we planning phase 1? Didn't we do that in the road map? Well, it's going even more detailed because the road map gave us the phase 1 key deliverables. Now, it's going to Take those key deliverables and break them up into discrete tasks for Claude Code. Again, you're seeing this over and over with this GSD setup is that
we have the big picture and then we just get the scope tighter and tighter and tighter till eventually we're telling Claude code to do this one exact thing. And by doing that over time, that's how we're able to build these apps. So, after about a minute or two, it should be done creating the phase 1 plan. And you can See here inside the terminal, it tells us exactly what is going to be done. So phase 1 has two plans, 0101 and 0102 to be completed sequentially. And then underneath each plan are the discrete tasks. It's
going to go ahead and execute. And again, it gives us the exact plan we're going to execute. So we just copy this command. We clear the context, paste the command, and now it's going to go to work. Now, this is the perfect time if you're brand new to the Stuff to actually go over here to the left and take a look at the plans themselves. So I'm looking at the 0101 plan. Right here it explains in clear terminology what it's doing. So it's going to create a next.js15 project with tailwind CSS and Chadson UI configured
with macrovoice design tokens. Macrovoice is the name of our product. What's the purpose? We're establishing the product foundation and design system infrastructure all features depend on And then it's telling us what the output is. Right? Again I'm going to keep harping on it. You need to start understanding what the heck is going on. Do you need to know the syntax? Right? All right. Do I need to know like what all this means? Not really. But you do need to know this. You do need to understand the objective and what the purpose is of each step.
Okay. Now, it just finished the 01 01 plan. So, it just completed its first three set of Tasks. What are you going to see? Well, right away you'll get a message that says plan 0101 complete. It adds a summary file. So, if I come back up here to the left, you see where we had 001 plan. There's now a 001 summary. And that's what I pulled up right here. And what this is doing, it's telling you, hey, this is everything we completed. It gives you the commit because every single time we finish a task, it's
going to actually commit that update. Now, This isn't going to be a lesson about Git and how Git works, but again, if you're serious about building things with AI, you need to understand Git. By understanding it, I mean, go watch a 10-minute YouTube video on Git, right? Claude understands it, but you should understand what a Git commit is, what people say when they say, "Hey, just push that to GitHub. What's a pull request?" Those sort of things. But long story short, outside the scope here, Just know that when it says, "Hey, it committed this," it
essentially like added a save point to your project. And so the summary files says everything it did, adds some notes, confirms the verification of the tasks. It specifies, hey, if there were any deviations from the plan, and then it also writes out, you know, sort of the new files. Again, what is this giving Claude? It's giving it context if it ever loses its step. Then it tells us what's next up. All Right, next is going to be 0102. So, what are we going to do? We're going to copy the command and then we're going to
clear. We also have the ability to actually review what was done if we want to. But, so at this point, you get the cadence, right? I've just like bang this in your head 10 million times. Complete the task, get the command, clear the context window, get the task. Now, what's going to happen for the rest of the video is I'm going to run through a Lot of this offscreen so we're not just sitting here for 10 minutes waiting for me to go through all the tasks. But we are going to stop at a number of
points. Every single phase we will stop. Every single phase I'll explain what's happening. I'm just not going to do it for every single actual task for both of our sanities. However, caveat understand this is one of the quote unquote costs of the GSD system, the GSD framework. Normally, if we just did this vanilla Cloud code, we would have given it that prompt, ask a couple questions, and would have just gone off to the races. Right? So, this is at the beginning a lot slower because we're much more methodical about how we build. Now, there is
100% an argument that says this is actually faster longterm because we're going step by step. We're making sure things work. And as you will see, there's a lot of checkpoints where we actually test things versus just letting Claude create something and then we test it after the fact. The second cost, which is very much a true cost, is that this is also more token intensive, right? Because it's much more methodical and the sub aent usage. Now, it's not so crazy that if you're in like a 20x plan or the 5x max plan that you're just
going to like burn through everything, but just know that's a real cost. So, I'm going to move forward with the next task and I'll bring you in in a second. So, I moved on to the 0102 task and as this finished up, now we're nearing the end of phase one, the foundation phase. I reached this, which was a checkpoint. Now, this will automatically pop up inside your terminal. And what this means is that you're at the end of some phase, some point in the build process where you the person actually needs to go and see
if all this is working. Right? In this case, GSD cla code is telling us, hey, I automated all these Things and I want you to verify the following stuff, right? I want you to verify really like the UI layout and if this all makes sense to you. And it gives you step-by-step processes of how to do that. So, we're going to run a dev server and we're just going to check on local host. So this terminal right here has Cloud Code running. You know, you can always change the name of these terminals to keep yourself
in check, but oftentimes you're going to want three Terminals up when you're doing this. You want one for Cloud Code, you want one for your dev server, and then you're going to have a third one for Enro. And we'll get to Enro later when we do some more testing, but we want to do the dev server first. So it's telling us to do PNPMdev. So to verify this, I'm just going to copy that. I'm in a new terminal, right? I just click the plus button here. I'm not inside of Cloud Code when I do this,
but I just put in That uh command. And so what's happening right now is it's creating a dev server and it is here at localhost 3001. So I'm just going to go to this uh website. So this is the web page it brought us to. This is what Cloud Code has built so far. Now remember, it's only executed a handful of tasks. So the purpose here isn't to look at this and be like, "This is terrible. Why isn't it working?" The purpose of this is just look at this page in development, go back to cloud
Code, and then verify everything it's telling you to verify. Right? In this case, it's the layout, it's the sidebar items, it's the dashboard page. Right? This is also a place where even if it's verified, if you don't like it, you can totally tell it here and now, hey, change X, Y, and Z. For me personally, for this video, I like to wait till the end once the functionality is working to do a lot of UI changes. So, really, I'm just making sure that, hey, it did what It said, okay? Okay. And it's only done so
much. Now, of note, localhost 3001. What the heck does that mean? That just means that this isn't actually on the internet right now. This is actually hosted on our computer. Okay, that will kind of become a problem later because remember, we need to talk to things that are out on the internet like Stripe, you know, like Superbase, like Naden. How are we going to do that? That's where Angro will come in. Hang uh hang on to That one. But just know this is a thing. Now, of note, you will notice I'm on localhost 3001. Often
times, Claude Code will assume, as you see here, that you're on localhost 3000. That's the default one, but I'm running some other stuff, which is why it pushed to 3001. If you are not on localhost 3000 and you're on 3001, make sure you tell Cloud Code this, and that's what I'm going to do. But at this point, what are your tasks? When you get To a verification required checkpoint, just do what it says, right? Again, you can ask questions at any point in time. You can have it adjust things if you want. But the purpose
here is just some testing, right? So we don't move forward onto another phase when some sort of foundational piece just isn't where it should be. So I told it I'm on 3001, not 30,000. And then I told it it was approved. So after I told it it was approved, we have now completed phase One. And the foundation, all the sort of building blocks and layout things we need for our project is there. It's complete. Now we're going to move on to phase two which is databases and authentication. And this is where superbase is going to
come in. So we're going to do the plan phase. So it gave us this command. We'll clear the context window. And as it's doing this, I'm going to explain to you what the heck the databases and authentications even Gives us. Like what's the point of this? So authentications, databases. Remember what are we building here, right? We're building this, you know, this wannabe my fitness pal food logger thing. So obviously we need a database to store the data, right? databases. It's just where data lives. Now, authentication also plays into that piece because if I want this
to be a SAS product, if I want to make money with it, I need users. Users need login. Users have their own Specific data that only they should see. Other users shouldn't see their data. So, databases, authentications, and security all kind of go in handtoand, and that's something we're going to tackle in this particular phase. And my go-to spot for anything authentication or database related is going to be Superbase. Now, great thing about Superbase, they have a very generous free tier. So, everything you see here today can be done for zero whole dollars And it
will handle the databases and it will handle the authentication for us, which is just great. And so, what I need you to do is I need you to head to Superbase. I need you to create an account and then create a new project. So, you can call this new project whatever you want. I'll just call mine YouTube GSD. Give it some sort of password and then create the new project. Now, just have this page up and ready to go because Claude Code is going to give us a bunch of instructions for what we're going to
need to grab from Superbase. So, right on Q, Claude Code has come back with the phase 2 breakdown. It has plans for O21 and 0202. So, what's here for the first part? We're going to do our Superbase setup. We're going to have the schema and RLS. So, this is all about getting the databases ready to go. And then the second step, O2, is going to be all about the authentication, the Verification, and making sure that actually shows up on the website the way it should. At this point, I can also click on the plan to
get a more detailed view of what's going on, but I'm happy with it. So, what am I going to do? Copy command. Clear. Execute. Okay. So, I jumped ahead a little bit and we're now at another verification point. So, it's completed all of its tasks for the database and authentication setup. Now, we need to actually go into Superbase, Set up some connections, and then actually test it all out on our local host. and it breaks down exactly what we need to do in both the prerequisites and then sort of the testing authentication flow. So first
step we need to create a subbase project. We already did that. Next we need to get our project URL and our a nonkey and we need to copy it to AMv.local file. Now you'll notice here on the left it created av.local.example File and it didn't create the EMV.local file. So I'm actually just going to copy this this example one. paste it in there and then we can just rename it. So we now have a EMV.local file. What this file does is this is a place where we keep our secrets so our project can work but
they're not going to be exposed to anybody. So what we need to grab is we need to grab our public superbase URL and the anon key. So to do that we're going to hop inside of Superbase. So I'm Going to go to project settings on the left. I'm going to then go to API keys and then I'm going to go to legacy anon and service role API keys. the anon public key. You're going to copy this guy. Come back into cloud code and paste that where it says anon key. Next, we need our URL. So,
go back to Superbase. Go up to connect at the top header. Go to app frameworks. And then the public superbase URL is right here. Copy that. Paste it in there. Save it. And you're Done. Next, we need to run the SQL migrations in the Superbase SQL editor. This is just the code that creates our databases for us. So, if I just control-click on this, it will bring it up over here on the left. And you'll see I have initial schema and then RLS and trigger. So, I'm going to need to run both of these. So,
on initial schema, alls I'm doing is I'm just going to copy everything in this file. And then I'm going to go back to Superbase, go to the Left, go to SQL editor, paste that in there. I'm going to hit run. And then it should say success. No rows returned. And then I'm going to repeat that for the next one. RS. Copy. paste. Run. All set. And so we've done the first three prerequisites. We can actually set up Google OOTH if we want instead of just doing your standard like just put in your email and password.
That's Optional. I'm not going to waste my time on that now, but it's something I could do later. So now we're actually going to go in and test all of this. So you know, it gives you the command again if you uh forgot. I'm here inside of my dev server terminal. So you can reset this if you want. So if you do control C, that will actually shut down the dev server. And if you just do the command again, it will bring it back up. So if for Whatever reason like your dev server is being
funky, just always try shutting it down and spinning it back up. And so if I head to localhost 3001, here is our sign-in page. Now remember how I said we aren't connected to the internet, so we might run into issues here. Well, this will still work with Superbase with a caveat. If you're on localhost 3000, it will work automatically, but if you're on 3001 or some other number like me, you have to make an edit in Superbase. So, inside of Superbase, if you go to authentication, and then over here on the left, you go to
URL configuration, right? This will default to localhost 3000. Um, but we're just going to put 3001 here. You probably just stay at 30,000, so you're fine. I'm not. So, once I save that, now when I come back here, this should work. So, we're going to try it out. So, we went to create an account, added all my stuff. Let's see what happens. All right. Um, it says to Check my email. So, we'll check the email and I did in fact get a confirmation email. So, I'll confirm it and hey, would you look at that? It
actually logged me in. Now, we can head to Superbase and actually confirmed all this happened. So, if I go into Superbase, I go to database, I go to profiles, we can see, hey, here is the user we just added. And so, it looks like the login functionality essentially works. But I will notice there is no like log out button. So, this would be a great time to go back into cloud code and actually state that. So, that's what I I told Claude, "Hey, everything looks good, but we're missing the sign out button." And we can
now see the sign out button over here on the left. And it works. And so that wraps up phase two, which is databases and authentication. The one other thing I wanted to talk about real quick, and you probably saw It inside of the SQL code, was this thing called rowle security. What does rowle security mean? Long story short, it means that the user can only see their data, right? Different users can't just see whatever data they want. Now, we can move on to phase three, which is the meal logging. So now we're starting getting sort
of like the meat and potatoes of this application, right? If we look at the planning um where are we? We're in phase three. So we have meal Logging. Then phase four will be the NAND integration. So this first part is pretty much like how does this look to the user, right? And then phase four is where we bring in the Naden side. And that's where we're also going to start talking about things like Enro, right? And how do we expose this to the internet so we can do some testing on things. So I'm going to
run through the plan phase. I'm going to run through the tasks and then I'll see you when it's Time to go through the verification step. I just jumped ahead a little bit. I'm now at the end of phase three. So, it's gone through all the task of phase three, doing all the meal logging stuff on the web page side. Now, it's time for the checkpoint, the human verification. Did it do what it actually said it's going to do. So, again, just like before, we're going to go through all the steps together. I'm going to explain
what the heck it just built, and then We're going to probably do a little troubleshooting. So, now we're just going to verify everything it's telling us. And really, what we're verifying is does it actually log the food when we put it in there, both in voice and text. So, we're going to restart the dev server and then we're going to run npm rundev. So, here I am uh cancel it out. So, control c npm rundev. And now it's up and running. And let's see if we can actually log a meal. So, I'll go to log
meal on the left. Right. What did I eat? Um I don't know. We'll just say two eggs. And we'll see what happens. Truthfully, I assume it won't work. So should you. So I submitted it. It says analyzing. This may take a moment. This should be almost instantaneous, right? It shouldn't take a long time. This should take like 1 second max. So obviously Something's not working here. So what are we going to do? We're just going to go tell cloud code to cloud code. I explained the problem and I also gave it some suggestions. So I
specifically said the mule logging is not working. We probably need some combination of enrock and a review of the neen workflow itself. Use the NEN MCP server to check/edit the NAND workflow as needed. By the way, here's the Enrog information. Now, right away, you're Probably saying, "Enro, what? How how would I ever know how to do this on my own?" Well, let me explain. So, what is Enro? Kind of alluded to this before. It's what allows us to essentially take our locally hosted server, our locally hosted web app that's on our computer, and expose it
to other things online, say Stripe, say Nad, right? We're going to give it essentially a temporary URL. We do that for free using Enro. It's actually pretty easy to do. So if you've Never used Enro inside of Cloud Code, just say, "Hey, I think we should set up Enro. Can you walk me through it?" It's going to have you create a account and it's going to give you an authentication token. It's very very simple. From there, what you do, you create a new terminal. So over here on the right, you see I have a terminal
called Enro. And you're just going to use the command enro space http space whatever you know local host you're using. So in my case It's 3001. It's probably 3000 for you. But it's that simple. When you do that you will if you're in Windows at least it will pop up an additional terminal that looks like this right? And it specifies hey here's the session account. Here's the account. Here's the new HTTP. Right? This is the URL right here. It's kind of hard to see but that's the URL that's now pointing to our local host. So,
Enro is one piece of the puzzle. So, we actually exposed This, you know, testing server to things on the web. Now, the other part of the equation was NADN. We told it to take a look at our edit workflow and see what's going on and make edits as needed using the MCP server. You should be doing this manually as well. If there's some issue with the underlying logic, go to your workflow, go to executions. In this case, there are no executions, which means in our macro voice test server, no data is getting sent here. So,
that's The real problem. So, we're going to bring this information to Cloud Code and just let it go to work and continue its troubleshooting. So, after having that back and forth with Claude Code, telling it about Enro, telling it to take another work of the NN workflow, we got it working. We put in whatever we just ate, in this case, 10 eggs, right? And it actually comes back completed. Now, uh, behind the scenes, this actually was more of a pain in the pain in the butt For me cuz I had a few end workflows with
a similar name and it was using the wrong one at first. So, always make sure when you're going through the troubleshooting steps, especially if you're running through NN, that you take a look at it yourself. The next step was to test the voice. So, I just clicked the voice button. In this case, I said, "Hey, I just had two eggs with toast." And you can see that reflected right here. So, our verification for this step Is that, hey, thumbs up. It's working. We can move on to the next phase. And luckily for us, we're already
done with phase four after knocking phase three out of the park because phase four was all about N&N integration. But, as you saw, we pretty much covered all of that already. So, we just get to move straight ahead into phase five. But I spoke a little too soon cuz there is one thing we can do before we move on to phase five. And your cloud code may have Already done this for you, but I wanted to talk about it really quickly. And that is the naden web hook configuration. So, this is going to be in
our.local file. You can manually add this itself if you haven't already, but this is sort of just adding another layer of security and another layer of authentication for when our um two programs, our web app and nnn are talking to one another. And to do that, you're just going to add a NAND web hook URL and an N8N web hook secret. And you're just going to add them. Now, there's two places you can find these. So, you're going to go into your NAN workflow. And again, you can also tell tell Cloud Code to do this
for you. But to find the web hook trigger, you're just going to go to the web hook trigger on the front end. Go to production URL and copy this. And then for the secret, if we go to the last part, the send to callback node, and I click on that. If You scroll down, you can enter it right here on the X web hook secret. That easy. And again, the MCP server will execute this on your behalf. So now we've shifted over to phase five. And phase five is all about this analytics dashboard that we
want to create for our application. We want this one-stop shop that can show you from like, you know, what's happening that day over the last week, last month, like year-to- date type things. We're talking like visual Graphics. This isn't necessarily where we want to log our stuff. This is just like the cool visual stuff. So that's what we're going to be executing. It's knocked it out in three plans and each plan has three to four different tasks it's going to execute. And you can see here when we get to 0502, that's when we're going to
have the visual verification checkpoint. So, let's let it go to work and we'll see how it does when we get to the checkpoint. Oh, and a Nice little tip with GSD. If you ever accidentally uh close out of all your terminals like I just did, if you do /gs GSD progress, it will essentially figure out where you were, show you the context, and route you to the next action, which is really nice. And again, it's why it's so methodical and laborious about all these like planning document, summary document, context document, like you know, state, road
map. So in case something like this Happens, you really don't lose your place. Okay, we've now gotten to the checkpoint in phase five, which is the dashboard phase. So what's it telling us to do? Well, it's telling us, hey, head your local host and kind of just take a look at the analytics dashboard and tell me what's going on and if you like it. So let's do that. So here's the dashboard. We have today's calories, a breakdown in macros. We can set our daily goals and then we even have like Sort of a calorie trends
over time. Um, it'd be interesting to see if we could have some, you know, fake data thrown in here. So, I'm actually going to ask Claude code to see if we can toss in some fake data over the last like 30, 90 days or even year to date to kind of see what we get. So, I told Claude I wanted that fake data to test everything. And it gave me some of this code to just put into the console and essentially just mimic data actually being there. It Walked me through it step by step and
then we can see here it actually worked and we can kind of see you know these trends over time over year to date 90day 7-day and then 24hour and so again this is where if you wanted to add things to the dashboard if you wanted to change like how it all looked this is where you would go to cloud code and do that again I know the UI is hideous I'm worried about the functionality we'll do a full-blown UI overhaul at the end so I Gave Cloud Code the thumbs up here so we're just going
to keep on pushing so at this point we should have finished up phase five which was the dashboard. And now we can move on to everybody's favorite phase, which is number six, and that's payments. Namely, we're going to be connecting Stripe so you can actually start making some money. So, what I'm going to do now is I'm going to get it to work on the plan. And while it does that, we're going to hop into Stripe. I'm going to assume you've already made an account and we're going to kind of get a lay of the
land so you can understand what's coming your way. So, why do we use Stripe instead of any other program? Well, you can use whatever program you like, but Stripe has a ton of documentation. Tons of people use it, so it's really easy for AI to guide you in your Stripe journey. Now, all you have to do is make an account and then just head to the Dashboard. Now, right away, you should notice a banner up top that says, "You're testing in a sandbox. Changes you make here won't affect your live account." When we're doing testing,
we don't want to have a live Stripe server up the whole time, and every time we want to see if something works, we give it real money, right? No. So, when you go into Stripe and you create an account, what you're going to do is you're going to create a sandbox that we Can test in. So on the main page, you just come over here to the left. You go to switch sandbox. You're probably in the default sandbox at first, but just create a new sandbox. Now once you create that new sandbox, just switch to
it. In this case, I'm in GSD1. And you'll know you're in the right place. Again, you have this banner on top that says, "Hey, we're just testing." Now, Cloud Code is going to guide us to a large part of this process. But the Common theme with Stripe is we're going to need to set up web hooks, and we're going to need a ton of API keys. You already see a couple here, like the publishable key, the secret key. We're going to have to create a new product. We're going to need to get the price ID.
So, it is kind of tedious, but again, AI knows what it's doing. When in doubt, tell it, hey, make sure you use your web search so you have all the up-to-date data. But in this video, we'll go Through it step by step so you don't get lost along the way. Now, Cloud Code should come back with a plan that looks something like this. There should be a fair amount of work that needs to be done because it's not just as simple as adding a, you know, checkout button. like this is tied to account upgrades and
one person who's on a free account, one person who's on a pro account is going to have different things they can see and use, right? So, we're not just Adding Stripe. We're going to be adjusting things in Superbase and there'll be some UI changes depending on the plan they're on as well. So, let's knock it out. We're going to start with plan 0601 and we'll come back when it's time to do some verification and add some uh web hooks and codes. Now, right away when we start the execution process, it's telling us that we need
to create a Stripe product. We need to add the price and we need to grab some keys. So, we are going to head to the dashboard. We're going to make sure in our sandbox and we're going to go and add a product. So, I'm going to go to the product catalog on the left. We're going to go ahead and we're going to create a product. We'll just call this macro test. Give it whatever description you want. We'll just repeat the name. For the pricing, we'll make it, you know, $9.99, blah blah blah, whatever You want,
right? In this case, it's going to be monthly. We're going to add our product. Next, we're going to click on our product. And then I want you to click on the actual price, the $9.99 over here on the top right. It's kind of hiding from us. This is our price ID. So, you're going to copy this. We're then going to head back into Claude Code. We're going to head to ourv.local file again. Remember, that's where all our keys go. And we're going to paste in The Stripe price ID key. Now, if you don't see this
in there already, the stripe price ID, just tell cloud code, hey, update my local file so I can put all these keys there. So, first is the price ID. Next, we need to get our Stripe secret key and the publishable key. Now, to get those two keys, they're actually right here. If we go to the homepage over here on the right under API keys, publishable key, copy it, paste it, it should start with PK test, And then do the same for the secret key. Again, the secret key should also start with sk test. And in
our case, we're going to tell cloud code to continue. Now, it's time to actually test out the Stripe checkout process. So, again, we're going to head to the dev server and we're going to try to upgrade our account and see if it works. So, right away, you can see some changes in the dashboard. It's telling me that, hey, you're on the free tier. You have 15 out Of 15 logs remaining. And we have a nice little button to upgrade to pro. So, we're going to click on it. And so, that brings us to this page.
For the card information, just put in 42424242. Um, put some sort of date that's in the future. Whatever else you want. It doesn't actually matter. We just want to see if this works. Oh, I should probably put a zip code. Again, numbers don't matter. Hit subscribe. Let's see if it redirects us properly. So, it redirected us back to the dashboard and says, "Hey, welcome to Pro. You're all set." Now, you'll notice it still shows this free tier button. And if we head back into Cloud Code, it specifically says, "Note, the subscription won't update in the
database." That's going to come in the next execution process in 0602. But hey, the checkout flow is working. So, this is great. So, we knocked out Everything in this checkpoint. So, we're going to tell it approved and continue on. So, now we've moved ahead to the next checkpoint where we're going to be adding the web hook inside of Stripe. Now, Cloud Code may prompt you to use the Stripe CLI. I personally haven't had a great time trying to use the Stripe CLI. So, if it does that, you can attempt to do so or you can
tell it, "Hey, just run me through how to do it manually through the dashboard." And That's what I'm going to show you now. So, what we're going to do is we're just going to head to the web hooks section. So, head to Stripe. In the search bar, just go for web hooks. We're going to do create a web hook. We're going to do your account. And here is where we're going to set up the events um that are being connected to it. So inside of cloud code, it will tell you the events we need to
add. So it's going to be customer subscription created, updated, And deleted. So inside of here, customer subscription created, customer subscription deleted, and customer subscription updated. So once you add those, you'll hit continue. We're going to do web hook endpoint. And this is where we're going to add our endpoint URL. Now cloud code should give you the endpoint URL to use. It's going to be that Enro URL we've been using followed by /appi/stripe/webhook. Now a note on enrock. If you shut down Your enrock terminal, you're going to have to start enro up again. It's going to
have a new URL. So keep that up and running as we're doing all this testing. But just know for whatever reason you shut it down, it's going to spin up a new URL for you when you do that. Then we just hit create destination. Now once you create the web hook, you'll get to this page. You'll see a signing secret. Go ahead and copy this. And there should be a spot for your Stripe web hook Secret. Again, if there's not, you can manually add it or tell Cloud code to do it itself. So, it says
Stripe web hook secrets equals paste it in. Now, we move towards the next checkpoint where it's going to ask us to verify if this web hook syncing is actually working. And so, to test that web hook, what we're going to do is we're going to upgrade to Pro again. And we're going to check our database inside of Superbase to see if it actually upgraded us to Pro. Because Remember, even though we upgraded to pro when we tested out the Stripe splash page, if I go into Superbase right now, we can see that my subscription tier
still shows free. So, we need to change that. So, again, I'm going to upgrade to pro. Same process as before. Subscribe with the fake number. And it brings us back to the dashboard. We get the welcome to pro sign. There's no longer any button that says, "Hey, do you want to upgrade to Pro?" And when I look at The dashboard, I do need to refresh it there. But when we look at the database, we can see the subscription tier is now on Pro. So that whole process of upgrading the account and making sure everything gets
updated properly across the web app is looking good. And I know this might seem kind of tedious, but you can't screw this part up, right? We have to make sure payments work properly. And that's why we're taking so much time here. So I tell Claude code approved and I'll see you at the next checkpoint. So for our very last checkpoint in the payment stage, it wanted us to verify the usage tracking and limit enforcement on the pro versus free plan, right? to make sure that free users could only do 15 logs at the time, and
the pro users pretty much had unlimited access. It looked good on my end, so I'm going to push it to approved. That way, we can now move on to the seventh and final phase of our Build, the polish phase. So, here's what's happening in phase 7. The plan is broken up into three parts. The first part is the settings page, so the user can actually see what's going on with their profile. Second is the landing page, and then third is some proper UI polish. And again, we can at this point, you've probably messed with the
UI yourself, and that'll be like one of the last things we do in this video. So, the plan looks good to me, so I'm going to Let Claude go forth and conquer. So, now we're inside of phase 7, the polish phase, and this is where we're having it create the landing page. So, it told us, hey, we created the landing page. Go take a look. And so, here's what it created for us. And honestly, don't like it at all. Right? We have this really odd sidebar on the left. like the stuff on here makes sense,
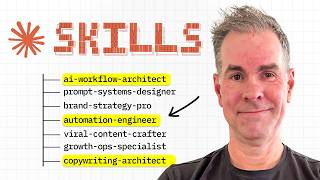
but it's very bland and it's very AI, right? We can do way better than this. So, when we were going Through the Stripe section, I thought, hey, their UI actually looks pretty good. So, I just took a screenshot of it. I dumped it into Claude code and said, hey, I don't like our landing page. Let's kind of do something closer to Stripe. And then I also told it, I want you to use the Claude front-end skill to help you redesign the landing page. Now, what are Claude skills? Well, Claude's skills are essentially just like special
prompts that Claude can use To help execute certain tasks. The cool thing about skills is they live outside the project, so they don't clog up the context window, but they're really e they're really cool and really effective. And so, if you do slashplugin, well, if you do slug, you're going to get access to the anthropic marketplace. And one of the things you'll see there is the front-end design skill. Now, this skill essentially, well, terminal's going Crazy. This skill is essentially something that allows Claude code to make better UIs that don't look like AI slop. So
this prompt I just gave it a gave an example of what we're going for. But now I told it straight up use that front-end design skill. So let's see what it actually comes back with. And as a note, is this something we could have done at the beginning? Yes, totally. I just tend to do it at the end because I like to make sure the functionality Works. But I figured, hey, why not? I don't think I can look at this disgusting [laughter] landing page any longer. So, let's see what it comes back with, which frankly
was a fairly vague prompt. So, after some back and forth, we landed on this UI, which I think is a huge upgrade. We went from sort of like a really dark, bland green mode to a more light mode with sort of like these uh orange um accents and we applied it to every single part of our application. So obviously the login has been changed and all these things. Now you're probably asking me what was the exact prompt you use to get it to do this. All I pretty much told it is it was like probably
three or four back and forth and I just said hey use your front-end design tool. I said I wanted something that looked was sort of like a linear style and that I wanted to be more light mode. And again I kept hammering use the front-end design skill. So there was no Secret prompt that did this. It was just some back and forth. And like I said, this is pretty impressive and it changed every single page and the functionality still works. And now that we got the front end design and landing page where we want, we're
pretty much done creating our application. We've knocked out all seven phases. And now we move into the deployment part. Now, for the deployment part, it's going to be it's going to be sort of a two-step process. We're going To push all this code to GitHub. And then from GitHub, we're then going to deploy it to Verscell. And Verscell is going to give us an actual URL. So you can go ahead and visit this web page. Now all you have to do is tell cloud code that hey I'm ready to actually go through the deployment process.
I want to do it in GitHub and then I want to move to Verscell and it's going to show you and tell you exactly what you need to do. Now remember there are some Things we're going to have to edit here, right? Because throughout this entire process we've been in a development server. We've been using Enraph. We've been on our local host. That's not going to be the case anymore. So there's going to be places where we have to go ahead and update things. Think of like your Stripe stuff, right? You're gonna have to go
outside of the sandbox, go to your main account, and start using real API keys to get real money. But the nice Thing is Cloud Code knows all this, right? And it's going to walk you through it step by step. And in this video, I'm going to show you the GitHub part. I'm going to show you the versel deployment and get you to that stage. So, first thing we're going to do, we need to create a new GitHub repository. And then we're just going to tell it, hey, here's what the repo is. And it's going to
push it to it for us. Now, if you've never been to GitHub before, just Go to github.com. It's totally free. Create an account and then on the main page where it says repositories, we're just going to create a new repository. A repository is just where your code lives. You can call it whatever you want. We'll call this guy macrovoice. We'll set it to private for now. And then we'll create it. At this point, all you have to do is just copy the URL up top, right? So, for me, it's github.com username/macrovoice. Go to cloud code
and tell it that's what the repo URL is. So the GitHub repo is blah blah blah blah blah blah send it as a prompt and it will go to work. It's then going to automatically push that code and if I refresh that page you can see here is all of our information. Now we don't have a readme right here. A readme is essentially just like a set of instructions or like an overview of what you built. Our repo is on private, so we're the only people going to see it. But you can have Cloud Code
create a readme, and it will upload it just like it did everything else. Next up, we need to do our Versell deployment. So, you're going to head to versel.com. Again, totally free. You're going to create a new account, but make sure you create that account using your GitHub credentials. So, those two accounts are linked. From there, we're going to go to add new project. And you can see right here, since it's connected to my GitHub Account, it already sees that repo. So, I'm going to hit import. It'll bring you to this page. And what we
want to do is we need to pass some of our environment variables. So obviously we have a number of environment variables. And when I talk about environment variables, I'm talking about the NEMV.local file, right? And alls we have to do is you just copy all this, come back here, paste it, and it's going to automatically put in all of them. So we Have our public superbase stuff, all these things. Now remember, we're going to have to update some of these eventually, like for example, the public URL, right? That's on Enrog. And then our Stripe keys,
but we can always do that after the fact. And from here, we're just going to hit deploy. Now, don't be afraid if when you hit deploy, there's some sort of deployment error. We're going to treat that like every other error. We're just going to bring It back to Cloud Code, and it's going to edit what it needs to to make sure we can get this up and running. But lucky for us, it deployed perfectly on the first attempt. So, we're just going to continue to dashboard. And once we get here, we have the domain. So
this is the no kidding URL that you can share with someone and it's actually on the web now. You aren't tied to this domain forever. You can change this for your real domain if you want to. Now I Mentioned a little bit earlier that you will have to update some environment variables when you go live like Sprite for example. To get to those places, it's really easy. Up top here, you'll see there's a settings button. And then if I go to environment variables, it brings me right here and I can easily edit these as needed.
And so now you're just going to head back to Cloud Code, tell it you deployed to Verscell, and it's going to give you a checklist of Like how you can update those environment variables when you're ready. There's nothing secret or crazy about doing that. It's literally the exact same steps. Then there's a final step what you can do if you want. It's part of the GSD framework is you just tell it, hey, I want to log a milestone. And that essentially caps all the work you've done and logs it as like V 1.0, right? Like
this is our MVP, gives you some stats of like what we've done, Right? 7600 lines of code. It archives all of this into the road map so it knows what we've done so far. And it also writes down the remaining deployment tasks, which in our case again are the environmental variables. So [laughter] this concludes the video, right? This was a behemoth. We covered a ton of stuff, but in the end, I think we got a pretty cool application, right? It's built on an NAN automation. This is Something that we added payments to. You could actually
use this and have people pay you money for it. And again, the purpose wasn't to show off this final product or even the automation at large. The purpose was like, here's a really cool framework that's repeatable, right? And that's why I really like this get done framework, this GST thing. You saw how methodical this entire process was. I mean, in certain areas it was kind of painstaking, but you know, when It comes to building with AI, that's what you need. You need these guardrails because the nature of AI means that it's not necessarily determinative. It
can kind of go off and do its own thing. But if we have these frameworks, right, we can really control what it does. We can really control it down to the specific discrete atomic tasks. And if we can do that over time after build after build after build, we can really create something if we have a clear vision, Right? We're not at the mercy of, you know, the algorithm underneath all this. So, I hope you got something out of this video. Um, as always, tons of free resources inside of the free school. I'm going to
include the PRD template. Um, so you can do that. Obviously, there will be links in the description to things like the um GitHub repos. And as always, we also have the Chase AI plus community. That's for someone who's a little more serious about the stuff, Who's trying to learn like how do I monetize all these things, start my own AI agency, and there'll be a lot more like SAS focused things there as well. So, as always, let me know in the comments what you thought, and I'll see you