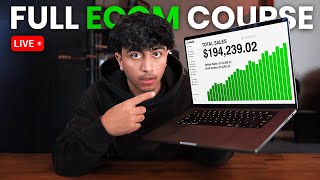
you may have seen all these sponsored posts on Facebook and Instagram and the people behind them are stupid 20-year-old kids like me making millions of dollars every single year from them and in this video I'm going to go over exactly how you can start a Facebook and Instagram ad campaign so if you've never ran ads before or you're just curious on how you can run them the right way this video is perfect for you now before I get into the video I'm going to show you guys one of the stores that we're running Facebook ads with and you guys can see yesterday we did $4,400 in sales if we go over to this entire month we are currently at $98,000 and it is only the 17th and you can see this is not a screenshot this is the chart right here we can even go over to the live view and we are at 3K for the day here's actually an ad account that we've spent $22,000 on to make back $90,000 we can even go to the next month here which we've spent 25 to make around 85 okay so you may be wondering how can I actually replicate this for myself now the first thing you actually do need is an online business or website something to drive traffic to now if you guys don't already have online store you can click the link below and get my full A toz Drp Shipping guide along with a fully pre-built store however if you do have a store already you don't need to do any of that now the next step is to actually create your Facebook business manager so you will need a Facebook account for this if you don't have Facebook for whatever reason you can use your mom's account your dad's account your brother sister dog whatever just get a Facebook account and you should be good to go and then I'll drop a link in the description to business. face. com and just go ahead and log in with Facebook once you're logged in you should see something like this I already have a business manager so mine does look different but you want to go ahead and fill this information in with your business account name you can name this whatever you want put in your first name last name and your email address and then go ahead and click create so it's not going to allow me to create one because I've already reached the limit which is two per account but once you create your business manager you should be on a page like this and go ahead and click on settings and yours may look a little different compared to mine however just remove the word later from the URL and it should look like how mine does now for those of you who don't know what a business manager is think of it as a Google Drve it's almost like a hub it holds your folders it holds your Google Docs your Google Sheets everything is within that Google Drve think of the business manager the same way it holds all your business assets your Facebook pages your business accounts Facebook pixels which we're going to get into later so the first place you actually have to go is the ad account section right here ad accounts are where we're actually going to start running the ads and since you don't have one you're actually you're going to have to click add and create new ad account for the ad account name you can put whatever you want I'm just going to name it B7 click next and then click my business and click create and again I've already reached the maximum limit of accounts so for you it should just allow you to create it a little side note you can only create one ad account until you actually start getting spend on it then it will allow you to come back here and click create ad account and you can do it multiple times after you've sort of built that trust with Facebook okay now the next thing we want to do is go over to the pages section right here this is what's going to be representing our brand so we're going to add a profile picture a logo all that fun stuff and when somebody actually sees our ad on their Instagram or Facebook this is the name that's going to show this is the page that we're going to have to design and fully make ourselves because again it's going to represent our brand so we want to go over to add click create a new page click brand or product and then right here you want to type in whatever your business name is for the sake of this video I'm just going to name it FB tutorial you can name it whatever your brand name is on category you just want to go over here and click brand and then click create page and your page should be created in no less than a few seconds okay now that our Facebook page is created you want to go over here and click view page and you're going to see a little message right here and you want to click switch now so that you can actually log in and are able to edit the page so once you're on here you want to drop some comments so hey what's going on and sort of warm up the page you don't want to start advertising on a brand new page otherwise Facebook might flag it go ahead and add a profile picture add a cover pho you want to add and fill in as much info as you can so you want to add an action button have this action button linked to your website I'm not going to do all this for just the sake of time but you want to go in and fill as much information as you can on this page right here now once you're done with that you want to go over to data sources and go to data sets and click add and we want to name it whatever we want I'm just going to do FB tutorial again just to align it with that same page and what a data set or a pixel is is what's going to send the data from Shopify to Facebook so so when we're running ads and we want to see which ad group or which video got to sale a pixel has to be installed in order for them to talk to each other and give information for us to receive and go based off that data okay now that our pixel is created right here we want to connect it to our Shopify store again if you don't have a store you can get it for a single dollar linked below however if you guys already have one you're chilling you want to copy this ID right here and go over to your Shopify store and get an app which allows you to connect pixels so in the Shopify app App Store there are a bunch of different apps that you can choose go ahead and choose one they usually all have free trial I'm just going to get this one right here to be honest I don't even know if this is good or bad I haven't used this specific app before okay so I just installed the app all the apps have a pretty similar process you just want to click activate and enable the extension on your actual Shopify theme so I'm going to go ahead and enable this right here click save and then you want to go back and click add Facebook pixel enter the name you could do whatever your business name is enter the ID which we copied from right here and then go ahead and just click I have done this and click save and now your pixel should be fully connected all the data should be translating from your Shopify store to Facebook and we should be good to go now you want to go to the ad account section and go over to the ad account you created and click open in ads manager this is where people get confused but I'm going to try and make it as simple as possible for you guys to understand so right here the first thing we want to do is go over to the columns The Columns signify all these right here and basically we want to be able to read the data so if this is all mixed up and jumbled up we won't be able to read the data that's coming in so I like to customize this myself and I'm going to show you guys how to do that so click on columns click on customize columns and then you just want to delete all of this so we're just going to go ahead and delete everything right here and click X and the first thing we want to add is delivery so go in the search bar and click delivery and just check that next we want to do is budget so go ahead and type in budget and add it right under delivery the next one is amount spent so we want know how much we spent so go ahead and check amount spent then purchase conversion value so you want to go over to purchases and check the value we're going to go ahead and uncheck all these boxes right here then we're going to go ahead and add in reach then we're going to go ahead and add in unique link clicks right here next we're going to do CPC CPM outbound CTR this is our click the rate from how many people actually clicked on the ad onto our website then we're going to do add to cart so we want to know how many people added to cart and uncheck all of these boxes for add to cart we're going to do initiate checkout we're going to uncheck all of these boxes for initiate checkout then we're going to do purchase add that and uncheck all these boxes and then right here we want to also add cost per purchase so that we know how much we're spending per purchase let check this right here then we want the row ad so this is the return for every single dollar we're spending how much are we actually making back we're going to check that as well and then uncheck these boxes and last but not least I'm going to go ahead and add frequency so these are sort of the columns that I have set up accustomed to me obviously you can change it how you want but if you're just starting out these should be a pretty good start go ahead and save this as a preset I'm going to name it FB tutorial once again and then click apply and you can see your column should be adjusted accordingly to this new preset now going over these One By One The on and off section is obviously if a campaign is on or off the campaign is the name of the campaign delivery again whether it's on or off or if the ad got rejected or disapproved budget this is our budget that we set for whichever campaign we're referring to amount spent is obviously the amount we spent purchase conversion value is how much we actually made back which is why I like to have these T right next to each other reach is how many people we reach unique link clicks is how many people actually clicked off the ad CPC is the cost that we actually spent for that one link click CPM is the cost for 1,000 Impressions outbound CTR is the amount of people that actually clicked from our ad to our website add to cart is how many add to carts we had checkouts initiated is how many initiate checkouts we had and how many purchases for purchases cost per purchase is how much we spent per purchase this is a really important tool just to know and as is for every dollar that we spent how much did we actually make back in return and then last but not least we have frequency how many times does one user see your ad but these are generally the metrics that you want to look at in order to get a good idea of how your ads are doing and if you're confused on where these numbers should range from or what is good and what is bad I'll leave a cheat sheet in the description below so you guys can refer to it and get an idea and understanding of if your numbers are good or not okay now for the fun part we're actually going to create our first campaign so how Facebook sort of works is we have the campaign level and then we have adsets adsets are almost like different audiences or demographics we're going to be targeting within that campaign then we have the ads level ads are going to be stored within each ad set and the ads are different creatives or videos we're going to be running so it's a pretty simple breakdown once you actually understand it and this is just important to remove confusion later on but let's get started with the campaign creation we're going to go ahead and click this green create button right here and and we're going to go ahead and click sales because we want sales we don't want to mess with any of these other ones unless we're warming up the page or getting leads or anything like that so for now we're just going to click sales and this is what I use most often click continue and then click manual sales campaign and then click continue and we should be on a page like this I'm going to just name the campaign campaign number one usually I would name this something more complicated just for my organization but for time sake I'm going to leave it at that Advantage campaign budget is what we're going to use later on right now we can leave it off but later on this will come in handy for when we're scaling so with this button ticked on it is what's going to be running as a CBO campaign when we're first starting out we want an campaign so that we can set the budget per adset we want to spend evenly across every single ad set now at a CBO campaign level we're going to be setting the budget at The Campaign which will then spend whatever budget we set across to all the different ad sets meaning not every ad headset is going to get the same amount of spend which isn't a fair test especially when starting out so that's why when starting we're just going to leave this unticked however we are going to use a CBO later on when scaling so go ahead and click next at the adset level we're going to go ahead and leave this name the same for now I'll change it later and I'll show you guys once I do and for the pixel section for the conversion event we're going to want to scroll down and click purchase because we want to optimize for purchases again we don't want to optimize for people initiating get checkout or adding to cart and you may see this message right here however you can just ignore it scroll down we can leave this off for the daily budget we're going to leave this at $10 per day we're going to have a lot more of these so I'll explain that later on but we're going to set it to 10 for now for the start date you can leave it as is and let's scroll down and go to audience controls we're going to go ahead and click more and you can see we can set the age here we can set the location I usually for Drp Shipping start with United States United Kingdom Australia New Zealand and last but not least where my homie Drke is from Canada so once we're done with that we're going to scroll down and go over to Advantage Plus audience we're going to switch to original audience and click use original audience once we do that we can select targeting so I'm going to go ahead and go to the example product we're going to be using which is this adjustable Bor cider which I actually did a full challenge video on if you guys want to see so I'm going to go ahead and pretend as if I'm targeting people for this so I'm going to go back back to the audiences and I'm going to type in hunting so for hunting you guys can see hunting sport comes up and the audience size here is 69 million how convenient to 81 million so this is a pretty good audience size I like to keep it big and Broad as broad as I can however if it's very narrow and Niche 1 2 million that's fine as long as the audience correlates with the product so I'm not really too picky with the audiences here sometimes I even leave it completely Broad and just completely have no interest now you want to name the ad set whatever the interest is so I'm going to copy this name and go back up and change the adset name to the interest so now our adset name is hunting and that signifies that we are targeting this demographic for this adset now we want to scroll down and for placements we can leave this broad however sometimes I do like to specify and only choose Facebook and Instagram feed and or in order to do that you you can just uncheck all of these and just leave these uh which literally just puts it on Facebook and Instagram only so you guys can see that we have a 983 to 2.
8k reach and 14 to 40 expected conversions this is not always accurate so if yours says zero completely fine just completely ignore this and click next okay now we get to the fun part the creatives this is what people are actually going to see so when you're running ads and people are scrolling through their feed they're going to see a video or a photo I tend to like to use videos better just because I've seen better performance with them however images completely work fine so I'm going to go ahead and and change the ad name to add one to signify that this is our first variation of the creative now we want to check this box on so that we can sort of get a visual of our creative and in order to upload the video or creative we want to click add media add video click upload right here and then you can go ahead and upload your videos now if you guys don't know where to get videos for your products you guys can head over to my team over at band off ads I'll leave a link in the description below they'll take care of literally everything for you within 1 to 3 days and all you need to to provide is your product link so the video just finished uploading and you guys can see it right here time and money byting your firearms from thefor of your home really really nice video I actually used this video in a challenge video and I actually ended up getting sales on it so these videos are proven to convert and if you guys want an ad I'll leave a link below so once you are done with this we want to fill in all this stuff right here now let's scroll down and fill in the rest of these so primary text bands off ads also provides I'm just going to go ahead and use the template which they have provided and enter it right here and basically this is something similar to what you're going to want again just a hook three benefits shop now and your website so I'm just going to go ahead and replace this with my website and I might tweak this a little bit here and there so I just changed the hook to this I just wanted it a little shorter I'm going to do zero in with ease zero with ease and then maybe add this Emoji right here for the description I could just add something like free shipping worldwide you can add whatever offer you want here or rated five out of five or whatever for the call to action I usually choose shop now and this is what has worked for me very very well in the past and now for the website you just want to Simply copy your website URL and paste it in here so everything looks pretty good I just shortened these because I wanted it to be on one line and it just looks way way cleaner but we're going to go ahead and click publish and it's going to ask you for your card information and business address and it should be publishing all three of your ads and ask for your card info if you haven't entered that already all right now that we published our campaign you guys can see that it says campaign one if we click into it we go into the adset this is the interest that we targeted and if we click into that we can see the ad that we made we can click preview and view the ad and everything is set up as it should be so now the next step is to go into the ad groups and we want to click duplicate right here and we want to duplicate this six different times so we're going to have a total of seven ad groups now I simply like to start with seven there's no reason for this it's just worked for me now the reason we have seven different duplicates is because each ad set is going to hit a different pocket of audience even if it's the same interest and I'm going to go ahead and click edit on each of these and the only thing that we're going to change is the audience we are targeting so what you want to do is go into each ad group here and just click on suggested and find one that fits your product so I'm going to click deer hunting and remove this and then copy this and change the new name of the ad group to that new interest that we're targeting then we're going to go ahead and edit the next one and do the same for all of them so simply scroll down click suggested find one that matches and or you can even type your own or a new one if you want and paste it in and I'm going to go ahead and do this for all of them and get back to you guys once I'm done okay so I am done I simply just Nam these whatever just for the sake of time you want to click review and publish and publish and now we have a total of seven adsets each at $10 a day meaning the next day we're going to be spending $70 in total I usually would leave this campaign off until it hits 11:59 or schedule it for 11:59 so that once it hits 12 the campaign starts running now one thing that I did not do which I usually do is duplicate the creative two times and simply swap it out with another video which means we will have three different videos in each ad group now just to clarify if you duplicate the creative your budget will still be at $10 per day and that's the most you'll spend no matter how many videos or creatives you have inside of each ad group so I like to start out with three videos in each ad group at $10 a day so congratulations at this point you have set up your first Facebook and Instagram ad campaign and you guys can let this run now of course there are more complications with it such as when to turn certain campaigns off when to turn certain ad groups off when you should duplicate and increase the budget on some of them which I'll go over briefly so here's the campaign that I'm actively running I haven't managed the ads for today so it's going to be a perfect example of what to do when you are running your ads so you want to find the break even row as of your product which you can simply do by going to this Drp Shipping calculator which I'll leave link below simply enter the amount that you get your product for so in this case around five bucks and we are selling it for around 25 bucks so the break even row as is 1. 25 meaning that if we go over here and go to the row as section and we can sort by row as which you should have set up in your columns earlier anything that is under 1. 25 we can feel free to turn off this is 0.
55 we're going to turn this off and you can simply turn them off way easier by just selecting them and I'm going to turn this off as well just cuz it's barely meeting the requirement you can go to edit and click turn off now this is just simple Skilling and scaling it does get more complicated however if you're just starting out this is all you need and these ones right here you guys can see has a five row as four row as 2. 7 2.