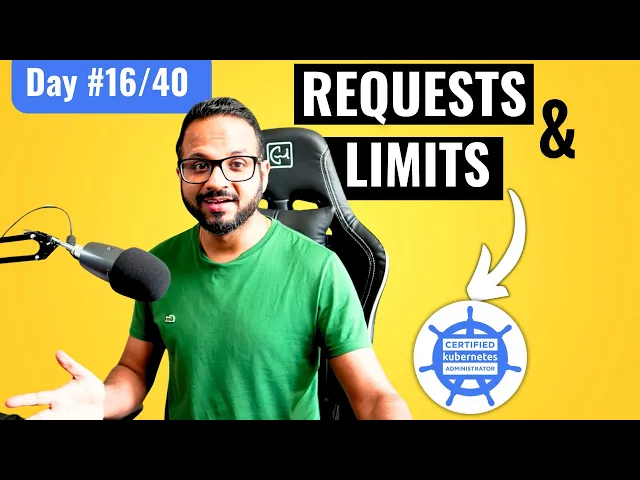
everyone welcome back to my channel my name is p and this is video number 16 in the series CK 2024 and in this video we'll be looking into resource requests and limits which is another concept that scheduler use to schedule the pods on the particular node or a set of nodes yeah till now we have covered a lot of other important Concepts like uh okay I'm not going to bore you with that so we have covered enough in the past 15 videos so check that out if you have missed anything if you are already following
long so let's continue with this video and the comments and like Target of this video is 180 likes and 180 comments so make sure you complete that Target in the next 24 hours and I will upload the next video as soon as the target is completed so without any further Ado let's start with the video okay so let's say uh we'll first have a look at the example uh with the help of this diagram and then we'll do uh you know we have few exercises that we'll do today to understand this concept in depth so
have two nodes okay node one and node two over here so node one let's say has four CPUs and four gigabyt of memory and node 2 has the similar specification 4 CPUs 4 GB of memory now there are multiple parts so you see each one of them is a pod and these pods required certain CPU and certain memory for the execution because pod underneath is nothing but an encapsulation of a container and inside the container we run a particular process and that process basically does the Computing does something and it needs a CPU and memory
dis and other resources to do the execution right so each one of these parts let's say requires uh one CPU and one memory so first scheduler checks uh the available node and let's say this node has the sufficient limit it will schedule the Pod it will do the same for other pods as well it will go and check uh other things like 10 tolerations node selectors affinity and everything else and based on that it will make the scheduling decision and it will try to schedule the Pod one by one or like in multiple threads that's
uh how it will do the scheduling and let's say once the node reaches it limits so let's say now this node is full it will try to schedule this pod but it will not be able to schedule but because it does not have the sufficient resources so it will find the next node and it will schedule the p on this node now both of the nodes are running at its full capacity we don't have enough resources now whenever a next part comes in it will try to go on this node it will error out like
we don't have sufficient resources it will check the other node it will error out again it will say that we don't have sufficient resources so this pod or any of the Pod comes after this it will stuck with this error sufficient resources insufficient resources sources or insufficient CPU memory something like that right so this part will not be scheduled that's why uh we actually specify request limit so uh your kubernetes does this calculation for you like how many have been utilized how many is spending and how many more do you need and so on now
let's see if we have have one single node with again four CPU for memory and there is one pod okay in which it requires we know it requires one CPU and one memory but we have not specified this somewhere in the Pod so we have not specified how much it should take or how much it should request what is the limit of it so we are not bounding it to a certain resource boundaries so let's say it started with one CPU and one memory but as soon as the load increases on that it tries to
take the entire node memory and P so now it takes entire node memory four CPU and four memory and after that when it trash to take more than that the Pod will be crashed and this time the Pod will be crashed with om error out of memory it can go beyond the uh available CPU that's what where we call it as CPU throttling but with the memory it will fail with the error out of memory and this node will also start the OM killer that means the node will also start throwing any pods with the
OM error because this node does not have sufficient resources now everything is been occupied by this pod this particular pod took all the resources from the node now node does not have anything left to be scheduled so that is why to avoid all these scenarios we actually specify request and limits in the partt in the container so that whenever the Pod try to take more memories than its allowed limit the Pod will be crashed so not the node the Pod will be crashed with the O killer okay so let's uh do a quick demo actually
we'll be doing a lot of tasks so let's uh have a look at that so first I'm going to do the cleanup of all the existing resources okay delete pod we have red is red is three and red is new okay those have been deleted now now what I'm going to do I'm going to go to my day 16 folder and inside that there will be a metrix server EML so metrix server is something uh we'll not go into the detail of that but Matrix server is something that actually exposes the metrix of your nodes
so it will expose the CPU memory utilization and these important metrics so that it can be used further with different processes like we have autoscaling which we'll be looking into later so vpa HPA all those Concepts so this actually exposes the metrics to those process processes so that it will take the action for now let's understand we actually have to apply this EML first and after that I'm I'm going to show you what it will do so if we'll do Cube CTL apply hyphen f I'm not in the correct folder so day6 and if we
do keep CTL apply hyphen f metrix server. EML okay because I have already have it running that's why it says configured and unchanged but uh for you it will it will create few resources we have role bindings so these concept I'm not explaining because we have not really covered those yet so it will be covered in the later videos cluster Ro binding uh service accounts service and deployments we have already seen right U props uh these are we have not seen yet okay so it will create few resources few kubernetes objects for you and after
that your metrix server there is an additional pod running so if you do Cube C get pods in the cube system name space because this is kubernetes add-on so it will be running in the control plane node so if we do that and you see there is a pod running with the name metric server and now if we do Cube CTL top let's say Cube CTL top node right so it will let me clear the screen and run this command again so it will now shows the CPU you utilization like 5% for the first node
0 and 1% for the other nodes memory utilization in bytes and so on right so these metrics are being exposed now because of the help of metric server metrix server did that for us and now using these resources actually CPU and memory we can now uh do some stress testing on on this kubernetes cluster and we'll actually okay let me show you what we'll do so first we'll create a new name space okay let's call this Nam space as memory example so Cube CTL create namespace and M example okay namespace has been created now we'll
create a new pod inside this namespace so we'll go to memory request. EML this is the EML that we have okay let's see what it does so it has a pod uh with this name Memory demo CTR and it uses an image po Linux stress so this image was specifically built to do the stress testing on your cluster okay it will put some pressure on the nodes based on our arguments that we have passed and you can see the results so now this is how we actually specify request and limits right so inside containers because
resources like CPU memory these are the resources of a container so it has to be the child of the container so that's why inside the container and then we have two properties request and limit now request can be of memory and CPU so you can add CPU as well over here and again limits can be of memory and CPU right for now let's just remove the CPU and we'll just have the memory for now now what it will do this pod will request 100 Mi so this is not uh megabytes this is MI this is
a different uh measurement unit it's it it has slightly different calculation but it's almost the same as let's say MB so let's say we have 100 Mi of memory is the request that's mean this is what it will allocate uh to the Pod this memory will be allocated to the Pod and the at the very beginning and as soon as it starts working it cannot go beyond 200 MB it can go up to 200 200 MB and after that this pod will be killed if we don't specify this limits right then this pod can take
whatever memory the node has and it can end up killing the node so that is why specifying request and limit is very important right so we specify a lower bound like 100 MB and we specify an upper bound 200 MB and then with the help of command so we have already seen commands and arguments so with the help of the command stress we are assigning 150 MB to this particular part so we are actually overriding this limit and we are saying okay you can use up to 150 MB okay so let's see what will happen
so Cube CTL apply iph f m request the yl name was M request. yl okay and there is one more thing so I I actually forgot to tell this earlier so when we create a nam space and we have to create resources inside the namespace there are two ways of doing that first is with the apply command or whatever command we are using let's say imperative command we add the Nam space along with it like use the CML to create the file in this particular name space or there is one more thing instead of doing
that we can do that within yaml itself so inside the metadata where the name is at the same level we can specify name space right so this part will be created in this name space okay so if we do apply this yl and let's say Cube CTL let clear the screen get pods hyph n mem example okay the Pod is running and let's run the top pod on this top pod and memory demo hyphen n m example Bo name is memory demo and the name space is M example okay maybe it takes some time to
generate the metrix so now uh when we do top part again it now shows that it takes 364 CPU because we have not specified any limits or requests for CPU but it takes around 150 Mi of the memory right so it will be able to schedule that's not an issue it's within the limit it's within 10200 MB or Mi now let's go ahead and look at the other yaml over here so I have made some changes in this yaml now the request is 50 and memory uh limit is 100 and now we are overriding it
with 2 250 MB which is more than the allowed limit so it goes beyond that so let's see what will happen now the Pod name is already changed memory demo 2 so let's see what will happen now if we do Cube CTL apply hyphen f M2 ml is created get pods hyphen n m example okay it says the part is om killed and if we do describe on this describe board and then hyphen n memory example I've made a mistake in the command name okay now let's see what it says it says back off fied
container okay and if we go a little up go up go up go up It also says the reason is om killed that means the part was trying to acquire memory that is more than its allowed limit and that's why it failed instead of failing the entire node we actually we prefer to fail the Pod so that a new pod can be created so that we can adjust the limits and request for that and if we do a top pod again so top pod on memory demo 2 you won't find any metrix because the Pod
itself is not scheduled okay now let's look at another example we go with memory 3 and now what we did we set the memory request and limits more than we have available inside the node okay and we are overriding it with 150 MB so we have seen uh two examples till now where our pod requested the memory within the allowed limits and request like 1002 200 MB and it was 150 MB then the second example we see where the part requested more than the allowed limit and now we are setting the memory request and limit
to 1,000 GB or th000 GI which is even more than we have available inside a node so let's see what happens now if we do Cube CDL apply hyphen f and mem 3. yl created get pods hyphen m m example or it was memory examp yeah me example so this pod is now stuck in the pending State and if we do a describe on this and hyphen n m example let's see the error that it says insufficient so first error is with the taint and toleration of kubernetes control plane node then the second is insufficient
memory preemption 03 nodes are available and so on right so we don't have the sufficient memory inside our node to schedule that part the Pod needs 1,000 GI we don't have that memory so please make the changes over here try to adjust this to a lower number so that the spot can be scheduled so this is um what I wanted to show you the importance of request and limits why do we use it and what happens when we actually go beyond the requested memory so the stress test that we did over here as well uh
let's say 250 MB this is just to simulate the real word example like let's say there is an application running with 50 Mi or 50 mb as the request it started with this and the limit was 100 MB but then something happened and it occupies all the memory let's say there's a memory leak or there is a increased uh traffic on the particular pod and it actually consumed all the available memory memory utilization reaches to 100% after that what should happen the Pod has to crash so that's what happening here when it it actually tries
to occupy more than the available limits it is crashing the Pod with om error out of memory we don't have the enough memory for this particular pod right and in the last case um the one that we saw over here it was actually requesting the memory that is available so that's why it is not even scheduling the Pod it says that insufficient memory we don't have enough memory available for this pod to be scheduled all right so that's it for this video as well uh I hope now that concept of request and limits is more
clear now and you will be able to implement that by the way uh you can always refer to kubernetes documentation kubernetes doio dooc I have already provided this information that uh this particular domain and all of its subdomain will be available in the exam and you can keep that handy to check any syntax to check any commands over there you know the more you practice the more you will be uh habitual of uh working with it so that's uh what I wanted to say and uh as always there'll be uh an assignment task in the
day 16 video folder inside the GitHub repository try to complete that and if you face any issue try to reach out to us on Discord or YouTube and uh you will be able to get your answers and uh try to help others as well so yeah uh try to complete the target of comments and likes for this video and I will see you with the next video as soon as the target is complete or within the next 24 hours so thank you so much for watching I hope you have a good learning experience so far
so thank you so much


![Docker Crash Course for Absolute Beginners [NEW]](https://img.youtube.com/vi/pg19Z8LL06w/maxresdefault.jpg)