LTX just dropped the best open-source AI video generator and it allows me to create 20 seconds long 4K AI videos with native audio and spoken dialogues. With this model, you can create advanced cinematic camera movements locally and completely free. You can generate next level AI videos with just 2 GB VRAM optimized for Nvidia RTX GPUs.
The model uses 19 billion parameters for audio plus video generation. A meaningful leap in open-source capabilities. Let's see how it's all done in practice.
This tilt model which is faster and optimized for performance. I'm using LTX2 distilt model on hugging face. But I will also show you how you can run it on confi on your own computer in the second part of this video.
So on model's hugging face profile if you click on here or here you can use either full model or distilled model online. These links will take you to online generator. You can drop your image if you want to use an image to video option and write your prompt.
It's quite straightforward. Now let's see capabilities of LTX2 models. I would like to start with showcasing some of the cinematic camera movements to elevate your AI films and take them to the next level.
Starting with slow doll golly in camera motion. Purpose here is drawing audience into the character's internal thoughts or rising emotion. It creates a deep sense of intimacy and focus.
For prompt, you can write something like slow dolly in camera moves slowly forward towards the subject. A slow dolly out is opposite. Its purpose is distancing the audience to reveal the broader context of the environment.
Or maybe you want to isolate your character and have an emphasis on that. It shows vulnerability. For prompt, you can write slow dolly out.
Camera pulls back from the subject and subject can be static or can be moving depending on your creative choice. Fast dolly in is aggressively invades the subject's personal space to create immediate tension, shock or a sudden realization. Right.
Fast dolly in camera moves rapidly forward towards the subject face. Urgent motion. Vertigo effect also called zullie effect visualizes a shift or creates a disorienting sensation where the world warps while the subject remains constant.
To achieve this right vertigo effect dolly zoom camera moves backward while zooming in background expands. Extreme micro zoom plays with the scale. It penetrates beyond the visible surface to reveal unseen textures, details or suggesting a journey into a hidden or abstract microscopic universe.
Right? Extreme micros zoom transitions from face to micro view of one of the eyes. Hyper zoom or zoom out connects the macrocosm to the microcosm seamlessly linking a specific individual or event to the wider world or universe.
Right? Camera starts in surface level and pulls back to the earth view. Extreme micro zoom over the shoulder shot plays with the framing.
The purpose is grounding the viewer in character's perspective while establishing their physical and emotional relationship to the person they are facing or to the environment they are moving. If you want to achieve this effect, write over the shoulder shot from a blurred woman's shoulder. She's running in the meadow.
Of course, you can change the context according to your character or environment. Fisheye or peepphole lens. This distorts reality to simulate a surveillance perspective.
Intoxication or a state of psychological paranoia or entrapment. Use the prompt static or handheld fisheye lens camera slowly moves towards woman. Can be also static.
Extreme wide-angle distortion and circular frame. Vac focus is a lens effect. It directs the viewer's attention from one specific detail to another, signaling a shift in narrative importance or a character's changing awareness.
Use prompt rack focus and specify what kind of shift you want to have. In this example, focus shifts from the tiger to the woman. Snap zoom or crash zoom adds comedic punctuation or energetic impact to highlight a sudden reaction, realization, or an important object.
Use prompt snaps straight into the standing woman's eyes. Combine keyword snaps with the specific element that you want to focus on. Reveal from behind us as a foreground obstruction to create a natural transition or to build anticipation before introducing a new subject or setting.
In this highly cinematic shot, you can create incredible revealing moments. Use the prompt wipe movement. Kea slides laterally from behind the tree to reveal the woman walking.
Tilt up emphasizes vertically and grandeur, often making a character appear dominant, powerful, or hopeful. Use the prompt tilt the camera up to show the sky. It is important to add to show the sky hint to have an accurate proper camera tilt up motion.
Tilt down is the opposite. It lowers the viewer's gaze to reveal vulnerability, defeat, or specific details at ground level that contextualize the character. Use the prompt, tilt the camera down, and you can add to show X, meaning that if there's a detail you want to show on the ground, you can specify that in your prompt.
Pedestal down is a vertical moment. It lowers the physical perspective to ground level, often to align with the child's view or to settle the scene into a state of calm. Use the prompt pedestal down.
Camera lowers vertically straight down to show the grass. You can exchange grass with ground or asphalt or whatever is required for your context. Pedestal up is the opposite.
It elevates the perspective to provide a commanding view or to match a character standing up. signifying a rise in status. Camera rises vertically straight up from base to eye level.
Another vertical movement is crane up. It detaches the viewer from the immediate action to show the vastness of the setting or the insignificance of the character within it. Use the prompt crane up.
Camera lifts high into the air. Opposite camera motion of this is crane down. And this moves from a detached contextual view into the intimacy of the scene, grounding the story in a specific moment or character.
Use the prompt crane down. Camera descends slowly to the subject. Drne orbit is orbital and an aerial movement.
It isolates the subject within their environment, emphasizing their pivotal wall in the scene or their emotional state of being surrounded. Use the prompt drone camera orbits 360 degree around the subject. Drne fly over establishes the geography and the scale of the world, providing a gut-like perspective that emphasizes travel or the layout of the land.
To achieve this, use the prompt drone flyover. High altitude flight moving forward over the landscape while woman is walking. Epic drone reveal.
Build cinematic anticipation by gradually uniling a majestic landscape or a key location, creating a sense of wonder and discovery. Use the prompt establishing epic drone reveal rising and tilting down to reveal the scenery. Top down or god's eye view.
Flattens depth to analyze patterns and movement mechanics or to view the action objectively without emotional attachment. Use the prompt tracking top-down shot. Camera pointing straight down.
Woman walks. Handheld shot adds raw energy and authenticity. Placing the viewer directly into the chaos or intimacy of the moment like a bystander.
Use the prompt handheld camera with shaky motion follows her natural movement and documentary style. Tracking shots purposes placing the audience into the character's footsteps, creating empathy and immersing the viewer in their forward journey. Use the prompt, "Woman runs fast while camera tracks her dynamically.
" And remember, you can combine handheld shot together with tracking shot to create even more of a documentary feeling. The side tracking shot has the same concept. It observes the subject's progress and speed objectively.
Often used to depict travel, chases, or conversations in motion. To achieve this right sidet tracking shot, and after that place your subject's action. And remember, if you want to achieve some of these cinematic camera motions, you may need to set the first frame correctly and properly.
For this job, you can always use Nano Banana Pro. And these prompts I'm showing throughout the video will work perfectly fine if you use them on Nano Banana Pro to craft your first frame. Dutch angle tilts the horizon to visually represent madness, unease, disorientation, or a world that has gone wrong.
Simply use the prompt Dutch angle, tilt the camera right or left. POV shot or firsterson view forces the audience to see strictly through a character's eyes, limiting knowledge to their subjective experience. Use the prompt FPV or POV tracking shot.
And then you can specify your character's actions and the setting around her. Worm's eye tracking makes the subject look gigantic and imposing while emphasizing the texture of the terrain they are traversing. Use the prompt worm's eye view.
Low angle tracking camera moves along the ground looking up. Time-lapse is a highly stylized subject tracking and perspective. And you can use this for compressing distinct periods to illustrate the passage of time, environmental changes or frenetic energy of a location.
Use the prompt time-lapse. Camera moves forward. Time accelerated.
Fast motion. Day and night changes. Seasons change.
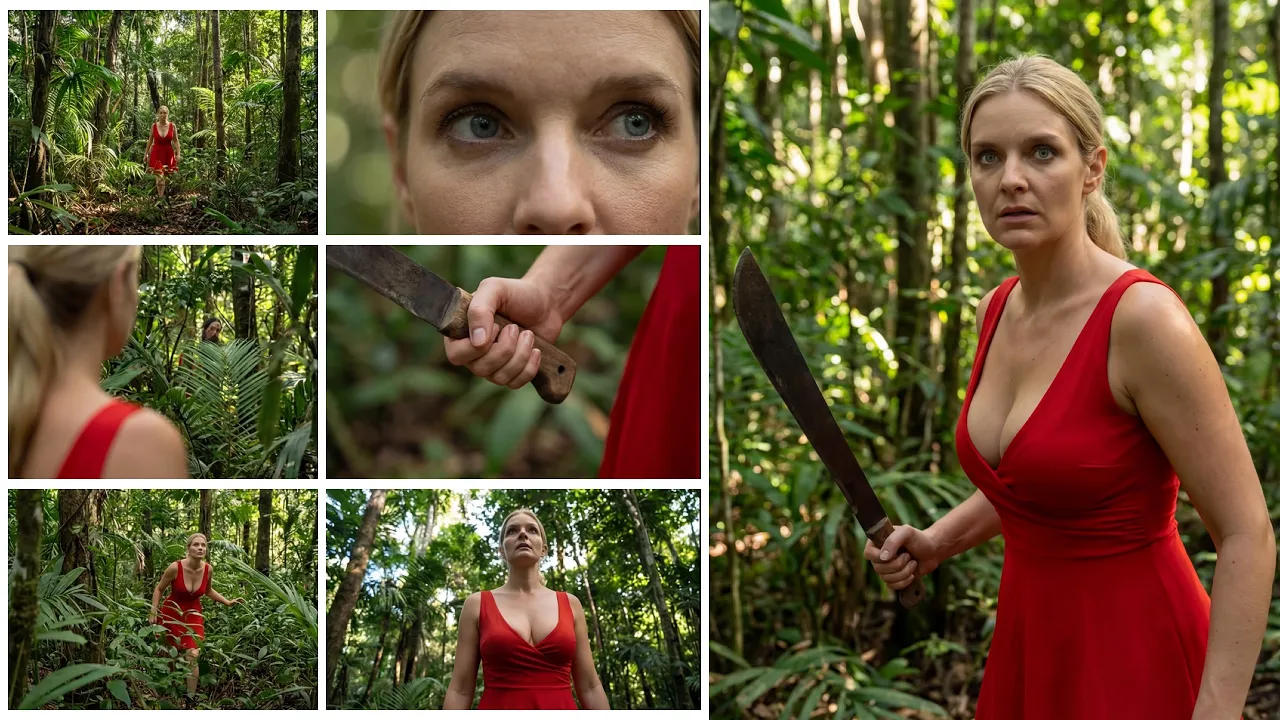
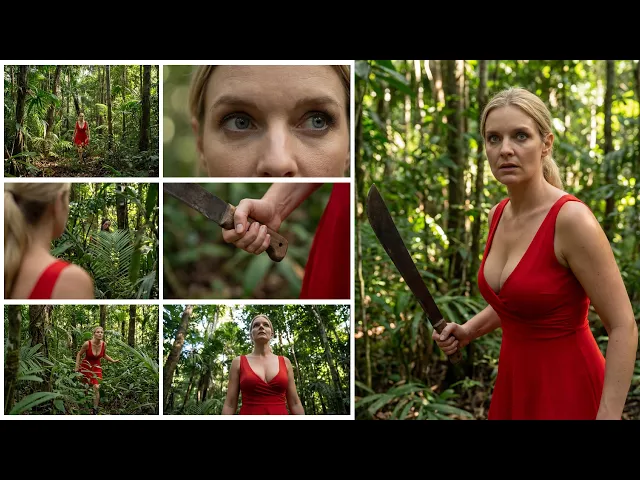
And you can be even more specific with other changes you want to see on the environment. Bullet time suspends time to allow the audience to fully appreciate the physics and detail of a split-second action that is usually too fast to see. Use the prompt bullet time frozen moment.
Ultra slow motion. While she is swinging her machete, camera orbits left. Now let's dive into running this model locally.
To install this model, open config UI and click on manager. Select install custom nodes. Search for LTX video and then click install.
Wait for installation and then restart confi. Notes will appear in LTX video menu. >> Focus, close your eyes AND FLAP.
[screaming] >> Let's dive straight into the distilled imagetovideo workflow. First we use this group to load our models. Here we have the LTX2 distilled checkpoint LTX upscaling model which upscales videos times two new Gemma clip text encoder and a new VAE.
In the next group we define the resolution and the video length in frame. Here we are doing 121 frames or 5 seconds at about 720p resolution. Note that the video dimensions need to be numbers divisible by 32.
If you have enough VRAM, you can try higher resolutions. It's crucial that the frame rate defined here matches the one in create video node. Otherwise, your playback speed will be incorrect.
If you are generating videos with fast dynamic motion, I suggest increasing the frame rate anywhere between 48 to 60 frames per second to get smoother motion and avoid any visible artifacts. Once your image is loaded, you can write your prompt. LTX benefits from long and descriptive prompts.
Try to include details on visual style, character appearance, camera motion, character action and dialogue, background music, and sound effects. By default, your prompts will go into the prompt enhancer node, which uses an elaborate system prompt to automatically refine your instructions. If you prefer full control of your prompts, go ahead and bypass the prompt enhancer node.
Note that changing the seed in the prompt enhancer node will also output a completely different prompt and a final output. Feel free to play around with this. You can also see the output of the prompt enhancer in the show text note here.
For convenience and organization, they have merged the core architecture of the workflow into a single subgraph. Similarly to their previous model, LTX2 works in a multi-scale rendering architecture, meaning you generate the base low resolution video first and then upscale it to twice its original resolution. The original resolution you set is divided by half for the first latent.
So, for example, for a 1080p video, we are actually generating a 960x 540 video first and then duplicating its size to achieve the final target resolution. This is especially useful for quick iterations and experimentation or for users with lower VRAM machines. You can connect the save video node to the first stage of the workflow, exposing the low resolution preview of your generation.
And as long as the seed of the stage one and stage two are fixed, you could bypass the second upscale stage, meaning you can upscale to the final resolution once you are happy with the initial preview of the motion and the audio. LTX2 is capable of generating synchronized audio and video. So we now have two empty latent nodes, one for audio and one for video.
Audio and video are generated separately and then merged into a single latent with a new LTXAV concat latent node. The latent then goes into our sampler. For this distilled workflow, we are using just eight steps into the first stage represented by a sequence of nine manual signal values and then doing three steps for the second upscaling stage.
We then split the audio and video latents again in order to upscale just the video latent and essentially duplicate the first stage node structure again for the second stage. Then they upscale the latent with LTXV latent upsampler node and then finally merge the audio and video latents again and decode them separately with their tiled decoding node which significantly reduces VRAMm usage. During the final step, the final decoded video is displayed into the save video.
Moving on to the full model workflow, you will spot a few minor differences. >> These markings aren't just random, it's a warning. >> Here, we use the full model checkpoint and a different VAE.
Additionally, you will find here a distilled Laura that we connect to the second upscaling stage of our workflow in order to speed up the generation time. The distilled Laura strength is set to 0. 6 which they think is a sweet spot in terms of speed and quality but feel free to experiment with this value for variet results.
In the full model workflow instead of sigma values they using LTXVuler and the number of steps is increased from 8 to 20 for the first stage. You could try going as low as 15 steps and still get decent results. And if you want to experiment, you can go up to 40 steps.
For the CFG value, I found that four is a sweet spot for good prompt adherence and refined details. But you can experiment between values of 3 to six. The higher the value, the better prompt adherence.
But note that high CFG values can introduce unwanted textures and a contrast to the output. Finally, there is text to video workflow. It follows the same.
>> I think we're almost there. >> This is Nana's old village, isn't it? >> It follow principles as the previous workflows.
Load your models, set your resolution and desired video length and enter your prompt in text to video. In particular, detailed and long prompts are crucial to achieve the best results. Hopefully, this video was truly helpful for you.
Don't forget to give a thumbs up and subscribe for more in-depth tutorials.


![[Playlist] 위안의 음악을 듣는 시간, 류이치 사카모토](https://img.youtube.com/vi/F7Ni1nMMm5I/mqdefault.jpg)