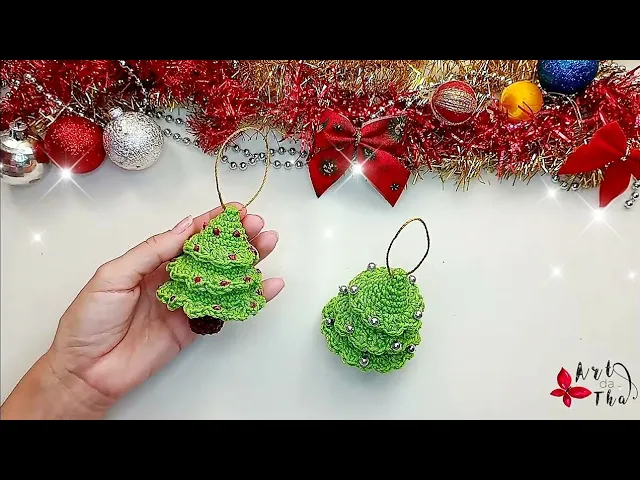
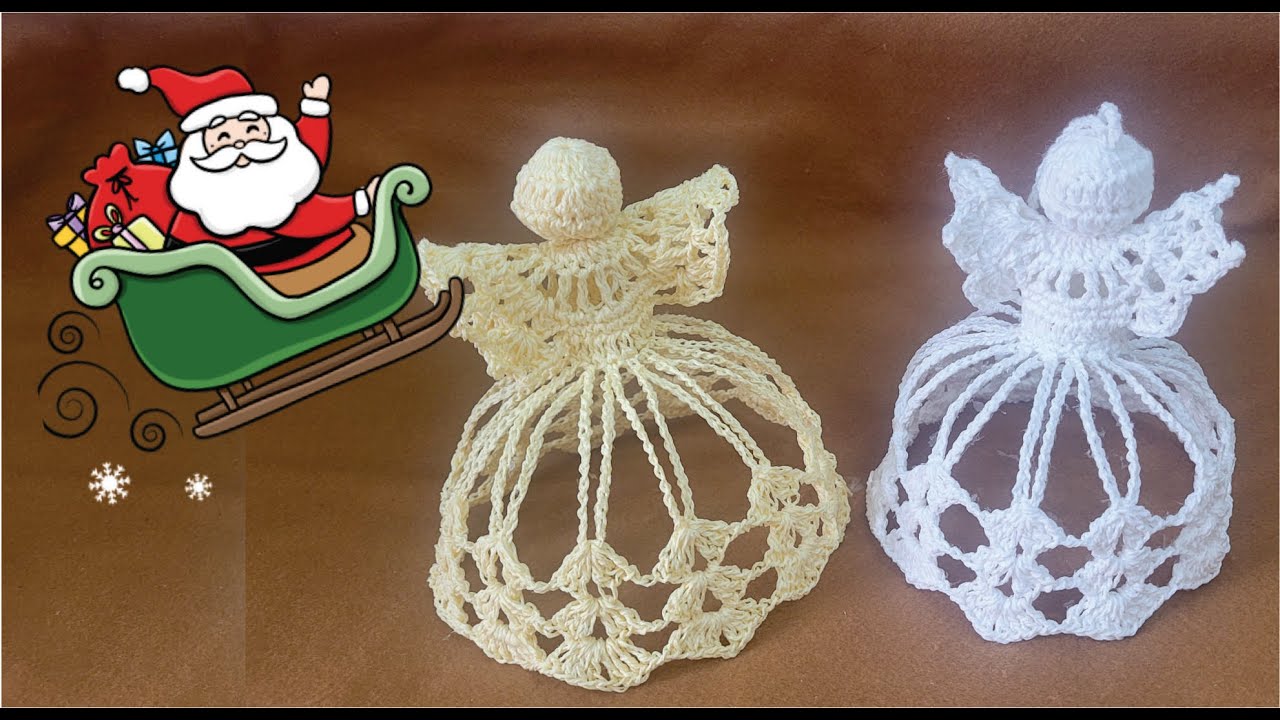
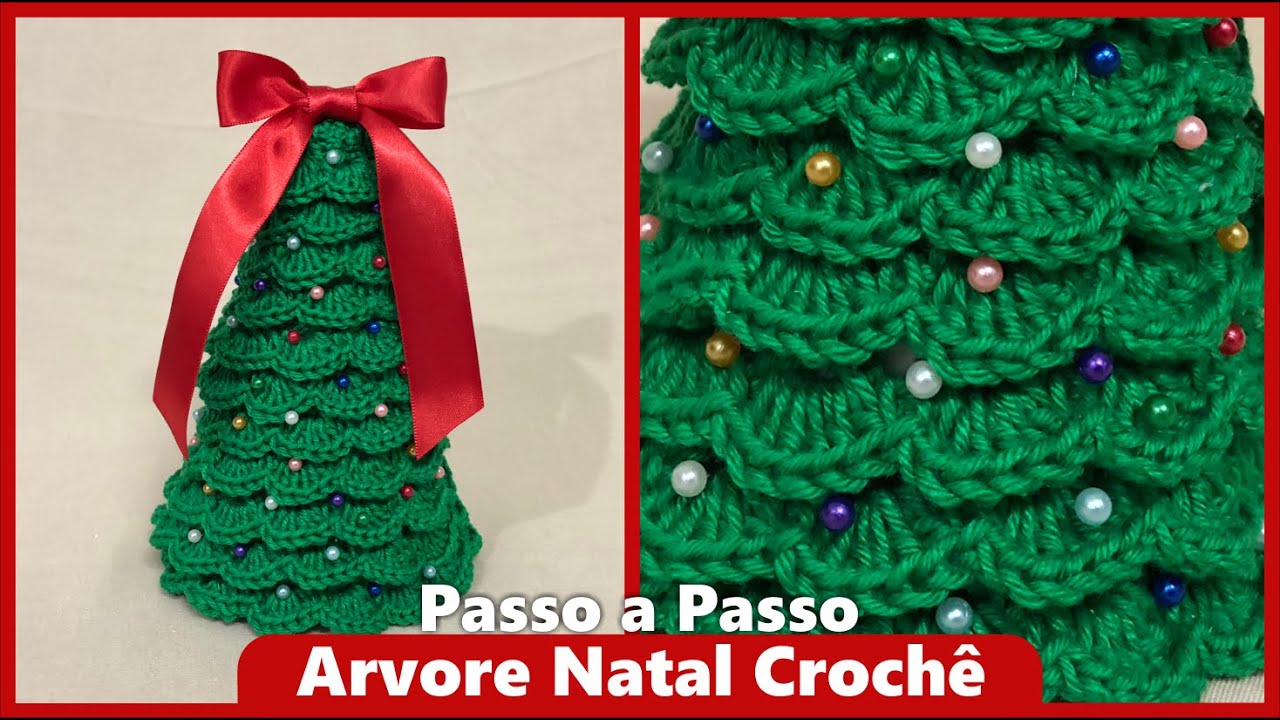
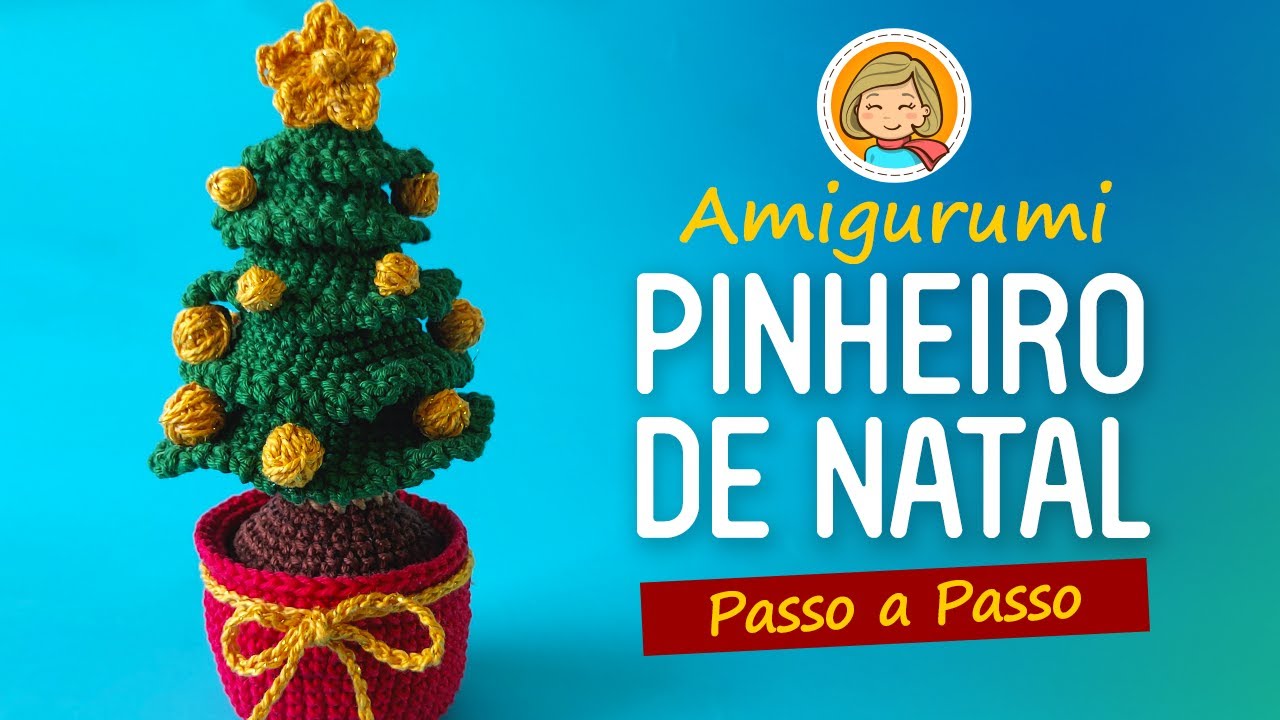
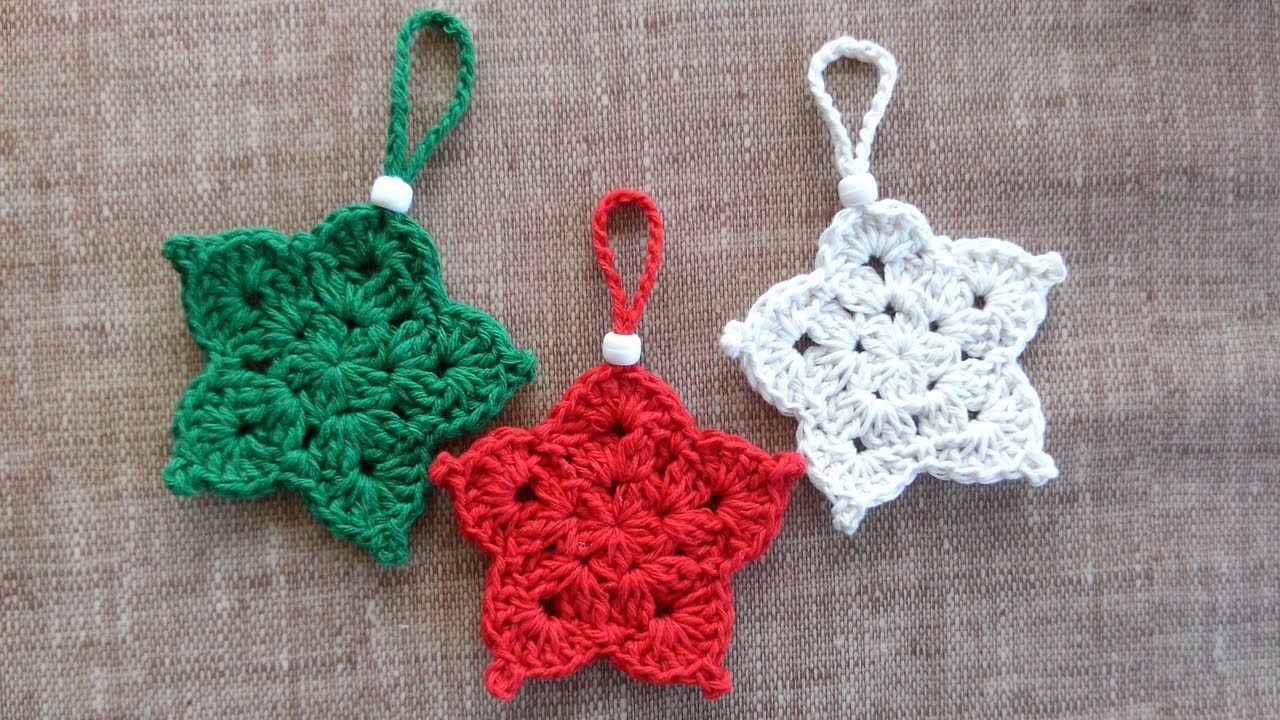
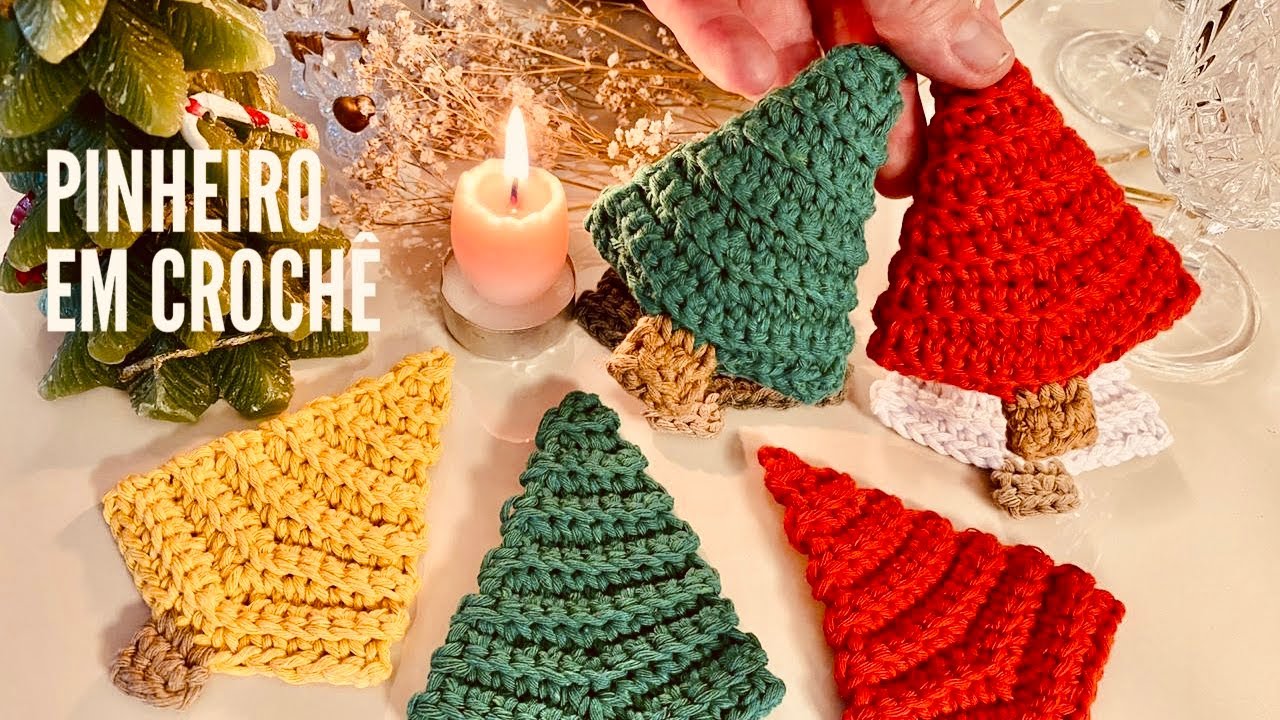
Hi guys, How are you? Let's start a sequence of Christmas decorations. Ideal for decorating your tree.
In this project we will need green wire, it can be any wire, ok. Brown yarn scraps. Crochet hook 2.
5mm. I'm going to use it to decorate this glue with glitter. Or that jar glitter.
The color you decide. I will also use marker and filler. Let's start with the pine tree.
I started by making 6 stitches on the magic ring. On the second lap I'm still doing 6 low points too. Now just adjust the points down.
So they get a little tight. Thus. And so we can move on.
So now on turn three, I'm going to put the marker, we're going to make 6 raises and get 12. So I keep making a raise at each point. We will be left with 12 points at the end of this lap.
Now on lap four I'm still scoring 12 points. Then a stitch-by-stitch row. Now on round five I make 1 point and 1 raise 6 times and we will have a total of 18.
I made a point, now I make the raise. Repeat until the end. Now on row 6 and row 7 I continue to make 18 stitches in each of them.
Then two rows of stitch on stitch. Now on row 8 I will make 18 stitches but only taking the back loops. Now on row 9 I make 2 stitches and 1 increase 6 times and we'll be left with 24.
But now, normally taking the stitches. OK. Then 2 points and the raise.
Repeat until the end. Now on the 10th and 11th row I continue to make 24 stitches. So two rows stitch on stitch.
On row 12 I will make 24 stitches taking the back loop. Taking the back strap, continue making stitch by stitch. Now on row 13, I make 3 stitches and 1 increase 6 times, and we're going to have 30.
Look, normally picking up the stitches. Now three stitches and the raise, go all the way. Now on the 14th and 15th row I continue to make 30 stitches.
Now I'm getting it normally. Two rows of stitch on stitch. Okay, let's move on.
Now on row 16, I continue to make 30 stitches, taking the back loops as well. Check it out, 30 stitches taking the back strap. Repeat until the end of the round.
Now on row 17 I'm going to do 3 stitches and a decrease 6 times, and I'll have a total of 24. So here we go, 3 stitches and the decrease, taking it normally now. On row 18 I make 2 stitches and a decrease six times and we will have a total of 18.
So 2 stitches, now I make the decrease. Repeat until the end of the row. Look guys, I've already been putting filling in our Pinheiro.
This is how this bottom part turns. So let's continue here. Now on row 19 I will make 1 stitch and a decrease 6 times, and I will have a total of 12.
Repeat until the end. Okay, now I'm going to do the color change. But before starting with brown, I'll do the stitch, by the way, I start with the stitch and finish with brown.
Look, I take the brown one and I'm going to finish with it. Look there, like this. You can now cut the rest of the Green Thread, leave one end and now just tie a knot in both.
Tie the knot so there is no danger of letting go. Quiet, right? Easy and quick to do.
Look at it, I'm going to tie the knot and that will be enough. He's already been arrested. Now just hide inside.
So, it adjusts ok. Look, now on career 20 doing 12 very low stitches. Fine.
I'm going to continue like this, I'm going to speed up the video and make 12 very low stitches. Check it out, and it will stay that way. It adjusts.
Now let's go down the trunk of our Pine Tree. Let's make 12 stitches, taking only the front strap now. Look, there are the two straps of the slip stitch, take only the front strap and continue making 12 single stitches.
It's a little tight at the beginning, but you can do it with ease. Just keep taking the front strap and making stitch after stitch. Look, very easy.
I'm going to keep doing all my 12 stitches here. Now to finish this trunk I'm going to make two more rows with 12 stitches. OK.
Then just close normally as usual. So I'll do row 22 and 23 with 12 stitches and then just close. Then put some stuffing on that trunk.
I'll do mine and I'll be right back here with you. Hey guys, I put a little more stuffing, cut the thread and now it's just a matter of closing as usual with any amigurumi. Now let's work on that detail that we left free.
Just turn the pine tree down like this. Take a strap and I'm going to attach the green thread, look there, I'm going to attach it here, I make a little chain, I'm going to work on that end that is left. I do one more chain and now two double crochets in this same place.
Look, one high crochet, and one more high crochet. Now I'm going to skip one strap, I'm going to the next one and I'm going to do a single crochet, a chain and two double crochets. All together.
One, two highs. It's just repetition. Look, I'll skip one strap, I'll go to the next one, I'll do a single crochet, a chain, two double crochets .
Look, very easy to do. Again, skip one loop, go to the next, do a single crochet, a chain, and two double crochets. One and two.
Just repeat this all the way around. I will do mine. Ready, people.
I got to the end, cut a piece of yarn and I'm going to finish off. Very easy and peaceful. Do that basic finish.
Then just repeat on the other two rows that we leave the loops free. It's just repetition. Finish off the thread well, hide it in a few stitches at the bottom, like this.
If you want to put a drop of glue and then cut the excess, you can too. But as it will hang, just cut these ends. And just do the same thing in these rows of straps that we leave free.
In those two. I'm going to do my two rows and I'll be back to finish with the decoration. Okay folks, that's how our Pinheiro was.
I decorated it with these polka dots. These polka dots are from that little cord that you find in 1. 99 stores.
But you can replace it with beads, embroider, I attached this thread to hang. Or you can use this glue with glitter. Just go dripping it and make the red balls.
Here it's talking about paint, but it's glue, people. Glue with glitter. Fine.
You can decorate however you want. Look there, I dripped and it stayed that way. It was fun too.
Unleash your imagination. You can use glitter. If you use glitter, I suggest using that white glue, spread it with a brush and then throw the glitter and remove the excess.
Look there, I tied it with a golden thread, this is the old gold. And our pines were like this. I hope you enjoyed.
Kisses and until next time.