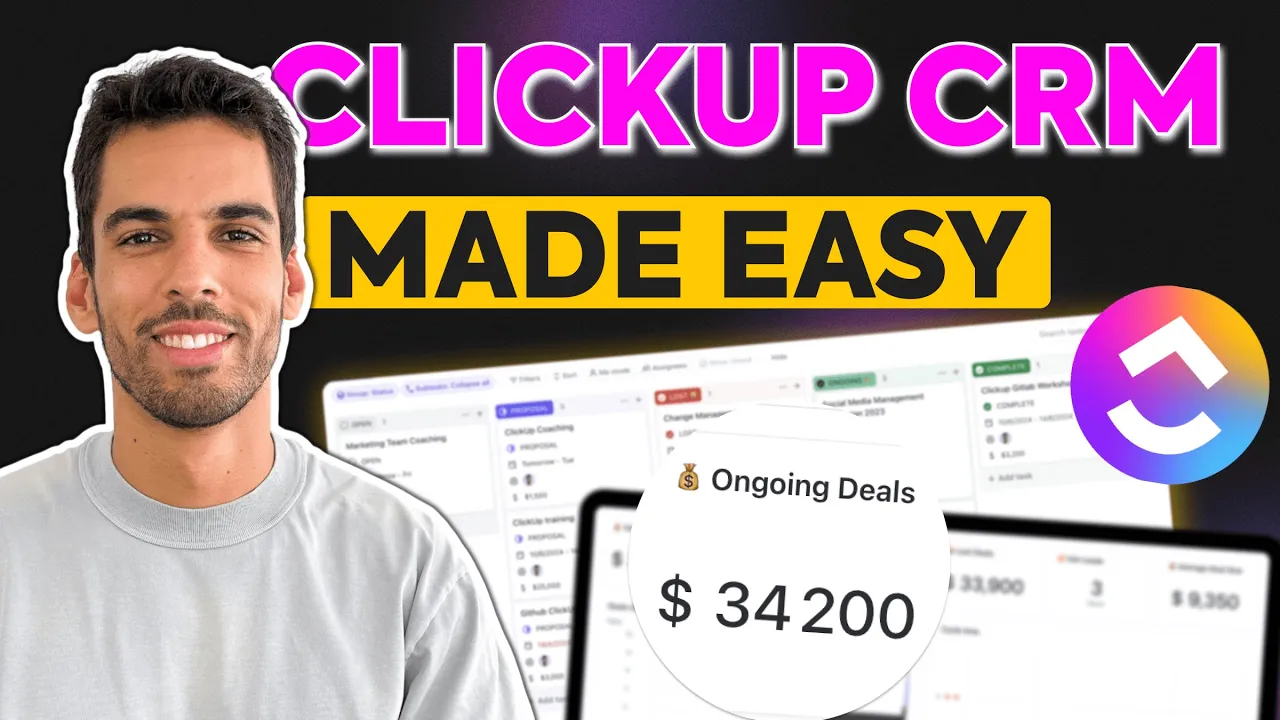
Hi everyone. In today's video, I'm going to show you how to build a CRM right in ClickUp. Now ClickUp is famous for being a project management software, but I'm going to show you that you can structure, operate, and systemize your sales process right in that software as well.
With a sales pipeline, we're going to build together, you're going to be able to handle your agency sales up to seven or eight figures easily right in that software. Now stay till the end because the automations and templates I'm going to show you are going to let you delegate your sales process to your team very easily. Now let's get started.
Now if we dive right in here in ClickUp, I open up the template center and I've searched CRM and ClickUp offers you about 30 templates for customer relationship, but please don't choose them. I opened up one here. It will create some custom fields.
It will create some custom task types, and we don't need those. We need to build a CRM that's tailored to our need as an agency, as a service provider. I'm going to show you how to do that from scratch because templates are going to clutter your workspace, and you're not going to understand the system under which it's built.
Let's dive right in by understanding how a CRM works. If I get to my presentation here, the CRM is fairly simple. It's built out of three main components.
Deals, accounts, and contacts. A deal is something that you sell to a client. If you're an agency, it could be a website design project, it could be a software design project, it could be an ads campaign management.
Anything that you sell to a client is a deal. Now your client is called an account here. An account is basically a company or an organization to which you provide a service.
It could be a large, small mid tier account. Now the last one is contacts. Contacts are basically prospects or clients that we want to reach out to.
It could be people that we have worked with in the past or people that we want to work for, they have a name, they have an email address, that type of information. First off, starting with deals. A deal will usually go through a sales pipeline, through a workflow.
It will have statuses. The proposal could be open under negotiation, won, lost, or closed. We'll do a fairly simple deal pipeline in that example.
Next, your deal can have a value. It could be 10, 000 deals. It could be 8, 000 deals.
It really depends on your company size and your agency type. But you need to track that information into your deal. Next you could have an assignee, which is a salesperson.
So if you're starting to get structured and you have different sales people, you need to assign those deals to different salespeople so that they track the sales flow and are able to resell, to cross sell to the client. You can think of deadlines. You can think of tracking products.
You can think of tracking about anything right into a deal in ClickUp. That deal will be tied to an account as we've seen. So an account will have a name and address, a location, a VAT number, some banking information.
You could have a retainer contract for that account that you want to track in ClickUp. So all of this, you can store into the accounts element. And the last one is going to be your contacts.
Your contacts are optional in my opinion, because you potentially could track your contacts right into your deals. You don't really need to have two relationships, one between deals and accounts and one between accounts and contacts, but I'm going to show you both options so you can choose. Now, personally, I recommend to only have deals and accounts and the contacts will be optional.
So it's really up to you how you want to complexify things. Now, if you download one of those ClickUp templates I've talked about, very often they're going to have different lists for leads, they're going to have more lists than you need. And you're going to have to navigate between those different lists.
And you'll probably lose yourself because in most cases, if you create a CRM, or if you use one that you bought on the shelf, you're going to lose yourself. like Salesforce or HubSpot, you probably will not use it to its full potential. I have seen situations of companies buying HubSpot and using it to 5 percent of its potential where they could set all of that up in ClickUp and track their sales, but also their projects in the same software.
And that will make your company workflow so much easier. Now I'm going to show you some of these automation examples. So if we set that up properly in ClickUp, we'll be able to create some custom automations and custom templates to allow us to go through deals much faster than usual and onboard the client in a more systemized way through creating a sales and onboarding process.
The first one is going to trigger a deal template when you start a new deal. That way your sales team will be able to run through the same style script when they start with a new prospect and you'll have a better overview of how each deal is going through. And next, when that deal is closed, we'll create a second automation to send an onboarding email to the client so that automatically without having to do this emails one by one, they'll get an email with all the information they need to know from your agency or from the way you provide your services.
. We're going to create that deal template we've been talking about. We're going to create a proposal email template, and I'm going to show you how you can use email templates right in ClickUp for your sales deals and an onboarding email template.
With this CRM structure, we're going to build a solid, lightweight, and automated system right in ClickUp that will allow you to track your sales. Now, one last part I'm going to show you is this dashboard. We're going to build once our CRM system is done.
This dashboard will allow you to track the main KPIs of your sales right into ClickUp. And you will see that ClickUp is pretty powerful to do this. Again, you can probably have much more advanced features and KPIs tracked in tools like HubSpot or Salesforce or any typical CRM, but again, you probably don't need all of these overkill figures and dashboards, and you can create a very simple one that fits for most of your needs in ClickUp.
We'll get back to this dashboard towards the end of this video. So follow through, make sure you understand each step because building this dashboard will depend on this previous step. I just got back into ClickUp and I'm going to leave this template center.
We're going to create our own space. That's much more tailored to how our agency or business works. So let's leave this and create a space right here and we're going to call it sales.
You can call it any way you want. It doesn't matter. I'm just going to use sales.
It's the most simple. You can call it CRM. It doesn't really matter, but this is where we're going to store all of our sales information in our company workspace.
Every time I create a space in ClickUp, I keep it as simple as possible and I customize it later. So I'm going to click continue. I'm going to choose starter.
Then we can use the default task statuses and we can go into ClickApps and turn off a few that we don't really need. I usually don't need the priority. The multiple assignees, I don't really like it.
You will probably not need time tracking or time estimates either for a CRM. You can keep it on if you want to track time spent on each deal, but this is really not mandatory. This kind of setup will probably be enough to start with your CRM.
So as we've done here, and we're going to create our space, ClickUp is going to create our space with a single list, and we're going to rename this list to deals. Now I'm going to create the two other lists I've been talking about. The account list, and finally the contact list.
Now, this contact list is optional and you don't really need it if you are gonna use automations in your CRM because automations are tied to a single list, as I will show you, they will all operate in your deals list. This contact list is only useful if you are tracking some lead acquisition, some prospects that are not necessarily tight deals in ClickUp, because you will see for my automations, I will store my contact information in the deals and not in this list, otherwise you can consider ClickUp as a CRM for your hot leads and only use the deals and accounts. Getting back into my deals, I'm going to create the information I need for my deals.
We're going to create a deal example. This is our first deal. And then you're going to ask yourself which information I need to track.
This is basics for your deals. You probably need to track the status of that deal. I'm going to create a new template based on your sales pipeline.
So a deal usually starts with Open, then it goes into Proposal. Then it might be won and ongoing. You can add an emoji if you want to save it and then it's going to be Complete.
Unfortunately, we also need to cover the situation where the deal is lost, which I hope happens the least possible for you. And we're going to add a status for a lost deal. We're going to use red.
I'm going to call it Lost and we're going to add our sad emoji. Going to save this as a template, call it sales, save it and use this template. And we're going to click apply changes.
That way, this list will have a sales pipeline. Now, if we click on our status here, as you can see, we're following through a specific sales pipeline, Open Proposal, Ongoing, Lost and Complete. And we can view that pipeline in our board view.
Usually sales team like to work in board views and ClickUp has recently updated that view. So that's awesome. We have our deal here and it moves through different statuses.
So it can go from Open to Proposal to Ongoing and then to Lost or to Complete if the deal and the project is completed. Now, if you want to go further, you can click again on the status here and pick a specific task type. You can create new ones if they're not created already.
If you don't know about task types in ClickUp, they're just a way to name your tasks. If you hover here, it explains you. What it's used for.
So it allows you to customize your names and icons to match your workflow needs. That way, a deal is a deal, an account is an account and a contact is a contact. And I'm going to show you how to change those task types for your accounts and contacts as well.
Next, I'm going to add some more deal information. I'm going to add a custom field which is a money custom field, and I'm going to call it value. That way we can track the amount of that deal.
We're going to create this and you can pick any currency you want. We pick USD and we can store that information right in our deal. So the value of that deal.
We have the salesperson, I've added the start date, the due date of the deal, the deal value that I'm going to leave empty because we're going to use this task as a template later. And you could potentially add any custom information you need on that deal. I've added the basics, but you can go a little bit further.
For example, you could add a product and I've created a product custom field right here. You can store your products if you're an agency, and you offer different services, you can store this information here and say, we sold a training or coaching or full setup or workshop to this client, depending on the different products you have. You can choose a single select field or a multi select field if you need to.
Now I'm going to keep this field here and I'm going to add one last field which is our relationship field. And this field is very important because it will create a relationship between your deals and your accounts. So I'm going to call this field account, and I'm going to pick the tasks of the list called accounts.
That way, I will be able to see which account these deals belong to and tie deals to accounts. So I'm going to create this right here and I'm going to add a second relationship field for our contacts. So I'm going to go into relationship and call it contact and pick the list called contacts.
So let's make these columns a little bit smaller and let's create our first deal, which is a ClickUp coaching service. Let's say I am the sales manager of that deal. And it starts on Monday and probably finishes up on Tuesday.
It's a two day coaching. And let's say the value is 1, 500. And I've only sold a coaching this time.
Now I'm going to create the account of that deal, the client of that deal. So that client is going to be Apple, for example, and I'm going to create a new task called Apple right into the accounts. Now, before I tie my deal to an account and a contact, I'm going to customize the lists.
So for accounts, I am going to use a default task type called account right here I've created it. And for contacts, I'm going to use a default task type called contact. Perfect.
And I can add a few more information into the list, but we'll get back there later. I'll get back to my deals and I'm going to create my first account. So let's say I do this ClickUp coaching for Apple.
I'm going to create my first account called Apple and I'm doing this coaching with a guy called Tim Cook. Perfect. That way we know that we have a deal Open with Apple on a ClickUp coaching for $1,500.
Amazing. And we can move this deal over to proposal and going, et cetera. As you can see, it was fairly simple and fast to create your CRM in ClickUp.
Three lists, one mail list, where you track your deal and the two others, where you store your information, such as your accounts and contacts, we can customize those lists as well so you can have an account manager assigned here. You probably don't need the due date, so we can hide that column and you can add other custom information. For example, you could add a text area for the company address, and that way we can store the company address of Apple here.
I've copied and pasted the address of Apple and it's stored right here. Next, you can potentially add any custom information on these accounts. You could add the account manager, but you could also add the NPS of that account.
You could add the tier of that account, and have gold, silver and bronze series based on the type of support you offer them, for example, gold could be through a life coaching, silver could be emails only and bronze could only be an FAQ or video, for example. So it really depends on the type of services you provide. You really need to customize this account list to your needs.
And that's exactly why I don't want you to use a template. This is just a demo. This is for you to work with me, async, to take a break and to go into your workspace and to build that CRM with me.
So we're going to create this list. Perfect. And we could track the tier of that client, say they're gold tier, for example.
And next, I'm going to customize the contact info. I went to contacts right here and I have my client Tim Cook, and I'm going to add their email here. If I click into email, I can add that email field, but it turns out I already have one, so I'm going to use it.
I recommend you to make sure that you don't have that field already created by template or by another coworker before you create any field. That's a very important practice in ClickUp. I'm going to add that email field right here, and we have our email here.
I'm going to say this email is tim. cook@apple. com.
For the sake of this example, the email of Tim Cook. So I'm going to remove this due date information. We could have a contact manager, for example, it could be the account manager, but we also don't necessarily need that assignee field right here.
We could add the phone number. And if I go into phone, I already have a phone number custom field. That's perfect.
So I can add the phone number of Tim Cook right here, as you can see, we have our contact list, we have our account list, we can have account managers right here, we can add any custom field to our accounts or to our contacts or even to our deals. And if we choose the board view, we can manage our sales pipeline in a board like way, like most CRMs work. Next, we're going to move on to how to automate and systemize that CRM more.
I'll get back to my deal example here, and I'm going to add some template information for my sales team. And to do so I've just copied and pasted a sales script example that I have. If you want to have access to that sales script and to the whole CRM template that I'm building right now, you can download it.
The link is right in the description. And that way you can save yourself time from building all of these automations and templates and workspace structure. We have our sales script right here.
That's amazing. We have our product information, our value. I could add a warning as a comment.
I could say, for example, always ask the prospect for a budget. And that way, every time the task pops up, the salesperson will see that instruction right here. I can even make it bolder, highlighted so that it's more visible.
I'm going to use it as a banner. Perfect. Always ask prospects for a budget.
And what we're going to do next is save that template. So that deal template is going to be saved into our template center and be reused in the future. I'm going to put AgenSys.
That's the name of my agency deal template, and I'm going to save it and create my first automation to trigger that template. Now, if I go into automations right here and create my first one, and I'm going to pick tasks because I don't want this to apply to subtasks. And I'm going to say, when the task is created, please use the template called deal template Something else I wanted to trigger is adding a start date and a due date to my deal that way you don't have to do these yourself and you can refine the start date and due date later, but at least these fields will be filled and it saves you a little bit of time.
And I'm going to add a start date. That started is going to be say three days after trigger date, because on average, we reach out to a new prospect three days after they entered the pipeline. And we're going to add a due date that's say 30 days, because on average, we close a prospect 30 days after we have entered in contact with them for the first time and we can rename our automation when test created apply deal template, and that's our first automation.
We can test it out by creating a second deal. We're going to call this deal, social media management campaign, and it's applied the template we need. It's added a start date, a due date, and we can add the information we need, such as the value, if we already know the customer value for that deal and the product, for example, like if it's coaching or something like that.
We can add an account, say this one is going to be for Google. And our contact is Sundar Pichai, CEO. The product is actually a setup and not a coaching, and we have created our deal.
And if I open it up, it will have the sales script that I've just created. It will have the comments that I've added. And as you can see, we've already started systemizing our sales process through this agency CRM.
I'm going to show you something quite interesting. Now I'm going to show you the power of that account relationship we've created here. If we have a second deal for that client, we can duplicate this one, for example, and call it 2023 and rename this one to 2024, for example.
Perfect. So we have two social media management campaigns for this client, and one is worth 12, 000 and the other is worth 20, 000 say. If I add my account right here and I say it's for the same client and I add my contact.
I can get back into my accounts here and create a rollup field. So what this field will do, it will aggregate the information based on that link we have between our account and our deals. I can add a column and display all our link deals right here.
And that field will be tied to the relationship between our deals and our accounts and it's going to display us the sum of all those deals with this client, whether they're open, lost, or ongoing. So if I go into rollup field right here and I pick the value from the deals link, and I go into sum, I can call this Total deals. We confirm, I'll bring that right here.
As you can see, we have the total sum of deals for this client. 32, 000 is the sum of the 12, 000 and 20, 000 of these two deals, the social media campaign of 2023 and the 2024 one. I hope you're starting to understand how this space works and how all these lists connect.
Our CRM is coming together and we're going to automate it even more. If we get back into our diagram, what I want next, I've done the deal template, I want a proposal email template. Now I just got back into my deals list in ClickUp and I'm going to create two custom fields into that list.
Because the next automations, I'm going to show you, are going to allow you to automatically send emails, to your prospects. But to do so you're going to have to create custom fields to track this information. So who the contact is and their email right into our deals list.
And that's why the relationship with the contacts and the contacts lists in itself are not really useful. As I've told you, they're useful if you want to track your leads, if you want a whole contact list, but you're going to have to duplicate that information between the contact list and the custom fields that are stored into the deals list. I hope that's clear.
The first field we're going to create is going to be our email field to track the email of our prospect. I'm going to add a field from the workspace and search for my field called email and add it. I've already created it.
You probably have already because you created your contacts list as well. And I'm going to add another field from the workspace as well. And I'm going to look up for name and I want the contact name.
If you refresh your workspace, these two fields will appear right here, and I can add the contact name, which is Sundar and the email is say sundar@google. com. Perfect.
These two informations will allow us to customize and automate sending emails to our prospects. Make sure that you have turned on the email ClickApp into the space settings and that you have an email connected to workspace. I have one right here, and that will be the email from which all of your emails will be sent in your automations and in your templates.
So first off, let's create a template. This is going to be our proposal template. I'm going to name it.
I'll just add a subject and I will add some email content. Now I have used a standard proposal template, but obviously you can customize this to your need. That way, every time you send a proposal, it's always standardized the same way for your clients.
Now, what's really good is that I'm going to be able to add custom information. Now I'm going to save that template by clicking create right here. And that way, every time I send a proposal to a client, it will suggest me the email of the client that is stored right here.
I can just add it with a click and pull that template, the proposal template, and obviously I have to customize it to the proposal, but at least that way, you will make sure that your service business always works the same way, that your proposals always have the same structure, and you can train your team on how to create this and how to fill it in and adapt and adjust that template as your company grows. I can send this email. It will be delivered to the client.
Now that's one way to handle email template and automating templates. That's what I would call half automating, because you still need to fill all of these placeholders. But what you could do is automatically send some emails to your clients.
And that's only if that email would be standard. Now that brings us to the next automation we can do. What we are going to do is an onboarding email template.
Trigger this onboarding email template when the deal is closed. So we have two automations to do and our deal is closed. So if I get back into Clickup and go into my automations, we're gonna create an email automation.
If we go into add automation right here, we're going to browse right here and into email. You can create a custom email automation and you first have to pick your email account. So I'm going to pick mine, click select, and I'm going to say when the status of a task goes to ongoing, which means the proposal has been accepted by the client, we can send an onboarding email to the client automatically.
And what's interesting, now that we have filled the email fields and the name fields of our client, we can pull that information right here. So it knows exactly to whom the email will be sent. And we can add a subject and a body right into our email.
We can also add custom field information right into our emails. So let's pick a standard onboarding email template. I'm going to add this one here and I'm going to add a subject.
Welcome to agencies. We're thrilled to have you on board and look forward to working together to achieve your social media marketing goals. To get started, please provide us with Google ads, account access, meta ads, account access, whatever you need.
And you also should have gotten a separate retainer inverse due tomorrow. Let's make great things happen. Best regards, and you can add anything you want.
Now you can customize the start by saying Hello. And pulling that first name that's stored right here. That way you'll have a Hello.
Welcome to agencies. And we'll send an email as Hello Sundar. Welcome to agencies.
We're going to try this one out and we're going to go into create right here. Our template is created when status changes, send onboarding email. The deal closed at onboarding subtasks, because that way, each time a deal is signed with a client, we can create some custom subtasks that will allow us to make sure that our deal starts and kicks in as soon as the client is closed, it will add the onboarding subtasks and we'll make sure that our onboarding goes through the best practices of your agency or your company.
So that it basically follows the right process. Let's close this one out and get back into ClickUp. We are going to create this automation, so we'll get back into automations right here, add an automation.
I'm going to go into status changes and get into ongoing as well. And next we can add some subtasks. We want this to happen only on tasks.
We can go into create a subtask and we're going to create a few instructions, a set of three instructions for our project team to handle this client onboarding. So first one might be, for example, checking with client. It could be a dynamic due date.
That way it could be, for example, one day after trigger date We can add a description to this subtask. We can add a priority, add an assignee. It could be me, for example.
We can add a due date. We can add a start date so we can say this check in has to happen a day after our client is closed and is due seven days after, for example. And we can move on to the next sub task, create a sub task and say create client project in ClickUp we can add a start date and a due date.
It has to be created a day to two days after the project is closed. And we can add a final one, which is for example, the retainer invoice. And we can say our invoice is due seven days after our deal is closed.
We could potentially add a tag to track whatever's in the invoice. So I'll add a tag called invoice right here. And that way we could create a view for invoice tracking, for example, right into our deals.
So I'm going to create this automation and test out our two automations right here these two automations will trigger when the status of the deal is Ongoing. It will send an onboarding email externally and create three subtasks to handle internally. Now for the email automation to work, you need to make sure that there's an email field right here.
Now, if you want to get an alert when an email is not sent, we could create a fourth automation and say when the status changes to ongoing and the email field is not set, then add a comment. That way it will remind you if you haven't filled the email field and the email automation has not worked. This is a very specific case, but this animation is useful in case you miss filling the email field.
Now we're going to test out these automations. We're going to move this task, which doesn't have an email field to ongoing. And we're going to move this one, which has an email field to ongoing as well.
So the subtask automation should work without a problem, but this one should display us a comment. So if I open this up, as you can see, email wasn't sent because my task doesn't have an email field for my clients. So it doesn't know to who to send this onboarding email.
Whereas this one, as you can see, had an onboarding email to this email address and automation worked. Now, I dove really deep into how you can operate and how you can systemize your CRM right in ClickUp. So you can create these templates, you can create automations.
If you need to get into more specifics, you need to think about what you can automate through your sales process, from your discovery calls to your proposals, to client onboarding, as you can see, ClickUp is very powerful with email automations, with email templates. You can do quite a lot already, and you don't really need to get into a more complex CRM software. and the last part is really going to interest you because I'm going to show you that you can create a whole sales dashboard right in ClickUp.
You don't need any external software. You can track yourselves right here. Now I've created a diagram to show you what we want to see in our dashboard.
And I recommend you to do the same if you want to create your own custom dashboard. Use a tool like Miro or Whimsical and put in all of the KPIs you want to track. Here I want to see the won deals, the open deals, the lost deals.
I want to see my active projects. And I want to have two different timelines, one for the deals won and one for the average sales cycle length. I also want a list of my active projects and a list of my hot leads.
You could potentially track any other CRM information, as long as you have the fields for it in ClickUp. So could track the customer lifetime value, the total sales per sales rep, the deal size, the NPS, any other information you want, but this is a starting point. This is the dashboard that I personally use for my agency.
Now, if you want to custom set up of your CRM and of your dashboard for your agency, you can book a discovery call with me and we'll go through your needs and do something really tailored to your use. I just got right back into ClickUp and created some dummy deals, some dummy info, and this is important because if you don't have your tasks filled with start dates, due dates, values, and you don't have enough information, your dashboards will not really be representative of your business. So you need to make sure that everyone at your sales team fills in this information.
So the products, the value, the due date, if you want to track all of this into a dashboard. So I'm going to click into dashboards right here and create our first dashboard. I have one here, an empty one called sales dashboard, and I'm going to start from scratch.
So the first thing I want to track is going to be the total deals Year over year. So I'm going to start from scratch and go into custom right here and pick a calculation. And I'm going to name this total deals.
Now I want this to apply to the deals list only. So I'm going to select this in the location and I will pick my money field called deal value, and I want to see the sum of my deal values. We don't have to change that.
We can keep dollars as a unit. Obviously, if you're using another unit, you can change your currency, for example, and we don't want to include the sub task. We don't really need those deals are considered as tasks.
But we want to include the closed deals right here. And we only want to see the deals we want. We're going to put a filter on the status, either an ongoing deal or a complete deal, because these are the two types of deals that are considered one.
I'm going to click confirm and I'm going to add another filter. So if we get back to our diagram, I want the rolling 360 days. So I'm going to get back right here and I'm going to say, I want deals that have date created in the last one years.
So as you can see, ClickUp has pulled that information 37, 400. Let's move on to the next KPI. We want to know the sum of open deals.
So let's get back here. And what we can do is duplicate this widget. That way it will save us time in setting it up.
So I'll go into my settings and this time we want the sum of the ongoing deals only. I'll just put a filter on ongoing, click apply and that amount is smaller because we know that the total ongoing deals is 34 200. So we have signed in total 37 400 from which we have 34 200 ongoing, and I can name this ongoing deals.
And let's move on to the next one. I want to see the lost deals. And all I have to do is change my filter right here.
So I'll put status as lost and created date is over the last year. I'm going to click apply, and that should pull an amount of 33 900. Let's make sure that data is correct.
So if I get here, yeah, it's the right amount. We have one deal of 33 900. So our dashboard's working.
Let's get back here. I'm going to finish up with the last data. I'll make these widgets slightly smaller so that we can put a little bit more figures here on top.
I want to see the amount of open deals next to it. Let's make my workspace slightly larger. Perfect.
I'll get into the settings here. And this time I don't want to see the sum of my deals amount. I want to see the amount of tasks.
So I'm going to click task count and click save. And that means it's going to pull the amount. And we still have a unit here and we don't want that.
So I'll get back here and click custom and name our unit deals. That way we know we have three deals ongoing. So our data is starting to make sense.
We have three deals of 34 200 in total. We have 33 900 of lost deals and 37 400 of total won deals. Let's add one last figure.
I want to see the amount of open deals, the amount of hot leads that I have. I'll just going to duplicate right here and change the status. I want to see the hot leads.
The ones I've sent a proposal to, and I'll just select that filter and call this widget, hot leads. So this is starting to totally make sense. I could potentially add any other KPI I want to say, I want the average deal size.
I can just duplicate this one and it will appear right here. And we're going to calculate the average deal size. Let's get into our settings.
And instead of the sum, I'll just click average here and name it average deal size 9, 350. I'll get back to my build right here. I want to see the deal on the rolling period of 360 days.
This time, this card is not going to be a figure. It's going to be a line chart because we want to see that variation over time. So I'm going to click my line chart and I'm going to name my line chart as deals over time.
I'll add my deals and I want a time range of a rolling period of 360 days of all the deals that I have in the pipeline. I could decide to group them by status to have an overview of each deal status over time. See if I'm losing more deals, if more deals are entering over time, this kind of data all in one single chart.
What I like is to stack that information. So that way I can have an overview of the overall geopipeline in itself and also fragmented through each different status over time. So I'll click stacked right here.
So we have our deals over time in our deal list with a rolling period of 360 days, and we group them by status and stack them. Let's see how it looks. This is starting to come together.
Obviously, it's not really pretty because I've just changed the statuses today. As your team works together. It will start to make sense.
And as the status has changed over time, this diagram will be way prettier than that, I can guarantee you, but at least, you know, the right setup. Let's move on to the next chart. We want the average sales cycle length.
So there's a widget for this in ClickUp and it's called the cycle time. So it will display a rolling average from a date placed in active status of a deal. You will know how long on average a deal is considered active in your workspace.
Let's pick the same location, which is deals. And I want a time range of this month by weeks. And that way it will display the average time the task stays in the proposal status.
So because our template is brand new, it doesn't display anything in particular. But as time goes by, and as you update the statuses the same way, this widget is going to update and let's add our two final cards. I want a list of my active project and a list of my hot leads.
If I go into filters, task list, I'm going to pick the same location, which is the deals. And for this one, it's going to be the hot leads. Hot leads are basically the one that I've done the discovery call with, that I've sent a proposal to, and potentially I'm going to sign with, I'm going to add my filter as ongoing status proposal.
Perfect. And that way we can see a list of our hot leads. You can decide to remove the grouping to kind of have a little bit more screen real estate, and you can decide to display or remove any of these columns.
We can duplicate this one and we can rename it to ongoing projects. And this time we're going to change our filter to status is ongoing and click save. So if I go into my settings right here, I could decide to hide this column and display my value, for example, and that way I could calculate the sum of value and see that we have 34, 200 ongoing projects, which corresponds to that KPI right here.
So our data is pulled properly and we have A sales dashboard built in a few minutes. You can track your total deals, your ongoing deals, what's lost. You can customize that data.
You can track even more data through the different widgets that are available, but this is already a great starting point for your agency. I hope this video helped. As you can see, in a few hours, you're able to create a very powerful CRM in ClickUp.
And this is more than enough for your agency to scale to five, six figure deals and for you to grow. You can manage very important deals right in ClickUp. You can automate it with emails, with automations, right in the software, with templates.
And this makes ClickUp a very powerful CRM. Now that you've signed those client projects, I'm going to show you how to track client delivery right in ClickUp, because it might be pretty to have a CRM and you can have some great lead acquisition funnel, but if you don't optimize your client delivery as well, and automate it, your company's delivery is going to be impacted, and therefore your margins are going to be impacted. Make sure you subscribe to watch the next series on how to systemize your agency in ClickUp.
We're going to build an insane delivery pipeline that will allow you to take in more clients with the same workforce. Thanks for watching and I'll see you next time.