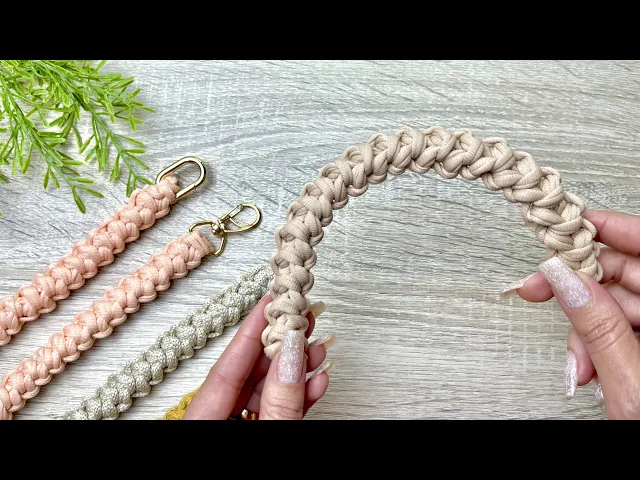
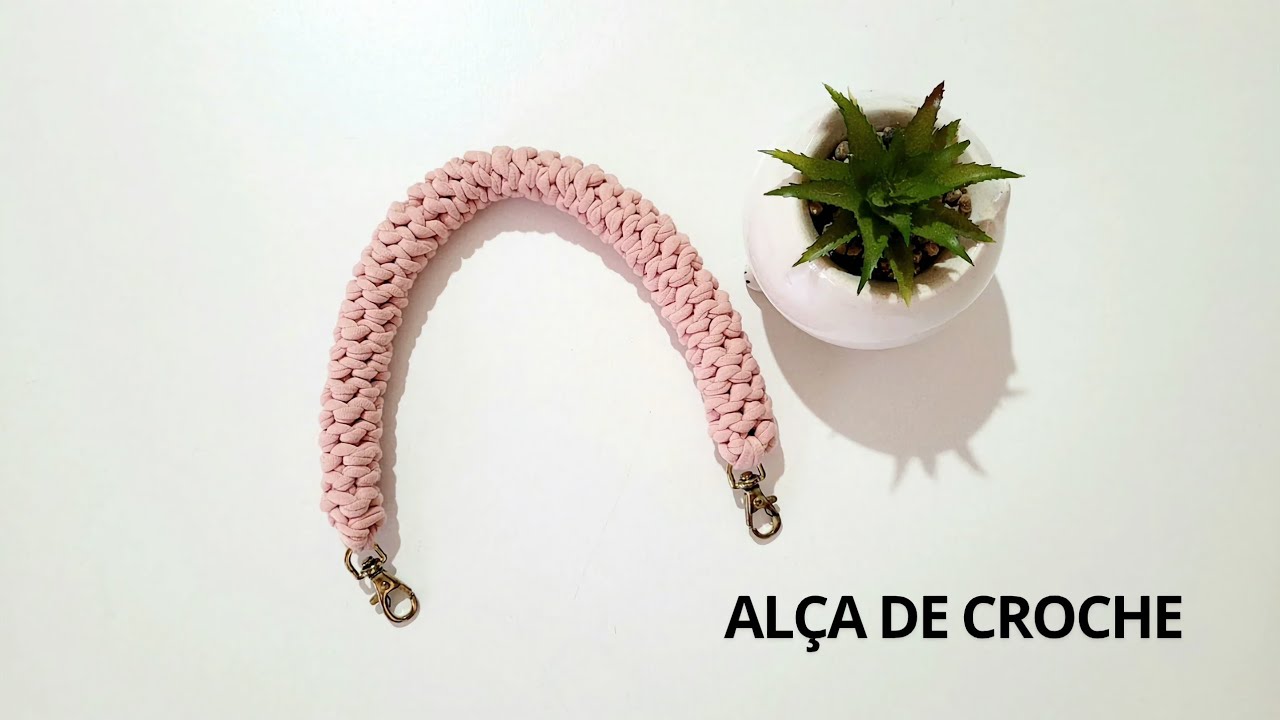
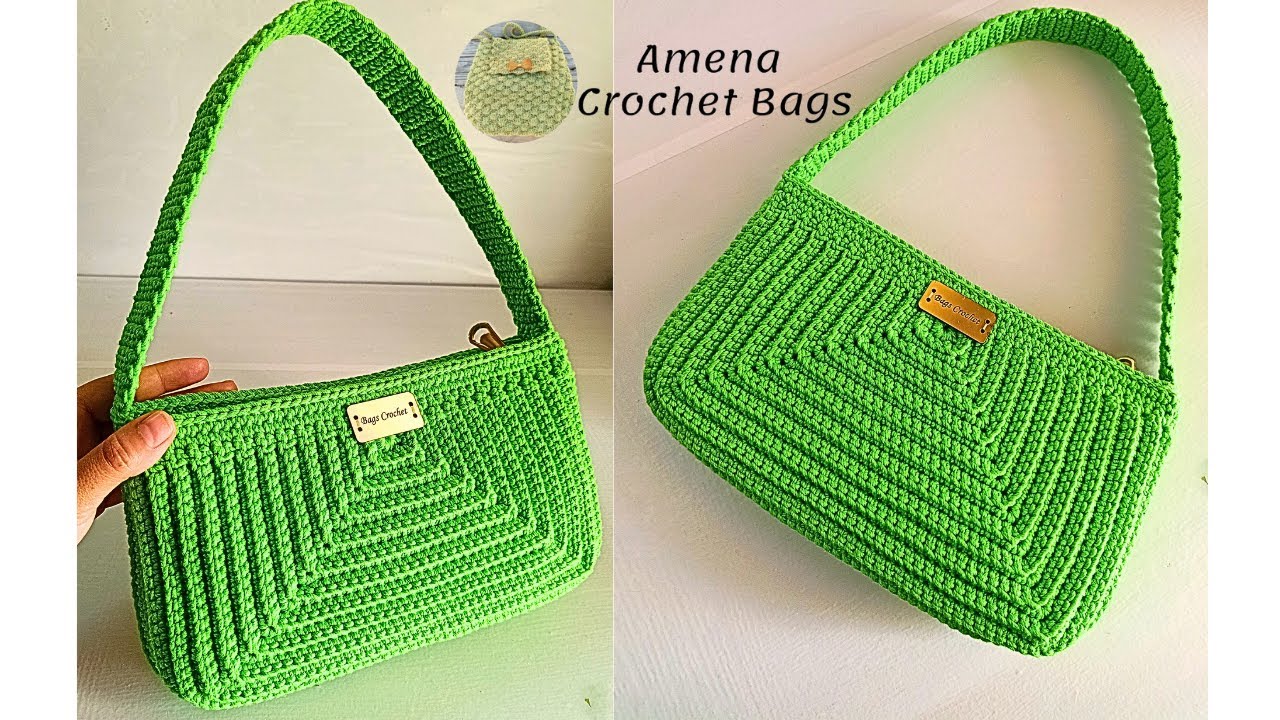
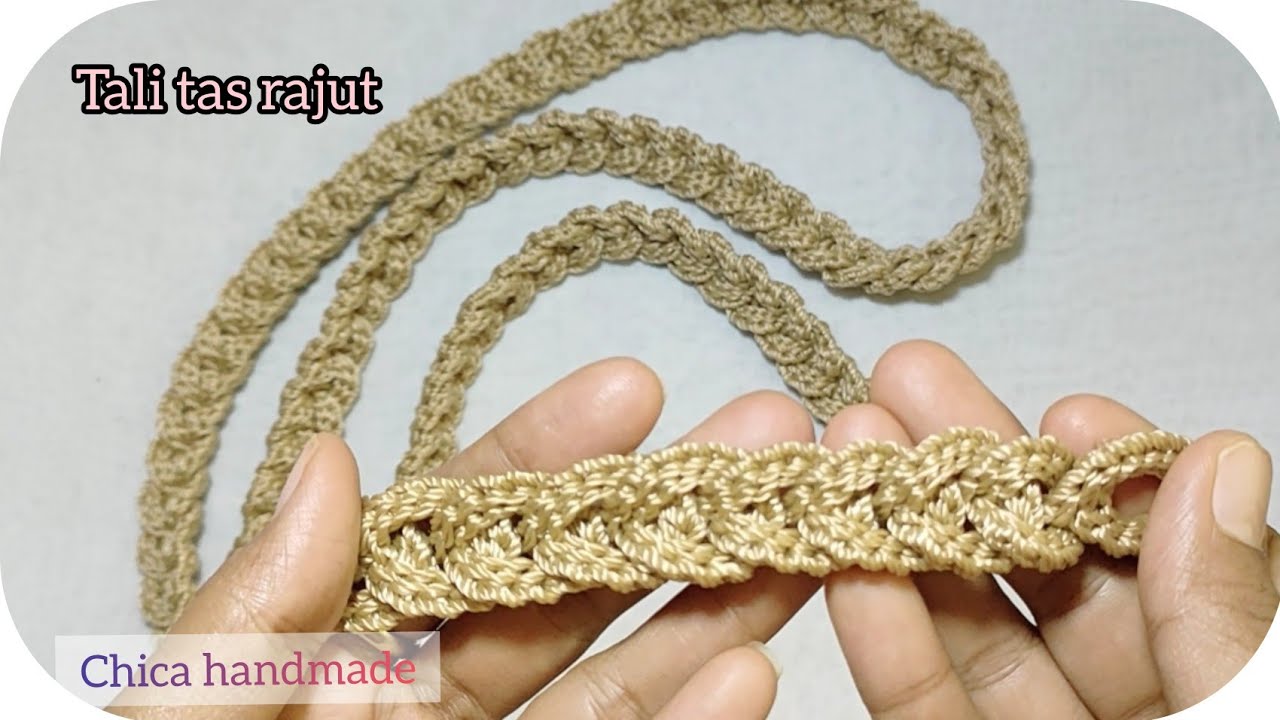
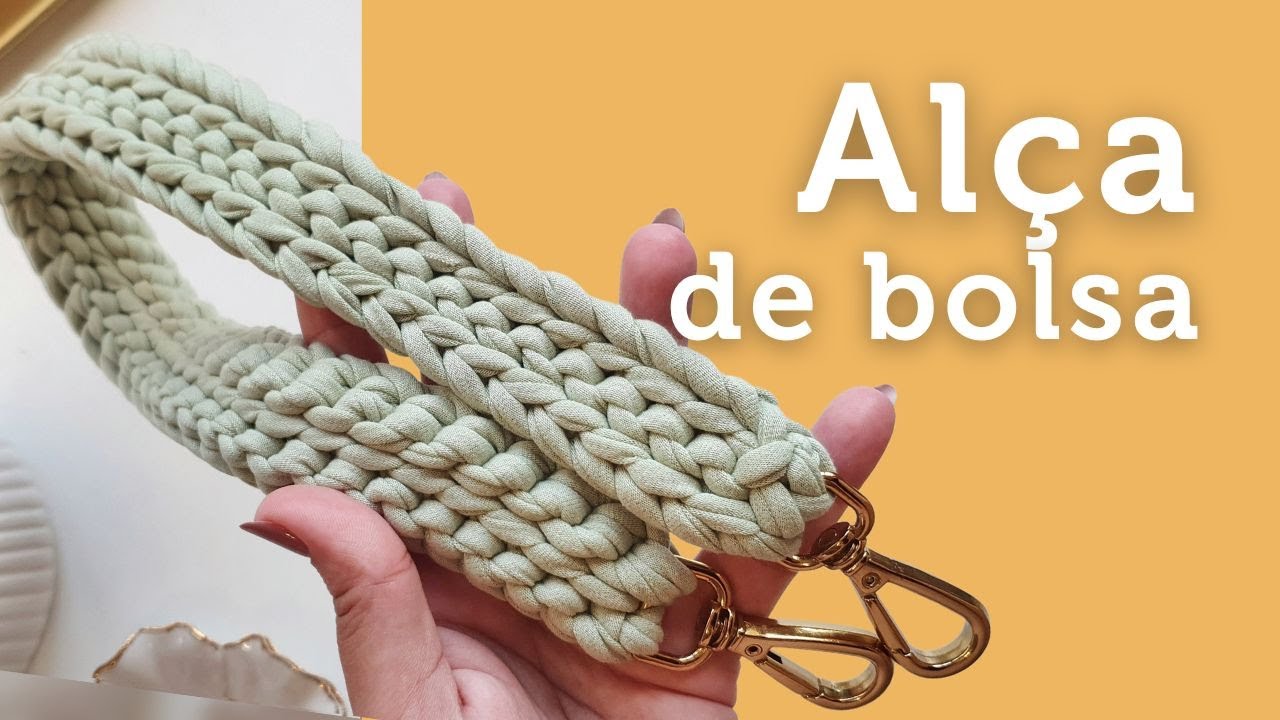
[Music] [Applause] [Music] [Applause] [Music] [Applause] [Music] [Applause] [Music] Hi guys, my name is Camila and in today's video I'm going to bring you this wonderful strap that looks super delicate with these tips and you can use it long for crossbody bags as well as straps like this to hold those that we hold so I will show you how to place the carabiners including starting from this carabiner and here I also brought some options so that you can see it, look done in other threads, you can do it in any thread you want. It's a super simple option, easy and quick to do, besides it looks really beautiful and you can work in any thread, I'm going to show you all of this, so leave that one thumbs up for me, it helps me a lot, leave here in the comments what you thought and how your strap turned out as soon as you make it, subscribe to the channel if it hasn't been written yet and turn on the notification to be notified as soon as a new video comes out Oh and now you can be a member of the channel With exclusive benefits for members the become a member button is next to sign up click there and check out the benefits that's it folks let's do [Music] guys here I made a point of bringing you some options I I did it here in some threads so you can see that it can be done in any type of thread. This thread here that we are going to make is knitted thread.
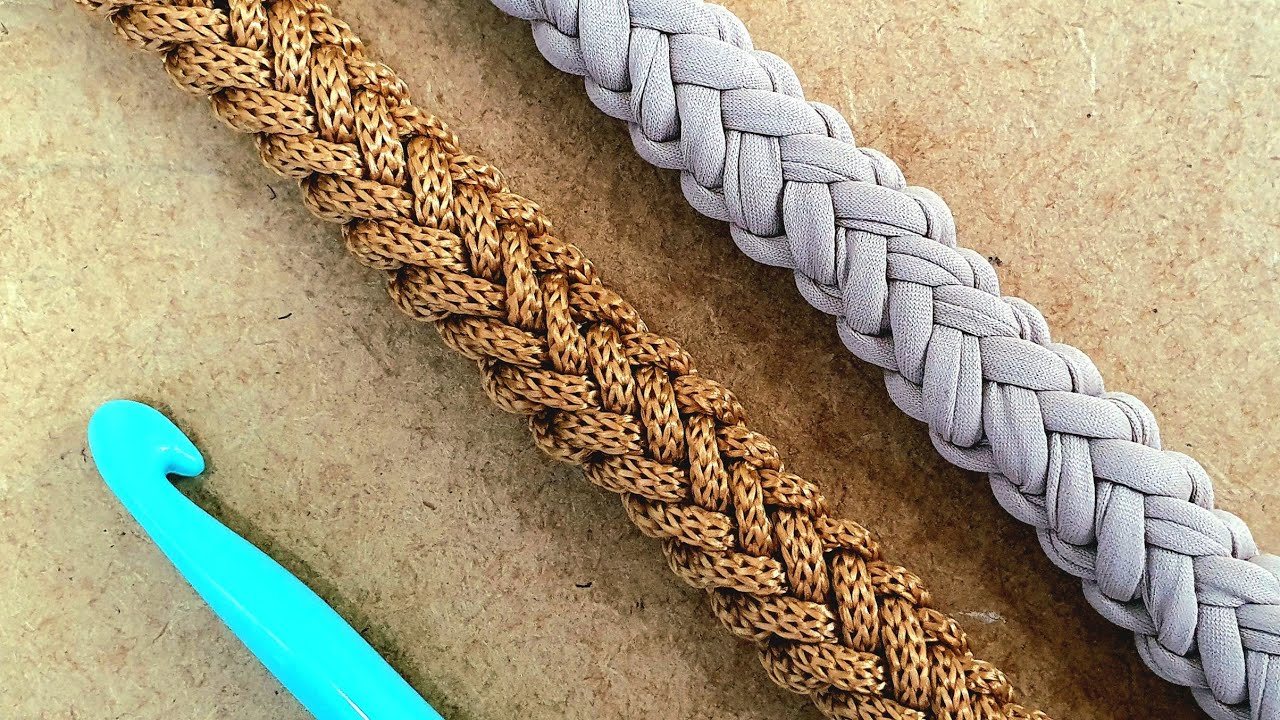
I used a Premium thread. These two types of thread here are Premium threads. Fischer, both are 25 MM, you can also work with 35 or 36 MM thread, the strap looks wonderful and perfect, just like you guys, for you to see.
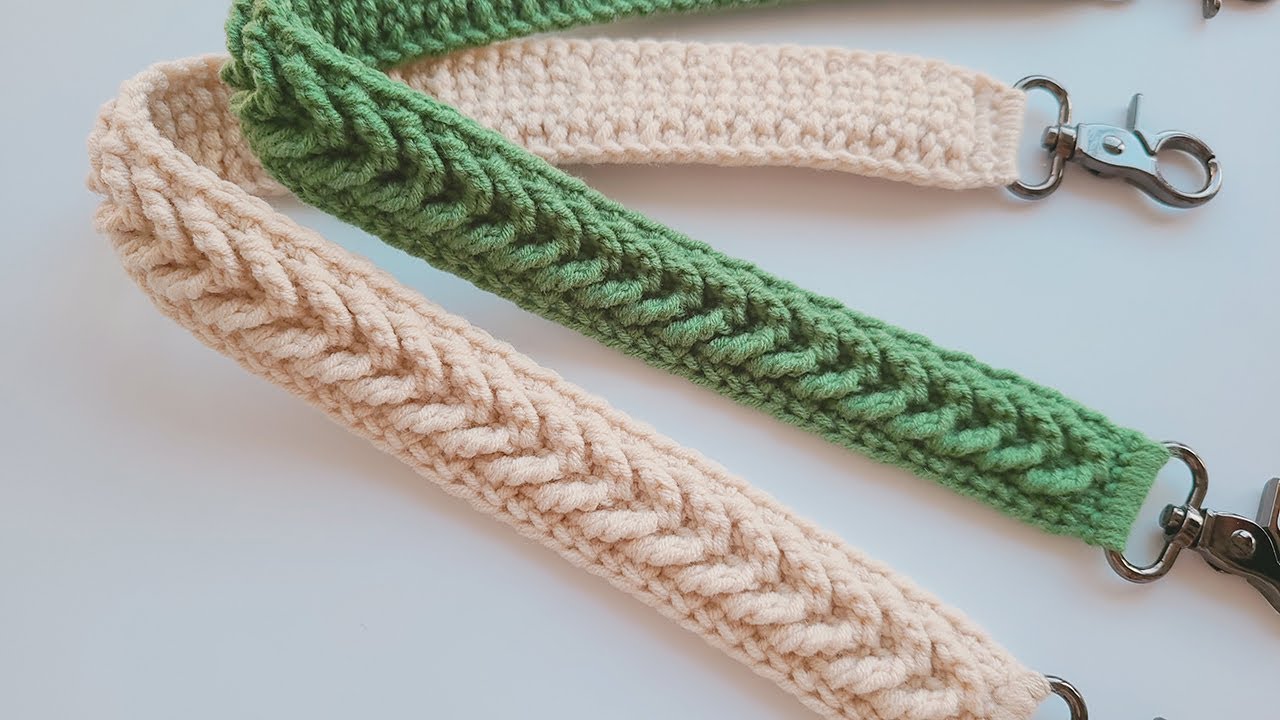
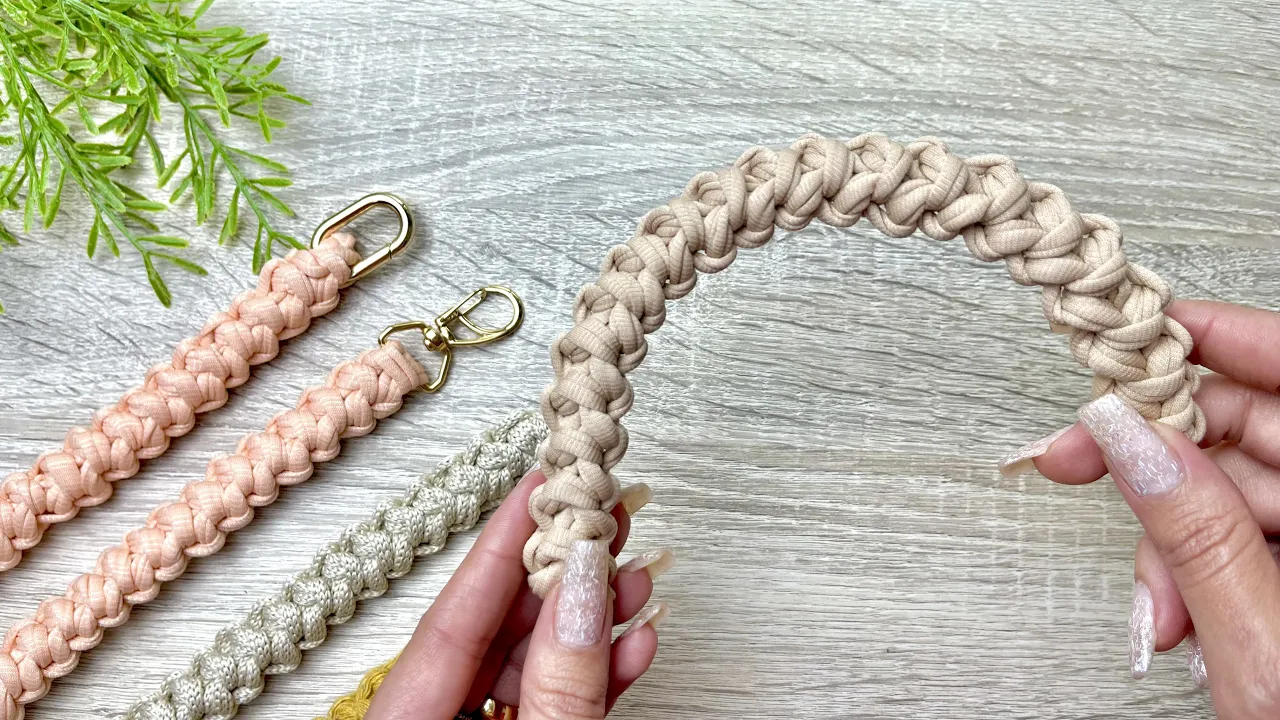
Look, I did it with each thread differently so you could see that the effect is the same, the strap has the same detail, so you can use other types of thread, this one was made with Nautical thread, look how beautiful it is, as well as being shiny, this one was made with 24-strand twine, it also looks beautiful and I brought an option here, Look, I'll go bring it here in the corner because I'm even making a bag that I'm going to bring to you soon and look at this handle, also made of jute thread, look how beautiful and perfect it looks, I can't put it straight here because I've already put it in the bag I just wanted to show you another option but it can be made with any type of thread and it looks very beautiful. I already brought another strap in the channel where it sits. Look, it's different, it has another effect.
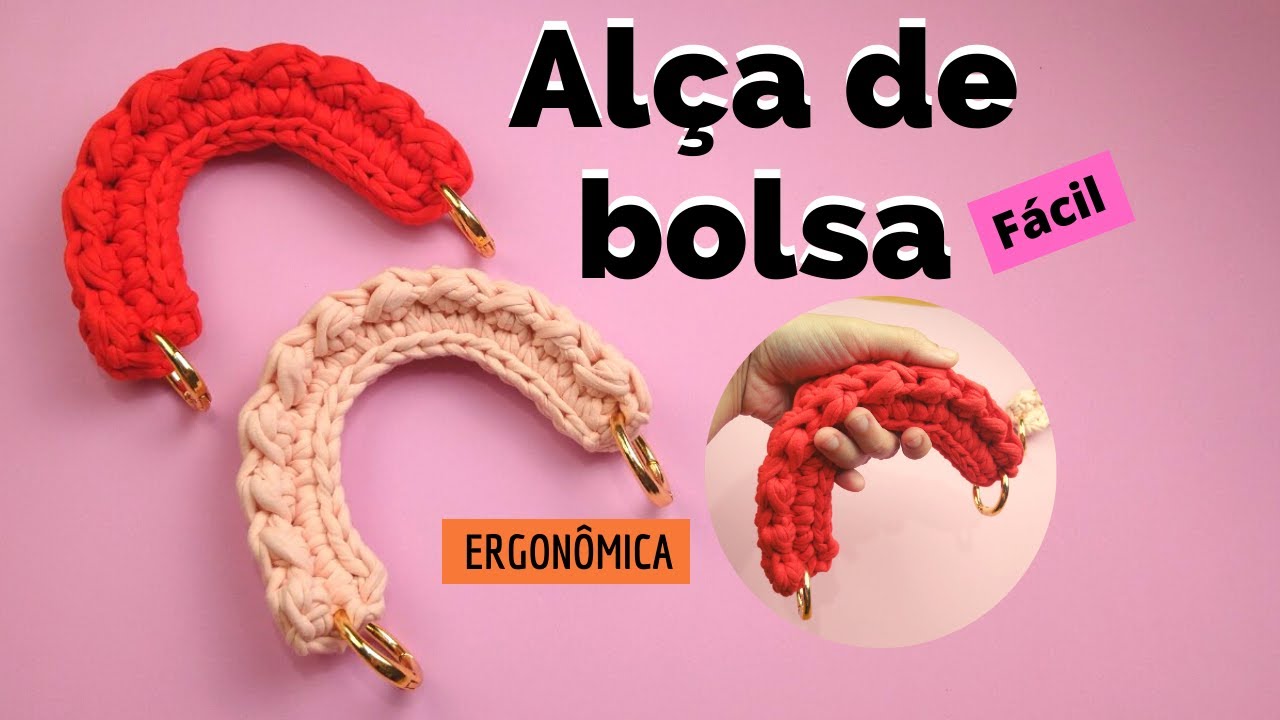
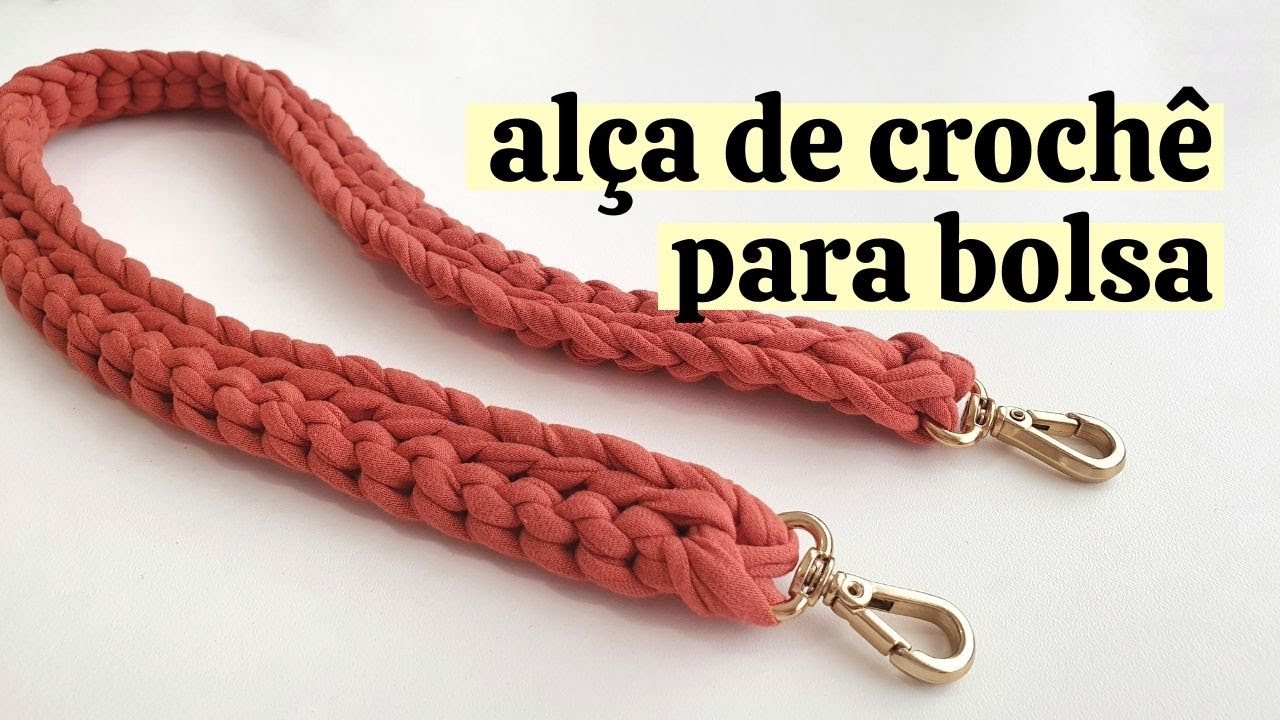
It's also beautiful. I'll leave this other one here in the description. type of strap If you want and it is different from this other one, there are two straps that I love guys, I love this one so much, it looks beautiful, looking like a fishbone like the one here that I'm going to bring to you today, it has this detail here on the side and it is very delicate the finish is very delicate Look how the strap looks very cool and I will also show you how to attach this type of carabiner.
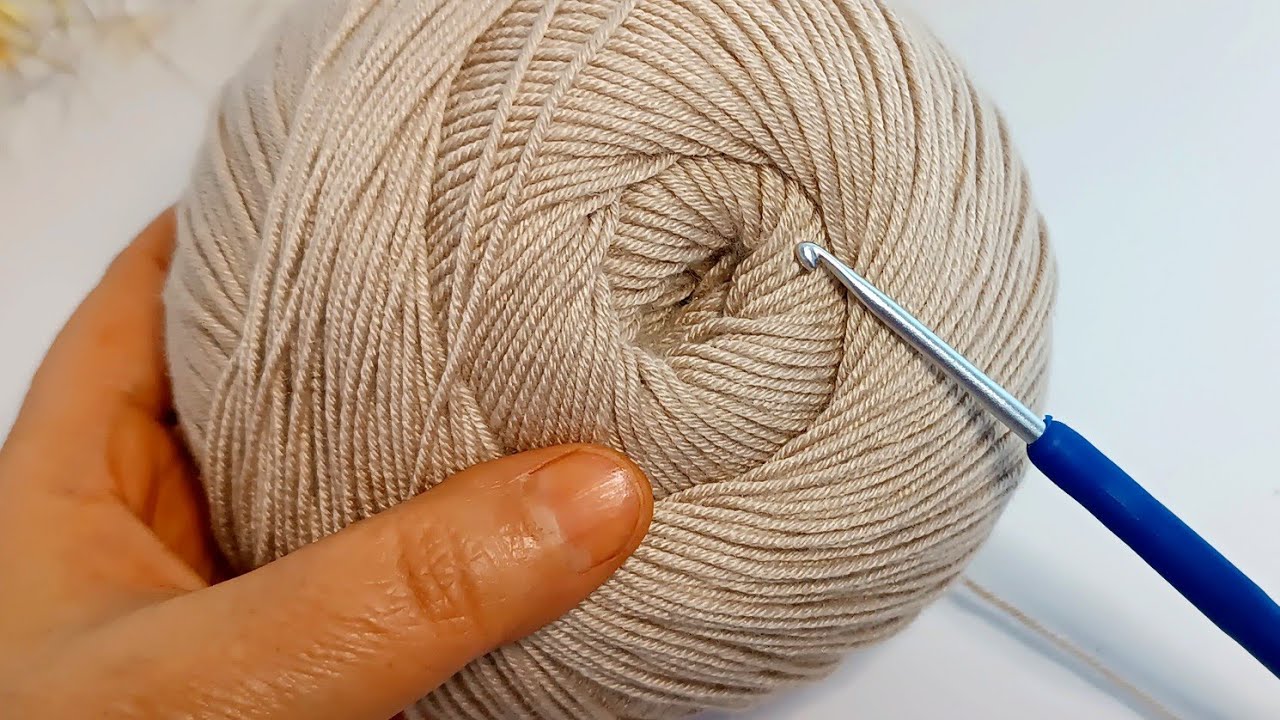
You can choose the thread according to the bag you are making and the size of the needle. you use the appropriate needle for the yarn you choose, there's no mystery and there's no secret, you just use the appropriate needle for the yarn you're working with, the yarn you choose to make and that's what we're going to do and here now to start I'm using a number 6 needle and a Premium knitted thread size 25 MM you can use the thread of your choice just adjust the appropriate needle to the thread here now I'm going to throw the thread over my finger throwing the thread over there this way I'm going to pass the needle under Under this thread above this other thread pull it forward, I give it a little twist, loosen my finger and pull the two threads down, this way I've caught the thread on the needle, this little nut here doesn't tighten it too much because we're going to use it. So now I I hold the smaller film just to adjust it here so it doesn't get loose on my needle.
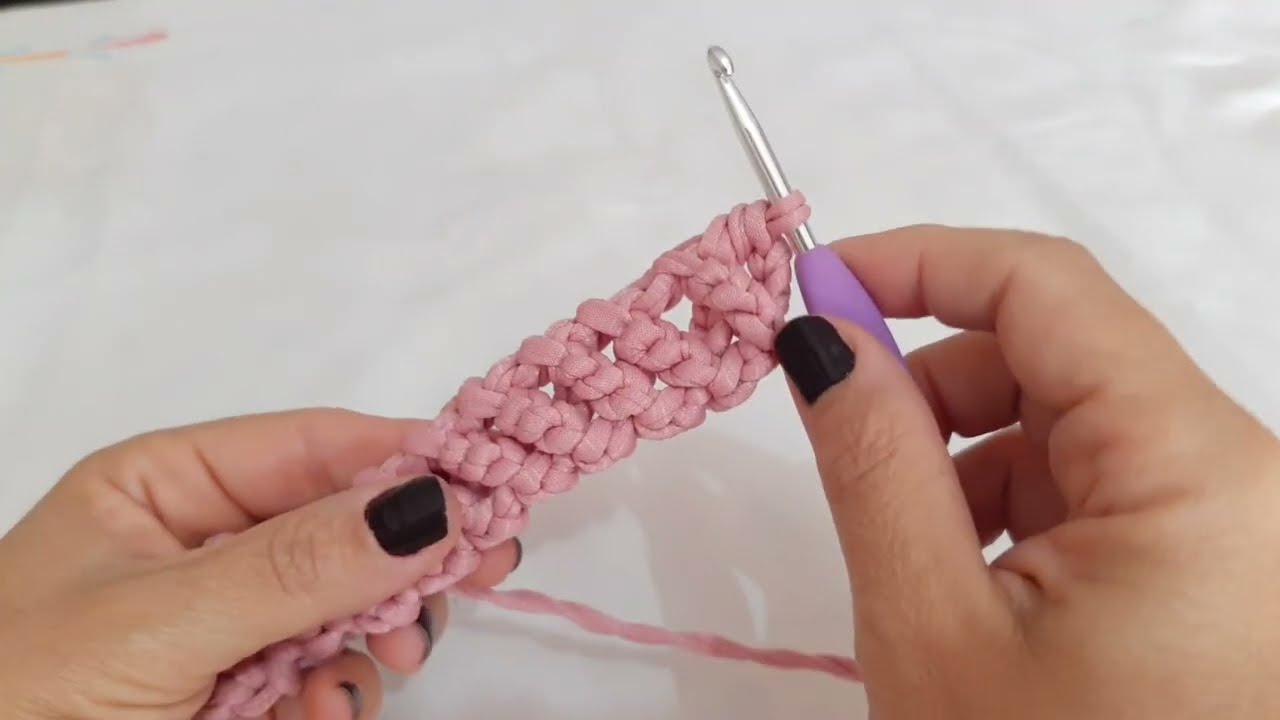
So you can pull it a little bit, just not tightening it too much, also not leaving this loop too loose or too tight, the equivalent of a chain and here I 'm going to make one more chain, I tie it and I go inside the one that is on my needle so here I have my Initial Nozinho a little chain that is this neighbor here and this one that is on my needle now I'm going to do the following I'm going to take this Nozinho look and throw it over here I take it here is this Initial Knot that we started, I'm going to loop my thread from the ball, hold it down here and pull it through just one thread, I'll just bring it up here if it turns the thread, you just adjust it now that I'm left with two on the needle, I'm going to loop it and take them both out like this now I come to this one that is lying right here below look where I came from So right here below I have this Nozinho Here is where I'm going to put my needle I'm going to turn my work over so I let it slide then Oh, I put it here in front, let it slide And then I tie the yarn from the ball again and I'm going to take one out, one, I have two on the needle , I tie it and I take out two more now again here from here, I'll always have two here too and I I'm going to take them out two by two, so here I'm going to take the two down here, one and two, these two down here, I turn the thread into a loop, I'm going to take out two, I'm just going to take out two, I'm left with two on the needle, a loop and I'm going to take out two more, I'm always going to take out the I put my threads in two at a time, now I put them back here, take the two threads from below here, I turn them into loops, I take out two loops and I take out two more, here again are my threads, come out from up here, I always turn the needle here and take them both here afterwards. That's what I did, I turn it, I pull my thread to the back, loop, I take two loops and I take out two more, that's all, we're going to repeat this until the end, but it's very simple and that's it, always taking both of them here, I turn, loop, shot. two loops and I take off two more Ah, it makes a difference, for example, if I turn and pick them up here, it makes it look different, okay, so I recommend that you always do this, take these two little stitches here in the front, these two little loops here in the front, then yes, come and pull the thread from the back.
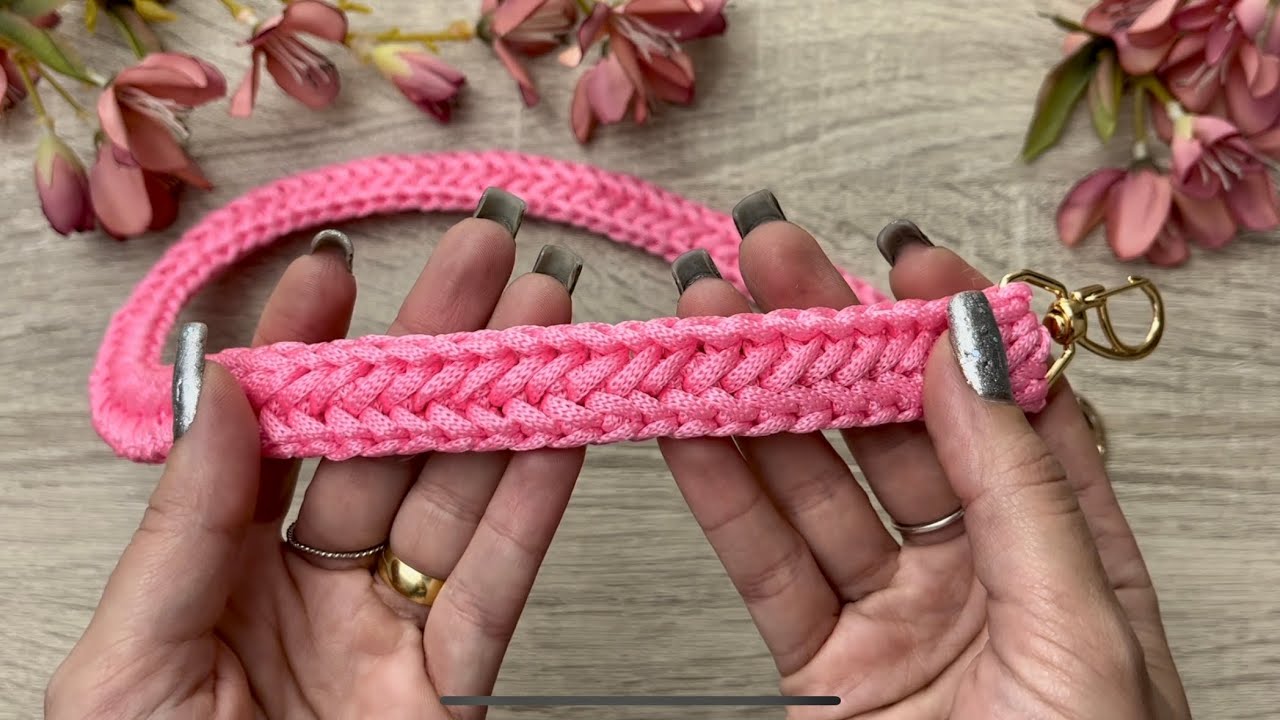
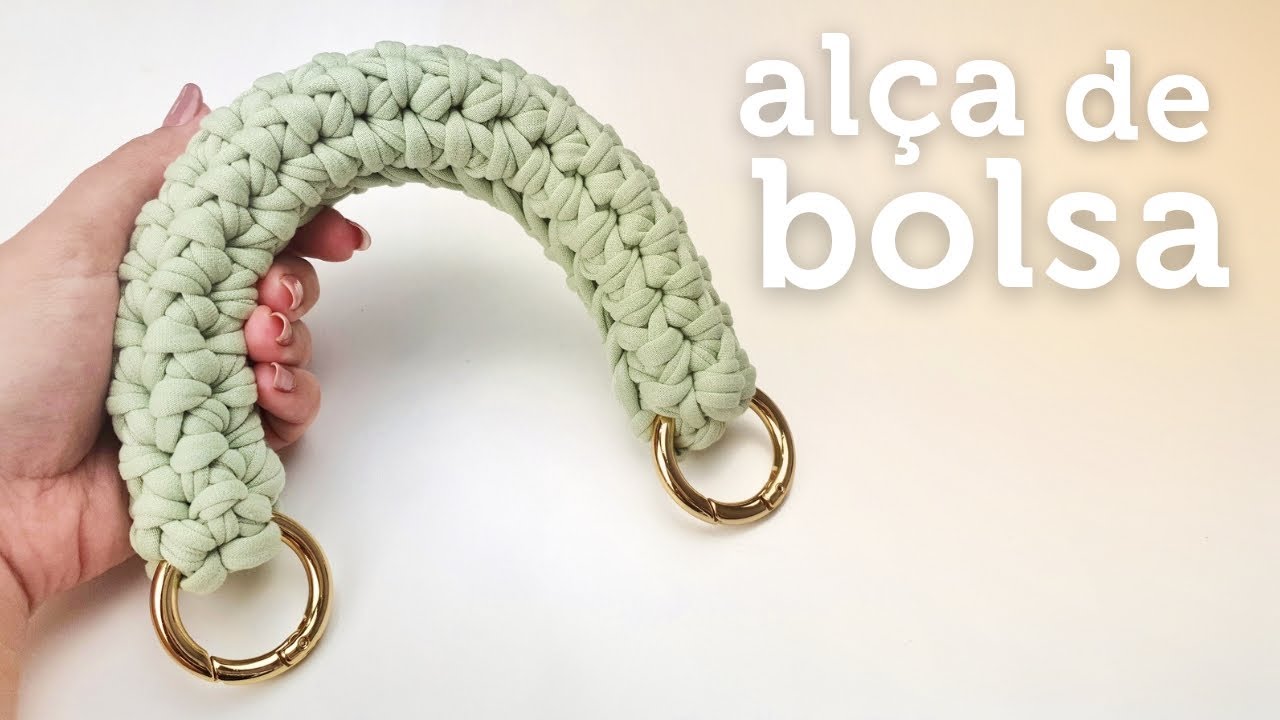
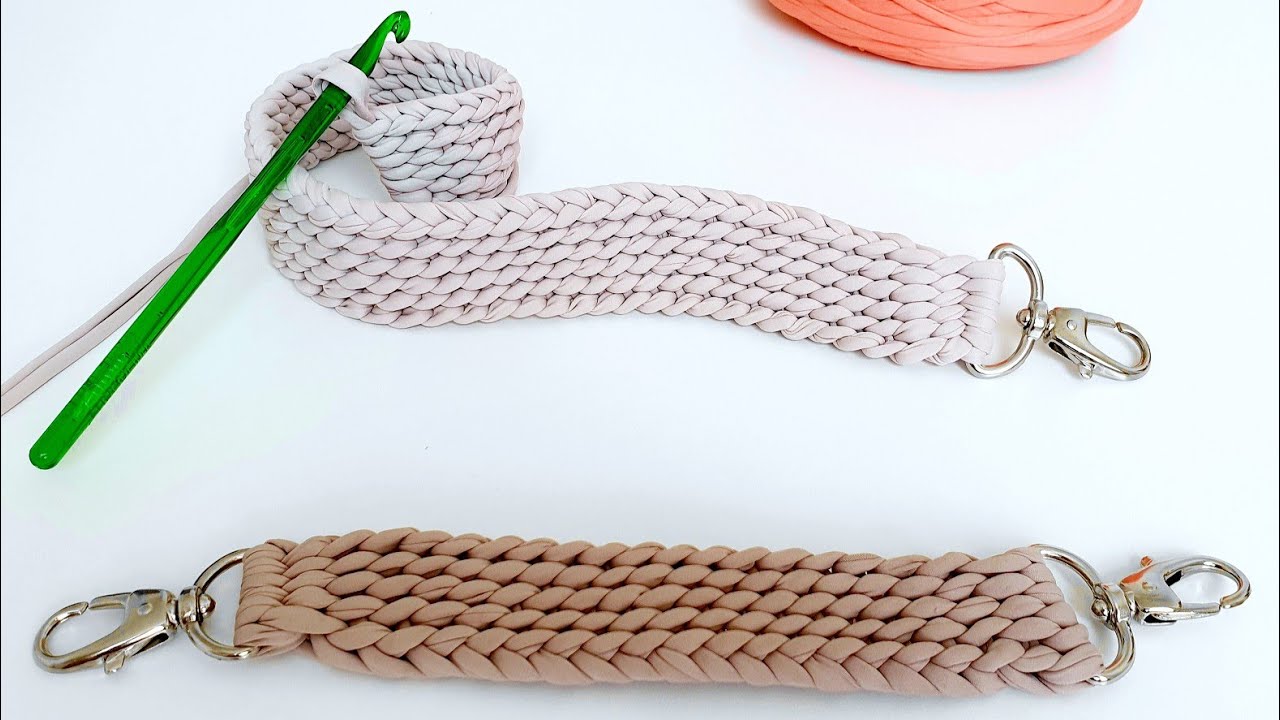
loop takes two loops and takes two more there is a sequence that, like him, is just sequential, how to do it that I always like to talk about and by doing so that we can always pay attention so as not to forget any details so take two, I turn into a loop, I take out two loops, I take out more two I take two I turn a noose shot two noose shot two more I take two I turn a noose shot two noose shot two more I take two noose shot two noose shot two more So they sing for you to get to the end but that's the procedure we just do This is where we look at an important detail here when we are making a raft. When you are going to pick up these two loops here, be careful not to put the needle down here and pick up this third one because this one here is our Quina and we need it to stay Here it's cold, so be careful not to get it here when you put it here, oh 70, if you only take the two, you can't take this third one because otherwise it doesn't go wrong . As we grow, look at this detail, both front and back, it looks beautiful, wonderful and very perfect, it's a strap that can be used on different types of bags, we needed to make it a little thicker, use two threads, so sometimes we want make a hanging strap, you can use this strap, yes, you want to make a hand strap like that that we hold like this, just use two threads and you will automatically get a much thicker and more resistant strap, also the elasticity depends on the thread.
For example, this one with string doesn't have any elasticity, these ones here are made of knitted thread. Look, it already has a little elasticity. So it depends on the weight of the bag and how you're going to use it, and the Nautical thread also has little elasticity.
But it's very firm, so I'm When you pull it a lot, it doesn't stretch very much, it stretches very little and it depends on the thread you are working with, but that's just the process and the straps look incredible and now I'm going to show you how to put them on. If you're starting with a fixed carabiner that doesn't open, it won't catch, so we need to start on it, either by sewing, taking a small point and then going around it and passing it through, or starting straight from it, I'm going to show you how to do this, so here I'm going to put it inside the carabiner, here my needle is going to pull this first loop up here and leaving an Elinho like this, now this little point here I'm going to throw it here, I'll pass it over the thread here and I'll tie my thread here and pass it inside this one it's on my needle so my little point was up here and I was like this with this little dot now I'm going to make one more dot so I come here water loop up here I got two dots here and here now I'm going to pull my stitch from this point here, from this little point, I come here, I put it here, you see, I got the two points here, just so you don't get confused, so in this first little point here, I'm going to place where my point is coming from, here, this one at the tip, I'm going to take this little point, here, I'm going to turn a loop, I take one out, I have two on the loop needle and they take both out now again here I start the sequence where I already have them both So come here, I take them both, the two loops here I turn and here it's the same people, exactly same loop, I take two, I keep two on the needle, I take two more, and repeat the sequence, I take them both here, I turn them into a loop, I take two, I take two more, same thing here, I take them both here, I turn a loop, I take two, I keep two on the needle, I take two more two and here repeat the process and our our strap will look like this, I'll show you front and back it will look like this this little thread here it's already attached so just hide it we'll take a needle or a smaller tapestry needle and just hide it inside so it doesn't show, don't modify any Weave, I'm just going to pull it in. It's not holding my handle, I'm just going to hide the thread and I can cut it easily, okay, it's firmly stuck here, so I'm looking at it from the inside and I'm going to pull it here inside , just hiding it, even throwing it up there, I don't work with it, just to avoid creating volume in the stitches, so as not to modify my stitch.
So, I'm just going to pull it up here, here, I can even pull it with my hand. I pull my thread up here and it is already hidden, nothing is showing and I can now easily cut the thread as it is securely attached and then it stays like this. Our handle, the same thing I'm going to do here when we start with this type of tip I'm just going to put the needle here inside also hiding the thread I hid the thread here so I pulled it I can even pull it here further inside without disturbing the Weave of our Strap and I can now put this carabiner here just really attaching it here on the side I attached it here the carabiner just fit it here the tip is already hidden here inside the strap so we have these two options and if you want to also place the carabiner here we finish it, right?