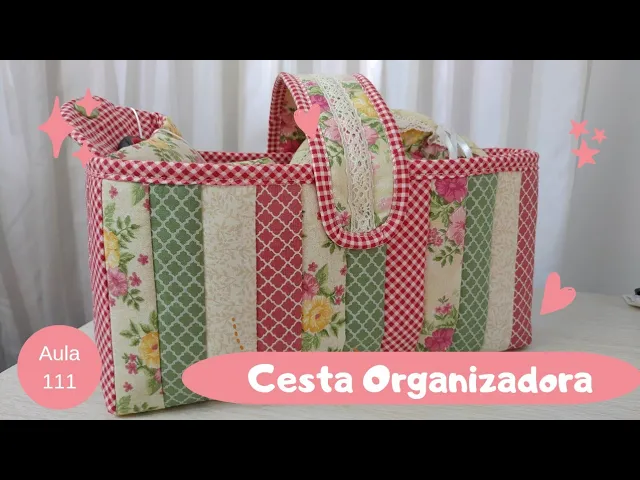
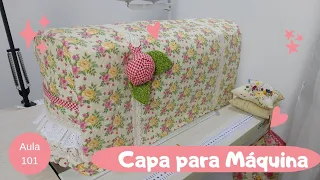
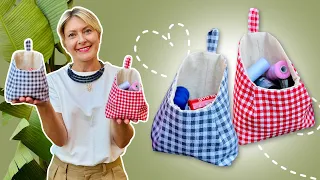
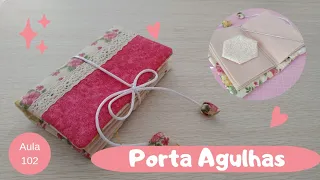
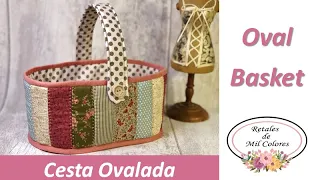
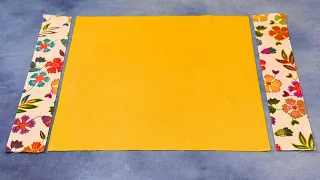
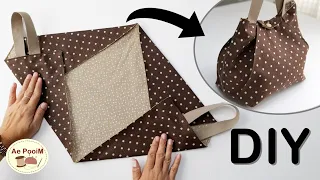
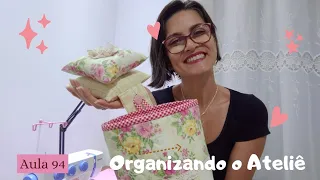
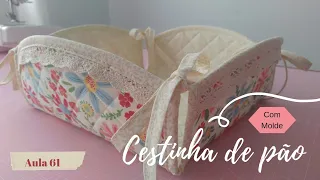
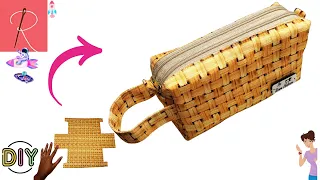
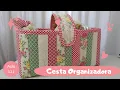
Hello my loves, today the piece will be this little basket here folks, it's an excellent size, it's a little basket that I made with scraps left over from the pieces we made previously here to organize the studio, so it will fit everything Look at the scissor holder and the pincushion Right, the needle holder, pardon the pincushion, it's supposed to be placed like this on top of the counter, leaving everything organized and when we just need to get it, let's go, let's make this beautiful basket, come with me Hello everyone, today our little lesson will be a little basket, actually a little basket, isn't it? a basket up to a really nice size because her idea is for us to use it in Atel on the bench to put the little things we did for organization. There are several classes here on the channel, it's a pincushion holder, it's a scissor holder, so eh, Needle holder So I I wanted a basket of a good size that could store these little things and stay tidy on the counter Ok and this basket, I made one, I'm going to start from a 40x 20 rectangle so what I did here I separated a rectangle of blanket R1 20x 40 and a TNT 80 the structure you can change then use the R2 blanket use just the R1 blanket I wanted I want the basket a little more structured so I like this idea Because depending on what you want or in this case here we are going to fasten everything together, right?
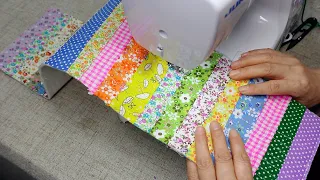
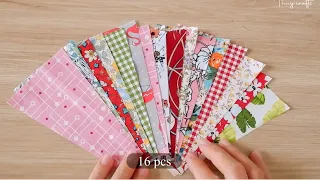
sewing the strips onto the blanket gives it a nice structure, I like the result Ok and another thing is the strap, I haven't thought of it yet, I'm going to get the basket ready first and then I'm going to put a strap on the outside and then during the video I'll show it to you what will be the idea Ok eh This will be to do two things, one of course, right? Another class for this playlist which is really cool to make the studio more organized eh and the other is to use our scraps Because as we did several eh There are pieces left over, little pieces here, little pieces there and then I already cut them, I cut 4 cm strips. I even put a color here that isn't even part of the joke but here we'll talk and I believe I'll still look for a green one in my scrap box a green one that matches too and I'm going to put it here because I want this very colorful basket Ok so let's start sewing, in the next block I'll show you how I start sewing to get it straight here guys, let's start what I'll do.
I always refill it, the bottom part is at the top, I leave it exactly the size I want, here you can see that it's crooked. See why later I'm going to refilage the width and height, I already leave it very correct because then it becomes easier for me to refilage it when The work is already all sewn, I redo it with the blanket and everything is fine, okay, so let's go, how do I start with this marking here with a pencil, I get the width of my stripe, in this case I'm going to start with a stripe of 4 cm in our case here we are working with strips of four but if they were random strips you would choose a width you would come here and position it I need four you see there is a niece here I leave this niece too so I can refile this one later piece, so I marked here the width that fits my four stripe, I come with the pencil and I did this, I'm going to position this mine and my stripe on the pencil stripe, if you want, so I don't run away if you're starting to give you a security, you can do this here, look, put a pin here, okay, if you still don't have much security and you come with the second strip and put it right to right and then you're going to take it to the machine like this and you're going to sew the foot machine Let me take these pins out of here, you come here, you can go backwards, the important thing is that you sew very precisely, right? Use the width of your machine foot as a base, we've already sewn two strips at the beginning because it's the beginning of the work, that's how it is Look, you come now and do one and Tumble without leaving the cloth loose on the band loose and without stretching it too much so it doesn't bend, ok Ah Silvana, every time I make a band I bend it, you're in doubt, come look at this here guys, it's just for you to be safe Look, it's ok, it's ok, look there, let's go, let's go to the second track, one other thing, wait, let me pick up here, my ruler fell, that's another thing you can play with with the scraps in the shape you want or you can do a coordinated game, for example, I started with the Green stripe, I come with the floral one, now I'll come with this one when the fabric option runs out.
You go back to the Green stripe, you come back with the floral one. make a sequence, this also keeps the work harmonious, okay, that's a choice when you sew, okay, I'm going to sew another two strips just so you can see, the same thing, if you have a crease maker, you can crease, let me cut it here if you If you don't have it, you can put it on your own fingernail just to make sure it comes with the pin without stretching it, especially here at the beginning because when you pull the fabric it starts to bend, you're in doubt, look, here I pulled it too much, guys. That's all here, it's practice, little by little you'll be making your work very accurate, look there, it's very accurate, I'm going to the third strip And then we'll complete all our work, I'll sew Just this one, get the scissors here, there's time for me I lose the scissors, look here without stretching it too much and without leaving it too loose, I'll show you that I've already done one, look here, look, I've already done this whole part here and now I'm doing the second part after I have this one ready, okay?
I'm going to attach these two parts here and I'm going to trim it, I'm going to leave it at the width I want at the height I want, that is, 20 by 20 by 40, let me check that, 20 by 40, okay, I'll finish it and I'll bring it with it trimmed. Ready guys Refiled , I'm back with everything refiled, it was exactly 40 by 20, ok, we're going to make a 5 cm milk carton, so here's what you have, it has both parts and the lining is also 40x20, you now have two ways of making this basket, one is assembling the basket, the same part, what I'm going to do here with the Lining part And then add a trim as a finish, which is what I'm going to do on this piece. When I'm going to finish the trim, I'm going to add a little lace because we're with a line here of several pieces that I'm using lace so I want to continue using lace but this is optional, if you don't want to use lace you can skip this part of the bias, right the piping, how do you skip this when you cut to the your lining you cut two more CA and from your piece for example here there are 20 you cut with 22 because when you assemble your basket and you go and sew the basket with the lining part it is 2 cm more it will do this turn here, look, I already have videos on the channel where I've already made this fake piping and she will make the piping with the lining itself, then you just have to do a little sewing here, a little PES dot, it's very practical, it closes the basket much faster Okay, so whoever doesn't want to add lace wants to do it this way, it can be done like this, okay, so now Guys, what am I going to do here ?
Right, I'm going to close the side bottom side then I'm going to make my 5 cm milk carton so I can close the basket and the lining Let's go and do it now guys, I've already done it and I'm going to make our milk carton 5 cm milk carton starting from the seam, okay, so we're going to take our ruler here, look, C CCO, I'm going to mark the four corners, then I like to do this here and I'm going to show you why, see, you see, I marked five from here to here and five from here, no. I'm going to cut it for now because I want my milk carton with five if I cut it here and sew it will be 5 cm plus the machine foot so I don't I want it with five So for now I'm not going to cut it Ok I'll do it here and on the lining also here guys, look, I made the marking, why do I make this marking here, I do it on both sides, this is just a tip so that you can really make your perfect milk carton, look here, when you do this sewing turn, line that you drew in the middle diagonally it stays here diagonally So you know that this milk carton isn't like that, it's not crooked it's actually in the position it is, so for example here I'm tilting the seam to this side when I'm going to do it this side here is cool that you always fall on the same side you You can leave the lining without it twisted, understand, when you unsew this part here to turn it and then you sew it again and iron it, your seam will be lying in the same place. This is also a good tip, so now here's how I made a marking at 5 cm , your milk carton will be 5 cm .
these excesses, let me take the scissors here, now I can come here and cut off our excess without fear, let's turn our basket to the side, I really like the way it is structured with the TNT, it turns out to be a really cool little basket, Ah, I think the size It's excellent guys, look how cute it's turning out Look, it's not too big and it's going to be enough to put it in Look at our needle maker, our needle maker, our needle maker, it's going to be very tidy, okay, you don't even need to cut it if you don't want to, okay, you can leave it here that it will even create a structure for your lining if in this case you are going to do it that way with the 3 cm of the extra 2 cm you will wear your basket right here with the right side sewing leaving a little space to turn it around Ok in our case here we're not going to do that, I mean I'm not going to do that I'm going to do that here because I'm going to put the piping on so now here the idea is to join the I saw you saw that I opened the seam here to be more relieved here I fell over and here I opened this there, it's one so there's no volume, okay guys, here the same thing, I'm going to open this seam, I'm going to open this seam and I'm going to join it here with this one and I'm going to clip it, then I'm going to distribute the basket, it's going to fit right, okay ? So you have two options for making your basket, I really like this way of making the false piping which makes the work quicker, okay, here I wanted to add the lace and then the lace could even be embedded in the other way, but I don't sew this lace. together like Sianinha this lace I usually put it on and sew it later so I'm going to speed up this clipping here and I'll be right back here guys I've already clipped everything now I'm going to do a little safety seam to attach it to the lining in the basket if you have a zigzag you can make a little zigzag stitch or you can make a little safety seam, so that later and there's more, it's easier to place the bias without running the risk of it twisting or anything, so the safety seam makes it easier, especially for those who are just starting out.
OK, let's do it now, oh, another thing is, as you have an already structured fabric and there's a fabric that's loose, which is the lining, I'm going to do the safety stitching on the part that has the blanket because it will stay there, there's no risk of damage. our lining fabric is twisted, okay, I'm going to do it here [Music] [Music] Ready, look, it's already done and now there's no more risk, we're going to start placing our piping here guys, look, I've positioned it a little better, I'll explain for you, what I do, as here is a piece that is already assembled, it is not a piece that you place here on the bench and comes with the piping and sewing straight, I like to come here, I position it even though when I come and take it off from the position I like to do this here, you see, let this tip tip over there, here now I'm going to leave a little point so that I can have a space here to make this splice from this end to this end, ok And then I'm going to bring it here my work on the machine, as it is a work that already exists, I have to be careful not to disturb these folds, okay, then I come here, I put it on my machine and I will start sewing our sewing of our piping there as already Here's the piping in the clips, I think it makes it easier to see, look, I fold it like this, that's why I say that anyone who doesn't have a lot of practice wants to do the fake piping can do it and it will look as pretty as it is because there isn't this part here When you sew your lining at work, it's already waiting, it's out of position here, can you see? I went to talk to you, wait, and how the fabric is the same, look here how it came out, look, I'm going to undo this here, wait a minute, I put it in position again and I'm going to come back, I went to talk to you and get out of position, as the fabric I'm using as the piping is the same as the Lining by sight, mixing is normal, it's ready, knead it, okay?
It's because I want you to have at least a view, look here, I left this part here unstitched, okay, so I'm going to cut off my excess here, so here I'll show you here how I I do look here guys, I'm here, I'm backpedaling here and backpedaling here, I'm bringing mine and my piping to each other but I'm not putting the two together, look, they're not together, there's a crack here, can you see Look, there's a millimeter crack here, but there's this one a slit is necessary Why does the fabric have elasticity if I cut it if I sew it together when I go to sew it gives it a bunch it gives it a pucker so here now look I come to where I marked I make a mark with my little ghost marker here look the crease This is for placemats, it's for everything, folks, you're going to sew the bias and piping here, you're going to join the two parts together like this and you're going to pin the seam, it has to be done exactly where you marked it, one side to the other, look back Here's the same thing, look, it has to be exactly the same, you bring it here to the machine and you'll sew a small stitch, ok, no, there's no reverse, I'm going to give mine here because my machine is programmed for reverse, I'm not going to remove it, but there's no need, there's this excess here, you go. Before you check, it's ok, let's see here Wait, there's a bend there, wait, I'm going to sew it, one came out, you can check it before you cut it Now yes, now here, look, I'm going to cut off my excess, open the seam, it's here, I'm not going to open it because I made two seams But you open the seam and come back with your work, look here how it turned out perfectly and stayed on the seam. Look, now you go here, ready, guys, it's all stuck together.
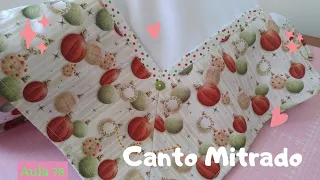
See, now we just turn it to the opposite side here. It's the same thing, look, you're going to take it here exactly where you made the seam and you're going to overlap your piping, covering that little seam, okay, it can't be like that, the seam can't be too much so that later your seam that you make here comes out on the side it's overlapping the seam then clip it again here guys Look guys, look at this, how funny it's looking Look, you see here now, you know, I don't think I'm even going to add lace, guys, I was going to add it, I'm just going to give you a tip But it's so so pretty, I think I'm going to save my lace for something else, look, I was going to put the lace here, you see I don't know, I'm going to think about it, I'm going to make the strap first, I'm not going to sew it here now because I'm going to think about the strap and I'll bring it to the next block The idea of the handle I'll give you an example here's a tip here it's a piece it's not a round piece and it's not a square piece it's a rectangular piece so it tends to do that there's no way because its structure is this is the only thing that locks a piece like this here is the things that you are going to put inside it and if you have a handle here in the middle that closes it if you put a handle like this it will do this I will put one handle like this, why am I going to limit the opening that I want this rectangular piece to give, for example, if I put a handle more or less, look, look at our bottom here, it has 10, it wasn't the five 10 milk carton, so I I can calculate a handle that is more or less 10 12 cm here Of course, going down here, going down here with the finishing that I'm going to do, when you reach this distance of 10 cm, it won't open anymore, it will always stay in that position and That's the idea I'm going to bring to you in the next block, I'll be right back here guys, I've already decided what I'm going to do with the strap, I'll show you, I took a little strip here measuring 5 cm by 30 front and back, I used it I chose a fabric here from my hem, I preferred to choose the floral one, inside it has TNT and R1 blanket, I made a sandwich, I cut it a little bigger, I cut almost 6 cm, I added TNT fabric, blanket fabric, I did a little safety seam, it was 5 by 30, ok? now you have the option of leaving it straight and then you will do the mitered here look do the mitered here like this or you can round it which is what I'm going to do that's why I'm doing my continuous bias here who doesn't know how to do a continuous bias I'll leave it At the end of the video, a little video just about the bias, which is there and we save time, I'm going to cut it 4 cm wide .
of the fabric and make a mitered corner here, it'll be a nice little square parsley, ok And there's one more option for those who don't want to put the bias here. Just put it in and make the sandwich, put it straight and straight and turn it, leave a little opening here, turn it and stitch it and make the strap 100 and you can put on straps from Montana you can wear straps it is covered in cotton people here are free now Okay then let's go I'm going to make mine mine my strap I'm going to put the bias here when I'm putting it on I'll show it to you guys, because here I'm going to add a little lace to decorate it, I decided instead of adding the lace here, I'm going to add lace only to the strap, okay? So in the next block I'm going to bring it here with topstitching because here it's just a matter of doing the topstitching, we have no mystery and I'm going to bring it here the hand of the strap here guys now we are going to put the bias on the strap, here I folded the strap here I rounded the ends with scissors even without any pattern after I made [Music] [Music] do [Music] ka one side I joined it to the other I did it exactly the same way, both sides were rounded, now we're going to put our bias in the same way I do it, I always leave the tip remaining, here you'll be able to see that there's no piece, remember I said the piece is straight, look very, very easy [Music] [Music] [Music] here guys, look, everything is clipped, okay, you can finish it like this or you can also put some lace in here, okay, I was thinking about adding some lace, let's [Music] see, I don't know if I'll put [Music ] ] lace, let me see here, I know, I'm going to put lace here in the middle, let me make a mark here with the Ghost pen and I'm going to put it here in the middle, I think it will look really cute, I think if you put it here when making the curve it will have a frill on the curve and straight here so I don't want that I'm going to do a little detail here in the middle of the strap, if you're going to do this you can do this detail before adding the bias, it's more easy here guys, I sewed our lace on the other side here.
So the sewing is no problem now I'm going to topstitch our bias, people, it's sewn, look, here it is, I left it to finish by hand to make it look nice and now we're going to put two little buttons on the little basket like this here look I took out the middle I took it here and the seam came and I marked it and I marked it exactly in the middle and here I'm going to position my strap here then you mark the height exactly, you see, I made this little basket with no idea what it looks like that she was going to stay, I just wanted the size that she was, other than that and look at those who didn't have a plan until she ended up looking really cute, right?