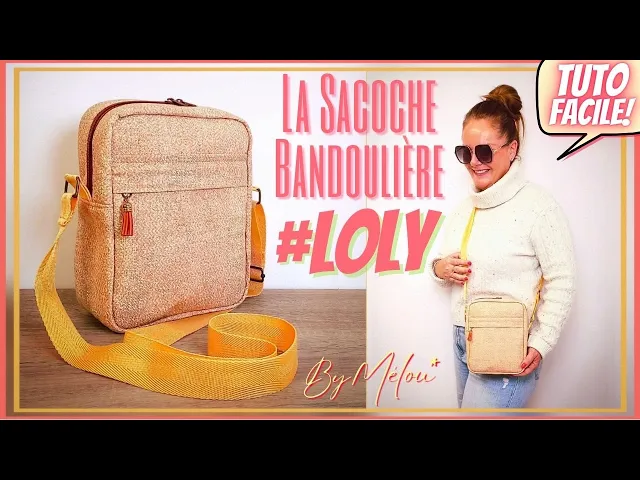
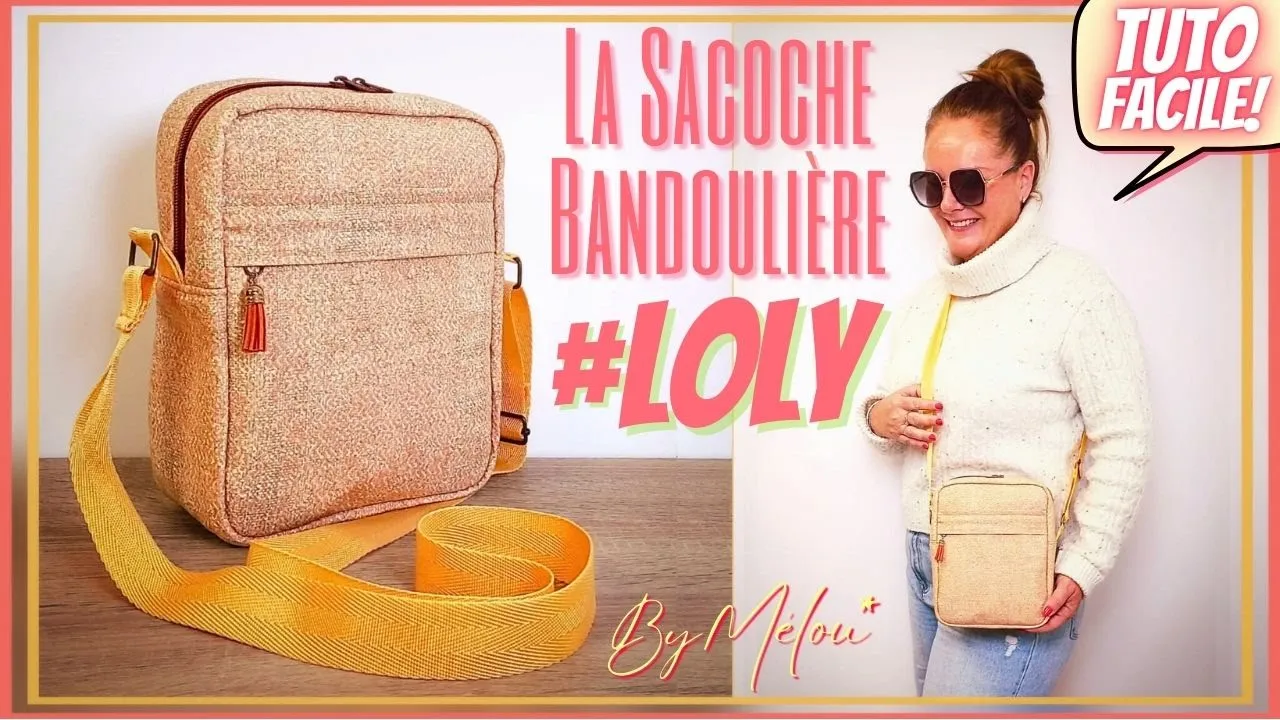
hello everyone I hope you are well so today we are going to learn how to make this shoulder bag or satchel as you want we have a shoulder strap which is adjustable so we can put it on the shoulder or across the body here at the front we have an IP pocket which is hidden here we have a large space inside and a patch pocket here so this bag you can make it in the fabrics you want you can make it for a man for a woman for children really according to the fabric the color
of the fabrics used you are going to do what you want that's why today I used a neutral fabric so that you can also project yourself for a man for example so if you like the video do not hesitate to share it on your social media to put a like and activate the little bell which is located here at the bottom to make this little bag this shoulder bag we need exterior fabrics hop of iron-on or iron-on foam it's as you want and lining fabrics hop of 19 cm long by 24 cm high then for
the edge of this bag we need exterior fabrics two iron-on or iron-on foam and two lining fabrics 37 cm long by 5 cm high for the edge but at the bottom this time we need an exterior fabric an iron-on or iron-on foam and a lining fabric of 53 cm long by 10 cm high we will also need a 40 cm zip and two sliders for this part there then for the pocket at the front of the bag we need an outer fabric a thin iron-on this time so if you use iron-on foam use a thinner
iron-on for the pocket or if you use a fine iron-on like me ciseline for your bag use the same and a lining fabric 21 cm long by 17 cm high still for this pocket we will need an outer fabric 21 cm long by 9 cm high we will also need h a 23 cm zip and a slider for the pocket inside the bag we need an outer fabric 19 cm long by 36 cm high then we will need 2 years of 8 cm each one year of 140 cm we will need two rings of a
regulator and then to finish we will also need around 2 m of BIA so to start I will glue all my iron-on to my outer fabrics which correspond I have glued all my iron-on stickers well and I keep the fabric for the outside pocket so that is to say the fabric of 21 cm by 17 with its double fabric and the 23 cm zip with the slider to start so I take my zip I am going to position it on the top of my fabric here I let it protrude from the zip to be able
to put my slider after I position it well at the top I take my clips and I am going to put the clips on the top here I take my lining fabric I am going to position it right side of the fabric against right side of the fabric like that I align myself and I put the clips back in so as to take everything together the zip the outer fabric and the lining fabric once that's done I'm going to make a straight stitch seam using my zipper foot here at the top seam is well done
here at the top so now I turn my fabric over I pass it behind I pull it well hop I 'm going to put a clip here to hold it a clip on this side also to hold it properly and now I'm going to topstitch here at the top 5 mm from the edge of the fabric by extending my stitch to 3 and a half so my overstitch is well done here at the bottom now I'm going to look for the middle of my fabric here so for that it's simple hop I take my ruler
and I'm going to simply so I'm basing myself on my outer fabric 21 so at 10 and a half I'm going to make a little mark I take my pencil I line myself up 21 so at 10 and a half 10 and a half sorry I'm going to remove this one so at 10 and a half I've made my little mark now so I leave that aside now I take the two outer fabrics 19 cm long by 24 cm high and I'm going to take my ruler with a rounded edge so I'm going to take
an angle of 8 cm in diameter if you don't have a ruler with a rounded edge it doesn't matter you take a sheet, a sheet or a piece of cardboard and you draw a circle of 8 cm in diameter using a compass and then you cut it out and so you will have your circle which you will position like me in all the angles of this fabric once well positioned I mark my angle I also align myself here I mark my angle again I do the same on the bottom I align myself well I mark
my angle here and of course on the last angle of this fabric here and now I am going to take my scissors and I so I'm going to cut out these angles so once I have cut out the four angles I'm going to do exactly the same on the other piece of fabric measuring 19 cm by 24 I mark the four angles and I cut them out so I have cut out the rounded corners of my two fabrics now I keep one on the two and on the bottom I'm going to look for the middle
so for that I fold my fabric in two hop I align myself well and so I have the middle here I'm just going to cut it out make a little peak here at the bottom so I have my middle here at the bottom now I'm going to position the middle of my pocket here on the middle here of my outer fabric so the fabric of the pocket is bigger it's normal don't worry uh and now we're going to start by putting a clip here at the bottom on the middle and then we put clips here
here and here now we go back and we're going to do a straight stitch seam so we're going to be careful we're not going to sew the zip eh we 're going to sew from the fabric only so we sew here 5 mm from the edge we follow our rounding we go back and we stop here at our fabric especially not sewing the zip eh we haven't put our cursor yet so we don't cut the zip so I sewed here as planned I didn't sew the zip you see so now I leave it like that
I take the piece of fabric of 21 of outer fabric of 21 cm by 9 cm hop on one of the finally on a length I'm going to trace I'm going to measure 1 cm and I'm going to trace a line with my pencil which s'fface once I have drawn my line I am going to fold my fabric up to this line at 1 cm I fold it hop I put a pliers here to block it and a pliers on the other side also to block it once it is done I am just going to
pass a little iron to mark the fold here at the top so I have ironed my fabric well now and I have my 1 cm which protrudes here now I take the piece of outer fabric with the future pocket I am going to slip this part below finally the part of 1 cm just below my zip I have to get to r of the 1 cm that is to say that my fabric must stay in the air so if you have your mark you can just slide here on the 1 cm you align your zip
like me I am going to put a clip here I do the same on the other side 1 cm and I put a clip on this side also see I still have my line here and so I align myself I push it until it is aligned with my zip here now I am going to make a straight stitch seam here using my zipper foot here at the top on the zip so as to take just the the fabric which is behind behind my zip so my seam is well done here now I fold this part
the top part I fold it so as to make it pass over my zip like this here I align myself if you wish you can put pliers so that it doesn't move hop and I'm going to make a seam again using my zipper foot here at the top so for this seam I extend my stitch to 3 and a half so my seam is well done here and when we fold you finally when we turn over you see that my fabric is well taken from everywhere eh so now I'm going to position my cursor so
for that h I open my zip a little I take scissors on one of the two sides I'm going to remove about 1 cm of teeth from the zip only the teeth here oh it's scissors there then I take my cursor I slide in the large part and when I get to the level of the teeth I slide them inside like this and I pull on my cursor so as to position it here in the middle once it's done I fold my fabric I'm going again put clips to hold my fabrics together hop here and
here I go back again and this time I'm going to finish my seam that is to say I'm going to start from the fabric here we see it here I finish my seam until joining the seam that we made earlier I also start from the fabric and I stop at my seam here so as to close my zip my seam and finally my seams are well done on each side of the zip so now I'm going to remove the excess all around so I'm going to follow simply follow my uh exterior fabric and I remove
all the excess zip fabric that is overhanging I'm looking at the rounded edges eh and I'm doing the same on this side so I've removed all the excess so I have my front pocket here which is done so now I can leave this part aside and I'm going to take the fabrics for the edge of the bag at the top hop so the two fabrics like that the zip and the two lining fabrics which correspond to start I'm going to position my zip right side of the zip against the right side of the fabric here
and I put some zip on each side to be able to then slide my two sliders so I align myself on my fabric and I do and I put clips all along now that I have put my clips all the way I take a piece of lining fabric and the same I am going to position it right side of the fabric against right side of the fabric I obviously align myself on the sides and so I put the clips back so as to take everything together now that I have put my clips back I am
going to make a straight stitch seam at using my zipper foot here at the top all the way my seam is well done so now I turn my small fabric over I pass it behind my lining fabric I pass it behind if you wish you can put small clips to hold your fabric together once that is done we are going to topstitch with a straight stitch all along at 5 mm from the edge of the fabric by extending our stitch to 3 and a half my topstitching is well done all the way so now I
take the other piece of outer fabric and I'm going to align myself with my piece of outer fabric here and I'm going to position it on the top of the zip right side of the fabric against right side of the fabric I align myself well and I put the clips back all the way I have put my clips all the way now I go back I take the piece of lining fabric that corresponds and I'm going to position it right side of the fabric against right side of the fabric I align myself obviously and I
put my clips back in so as to hold everything together once it's done as usual time I 'm going to do a straight stitch seam using my zipper foot all the way here at the top my seam is well done here at the top so as usual I pass I turn over I pass the lining fabric underneath I align hop I align everything everywhere if you wish you can put clips to hold your fabric together I'm going to do it and then we're going to topstitch again with a straight stitch 5 mm from the edge
of the fabric by lengthening our stitch at 3 and a half my topstitching is well done so now I will be able to position the two sliders so there is one that I will put on this side and the other on this side so that it meets in the middle so for that it is exactly like earlier I show you on one side but not the second because we have already done it so I remove about 1 cm of the teeth at the level of the zip on one of the two sides hop I take
my slider I slide it in the large part and once I arrive at the small side hop I slide the teeth inside and so I pull so as to put my cursor on the middle and I'm going to do the same on this side so that my two cursors meet I have positioned well so my two cursors one in front of the other as planned now I'm going to sew all the way around with a straight stitch or a zigzag stitch it's whatever you want but as close as possible to the edge of the fabric
so I sewed everything the trick so now my lining fabrics hold up well with my outer fabrics now now I can remove the excess bah for example I have a little bit of lining fabric that sticks out and zip we remove the whole hop on each side here now I take the two dense pieces of 8 cm and the two rings I am going to pass the ring inside the lance here I put a pliers I do the same on this one I put a pliers and then I am just going to make a small
seam using my zipper foot here as close as possible to the edge of the ring so that it is maintained I do the same obviously on this one so my seams are well done so you see my rings hold better so now I am going to position the middle of the lance here on the middle of the zip here I align myself once I am well aligned I position a pliers to hold it I do the same on this middle side on the middle hop I align myself well and I put a pliers now I
am going to make a seam on each side 5 mm from the edge but I am going to pass twice so I have it well sewn my two years here so now I can leave this part aside I'm going to take a piece of lining fabric measuring 19 cm by 24 and I'm going to take the fabric for the inside pocket the fabric measuring 19 by 36 so I have my fabric measuring 19 by 36 I'm going to fold it in two with the wrong side of the fabric against the fabric I line it up
well I put a little clip so it doesn't move hop here and now I'm going to just make a little topstitch here 5 mm from the edge of the fabric by extending my stitch to 3 and a half so my topstitching is well done here at the top so now I take my lining fabric I am going to position my pocket on the bottom here of my fabric I align myself well from everywhere on the sides at the bottom and I am going to put Lefin clips all around so as to hold my pocket correctly
and now I am going to make a straight stitch seam starting from here at the bottom and here I make this seam 5 mm from the edge of the fabric in a straight stitch my seam is good done so now I have my pocket here now so my pocket I'm not going to position it on the back of this one because that will be the front of the bag obviously so I'm going to take the fabric which is smooth the outer fabric that we cut which is smooth and I'm going to position my fabric like
that in the direction of the fabric against the back of the fabric and so there you are going to put clips you have two floors this is where you have the sticky bomb for example like that for textile and in this case good well you just have to apply it here on this fabric and then glue your lining fabric or you don't have one it doesn't matter you are going to put clips all around you turn around and you sew with a straight stitch as close as possible to the or with a zigzag stitch as
close as possible to the edge of the fabrics all the way around it's as you wish I'm going to glue since I have my bomb so I'm going to glue this one and I take the fabric which is therefore the lining fabric which is smooth here where it there is no pocket and I'm going to position it also here so we don't cut out the rounded edges on the lining fabrics it's no big deal we'll cut them out once glued or sewn for my part I have glued my lining fabrics to my exterior fabrics so
now I turn them over and I'm going to remove the excess lining fabric in each corner here I removed the excess fabric in my corners so now I'm leaving that aside I'm taking this part again I'm going to take the part of fabric for the bottom for the turn but at the bottom so 53 cm by 10 cm and I'm going to position it on one of the two sides here right side of the fabric against right side of the fabric I align myself well and I'm going to put clips I turn around I take
my lining fabric and I'm going to position it right side of the lining fabric against right side of the lining fabric I also align myself and I put my clips back so as to take everything together and now I'm going to make a seam on this side with a straight stitch 1 cm from the edge my seam is well done so now I pass my fabric through lining on one side and my outer fabric on the other I pull on them, align them and I'm going to make a topstitching with a straight stitch at 5
mm here from the edge of the fabric by extending my stitch to 3 and a half my topstitching is well done here so now I'm going to measure the circumference of my bag finally my future bag so for that I take one of the two parts it doesn't matter which one hop and I'm going to position my fabric like that on top I'm starting from anywhere there for now it's just a test it's to see what we have to remove so it doesn't matter the important thing is really to be well positioned so align well
with the edge of our fabric and in our roundings as well so we put lots of clips all around so we put clips until we get here at the end so I put my clips I arrive so at the end which was here I will put in the direction so that you see so you see I have my fabric which starts from here and in fact I am going to have a part between but not all eh so I am going to look at where the part falls this part there the zipped part and I'm
going to mark it on my fabric so for me it falls right there see I put myself on it hop it falls there now I can remove my clips hop we remove all the clips remove all my clips I end up with my mark here I'm going to draw a line so my mark for me hop here I'm at 11 cm so it depends on you it depends on the roundings that you have made so you don't trust my 11 cm you really trust your mark so you I have my first line here from this
line I am going to measure 2 cm on this side so 2 cm I align myself with the line that I have just made 2 cm here so that means that I am going to cut out this part I am going to remove this part I am keeping these 2 cm and I am going to transfer the measurements to my lining fabric and I am going to remove exactly the same measurement I have removed the excess fabric on the outer fabric and the lining fabric so see that I don't need it now I am keeping
the outer fabric I'm going to pass it over here so right side of the outer fabric against right side of the outer fabric I align myself and I put clips in once I have put my clips in I turn it over and I'm going to pass the lining fabric right side of the lining fabric against right side of the lining fabric I also align myself and I put my clips back in so as to take everything together and now I'm going to make a straight stitch seam 1 cm from the edge my seam is well
done here so now I'm going back so that I have my outer fabric and my lining fabric one under the other one on top of the other and so I'm going to do my topstitching here 5 mm from the edge of the fabric by extending my stitch to 3 and a half as we did on the other side on piicure is done now I'm going to take the opportunity to sew all the way around here so we've already sewn the zipped part now we're going to sew here our outer fabric and our lining fabric together
so we make this seam or with a straight stitch 5 mm from the edge or with the stitch zigzag as close as possible to the edge of the fabric I have sewn my fabrics together well now I'm going to take the opportunity to remove all the little threads that stick out on each side now I'm going to the middle of the bottom of the top of this round of the bag so for that I align my fabrics seam to seam here I'm going to put a little clip like that it won't move I pull on
it I make a little pque here I do the same on the bottom a little P I do the same on the other side I check to be still well aligned hop I make a little peck on the bottom a little prick on the top of the side of the zip so now I have my middles now I take a first part and I'm going to look againfinishly the middle of the top and the bottom of the top and the bottom of my fabric so for that I fold my fabrics well against each other well
aligned h and I therefore have the middle here at the bottom I do the same on the top I have the middle of the top I'm going to do the same on this one I'm going to also mark the bottom and the top mark my middles on the two pieces of fabric now I'm keeping one I'm going to position so I'm going to put it in this direction hop I have the zip part here and I have my zip here at the top of my pocket so the zipped part also goes on the top so
I'm going to position middle against middle right side of the fabric against right side of the fabric I start by putting a clip here in the middle I look for the middle of the bottom and I'm going to put a clip also middle against the middle and I put a clip here at the bottom and now I'm going to put clips all around my bag so I've put my clips all around you check carefully that you have the zip here on the top of the bag he check carefully because once sewn if that's not the
case you have to turn the necks it's painful so now I'm going to make a straight stitch seam all the way around 5 mm from the edge so as to take everything together so I have sewn everything as you can see so now I am going to position my bias and on this part there I am going to start from the bottom so for me it is a BIA as often you see in my videos it is a bias which is simply P in two so it is super simple to position I am going to
position it on top like that you do as you want either you put clips all around I I know that there are people who prefer to be well stabilized and there are people who don't like to put clips all around who prefer to pull their BIA gradually to position it so there you really do as you want as long as we put BIA all around so I have sewn my BIA all the way around so now I'm going to do exactly the same thing here on the other side so we're going to be careful to
have the top of our pocket so you see I have my zip well here I have the top of my pocket here I am going to position myself in the middle of the fabric against the middle of the fabric the middles that we marked earlier I put a pliers to start here and I am going to put a pliers also on the bottom of the fabric here middle against the middle and then I will be able to put my pliers all the way around as we did earlier so I have put my pliers in as
before and I am going to make a seam again 5 mm from the edge of the fabric and then I I will therefore position my biaia again starting from the bottom and I will position it all the way around as I did on this side so I have sewn the circumference well here I have positioned my biia well also so now I open and I turn the whole thing over by taking out my roundings I have turned everything over I have taken out my roundings so now I have my pocket here ziée and I have
my pocket here on this side to put what I want and my large space inside so now we're going to take care of the Ance so I take the Ance I'm going to pass it through a ring no matter which one I'm going to fold it back on itself about 2 cm and I'm going to position it like that again I hope you see see like that I'm going to put a clip on each side to hold the Ance correctly and I'm going to make a straight stitch seam here see I put it in this
direction here to hold the Ance well my seam is well done so now I'm taking my regulator so I pass it through I stand up straight I pass inside the first time like this I'm going to pass through the ring here I come out and I'm going to pass again so I lift here so it doesn't bother me see and I pass again inside hop the regulator a first time then a second I pull and I'm going to fold the Ance back on itself about 2 cm again and position it here against the other dance
piece I put a pair of pliers and I'm going to make a seam again see I'm going to put myself in this direction so that you can see clearly I am going to make a seam here at the right point to hold the Ance well my seam is well done here you see so now I can adjust the shoulder strap of my hop bag so I am straight and I can adjust the size that I want so if I want to put it on the shoulder over the shoulder in really the way I want so
our little bag is finished so as I told you at the beginning you will be able to make it for everyone that is to say for a man for a woman for a child depending on the fabrics that you are going to use, that's why today I took a neutral fabric so that you can apart inside where there is a little flower but so that you can perhaps more easily project yourself for a man for example uh so we have our pocket here in front of our patch pocket here and the large space here inside
to put what we want and therefore our shoulder strap which is adjustable so I hope you liked the video don't hesitate to put a like subscribe to my channel and my Facebook group the world of mloup in the meantime I give you lots of big kisses and I'll see you soon for a next video bye bye