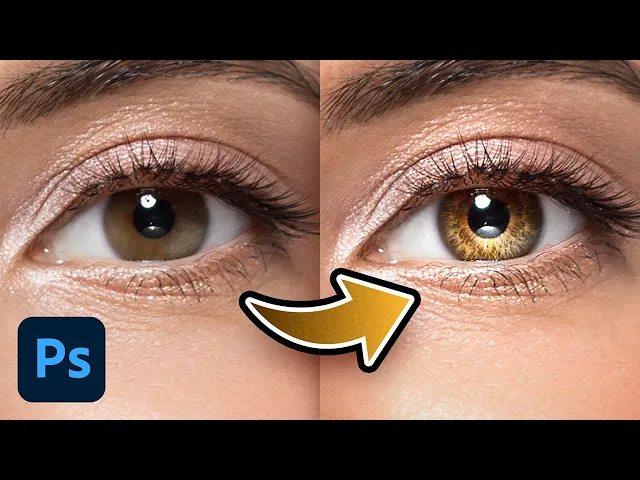
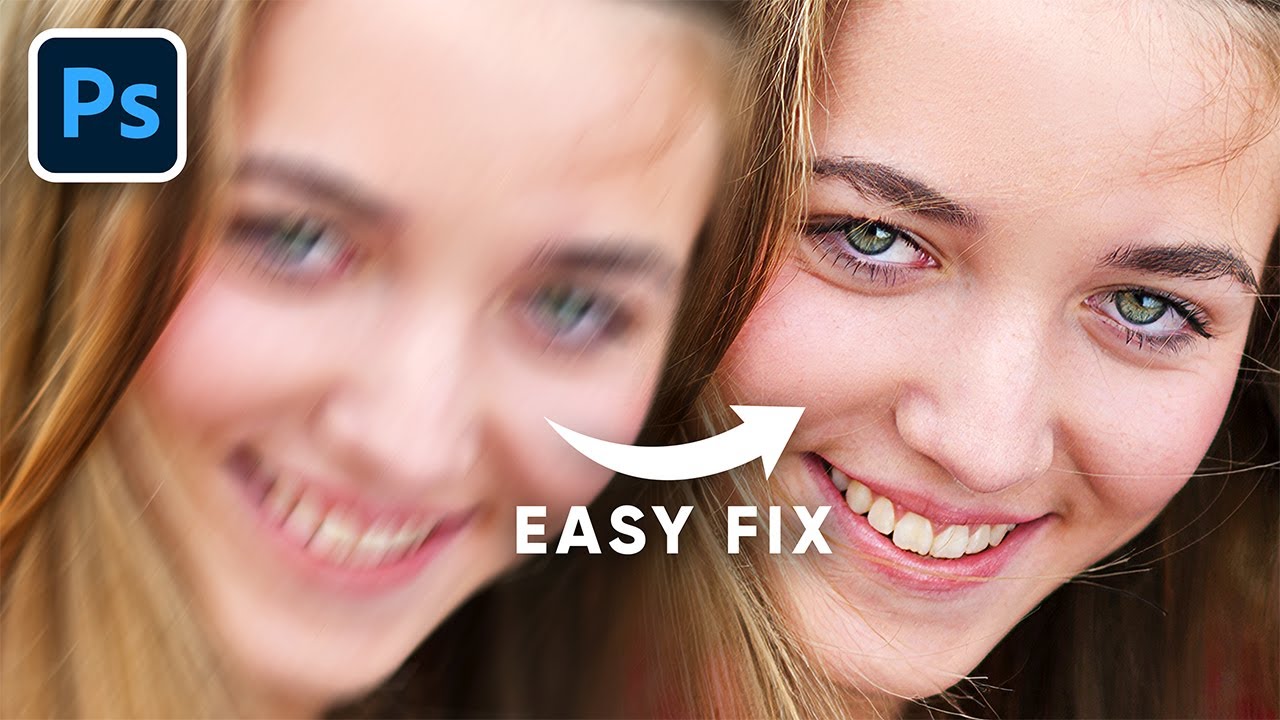
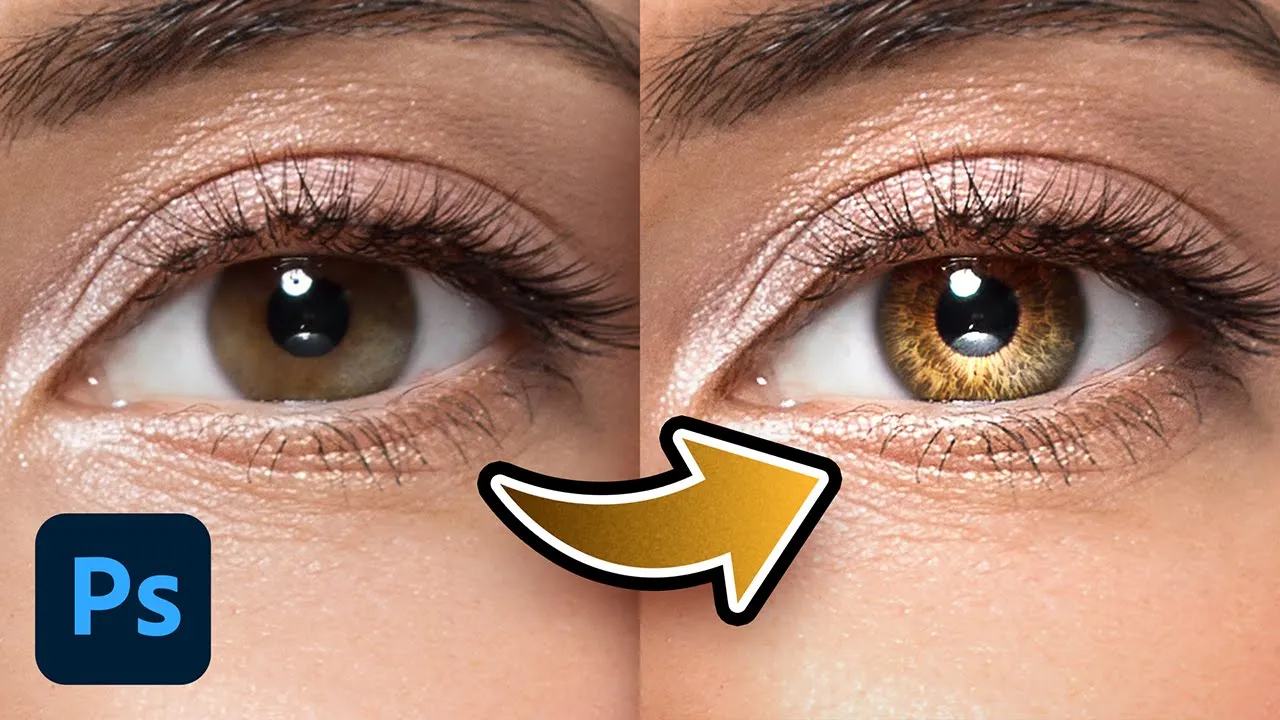
[Music] they say eyes are the windows to the soul so better make those windows beautiful today we'll learn how to add creative details to the eyes and add Dimension to our souls these details are not real it's like wearing creative contact lenses it's a creative choice so is almost everything in Photoshop so without any further Ado let's get started back in the magical world of Photoshop and if you wish to go ahead and download this photo and follow along you know what to do check the links in the descript deson the first thing we need
to do is to create the details for that let's create our favorite adjustment layer click on the adjustment layer icon and then choose curves now take it all the way up like Fat Joe now select the mask press controll or command I this inverts the mask and makes everything black remember black hides and white shows and that is why any change we do here is not visible there unless we paint something with the mask selected select the brush and here's the secret I have an awesome brush for you that you can download using the link
in the description last evening I had nothing better to do so I had this idea of creating these Iris brushes so check it out to install the brush click on the drop down right here click on the gear icon and then import brushes select the downloaded brush file and click on open and there you have your pix Iris brush now you're not able to see how the brush is shaped so click on the gear again and choose brush tip that way you'll also be able to see the tip of the brush which is most important
here now you can already guess where we are going with this but trust me it's a bit more creative with this Iris brush selected select the mask right here just zoom in let's do one eye right now zoom in size the brush make it smaller like so and you can size it exactly as the size of the iris to do this on Windows you can hold the ALT key the right Mouse button and drag it to the right to make it larger drag it to the left to make it smaller on Mac however hold the
control key and the option key and then click and drag it does the same thing so just dab right here and you're done have a look at the details it's incredible isn't it so here's the before and here is the after keep in mind we are just getting started now brightening is not only the part of the puzzle you need both hands to clap so with this curves adjustment layer selected press control or command J let's say the top one is for the highlights and the bottom one is for the Shadows or the dark areas
whatever you want to name it now in this mask we want to darken the opposite areas so with the mask selected if we need to invert it press control or command I to invert but right now it's just brightening everything why because have a look both of the curves are the same so with the Shadows we need to just take it down like so now have a look at the details it's crazy crazy good but right now the darkness is all over the place all it takes is a little bit of Hope in Photoshop a
group mask so with the shadow layer selected hold the controll or command select the highlights layer both of them are now selected now press control or command G now you can have a mask for this group so hold the ALT key the option key and then click on the mask button this creates a black negative mask now you can take the brush let us take a regular soft round brush and let's just paint right here that's all with white you want to make sure opacity and flow both are at 100 see the details this is
crazy crazy good you can even choose to erase the highlights from the corners so if you open up this group let's open up the highlights mask select that and set the foreground color to Black by the way if the foreground color and the background colors are just some else you can always press D to set them to defaults white and black and press X to toggle between the foreground and the background colors let's take it away from the corners now this is nice now let's get back to this mask right here and then take it
away from the extra areas like these now it looks fantastic right now right here's the overall before and here is the after but the only problem is it darkens the pupil way too much so with the Shadows mask select that black as the foreground color and take it away from that particular area that's all let us not forget organization is important so double click here let's name this I details and you can close the group at this point I recommend taking a break and then getting back and maybe you can get more creative as well
for example you can also consider changing the colors of the highlights and shadows for instance if I double click on the symbol of the adjustment lay curves open inside of the curves you can play with other channels for example let's go to the blue Channel and you can take it down to make it more yellow why because blue is the opposite of yellow let's take it even further like so let's go to the green Channel and take that down as well to create a warm feel you can do the same with the Shadows maybe try
a different color up to you next we need to create the kicker light and add some depth when light enters the eye it creates a catch light at the entry point while a lot of it goes inside the pupil some of it also hits the opposite side of the iris and this my friend is the ker light that gives the eye its incredible shine to create the kicker light just above this group let us create one more our favorite C's adjustment layer take it up again like so select the mask press controller command I you
can take the brush a soft round brush and just dab with white on the opposite side like so and then you can also create some Corners here like that to add some additional shine and this creates a brilliant effect you can paint even more so I'm going to go a little bit here like so and paint a little more around the corners now sometimes it may be too much in the center so you can take that away as well press X foreground color is black and let's take it away from the center like so now
we are getting into the depths of the eye I believe we can go back here and maybe even increase the Shadows a bit more to create an additional depth fantastic isn't it you can also experiment with blend if with this but let's save that for later right now let's create some depth for it first of all name this Geer light and then we are going to create our favorite one more time and many more times curves just take it down this time slightly like so select the mask press control or command I take the brush
and with a soft brush just outline this that's all make sure the foreground color is white this creates a wonderful feel now you may be doing extra so let's erase the extras press X to toggle between the foreground and the background color and then erase the extras now sometimes this may be too much so you may need to adjust it ever so slightly like so want to have a look at the overall before and after so here's the before and oh my gosh here is the after now I know it's over the top but wait
for it we're going to meet our best friend later now it is time for us to create some shiny highlights for it again let's pick our favorite curves I love it in and out of Photoshop this time again just take it up and we are trying to create those highlights around the edges so select the mask press controll or command I and just paint with white like so don't focus on the inside just focus on the edges we're going to remove the insides easily later see it's looking like something from space this is amazing and
add an extreme highlight here like so just look at this create that ring now we need to remove it from the dark areas for it double click on the right hand side of this layer this opens up the layer style dialog box inside of that we need to take it away from the dark areas of this layer and where is this layer it's under this layer so we need to play with the sliders of underlying layer and we need to take it away from the dark areas like so see it's going away from the dark
areas but this is Harsh so hold the ALT key or the option key click on the slider to break it apart make the transition smoother and take it away like so now this is really really nice let's keep it this way this is fantastic hit okay now if the catch lights in your eye is not that bright you can create one more highlights layer to brighten up the catch lights but it's not really required here let's name this highlights want to have a look at the overall before and after so here is the before and
here it's the after crazy now it is time for you to meet your best friend our best friend or is jenz to save besti and that is opacity so select the topmost lay hold the shift key select the bottommost lay press control or command G let's zoom out of course this is way too much unless you're trying to create something very creative let's decrease the opacity for this image let's keep it at about 66 now I know this is over the top but it looks fantastic now do we need to create it again for the
other eye yes and no but not exactly we can actually copy this and then then make some adjustments for the other eye since eyes are never exactly symmetrical and even if they were the lights and angles come into play so let's name this right eye her left eye actually and then press contrl or command J to make a copy of that now it is too much but select the move tool right here and just move it to the other eye like so now you can press control or command d as well and I guess this
fits pretty nice only one problem there's a leak so let's open up this group select the mask right here for the eye details take the brush black as the foreground color remove the extras not a big deal similarly from inside of the eyes gone perfect there we go pretty darn fantastic now if I actually doing this I would rotate this just a little bit so it's not exactly the same do not forget to name things and this is Left Eye so here's the overall before and here is the after let's zoom out and see here
is the overall before and here is the after now of course this is higher opacity you can even go lower if you wish to I hope you liked it be sure to check out pixin perfect pro at pixin perfect.com to master Photoshop from start to finish and Beyond also as a pro member you'll have access to all of these Iris brushes and more just last week I released some Pro skin retouching actions that are just apply and go we have over 110 lessons 342 practice projects assets actions and stuff like this and all of it
is constantly growing for the just starting out with Photoshop or have been using it for a while you'll find immense value in these coures plus you get a super friendly customer support check out pix imperfect Pro only on pixin perfect.com time for us to do a little bit of recap first we created the details using this Iris brush we dabbed once for the highlights and we also created the Shadows then we created the kicker light which is opposite to the catch light so if the catch light is right here the kicker light will be here
and we created that after that we darken the edges to add some depth before after and finally we created those extreme highlights where we used blend if before after now of course as humans we tend to go overboard so decreased the overall opacity to something like 66 you can go even lower and copied the same thing to the other eye that's it so that's it for this video I hope this one helped and if it did make sure to give us a like and also don't forget to subscribe and not just subscribe ring the bell
so that you my friend don't miss any other future tips tricks or tutorials thank you so much for watching I'll see you in my next one till then stay tuned and make sure that you keep creating [Music]