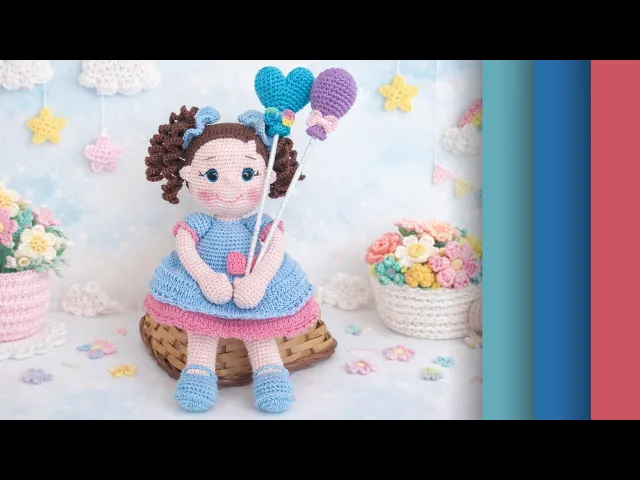
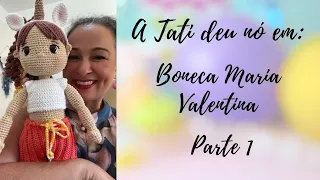
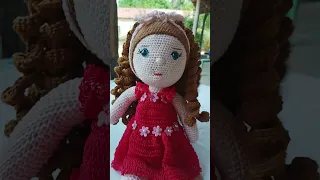
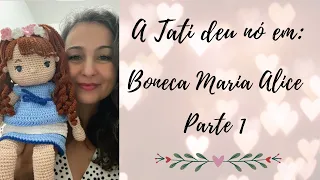
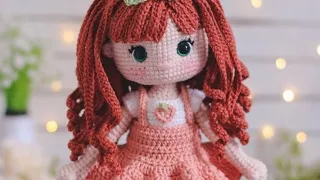
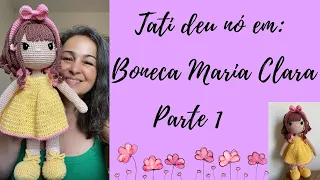
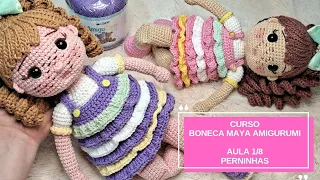
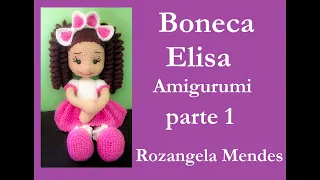
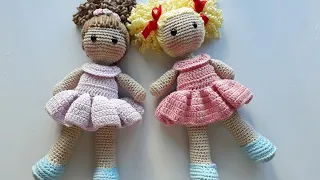
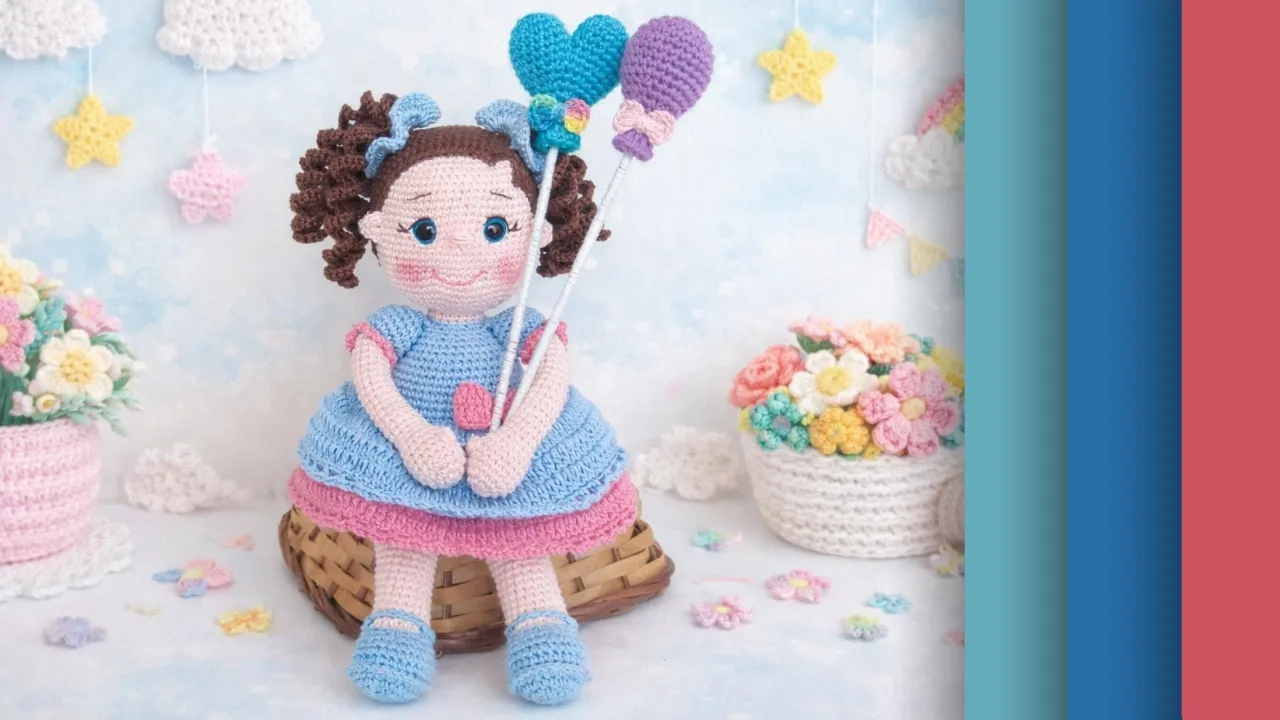
To celebrate 100,000 subscribers here on the Artes Linha channel, I brought this little doll here, very cute, super easy to make and 100% seamless, this little doll here is Maria who was crafted with traditional amigurumi line, the list of materials I will leave here in the description video So run there, write down everything and come here to make this little doll that is 32 cm tall and is full of new techniques for you. Her first technique is the little knee. So this little doll will be able to bend both her knee and her leg here so she can sit like this, there's also this technique for the doll's butt so she can sit properly in the niche and also the new neck technique so here we work on several techniques for you friend urumi, totally free every week with a new class if you liked it of our little doll Maria, it's very simple to support our channel, bring cute things like this for you, just leave your like, which is very important for our channel, so YouTube will recognize that you're enjoying our content and will promote our video to more people watch you can also help by sharing this video in Facebook and WhatsApp groups wherever you prefer and also if you are new to arts online and want to continue checking out this and other lessons just subscribe to our channel and activate the notification bell forever When a new class comes up, a notification will arrive for you.
You can also become a member of the online arts club, click on this button at the bottom of the video, be a member and become a member of ours. If you have any questions or want to suggest any other class, just leave it in the comments So come with me and check out this little lesson [Music] start our little lesson I'm going to work on our doll's leg now I'm going to start with the shoe, this little doll is 100% seamless so the shoe is integrated into the doll I'm going to use it in the entire project amigurum line from Ciclo and 2. 5 needle the other materials for you to make this doll will be in the video description So go there Write down everything and come here to make this one and before you start leave your like if possible share this PR video to help the air bring more cute things like this for you to start the little foot I'm going to work here with little chains So I'm going to attach it here, give it a little knot and I'm going to go up here six chains so here I already have 4 5 six six prone chains I'm going to start now the little foot to start I'm going to skip a chain in the next chain I start working and I'm going to work here four single crochets so I have 2 3 and in my last chain I'm going to do a triple increase there are three single crochets in the same space so in this last chain I'm going to work three single crochets 1 , 2 and 3 from the same chain now I'm going to work on the C side of the chains so we can follow our step by step now I'm going to the next chain and I'm going to start a sequence of three single crochets, one for each chain then I have here a 2 and TR single crochets in my last chain I'm going to work a double increase there are two single crochets in the same space and I finished my first row here which had 12 stitches I'm going to pass this thread here Before starting my second row you You can also use a marker, a clip, whatever you want to mark the beginning of your row.
Let's now start the second row here in the first stitch, I'm going to do a double increase, there are two double crochets in the same space, now I'm going to work three stitches, one stitch for each base stitch and in this curve here where I made the three stitches of the same chain I will work an increase for each stitch so here are three increases I have already done [Music] 1 2 and three this here is the double increase there are two stitches in the same space again three single crochets and I will finish the row with two increases and this row two had 16 stitches I will now start the TRS row So I will pass this thread here forward to mark the beginning of row three and on row three I will go start with an increase now four points one for each point I already have TR and 4 and now I'm going to work a sequence of an increase and one point three times so I already have one increase and one point one increase and a point yarn back here to mark the beginning I'm going to start this row with an increase now I'm going to work five stitches I have two 3 4 and 5 and now I'm going to work an increase and two stitches three times so here I've already done one I'm going to do the others two one increase and two stitches one increase and two stitches and I'll be right back, I've finished here now I'm going to work three stitches and I'm going to work the sequence again of one increase and two stitches twice so I've already done one two one increase and two stitches and this row I ended up with 30 double crochets now I'm going to start my row with number C and on row C I'm going to work on the back strap of each stitch 30 double crochets now I'm going to teach you a technique on how to work these straps here without letting it show the filling So I'm going to introduce the needle here, taking the needle here, and let me show you PR here, when we take it here, the back strap, there's another strap here, I know if you can see it, but there's another strap here, so when the we'll take it here, on the back strap, we'll also take this other strap here, we'll take it on both straps, so every stitch has this second strap here, and we'll work using this second strap too, to avoid showing the filling, so here we are going to take the back strap and the strap that is inside the piece, so here I move from one side to the other, you see, I took the two straps, the one behind here and the one behind the back and I make a stitch I low the next stitch, I go through the first one through the second loop, I pull the thread, I make my single crochet, the next back loop, I go to the next one, and so I will work 30 double crochets, passing through the back loop and the loop that is inside the piece, so I will do it here these 30 stitches using just this strap here and I'll be right back, back strap, I've finished my row here, I'm going to start row number six, row six, I'm going to work normally and from this row I'm going to make a sequence of two rows, each with 30 low points so I'm going to work here on row number six and row number seven and I'll come back so we can continue. If you're not already subscribed, you've dropped by parachute here on the channel, take the opportunity to subscribe to our Arts channel and free recipe line every week I've completed my sequence here, I'm now going to start my row number eight and I'm going to start working seven double crochets on it, so here I already have 2, 3, 4, 5, 6 and 7, now I'm going to work a sequence of a decrease, the decrease is the front loop of the first and from the second stitch I pass the strap through the two straps and make my single crochet now I'm going to make two single crochets I'm going to repeat the process of a decrease and two stitches three times so I've already done one I'm going to my second one a decrease and two stitches a decrease and two point so I have 1 2 3 4 5 6 and 7 now I'm going to work on a decrease and one point I'm going to repeat this process three times so I've already done one I'm going to do the other two and I'll be back I've completed my sequence of a decrease and one point per three times now I'm going to make a decrease and I'm going to finish the row with eight double crochets and this row will have 22 stitches so I'm going to finish it and I'll be back, I'll finish my row I'm going to do a little knot here, I'm not going to cut this thread now anymore Next, I'm going to show you why we're going to work with the color now in the skin tone, you can make it in this light skin tone, you can make it brunette in the color you prefer and I'm going to start now with this line here and this one here at the end we are going to finish the shoe but for that I need to advance a few rows with this thread So now I'm going to make a little knot here I'm going to the next stitch, right the normal stitch on the back strap I attach my thread here and I'm going to work here on row number 10, 22 single crochets using only the back strap. So I'm going to finish this row and I'll be back, I've finished my row here, oh I worked normally, now I'm going to come here to the beginning and I'm going to start my row number 11 and in this row I'm going to work here six single crochets, let's just pull here then [Music] 1 2 3 4 5 and if six single crochets now I'm going to do four decreases in a row So I'm going to take the front loop of the first of the second stitch I pass the thread through the two loops, completing my single crochet again, I pass through both and complete my single crochet, so here I am already on my third decrease and the last decrease and I will finish my row with eight stitches and this row will have 18 double crochets So I'm going to finish it here and I'll be right back, I've completed my row I'm going to start row 12 now and from row 12 I'm going to start a sequence of 12 rows Each with 18 double crochets so here I'm going to work from row 12 to row number 23, I'm going to add padding until I get to that row and I've now completed my sequence here, I put padding up to the row we worked on, but here I don't add much, it leaves a little empty here, about two empty rows to When we fold it here, this part here won't be so full and the doll's leg will be up, so now we're going to work on our doll's knee, if you noticed, we finished the row here and it's here at the back, but I need to so that it stays here on the side so I can close the knee, so for that I'm going to advance six double crochets here so I have [Music] 1 2 3 4 5 and 6 this here is row number 24, I'm here on the side, when I double it will be on the same side as the leg, now I'm going to work nine double crochets PR, close this part of the leg, then I come here in the next stitch, I go here for the last stitch, I pull the thread that comes from the ball through the two pairs and I double crochet the next stitch pass here from one side to the other, I pull the thread and complete my double crochet.
So here I already have three double stitches, I will have this marker here 4 5 6 7 8 and 9 double stitches here we closed the leg and now I'm going to go up the second part of the leg, in this case row number 25, so now on row 25 I need it to be open like it was here, right, so we can work circularly, so what am I going to do ? a little time up here So I'm going to work on this little strap and then on this AL it's going to be a circular work to start I do a chain I'm going to come here on this little strap on this side, right next to me and I'm going to work here on row 25 Right at the beginning an increase is two double crochets in the same chain now I'm going to make eight double crochets using just one of the loops so here I already have 2 3 4 5 6 7 and 8 now I'm going to turn my work if you notice there's a loop here front part and I'm going to do the same thing so here I have 3 6 9 in this strap here I'm going to start my work with an increase and eight double crochets, one for each strap, I'm going to do these eight here and I'll come back here with my sequence, I've already added it the filling now let's close this little part here like we did here on the little knee and for that I'm going to have to work three double crochets so I have a 2 and 3 so here I got to the side of the little leg now I'm going to join the two parts and I'm going to come here, in the next stitch and in the last stitch, then I'm going to pass here and in the last stitch, I pass the thread through both and do a double crochet, next stitch, I go from one side to the other and do a double crochet, let me remove this marker here, I'm going to work here 10 single crochets passing from one side to the other this one is row number 37 which is the last row of the leg so here I have already worked six stitches 7 8 [Music] 9 and 10 10 single crochets And we closed the leg now I'm going to cut the thread doesn't have to be big because we won't sew it And I'll fasten it here and we've finished the little leg, now we're going to work on the finishing here on the shoe to finish it completely, so remember that we tied a little knot here, I'm going to untie this little knot, I'm going to attach my needle here and now we're going to work on the finishing, which is this little part here, of the slipper so I'm going to start here with six single crochets in the strap that was here in front, I'm going to work six single crochets so here I already have 1 2 3 4 5 and six single crochets now I'm going to work seven chains 1 2 3 4 5 6 7 I'm going to skip eight straps like this so I have 1 2 3 4 4 5 6 7 8 in the number one, I'm going to fasten with single crochet and counting with this single crochet I 'm going to work a total of eight stitches so here I already have 1 2 3 4 4 5 6 7 and eight single crochets now I'm going to cut the thread with the space I gave to finish my row I'm going to pull this thread all the way here, sorry, everything, I'm going to skip a stitch in the next stitch here, from the back to the front I'm going to pass my thread here I come back here to the last stitch, I pull it until it's the same as the others and I come back here through the stitch I skipped back here, I'm going to make a little knot here and I pass this thread here inside the [Music] leg and cut the excess and we finish here look at the finish on the top of the shoe Now let's finish it down here, the finish on the bottom here is just with slip stitches, right, just to give a little detail to the shoe, I gave it a little knot here, I'm going to come here on the strap that we left in the front, I like it start here at the back but you can start anywhere Oh I put it here I'll come here and for the next stitch I pull the thread and make a slip stitch next I pull the thread and make a slip stitch and that's how I go around my entire piece working with stitch So I'm going to go around my entire piece here and at the end I'll come back to finish with you, I'm done here, I'm going to cut the thread, I'm going to pull it all here, I'm going to come here, in my first slip stitch I go under it, taking the two loops, I'm going back here in the middle of the Last very low stitch I pull it so it stays the same and I come here to the bottom here at the bottom I'm going to make a little knot and I'm going to hide this thread here inside the leg I'm going to do the same thing with this one as we Step started here and now just cut off the excess and [Music] we finish the leg of our [Music] doll Let's now start our doll's arm So I'm going to start here with the magic ring I'm going to hold the thread here I'm going to go around my finger here crossing it up here, I'm going to follow this thread to guide and I'm going to pass my needle here under this thread, over this thread here that comes from the ball, I pull this thread that comes from the ball into this arch, I have a little chain here on the needle now I'm going to go under the thread and I'm going to pull the thread that comes from the ball into this smaller arch and our magic ring is ready, inside this magic ring I'm going to work six double crochets so I have 1 2 3 4 5 and 6 I'm going to pull this one smaller thread here to close the magic ring pull and tighten well now I'm going to mark the beginning of my second row I'm going to mark with this thread but you can mark a clip with the marker Whatever you think is best I'll start my second row in my second row I will work an increase for each base point our base has six stitches so here I will work six increases and the increase is two single crochets in the same base point so I have one in the same space two stitches next stitch one in the same space two, I'm already here in the second increase, third, fourth , fifth and sixth increase and row two had 12 stitches, I'm now going to start my row three, I'm going to pass the thread backwards here to mark the beginning of row three and in row three I I'm going to work the first stitch, a double crochet, in the second I'm going to work an increase in the third, a single crochet and in the fourth stitch, an increase, I'm going to repeat this process of one stitch and an increase six times, I've already made two missing four and this row will have 18 points so I'm going to finish it and I'll be back, I'll finish my career, I'll Now start my row number 4 and from row 4 I will start a sequence of two rows each with 18 single crochets so here I will work row 4 and row 5 and I will be back, I have completed my sequence here now I I'm going to start my row with number if and in the row we're going to work our doll's Thumb so I'm going to start here working eight double crochets I already have 2 3 4 5 6 7 and 8 now I'm going to work with you the puff stitch that I I use it a lot to make our doll's inch. So I'm going to make a loop here as if I were going to make a double crochet, I'm going to the next stitch, I pull the thread, I'm left with three loops on the needle, I'm going to pull the thread that comes from the ball to the first two loops and I leave it aside here these two loops on the needle I'm going to make another loop in the same space I pull the yarn Now I have four loops I'm going to pull the yarn for two first I had three I'm going to make another loop in the same space I pull the yarn again I have five loops I'm going to pull PR for both first, now I have four loops, I'm going to make one more loop in the same space, I now have six, I'm going to pull the first two loops .
I'm going to come here straight to the next stitch and I'm already making a single crochet because if I fasten it with a slip stitch it will form one more stitch, which is what I want, so here, counting on this stitch here, I'm going to work to finish my row with nine single crochets. I'm going to do these nine stitches here and I'll be right back, I've finished my row, it continues with 18 double crochets, I'm now going to start my row number 7 and from row S I'm going to do a sequence of two rows, each with 18 stitches, so here I I'm going to work row 7 and row 8 and I'll be right back, I've finished my sequence I'm going to start row number n on row n I'm going to work a single crochet and a decrease the decrease is the front loop of the first and second stitch I'm going to pass the thread through the two [Music] loops and complete my double crochet again a double crochet and a decrease front loop front loop I pass the yarn through the two loops and again through the two loops I will repeat this process of one stitch and a decrease by six I've already made two missing four times and this row will have 12 double crochets. So I'm going to finish it and I'll be right back, I've finished my row, I'm now going to start row number 10 and from row 10 I'm going to start a sequence of 16 rows each with 12 single crochets, so here I'm going to work from row 10 to row number 25 and I'll come back so we can continue.
So you work on, adding stuffing until this row, I'll be right back, I've finished my sequence here, now I'm going to cut the thread so we can change of color I'm going to pull [Music] here I'm going to pass my needle here I'm going to skip a stitch in the next stitch I'm going to leave with this thread from the back to the front I'm going to come back here in the middle of the Last Stitch from the top I'm going to pull it so it stays the same as the others and I'm going back here through the point I skipped back here I'm going to give it a little nut Let me just put it here again and our base is ready to start with the next color the color I'm going to use will be yellow we're going to continue with this yellow So I'm going to make a little knot, I'm going to leave this little knot on the needle because I'm going to start here working a single crochet, I'm going to come here to this stitch that I just made and I'm going to start my row 26 n on row 26 I'm going to work 12 double crochets in yellow so I'm going to do these 12 double crochets here and I'll be right back, I'll finish my row. I'm going to start row number 27 now and on row 27 I'm going to work 12 double crochets in the back loop, so I'm going to do these 12 double crochets here in the back loop and I'll be right back, I've finished my row, I'm going to start row number 28 now and in this row I'm going to work 12 increases, in this case I'm going to work two double crochets for each base stitch and this row will have 24 double crochets. So I'm going to finish this row and I'll be right back, I've completed my career now I'm going to start my career number 29 and from career 29 I'm going to start a sequence of four rows, each with 24 single crochets, so here I'm going to work from row 29 to row number 32 and I'll come back so we can continue, you'll work and add the filling, I've finished my sequence, I'll now start row 33 and In this row I'm going to work 12 decreases in a row.
So I'm going to take the front loop of the first and the second stitch, go through the two loops and again through the two loops here I did a decrease in the next stitch, the same thing, front loop, front loop, I pass the thread through two straps and again through the two straps so I'm going to repeat this process of decreases 12 times and this row will have 12 stitches so I'm going to finish it and I'll be right back, I've completed my row, I completed it here with arm padding, now I'm going to work the row to close the little arm like I did with this one, to close it so that when I put it on it's better so I can get here on this side. I'm going to need to work four single crochets so I'm going to do it here, 1 2 3 and 4, so here I got to the side of the my little arm like this, I'll be able to fold it here and he 'll have his thumb on the side. So now I'm going to work passing here from one side to the other, I'll come to the next stitch and the last stitch here and I'll do a single crochet next stitch I'm going to pass here and I do one more double crochet next stitch from one side to the other and I do one double crochet and so I'm going to work until I complete six stitches so here I've already done three 4 5 and if six double crochets we close the arm now I'm going to cut and attach It doesn't need to be cut big because we're not going to sew this little doll together and we've finished the little arm now we're going to finish the little arm here so to do the finishing I'm going to use the thread in pink this one is number 31 31 in the video description there is the whole list of materials I'm going to do a little knot here and I'm going to work here using the straps that we left here at the front so I'm going to start with a single crochet I'm going to go up three chains 1 2 3 in the stitch next I do a single crochet now I'm going to go up three chains and in the next stitch a single crochet I'm going to do one more with you three chains and in the next stitch a single crochet I'm going to repeat this process 12 times so here I've already done three missing nine I'm going to do the other nine and I'll be right back, I've finished mine here, now I'm going to attach it here, in the first single crochet with a slip stitch, you finish with three chains, okay, I'm going to cut the thread, fasten it and I'm going to pass this thread here, just inside the arm, let me pass it, here I go pass it here, it goes anywhere on the arm, I cut off the excess and we finish our doll's arm, we finish our little lesson.
I really hope you liked it. If you liked it, leave a like, share this video and for you to check out the continuation of this lesson, just run here, look at video description the link to all the classes will be there, click there and you will check out all the classes taught by our little doll and don't forget to leave your like on all the classes, I will also leave you suggestions for classes that are available here at Arts in the description of the video.