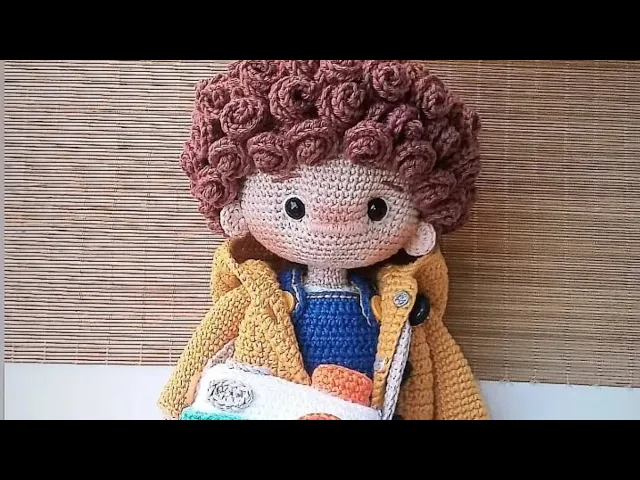
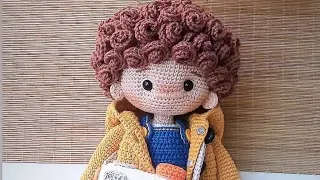
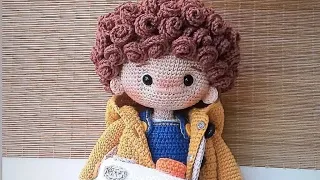
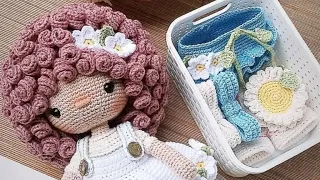
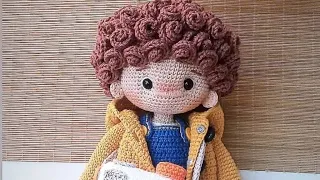
Hello girls How are you? I'm Lidiane, for those who don't know me, I'm the creator of the amigurumi heart and today we're going to start Artur's class, right ? We're going to go up his legs with the socks he wears the socks up to his waist, okay, I'm really inspired by those, those old kids, right from the old days, and my son also wears them in the cold, he wears those socks low to the waist.
jeans for warmer Cold, so you'll see this a lot in my class, right? These inspirations from the old days, I always bring something from there, okay, so we're going to need the aquarium, tape the garbor zado wire that we're going to make the base of the foot and wrap it in the wire wire okay I left the number there in the description we will need a 3 mm TEC needle I say it's tec, right I don't think that's the name but I say Tech pin No we won't need a pin and basically the class is this thread Needle wire the Tec and the ribbon so for this first lesson we are going to use this here and pliers that my wife will teach you how to make the base, right the structure of the foot so you will need pliers there Okay so grab your pliers, let's go to class too, girls, let's start working with the aquarium thread which is 29 27 and we'll start with eight chains 1 2 3 4 5 6 7 and hey then we'll work with Needle number three, okay, let me release my thread here, done the eight chains in the second from the second chain, six double crochets, one 2 3, finishing this thread 3, 4 5 and six in the last chain, an increase here at the tip, an increase of two double crochets at the same base as the on the other side six single crochets 1 2 3 4 5 and 6 and an increase and this row ends with 16 single crochets the increase here is right at the tip here it is and an increase recapping we made eight chains from the second we made six single crochets an increase here at the tip another six single crochets and an increase at the end, okay And this row ends with 16 stitches in the second row Let's work an increase of two single crochets four single crochets an increase five times four single crochets and an increase twice and the second row ends with 24 let's go an increase of four double crochets 1 2 3 and now an increase of five times one an increase of two double crochets two [Music] increases of two double crochets three increases of two double crochets four increases of two double crochets and last increase of two double crochets now four double crochets 1 2 3 and 4 and here at the end two increases of two double crochets each ok And this row ends with 24 stitches which is number two ok now row number TR Let's work one single crochet one increase four single crochets one stitch and an increase five times four double crochets one stitch and an increase twice and the TRS round will end with 32 single crochets come on girls let's do one single crochet one single crochet one increase place the marker of you, I'm not putting it in but I'm finding myself here an increase four double crochets again oh [Music] 1 2 3 and four double crochets one point and an increase five times one point and an increase one one point and an increase 2 one stitch and an increase TR one stitch and an increase 4 one stitch and an increase c four single crochets here on the side 1 2 3 and 4 and here at the very end Let's do one stitch and an increase twice there is one stitch and an increase one one stitch and an increase two and row three ends with 32 single crochets, the next row is 32 single crochets, let's continue here normally, 32, the row that 32 single crochets make your 32 single crochets, then on row four that I'll be right back girls I did my row four here with 32 double crochets and now we're going to do five and four rows of 32 double crochets but the first row we're going to do taking the back loop, just the first one, okay we're going to do 32 double crochets taking the loop from the back, then you will do three rows, taking it normally, okay, there's no secret, just the first row is taking the back loop, ok just to do that we're going to work on the side of his little foot, right? So only this first one is 32, the other three are taken normally and make 32 single crochets and in total there are four rows, okay, so do yours and I'll do them mine here and I'll be right back girls I did my four rows here the first row we did 32 double crochets taking the back loop and the other three we took normally, now we go and this and these four rows was row 5 row 8 is good in total now in row n we are going to work eight single crochets we are going to start doing the instep 1 2 3 4 5 6 7 and 8 eight single crochets and a decrease front strap and back strap of the second close after that we will make a stitch and a decrease four times o a single crochet a decrease [Music] a single stitch a [Music] decrease of a single crochet a decrease [Music] TR a stitch [Music] low a decrease that now more a decrease here and let's finish the row with eight double crochets 1 2 3 4 5 6 7 and 8 and the row ends with 26 stitches, okay, we're going to do S single crochets decrease CCO times, I'll recap again on row 10 let's do seven double crochets a sequence of decreases for five times seven double crochets and a decrease at the end and round 10 will end with 20 single crochets okay let's go, seven single crochets in round 10 Oops 1 2 3 4 5 6 and 7 now five decreases one decrease two decreases 3 3 Wait, my three here got messed up, I'm back to two here two decreases 3 [Music] here 4 here and 5 and row 10 will end no later than five decreases seven double crochets 1 2 3 4 5 6 and at the end a decrease and round 10 ended with 20 stitches, okay girls, round 11 I'll recap for you, round 11 you're going to do seven single crochets, a decrease three times and seven single crochets, okay, it's very practical, oh one 2 3 4 5 6 and seven now let's do a decrease three times three sequences of decreases front stitch and back stitch of the next stitch one front stitch and back stitch of the second stitch two front stitch and sec and back stitch of the third stitch three now let's make seven double crochets and finish this row [Music] 1 2 3 4 5 6 and 7 and row 11 she finished with 17 double crochets ok on row 12 there will be seven single crochets seven no sorry on row 12 go be 17 double crochets taking the back strap Ok, I'm going to do a little bit here and then you do yours and then I'll do mine here ok Oh taking the back strap Oh don't wait, girls I'm not going to take the strap from the back I'm going to take a look at my draft here I'll be right back, so row 11 ended with 17 single crochets So that's it for row 11, I'm going to come to 12 here straight and I'll be right back, ok girls, I'm back here to row 12, let's not take it the back strap, okay, we're going to do 17 double crochets normally.
So now let's do from row 12 to row 20 12 13 14 15 16 17 18 19 20 nine rows of 17 double crochets. Okay, I'll be back here with you remembering, normally picking up row 12 to 20 nine rows of 17 single crochets nine ok, I'll be right back here with you girls I'm back here with you because I need to do something very important before we go up the nine rows completely, okay my husband will come here to explain to you the measurement of this wire because we are going to put it here on the instep, okay? So this is the structure of all my dolls, okay, it will always be this one and he will come here with you to explain the measurement and twist this wire because I don't have the strength Okay, I'll be right back So when you, before climbing the nine rows, you already position the wire, I'll fill the instep here with you so you can work on climbing the rows already with wire Okay, I'll be right back here with it, good guys.
I'm here to explain to you how you're going to work with this wire, okay, you're going to take your wire there and you're going to cut it to 44 cm, it's 44 cm, then what are you going to do ? the tip is connected to the tip then you will come with pliers, you have to complete the closure here, you are doing this Link here, you will hold it here, be careful not to hurt yourself and not to pierce your hands, because this Wire here is hard, so be careful not to hurt yourself And then you go Come here, see, twist, take your time, take your time, if it's bending, there's no problem, then you untwist it, ok AF, the purpose is for it to be twisted. What for?
To give your feet more firmness, as you can see, mine is now crooked. I'm going to give it a little tweak here, it doesn't need to be that wonderful capreo, it doesn't, it's just to support the doll's legs, I'm done, right, let me give you a little twist here at this little point here, I'm finished, you see, here, there, how are you going ? do this part of the Elo here, you're going to do it more or less like this, a finger's width away, ok, you're going to take the pliers, you're going to come here, more or less, you see here, it got here, you do it like this, ok, it doubled up, ok, there you guys what are they going to do, what are they going to do, are they going to get the tape, the durex, it's there in the description, okay, and I'm going to wrap it completely over this wire so to avoid that stainless steel, you know what people say, oh, but this wire doesn't rust, well, I don't, I prefer to avoid it, right ?
It ends up getting damp, your doll ends up having an accident or you wash it, right? So to avoid this problem, it's a good idea to wrap the tape a lot, and then you do this, when it ends, it happens, it's ready, you see, it 's well involved, you see, there you go. being able to put it on your doll's foot, you can see it will look like this, now my wife is going to go through the process for you, she's going up the legs and filling it with wire, okay guys, so this is the explanation, I hope you understood, okay, and That's it, girls, I'm back here, now it's up to me, right ?
to place the wire and you carefully place the filling, be careful not to burst the stitches, okay, and that's it, add a little bit of filling here, leave the tip of the instep very round and we will fit this wire to place the structure of the legs and feet, my structures will always be this one, I don't like adding structures. At first, I used to put them on with a hot glue stick, right, but on certain occasions, it would be very soft and I don't like it, right? I like it to be very firm, so this one My husband created this technique for me and so it makes a lot of sense and for me it's wonderful.
I don't know how to use another structure and if it's not this one I think it's wonderful and very firm, so I filled the tip here, now I'm going to do it here. Fitting the wire here underneath, if you think it should be filled, do the fitting another way, right ? Now we're going to work from here with this Arame, okay, so for those who never participated in my class, the first class, this second class, right, it's Artur's, I work like this in this part of the structure, okay, and all my pieces, you'll see That's Artur, the only thing I'm not going to use on him is the wire around his neck because his hair is very practical, very light.
So I'm just going to use the hot glue stick, okay? And because it doesn't need that structure that we used on the other one piece, right, than the other because I had to support a giant head of hair, this one isn't necessary, so on the neck I'm just going to use the hot glue stick . ok and that's it, girls, coming back here to the leg, right, and that's it, you see, I'm just going to finish here, leave it very round and I'll be right back here with you, but this is the structure process, okay, I'll be right back here, girls, look, I filled my little foot here, I structured it the wire here in the middle is now yes, let's go up to nine rows, right in my case, eight because I had already done one, okay, I did this, what am I going to do, every three rows done, they fill it, okay, Don't wait to fill it all before you can in fact, don't wait to crochet all the rows to be able to fill the stitches, they will open, they will be full of holes because you will have to force it to push the filling down.
So my advice is, every three or four rows completed, fill, fill, shape, do not need to punch the filling, go carefully, calmly, ok so it doesn't stay open, I didn't fill it, I didn't open a stitch, you see, it's quite full here, but why didn't it open ? OK, so your crochet will look really nice and won't show an open stitch, OK, so I'll come back here with you with the nine complete rows ready, OK, I'll be right back And you're already filling them up, hey girls, I'm back here with my little leg Half is already full, you see, it didn't burst stitches, everything is beautiful, now we're going to do row 21, which is four single crochets, an increase of eight single crochets, an increase of three single crochets, and this row 19 will end with sorry, row 21 will end with 19 stitches. lows Okay then, let's go four single crochets, put your marker 1 2 3 and four single crochets an increase an increase eight single crochets 1 2 3 4 5 6 7 and eight now an increase again four single crochets not three single crochets girls sorry 1 2 and TRS I will recap we started with row 21 there are four double crochets an increase eight double crochets an increase three double crochets and this row 21 it ended with 19 stitches o 1 2 3 4 5 6 7 8 9 10 11 12 13 14 15 16 17 18 and 19 is row 22 nothing more than 19 single crochets is row 22 the next row So do your next row and I'll be right back girls I finished my row 22 with 19 single crochets and on the row 23 Let's work as follows five double crochets an increase eight double crochets an increase four double crochets and round 23 will end With 21 stitches let's go five double crochets 1 2 3 4 and 5 five double crochets an increase an increase an increase five double crochets an increase eight double crochets 1 2 3 4 5 6 7 and 8 eight double crochets an increase an increase and four double crochets at the end 1 2 3 and 4 and row 23 ends with 21 single crochets row 24 is nothing more than 21 single crochets, then do row 24, then that 's the next one.
With 21 single crochets, I'll be right back, okay girls, I've finished my row 24. With 21 single crochets, I'm already filling up, okay, now on row 25, let's do six single crochets, an increase of nine. double crochets one increase and four double crochets, okay, six double crochets 1 2 3 4 5 and 6 an increase one [Music] increase nine double crochets 1 2 3 4 5 6 7 8 and 9 one more [Music] increase and finish the row with four double crochets 1 2 3 and four then you ask yourselves Lidiane But why is the leg all blue I look at my patterns like this I get a lot of inspiration I remember a lot of those kids from the old days who wore those socks underneath trousers trousers over trousers and I think it's very beautiful, they're all my inspirations, I always try to bring things from the back to here, I always do too and I'm inspired in some way by my children, you know, and for example when it's cold the Angelo wears a pair of pants, they are warmer under his jeans, so under his sweatshirt, so I get a lot of inspiration from that, you know, I based it a lot on my children and I like to remember those children from the old days who usually wore those socks and stockings.
under pants and that's it's my patterns you'll see a lot of this okay I've finished row 25 here now from row 26 to 29 we're going to do three rows of 23 single crochets okay so the next three rows are single crochet over double crochet ok From 26 to 29 I'll be right back here with my three rows ready girls, I finished my three rows here and we're going to row 30 which is two double crochets, an increase and 20 double crochets and we finished the three rows which was 23 stitches, right? The end was 23 stitches each in the row and now in row 30 we are going to do two double crochets an increase 20 double crochets let's go 1 and two Now let's do one increase and 20 single crochets 1 2 3 4 5 6 7 8 9 10 11 [Music] 12 13 14 15 16 17 18 19 and 20 and row 31 is nothing more than 24 single crochets row 30 ends with 24 single crochets the row 31 2 single crochets then you will continue on the next row 31 with 24 single crochets and I'll come back here with you so we can cast off this row of 24 single crochets is the last row and I'll come back here with you so we can cast off and I'll I'll also come back with the other part and with the other leg ready too, because you're going to work two legs, okay, one after the other, no, no, don't wait and half an hour to do 40 minutes, 2 hours, which will make a difference in size, will make a difference in of everything because the tension in your point will change, so this leg is finished, take the other turn of the video and do the other one exactly the same and you are also defining what is a right leg and what is a left leg, the tip is always turned so as not to be one foot facing there, the other foot facing here, ok, so row 31 24 double crochets, I'll be right back here with you with my other leg ready too so we can finish this class, ok, I'll be right back girls, I've finished my row 31 here, now let's finish it off. little thread on the needle skip one base stitch in the next insert the needle ok Pull not too much go back to where the thread came from and insert the needle again pull it a little to adjust here so that the chain is clearly visible but there is no point of it disappearing Come back outside and insert it inside again, okay, I'll go back outside again and I'll pass between one and two points, between two and three points, right?
To give it a better hold and that's enough, okay, I'll pass it another three to ensure that I don't do many turns because if I need to undo it, it's a lot of work, so this won't come loose, let's cut this thread, okay, that's the end of today's lesson, look, girls, define your feet correctly, which is right foot, which is left foot, okay? so it doesn't end up like that, one foot this way and the other, that's not the intention, that 's not the intention, it's defining the foot, okay, shaping the right foot, the right foot to one side, the left foot, to the other, o Do both legs at the same time Okay, they're filling it up, okay, and that's the end of today's class, okay, do both legs at the same time, okay, and that's it, here I want to explain something to you, Artur, the shoe is going to be crocheted, we're going to crochet the shoe here, it's on his little leg. because then it won't come off and the part here that we're building him with is like this, girls and the jumpsuit too, the sequence will be jumpsuit and shoes first, because his jumpsuit doesn't come off and I made Artur and the way I did it like I put the shoes on for later as a jumpsuit so that was a lot of work So let's make a jumpsuit the next class will be the jumpsuit because we 're going to crochet with the jumpsuit already attached to the legs and the next class will be the shoes because the shoe Don't take off your overalls, don't take them off and we're doing this part with Artur here, look at his socks here, okay, so just so you know what you're doing, look, that's it, girls, okay, so we'll go to the next class.
make the jumpsuit, let it be done here and now make the shoes. The third class will be the shoe class. Okay, but the jumpsuit class will be soon and very soon.
Okay, so I hope you enjoyed the class. It was a good class.