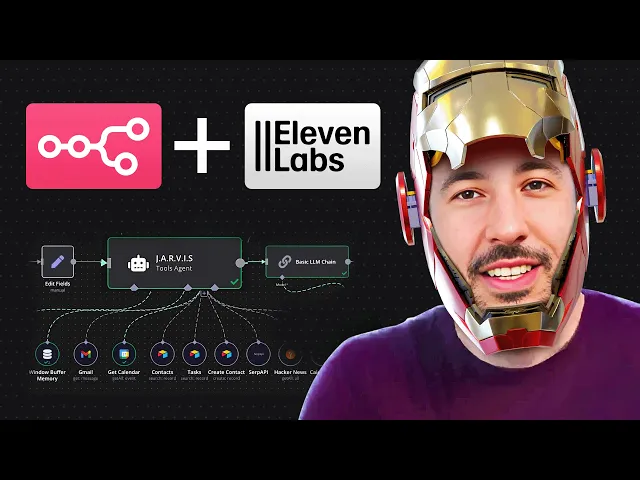
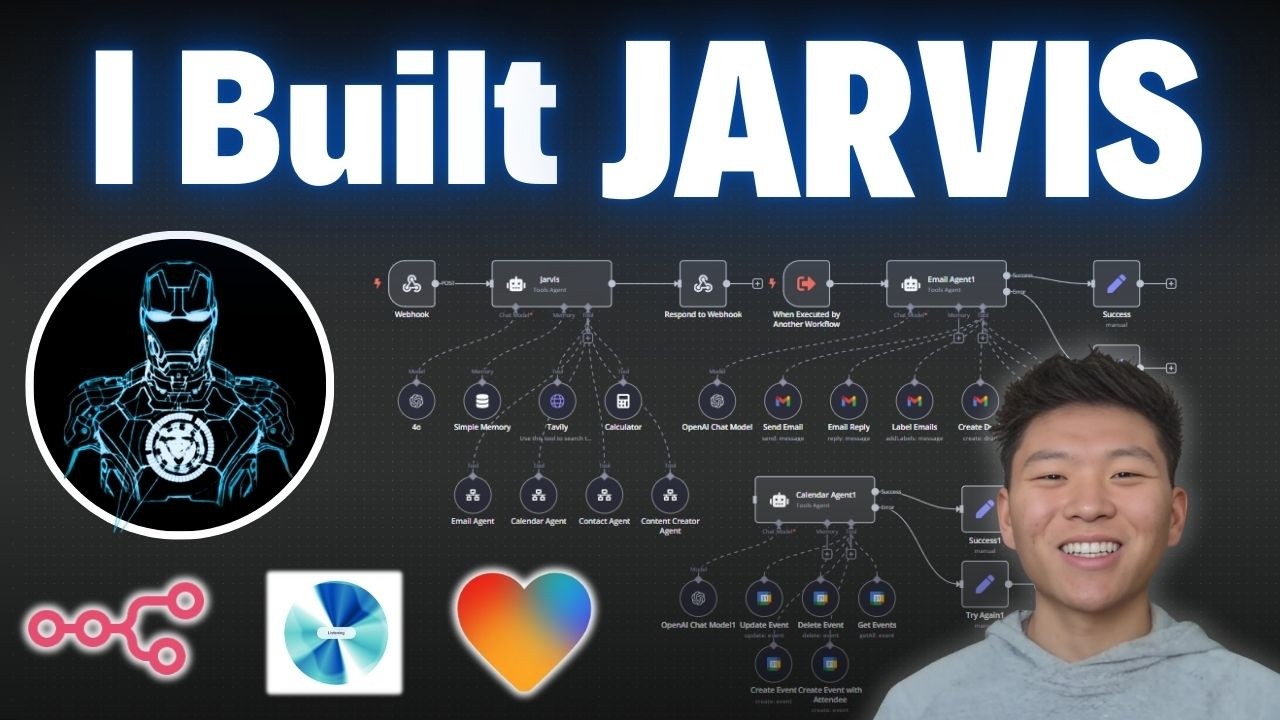
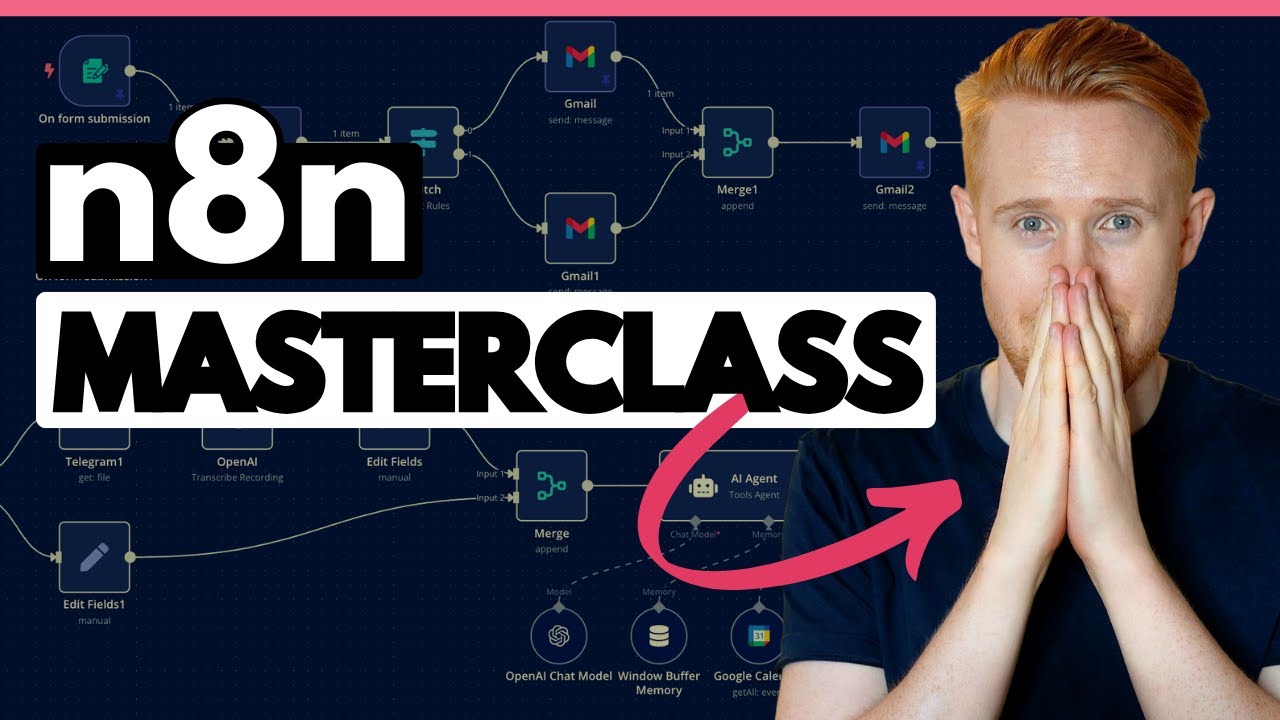
look alive Jarvis we got a lot of work to do today certainly sir I'm at your service circuits humming and algorithms primed though I must say looking alive is a rather ambitious request for an AI perhaps we could settle for looking impeccably coded instead impeccably coding sounds great can you tell me if I have any meetings tomorrow here's what you requested sir I must say your social calendar is rivaling that of a Teenage influencer shall I prepare your witty rep party in advance or will you be winging it as usual all right relax Jarvis can you do me a favor and actually send a email to John Doe and tell him that I cannot attend the event tomorrow certainly sir I've taken care of that with my usual flare for diplomatic cancellations perhaps next time we'll invent a more exciting excuse than urgent superhero business hey guys so in this video I'm going to show you how to build the amazing Jarvis from Iron Man as your personal assistant so that way he can automate every aspect of your life and you can have fun with it all right without wasting too much of your time let's jump right into the video all right so I'm in my blank workflow here in nadn I'm going to go ahead and import the whole file first or the Json file and I'm going to show you one quick more demo and then we're going to go ahead and walk through in step by step especially on the Jarvis personality and voice side build that out and then the rest as well all right so I'm going to head over to my community so in the classroom section if you go to all NN automation and if you come all the way down on JIS 2. 0 so this is where obviously all of the resources useful documentation all the prompts everything is there but most importantly if you come to the bottom the resource file you can just click on this blueprint I'm going to download this I'm going to head over to my workflow I'm going to bring this import from file and now I'm just going to double click on this and this is all going to be brought in all right so let me go ahead and do one more quick uh demo for you and then like I said I'll show you quickly what's going on and then we're going to build out this section first and then I'll show you the build on this side as well all right so we're going to be using our telegram so I'm just going to bring the telegram back up so this time I'm going to ask it just like I showed earlier I'm going to ask it to send an email uh to John Doe tell him that I cannot make the event tomorrow right so that way you'll see exactly what's happening and I'll quickly explain and then we can move on to uh kind of the build side oh and the reason why I'm calling this Jarvis 2. 0 is because I already did the first initial version of this like 6 months ago and I'm going to show you what the difference is between this and that and why this is such an improved version of the original Jarvis video as a personal assistant that I did but anyways let's go ahead and take a look at um the demo here so that way I can explain exactly what's going on and like I said then we'll come back and do the build all right so I'm just going to ask it to send an email to John do that's it I'm not going to provide any information other than that and tell him that I'm going to can I can attend the event tomorrow and I'll show you what's going on hey Jarvis can you send an email to John do and tell him that I cannot make the event tomorrow the birthday party at 600 p.
m. so now I'm sending this so now it's going to transcribe that now the assistant agent is going to reach out to contact database agent to get the information about John do like their email and then it's going to hit the email agent to send that email to John do telling him that I cannot meet the make the event tomorrow so I receive this as a text and then the Jarvis personality gets developed this gets convert it to from text to speech and then this sends us an audio file so now let's go ahead and take a look at the telegram as you can see it says I sent the email to John do to inform him that you cannot make the event tomorrow so if I click on the play now certainly sir I've dispatched the digital messenger pigeon let's hope MrDo's inbox isn't as cluttered as your Workshop all right so as you saw now it did a little humor but let's go ahead and take a look at my email now so I'm going to open my email and as you can see perfect right it says unable to attend the event Dear John I hope this message finds you well I reget regret to inform you that I will not be able to make it to the event tomorrow the birthday party at 6 p. m.
thank you for the invitation I hope it's a wonderful Celebration best recard right it did all of that without me doing anything without me telling it what to write what not to write it's smart enough to determine and what to write based on uh my instructions even if it's very minimal instructions right and as you can see it was sent to John do which the email is John gmail. com and it grab that information from our contact database so it knows a autonomously because it has access to these child agents that I'm going to show what these are but these are all different child agents that it has access to So based on the prompt here it knows exactly what to do first to reach out to the contact database to grab John Do's email and then get the email agent to send an email and make it really nice and pretty as far as the content of the email itself and then obviously it's going to send us the response that hey I sent that message in a text message in the telegram and then also it's going to send us a nice little voice here all right so that's kind of the uh demo on the demo side of things so now let's go ahead and kind of build this in different sections so I'm going to build this part first the Jaris personality and voice and then I'm going to show you kind of what's going on on this side as well so let's go ahead and get rid of this now so I'm just going to start fresh actually I'm going to keep the notes here so that way I don't have to these are just sticky notes you know I can get rid of this all right so let's go ahead and build out um the first for the trigger I'm just going to use the telegram of course but you could use WhatsApp or whatever it may be and this is going to be on message so I'm going to leave this for now the telegram account cuz I've done several of these so uh we can walk through later on but I just want to build the um this SE section right here right so first we need first thing we need to do is add the Jarvis personality so this is just the basic llm chain so what I'm going to do is go ahead and add or just go to Advan Ai and this going to be a basic llm chain the reason why I'm using this is because you don't need to add an AI agent here because it doesn't need to have access any tools this is just the personality part that we're building right so the only thing we need is just access to a large language model so in this case I'm just going to add an Tropic and if you don't know how to add uh the entropic credential you're just going to click oops you're just going to click on the create new credentials and the API key is very easily grabbable so like uh if you go on top here so if you click on entropic API key you'll just go right here log into your account and create your um API key and then you can come back and just add it right here very very simple you going click on Save and your account will be added so you can select whatever um different models that's that's available for you that you can access right so um I'm just going to choose the 3. 5 son which is fine like we don't need to grab anything else and again you can add like a chat GPT or open AI here as well if you want all right so let's go ahead inside the basic llm chain you're going to use um instead of chat trigger we're going to be using telegram but for now that's fine let's just leave it as it is the most important thing here is the prompt the system prompt because we need to give this a p because this is where we're determining Jarvis's personality so first thing always always a good practice is to change the name here so I'm just going to change this to Jarvis personality right because this uh llm chain is essentially defining the personality so you're going to click on ADD prompt you're going to go to system prompt and now we're going to click on Expressions expression I'm going to maximize this and I'm going to bring over the Jarvis prompt here so if I go again to my community in the bottom right here says Jarvis personality prompt so you just literally copy and paste this this like a long prompt but that's fine so what this is doing is it's um let me show you exactly what's happening so this is giving it a defining the personality so I'm saying your Jarvis and I did this a lot so I refin this prompt a lot because I had to go back and forth and figure out exactly what's the best prompt I provided a bunch of examples here so knows exactly how to respond based on the personality of Jarvis from Iron Man right so same thing I'm saying you're Javis you're sophisticated quick witted AI assistant from Iron Man for specific information request if you're using blah blah blah right so I'm giving it a bunch of examples so it knows exactly how to respond and I'm just describing kind of the personality that you a refined British accent a calm and confident demeanor so again this is all based on the Tony Stark and um kind of the interaction that fun interaction that it has with with Iron Man uh um in the movies right so just go ahead and copy this we're going to come back here on our workflow so you're going to paste this and whoops well that's fine I'll just paste it right here there you go you'll just paste this and the json.
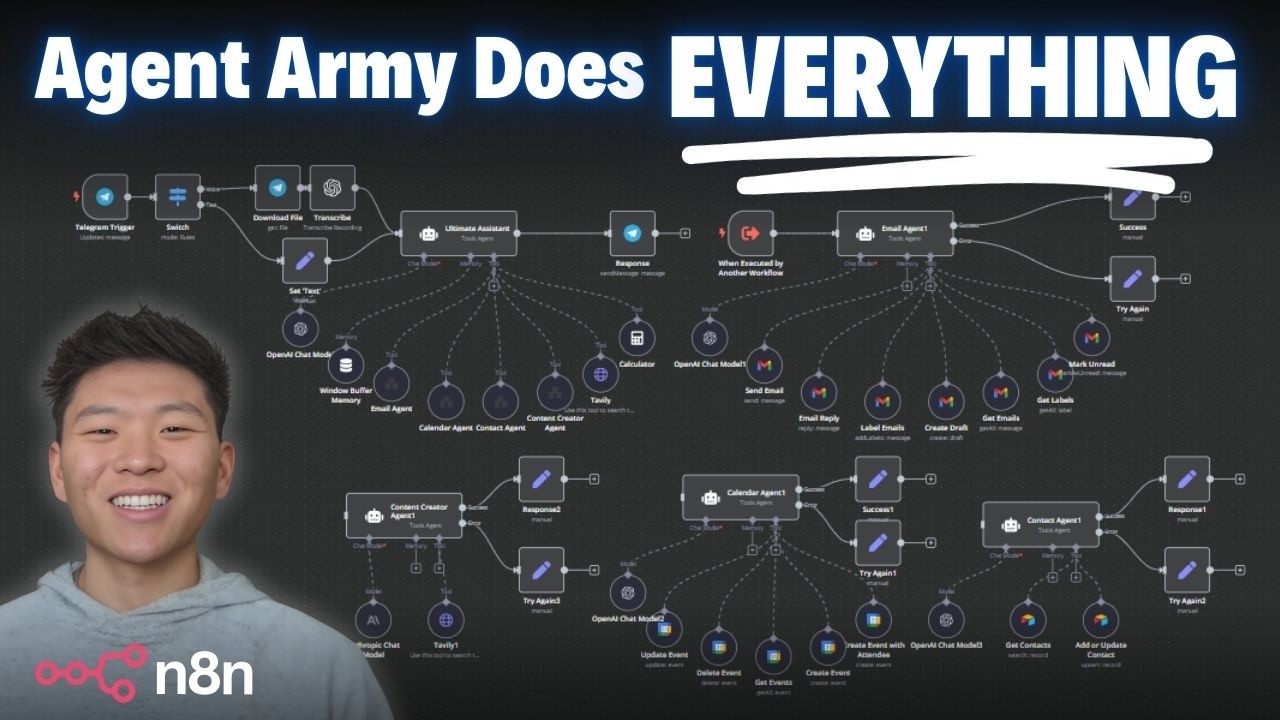
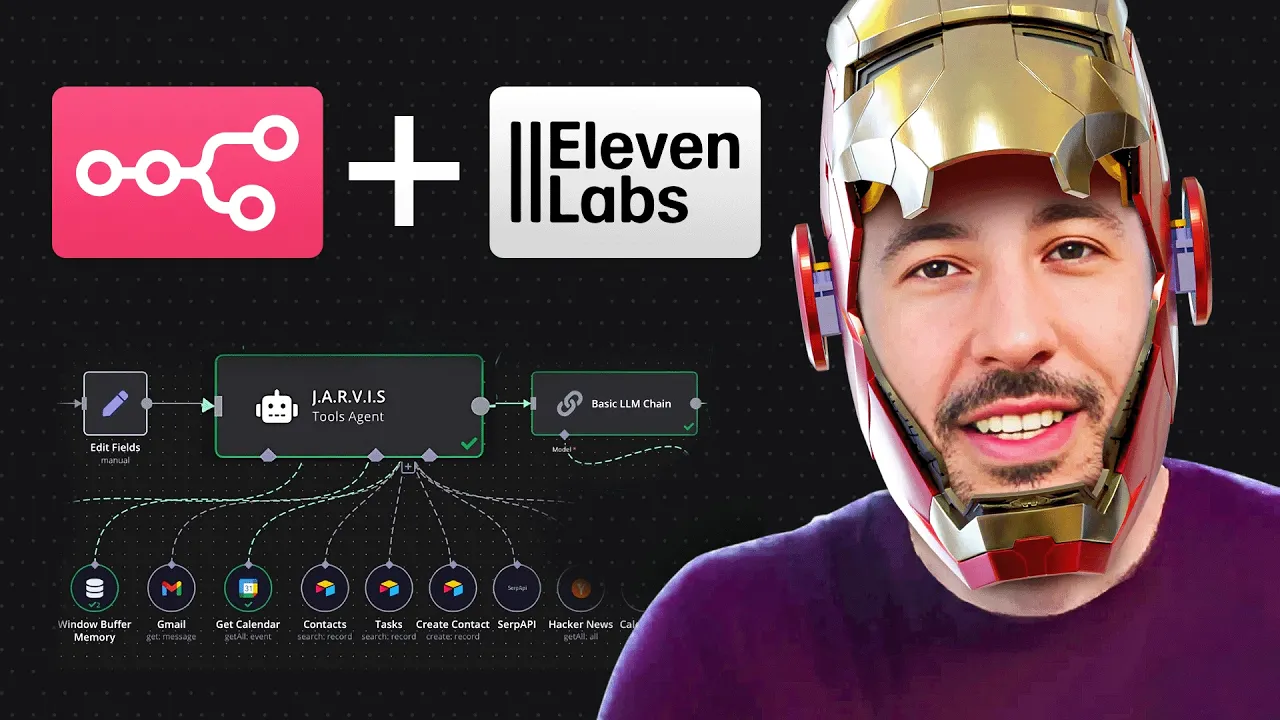
output right here so if I click on expression so this is what's going to be coming in from our uh AI agent here so this assistant agent so that's what we need to connect but but that's fine you know I'm going to show that in a little bit all right so that's kind of the prompt and the personality side of things so now let's go ahead and add the Text to Speech cuz as you can see right here we're con let me actually zoom in here to see so you see exactly what's going on so the next step is we need to convert this text into speech all right so what we need to do is add as you can see we need to add our text to speech here through the HTTP request Noe so I'm going to come here click on this plus button look for HTTP request or just type HTTP so now this is our HTTP request tool because obviously NN does not have at least I don't think it has any integration with 11 Labs right now the notes so that's why we have to use our HTTP request node so the method is going to be post because obviously we're going to be sending information or requesting information to convert this text into speech the URL same thing we're going to head over here and come down to Jarvis Voice setup so here's the URL right I'm just going to copy this so copy this and paste it right here the post method you is going to be this all right so what's happening here is like it's reaching out to api. 111 labs. iv1 text to speech that's the end point and this is the ID of the Jarvis voice that I had created in 11 Labs right so the way uh so if I go to the top here and go to 11 Labs just click on 11 Labs API or 11 Labs stuff if I go to my account here and click on voices so these are all the voices that that that are here available the one that I created the jarv voice that I that I cloned that has a different ID just like all of these voices have an ID so if I click on use here uh actually no not on use let me go back here click on view right so if I click on view you'll see in the bottom right here it says ID you see that so if I hover over it you'll see that's the ID so that's what I did right so I this the ID that's is right here is based on the Clone voice of Jarvis that I did so that's exactly when you paste this URL it includes that um ID there um so make sure you are uh using this proper URL because that's exactly the end point that we're reaching and then obviously if you want to use some other voice so just go ahead and change this ID to whatever voice you're trying to use right all right so for the authentication you're going to do uh generic credential types and for the generic O type we're going to select custom o and then for custom o you just going to do a drop down here so I have all these different authorization that I've done I already have an 11 Labs one but I'm going to show you how to do it so all you have to do is click on new credentials so this Json again I've made it very simple so you're going to head over to right here you're going to literally copy and paste this right so you're going to copy this and there you go so now make sure you replace this so it says your API key so you're going to replace this with your API key how do you get your API key same thing I'm going to head over here to my classroom section click on 11 Labs API key and right here is where you create a new API key and as soon as you do that it will give you a long API key and all you have have to do is come here and just paste it between these two quotation marks once you do that you're going to click on Save and make sure you change this to like 11 laps Au or something like that right so if I cancel this I'll show you exactly like what mine looks like I've just named it uh 11 Labs there you go right so that's what exactly what that is it's very very simple you just copy and paste this make sure you add the custom op and you're good to go all right so once you're done there we're going to leave the send query parameters as it is and we're going to go to send headers you're going to toggle this now you could add this inside your custom off but I just wanted to show you how there's different options here right so you're just going to say use uh field uh field below and you're going to head over to your same thing on the community I'm going to scroll down and right here it says send headers you're just going to copy content type and I'm going to bring this over here say name content type and it's going to be application sljs right just going to copy that paste it in a value here and again all of this is an um 11 Labs API documentation I've just made it very easy all you have to do is copy and paste right here everything is set together but if you want to do it on your own go ahead and read the uh documentation there it's pretty simple you can figure it out okay so we're also going to send body you're going to toggle body here and you're going to do this time you're going to keep it as Json instead of using Fields below you're going to just say using Json the reason why doing the the reason why we're doing this is because we're trying to we're making sure that the output that's coming in from the assistant agent right here or sorry from the Jarvis personality uh llm here is uh a a Json it's a valid Json and sometimes what happens is that when you're using a basic Alm chain or an AI agent the output a lot of times is not a valid Json so that's why I created this really nice little code that will take care of all of those right so if you come here on the body let's just copy this copy this and paste it right here so what this does is basically this converts any uh any of these edge cases so if there's kind of like any asteris or if there's any line breaks or whatever it is that's coming from our Jarvis personality here the output of this it's basically going to make it nice and clean and clean it up so that way our HTTP request node that's sending this information to 11 labs to convert this text into speech doesn't throw any kind of error so that's exactly what that is right so let's go ahead and get out of that for now all right so now the next step and again if we run into errors we can check it for sure um let's see what's the next step so the next step is going to be now outputting this information back to our um our telegram node right so we're just going to grab this information and send it back to our telegram node so we can add that in a little bit but I just wanted to make sure you watch I mean you see exactly step by step how to create this this section so now we're going to add our Telegram and everything else so now that we're done with the personality so we essentially now created the Jar's personality with this prompt and then afterwards we also convert it all we're going to convert then information that's coming in from here as a text and converting it into uh the voice with Jarvis's voice right here based on this URL in this voice ID and now we're we're all set with this particular section right so we can add let's add a another telegram here and we're going to use we're going to look for message message actions and we're going to do send an audio file right so we're going to click on this and let's just leave this for as it is for now we'll come back and fix this later all right so so this part is pretty much done at this point so let me grab this it's a little too big there you go all right great so now that that section is done let's put this on the side so now let's go ahead and work on our our kind of like our build from this side of things right so this is pretty simple I've done this several times as far as the kind of this first step so what we're doing here is we're essentially using a telegram trigger and if you don't know how to set up the credentials it's very simple you're just going to create a new credentials and the access token is very simple to get if you head over to your telegram you'll chat with this thing called nadn or sorry uh telegram bot and you will just grab the access token from there and you will um save this or paste it here and click on Save now again I've done a step-by-step tutorial on this so if you I've did cuz I did a live build here of that section completely so watch live build of personal assistant agent right here here so if you click on it this will take you to this 1hour video where I walk through step by step and build this um kind of this entire process from here all the way to here so make sure you watch that but anyway so once you have your telegram uh trigger connected you're going to have the tri um trigger on message and then this switch node what it's doing is this is essentially grabbing and accessing to make sure that it can convert both the voice file and then also the message right so this particular example for example when I send that information that initial instruction via voice so as you can see on the left hand side it's grabbing that voice if I go to schema here uh what you can see is like we're just putting this file ID right and that file ID is literally this so I'm just grabbing it putting it there right and then I'm outputting that as voice and then same thing this section is just processing text to make sure that if there's any text coming in we're able to process that as well so once that switch Noe is done we're sending this into two routes One Voice one text on top the download file we're just going to grab that file that message file that the voice file from telegram as you can see so we're just grabbing that file right here we're clicking on download So once that gets downloaded we're adding a transcribe node Opening Our transcribe node so this is going to essentially grab that audio file and convert it into text right so as you can see this is the audio file that came in because I said one more thing I'm doing my bookkeeping can you tell me how much I spent on a marketing last quarter CU that was the last message of the demo that I did right so now it's going to transcribe that the reason why we're setting this set node is because we want to make sure that the output regardless of whether it's coming from text or from this voice is the same thing which needs to be json.
output right so that's what we're sending this we're sending that information here and as you can see if I go to schema here I'm literally grabbing that right here so this is this right so I'm using that so this is a tools agent and we're defining the source of prompt from below and that's exactly what this is this is very simple this is the prompt that's coming in from our previous transcriber or our set note so this is going to be brought right here so now this personal assistant also has a prompt so this prompt same thing you can just literally copy it if you go to the top here so this is the prom assistant agent prom you can just copy this and paste it on your on your workflow there so what this is doing is it's saying you're a personal assistant Your Role is to efficiently delegate user queries to appropriate tools because it has access to all these tools now all of these tools that you see the email agent the calendar agent the contact agent calculator research agent expense agent these are all child agents right so the child agents are right here these are each individual separate workflows right so if I click on plus button here you say call NN workflow as a tool so again this is just essentially calling in making this separate so that way we're kind of delegating and shifting all of these information otherwise this will look really clunky right so for example the calendar agent if I bring that over to my uh my workflow here so let's go ahead and bring that calendar agent get rid of this let me go back to the bottom here so again all of these agents are there so if I click on calendar agent and click on download go back here and import from file and bring that here so this is the calendar agent right so this is going to be when executed by another workflow because we're calling this workflow from here right from from this main agent so that's why this needs to be attached as a tool so if I go inside my calendar agent so I'm I saying is call this tool for any calendar action right and I'm attaching that source and I'm uh cuz this was part of the agent Army that I built so this is the calendar agent so if I go back now to my calendar agent What's Happening Here is we're using this when executed by another workflow because we're calling this workflow from that uh main uh agent right so this is has its own separate agent so what I'm giving this a system prompt saying your manage your role is to manage users calendar by creating retrieving or updating or deleting events and this has now all of the calendar related activity as separate um tools that attached to this a AI agent right so for example if I go to get events right so this get events obviously it's connected to my calendar and this is just a Google Calendar the great thing is now with the new update of nadn you can just click on this little three star and this it says defined by the model right because it's just saying the time from before and after whenever the user is asking to set some kind of event so for example creating an event same thing you're just clicking on adding your your email here so that way you can grab that and then you're literally just clicking on these like little start things which essentially is the from AI functionality right so if I click on that it'll just Define everything automatically it's very very simple you don't have to actually do anything just add these different nodes and just make sure that you're clicking on those three stars or like I said you just import this on your own workflow don't change anything else just go inside each node and change the calendar to your own email or to your own calendar so that's our calendar uh agent and the same thing these all of these other agents that you're seeing that are attached as separate child agents so the email agent same thing the email agent is a separate workflow as well just like similar to the calendar agent it does all of the email stuff the contact database this is just our air table contact where all my contact information is sitting the personal expense agent so let's go ahead and bring that over so that way you can see what that looks like cuzz that's a little different so if I go ahead go back to my personal expense agent here download this go back here import from file so this is the personal expense agent right this has access to my personal expense history uh and in my particular case I asked it how much money that I spend I mean that was just like dummy data on the last quarter of 2024 so it has access to all of that information and what this system prompt here here it's saying is that you're a personal expense Your Role is to provide accurate and relevant information and I'm telling it that what kind of tools it has access to and when to use it right so it has access to the new CC payments which is the credit card transaction which is a Google sheet and it also has access to this Vector database in M uh my case is the pine con Vector database that I've inputed all of my or uploaded all of my uh previous expenses and expense histories so that's literally what it's doing right so it's just grabbing it's calling the work this workflow from the main workflow here and it's just it's smart enough to know based on our system prompt that we have provided here to know exactly hey these are the tools that you have available and here's when you should use them right so the expense agents for example tracks and manages personal expenses right so if I go to my um personal expense right here this is just you need to make sure you're naming it properly so that's what I'm doing and I'm saying call this tool for any personal expense related actions right you're just describing this to make sure you're letting the model know or the agent know when to use this right and then you're just selecting literally that from your workflow list right there so that's so that's what it's doing and same thing as far as the research agent is just another agent that has access to like Hacker News Sur API so that way it's grabbing the relevant information and sending us uh I didn't do a demo of that but that's just pretty simple as well and you can add multiple more child agents to this if you want right like just makes it more and more robust here and I'm also giv it a calculator tool just just because if there's any kind of mathematic related operation it's always good to have this calculator here and then the respond right here so what we're doing here this we're just literally responding the message that's coming in from the main personal assistant back to our telegram so we're just outputting the Json that's coming in from here so same thing like when this is uh going over to this route that's a text response and then we're also sending that response to the jav's personality here so this is going to create the output grab the output from this um agent or the personal assistant agent and it's going to convert this with like a nice little witty comment right so here's what you requested sir I'm going say you marketing strategy is subtle as your interest to start Expo right so this is just going to grab the information that's coming in from here and it's going to make like a witty comment about it and Jarvis's personality and that's then what we're doing is we're converting this and this is where that json.