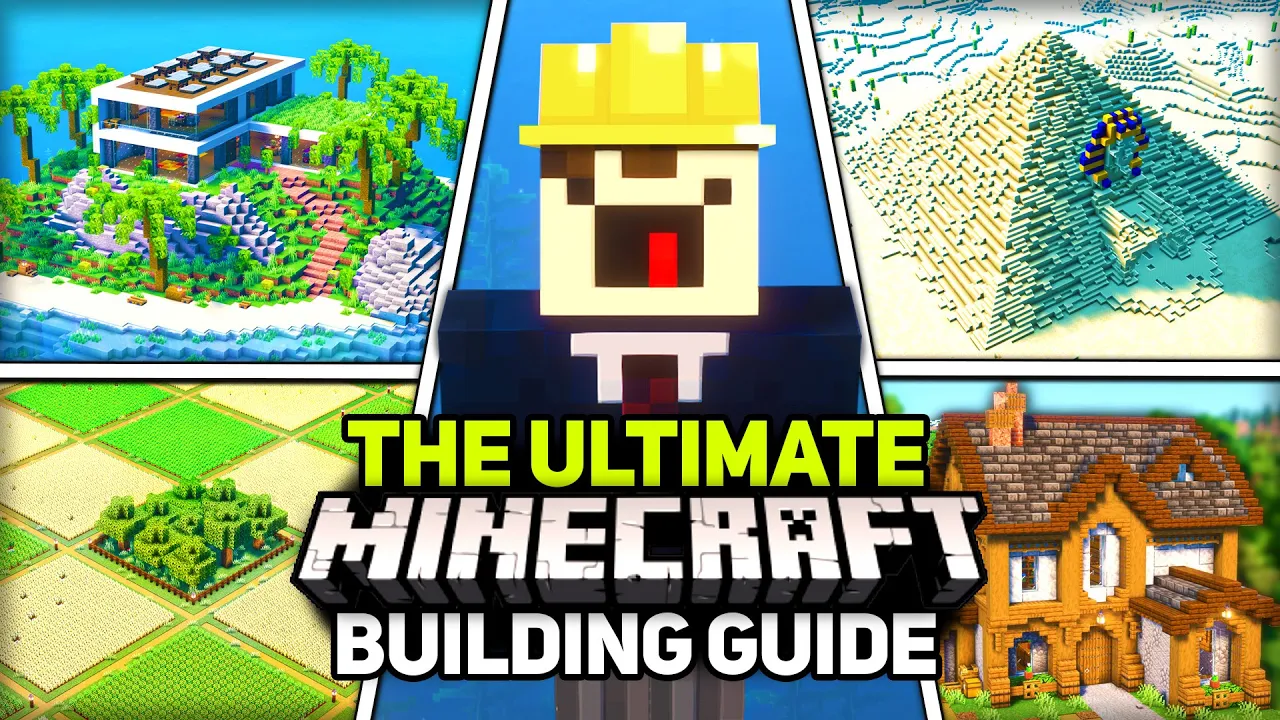
Minecraft is a game about Mining and grafting quite literally it's in the name but to me Minecraft is mostly about building and that's been my passion for the last Almost 4 years now I've made hundreds of builds in all different shapes and sizes and I'm bringing you this long ass video as an all atone place to improve your building skills and I guarantee you that by watching this entire video you will Be a better Builder let's get started all right so starting out I'm going to quickly cover the things you should always be doing or
using when building in Minecraft the first thing which I feel a lot of people don't even know about is to use hot bar saves this simply lets you put blocks in your hot bar save it and then you can reload that whenever you want for me this makes building so much more enjoyable because you don't have to spend half of the Bloody time looking for blocks say you need Spruce blocks bang detailing blocks there they are my second recommendation is to use shaders to make your builds look better now I am half joking when I
say this because a lot of people like to claim certain builds only look good when shaders are on which I mean they're kind of right the truth is that everything looks like without shaders on so I recommend using them if your PC can run them and if not just try using those Super simplistic shaders that are potato friendly like complimentary reimagined also if you want your game to look exactly like mine luckily I have a video for just that link in the description and the last thing I'm going to mention is to use reference images
when you build until you're more experienced and can build without them it's easy to be overwhelmed when you load up Minecraft and say I'm going to build a medieval house then you might say to yourself uh Where do I start oh you know this is too hard I give up my friend your savior is reference images now when I say reference images I'm I'm not meaning to use other Minecraft Builds as reference that can be a good way to learn when you're just starting out but the reference I'm talking about is real world buildings 3D
models things from Games Etc go to Google Images search whatever your build is and get a few pictures up use elements from each one And make it your own and also always give credit to whatever you use and one quick bonus thing that you don't absolutely have to use but will make your life way easier is world edit it's a mod that allows you to build quickly and easily with commands like set which allows you to set a specific Block in an allocated region replace which lets you replace C blocks with other blocks and walls
which makes walls I'll be using world edit in this video and if you want To learn how to use it there's heaps of videos out there so I recommend giving it a try okay and last bonus tip is I definitely recommend exploring builds yourself and discovering the techniques and details that were used and for that I have just the perfect thing my patreon each tier is able to download my builds with the highest tier being able to download my entire building world with over 1,000 builds I've created so be sure to check it out if
you want to Explore the builds I Showcase in this video and further your building skills themes are a very important aspect to any Minecraft build you obviously need to consider what theme and style you want to build in you've got themes like modern medieval Japanese natural overgrown ruined futuristic industrial dark medieval you know the list goes on it may be wise to choose your favorite theme and stick with that to build up a repertoire of designs and details for That particular theme as I feel that's the most efficient way to improve as a builder once
you've gotten a grasp of let's say medieval builds then you can Branch out and try dark medieval Gothic Japanese ruined overgrown things like that but for the sake of this video I'll mostly be covering the Medieval theme as I feel it's probably the most popular and it's also my favorite and I feel I have the most experience in that style and I don't really want to give advice For things I don't know much about okay so starting off we're going to talk about block pettes and just as a little side note this is my building
platform and this is the first time I've actually been able to see the entire thing and I think it looks really cool so once again if you want your Minecraft to look like mine I highly recommend checking out the uh video in the description okay but yeah so back to block palettes we're starting off with something pretty Simple here where we just have primarily Spruce Wood and Spruce planks used you can see I have the block pallet off to the left here and uh yeah block pallets are honestly a very important aspect to building that
I don't even do very well because as you can see here and in a lot of my builds I use predominantly Spruce Wood and stone as uh shown over there and in you know a lot of my builds okay so don't judge me but I do highly recommend actually sticking to some more Simplistic block palets while you're starting out and then you can Branch out to some more complex ones once you've you know gotten a grasp of how to build with certain Styles more you know predominantly I guess but yeah so here's some block pallets
shown in actual builds here we have like a spruce gate that does look kind of weird honestly I probably would strip a bunch of these spruce wood blocks nowadays this is quite an old build but over here you can See another Spruce build that's actually done pretty well we have these like Palisade style walls this is the block palette obviously over here we just have pretty much three blocks throughout this whole thing with a bunch of you know accenting Spruce blocks over here we have like a stone SL a little bit of spruce wood block
pallette here on this gate where we've used yeah just our texturing with some stone bricks and stone which which we'll get into another Section later on in this video and we have just a little bit of accenting blocks with some Spruce Wood trap doors we also got some leaves and stuff and just a bunch more like accenting blocks as well this next one is a bit of a nether kind of block palette another very simple one we just got deep slate tiles warped High stripped whatever it's called and then warped planks as well and that
gives a very nice kind of blue nether vibe to this one and then over Here we have another Stone one except this time we've utilized a bit of a ruined aspect and over here at our block palette you can see we have the same block palette from our previous Stone build but we've Incorporated these new blocks here to add that ruined look to our whole build by adding you know leaves and mossy cobblestone and we got andesite scattered throughout that as well also forgot Mossy stone bricks we got them as well over here so they
Should be uh you know probably right there and yeah so just adding those simple blocks there gives us a bit of a ruined look as well and yeah so obviously there are a lot more block paletts throughout um this one's a little bit overboard in my opinion I didn't build this and I don't know who built this in my world Al I don't know what that's doing there but you can see this is also utilizing a bit of a gradient which we will also cover later In this video but here's a really awesome build done
by my good friend exra builds and this is using a really nice block palette using some Mangrove logs Mangrove planks we also have diorite and Blackstone in the roof as well and that just gives a very classic kind of barn look to it and it just looks awesome dude so yeah there's definitely a lot more block palettes out there in the world um I'm going to leave them for you to discover because again It's not really my strong point as you can see a lot of my builds are mainly Stone and Spruce which is something
I definitely need to work on as a builder so yeah let's move on to the next segment all right let's go on to some detailing H yeah as you can see right now I have just you know the probably the newbest kind of house you can make it's literally just a square of spruce planks I mean there might even actually be a roof on this but I've just left it Off for now and so I think what I'm just going to do is just go through all of the details I would add to this to
make this into the perfect medieval house starting off of course with the most important thing in my opinion which is pillars it's just going to make this look way more like a house end instead of just you know a box so let's first grab out some spruce logs and we're going to replace our Corner blocks with those logs and as you can see even with Just that it has made this look a little bit more like a house the next thing we can actually do is connect those pillars up along the top here to have
something like that and that gives us an even better frame and what I might also do is add in a Another Log in the middle here that gives us two separated walls to work with and I'm just going to quickly add this to the sides and also the back so just give me a second okay and here is our house so far now and the next Thing we obviously need to add is a roof to this now we could just do you the old bog standard stair roof this is pretty much yeah just the roof
that everyone adds and I mean it is tried and true you know it's going to work for everything but there's a lot of different roof styles that you can try to definitely make your builds look a lot more interesting than you know just this kind of roof say you wanted something a little bit more mellow you could go with A simple slab style roof like this and that always looks good as well but my personal favorite is to do a mixture of both of those Styles so we're going to start out with slabs like this
for maybe the first 2 and 1 half and then we're going to transition into stairs on the top half leading up to the top of the roof like this and see that way we get like a nice kind of like curved roof like that instead of just a straight angle either really steep with stairs or Really mellow with slabs and that gives us like yeah just an interesting angle to work with there's obviously a lot of different roof Styles you can go with you can go with something like this where you kind of have a
steeper slab style roof you could do something like that but put stairs on top instead to have it even steeper like something like that would go really high up those are good for really tall houses so that's just a couple of different roof Styles You can play with and also what I recommend doing with roofs is using a trim block instead of like the main block like instead of just using Spruce for the entire roof we can do a trim of stone and then use Spruce for the inlay of the roof you know what I'm
saying so I'm just going to quickly get that set up and I'll show you how it looks afterwards all right and there is our new house we've got the roof added on we're protected from the rain now and uh It's starting to look a lot better now but there's a lot more things we can do to this to elevate it even further with the next most important thing being some depth right now all of the walls are very flat they are literally just a single plane and so there's a couple different ways we can actually
add a lot of depth to this build with the first one being to add some stuff on the kind of external part of the base and my favorite thing to do is adding these Little sticking out parts and all of the corner sections of the pillars here I'm just going to do it to the front for now but so even just that first thing already adds a lot of depth into this and you can take it even further by maybe adding some stairs under these you could add some Spruce fences in between these and then
you could put maybe a lantern hanging from that to brighten up your base as well you could also Elevate this kind of pillar part further by Maybe adding like some stripped logs at the bottom and you could even add some fences in between those or something like that if you wanted to go super extravagant that looks good as well and so you can see we've added a lot of depth to the kind of outside layer here but on the inside layer it's still very uh flat and the next thing we can do for that is
actually insetting the walls and what that means is we're going to Simply put the walls in by one block and that Gives us this whole layer here to add detail too I'm going to do it to this other side as well just to uh you know give us some more room to play with yeah so in here we obviously need to add in a doorway and uh we could simply just slap in a door also Pro tip add in that you know your floor block on the bottom here but yeah so we could definitely just
add our door in but right now this looks very blocky and my favorite thing to do is adding stairs above our door here and That just makes that transition way smoother to the door and uh yeah I'm pretty much always do that without fail the next thing we could do is adding a nice Arch into this area here it's always just the perfect detail to add so we're going to add two stairs like that we can Elevate this further by adding in some trap doors in between these and that just makes that Arch even smoother
along there and that looks perfect man now we're going to keep the consistency Going and add another Arch on this side and I reckon a nice window here would look really good as well so we're going to employ this same tactic here by using a smooth transition into our window so we're going to add that at the top end the bottom and then we can add in our window block here that could be like a fence it could be a fence gate it could be a glass pain if we wanted any one of those is
going to look great and now turning our attention down to the bottom Here we can do a lot of different things we could add flowers we could add aelas we could also do one of my favorite things which is actually replacing this stair block here with a full block and we're going to add some grass blocks along here followed by some Spruce trap doors to cover up those exposed blocks and then we could place in a flower here we'd have to remove these to add in more flowers of course but that looks great as well
you could also instead of doing That you could do something like this you could just have a single table add our trap doors back in and then on there you could put any kind of decoration you could put a lantern you could put a flower pot with an aelia I mean that's obviously going to cover up all of the window but yeah you could put any kind of detail in there and it's always going to look good also one extra thing we could do to add some depth on the outside here is just adding some
buttons On here whether that be wood or stone that's going to look great we could also add our lanterns back on there if we wanted and now yeah that is looking like a truly detailed base it might even be too much detail at this point I might actually remove these and that just looks a lot kind of simpler and uh yeah I think that looks better than just having the rest of all that stuff it was a little bit too much you could even go as far as adding those trap doors there As well I
think that looks good too and so yeah that's our house so far obviously with these inset walls we' do this to all of the sides but the only downside with inset walls is that you're going to have a much smaller interior which does kind of stink so you can see before we had all of that space and now over on this side we're going to have literally this is going to be the size of our interior so you kind of got to plan out you know if you're going to Inser your walls not and you
got to make your base a lot larger than you thought but yeah that's just about going to cover detailing and pretty much the exterior of house details and stuff like that so let's move on to the next segment next let's get into texturing and how that can actually improve a pretty simple build and make it look a lot nicer so for instance here we have this big kind of cliff thing in the water honestly it's a pretty cool Generation I actually didn't build this at all but something we can do to elevate this build even
further is by adding some texturing to it and all that is is simply just sprinkling in a bunch of blocks that look similar to the original Block in this instance we have stone and we could use a number of different blocks like andesite Cobblestone stone bricks I usually like to keep it just two different blocks in total for for instance Stone and Andesite but you may want to mix in maybe like three four five different blocks you could go as far as that like for instance stone bricks here just definitely adds in a lot of
extra detail to this as well and that's just a really easy simple way to make a build look a lot more complex than it actually is and this extends to our house over here as well we could add some texturing pretty easily to all of these walls and it's going to make this base look a lot more Complex than it does right now so for example a perfect texturing block that I would add to this is some stripped Spruce logs cuz they look very similar in color but the texture is quite different as you can
see we have kind of horizontal texturing here but this the way we have vertical texturing I mean you could place these like this if you wanted to but I would almost always do that and that's a really great texturing block for any kind of spruce like house Build or anything like that and also the thing with texturing is you want it to look look pretty random and that's going to mean putting blocks close together sometimes so for one wall I might do something like that but for another wall you may want to keep it kind
of spread apart like that you definitely don't want to have a repeating kind of pattern I guess like this does look like a k and I would kind of avoid that and I'd probably just go with something like That but yeah obviously it will take practice getting the perfect kind of texturing patterns you can also use world edit for this to texture a large area as well so I'm just going to set this back to Spruce planks and we could do sl/ set and we could do Spruce planks and then a comma and then our
stripped Spruce logs and that's just going to texture it obviously that doesn't look very good but uh let's do another one that doesn't look very good either but Yeah see that looks kind of good I might actually even go in and kind of change that a little bit but that's also a good way to kind of get an idea of how you might want to texture something and it's a quick way of doing it too all right now on the other side of our big old uh wall here I'm going to Showcase gradients so gradients
are kind of similar to texturing in that we're making a build look more complex just by simply replacing blocks but this time Instead of just randomly scattering around blocks we're going to make a specific pattern starting from the bottom and uh you know working our way up to the top I'm actually going to make this more of into a flat wall to kind of illustrate this better but yeah so one of my favorite gradients is this one right here we go from Moss blocks mossy cobblestone Mossy stone bricks and then to stone bricks and that
just gives a really nice overgrown kind of look and I Love utilizing this kind of gradient in water here so down in the water it might be you know the most kind of kind of Mossy because water has been you know sitting on it for a long time and so this might extend up kind of like this another tip with your gradients you definitely don't want to do kind of a harsh gradient like you know having all Moss here and then we're going to transition to mossy cobblestone and then stone bricks like that you definitely
Kind of want to uh make it a little bit more loose than that and so that might actually include making our Moss maybe look like this or even that then we're going to transition into mossy cobblestone for our next block like maybe something like that and then two Mossy stone bricks and then finally stone bricks for the rest of our structure here and that's just a really nice way to get an overgrown look now you can of course do this with Completely different colored blocks like you could go from Black Blocks to White if you
wanted to this is kind of the only gradient I've ever really used and you can see that used here in my medieval Dam build we've basically got the exact same thing I just talked about we've got Moss blocks to mossy cobblestone Mossy stone bricks and then finally into stone bricks and that makes our dam look a lot more lived in and like it's been here for a long time okay Now it's time to start getting into the specifics I'll be going more in depth with a bunch of different topics with things like Interiors houses castles
Pathways and more and I'll provide a bunch of my knowledge on all of those things starting off with interi is here let's just say this is the inside of your base at the moment uh obviously we don't have a roof um don't worry about that F you know where do you start how do you how do you get started with an Interior and uh it's definitely a lot harder I think than an exterior but it'll take a lot of time to learn understand and master so basically the goal is to just fill up our interior
with as much useful stuff as we can and just fill in all of the blank space with decorations and details and most importantly useful stuff so let's just say uh let's actually Mark in our doorway here cuz it's going to help us you know kind of design the interior Here so we're just going to say this is the door to our base and so the first thing I usually take into consideration is uh where I want to put the bed because I'm going to want to be quickly coming in here and just sleeping and then
going back out if I don't have a bed you know in my inventory this is specifically while playing Survival by the way but um I do like to take that into account and I usually like to place it directly opposite the door as long as It's not too far away so let's just make this our bedroom here and so that leads on to the next thing which is actually defining our sections and if you have pillars like I do for our house here I usually like to use those to kind of Define our separated sections
so that gives us a three block wide section here to work with for our bedroom and we could either add in a couple extra beds if we wanted to or something else I like doing is adding in some bedside tables Whether that be you know out of some Spruce logs or anything like that and then the next thing I like to do is add a carpet with the same color of the bed kind of around in a ring like this and then under the bed as you can see we still have stone here so we
can replace that with some red wool to kind of make it look like the carpet extends under there and dude these freaking pillages keep spawning I'm literally just going to copy and paste everything and move it Away cuz they're pissing me off look at him you're a you're a little sh head man okay we're in a new spot we don't have any pillagers annoying us and uh yeah so let's continue on with our bedroom here so on top of our bedside tables we could add in you know just any kind of decorations I like to
usually keep my Interiors pretty bright and so I like to add a maybe a Lantern on one side you can even do a couple of candles if you wanted to and then on the other side I Like to add in a flower pot with any kind of flower and that always looks great for some bedside tables another thing you could do is also replace these tables with some barrels if you wanted some extra storage and so obviously the top here is quite uh it's quite empty and we definitely need to add something up here whether
that be maybe a row of barrels when I go with barrels I like to usually make these look supported and I do that with Whoopsie Daisy what am I Doing I like to do that with a uh a nice kind of shelf design whether that be something like this you can kind of invert that and do something like that you could even if your interior is pretty high you could make these up higher add in your shelf design and then you could maybe add in another shelf design here if you uh actually we really don't
have enough space for that so never mind but yeah you could go with barrels another thing I love doing is Leaves let's add in three oak leaves where our barrels were and then I like to usually surround these with trap doors to make it look like uh you know it's kind of contained and that's just a really nice detail to liven up your base as well make it look a little a little bit more Lush too and that right there is the perfect bedroom to me honestly you don't really need to add much more to
that and so I'm actually going to move on to now the floor design I kind Of probably should have done this first uh but that's okay and so there's a bunch of different ways you could do floors uh and the first thing I usually like to do is add in a ring of a different kind of block on the outside so I reckon stone bricks would look quite nice for this oops that's uh that's the wrong thing I meant to do walls wall stone bricks there you go and that just makes uh the floor look
I don't know it looks a lot cooler to me Another thing you could also do is a checked pattern so maybe maybe instead of doing a ring we could do a checked pattern of stone bricks obviously it's a bit more time consuming but it's going to look a lot kind of cooler as well so just something like that you could repeat throughout the whole base you could use that for the pathway that leads throughout the base and I feel like I I just kind of want to make this look a little bit Cozier so what
I'm Going to do is actually add some Spruce Planks on the floor in this little square here so I'm going to add a two block ring of stone around this and I feel like that's just going to make the base look a lot Cozier of course I accidentally undid so all of my crap here got undone which is an absolute pain in the ass but yeah so with our FL done let's move on to our next section and we might make this into maybe a smelting area so as you can see here we Have a
corner section to work with which is uh pretty good for anything that you want a lot more space for for instance uh furnaces so let's do like an l-shape of furnaces and we could do we could if we wanted a lot of furnaces we could do something like this and for these top ones we could definitely just add in like a little shelf design like this even I think that is probably going to look better as well so yeah if you want a lot of furnaces in your base this is Going to look perfect maybe
if you're fine with just having like eight furnaces or something like that you could even just do something like this and that allows you to put in some details as well so maybe we could even put uh we could put a barrel like maybe in these Corners to add some storage to our furnaces you could even add barrels up here if you wanted to and that of course allows us to add some details on top of these furnaces for furnaces I Usually like to do kind of extinguished campfires and that looks like fuel that would
be used for the furnaces I like to do like maybe amethyst buds as well flower pots also always look good and lanterns too and there you have it that's a nice simple little furnace area that looks awesome next let's move on to crafting and something I like to do for these is usually adding our solid crafting blocks along the bottom and then of course once again adding a shelf But maybe this time we could do a shelf kind of like this I think this is going to look quite nice and on here we could put
in maybe an anvil right there we could put a grindstone on this one maybe up here we could put a stone cutter and then maybe just like a lantern on here or something I usually like to put the transparent blocks or like the semi you know the blocks that aren't full blocks they kind of have like you know interesting shapes I like to put them on The shelves as it just makes it look you know it makes it look better than just putting full blocks on there that just kind of looks crap you know so
yeah that's a pretty nice looking crafting area you could of course add in more details on there if we wanted to and now for our next interior module we could do some storage and for storage I usually like to keep these pretty you know chest heavy you could of course make these look super nice by just doing something Like this maybe like adding it's kind of hard in a corner actually to do storage so maybe let's do storage on a flat wall like this yeah so it' be pretty easy to do just some kind of
nice looking thing but I usually like to keep these pretty uh you know efficient in terms of storage so let's maybe do some sideways chests like this and literally something just like that uh you know it doesn't look amazing but you really need storage for survival and I just kind of like to Go all out with it I'd honestly just fill up all of these walls with storage but if you wanted your storage to look super nice you could definitely do so something like this having like maybe barrels along one side and just having double
chests up like this if we had a bit more area to work with let's just say we'd extend out in into these pillars we could add barrels on either side and then we could do chests like this if you wanted something super fancy You could do maybe like a little shelf like that to hold them up obviously you're going to get even less storage so yeah I'd kind of just recommend just sticking to adding as much storage as you can into one section so actually this corner might be the perfect spot to just kind of
fill up entirely with chests and honestly to me that looks perfectly fine now let's move on to our next section which would be our Brewing area and for these I like to keep them Pretty unique looking and I like to use polish andery blocks as it looks a lot like kind of like a table you'd work on and so I might do something like that maybe even actually something like that and put our cauldron on this side and then I'd have Brewing stands on top of those and sometimes instead of a cauldron I like to
actually use a spruce trap door kind of system like this actually you might even do it like this and then you can put water in that and That way you have an infinite kind of water source that you can use for your potions and stuff obviously that's clipping through that there which is kind of annoying so I might just do that to cover that up and then yeah obviously for our top area here you you could maybe add in more Brewing stands if you wanted to but something I really like to do for these is
actually just add a row of barrels along the top and keep my potion ingredients in there if you had a Bit more area to work with you could definitely just extend this out if you wanted to do something like that and that would allow you to do some interesting things like maybe alternate between Brewing stands and storage up here if you wanted a bit more of a rustic Vibe let's say you had obviously a ceiling up here and that would connect up with some chains like that and that makes it look like a hanging shelf
you could even replace these with just some More details if you wanted something a little bit more fancy looking just something like that if you wanted to look like this was a sink and it had a tap you could easily add in a trip wire hook and that's one of my favorite details to add to something like that and also pressure plates and stone buttons are just great little accenting details to add on any kind of stone surface if you wanted a kitchen or anything like that a pressure plate is a Great kind of stove
top looking thing buttons look like any kind of like utensil or something like that but yeah that's a pretty cool looking Brewing area I'm happy with that but yeah I think that's just about going to do it for interiors I've pretty much covered uh some of the main things you can obviously just repeat these same kind of uh principles into any other kind of interior design but let's just take a look at a couple of the builds I've made Uh for instance this one I made with a good Builder crypto zoology and we can take
a look at a couple of different interior Styles as you can see this is completely different to what I showcased previously we have a very open area we've got a big old smelting wall on the side here we've got our Brewing on this side here this is very similar to what I just showcased and another really good tip as well if you have a lot of floor space that you don't really know what to Do with these Island kind of designs work really well you can make these out of like just spruce wood or stone
or anything wrap them in some signs and some trap doors and put any kind of detailing blocks on top of them it's always going to look good and then heading upstairs this is going to be one of my most favorite Interiors up here we got a nice hallway that leads over into some separated rooms we've got a bedroom here with just a bunch of awesome Details on some shelves and then on this side we have our enchanting in our crafting room so we got our enchanting in this corner we've got our crafting here and a
little bit of storage too and then another thing you can do with atcts as well is actually just completely fill build them to the brim with storage and then at the back here we just kind of have an allpurpose like crafting and detail kind of area and yeah that's just an example of using some Interiors you Know in practice next up let's take a look at castles with this one here being the biggest castle I've ever created as you can see it is pretty unique as well it is just completely submerged in the water which
is uh yeah I think it looks pretty cool but we have a lot of interesting things here to cover for Castle specifically let's first take a look at these uh Towers on the corners here and so with this base in particular kill I have three different Tower Designs that I'm using here so we have two identical ones here at the front and then as we transition to the back we have a slightly taller ver variant of our front one and then on the left side we have a massive even taller and wider variant as well
and that just gives us a really unique look to this Castle because even if we stand at the front here you can kind of see like it has a teered effect it goes like from small to medium to large and it just looks Awesome as you can see here we've employed the inser wall design that I talked about previously we've also got pillars out of polished and theight then we go into stone bricks and then our inset walls and that just adds a lot of depth and visual interest to our Towers here another thing I
haven't really talked about before is uh building in you know odd numbers I love to build in odd numbers because just for me it just makes it so much easier to detail stuff I hate building in even numbers and you'll rarely see any of my builds using even numbers so yeah honestly just kind of figure out what works well for you I feel like it's probably going to be odd numbers so yeah and I'll just kind of just stick to that over here we have a medieval gate which is kind of kind of similar to
the castle theme here and you can just kind of see I've employed a couple of different uh you know ways of building towers and stuff we have a gate Between these as well with a bit of a port cus that's raised up here which I think looks awesome definitely a really nice entrance design for any kind of Castle and here is yet another Castle design this time uh yeah we're floating uh just don't worry about that but on the outside we've added some crop farms which is a really nice detail to add outside of castles
having a ring of farms around this would look awesome as well you can see some different Tower Designs here I've employed some leaves kind of like as a SE aration Point we've also used a lot of stone bricks in this honestly I would probably have tried to use more Stone in this nowadays but it still looks good we've also added a Archway in between here some fence gates in this top design in our gate as well we have that Port callus design as well and on the inside we actually have a bit of a keep
inside which I think looks really cool you could of course just Kind of make this into a flat roof if you wanted to have a massive interior or you could do kind of the more realistic thing which is actually having a keep on the inside of your castle walls okay the next topic that I want to cover is going to be Landscaping so we have this really nice area here that actually is going to allow me to Showcase pretty much everything I want to cover which is going to be perfect so the first most basic
thing is uh you know just Smoothing off landscape it's one of the things I pride myself on because I I don't know I just I always have a habit of smoothing off landscape and making it look nice like this area right here even though this is completely naturally generated it's honestly it's pissing me off okay you see we've got these like really hard angles especially over here and over here so to make this look more natural and just more pleasant to the eye is I just just smoothing it off like This that might even be
a little bit too smooth maybe even just something like that but just breaking up these little corners and just smoothening them out you know instead of just adding a single block like that add a couple of blocks and just make it more of a gradual kind of smooth kind of slope like that you know what I'm saying like even over here we could make this a bit more interesting cuz right now this is almost just like a straight line we can make it Kind of come out to a point out here and then go back
that way and to do that we could honestly just add in a little bit more sand here we could have this Branch out to Grass along here actually going to remove that sand and we'll just add a bit more of an interesting shape maybe something like this that could come to a point there and then we could slowly transition back down to Grass over here and then once we fill in this entire section you can see how different this Landscape is going to look yeah like that so now instead of just a straight line it's
more of like a curve and it comes back around this way you know you don't need to go that crazy on you know the Landscaping but it's just something that I really enjoy doing and I feel like it should definitely be done by more people you know what I'm saying and so another thing to do with Landscaping is going to obviously be ponds and stuff like that it is just landscape and so we Also have this perfect area to work with here so the first thing I'm going to do with this Pond is actually replace
all of the ground with the same general kind of block which is going to be sand here I'm going to get rid of all of this clay and this gravel and stuff and just replace it with sand because generally ponds and stuff look best with just one type of block or multiple of you know like a similar kind of block and something else that works really well For pwns and stuff like this is instead of just having it a completely flat bottom we could add in a little bit of depth to this and make it
go a little bit deeper towards the middle now obviously you don't really want to go directly up to the edge like this you kind of want to have at least a one block Gap around the sides something like that you could even make it look a little bit more uneven with something like that as well we can just kind of Branch this out this way Ian I'm not going to do this entire Lake cuz it's going to take forever but we might just go to there and now cuz this is sand we can actually use
Sandstone slabs and stairs to make a bit more of a smoother transition now I'm not talking about adding this to every single block around here but maybe just a couple mainly in the corners along here is where is where it's going to kind of look the best and not really over do it so you can see Even just something a little bit like that just adds a lot more visual interest to this Pond and makes it look a little bit more you know sculpted and beautiful looking I guess now if this was a pond where
we had dirt on the bottom I would probably use stone slabs and stone stairs and make that look like kind of little rocks and I wouldn't really add like this transition I'd probably just scatter them around the place might even have a pond that we can Look at where I've uh explained that already okay here we actually have a medieval landscape which is pretty cool yeah you can see here I've added in little Stones throughout here just along the edges and you see a pretty cool landscape around here as well we've got like this nice
kind of Cliff like rock things around the place we've got a nice little waterfall that trickles down one thing I love about waterfalls is having like several platforms instead of just Having one giant drop have it go down to a bit of like a flatter kind of area and then go down again it definitely just makes them look a little bit more you know interesting compared to just the Giant Drop of a waterfall you know what I'm saying let's head back to our little area and so continuing on with our pond decorations I would definitely
add a hefty amount of seagrass into any kind of pond can even get out the bone meal just to add some thicker patches of it But I mean it also does depend on the build like maybe something like this with sand you don't want to go too heavy on the seagrass maybe just keep it a bit more on the lighter side but maybe for like a grass kind of pond you'd probably want more so yeah that's looking pretty good you can also of course add a bunch of lily pads into any kind of pond I
prefer to not make them touching the edges I like to have them more towards the middle I personally think that looks A lot nicer here just something like that nothing too crazy also of course we do have Kel blocks I don't really use them too much but um you know it just adds a little bit of variety in the water and now as for decorations and landscaping around any kind of pond you can definitely use a bunch of different things I'm going to Showcase uh you know you could also just use bone meal to add
in a bunch of grass around the edges this is definitely a lot easier in Survival but in Creative I prefer to honestly just hand place my grass as I get it you know exactly where I want it we've also got sugar cane which obviously looks amazing next to any kind of pond another Pro tip if you don't want your sugarcane to grow up to the max height you can use a piece of string and put that on top and that'll just stop it from growing any higher and it's a nice like pretty much invisible way
to yeah just block any kind of plant or Sapling or anything from growing another really awesome detail to any kind of pond is leaves having leaves start on the edges and then Branch down into the water looks awesome especially when they're water logged as well so just small little bushes like this even just around the edges not actually going into the water can definitely just make them look a lot more Lush and yeah there we go that's pretty much everything I do for a pond in terms of landscaping and Terraforming I think that is looking
awesome and nice and Lush now and now the final thing I want to talk about with Landscaping is actually going to be Cliff faces and overhangs and stuff like that so right now you can see this area right here it's kind of boring it's just you know it's just a hill but we can transform this into something truly awesome looking and so first what we're going to do is we're going to bring this to be just completely flat so I'm just Going to add in a bunch of blocks like this to get this completely flat
let's get rid of these blocks as well I'm also going to get rid of this gravel cuz it's kind of ugly and there so we're left with something like this and what we can do with this is actually just replace all of our bottom blocks here with some Stone just up until about there I might even yeah leave a little bit of a gap between like the layers there and that's looking good the next thing I would do Is get some stone slabs and stairs and just on this layer here just add in a couple
of slabs and some stairs like this leave some gaps in there as well and then you can bring out this top layer of grass and put it on top of this here you can just have this connect up over I might even add another piece in there and then just kind of add in a little bit of a mound there as well and you can see we've just added this nice overhang here to our cliff and it's just Yeah just makes it look way more like you know interesting I guess we could add some hanging
roots in these little gaps we could add lanterns in there as well so that's added some detail to the top of our area but in here we're definitely lacking a bit of detail so what we could do is just add in some kind of chunks taken out and to make this look nice what I like to do is just add Stone stairs and slabs throughout this and that just makes it feel like It's uh you know like a big crack in the wall or something like that over here we might do something like that as
well so that just adds a little bit of depth and stuff into there you could even do something cute like this Chuck a lantern on there of course you could add bushes hanging down from this you could do all kinds of things but that's just a general look at uh you know all of the kind of landscaping stuff that I mainly do which is just smoothing off edges Ponds and legs and decorations around them and then just Cliffs as well all right and so that actually leads in nicely to the next topic I want to
cover which is Pathways I've got a couple here to cover and uh the first one here being a bit of a natural style path we just have dirt path we've introduced a little bit of coarse dirt into that as well not too much you can see we've gone very light on the dirt here we've also added back a little bit of grass in between The pathway blocks through here and we have a nice curved shape as well it's like a bit of an S shape so obviously that is just a lot nicer than your standard
straight dirt pathway and it's just a great way to add more detail to any kind of Village or you know literally anything you want to add a pathway to definitely just spend a bit more time and make it look a bit more interesting of course we've got details on the sides as well like these little Broken up fences we've got bushes we've got some extinguished campfires to look like uh you know Fallen logs or something like that and adding them in between bushes as well as a really nice detail and so heading over here we
have the same pathway shape except we've just Ed some different blocks or a different block palette for this pathway we've utilized stone stone bricks Cobblestone we've even got freaking blast furnaces in there which is kind of crazy pressure Plates and buttons are also a really nice detail to add either on pods or to the side of PODS and that just obviously looks like little stones and stuff as well and then we've got the same kind of little details on the sides we've got a bench we've got bushes and this time we have some walls with
lanterns on top this time over here we've got a brick and granite theme as well it's pretty much all the same kind of stuff and then finally we have a quartz / diorite path Over here and so I also will just quickly showcase how to get that path shape so my general rule of thumb when I build any kind of path is I have a three wide path most of the time and I'll have the same kind of shape for the first three blocks then as we transition into the next shape we want to have
that same three wide kind of thing but we're going to start it over here instead and so we're going to extend this to be three blocks and then I might just do the same Thing for this next shape here and then now we can maybe start going back this way and then maybe instead of just going fully back that way we can come back this way once again so you can see there that's just like a really interesting pathway shape it's very simple and easy to do sometimes I might instead of just having like this
kind of it's almost like a two block kind of pathway here I like to sometimes just add in an extra block here to make it feel like it's Still three blocks throughout the whole thing so I'll add that maybe there and there there up here maybe down here as well so that gives a bit of a thicker feel to the pathway as well so whichever way you prefer to do obviously it's up to you and maybe if you need to do a sharp corner as well instead of just continuing on with our pathway shape like
this you could maybe just do two blocks and then keep going like this and that gives you a bit more of a sharp Turn or you can just also of course just completely have a turn like this and that's still going to look great as well and so yeah that's just like a really cool and interesting little shape design for a path instead of just a completely freaking uh you know bloody straight line and as for texturing for this I of course would just add in probably some stone bricks and some andesite that's my favorite
texturing blocks for a stone path we're just going to lightly Sprinkle those in nothing too crazy you can see I'm just kind of just randomly placing them everywhere and that just gives a really nice look honestly I might even add in a little bit more stone bricks throughout the place too I like to keep the stone bricks predominantly on the edges as well just cuz it kind of outlines the path a bit better as well so you can see that's kind of like texturing but with like intent I guess so you're mainly keeping Them on
the sides and that frames the pathway a little nicer as well obviously you don't have to do that but yeah and then from this point here you just add in all of your decorations add in some broken up fences like this have some lanterns on some of those then we could go for some bushes as well with some extinguished campfires in around those and then the next detail we could add is just some Stones once again have them on the outsides of the paths even on the Path as well just don't go too overboard with
them and yeah so that's just a nice little detailed pathway doesn't take too much extra time to make something like that look way better than just a simple straight line with one block but yeah that's how you get a really nice detailed pathway and so that also nicely leads into what the hell we got some boys around here why the hell have they spawned in uh but yeah like I was saying that nicely leads on another segment Which is General details and decorations you can literally add these anywhere beside Pathways in villages next to Bases
or literally anything and they just serve the simple function of filling dead space and making areas feel a bit more lively so you can see on the side of this medieval pathway here we have a couple of different decorations we've got a little bit of a campsite we've got a wagon design here with a bunch of details on top of that we've Just got some scattered barrels and chests and extinguished campfires with all kinds of little decorations on there we've got a dirt path that branches off this as well to make it look like it's
a bit of a used area too and then over here is a bit more of a different kind of pathway we've got like a junction here that goes to uh what the hell muscle coock Grove and boner City okay I don't know what I was thinking when I made this but um oh actually yeah this Was to showcase the new 1.20 features at the time this is a bit of an old build you can see this time we've actually added a little men river that runs alongside this as well we've got like a big rock
over here a big Mossy Rock actually I don't know if I built that or if that was in the biome yeah I think I actually built that got some scattered pots and pot plants and stuff like that and then again over here another little campsite and that's just some general Decorations you can add throughout any kind of pathway or even a village too you can see here I've just scattered a bunch of these random like piles of barrels and chests and stuff everywhere we got these little garden beds too these are awesome these were made
by extra builds fences and bushes and even crop farms and stuff like that are just perect little details to add to any kind of Village okay the next topic I want to cover is going to be custom trees let's Say I wanted to add a custom tree right here now custom trees can be uh you know quite a daunting task to cover but with my patent pending custom tree technique that I've uh you know been pioneering throughout the years I'm going to make it nice and easy for anyone to make a custom tree so the
first thing we're going to do is we're going to make obviously the main trunk and this is also going to dictate uh you know how high the tree is going to be and so from This point here what we're going to do is we're going to add several branches kind of branching out we're almost building like a basically a very realistic kind of tree so we're just going to add branches coming out in all kinds of different directions and different heights as well we might even add a little mini branches coming off of the main
branch I've never actually done that before with my custom tree technique so we're going to see how that Goes but yeah we're going to just add a bunch of these branches going up and down all kinds of different ways and the height is also going to dictate how big our branches are going to be as well obviously we if we have a smaller tree maybe like up to here we're just going to add very small little branches but because we have a big old tree here we're going to add some very big branches so this
technique obviously isn't meant to be kind of the Beall end All you know once you've built the tree with this technique it's going to look perfect you're going to have to add some touch-ups here and there to it but that's the general kind of idea there you want a shape a bit like that with maybe four or five kind of branches and now the next step is going to be simply covering every single exposed face of these Branch blocks here with some leaves on the sides underneath on the top just every single exposed block We're
going to completely cover it so just give me a second I'm going to get all of this done real quick right now all right and so with that done you can see our custom tree right now is uh yeah it's definitely looking like I said before it can sometimes look a bit weird once you've covered all of those branches but that just shows us that we need to probably add a bit more branches to this cuz right now we just have kind of an X shape and it looks a bit weird Also what we're going
to do is we're going to cover this top stem as well which is just obviously looking a bit weird we might extend that to be a little bit higher too and so what we might do is just add another br branch in the middle of all of these and maybe vary the heights a little bit more as well like on this one we might start down here and kind of make this one come up like this maybe not as far as well I think these are sticking out a little Bit too far so I might
cut down in these just a touch and we're going to add in a couple more branches around the place and uh we'll just see how that looks once I've done those all right and there you go now you can see our tree is really starting to take shape this thing is looking pretty nice now and nice and bushy you can see I've also changed some of the rules as well I haven't added leaves to absolutely every single block especially these lower br here it does Look a little bit nicer having those exposed and it also
allows us to do things like add lanterns underneath those which is just a really nice detail for any kind of tree another tip is to use the better leaves addon if your tree is still looking kind of poo you can see once we've added this on our tree is looking uh yeah it's looking way better I don't really use this resource pack anymore because it does make the game Run a lot slower which I can instantly Tell you can see our tree is looking really nice and Lush I'm personally going to leave that off for
now but the next thing you can really see here is that our tree is looking very top heavy uh we've got this little tiny stem here for this big old bushy tree at the top and so what we can do to remedy that is of course just obviously thicken up the tree we don't just want to kind of make a giant thick ass trunk you know so what we're going to do is actually break it Up and make it look a little bit you know just not as thick and so what I mean with that
is we're going to add kind of a broken up stem as if it's you know been a 3X3 kind of tree but we're taking big old chunks out of it like that another thing you can do to smooth that off a bit more is actually use Oak stairs obviously it doesn't have to be Oak but whatever wood that you're using use that same kind of wood just to smooth off some of these edges you can Even use some fences as well to get more of a smoother kind of feel to it and yeah there we
go we've thickened up that tree base a little bit more and it's looking a little bit more uh you know sturdy I guess we can even add some slabs to these to transition into those branches a bit more nicely too and yeah there we go that's the perfect little custom tree design there I mean it might not be exactly perfect as I've just kind of roughly done it but that's all of the Techniques that you need to use to basically make a nice custom tree you can see here for this tree design I've used that
same kind of thing except I've made it a bit more of a thicker trunk this time but we still have our stairs and our slabs throughout up in here you can't really tell but we still have our stems like our little branches except it's just kind of been they're kind of more closer together which gives us this more bushy look and I've made it into a Bit of a weeping willow style Tree by adding these like drooping leaves coming down on the sides and here's another really cool costom tree that I made that is once
again scaled up pretty large from the previous one we've even got these roots kind of sprawling out into the ground and then we just have these like big branches kind of coming out on all of the sides here and I've also added Vines to this as well just to make it feel more like a like kind of weeping Willow tree but yeah there you go that's how you make a really nice custom tree all right next up let's have a quick little look at Gardens so I have this uh well theoretical house here where I
want to add a garden to the front of it so you might think you know Gardens are pretty easy all you got to do is just add a bunch of different types of flowers and that's it call it a bloody day you can go a bit B more in-depth with that and have a much looker nicing Garden with the first thing being to replace the actual ground block with something a bit more different so instead of just grass let's maybe go for some coarse dirt and then we go that's just a nice and easy way
to separate our garden from the rest of you know the surrounding landscape you could also add a fence around it if you wanted to but uh I personally I prefer replacing the ground block as it takes up less area as well so the next thing we can do is Obviously start adding in our blocks to our garden you can see here I have a couple of blocks blocks I have a couple of flowers here that are very similar in color we've got mainly white and some pink as well you can take a look through all
of the different flowers here maybe let's actually go for a predominantly blue kind of purpley themed one I just you know it's my favorite color might as well might even Chuck some pink maybe even a little bit of sprinkle in a bit Of white as well and see that's probably actually too many flowers most likely so let's maybe get rid of the that one so now what we can do is just start adding in our flowers and what I like to do is just scatter them all around the place mainly so we don't have two
of the same flower type touching directly next to each other so I just scroll through all of my different flowers see I've already done it there and just add them in in all different kinds of areas and there We go you can see that is our garden there but right now it's just it's very flowery you know and so a great way to break up the flowers and make it look a little bit more natural is to add in some grass in between them so let's just come in and remove just a couple of our
flowers throughout here literally just that much and we're going to replace those with some Short Grass just like that and you can see that gives us a nice kind of you know I don't know how to explain it but it breaks up the repetitiveness of the flowers and makes it look a whole lot nicer in my opinion now also if you want to add in tall flowers or Tall Grass let's say maybe you wanted to add some lilacs and some peonies into this instead of adding these at the front I would predominantly keep these on
the back layer so we might replace maybe that one this one and we're going to keep them all pretty much at the back Obviously not covering the window and so that's obviously going to uh not block up the rest of the garden by adding them at the front also if you have like a freestanding Garden like over here is a really nice example if you have a freestanding well actually it's not really a nice example but maybe this is your garden here you'd probably just add your big or your tall flowers into the middle and
not on the sides but yeah over here is another example of a really Nice kind of garden layout we've got four separated areas we've got this just like flower field using all of the same things that I showcased previously we've got the Tall Grass only on the edges and we've broken up all of the flowers with some grass as well then over here we have some like Min trees I really love this design using a fence and then just two Leaf blocks above over here we've got our custom tree design of course and then over
here we also have a little bit Of a waterfall too so yeah that's just a quick little look at some garden designs and techniques let's move on to the next topic so farms uh they're simply just they're amazing things they're easy to build they always look great and they're highly useful as well you literally can't go wrong with a nice crop farm so over here I just have a bunch of different designs they're literally my most favorite thing I'm pretty sure they're the most built thing that I've Made as well and they just come in
all different kinds of shapes and sizes really just awesome things to add alongside any kind of build into any Village and stuff like that and so the main thing I will say is don't just make flat Farm Fields like don't just build them on here or don't like you know flatten off an area to make a farm definitely just make them to kind of conform to the landscape so I'm going to quickly add one in here and I'll make a Flat one as well just so we can showcase the difference in how cool they can
look on an actual landscape so here we go we just have a boring old plain flat Farm it definitely still looks awesome but compared to this one over here just that simple elevation change that happens a few times just makes this look a lot more natural a lot more like I don't know it just it just adds some variation to it and makes it look awesome dude don't flatten off your Farms okay build Them to the landscape okay next up let's cover Bridges I found this really nice spot here to add a bridge to and
we're just going to make one from scratch and I'm going to show you how I do it so I figured out my block palette of course you can see I've got the classic Spruce and stone it's the style I'm most confident with so that's the style I'm going to show you guys and so the first thing we're going to do is figure out the layer or the level that we want to Build our bridge on and I'm thinking this is going to be perfect right here and so we need to find our stars and our
end point we already have a nice little area right there for our end point and that is five blocks wide which is actually perfect that's the exact kind of size I want to do and so we're going to add in our little pillars on this side and we'll add them in on this side as well now we need to add some in between here and it I mean it depends on What kind of bridge you want if you want one big Arch then of course you'll just have these pillars on the sides if you want
two arches you'll add one more pillar right in the middle here and you'll have two arches like that you know if you want three archers and so on and so forth I think I want two big archers so what I'm going to do is I'm going to find the center point and build another pillar in the middle here so I'm thinking this might be our Center Point Uh it looks like it is we can make sure it is by counting the blocks in between them of course so we've got eight blocks in between both of
these which does actually make it kind of harder because I'm used to building in odd numbers like if we had a gap of seven I'd be uh I'd be laughing but right now we got eight which makes it kind of hard obviously we could make it the kind of Gap that we want by just simply bringing these in one block closer I'm just going to Challenge myself and do a eight block Gap so there we go we've got all of our pillars situated now what I want to do is actually add in our pathway that
will connect both of our sides and I'm going to do this with some Spruce slabs I'm simply just going to build this all the way down to the opposite side over here all right so there's our pathway I've actually decided I'm going to completely ditch the stone and I'm just going to stick with spruce and so what I'm going To do next is either you could add your pathway kind of out here and add details on top of this like a fence or something like that you could do that if you wanted to but what
I'm actually going to do instead is add some Spruce logs in between these here to kind of make the bridge feel a little bit more uh you know supported I guess and I mean I guess on top of this we can still add those details and also this is looking I don't know it looks a little bit strange So what I might do is actually strip all of these blocks in between here we also need to extend our pillars down a little bit and I'm just going to expose them a little bit as well like
that we're going to do the same on this side just expose it and build it down a little bit more like that okay and so that gives us a nice area to work with for our archers and let's get started with those so our archers are actually going to be probably the most difficult part of the Bridge because we need to come up with a shape that's going to look nice basically so we can start with the Middle Point here which we have an even number which kind of sucks so I'm going to add two
there then what I might do is add a full block on this side and now I mean this point here is where you can either have a very kind of harsh Arch like it could start from there and be like that or you can have a bit of a gradual Arch like that I think we might Go for the more kind of gradual Arch so I might do a shape kind of like that maybe even incorporate some stairs in there as well that's a little bit too harsh so let's maybe try something like this yeah
I like that it's a little bit more extended than I liked but I think that's going to look nice let's add this on the other side and just get a full look at how it's going to look so there we go there's our Arch design and I actually think I messed up I kind of Want this to be ins set one block actually so thankfully we have world edit so I'm just going to cut this out and I'm going to paste it one block in that's uh that is too far there we go that's looking
better and I'm once again just going to use world edit to Simply paste it on the other side instead of having to build it again what the hell where did it go there we go there's both of our archers added in now you can see we do have this kind of harsh drop off Here and to fix that honestly what I might do I might try something like this let's have that transition into slabs like that to kind of open up that face there a little bit Yeah I think that looks pretty cool I like
that on top of here let's add in some details like I was talking about before and so because we're working with even numbers I'm going to do something like this we're going to have two fence gates and then a fence and then repeat that design Obviously yeah that looks really cool then just to get a little bit of a different kind of block in here I reckon some stone slabs on top of these pillars is going to look nice like that and that actually also gave me another idea right here we could add kind of
a secondary Arch to this maybe some stairs like that and that just kind of like frames that secondary arch in there a lot more nicely as well I really like that actually then another awesome detail I Love adding to these kind of areas is a little bit of a bracing design with a spruce trap door and then some signs beside those and that just fits in perfectly right there obviously on this side we're just going to add a single trapo and a in a sign like that and yeah dude that is looking awesome I love
that yeah I mean there's a lot more you could do to this bridge obviously we'd add all of these details onto the other side as well right now it's just kind of blank I'm just going to save time by not doing that another detail that looks awesome is adding some of these like these wrapping signs around all of the pillars this adds a little extra detail you could add several of those going up and down however many you really want and also of course some lanterns on these fences would work perfectly as well and there
you have it there's a nice and easy little custom bridge design nothing too crazy but um just wanted to Showcase Some of those techniques now let's go take a look at some of the bridges I have made previously over here we have a uh you know it's floating don't worry about that you can see we have the same kind of design here I wanted a single Arch but this time I added a bunch more pillars as well honestly we probably could have left this Central pillar out in entirely just had the two on this side
and the two on this side and that would have looked a lot nicer here not Instead of just having this weird kind of like ending block but overall it still looks really awesome I love this design as well of having a little pass through down on the bottom for the bridge and over here we have the exact same shape and height Bridge except using Stone and we've made it look like a bit of a dam as well using predominantly stone blocks we have the water higher on this side and lower on this side and it's
kind of filtering out Through there over here we have like kind of a larger variant of the bridge that I just made before we've got the two massive Archway designs we've also added like this kind of roofed area on the top which is another awesome detail to add to Bridges you can even have this whole thing being roofed or you could have a roof only on this side and this side and we've also had a bit of an advancement in the lanterns we've got actual like lamp posts throughout this As well which is pretty cool
and another final finishing thing that I'll say to add to your Bridges as long as they're big enough is just add a bunch of these little details throughout them it just makes them feel a lot more lively and less empty you know without those this bridge would just look boring and Bland on the top but adding those in makes it look awesome next up another one of my most favorite build types is fishing docks if you live near a lake or a river You have to add a dock to it without question and so docks
are once again very easy to build they're kind of similar to Bridges except they're lower and they don't go you know obviously all the way across the water and so with docks usually what I like to do is have a nice little flat area to work with here I'm actually going to flatten that off even more and I like to have our pillar blocks right on the edge here and then I always usually leave a gap of Three in between those I'm going to do something like this and I might have this be a bit
of a shorter dock just so I can easily show you all of the stuff I want to show you so we're just going to have a short dock like that I mean you can have this go out as far and in different shapes as you wanted I'm just going to leave it like that and so yeah docks are very similar to bridges in that they are literally just kind of pillars with a bit of a walkway on top Now at the ends of the bridges what I usually like to do is have this U shape
like this it just makes it look like a nice docking point for boats there you go it's a nice little yeah docking point for boats you can even have them on the outsides as well if you wanted to now you can literally leave it like this this is a respectable dock I mean it's lacking a bit of detail but um still very nice the next thing I would definitely do is add in a bit of a Trim Design to the sides of this I usually like to use Spruce trap doors for this then have this
design with a with alternating fence gates and fences on the sides now similar to our Bridge before we can add some stone slabs on top of these if we wanted to and we can slap some lanterns on top of those fences now on docks I definitely love to add in barrels and chests and stuff like that just make sure you don't Place barrels like directly in front of fences Cuz it'll connect up next to it you can add a chest there and it won't connect which is uh you know just a handy little tip for
you yeah just some general little details like that just livens it up a whole lot more and yeah that's a very respectable little dock there next I'm just going to Showcase you some other docks that I've built with this one here being a very popular one on my channel which does have a full tutorial video as well so you can just search my Name and then like I don't know fishing dock and it'll come up but here you can see I've employed that exact same technique that exact same design throughout here we've got our gaps
of three we've got our fences and fence gates except this time I've added a couple of different branches like over over here we have a boat rack I mean there was once boat in there I don't know where they've gone we've also added some lamp posts onto this as well which Is really awesome little detail for some more established docks on the left side here we have our docking area and it's a bit more of a uh you know an advanced design instead of just that simple u-shape we've got you know a couple of different
areas for our boats to dock into and we have this kind of connector as well that's connecting them up together which is pretty cool over here we have our Shack or like kind of like a trading stall or something like that Maybe like it sells fish and stuff like that and boats and then over here we have a fishing platform as well yeah there's definitely a lot of different things you can do to docks a really nice and easy way to liven up your rivers or your oceans or lakes or anything like that highly recommend
adding these into your world next up let's take a look at underground bases they're absolutely my favorite type of Base literally instead of building walls and a roof and and all Of that crap like this base over here instead you just carve out a massive area and you literally gain blocks instead of losing blocks which is just awesome there's just nothing better than an underground base you know what I'm saying so this base right here is My ultimate underground base which does have a tutorial video on my channel it's the most popular video on my
channel you guys love it so I definitely did something right with this I think and so My general theory with underground bases is to have kind of modular sections you can see I have these pillars throughout all of the base and then I have these sections that are all the same kind of size they're all five blocks long so you can literally just mix and match these and put these wherever you wanted and I love to just design these little sections with that in mines like we have our Brewing area we have our bedroom we've
got our enchanting we've even got Freaking fully automatic sugar cane farms and all that kind of stuff another Pro tip when it comes to underground bases is definitely lighted up a lot when it comes to this base here I honestly did not uh put in quite enough lighting I think it is very dark in the middle here and in the middle of the roof as well so I highly recommend just adding in a lot of lighting because uh yeah it does get very dark and gloomy in here you know another thing is it can Definitely
be kind of hard to make these look good you need uh a lot of experience with detailing honestly because you do have only these small little areas to add your stuff to I mean if you're building in this style there's a lot of different underground based styles that you can build in not just like this but you're going to have to do a lot of detailing stuff to make them look good especially for the larger underground bases you can see another Underground base that's a bit smaller compared to the ultimate one it's a lot more
nicely lit as well but you can see some of the detailing I've talked about like adding like these rugs and stuff in we've got like this Leaf design above the bed a nice little indoor farm right in the middle just to brighten things up with the color as well and here you can see I also even have an underground storage base as well which is just pretty much completely chests except for This wall we have some utility stuff but it's mostly chests so you can even just do stuff like that too and well that's it
if I missed anything then um say that kind of sucks if you want to watch a more in-depth video on how exactly to get started building be sure to check this one out thank you so much for watching and I'll see you in the next video