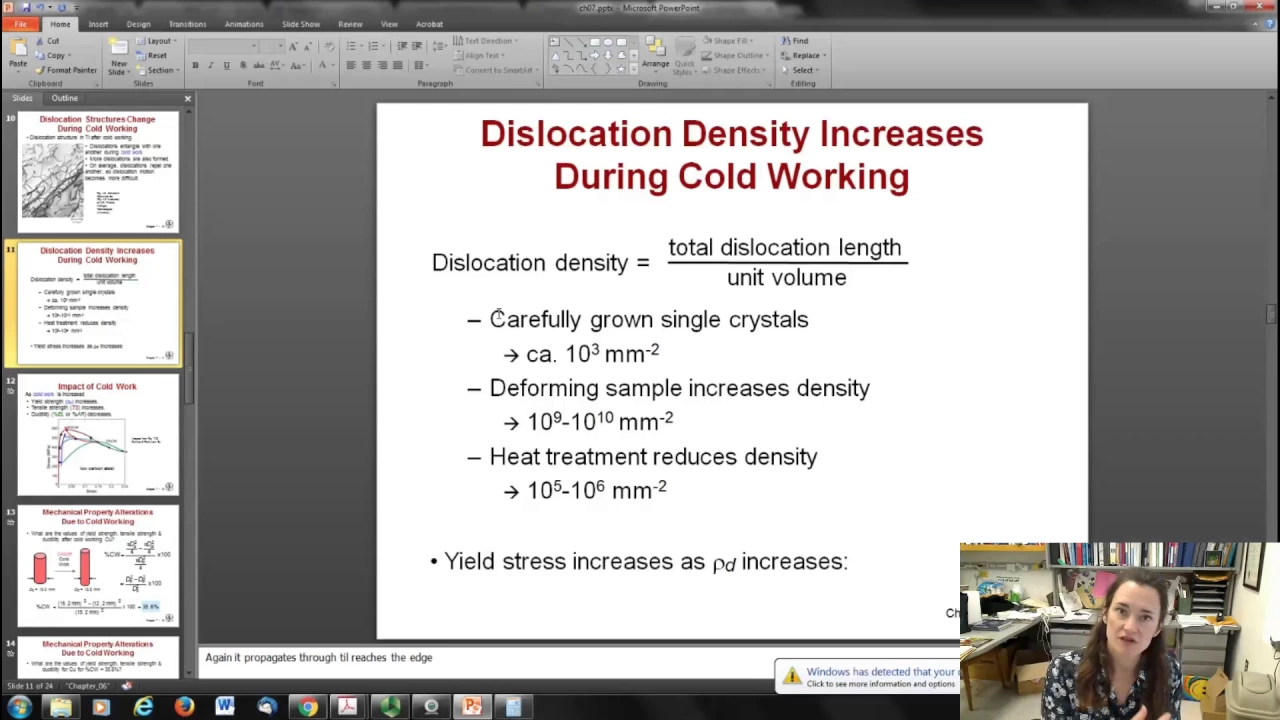
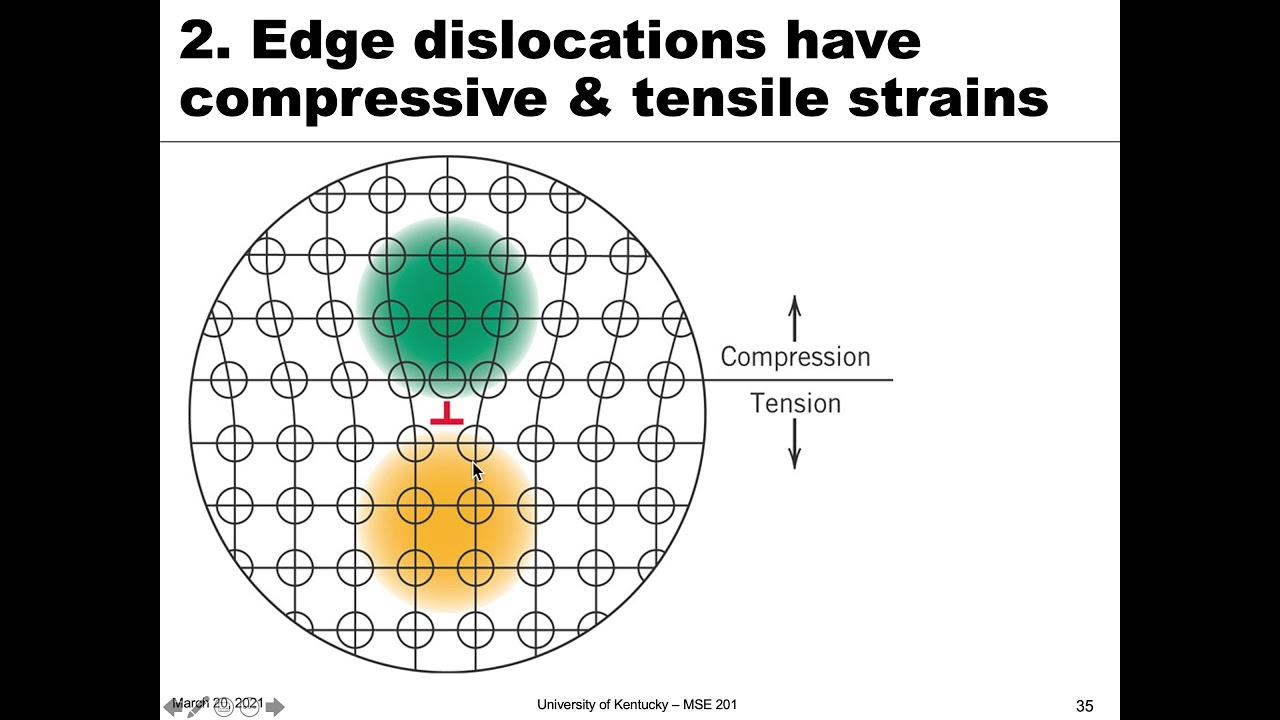
hi to continue on with our study of chapter 7 I'm going to today talk about strategies for strengthening materials and making them more resistant to slip and dislocation motion so as we discussed in the L last lecture um grain boundaries can act as barriers to slip because of the different directions um that material wants to slip along in the at the grain boundary due to the orientation of the crystal so since grain boundaries are the barriers to slip you can increase the strength um by increasing the angle of misorientation um or by making smaller grains um which are more barriers to slip so if you have more grains within the material then your grains are smaller and you've got more grain boundaries and so a material won't slip as much this is the hall patch method for strengthening a material and it's governed by the hall patch equation which is an empirical equation and the empirical equation gives the yield strength of the material Sigma suby and it's equal to the value um at The Intercept or the null value for the material before you reduce the grain stri Sigma knot plus KY which is a um a constant that comes from the fit times the diameter of the average grain size to the negative one2 power okay so that shows you that as the grains are smaller the yield um strength goes up up okay um as a an example problem here briefly explain why hexagonal close pack metals are typically more brittle than FCC and BCC metals based upon table 7. 1 which tells us about slip systems for face Center cubic Body Center cubic and hexagonal Clos pack Metals okay so if you look at this um for the FCC uh metals like copper aluminum and so and so forth remember their slip plane is the 111 direction or 111 plane family of planes and the slip direction is the one one bar zero Direction um that has 12 slip systems associated with it for body centered cubic metals like iron tungsten potassium so on and so forth they have at least 12 and for some of them more 24 slip systems so that's a lot of slip systems um for these different families of planes um now if you look for the hexagonal closed pack metals like cadmium magnesium titanium things like that you can see that for each um slip plane there's only a few slip systems so they have three three and six so that's a lot less than the number of slip directions and slip systems for the FCC and BCC Metals so because there's fewer slip systems then of course less slippage occurs if less slippage OCC occurs then instead of plastic deformation stretching it out it's just going to break so that makes um hcp Metals more brittle than the FCC and the BCC Metals okay four strategies for strengthening number two form solid Solutions so number one was to reduce the grain size basically anything though anything that causes um uh less slippage is going to strengthen the material and if you can form a solid solution or an alloy that's another way to do it and the reason is that the impurity atoms actually distort the lce and they generate lattice strains they generate strains in the lattice and remember that um like strains repel one another so if you had two um dislocations moving towards one another unlike uh strains like a compression and attention attracted one another but compressions repel repelled other compressions so if you have a a substitutional atom in there a substitutional impurity that generates a lattice strain and then what that does is it prevents like strains from moving towards it so it forms sort of a barrier and these can happen with either smaller substitutional impurities which cause a tension or l or larger substitutional impurities okay so either one can help so small impurities they have a tendency to concentrate at the dislocation so this is another reason that solid solution solution alloying works out what'll happen is if there's a an edge dislocation or something in the material the um the impurity atoms will walk around kind of hop around randomly until they reach one of these dislocations when they hit the dislocation they actually cause it to relieve some of the lattice stress and because it relieves some of the stress that lowers the energy for the system and so they're less likely to hop out of that position so they stay there um it cancels the dislocation and compressive strain but because it would increase the energy for that little guy to hop back out it doesn't do it it stays there and that acts as a barrier to that dislocation moving and slipping around um you can also get larger impurities to help you out they also have the tendency to concentrate at dislocations but in that case they they have a tendency to concentrate on the other side of the edge dis location and they relieve the stress of the um of the tension on that side because they're big and they sit in there and they fill that hole okay and then yet again they' Lower the energy of the system when they move to that spot and so they don't want to hop out and so they stay and the dislocation can't move here's an example of solid Solutions solid solution strengthening say that 10 times fast in Copper okay so um nickel would be the alloy that it's forming here so this is a plot showing the weight percent increase of nickel and then as the weight percent increase of nickel goes across here you can see an increase in the both the tensile strength and the yield strength of the material it's a very significant increase it starts off at say 230 is megapascals and it goes up to above 400 by the time you get to a weight percent of say 50 or so and then the yield strength same way it starts out here at maybe 80 or so megap pascals and it goes up to over 150 by the time youve increased the weight percentage of nickel so that shows you you know how how big an effect that solid solution um forming a solid solution can have on increasing the strength of the material because it prevents the slip um there's an empirical relation um relating those two yet again it's just a fit to the curve there's no fundamental real thing here um it just shows that the yield strength goes the concentration of the one half power roughly um and alloying is going to increase yield strength and tensile strength okay now um in terms of the next one of the four strategies for strengthening there's precipitation strengthening this is covered in a lot more depth in chapter 11 but basically to sum up the strength and the hardness of some metal alloys is enhanced by the formation of extremely small but uniformly dispersed particles of another phase or precipitate of that phase within the original Matrix um and this has to be accomplished by phase Transformations that are induced by heat treatment so basically you heat treat it and this process the whole process is called precipitation hardening because the small particles of the new phase are termed the precipitates um and then of course the they can act as boundaries to slip for much the same reason that a grain boundary or a solid solution alloy can act as a boundary to slip it's harder for that dislocation to move through the precipitate because it's kind of like having a different grain of material in there and it's hard to slip along that thing okay um and you can see that the yield strength is going to go as one over the concentration uh of that okay um this is a really common uh method for aluminum in particular um aluminum gets used in a lot of aircraft so being able to make uh aluminum a lot stronger makes a whole bunch of people that are flying in these planes much much safer and those Al Alloys commonly employ uh precipitation hardening so what you see down here at the bottom is a transmission electron microscope image of an aluminum alloy the light Matrix is the aluminum solid solution um and then the dark particles are the precipitates and what they are is denser and more copper Rich um regions than the Matrix okay the next uh method for strengthening material is to do cold work it's also called strain hardening and basically what this is is the deoration at room temperature for most materials but anyway uh cold is a relative term it's cold relative to the melting point of the material okay um so cold cold work much less in the melting point of the material operations um and there's a lot of um operations that people commonly employ in factories to get this to happen happen so one of them is rolling it out that's a really common way so you have a sheet of metal and you pass it between two rollers that you usually cool with water or some other um form because it's going to heat up as you mush it um and then that makes the cross-sectional area of of the metal plate um much smaller you can also get it through uh forging where you take a a piece of metal you put it into a Dy and then you push real hard on it to get it to take that shape um again you're applying a lot of force to it you can get it through drawing where you have some sort of die but it's not closed off on either side and you push it through maybe to make um maybe to make a cylinder into a triangular shape or whatever um and it goes through reducing the cross-sectional area and then finally um there's Extrusion where you use a ram um and you force it through the dye on the other side okay so this causes uh a change in the cross-sectional area of the material that causes it to reduce and so what you do is you um calculate the percent of cold work by calculating the percent change in the area so a not would be the initial area cross-sectional area of your material and then ad is the uh cross-sectional area after it's been through cold work and you take that difference over the initial and multiply times 100% to get your percent cold work of the material so here you can see um what's going on and how cold work influences um material and material properties and why it makes it stronger this is a scanning electron microscope image um and of course the dislocations and the slips the defects show up as these little dark Lines within the material so these are the defect regions and you can see that this is for titanium after it's been cold worked and you can see that the dislocations are all tangled up it looks kind of like spaghetti there so since the dislocations are entangled with one another and and there's more dislocations that have been formed after the cold work the reason that this helps is because the dislocations remember uh for likes like strains they have a tendency to repel one another and so if you get them in there and you get them all tangled up dislocation motion actually becomes more difficult as time goes on and that's why Cold work uh really makes the material much more stronger um dislocation density is actually usually measured by measur meing the total length uh in the previous image of all those little squiggly lines if you sum up the length of all those lines end to end and then you divide it by the volume of the material that you've looked at then that gives you your dislocation density now typically um you know all materials have some defects so even if you're very super careful and you haven't put it through any cold work or done anything to it and you're growing a single Crystal of material then you're still going to get a dislocation density 10 3 um millimeters to the -2 power but as you increase it as you deform it put it through cold work or something like that then you can get it to grow by six or seven orders of magnitude to 10 to the 9th 10 the 10th um inverse millimet squared and then if you want to recover that material and um you know make it nice again reduce the number of dislocations you can put it through a heat treatment and that's going to reduce the density back down a couple orders in magnitude three four orders of magnitude 10 5th 10 6 inverse millim squared okay now remember your yield stress is going to increase as your dislocation density increases as you have more defects more dislocations you're going to have a stronger material um so that shows up here um in this material it shows the impact of cold work as the cold work is increased so this is the percent cold work indicated here by the different colors of the line so you have 0% cold work for this low carbon steel in the green 4% in the blue and 24% here in the red and you can see that the stress um that it can withstand has gone way up as you increase the um cold work the tensile strength also increases but what's going to happen is the ductility decreases you can see the truncation of these curves this is the 0% cold work it underwent a whole lot more strain before fail than the 4% cold work or the 24% cold work which could undergo the least amount of strain okay okay so mechanical property alterations due to cold working so if you look for example at what happens when you cold work copper let's say that you pulled it out applied some kind of stress put it through a d whatever so that the initial diameter of the thing was 15. 2 millim and then it goes to 12.
2 millim so then you can um uh uh calculate the percent cold work it's going to be proportional to the radius of the diameter squared differences so 15. 22 minus 12. 22 over 12.
22 will give you a percentage of cold work of 35. 6% cold work so this material has has gone through 35. 6% cold work now if you look at this plot for copper and shows you the impact on the yield strength tensile strength and ductility for various percent cold works if you take that cold work that we calculated in the previous slide and then you read off on the graph what's happening it can increase the yield strength from something like 150 to 300 megapascals it can increase the ten house strength from something like oh gosh 250 or so to 340 megapascals and it can drop that ductility from over 40% down to 7% % um of ductility so it anytime basically you increase the strength of your material you're going to sacrifice the ductility of the material and that just makes sense okay so here's another example for you experimentally it's been observed for single crystals of a number of metals that the critically resolved shear stress is a function of the dislocation density so here the critically resolved she sheer stress is equal to a constant knot plus another constant a times the root of the dislocation density so for copper the critically resolved sheer stress is 2.
1 megapascals at a dislocation density of 10 5 inverse millimeter squared if it's known that the value for a is 0. 635 megapascals time millimeters compute the critically resolved shear stress at a dislocation density of 10 7th inverse millimeter squar so this is a pretty simple plug-and chug you just take that equation that's given two point plugin values for it so your critically resolved shear stress is 2. 1 megapascals you don't know Town not you've got to solve for that but then it's plus 0.
635 time theot of 10 5th doing a little simple manipulation you solve for Town knot and you get 0. 1 megapascals and now you can plug that back in to your equation for the new dislocation density of 10 the 7th inverse millimet squar and you get your critically resolved shear stress is 0. 1 plus 0.
635 * the < TK of 10 7th is 20. 1 megapascals okay so you can see that for just a small you know well not a small a factor of a 100 difference in the um dislocation density can result in also about a factor of a 100 um no factor of 10 difference in the um the critically resolve sheer stress okay now after you've cold worked it if for some reason you would like to um get rid of some of the effects decrease the number of dislocations maybe because uh you want to recover some of that ductility for example then you can put it through a heat treatment um this is uh called annealing the material so you put it through for example a oneh hour heat treatment at some annealing temperature and then what that'll do is it'll again decrease the tensile strength but it'll increase your produc ility all right so this helps nullify some or all if you do it for enough or for hot enough or long enough uh it affects some or all of the effects of cold work okay so there's three analing stages so you start putting it through this heat treatment and the first thing that happens is recovery and then it recrystallizes and then the grains begin to grow again okay so that's what happens as the time and temperature change okay so during recovery what happens is um there's a couple of things it causes those dislocations to move more easily when it's hotter and when the dislocations move they have a tendency to annihilate one another so you get a region of compressive stress moving to a region of tension and they annihilate so that happens another thing is that if if there's some obstacle like precipitate or something um solid solution prevents the dislocation from moving even with the heat then maybe it can move the other way to a um to a boundary or the surface and then it can move up and move out you remember um what we talked about with uh Heating in the expansion and the vacancies hopping and they can hop up towards the surface until it just forms a little step and it goes away we saw a movie of that earlier in the semester so that's another thing that can happen during recovery so basically during recovery your dislocations move around until they annihilate or go away another thing that then happens during the heat treatment is that it can recrystallize so what me what that means is that it forms new grains that have those low um dislocation densities they're smaller in size and then the grains grow and consume and replace the parent cold work grains now these crystals are going to nucleate preferentially at sites that high have high strains in the lattice that's what kind of gives it the kick that it needs to form and new nucleate that new grain so they're going to they're going to um initiate at points of high stress within your material and then um the cold work grains you can see here over time um this was our original material you can see these cold work grains and you can see some of these little new crystals starting to nucleate in there just after you know a few seconds three seconds and then as time goes on at 4 seconds you can see more and more of those little crystals um form and then after 8 seconds it looks like all the old grains are just gone okay um now this recrystallization temperature that you want to hold it at is not at the melting temperature so it's important to understand that you're not melting the material that's starting all over from scratch what you're doing instead is you're taking it to a third to the half of the melting temperature and holding it there below the melting point and letting new grains form now after you um have those new grains form you hold it at that temperature and let some time pass and then the average grain size is going to increase you're going to see the smaller grains shrink and ultimately disappear as they're consumed by those larger grains because the grain boundaries have energy and the energy is reduced with fewer large grains as opposed to a lot of smaller grains okay and so this shows the process you had after 8 seconds all those little tiny grains forming but then if you let it um go for a little while after 15 minutes you can see that you got a lot larger grains than you did at the 8C time um this is described by this empirical relation right here um D to the N minus D KN to the N equals KT here uh T is the elapse time K is a coefficient that depends upon what kind of material you got and the temperature that you're holding it at um D is the grain diameter at the time after you've let it elapse n is an exponent that's typically about two and D KN is the initial grain size um uh once the uh recrystallization has happened okay for this example problem it says you know using this graph um use the information in the graph to compute the length of time required for the average grain diameter to increase from 0. 01 to 0.
1 millimeters at 500 degre C for this brass material and then use that to find K if you assume that the exponent n is equal to two Okay so first of all I want to draw your attention to the fact that there's different lines on this plot for different temperatures okay remember your kneeling temperature can be any temperature as long as it's you know a third to a half of your melting temperature so see here we have a range of temperatures from 500 to 850 degrees C okay now you can notice that the higher temperatures are going to cause more rapid grain growth here this is a plot of the grain diameter and millimeters versus time and you can see that it reaches those larger grain sizes much faster for those higher temperatures okay but what we're interested in is what happens at 500 degrees C which is this lowest plot right here and it's asking for um the time required the length of time required for the grain diameter to go from 0. 01 to 0. 1 okay so if we look at this plot the 0.
01 grain size is down here on this bottom line and so you can see that if if you read off um how much where where it is in that period of time it it looks like it's at about five minutes or so okay now it goes from 0. 01 to 0. 1 0.
1 is the next line up here and if you look at the intersection of our 500 degre C curve with the 0. 1 point on the graph then it looks like that happens at about uh say 5,000 minutes or so so we've gotten a lapse time of about 5,000 minutes from um our beginning here um from 0. 01 to at 0.
1 okay so that's the time interval that I'm going to use that's the time interval and now I'm going to use that time interval to find my constant K assuming n equals to two I do that on the next slide here I'm going to plug into that equation the time that um I'm interested in after about 5,000 minutes the grain size is 0. 1 millimeters um and then I'm going to square that uh and then I subtract off the initial grain size which is about 0. 001 Mill and I'm going to square that and then that's equal to KT T is 5,000 minutes or so and then I'm solving for K and if I do that then I get K is 2 * 10- 6 millimet squ per minute okay what's shown here is um what are the impacts on the analing temperature of the tensile strength and on the ductility for a particular um material I believe here it's brass and then um what's happened is the brass has been alloyed I'm sorry analed at these um various uh temperatures for an hour so this is all showing what happens after an hour okay so it's a KN you can see that for the lower temperatures for lower a kneeling temperatures there's not tons of impact on that tensile strength it's still very high okay but then you can see that the tensile strength starts to drop pretty significantly once you reach about 300° see and then it kind of plateaus out and how well it does here as you reach some of those higher temperatures so it looks like you know you get a big increase um in effect between say about 200 degrees Celsius and say 500 degrees Celsius but once you've reached the 500 degrees Celsius Point there's really no point in turning it up much more because you don't see many returns for that and then of course the ductility goes as sort of the inverse of the tensile strength that always seems to be the way the stronger the material is the more brittle it is um and the less ductile all right now another thing is this bottom plot shows the grain size the average grain size um after an hour of a kneeling at these temperatures and you can see that it kind of plateaus out here at about 400 degre c um you're still seeing pretty small grains but then it goes up very rapidly as you go up in temperature and so you can see that you're getting grains of about 0.







![Strengthening Mechanism Grain size reduction & solid solution strengthening [Reupload]](https://img.youtube.com/vi/et4Rcb8y_GA/maxresdefault.jpg)