so welcome to today's webinar on unbox setup and take control a live demo of the cloud networking solution with TP link and their Amada solution so I'm Dave Davis he to DVS and over to you Daryl yes good morning um yes so I'm Daryl Bolter um so yeah pre-sales engineer for TP link so focusing on uh B2B um customers and Enterprise Solutions so hopefully we can uh show you some of those um devices today sort of connecting up and how we would add them to the Amada Cloud platform yeah correct what I will do is
as we've started you've all had enough time to read that slide so I'm going to stop sharing my screen in that aspect um we are going to show you I'll share my camera briefly and sort of show a very basic setup of what the solution looks like so it can sort of visualize and understand a little bit more why we're trying to push and promote this solution I think the first webinar we did was really successful we had a lot of inquiries a lot of questions after it which is ABS absolutely the idea of a
webinar to plant those seeds and let them grow and hopefully for you guys then to take away um something from today especially from the last one and then use the technology in a way that you may not have been aware of or that may Empower you and and enable growth for you moving forward so without further Ado I'm going to share my webcam so please bear with me for one second while I do this and I need to change the microphone as well so that's okay is that camera come on now Daryl uh not yet
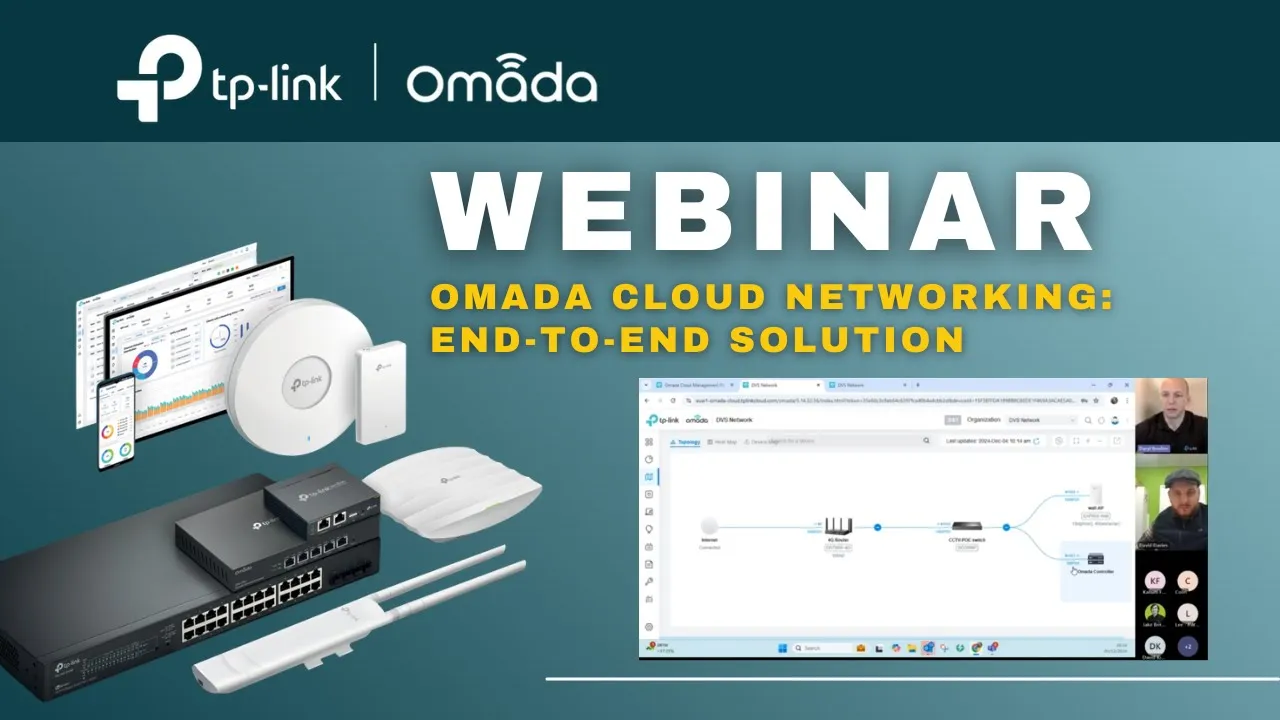
is there you go yeah you should see okay so I am live in the D room so apologies this is not broadcast standard so uh you know we didn't have anyone drafted in to help set this up but as you can see on the desk in front of me to sort of visualize and understand we have an Amada enabled TP Link switch so if I take this one off first so this is a standard in stock 24 Port Amada switch if I sort of drag it closer to the camera you can see there 24 ports
Poe and I've actually separated the networks I've got blue for our CCTV I just pulled one out like a silly Billy and I've got gray for our Wi-Fi access point so it's very common in the networking world to use separate colors for different devices which I've tried to replicate here to make it somewhat Professional installation on a messy desk so so the idea is we can use a TP Link M powered switch um which enables which darl will run through the portal the essentials and how that would look from a portal perspective so we have
this option TP link a mder enable device and that is now ingrained in a lot of the devices so it enables that cloud networking directly to the Amada platform so this is one of those 24port very standard surveillance um what you guys would use in a standard you know medium to large large even small to some degree installations and it it's inst stock it's on the shell so we have the switch in the first instance which would be connected directly to our network access or our router Etc but there is another option so what you
can use if you want to use the switches that's absolutely fantastic you can you can actually use these CPL link the Amada the OC controllers which basically becomes the gateway to the Amada platform as well so it's the hardware controller which you can link and we've actually got this set up at DVS ourselves so a lot of our Network and equipment is rooted through this and onto the platform for testing analysis Health monitoring Etc which Daryl will show you but it's a very simple um Concept in the fact that we have our standard H vision
cameras of course with Hy vision and we've got a couple of selection of Hy Vision cameras we've also got like a war M War Mount AP we've also got the external IP rated AP and they could be a mix of you know wall plate there could be you know any number of devices connected to that switch also so it is a mix and matx mix and match topology this isn't strictly CCTV it's not strictly networking but it's how you converge that technology to give a unified solution to your customer and that's the exciting thing about
the Amada range is that unification and delivery to your end customer in one network infrastructure so hopefully you sort of got a very brief overview of what that would visually look like so I'm going to let put my camera back back on my proper camera back on and I'm going to let darl share his screen so that he can then talk us through once we've got the infrastructure connected we've got it online we've got our devices connected powered up Etc how then the portal comes into play to give you that added additional benefit and functions
and features so Daryl over to you thanks Dave yeah so hopefully you guys can see my screen now with the portal um so again just to kind of start real from the beginning you know obviously it's uh web based cloud-based platform so you can access it on any machine um whether it's a phone we've got an Amada app as well so it all links into the S of same account uh and sort of to do that just to jump in there the app is Android and iOS I believe I I've got it on iOS yeah
so it is multiplatform compatible yeah I've I've got mine on Android as well so yeah again doesn't matter uh what device you use yeah you've got options uh for that as well so yeah so initially if you've not already set an account up you can sign up um and and go through the process of creating your TP ID account so once you do that um if I just log into my one here uh yeah so once you've signed up to your account and created that that's when you can start adding those devices that Dave was
just shown you so we've got straight into to the Amada platform here we've got a couple of options so just sort of following on from the hardware um Dave was showing you so as a as a fresh installation or network you add your device um and it gives you options here which is very very straightforward to um follow go to add and then this is the controller or the OC uh controller um and then there's a device key at the bottom uh underneath sorry that you can just enter that code uh and then it will
come up on there if you can see that yeah so um so yes once you've added your device key confirm those um credentials it will then log you straight into the controller so if I just uh go back of stage I've already got a controller online here uh so if I just launch that might take a couple of seconds to connect in and then once once that's connected um I'm now connecting into the controller directly so at the moment I'm not um connected to any devices as such apart from that controller um that we've kind
of added into the system so I can go on to devices at this point and I've already got a few um devices added into that so the switch the access points as well are already associated with the controller um but also in this section is where I can then look at doing the firmware updates and things like that which obviously you know is advisable to do um soon as you kind of do a fresh installation to make sure it's kind of all up to date and everything else um so you can do that straight away
um here or you can do a per a periodic one so you can schedule it so if it is a live Network or it's being utilized you can sort of schedule that out of hours to yeah so it's not going to sort of impact something because you know again with security devices even with you know Wi-Fi access points you want to do that at the quietest less least you know affected point of the day or the night in most instances isn't it where you can do that upgrade and doesn't really affect operational business a fantastic
function you know I think as all of us being Engineers you know trying to do a firmware update like at 3:00 on a Friday afternoon is not the best thing in the world um because it will always come back and bite you you know so you know again it kind of gives you that option to to schedule that which is really nice you've got audit logs as well so everything that sort happens to the controllers in here so you can sort of Follow that um audit uh process uh and then we've got the security as
well so you can sort of add different layers of security into the controller uh and then there's a few uh tools as well for sort of pinging the network if you were sort of struggling to um do anything on that controller itself and then into the account section so this is really important actually so as I mentioned about your TP ID um creating that that becomes the the main master or admin user of of the system or controller but you may have other guys in your team other Engineers or uh people that you want to
add um into that as well so you can do that here so as a new user I can do it as a cloud user or local and then I've got the roles um so I can these are kind of set roles as such um but you can sort of create new roles as well so basically um you can do that all through here um okay to to yeah kind of accommodate Engineers if they're out on site and they may need access and so on and so on so again that's that's quite nice to to change
roles that's on the tab on towards the top left right when you can add the new role you should you want to do a granular role that is more specific to your customers needs right yeah so yeah exactly that so you've got these kind of set roles already kind of pre-programmed as such as main admin or just administrator viewer but if I wanted to then really narrow it down to certain elements of the controller um I could do that via here so again you can sort of enable modify uh all of those settings for for
every part of the um platform basically so yeah so you can either even if you really want well I don't know if a customer or end user wanted access for whatever reason you may only want to sort of give them view only or something you know just so that they've got visibility of it um but then you still have the main sort of admin account for for that as well um and then just quickly oh sorry Dave no no yeah fantastic yeah so and then you got the settings so again just to kind of focus
back on this is just purely on the controller at the moment but again it gives you a lot of information in there serial number you know system time date all of these other things uh notifications um and I can also add um some addition layers of authentication as well so if you wanted like a two-stage um authentication so again again if you wanted to make it even more secure um even though it's you know all done on your tpid account you could add another layer of authentication on top of that as well if uh if
it you know is required so all of those settings and and functions are in here as well so again it's worth sort of navigating through those and you know just getting bit more familiar with that um and then if I literally just go back to my dashboard so if I go into the controller again okay just while that loads up let just coming back online so yeah so that's gives me an overview of the controller itself but I I now want to Launch into my network so basically this is kind of uh what Dave has
there set up on the desk so as a overview sort of dashboard view we've got this nice interface it kind of gives you all of these um bits of information of a Gateway device switch access point and how many clients You' got connected any one time and then down here this section actually is a customized um view so you could add uh and these These are actually called widgets uh but you can add these depending on your your own requirement so because we're sort of mainly focusing on CCTV I've got the the poe utilization uh
widget here which will sort of indicate what switch uh sorry that what ports the switch has and what ones are active and and how much is being used so again it's really nice to kind of have that if you want again just as a an overview if you wanted to add more devices or more cameras to that switch you can access that remotely um you know and work out whether you've got that capacity to add add more to it which again really nice to kind of do off site um but as I say you've got
lots of other features and and to kind of add more just click on the settings tab up here or the Cog and then I can then add additional widgets there there's loads there's a lot of them to choose from isn't they yeah depending on what your client or what you were sort of interested in in viewing you choose the applicable widget that then gives you and highlights that functionality doesn't it yeah exactly yeah so you know if it's even just going back to the the wireless network you can do um lots of you know functions
and settings with these as well through through that so again yeah you've got lots of options to kind of customize that and once you kind of set that uh every time you log into your account it will then display those those um widgets on the dashboard so really nice um so then we've got the statistics page so um we've got if we wanted to sort of measure the performance of the devices so again I can sort of switch between router switches APS um under the performance and then I can then access uh certain bits of
information from that as well but this is a really nice feature as well that it offers the visual of what ports are being utilized whether it's Poe what the port speeds are as well which is quite important so certainly as you know um camera Network becomes larger you know you might be slightly concerned that it's running at 10x 100 speed on Port one so you might want to sort of investigate to see why it might just be like a dodgy plug or dodgy lead or something like that that could be causing it but if you're
expecting the other benefit to that d one is like from a security ccdv perspective or like Access Control any device really that can sit on these switches is we've all had that phone call where the camera's dropped off the access controll is not responding you can simply quickly go into this portal and you can see you know even is the port live so is it supplying and drawing Poe because if it is then there something else that you need to investigate now that might be to do with the switch or it's probably going to be
an on-site issue but if you can quickly see it's disconnected um or disabled where inadvertently somebody's disabled the port and it needs to be re-enabled it's a very quick high level way of checking that a device is online or what the state of play with that device is without even going to site in the first place exactly I mean that's what I see Amada being you know it's its primary function really is to to kind of help businesses or help you guys be more efficient I suppose in kind of finding out uh what could be
the issue and and like you say Dave you know you can you can gather a lot of information off of this um and like it could just be yeah that um you've tried you know doing a couple of things but it kind of prepares you a little bit more uh in terms of that site visit especially if it's miles away as well and you know it just all helps towards that doesn't it so so yeah again it kind of gives you a lot of information there and then um again there's not no traffic on the
here but this would be populated with you know uh certain bits of information to indicate you know what what is actually happening on that switch itself yeah uh and then likewise we've got it for the uh access points so you can then switch between the uh Wi-Fi bands um and then we've got different options for searching as well so we can do like a 7-Day search um or even more than that if we wanted so let's just go for the whole year you can then you know get a good understanding of actually what's been utilized
how many um users have kind of been accessing those devices as well so really nice to kind of have that built in and again this is a really useful tool the topology map so as soon as you add devices into the controller it will already know where it's Associated or what device it's connected to so again I've spent many many hours on sites trying to find out you know what does that switch connect to this device and so on and so on um but again it kind of just gives you a more um clear understand
understanding of how those devices are connected together and it also on here actually tells you the the the connection speeds as well so again from my Internet to the rout I know that's gigabit um speeds down to my switch um but then when it comes to the controller it's it's dropped down to 100 so that I mean it could be the limitation of the device itself or like we just mention it could be something else that the you know it could be just a dodgy plug on the lead or the patch leads you know um
not not connected properly so again it's kind of just arming you with you know all that information that can be um just to save time ultimately sort of messing around on site when I you know people have got lots of things to do these days so it's it's nice to kind of have um the great thing about this is obviously you know you could this is a great like we've done it several times where we've actually exported that information and given it in like a Handover pack with customers so they so their end client gets
a A visualization of the topology but the most important thing that we found when when we've been speaking to Engineers who who use the Amada is when they're sending maybe unfamiliar Engineers maybe they're new to the company they've never been to that site before and they need to find the fault actually given a visual topology layout lets you understand where the devices are connected so at least gives you a fighting chance and actually becomes more efficient and effective at finding the fult is if there is one to find on site yeah yeah and that's it
isn't it it's just having the information to hand you know um certainly for like service Engineers or callout Engineers if you've not been there before you know and it's a even just a mediumsized network can take a a bit of time to kind of discover you know what's connected and stuff so yeah again it's got the option you can sort of zoom in and out um I can expand these um so if it is larger you you've got the option to kind of customize that so while we're on this page actually um all of these
are kind of hyperlink to the the actual device itself so if I click on the switch here it will take me straight into the switch settings so I get the nice overview as well um of kind of what ports are being used but these are so again I've got a camera connected to this one so it's got the Thunderbolt icon there to indicate that it is utilizing Poe so again that those uh ports are controlling the pee devices and this is my link Port um as well so again it's nice to kind of know all
of that info we've got all of the model numbers uh IP addresses and everything else of the device but the the real unique point of this um certainly for security guys that if you do need to kind of down power or power cycle those cam so let's just say the camera um isn't viewable yeah yeah but you can see that it's connected it's using Poe you know we all know like the first protocol is just to kind of power cycle it um engineer res is it um so again this becomes really good uh to be
able to do that Port recovery so you're not taking down the whole network um as such with just re you know power cycling that one port uh again to kind of you know try and bring that camera back online and it certainly you know if even if the the job's half an hour or an hour away that that's still potentially two three hours isn't it for an engineer uh just to go there and you know power cycle it so you you've got that capability through Amada to to do that initially and like I said at
least it you know if it doesn't come back up you know you're kind of looking more at a like potential Hardware fault rather than anything else aren't you so again it's just building that kind of um information up to to know kind of what what might be happening to the network for me one of the most important functionalities of this is to have that you know granular port to port functionality where you can do that like you just said nine times out of 10 if you power cycle a device that is not quite working as
you expect that will resolve the problem and if anything that might just buy you enough time to then do more diagnosis or at least keep the client happy with not resolve to drive in like you said it might be 1 hour it could be four hours you know with the way the UK works now we sort of tend to You Know cover all of the customers all over the UK so it's a fantastic ability well and and that what just swinging back to what I mentioned about the app as well so certainly for a lot
of you guys if you're out on site yourself and you're not um office based or whatever and you're on another job you can do all of this as well through the Amada app so again like like you said Dave you know we've all had customers like shouting down your neck sometimes kind of wanting it done there and then so it it kind of you know just becomes a lot more efficient to be able to kind of do that on the go uh through the app as well so yeah it's it just offers that flexibility um
to to do that so uh and then while we're just on this section um you can obviously name those ports again where that becomes really important when you've got like a setup that that Dave's got there on the desk you know visually it's nice with the different hatch leads but if you're not in front of it you know it's nice to know kind of what devices connected to each port on that switch as well so you can actually label those uh within here to to to you know uh access that kind of information so uh
so yes you've got all of that there for the for the switch and then just quickly if you needed to do any additional um configuration you've got the config tab uh and then we can go into the the switch itself and then create VLS and all sorts of things uh through this option so won't go into that today because it's a bit more detailed but um yeah it is very intuitive you know it's designed the app as well you know I think the app is very intuitive you know both the web and the app they're
so intuitive that if you do need to adjust any of those settings you can do that like you said through those additional setting yeah again yeah just touching on that you know obviously the guys at DBS really good with the support and and our guys as well we got Tech Team uh to back that up as well so if anyone does need any support you know um please do yeah reach out um so yeah just quickly then I'll just briefly go through this section so under the device tab um as mentioned these are the devices
I have on my network already um but you've got the option um to kind of at soon as you add a device it will automatically populate in this this window um but it will under the status it will indicate that it's pending so so you'd need to adopt those devices um and you just simply again just click on the device uh and then at the bottom there will be an adopt option uh to kind of add it in once it goes through that sort of um Discovery process of connecting and then adding it in it
will then come up as these are saying connected uh and that's when you can then do your updates or configuration changes that way um so I won't go into these details these just the client devices and some insight information um of kind of how how the Amada platform um detects those devices and uh gets the information as well but under the uh alerts or log sorry there's lots of uh options in here as well so we we can go into the events um see what was actually happening on the network so how the DHCP server
um is allocating the addresses or what devices um but yeah there's lots of lots of information that you can gather from from that part as well so nice nice and easy to follow we've got the audit Trail as well so this is more in in line with the operators or users as well into it so again if you were to issue um access to other team members or as as I said customers potentially you can um go into this this option here and see who's logging in at you know as and when um so again
it's all all you know um trackable so that you know it's it's all in there um if there were to be yeah any requirement to check that so under the tools we got uh some um options to pin the um w w um sorry the access point switches or Gateway so again if if you were to try and start sort to diagnose any potential faults or it wasn't quite connecting uh you've got that option built into the platform we've got package capture as well so again if you're sort of getting intermittent Wi-Fi um problems you
know you're getting sort of users complaining that the Wi-Fi is slow or anything else then you can sort of capture what's going on uh with those devices uh which is important uh and then we got terminal as well so for anyone that's um of an older generation now I suppose myself to put it politely you know if if anyone's done the CCNA and the control line interfacing and things like that we still have that option to um add those kind of third party devices and control them uh through through those old uh processes so again
it's kind of uh nice and intuitive like you said to to do that and then just uh finishing up on the reports so we've got um separate reports that you can run on the wireless networks wide Networks and then devices um even your your ssids as well so if you've created like guest networks private network Wi-Fi networks you can then start accessing um those bits of information to kind of you know see how many users or uh how much traffic is being utilized across those so nice nice and easy but these are the kind of
main uh functions of the Amada and then really in the settings section uh which won't go into detail today it's a little bit more um in detailed in in terms of what you can do but this is uh how you would kind of commission those uh W wireless networks your wide networks your vpns and things like that are all kind of under this uh settings one one function if you can touch on it because I think it's really powerful I say I think we touched on the first B and we've used it several times at
DVS and with our customers under the wireless networks where you always get a customer somehow forgets their wireless password and they need to dashly connect or they want to create a guest Network and they want to isolate it from their main Network Etc this can all be done remotely now so password changes like changing the ssids to stop people blocking people you know enabling new networks all done remotely for the portal no need to go to site anymore that's how fantastic this system really is yeah yeah again it's it's such like a um because it's
already built in it like you say it's it's nice to kind of have that if if um you know certainly if there's a change over a staff in a um application or a site and they're like you know what is the Wi-Fi login like you say you can literally um log into your wireless networks so if I just um go back um into that sections wireless networks I've got two networks set up uh on this one I've got a guest Network which doesn't have any password but on the the actual private one it's protected uh
with WPA2 uh personal so I can go into that option access the password here or change it essentially um to to whatever the customer needs so again it's really nice to kind of access that just on the fly or through the app as well um yeah yeah so yeah as I say there there's lots of um things you can do through here but it's the TP Link way is kind of simplify all of these processes so just again you know it wasn't that long ago really in reality 5 10 years you know everyone was all
these long codes and hashes and all sorts of stuff to program all of these functions but it's been simplified massively through through this platform to to make it easier really to operate and navigate through so so that's the kind of interface um into the controller but again just really quickly I just wanted to navigate back to the main uh login page so we've launched our Amada Essentials now which is a free of charge cloud-based um option so as you can see I've got cloud-based systems or on promise system so this just replicates what Dave has
there in terms of Hardware but if you would you know wish to to um use the cloud-based option you can do it without the actual uh controller itself so once you're in this tab I can go to add new organization and then click on The Mod Essentials and then it will just go through the process of kind of setting that up so as soon as I've done that so just if I just quickly quickly do that [Music] um yeah already got one yeah so um so we'll launch that straight straight away I just go through
the options and click okay so I'm straight in now so I can then start adding my site um and then devices so if I click on there add device and then you can add it via the serial number or the device key as as we kind of shown you so those switches you can add straight into this now yeah uh and it will become live uh and you've got access straight away so there's no licensing or anything Associated um and it's unlimited the amount of device you can put on it so again if any more
information you need on it then obviously um you know the guys at DBS can help or or we're more than happy to to run through that if you wanted on a on another you know separate core meeting so appreciate Prett much pretty much it for me so know that was kind of like a bit of a well- wind overview but um yeah hopefully it was useful and yeah anything you need just let us know so yeah on that if if there's any Q&A you can either type it in the chat although I'm not sure the
chat is working I just did look at it or speak to us offline you can either speak to your DVS rep contact myself contact darl if you want to know more about it hopefully the webinar's given you enough insight to allow you to sort of investigate the solution more you can see how powerful is and we've only really scratched the surface of the applicable stuff that we really wanted to highlight to at least entice you into using the product line I I would say so yeah if you want to know any more please do get
contact with DVS or TPL link directly hopefully we can sort of uh answer any of your questions and if there is no Q&A what we would like you to do is scan the QR codes and follow both DVS and TP link if you don't already which I'm sure you already do um but again just scan the QR code and you'll be able to follow us for regular updates moving forward we do hope you found this webinar very very powerful and again we will try to do another one in January and I will try to do
another one on a sort of a different product line to highlight some of the additional products and solutions at TP Link too but other than that darl you've be most helpful and I really appreciate you taking your time today sorry D David has asked in the chat if um if we can get Daryl's contact details as well so what I'll do is yeah I'll yeah I'll email is it if it's if it's Kingo I'll email him directly and and give him darl's I think it is David Kingsland so I'll I'll drop that in there so
yeah that's fine thank you Jake for doing that yeah no thanks Dave that was good other than that thank you so much for joining us on this webinar and it will be live and we'll see you very soon for another webinar in January thanks all thanks cheers bye bye