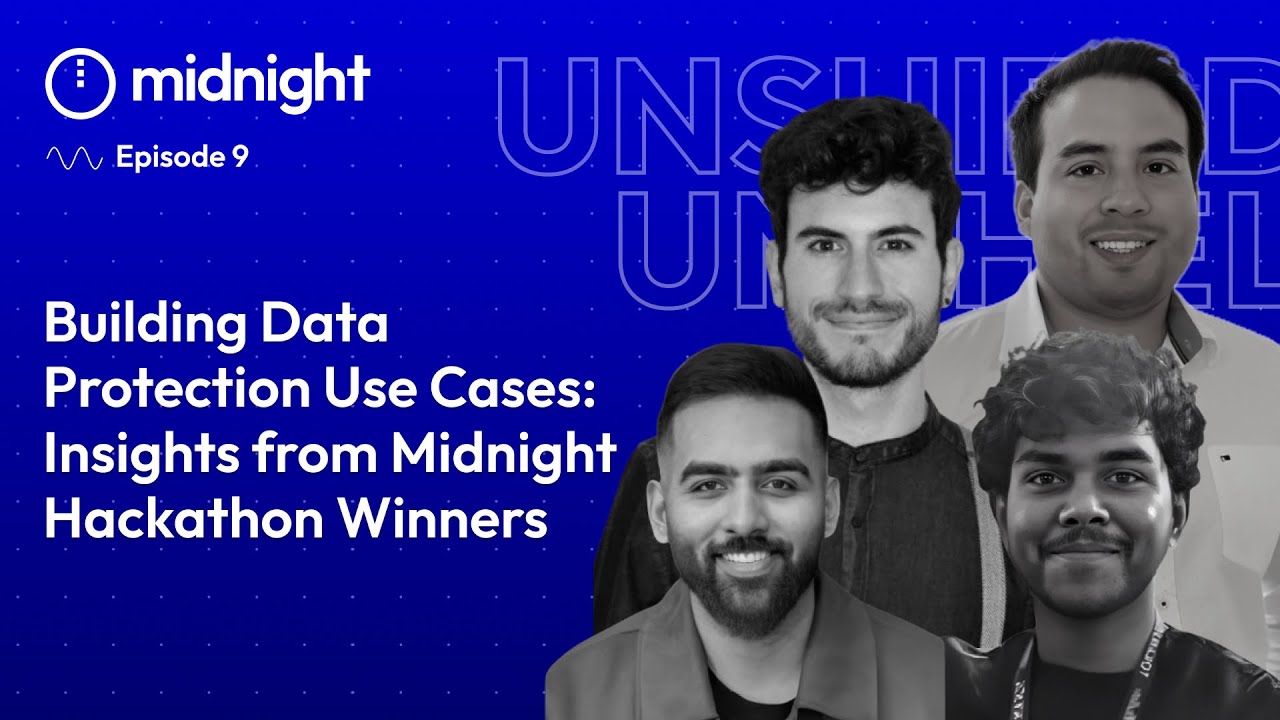
Hello everyone! I'm Stavon Loa, Developer Relations Engineer serving the Midnight Community. Today, we are not just watching; we are doing together!
We're going to dive deep into becoming a Midnight block producer on the Midnight testnet. Midnight is a Cardano partner chain, and block producers of partner chains are Cardano Stake Pool Operators, also known as SPOs. Therefore, this workshop is tailored to SPOs.
Block producers are vital in blockchain networks because they validate and add transactions to blocks, ensuring the integrity and continuity of the blockchain. Therefore, it's strongly recommended to have in-depth knowledge and skills in Cardano stake pool operations, blockchain management proficiency, command line interfaces, system administration, and robust networking capabilities. If this is your first time, don't worry!
Do your best to follow along. Visit our documentation at docs. midnight.
network. In fact, there's a QR code on the screen right now that will bring you to docs. midnight.
network, which has our Midnight block producer documentation. Also, join the Midnight Community Discord server where you can ask questions and chat with fellow block producers. So come on in, join there, don't be shy, and ask questions!
I'll also be in those channels, and I look forward to chatting with you. Testnet block production has three main infrastructure requirements. Firstly, one must have a Cardano SPO on the preview testnet.
Second, partner chain dependency services are needed to allow the Midnight testnet to follow preview. And finally, the Midnight testnet node, which runs as a block producer node. Now, let's go a little deeper.
A Cardano stake pool is composed of a block producer node and a relay node. Partner chain dependency services consist of a Cardano dbsync instance, which indexes the Cardano chain from a relay node and makes it available through PostgreSQL. However, the Cardano dbsync PostgreSQL instance needs to have its ports available to the Midnight node.
As you can see, the arrow from the Midnight node going to PostgreSQL indicates that access is needed when using the partner chain CLI, which we'll discuss later in the video. Now, looking at this infographic from right to left, a testnet block producer runs a Midnight node. This node follows the partner chain scripts for testnet on the preview chain through the Cardano dbsync instance.
These scripts contain the block producer committee, which is a list of candidates that participate in the committee rotation each epoch. These candidates are SPOs and must also run a Midnight block producer node. So how does an SPO become a candidate in the committee?
Well, an SPO may register their stake pool as a candidate in the committee. This can be done by using the open-source partner chain CLI tool to create the needed keys, generate a registration signature, and officially submit the registration. Upon doing so, the candidate will participate in the committee rotation algorithm in two preview testnet epochs, which is around 48 hours since the registration was executed.
So the first step into becoming a Midnight block producer is to become an SPO on the preview testnet because the Midnight testnet is a partner chain to the Cardano preview testnet. Like I said in the beginning of this video, this is tailored to SPOs. There are tons of resources, tutorials, and courses all about Cardano stake pool operation.
We'll provide a link and a QR code on the screen that you can scan right now if you're new to Cardano stake pool operation. However, if you are an SPO, simply deploy an SPO on preview and make sure you have a UTXO's associated payment signing key, the SPO's cold signing key. Please be aware that extended signing keys are not supported at this time.
So deploy an SPO on preview, make sure you have those keys handy, and then we will move on to step two, which is to set up partner chain dependency services on a Linux server. All right, so let's set up the partner chain dependency services on a Linux server. You can see here we have this repository in the Midnight Network GitHub called partner chain deps stalker.
This is simply a Docker Compose project where we can easily compose up the partner chain dependency services. You can definitely create these services, build them from source, and use other images that you trust; however, I'm just going to use this provided Compose project because it's a bit faster and easier to manage all these services in Docker. Just a tip: if you're going to be running Cardano services in general, there tends to be a lack of support for pre-built binaries and images for ARM architecture in Linux.
So just be aware of that. Ideally, use an AMD or Intel chip architecture, but that’s just a tip here. So anyways, I'm going to this repository, I'm going to copy it, and I actually already copied it in my server here.
However, let me just exit here. I was actually SSH'd into my server, and since I’m on a Mac right now, I’m going to enter my Linux server and do `git clone` to clone that repo. It's the wrong URL for some reason.
Let me see… here we go, `git clone`. All right. It says I already cloned this previously, but it's telling me that the directory already exists.
So I'm going to simply change into that directory, and then there are some steps that you're going to… Want to change "in" to "here," so if I do, maybe use "cat" to, um, let's see, here you can see we have, um, the Cardano config folder, which has our preview configuration files. Um, we have the compose file, which describes all the services that we'll be running in Talker. Um, and I do have some cheat sheet queries—um, basically everything that's um in the repository.
So, um, what I'm going to do is, first things first, I'm going to look at this compose file again, and I want to tell everybody: please change the username and password for Postgres to something unique that only you know because, um, Postgres and password 123 are obviously not secure passwords. So, change these to unique passwords that only you know, and you may also change some of the other variables. Um, if you don't want people guessing them, such as, you know, if you change the port numbers for any of these services, just make sure you remember what port you're using.
I'm just going to leave the defaults because this is just a demo. Um, yeah, please change the username and password for the um, Postgres DB sync. All right, so now to start up all these services, you're going to do `docker compose up` and the `-d` flag for detachment mode.
If you're using a previous version of Docker Compose, you're going to be doing `docker-compose` with the middle dash and then `docker-compose up` detach mode. Since I'm using the most recent version of Docker Compose, they no longer require the `docker das compose`, so I'm going to do `docker compose up` and then the detached mode flag, and that will start up all my services. If this is your first time starting them up, you'll see some output of Docker pulling the images and stuff, but as long as you see all the checkmarks and, um, it's all green saying "created," "started," and "healthy," then all should be good.
Now, um, I just did `docker compose up`, and you can see it says everything's running, but let's verify this. So let's do `docker container list`, and that will list all my containers, and you can see their status, which says they've all been up, and they do seem healthy. I also have the port numbers that they're running on, um, and I also have the instance names.
The instance names are good because you can do `docker logs` and then the instance name, such as "Koo," which I see here, and they'll print recent logs. So that's important for debugging, or, you know, there's many reasons why you'd look at recent logs. Um, also, it can tell you some status information, too.
But let's clear this, and then I also have some cheat sheet queries here. So if we look at these queries, they are also in the documentation at docs. min.
network. If you look at the blocks or documentation, however, um, we have this query here for Cardano DB sync. This is going to query the percentage, um, the synchronization status.
So if I run this query, `query dbsync`, it's going to ask me for the password for user "Postgres," um, and I use the default one, which is password 123. But you used a different password because that's not a secure password. You can see the synchronization status is, uh, 4%.
I can clear this again and see if that's progressing. I guess I did the wrong password: password 123. Okay, and you can see there is a synchronization process.
This could take a few hours and also depends on your internet connection and how much, um, resources you have allocated to the services. However, um, you want all these services to sync to 100%. Now, I can also query um, "agos," and you can see here I do have that cheat sheet query.
So this is a much simpler query, um, which is just, um, using the regular health check from the "Aus has. " So I'm going to query that, and that's going to tell me, um, the health and synchronization of my OS instance, which is connected to the Cardano relay node. So let's run this query, and some important things to see here are: we see it's connected, we can see the current epoch, total connections, um, and we could also see the um, network synchronization status.
Um, and yeah, so you want that to sync to 100%. Otherwise, partner CH dependency services are up and running on our Linux server here, and, um, just be sure you know this. It might take a few hours, maybe, uh, faster for some of you, but, um, let those services synchronize to 100% with the Cardano preview testnet, and we will move on to the next step.
All right, actually want to show you a few more ways to access the um, SQL shell and query your DB sync um, sync status because that's an important service for your midnight node. Um, there are a few ways, since we're running in Docker, you could do it this way, um, through Docker to go into the SQL shell. Okay, and that brings me into the SQL shell; I can start making SQL queries.
I'm going to exit this. I'm going to show you the other way, which is to use um, Postgres SQL command, and that prompts your password, and then I can do the same thing to query SQL commands. And I'm just going to copy this SQL query, throw it in here, and this will give me the, uh, percentage, the synchronization percentage.
All right, so now you have a few more ways to check your um, DB sync synchronization status. All right, now we're going to. .
. Um, register as a candidate to, um, join the block producer committee on the Midnight testnet. To do this, we're going to use the Partner Chain CLI tool.
However, we're going to, as I'm making this video, be using the Partner Chain CLI version 1. 1. 0—that's just, uh, the time of recording.
Um, and I'm going to go through the documentation with you here. So, if you go to our Midnight Block Producer documentation, um, a lot of the steps in here we're going to be doing, um, from the documentation, and I want to walk through it with you here because there are so many, um, commands, and I have some scripts that just make certain things a lot easier. We're going to go through that together here.
Now, I'm in my Linux machine in my shell here, and remember in the beginning where I said you had to be, uh, an SPO on the preview testnet? From that process, you're going to need that Stake Pool code signing key and a valid UTXZ associated, um, payment key. Well, where I'm going to be performing this registration, um, I actually put those keys here.
So, if I show you here, I have this priv directory—basically stands for private—but I did put my cold signing key and payment signing key in this directory, as you can see here. Now, this is just testnet, so, um, I just copied them over into the server. However, um, if you want more security, it's best practice to do this via an air-gapped device.
Um, because, um, you could also do some—you could also generate the signature, um, offline technically. But, um, this is just for demonstration purposes, so, um, I did make sure I have my cold key and payment signing key handy here. All right, now let's continue.
So, what we're going to do here is we're going to install the Partner Chain CLI tool. As you can see in this, uh, in these commands here, we're going to install version 1. 1.
0, and I'm simply going to copy this. This will, um, download that binary release package and unpack it so that we can use it. So, just copy all this, paste it into your shell, and hit enter.
You know, it's going to prompt you if it wants to unzip, um, all the artifacts. Just, uh, just select "A" for all and hit enter, and that should, um, continue the unpacking. All right, so the Partner Chain CLI has been downloaded and unpacked.
We can verify this by simply going into the Partner Chain CLI directory, and you can see here when I, uh, list everything that's in here, I can see the Partner Chain CLI binary. We can verify if we can run it by simply invoking this CLI, and I'm going to do the, um, the help flag just to display usage and commands. Um, and something to pay attention to in here is we're going to be using the registered validator flow, so we will have to generate keys, and then there's a three-step registration process.
We are not going to use the start node part because we're going to run the, uh, the Midnight node separately. Okay, and you'll see here it says, "Note this: we get assumes that the chain spec JSON Partner Chain CLI chain config file has been obtained from the governance authority. " Blah blah blah, this is basically because, um, the Partner Chain CLI does not know that it's being used for Midnight right now.
So, we need to provide the, um, the Midnight testnet, um, chain configuration, which contains all the network parameters. Um, so to do that, I have a handy-dandy script in the docs. We continue here, um, we basically need to provide, um, these network parameters into this Partner Chain CLI chain config.
js file. I'm just going to use this script that's in the docs; just click to expand, copy this, and we're going to paste it here. All right, and it says, "Partner Chain CLI chain config.
js has been created. " Let me turn these notifications off because they are interrupting the video. I'm going to keep this in the video, though—why not?
All right, let's continue. We have Partner Chain CLI chain config. js has been successfully created, and, um, I can verify this by doing `cat partner chain CLI`, and this will show me the, um, network parameters.
I should just verify that, um, these values are equal to the values I see in the docs here, and they are very, very nice. Now we're going to create—now we're going to, um, generate Partner Chain keys. These are going to be a set of three keys, okay?
So, we're going to invoke the Partner Chain CLI to generate keys, and this is going to start, um, kind of like a wizard, um, and it's telling you we're going to be generating a cross-chain key, Grandpa key, and Aurora key, and it's also going to generate a network key, which is going to be really important. I'll just explain why in a moment, but, um, we can just leave this, um, data path here as default. Um, we're running the Midnight nodes separately, and we're going to pass our keys in a different way.
But, so just hit enter for now. Okay, and it says all done. Now, the prompt is very important.
Um, it tells you it's generating the key, and then what's also really important is it says this cross-chain key is stored at— it shows you the data directory. Um, it's within the same directory we're in; it just—it's Just in this folder now, data chains, part of chains template, etc. , and it tells you the secret.
It’s hard to sometimes guess what the secret is associated with. For example, is this secret the grandpa key or is this secret the cross chain key, etc. ?
So I would suggest you copy this entire prompt and store it in a safe place. However, it does tell you that it's also saving the partner chains' public keys in a JSON file, so these associated secrets are associated with these public keys. Okay, and also very importantly, it is generating a network key down here.
This is a very important key because it's actually the key we will be using when we start the midnight node. So make sure you copy this key and store it in a safe place. We also have where the secret is stored.
You could also look inside those directories; for example, we have data. You can just follow where these keys are from here, and we also have this part of chain public keys JSON. But like I said, we should copy these and put them in a safe place.
This is testnet, so I really don’t care if you see these keys because they're going to be irrelevant anyways. So I'm just going to let me see, let’s copy this prompt. I’m going to copy that and I’m going to store those in a safe place.
All right, so now we're going to do the registration steps. You have to make sure you have your cold signing key, absolute path to the signing key, and I actually made a mistake where one of the other requirements is to make sure you have your payment verification key, the payment V. V.
key. So by the time you see this documentation, it will be updated, but you will need that payment key. All right, so let’s continue here.
So you have your cold signing key, you have a payment signing key, and a payment verification key, the absolute path to the Cardano node socket. If you're using the provided Docker Compose project, the node socket absolute path is in your home directory. So you can see here in my shell, I’m in my home directory, and you can see the node socket in this IPC directory here.
Okay, now obviously your absolute paths might be a little different, but it’s in your home directory, but if you’re using the provided Docker Compose, it’s in the home directory. All right, and then you also need accessible ports to AGUS, Koo, and Postgres DB sync. I’m actually going to use a.
. . and you’re the first to know about this.
But you set up AGUS and Koo; however, you are also welcome to use the public AGUS and Koo endpoints. The reason why I’m telling you this now is because it’s good for you to run these services yourself. However, you’re welcome to use the AGUS with Koo endpoints.
It's just Koo preview, Koo preview, midnight network. Simply replace Koo with AGUS to get the correct instance of that, so feel free to use those public endpoints—they're maintained by the U Midnight Court team. Cool, now the next thing we’re going to do is.
. . right now, I have my partner chain dependency services running in Docker and I have my keys in this priv directory.
The priv directory is just for private keys where I’m keeping all the secrets I need, but the Docker container doesn’t know about this by default, so that means we need to copy them over. Okay, now if we go to the documentation here, we have an example command where you copy an individual file. You do Docker, the location of the file, and then where you want it in the container.
To remove that file, you just execute the remove command on the particular file within the container. Okay, so let’s show you an example of this. I'm going to just copy all the contents of my priv directory.
So what I'm going to do is Docker copy home/stev/priv and I’m going to do a period to just get all the contents of the priv directory, and I’m going to put that in the container in cardano-node temporary. Okay, successfully copied everything over there. Now we can verify the contents are in there by doing Docker execute, the container name, and we could list the contents of temp.
We see that our files are in those containers. All right, so let’s invoke the register one command. Okay, I’m going to go to the partner chains CLI directory, list the contents, and we have the partner chain CLI.
I’m going to do partner chains CLI register one, okay, Cardano CLI executable. Now, since I'm running this in Docker already, if you're using the provided Docker Compose, you have to do Docker execute Cardano node Cardano CLI since it's running in a container. If you’re running C nodes, Cardano node or have Cardano CLI installed somewhere else, you simply just put the executable path in there, but this is running in Docker, so I’m just going to put that in there.
Okay, path to Cardano node socket file—that's in the home directory. It's actually the same as this, just make sure you have the absolute. Path um, you know, if your username is different, you might not have St in here.
But the, uh, IPC node socket is in the home directory if you're using the provided Docker, uh, Compose project. All right, now set the Cardano node socket environment variable to. .
. all right, so it did that for me. Path to payment verification file.
Now this is also through, um, so now, now that you don't want to give your host key unless you're not using Docker, um, you want to give the location that you, um, the location to the secret that’s in the Docker, that’s in the container. So, if you remember that, uh, I put that in my home, in my temporary directory in the container, and that’s payment. vkey.
Okay, um, it says, um, no UTXO is found for a given address. Is that so? All right, so let's solve this right now.
I'm going to copy this receiving address and let's go to the preview testnet. Okay, I'm going to go to preview receive test ADA, put your address in there. I'm not a robot.
Let's do bicycles. All right, request funds. Your address has been successfully sent, and test funds have been sent to blah blah blah.
Here’s the verification hash. Let's go to CardanoScan and verify that this exists. All right, all right, there we go.
So that transaction's been sent. So let's try, let's try this again: partner chain CLI register one. Um, and the cool thing is that the register wizard, it keeps the same, um, it remembers the same paths that you used, so that helps speed things up a little bit.
Um, okay, no UTXOs found. Interesting. All right, so the reason why it’s not finding my UTXO is because my Cardano node is actually not synced.
If I query AGOS, which is connected to my, um, relay node, um, you can see we’re only, uh, synced 64% to preview. So, silly me. I think this would be a good time to say, like, hey, what if you actually don’t—what if you don’t have a UTXO?
So, how can you do this? Um, so let me show you. So, we already copied our keys over, but I'm going to show you how to, how to, um, create a unique.
. . if you ever need to get a new UTXO or new, uh, payment key, um, we can do that together too.
So what I'm going to do is Docker execute. I'm going to do Cardano, Cardano node for the container. I'm going to do Cardano CLI.
I'm going to do address key gen to generate new keys, and I'm going to say the verification key file will be payment. payment. vkey, and let’s store this in, um, in the temporary directory.
So I'm going to do, I’m going to call this payment2. vkey, and let’s do signing key file as payment, temporary payment. key, and we’re also going to do this as payment2 because we're creating a new second, um, second key.
Okay, so, um, so I created those keys. Now, let’s see if we can verify the contents in there. I’m just going to go in my history, grab the, um, Docker command that we used to look inside there.
You can see I do have my new payment keys. All right, now we need to generate a payment address for these verification key files. So what I’m going to do is, um, Docker execute, container name is Cardano node, and Cardano CLI, and do address build to build a payment address, and we're going to do -dH payment verification key file, and then space, uh, the absolute path to that payment key file, absolute path to verification key, uh, verification file, payment key verification file, and then, um, let’s do out.
The output file is going to be temporary. . .
okay, almost made a mistake here. Remember this is payment2. Output file is going to be [Music] temporary payment.
payment2. address, and this is going to be testnet magic 2 because, um, it’s going to be a preview testnet, and that’s in testnet magic 2, which is, um, previews Cardano network code. All right, now let’s see if those contents exist.
All right, we got the payment2 address, payment2. vkey, payment2. skey.
Okay, now let’s look at the contents of the address, and we could actually fund the address. So I'm going to do cat, um, temporary payment2. address, and I'm just going to copy this address, and I'm not going to copy that, um, percentage that B that came over.
So I'm going to copy the address, and then let’s go to the preview, do preview testnet. Okay, I’m going to do receive test ADA, put my address in there, confirm that I’m not a bot, and. .
. eight limit exceeded. Please try later.
What? That’s a new one. Maybe it’s because I’m using the same IP address.
So let’s be miti, let’s go to a VPN, my address in there. I promise I’m not a robot! Request funds, and it says your transaction looks successful, and test funds have been sent to blah blah blah.
Here’s the address, so we can see if that UTXO exists on the Cardano preview explorer. All right, it’s not showing yet, but it’s about here. Let’s refresh again, and there it is!
Got one confirmation, and UTXOs do exist for it. Cool! So if you’re struggling to get a UTXO or don’t have a UTXO, that’s how you can improvise to have one.
So, um, now we’re going to. . .
I'm going to wait till, um, my Cardano node syncs, but I thought this was a good segue. All right, so now let’s try the registration again. So I have.
. . My um, okay, so my services are synced, and now I'm going to try the registration again.
So let's do this part: Chain CLI register one. You see here, now it sees my UTXO, so I simply have to choose a UTXO that I'm going to pay for. Um, I'm just going to pick this one here.
And then the wizard tells you to run the following. Once you do that, it says to run the following command to generate signatures and maed up. So this is actually a command that you could um, run off-chain if you want, or offline if you wanted to, using the partner chain CI.
Um, however, it prints out the second command for you, so might as well just copy and paste this. And that's already the registration two command for you have to main chain key file. That's a temporary C do key.
Unable to read main chain key file. Oh, this probably needs it from my actual host machine, not the docker container. So let's run register 2 again, and that's in home Home St proof co.
key. All right, now that worked too, and you can see here, now it gives you the register three command. Um, so you can just literally copy this, and let's run this command.
So now, let's run the register three command. I'm going to include the path to my payment signing key file on my host machine, and I'm going to use the public endpoints. So it's going to be HTTPS, and I'll put those Agos and Koo um addresses.
And this actually fails for me because I already used the cold, uh, the stake pool key that I'm using to um register. However, um, if you follow these steps, you will be registered, and then um, let's go and show you how you can verify your registration. Okay, now let's verify the registration.
Um, there are a few queries that we can do to um see our candidate within the committee itself. So what I'm going to do is I'm going to query the status of the midnight testnet with this saying, "Get status" um query. Um, and this is going to tell me the current preview test at Epoch.
Um, because once you register, so if I register on 265, my registration should be eligible in N plus 2 Epoch. So, uh, my registration should be valid by um Epoch 267. Okay, so I can actually query the committee and see if my candidate is there.
I'm going to do that by using this side chain get Rion parameters query. Copy this, and I'm going to make sure I replace the pams here with the correct Epoch, which will be, in my case, 267. And this is going to return the entire, the entire um block producer committee for tesut.
Um, and to verify your um, your candidate, you basically just have to search for the candidate that has your associated public keys. Um, so in my case, I already have my public key, so I'm not going to scroll and search for it in this output. I'm just going to corrupt it really quick—d67.
I already know mine is valid. All right, and it's definitely there. I already know it's um, it's valid.
Um, however, your candidate, if you query it within the two epochs, it's going to say false, but it should be true in the later Epoch. All right, so now we're going to run the midnight node and block producer node. As a block producer, um, you have to make sure that your Cardano DB sync instance is fully synced, and you actually don't need your seed phrase, but you're going to need the node key that you generated.
Um, the node key that you generated when we um generated keys—for example, when we generated keys and you created that generating network key, you're going to need um this key for your midnight node. Okay, let's uh continue. So in running a midnight node, there's a Docker Compose project similar to the partner chain dependency services.
Um, it's in the midnight network, Giorg, and it's midnight node Docker. So what you're going to do is, before we clone this, I'm just going to show you within the project um what values you have to change. So here in the environment file, you don't have to change um much, but in the bottom here, you see that node key—that is where you're going to input your unique node key.
And um, you also need to make sure that your Postgres DBC credentials are unique to yours um, so that your midnight node can communicate with dbsync. Okay, so let's go to minute out Docker. What you're going to do is you're going to copy this, you're going to git clone it, which I've already done that, and I'm just going to show you what I've changed.
So here's my project here; as you can see here, um, we have the midnight node version. You can change this to latest if you want to, however, I have the Postgres DBC credentials unique to mine. Um, my DBC is running in my local network here, and I'm able to access its port from the machine I'm on right now.
Right now, uh, the base path is the same; I'm going to leave the default arguments, and I'm also just going to add my unique node key. Um, this is just testnet; I'm going to deregister everything anyway. So um, so yeah, there's my unique node key, and now it's just simply a matter of doing Docker Compose up, and I'm going to do the D flag to run that in detach mode.
It says it. . .
Started the container. Um, you could do Docker logs. Um, let me actually see what the container name is: Docker container list.
Okay, so the name is "midnight. " That's actually the name. Copy that.
I'm going to do Docker logs for "midnight" node, and I can see recent synchronization. I'm also running this locally here, so I'm actually just going to go on Docker Desktop, and I can see my node is syncing and validating transactions. It will be participating in the block producer committee.
Thank you for joining me in this workshop! If you become a midnight testnet block producer, then I just want to say congratulations! Um, if you just watched the video, remember that there's a documentation version of the content presented here, so please scan the QR code or check the link in the description.
Also, we are always trying to improve our content, and I'm going to be personally looking at the comments and discussing people's feedback um within the Discord server. So if you have anything you like, don't like, or ways we can improve our content, leave a comment and also tell us directly in the midnight Community Discord server. You can join that by scanning the QR code on the screen or checking the video description.
Again, thank you very much! Thank you for your time, and I hope this was useful to you.