This video has been sponsored by Brilliant. As far as I can remember, I've always been kind of fascinated by liquid nitrogen, which is just this weird foggy liquid that's so cold that it can freeze things to the point that they can shatter. For whatever reason, I've also always wanted to be able to make it myself, just like how I'd seen it done on channels like Applied Science and Veritassium. And in early 2020, I actually ended up reaching out to Veritasium and buying the cryocooler that he used in his video. I also eventually got it going
where the first thing that I did was make some liquid air, which was technically about 80% nitrogen and nearly just as cold as pure liquid nitrogen. And at the time, I felt that this was good enough. However, in 2023, as I started working on more and more projects that were going to require liquid nitrogen, like the entire air series that I'm planning, where I turn air into things like alcohol, gasoline, and even a bomb, I started thinking about making it again. More specifically, I started thinking that it would be really cool if I could only
use my own homemade liquid nitrogen for all of these projects and for all of my future projects in general. And I ended up getting really fixated on this idea. The only tricky part though was that for this idea to work, I would need to be able to quickly produce a lot of liquid nitrogen, which unfortunately wouldn't be possible with that cryocooler that I had bought years ago. It also turned out that any commercially available system that was able to do this was shockingly expensive. Where even on Alibaba, the lowest price that I was able to
get for a cheap Chinese system was for $24,000, which was way more than I was ever willing to pay. Instead of just immediately giving up on this idea, though, I started thinking that it had to be possible to build one for cheaper. At the same time, I also slowly convinced myself that this was something that I would actually be able to do despite having basically no experience. And well, long story short, I decided to just go for it. So, I just went ahead and got started. And the first thing that I did was search the
internet for anything that I could find about making a massive liquid nitrogen generator. And unfortunately, I wasn't able to find anything. However, I was able to find several really useful videos of it being done on a smaller scale where besides the ones that I mentioned earlier by Applied Science and Veritasium, some notable examples were this one by Ben and Builds, this one by The King of Random, and this one by I'm Smoother. As an honorable mention, I also want to point out this one by Hyperspace Pirate, which I didn't see at the time because it
was posted shortly after I started this project, but I think it's really impressive, especially because it was done entirely from scratch using a bunch of old AC parts. With that being said though, after seeing all of this and after examining every commercially available liquid nitrogen making system that I could find, I was able to get a rough idea of what I had to do. I was also able to put together a rough plan of what I would need to build a massive one myself where the first major component was going to be something called a
membrane nitrogen generator that would allow me to generate pure nitrogen gas from air. The second would then be a massive cryocooler that I could then use to liquefy this nitrogen gas. And the third would be a really big insulated doer where I could then collect this liquid and ideally hold up to 100 L of it. Along with all of this, there would also of course be a bunch of wires, hoses, and miscellaneous parts and accessories to make it all run. But at least for now, I felt that the best idea was to just focus on
these three main components. And by focus, I mean that I had to somehow obtain them, which I knew was going to be both difficult and potentially super expensive. What did make things a lot easier, though, was that I actually already had a membrane nitrogen generator that I'd gotten from Veritassium when I bought his cryocooler. The only tricky part was that I had never tested it myself and I wasn't entirely certain that it still worked, but it seemed perfect for what I wanted to do. It was also extremely convenient that I already had it, especially because
even used, these things were apparently going for thousands of dollars. With that being said though, this then meant that I really only had to get my hands on a massive cryocooler and a huge doer where at first I was actually tempted to try and build them myself. However, after thinking about this for a long time, I realized that this was a completely unrealistic idea. And if I wanted this project to even have a chance of succeeding, I was going to have to buy these parts pre-built. I also decided to just keep searching online every day
where I was hoping that I would eventually find the parts that I needed and that they wouldn't be too expensive. It was then one painful month later when I stumbled onto this cryocooler which was normally meant to be used in an MRI machine and I felt that it was my best option. This was because, as far as I could tell, it was one of the most powerful cryocoolers that I could reasonably get, and it was at least several times more powerful than the little one I got from Veritassium. As an added bonus, it was also
theoretically capable of getting cold enough to make liquid helium, which is way colder than liquid nitrogen. And I started getting excited about the idea of using it for a future liquid helium project. There was one major downside though, which was that it wasn't exactly cheap, and it was about $5,600. However, from what I could tell, this was still a really good price because unlike every other one that I found, which was around the same price and heavily used or in unknown condition, this one was supposed to be brand new. In my opinion, this meant that
there was a much higher chance that it would work and that I was way less likely to be left with a giant and expensive piece of crap that may or may not be possible to repair. So, I just went ahead and bought it. And only a few days later, I received this really big and heavy box. I then started opening it. And up until now, part of me was honestly a bit worried that this deal was too good to be true and that I might have gotten scammed, especially because the seller had just joined eBay
and had zero feedback. Except that thankfully wasn't the case. This was because inside of it, there was in fact a cryocooler. And at this moment, I was both relieved and pretty excited. >> Yes. It's real. I was not scammed or I hope. I still don't know if it works, but it does look new. And it's also very heavy. But anyway, with this hopefully functional cryocooler in hand, I was officially $5,600 deep into this potential disaster of a project. And what I had to do next was sink even more money into it. So, I just popped
back onto eBay where my goal now was to get the last major piece, which was the large doer. And while looking for the cryocooler, I had actually found this one. That seemed pretty ideal. This was because just like the cryocooler, it was apparently brand new and it was at the very reasonable price of only around $1,100, which was extremely cheap for a doer this big. As an added bonus, it was also technically made for liquid helium, meaning that it was much better insulated than a typical liquid nitrogen doer. And at least in theory, it would
pair super well with the cryocooler and potentially allow me to make liquid helium in the future. The only downside with this doer was that it was apparently 30 years old, which really made me worry that it might have some major issues, and the seller provided no guarantees that it would actually work. This meant that just like the cryocooler, there was a decent chance that it was just a complete piece of trash that could end up being a total waste of money. However, at the same time, it was only $1,100, which was way cheaper than anything
else that I had found, and I decided to just go for it. It was then a few weeks later when I received this extremely large wooden box, which I quickly cracked open to reveal my beautiful duo. Huh. After that, I very carefully started taking apart the crate with the help of my favorite hammer. And once most of it was gone, I was able to use some 2x4s to very expertly unload it. I should also say that this probably wasn't the best way to unload it, but I felt that it was fine and I did put
a lot of effort into making sure that the doer wasn't damaged. But anyway, at this point, with the doer, cryocooler, and nitrogen membrane generator secured, I now had the three major components of the setup, which I thought was pretty exciting. The only unfortunate part was that I actually wasn't quite done buying equipment and I still had one last but extremely important thing to get, which was a compressor to run the cryocooler. This was also something that I had no idea that I needed when I first started this project. And this was mostly because I didn't
need one for the cryocooler that I got from Veritasium. And it also didn't seem to be needed in the applied science video. It turned out though that for those smaller cryocoolers, the compressor was just integrated. And for a massive one like the one that I had just bought, I was going to need a dedicated external one, which as far as I could tell wasn't going to be cheap. In fact, it was looking like it was going to be by far the most expensive part of the setup. And after searching for a really long time, the
best deal that I ended up coming across was for just over $10,000. In my opinion, this price was honestly kind of shocking, but at the same time, it was actually cheaper than pretty much everything else that I was able to find. And as far as I could tell, it seemed to be a pretty good price. Most importantly though, it seemed to be in really good condition. and it claimed that it was taken from a working environment. So, at least in theory, it shouldn't have had any major problems. However, just like everything else, there was of
course no guarantee. And at this point, I was genuinely thinking about just bailing from this project. This was because it was a lot of money to spend on something that might not even work. And if I considered all of the other money that I had already spent, this would now put the project at nearly $17,000, which was way more than I ever expected to pay. At the same time, though, this was technically still over $7,000 less than the cheapest Chinese system that I was able to find. And moreover, I just hated the idea of quitting
after already spending thousands of dollars and then being stuck with a useless cryocooler and a giant doer. So, I decided to take a few days to think about what to do where I knew pretty much the whole time that the smart decision was to probably just cut my losses. Except long story short, I decided to just go for it. I then anxiously waited and a couple of weeks later, this tiny little pallet arrived. And after slicing open all of the plastic and the packing stuff, I revealed the worst financial decision that I had ever made.
In fact, unlike with the Doer and the cryocooler, it was actually hard to feel excited at this moment. And looking back, I think what I felt was mostly regret. But with that being said, at this point, I now actually had all of the major components that I needed to make a huge liquid nitrogen generator. And with all of this, the first thing that I did was absolutely nothing. This was because every time that I even thought of starting this project, I was almost immediately overwhelmed with anxiety. mostly because I had basically no experience with any
of this, but also because I was really afraid of finding out that I had just wasted a ridiculous amount of money on a bunch of nonfunctional crap. So, out of sheer avoidance, I ended up just letting it all sit around and collect dust until one day I randomly woke up and I felt that I was ready to see just how badly I'd screwed up. I then just went ahead and jumped right into it. And I still wasn't entirely sure where to start, but I felt that the best first step was to figure out how to
mount the cryocooler to the doer. I also felt that the fastest way to do this was to just steal the design from someone else. And I spent a long time looking at the Chinese systems that I got a quote for, as well as any commercially available ones that I could get a photo or video of. Then when I eventually felt that I had a decent understanding of what I had to do, I took a bunch of measurements on the top of the doer and around the cryocooler mounting ring. And I reached out to my friend
Tommy to make a 3D model. He then quickly sent me back this, which I felt looked pretty good. And my basic idea was to get this made out of a giant slab of stainless steel and to mount it to the top of the doer. With this in place, I figured that I could then attach the cryocooler through the giant hole in the middle. And in the other holes, I would then hopefully be able to add some very important things like my nitrogen gas input as well as a pressure gauge and some safety valves. In my
mind, this seemed like a decent design. And after a few last minute alterations and 3D printing it a few times to make sure that it fit the cryocooler and that it lined up with all the holes in the doer, I had Tommy send it over to his friend to make it out of stainless steel. I then patiently waited and eventually I received this nice little package from Husky Machining and I quickly opened it up to reveal my beautiful plate. That's nice. The moment that I saw it, I was also both really impressed with how it
turned out and excited that it finally seemed like this project was starting to move. I mean, that was until I suddenly realized >> that I had accidentally screwed up the 3D model where not only did I make all of the holes around the center way too big and not get them threaded, I also somehow didn't ask for nearly enough. So, unfortunately, I was going to have to fix this. And I ended up spending the rest of the day drilling all of the extra holes, then tapping them to thread them and adding inserts to make them
the proper size. What also made things extra painful was that I tried to speed things up by using a drill to thread the holes, which was a terrible idea, and I ended up spending hours manually removing the broken tap. But either way, when I was eventually done with that, I was very happy with how the plate was looking. And what I had to do next, which will make a lot more sense in a minute, was build a small metal frame. This was also something that I thought would be really fast, except it ended up taking
me almost an entire day, mostly because I'm kind of terrible at welding. When I was eventually done though, what I ended up with was surprisingly nice, considering the disaster that went into making it, and I was pretty happy with how it turned out. But moving on, with my hopefully sturdy frame now built, I quickly dropped on my big steel plate and I added four bolts to loosely hold it in place. Then after that, I added a mounting ring that came with the cryocooler where I was very happy to see that all of the extra holes
that I had made actually lined up perfectly. And after tightening down all of the screws, I went and got my expensive and heavy cryocooler. I then very carefully lowered it in and it was really satisfying and it seemed to fit perfectly. It was also really nice to finally have it out of the box and sitting vertically like this. And at this point, I should probably say that the main purpose of this whole frame setup was to basically just be able to easily test out the cryocooler without having to involve that potentially broken doer. The only
unfortunate part with all of this though was that before I could even think about testing it out, I was first going to have to get that really expensive compressor going where I was genuinely super afraid that it was going to be totally nonfunctional and that it was going to completely ruin this entire project. However, long story short, it only ended up being kind of non-functional where to get it going, I did have to do a few things, like swap out this weird power socket on the front for a proper power cable and reressurize the system
to 200 PSI using high purity helium gas by following a kind of long and painful procedure that I had found in its service manual. At the same time, I also ended up having to replace the crusty water fittings at the bottom so that I could attach this massive water chiller to cool the compressor. And I had to bring in this 480 volt 3-phase transformer to power the compressor where both of these were originally meant for one of my air projects. And I had actually gotten the chiller for free. When I was eventually done all of
that though, I had what appeared to be a fully functional compressor, which was really relieving to say the least. And now I was finally able to get back to testing the cryocooler. And by that I mean that it was finally time to see if it would actually work or if it was in fact a giant piece of crap that may or may not even be fixable. But with that being said, there was only one way to find out. So I just immediately got started where the first thing that I did was connect a power cable.
Then after that I quickly added some gas fittings that I bought from the company that made the compressor along with a helium line. And this was because the first thing that I was going to have to check was whether or not there was still any pressure in the cryocooler where if there wasn't then well at least according to the company that made it this would likely mean that it had been infiltrated by air and moisture and that it probably wouldn't work. And I was honestly expecting the worst. However, I almost immediately heard a hissing sound
when I opened the valve, telling me that even after 7 years, it was still under pressure and that somehow [sighs and gasps] I had apparently gotten super lucky. >> That's good. >> With that confirmed though, I then quickly refreshed the helium in it by following a procedure that was very similar to the one that I used for the compressor. And when I was eventually done, I quickly got rid of the special fittings. I then went and got some really long and big helium lines, which I was going to use to properly connect the compressor to
the cryocooler. And I bought them from the company that made the compressor. What was also very important about these helium lines was that they were pre-charged with 200 PSI of helium gas which matched the pressure of the compressor and the cryocooler. This way when they were attached they wouldn't introduce any air or moisture which would contaminate the system and ruin all of the cleanup work that I just did. But either way, with all of this in place, in theory, the system was now ready to go. And to see if the cryocooler would actually work, all
I had to do was turn on the compressor. So, that was exactly what I did by just clicking the on button, and almost immediately, I was greeted with an interesting sound. Okay, >> this was also exactly what I was hoping for because it was very similar to the cryocooler sound that I heard in the background of some videos about MRI machines. And this was a very good sign that it was working properly. So far though, it still seemed to be around room temperature and to know whether or not it would actually get cold, I was
just going to have to wait. So, I just sat there and I patiently stared at it. And over the next 20 minutes, I could faintly see it turning white because frost was forming, which confirmed to me that it was definitely getting cold. This was then further confirmed when I tried touching it. And just by the sheer pain, I knew that it was down to at least 80 C orgative 112 F. However, this of course still wasn't even close to cold enough to make liquid nitrogen. And to help it out, I decided to insulate it a
bit by adding a small doer over the second stage of the cryocooler. This part was also in theory the part that got the coldest where it should have had no problem getting all the way down to near absolute zero. And I was really curious to see what would happen. More specifically, I really wanted to see if it could start liquefying the air around it. Because if it could, this would prove that it was capable of making liquid nitrogen, which forms at around the same temperature. However, even after an hour, nothing was there, and I was
honestly starting to get really worried. This was because it was very possible that the system was working well enough to get really cold and to free some moisture out of the air, but it was then failing to get cold enough to actually condense the air. Just for good measure though, I decided to let it go for another 20 minutes, and I was honestly starting to really lose any hope until I noticed >> that there was actually a bunch of liquid air already in the doer. I was about to give up. >> So, apparently I was
just super impatient and it just took a while for the whole system to cool down. And when I looked closer, I was able to clearly see some drops of liquid air. I then let it sit like this where I just slowly collected more and more. And in my opinion, this was extremely exciting, especially because it was doing it at a much faster rate than the small one I had gotten from Veritasium. What also made it even more amazing was that this second stage was supposed to have way less cooling power than the first stage, which
meant that the true liquefying capacity of this system was probably at least several times more than what I was doing here. With that being said though, I feel like at this point I should probably explain a bit about how this cryocooler was even working and how it was getting so cold. I should also say that I think the general idea is relatively simple where this cryocooler setup was basically just a little refrigerator or heat pump system that exploits the fact that gas gets hot when it's compressed and cold when it expands. where in this case,
the compressor over here was compressing the helium gas that I filled it with, which was causing its pressure to spike by about 100 PSI and for it to get really hot. However, it doesn't stay hot for very long because there's a cooling system in the compressor that allows this heat to be dumped into water and pulled away by the chiller. This is also very important because this then allows the system to push cooled but high pressure helium through this gas line and into the cryocooler where it's able to expand. This expansion then in turn causes
the helium to get really cold where it's able to quickly pull a bunch of heat from the cryocooler before getting pushed out into the return line. It then travels as a hot lower pressure gas back to the compressor where it gets compressed again and the cycle is repeated over and over where every time the cryocooler gets slightly colder and colder. In this case though, I only needed it to get down to at least liquid nitrogen temperatures, but as I mentioned before, it's supposed to be able to get all the way down to near absolute zero,
which I think is kind of insane. Also, I should say that this specific cryocooler that I'm using is a Gford McMahon or GM for short, and it's just one of the few common types of cryocoolers out there, where they all kind of work in a somewhat similar way. But anyway, after collecting it for about 40 minutes, I had what looked like a pretty decent amount of liquid air, and I was really happy with how things were going. I also decided to do a quick and kind of crappy experiment where I just lit a piece of
steel wool on fire and then I tried pouring my liquid air onto it. For some reason, I thought that because it was such concentrated air, it would burn a lot better. And I guess maybe it did slightly, but it wasn't nearly as interesting as I was hoping it would be. With that being said though, at this point I was extremely excited because apparently most of my fears were completely unfounded where both the compressor and cryocooler seemed to work perfectly. Now the only remaining question was whether or not the doer was actually functional. And well, long
story short, as far as I could tell, it probably was. This was because when I connected my vacuum pump to it, I was actually able to pull a really strong vacuum in the space between the outer wall and the inner chamber. More specifically, I was able to go all the way down to at least 1 * 105 mibar, which was pretty much exactly what I was hoping for. And I was very happy when I saw this. This was because at this level of vacuum, there would be a very strong insulating effect around the inner chamber,
which at least in theory would allow me to collect and hold liquid nitrogen in it without having almost any of it boil off. With that being said, though, what was more important than just pulling a vacuum was seeing if it could maintain one once I'd sealed it up and gotten rid of the pump. And well, it seemed to have no issue doing this. This told me that somehow, and by some sort of miracle, there weren't any leaks, which was honestly super surprising to me, especially considering how old this doer was. But either way, with the
doer apparently good to go, this meant that I could finally start putting together the whole system. So that was what I immediately started doing where the first step was to basically dismantle everything that I had already put together and to reclaim the mounting desk. I then quickly got rid of that welded frame and I dragged over the door which actually turned out to be a huge pain because it was way heavier than I remembered it. After a short struggle though, it was eventually in place and I quickly leveled it with some shims because my floor
is terrible and completely uneven. While I was leveling it, I also thankfully remembered that I had to clean the inside of the door because it was filled with a bunch of dirt along with a small dead lizard that it apparently made it here all the way from Florida. After carefully removing the lizard though and cleaning it out with a vacuum, I felt that it was looking pretty good. And what I had to do next was fully assemble the mounting plate. So, I quickly got started with that by first dropping on a gasket that I printed
out of TPU using my new 3D printer that was sent to me by Prussa. Then after that, I readded the cryocooler mounting ring along with all of its screws and I tightened it down. And I started adding all of the other peripherals where the first was some pressure relief valves. I then followed this up with an input for the nitrogen gas along with a little pressure gauge assembly and a large tri clamp fitting. And this will all hopefully make a lot more sense later on. With the plate now ready though, I then quickly brought it
over to the doer and I carefully placed it on top and I screwed it down tightly to seal it. It was also only at this moment that I realized that I completely forgot to put thread locker on all of the screws in the mounting ring, which was very important to keep everything airtight. So, I had to quickly take them all out and properly seal them. With everything now securely in place though, I then went and got the surprisingly heavy cryocooler, which was around 50 lb. And it was honestly a bit nerve-wracking to carry it up
the ladder. I also didn't exactly feel super safe or comfortable having to lean over with it so that I could carefully lower it into the plate, but thankfully I was able to do it without any major disaster. With it loaded on, I then fastened it with some screws that I actually remembered to cover with thread locker this time. And with it securely in place, I was starting to get pretty excited. This was because so far things actually seem to be going together as I planned. And now there were just a few final things still left
to do, like adding a large sight glass to that tri clamp fitting from before. I also quickly lowered in a small strip of LED lights through a port on the cryocooler and together these would allow me to see inside the door while it was running which I felt was very important. Then after that I just quickly reattached the helium lines along with the power cable and I carefully shoved a huge siphon tube assembly down the valve that was connected to the pressure gauge. This part was also especially important because it would allow me to actually
take the liquid nitrogen out of the doer. I mean, assuming that I did end up making any. Moving on though, at this point, the main part of the system was officially done and the only thing that I still needed was a nitrogen source where for that I had put together this cute little setup. At first, it also might look a bit complicated, but it actually wasn't too bad. Where the main part of it was just my membrane nitrogen generator. This thing over here was then just an air compressor, which would be my main source of
gas. And the basic idea was that it would push high-pressure air into the nitrogen membrane, which was filled with a series of hollow polymer fibers. These polymer fibers were very special though because they were selectively permeable to oxygen and water vapor where they would allow both of these gases to pass through their walls at a much faster rate than nitrogen. The result of this would then be a concentrating effect where the nitrogen in the compressed air would slowly get more and more concentrated as it traveled up the tube and the oxygen and water vapor would
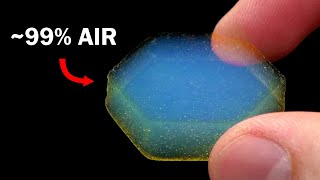
get rejected out of these holes at the bottom. In theory, it was also supposed to be possible to get the nitrogen concentration all the way up to nearly 100% which was way better than the 78% that's in normal air. And in my opinion, it's really amazing that a simple looking tube can even do this. With that being said though, once the nitrogen did get to the end of the tube, it was then just fed into a regulator to knock down the pressure, followed by a gas flow meter, which would tell me how much of it
was coming out. What was also kind of funny was that up until this point, I had actually never tested if the tube even worked. So, I decided to quickly do that now by opening up the gas flow and by holding an oxygen meter to the end of it. I was then very happy to see that it quickly went down to a nice reading of zero, which told me that all of the oxygen was gone and that it should have been effectively 100% nitrogen. With that thankfully confirmed, I then went ahead and connected the flow meter
to the nitrogen input on the setup. And at this point, it was finally ready. What I had now should have been a fully functional liquid nitrogen generator. And after spending probably way too much time, money, and effort on putting this all together, I could finally test it out. And I was feeling both excited and nervous. >> Okay, should be good. With that being said, I then just went ahead and got started by first opening the valve on the siphon tube, followed by the nitrogen regulator. This then caused pure nitrogen gas to start flowing through the
system, where the goal was to completely replace all of the air that was currently in the doer. To monitor this, I also just occasionally checked the output with the oxygen meter. And when it eventually started reading 0%, I closed the siphon tube valve, but I left the nitrogen gas input open. This then caused the pressure in the doer to slowly rise where I let it pressurize just up to the rating of my lowest pressure relief valve, which was at around 1 PSI. This, of course, wasn't actually very much pressure, but it should have been enough
to keep out any air or moisture. And at this point, it should have been good to go. So, I turned on the compressor. And that's it. >> Now, at least in theory, all I had to do was just leave it like this. And if it went anything like my earlier test, it would eventually start generating some liquid nitrogen. I also knew that this was going to take a while to happen, especially because this time it was first going to have to cool down this huge doer. However, despite knowing this over the next few hours, I
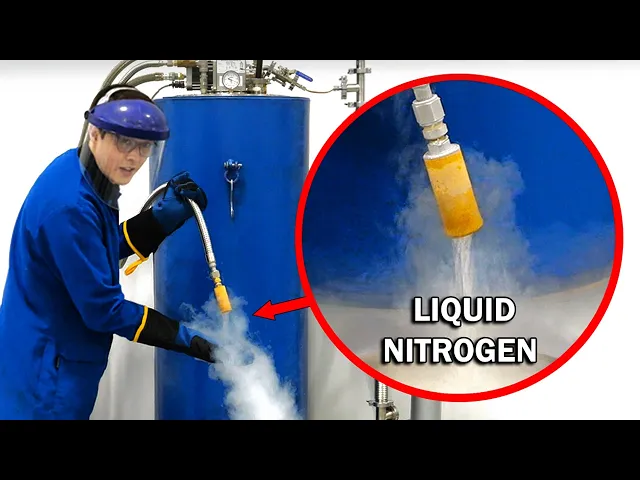
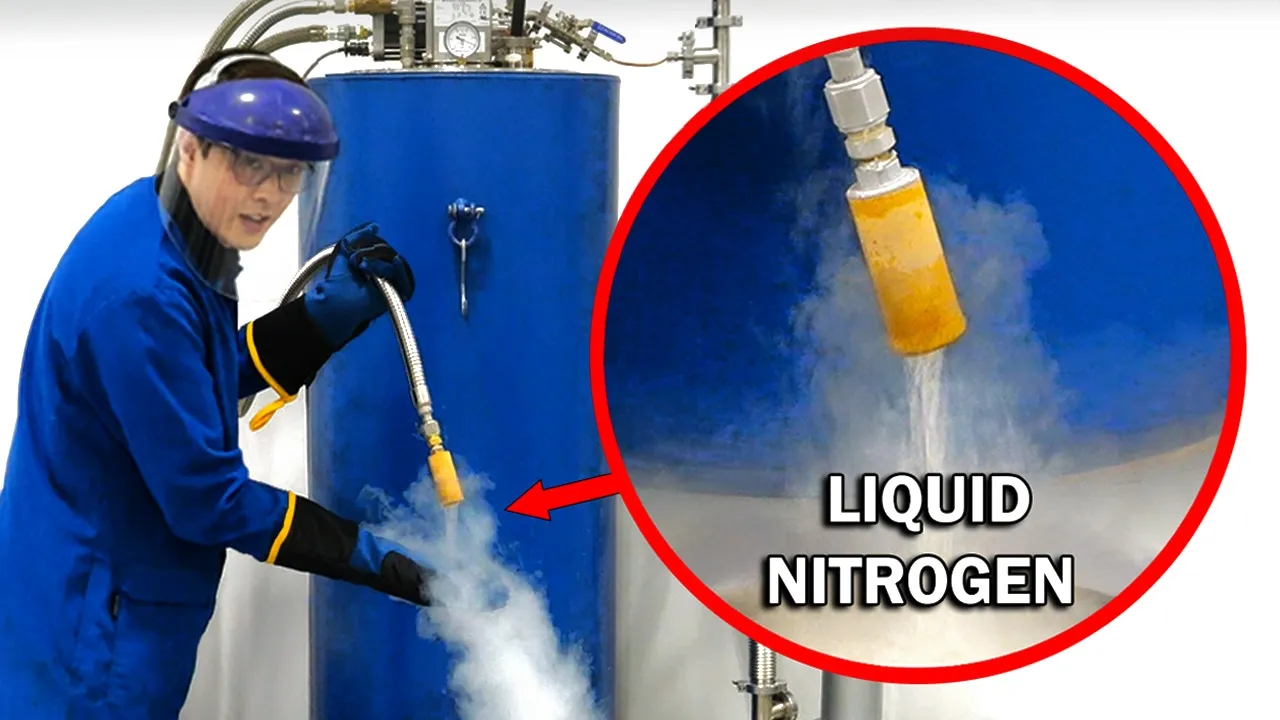
still slowly got more and more concerned when I didn't see anything condensing, and I genuinely started worrying that maybe the doer was in fact trash or that maybe I'd somehow messed up the cryocooler or the compressor while I was putting it all back together. It turned out though that I was mostly just really impatient and freaking out for no reason because it wasn't too long after this that I started seeing the first drops of some beautiful liquid nitrogen. >> Yes, it's actually condensing it. Then only an hour later, it was basically raining liquid nitrogen in
there, which was really exciting to see. And I thought that it was kind of satisfying to watch it all fall and crash on the bottom of the doer. At the same time, though, I couldn't help but get kind of concerned when I noticed that none of it was collecting, and it seemed like it was all just instantly boiling off. What also really didn't help was that this didn't seem to change even after an hour of waiting. And this made me really worry again that the doer might have actually been nonfunctional or something where if that
were the case, it would have never been able to collect anything. Long story short though, I was again just really impatient because it wasn't too long after this that a pool of it started forming at the bottom, which was really relieving to see. >> Yes, it's finally collecting something. >> From there, this pool then grew relatively quickly where only several hours later, I already had what looked like a decent amount. And at this point, I was feeling pretty excited. >> Wow. That Okay, there there's a good amount there. I mean, it's it's going now. The
only unfortunate part was that it wasn't too long after this when I looked over at the pressure gauge and I noticed that it was at zero instead of one, which told me that the cryocooler wasn't getting nearly enough gas. So, I looked over at the nitrogen generator to see what was happening, and I noticed that the flow meter was apparently maxed out with a reading of nearly 6 L per minute, which wasn't exactly ideal. This was because this nitrogen generator was only able to provide pure nitrogen at up to 4 L per minute. And this
meant that the gas coming over now was contaminated with oxygen and water. The exact level of contamination was also completely unknown, but as far as I could tell, it most likely wasn't that bad, and the nitrogen purity was still probably above 95%. In my opinion, this was something that I was able to tolerate for this first run, so I decided to just leave it like this. But in general, this was definitely something that I would have to address later on. With that being said though, over the next day or so, the liquid level then just
continued increasing and it slowly got hazier and hazier because of the water making it past the nitrogen generator. I was then eventually able to fill the entire bottom part, which was really exciting because this should have been about 30 L. And when this happened, I decided to turn everything off. This was mostly because at this point it was pretty clear that the system did in fact work, but also it was because what I had now was more than enough for the one last and very important thing that I still had to test. This, of course,
was to see if that siphon tube that I had put in earlier would actually work and whether or not I would actually be able to get any of this liquid nitrogen out of the doer, where if I couldn't, then well, it would kind of be a huge disaster. There was only one way to find out though, so I just got started with it by first attaching this large insulated extraction hose that I had gotten on eBay for a really good price. Then after that, I just cranked up the nitrogen flow even more and I blocked
the 1 PSI relief valve. And the goal was to slowly increase the pressure inside the doer. While I was waiting for it to increase, I also added a bowl. And I went and changed into some proper protection, which included some sealed boots and a face shield because I was honestly a bit worried that this whole system might explode. This was because even though I was only going to be raising the pressure by maybe several PSI, I had no idea if this door was actually rated to take any pressure at all. And when I had asked
the company that made it, they didn't recommend it. More specifically, they said that they didn't necessarily design their doers to have much more than maybe 5 PSI in the reservoir, which really did not inspire confidence, especially with a secondhand 30-year-old doer. With that in mind, though, I then just let the pressure slowly climb. And when it eventually got to around 2 PSI, I decided to try opening the siphon. And I was expecting to hear something or to see some cold vapor coming out. Except literally nothing happened. This told me that the pressure was likely still
too low and that I was going to have to push it a little more, which I wasn't exactly excited about. I didn't really have a choice though, so I just closed the valve and I let it climb. And as it increased, I slowly got more and more nervous. Then when it eventually got to a little over four without exploding, I felt that this had to be good enough. And I opened the valve again. This time I was also instantly greeted with a kind of horrible whistling noise which told me that the liquid nitrogen was actually
moving up the siphon tube. Then not too long after I started seeing some nice and cold vapors coming out and I was really hoping that I would soon get an amazing rush of liquid nitrogen that would just spray out the end of the hose. However, that unfortunately did not happen at all. >> [laughter] >> and it wasn't nearly as impressive as I had imagined. I guess on the positive side though, it was actually coming out, which told me that the siphon tube was working, and it did kind of speed up over the next few minutes.
I was then eventually able to fill this entire bowl with liquid nitrogen, which was about 3 and 1/2 L. And when I saw this, I was feeling pretty excited. This was because finally after working for what felt like forever on this project, I actually had a bunch of my own homemade liquid nitrogen sitting right in front of me. What also made things even more exciting was that this was only a fraction of what was still in the doer. And I felt that I had to celebrate this by freezing something where the first thing that I
came across was this old orange. I then patiently waited for it to fully solidify and I spent the next several minutes having way too much fun smashing it and turning it into a crunchy orange dust. When I was eventually done celebrating though, I quickly cleaned up my huge mess and I started draining all of the remaining liquid nitrogen into an empty 30 L doer. I was then able to completely empty out everything that I had made, which nearly filled this entire doer. And at this point, I was feeling pretty good about my setup. This was
because overall, it clearly worked. And on top of that, I was actually able to make a decent amount of liquid nitrogen at a rate of about.58 L an hour, or around 14 L a day. This was also way better than I ever expected for my first run where it was already kind of close to the 20 L a day advertised by those Chinese systems. And honestly, I was really tempted to say this was good enough. However, at the same time, there were just way too many glaring problems that I couldn't let go of, like the
fact that the liquid nitrogen was being heavily contaminated by oxygen and water vapor, and that the extraction system was almost comically slow. There were also some other major things that I really didn't like about the system in general, especially the fact that I still wasn't even close to maxing out the cryocooler. And I felt that I had to do some final fixes. So again, I ended up taking the whole thing apart and I immediately started working on all of the random changes that I wanted to do. And after about a month of effort, this was
what I ended up with where for the most part, it still kind of looked the same. However, there were some pretty major upgrades where the nitrogen generator was now massive and everything on top of the doer was rearranged and a few extra things were added. When I tested it out, it was also very obvious that it was way better than before, where the first thing that I noticed was that it was producing a lot more liquid nitrogen. In fact, it was actually making over one liter an hour, which was nearly twice as fast as it
was before and honestly way better than I ever imagined. And at this point, I was definitely maxing out the cryocooler. At the same time, everything that I was making was crystal clear with no sign of fogging or haziness. And over a few days, I was actually able to collect nearly 100 L of beautiful liquid nitrogen, which was the obscene amount that I only dreamed of making when I first started this project. I should also say that this was all only possible thanks to this completely new and massive nitrogen generator that I put together, which was
able to output around seven times more nitrogen gas than the old one. What was probably my favorite upgrade though was swapping out the simple sight glass for this new probe lens and phone setup, which along with this new powerful flashlight at the back allowed me to easily see inside and to record this way higher quality video. It also allowed me to easily monitor the liquid nitrogen level remotely from my computer, which may or may not be a bit overkill, but I found it to be pretty useful. There was just one kind of sad part with
this whole new setup, though, which was that despite making the siphon tube way bigger and swapping the extraction hose to one with a much higher flow rate, it still didn't end up blasting out like the fire hose that I was hoping for. I mean, to be fair, it was definitely way faster than before, where I was actually able to fill this entire bowl in around 2 minutes, which was so much better than the nearly 12 minutes that it took last time. When I did a sidebyside comparing the two, the difference was also super obvious. And
for the most part, I'm happy with how it is now. Overall, I was also very happy with how this entire project had turned out. And after transferring all of the liquid nitrogen to my 30 LER, as well as to a new 60 L doer, I finally felt that I was done. This was because at this point, I had successfully put together a huge liquid nitrogen generator that actually outperformed the Chinese systems that I was originally looking at. and that at least technically did end up being cheaper. At the same time, it was also basically able
to do everything that I wanted and dreamed of like storing a 100red LERs at a time. And there really wasn't much else that I wanted to change or fix. I mean, besides the slight problem that there did end up being a small leak in the doer, which means that every time that I want to run the system, I'm gonna have to run the vacuum pump at the same time. And while this is mostly just a minor inconvenience, I should probably try and fix this in the future. Until then though, I'm just going to focus on
the fact that from this point on, I can officially use only my own homemade liquid nitrogen for all of my future projects. In my opinion, this is also really exciting, especially because I have a bunch of really interesting projects lined up, like that entire air series that I mentioned earlier, as well as a couple that I'm not ready to talk about yet. Ah, >> it's so bright. [laughter] What is this? What I'm probably most excited about though is that this now puts me one step closer to my dream of recreating this superconductor demo that I
did years ago, except with only things that I've made. At the time, only the superconductor and the ferrofluid were mine. But now I could add liquid nitrogen to the list. And this meant that the only things left to make were the glass dish and the magnet, both of which I'm currently working on. I'm also hoping that I'll be able to finish all of this by next year, and that it won't be too horribly expensive. But if it is, I should still be okay thanks to all of my amazing YouTube members and patrons, and because of
Brilliant, the sponsor of this video. I've been using Brilliant for years now, and with tons of lessons in things like math, science, and computer science, I still think that it's one of the best ways to learn something new. This is especially because all of their courses are fully interactive, which makes it feel a lot more like a game and not like you're just watching a lecture or reading a textbook. On top of that, what's also really nice is that every course is chopped up into a bunch of smaller lessons, which has allowed me to go
through each one at my own pace. And this has been particularly helpful for me with some of their more complicated topics. For example, I just recently started their course on digital circuits, which covers everything from basic logic gates all the way to building simple computers. And I found that being able to slow things down and take breaks has been really useful. Also, even though this is a complicated topic that I know very little about, it has still been a lot of fun and I've still been able to progress even when I only have 5 minutes
here or there to work on it, which I think is really nice. But anyway, as I've said many times before, I personally really like Brilliant. And if you're looking for a fun and easy way to learn something new, I definitely recommend checking them out where right now you can actually start learning on Brilliant for free by going to brilliant.org/nile red by scanning the QR code on screen or by clicking on the link in the description. On top of this, Brilliant has also given all of our viewers 20% off an annual premium subscription, which will allow
you to have unlimited daily access to everything they have to offer. But with that being said, I hope you enjoyed the video and I hope to see you next time when I turn air into alcohol. As usual, a big thanks goes out to all my supporters on Patreon. Everyone who supports me can see all my new videos at least 24 hours before I post them to YouTube. You'll also get access to all the older videos that I had to take down. And if you support me with $5 or more, you'll get your name at the
end like you see here.