In this complete game development course you will learn how to develop a variety of games using JavaScript Frank's courses are topnotch and he has a really creative way of presenting things you are going to love this course hi coders in this class we will use HTML CSS and JavaScript to build nine separate game development projects I will write and explain all the code from scratch line by line using just plain vanilla JavaScript no Frameworks and no libraries we will start by learning individual 2D game development techniques on smaller Standalone projects and once we covered everything
we apply all of them to build a simple mobile game simple point and shoot game and a more advanced fast-paced 3D s scroller with precise keyboard controls and special visual effects my name is Frank and I'm a front-end web developer if you want to learn even more about Game development and creative coding you can check out my YouTube channel in this course we will learn everything you need to know about sprite animation we will write a JavaScript code that handles seamless endlessly scrolling Parallax backgrounds we will learn how to extend JavaScript classes to create a
variety of enemy types with different visuals and different behaviors I will show you how to implement State design pattern to manage player States and special Abilities we will learn how to use Collision detection by color collision between circles and between rectangles we will add different particle effects and many other things this class is made out of nine separate Standalone projects and a couple of special lessons so if you already know some of these techniques you can skip around this class is not for complete beginners but if you are already comfortable with the basics of JavaScript
and you understand Functions for Loops objects and arrays come join me and let's build some games in the first class we will explore two different JavaScript techniques you can use to animate Sprite sheets and we will build this project where you can choose different player animations from the drop down we are giving away a lot of free art assets you can download them in the video description and you can use them to follow along with this course for more beautiful game art let's visit This website now let's do a quick JavaScript setup I will show
you how little code you need to animate something on canvas I create a custom variable called canvas that will hold a reference to my actual HTML canvas element I created in index HTML I point JavaScript towards it using get element by ID and I pass it ID I gave it canvas one constant variable I call for example CTX shortcut for context is equal to this canvas variable from line one dot Get context and I pass pass it 2D I could also pass it webg here which would give us access to a completely different set of
drawing methods but that's for another video now I have all canvas 2D drawing methods stored in my custom CTX variable and I can call them from here for example CTX fillrect will call a method to draw a rectangle on canvas if I conso loog CTX we can inspect this object it has some properties which basically are Global canvas settings Such as fill style that says color of shapes we draw or font which sets size and font family of text we draw on canvas this tutorial will be focused on sprite animation we want to learn how
to create animated characters for games so we are most interested in building canvas draw image method which sits right here I will explain everything you need to know about draw image method and it's three versions in a minute it's easy don't worry about it before we do That I will quickly finish canvas set up to make sure we have correct scaling I need to set canvas width and canvas height by default canvas will be set to 300 * 150 pixels and our drawings can come out distorted that's why I will manually set it to 600
* 600 the same values I gave it in style CSS I create a custom variable called canvas with I will use capital letters here to make it clear this is a global variable I set it equal to Canvas from line one dot width And I set it all to 600 same width I give it in style CSS I do the same for canvas height also 600 now that we made sure scaling is correct let's bring an image into the project in this tutorial I want to show you two different ways you can animate Sprites very
simple one for beginners and then more advanced more complex and flexible way where you can just run commands like run jump sit and it will play the correct animation for us when You know both you can decide which one to use when you are building your games I want everyone to get the same result that's why I will be giving away this animated spr sheeet for free today to bring image into JavaScript project I can just declare a custom variable I call for example player image and I set it equal to New Image like this
this is a built-in image class Constructor it will create HTML image element same as you would create if you Put image tag IMG tag in index HTML markup we can append it to our web page if you want but today we will just use it to store that spread sheeet image for us so that we can animate it with a JavaScript I need to give it source so player image variable from line six. SRC and I set it to path to my Sprite sheet your path might be different it depends on how you organized your
project files let's animate something on canvas I create a Custom function called for example draw frame actually let's call it animate because this is our animation Loop let's make sure that's clear inside animation Loop first I want to clear old paint from canvas between every animation frame so I take CTX variable from line two do clear rectangle built-in method it expects four arguments to specify what area on canvas we want to clear I want to clear the entire canvas so from coordinates 0 Z to Canvas width canvas height now we can draw I will just
test if everything works by drawing a simple rectangle at position 50/50 and I give it width and height of 100 pixels now I can call a request animation frame built-in method which will simply run a function we pass to it it will call that function once if I pass it animate the name of its parent function from line nine it will just run Over and over create an animation Loop so we declared animate I also have to call it like this and we have a black rectangle drawn on canvas if we don't specify fil style
color of shapes on canvas always defaults to Black it looks like a static image but it's actually animating the same rectangle over and over I can simply prove it by creating a global variable called X I set it to zero and here on line 12 I replace hardcoded value with this variable and Every time animation Loop runs I increase X by one I told you you don't need much code to animate something on canvas well done you are a programmer now see you later okay there's a bit more I can show you let's put it
back and let's use built-in draw image method to draw our Sprite sheeet on canvas draw image method is a bit special you can pass it three or five or nine arguments depending on how much control do you Want to have over the image you are drawing the first argument is always the image you want to draw so I pass it player image variable from line six then I pass it X and Y coordinates where on canvas I want my image to be drawn if I pass it zero for x and zero for y it will
be drawn from the top left corner of canvas coordinates 0 0 it will also keep the image at the original width and height the Sprite sheet I'm using has 10 rows and 11 Columns of Animation frames it's many times larger than my canvas so now we can only see this small part 600 * 600 pixels in the top left corner of my spreadsheet it's 600 * 6 100 because that's the size I set my canvas to so this is the version of draw image with only three arguments it works and you can change X and
Y coordinates to move your image around but you would need to resize your images using some other program such as Microsoft Paint or photoshop but you Don't have to do that because draw image also accepts five arguments that's its second version if you pass it five arguments the fourth argument will be width and fifth argument will be height so we are now able to scale the image up and down and we can also stretch it vertically or horizontally if I pass it canvas width and canvas height it will stretch the image to match my canvas
area 600 * 600 pixels and since the image is not the same ratio as my canvas You can see the image is stretched just a little bit let's remove the black rectangle by commenting out line 11 I can pass any values as width and height and JavaScript will just stretch my image based on these values you can also change X and Y to move the entire image around the final third version of draw image method accepts nine arguments this gives us the most control over the image the first argument again is the image you want
to Draw the next four arguments determine rectangular area we want to cut out from the source image source X Source y Source width and Source height and the last four arguments will tell JavaScript where on our destination canvas we want to draw just that cropped out part on two destination X destination y destination width and destination height these last four values basically work the same as these four values in the previous draw image call I showed You the only difference is they are not used to position and stretch the entire image but just the area
we cut out using these arguments I comment outline 12 but I will leave it here for a reference and on line 13 I will add Source X Source y Source width and Source height arguments and I will use them to cut out only one dog at a time one frame from my large spreadsheet so these four values determine area we cut out from the Original Sprite sheet and these four values determine where on canvas we want to place that cutout piece of image onto if I set Source X to Zero Source y to zero Source
width to 200 Source height to 200 we are cutting out square 200 * 200 pixels from the top left corner there is nothing in the area if I change it to square 400 times 400 pixels we can see part of our Dog I can put any values here and cut out any chunk of the original Sprite sheet I want I can also scale it stretch it I can do whatever I want here I create a global variable called Sprite width let's have a look at our Sprite sheet if I take width of the entire file
and divide it by number of columns I get width of one frame my spreadsheet is 6,876 pixels wide and it has 12 columns 6,876 divided by 12 is 573 I will use 575 for now because I made the last frame a bit smaller when assembling my spreite sheet in Photoshop and there's some margin that snuck in sometimes when you see that your animation is moving sideways when it shouldn't try to fix it by adjusting width and height by small pixel amounts and and watch what happens I will show you a bit later what I mean
it's simple you can just ignore it for now Sprite Height or height of a single frame will be height of my entire spread sheet which is 5,230 divided by the number of rows we have 10 animations 10 rows so 5,230 ided by 10 is 523 on line 15 I can replace Source width and Source height with Sprite width and Sprite height variables I just calculated and now we are cropping out exactly one frame from our Sprite sheet and in destination width and Destination height instead of stretching it to cover the entire canvas I can also
use Sprite width and Sprite height variables here and we are drawing the frame at its original size if you are still not clear what each of these individual arguments past to draw image method does feel free to play with it change the values and see what happens it's quite straightforward once you get used to it here I'm giving it an image I want to draw these four values specify Rectangle area to crop out from the original large Sprite sheet and here I'm telling it where I want that cropped out piece of my Sprite sheet to
be displayed on canvas if I set source x coordinate to 1 times Sprite width I am jumping one frame as this number increases I am moving to the right jumping by the amount of sprite width this way I can display my animation row frame by Frame when this number gets too high there will be no frame there eventually so Source X argument allows us to cycle through sprad sheet horizontally if I want to swap between different animations the way our spread sheet is structured I have to travel through it vertically we have Source y argument
for that again starting from Top would be zero times Sprite height variable from line nine and that will give me the top Row in this case we have idle animation there 1 * Sprite height is row two jump animation then there is full animation running and so on traveling through this spread sheet vertically along the Y axis switches between different animations and we do it by changing Source y argument traveling horizontally Cycles between individual frames of these animations and can be done by changing value we pass as Source X argument instead of manually changing Numbers
like this let's output it to variables I create variables called frame X and frame Y and I set them to zero in initially then I just replace hardcoded zeros inside my draw image method with frame X and frame Y and now I can swap between animation frames by assigning different values to these variables frame X Cycles through frames of each animation horizontally frame y swaps between different animations it travels through my Sprite sheet Vertically now let's cover a very simple way you can animate your Sprites and then I will show you proper Advanced scalable technique
that is suable for both small and larger game projects the simple way is this we know that frame X variable Cycles through our spread sheet horizontally first row in our spreadsheet is Idle animation it has seven frames inside animation loop on line 18 I can say if frame X from line 10 is less than 7 increase frame X by 1 Frame x++ else meaning when it's equal or larger than seven reset it back to zero you can notice two things our animation is blinking and it's going very fast let's deal with it first frame is
zero so last frame is actually position six if I change this to six the empty frame is removed and blinking is gone on line 11 I can just change values of frame y and we are animating different roles in The spread sheet problem comes when I get to frame y4 which is row five we are starting from zero this animation has 11 frames but I'm cycling only until frame six so we are not playing the entire animation when I get to this row we have a problem again sitting animation has five frames and we are
cycling through more frames here so now it's blinking because we are including some empty frames to get this to work properly Every time we want to swap between animations we have to change frame y value on line 11 but also this hardcoded number six on line 18 ideally it would have to be a variable that always changes to the correct value that reflects the number of frames for each animation row depending which one we are animating right now I would solve it by having variable called for example Max frame I would slot it here and
every time I change Frame y variable I would change value of that Max frame variable from six to whatever value we need here to display all frames so 10 for this row and four for this row since we are animating from frame zero animation is going very fast to slow it down we can use this simple trick I will create a lead variable called called game frame and I set it to zero on line 22 inside animation loop I take this game frame variable and for Every Loop we increase it by one so now game
frame is endlessly increasing as our animation Loop runs over and over on line 19 I create an if statement let me just write it and I will explain it when we see the whole thing I say if game frame modulus percentage symbol something question marks for now is equal to zero only then increase frame X on line 13 I create a custom constant variable called stagger frames whatever value I give it it will slow down Animation by that amount let's try five on line 20 I say if game frame modulus stagger frame is zero only
then increase frame X modules operator percent symbol is also called remainder operator it returns remainder when we divide the first number by the second let's say game frame is 17 and Stager frames is five 17 modulus 5 is two because 17 divided 5 is three that gives us 15 and remainder to 17 is 2 remainder operator simply divides the First operand by the second one and returns the remainder here I'm checking if the remainder is zero game frame is ever increased in number and stugger Frames is always five this statement will return remainder zero and
be true every five frames so because I set stagger frames to five this code Block online 20 will run every five frames slowing down our animation five times new frame in our spreite sheet will only be served every Time the main animation Loop runs five times I can also slow it just by two zero here will stop animating the higher the number you use here as stagger frames the slower the animation will be let's leave it at five for now I think it looks good for most animations as I said when I change frame y
to four if I want to display all frames in my animation I also have to change six here on line 21 to number Nine for shorter animation rows like this sitting animation it has only five frames so I have to change this number to four so now we have a way to swap between animations but we always have to change two values let's refactor this code and let me show you more advanced sprite animation method that allows us swaping between different animation states by changing just one value we are venturing into a bit more advanced
territory if you are New to JavaScript don't worry if it takes you a bit longer to understand what I'm about to show you it becomes easier with practice we all started somewhere I delete code between lines 20 and 23 we used it to cycle between animation frames horizontally in this more advanced method we will do it differently I set frame y to zero that's my top row idle animation I also delete lines 17 and 18 they are commented out anyway let's clean this Up inside animation loop on line 17 I create a Le variable called
for example position its job will be to cycle through horizontal Sprite sheets but in a different way we will need this later I take a game frame variable from line 12 this variable is increasing over and over on line 20 as animation Loop runs I divide it by stagger frames variable from line 13 and I wrap all of this in math. floor To get rid of potential decimal points I want this value to be only integers whole numbers without decimal points then I take this entire value and I do remainder operator and six six is
here because I'm doing idle animation which has six frames counting from zero this line of code is not the easiest thing to wrap your head around I said this would be slightly more advanced don't worry if you're struggling to read this this is not beginner level JavaScript anymore What's Happening Here on line 17 game frame divided by stagger frames means we will have to increase game frame five times before we get to one because as game frame variable increases 1 / by 5 is 0.2 2 / 5 is 0.4 3 ided 5 is 0.6 game
frame 4 divided by stugger frames 5 is 0.8 and only when we get to game frame 5 divided by stagger frame 5 we get value of one here so as game frame cycled from 1 2 3 4 5 by dividing game frame by stagger frames we got 0 0.2 0.4 0.6 and 0.8 all of these values were turned into zeros because it's wrapped in math. floor it took five animation Loops five increases of game frame variable to get the number one here when this is one one modulus 6 is 1 because 1 ided 6 is
0 and remainder from 0o to 2 one is one basically this value increases by one every time game frame variable increases by five slowing in or stugger in our animation five times making it five times slower we are using math Floor removing decimal points from these divisions for the first five frames we get Zer modulus 6 which is zero then this calculation increases to one for the next five frames 1 modulus 6 is 1 then 2 modulus 6 is 2 3 modulus 6 is 3 and so on position variable increases until it reaches 6 6
modulus 6 is 0 7 modulus 6 is 1 8 modulus 6 is remainder 2 and so on this calculation makes sure position variable only Cycles between zero and this number I appreciate that This calculation is quite complex this is not course in advanced mathematics and logic so for now just take this little formula here and believe me when I say it works don't worry about understanding it completely we are focusing on JavaScript today being able to understand this calculation has nothing to do with your ability to be good with JavaScript these are two unrelated skills
on line 18 I take frame X Variable from line 10 and I set set it equal to Sprite width from line 8 and I multiply it by this position variable we just calculated on line 17 as I said this position variable will cycle between zero and number we put here first row in my spreite sheet has seven frames starting from zero frame X will be cycling through these values horizontally on line 19 inside the draw image I remove Sprite width because width of our Sprites is already Accounted for inside my frame X variable on line
18 I misspelled stagger frames on line 17 when I fix this small typo we can see this is working and we are animating Row one in our Sprite sheet don't feel that you need to fully understand this calculation on line 17 to be good at JavaScript I did not come up with this formula tricks like this are usually figured out by someone much smarter than me we can just use them and they will Work for us I could have achieved the same result using a bit more code and simple more readable calculations this is more
complex and hard to read for beginners because it's such a short calculation it's kind of a neat trick to use this but it's not a necessity I like it because it makes the code look clean and compact I can still change value of stagger frames variable on line 15 and it will slow down or speed up my animation this is really nice code base To animate any spr sheet but it can be done even better to swap between animations I still have to change frame y variable on line 11 and I have to make sure
that this value on line 17 sets the correct amount of frames per row to make sure we don't have any empty frames or that we are animating all available frames from that particular row depending on what animation we are currently drawing I would like to have code structure like This some kind of data array called for example Sprite animations that contains objects each object's name in this array is the same as the name of that particular animation it holds data for so for example idle jump run and so on each of these objects can contain
additional data for example for irregular spr it can be pixel values for width and height that can be different for each frame and mainly it will contain locations array this location Array will hold a set of JavaScript objects and each of these objects will have X and Y property each of these objects represents one frame in that particular animation and its X and Y properties will be coordinates we need if we want to use draw method to cut out this particular frame from the Sprite sheet that way we can access any frame we want Anytime
by directly targeting positions in this array I can just cycle through this location array with a for Loop and it will always play the entire animation for me without the need to set up number of frames each animation has each time it will know how many frames that animation has based on the number of objects in this location array each object will be one frame so how do we create a data structure like this with JavaScript and how do we map it correctly to match our spreite sheet let me show you on line 14 I
create a custom Constant variable I call for example Sprite animations and I set it equal to an empty array this will serve as the main container to hold all data for all my animations I will create another variable I call animation States this will also be an array and I will use it as a place where I can create kind of a simple map that will match my dock spreadsheet I will go through my spread sheet row by Row from top to bottom for every animation Row in my spreite sheet I will create an object
like this with two properties name property will be whatever I want to call that animation row so for the first row let's call it idle and I will also need frames property I check my sprad sheet and I see that idle animation is made out of seven frames the second row I will call jump animation and it has seven frames I will Create an object like this for every Row in my Sprite sheet going from top to bottom but before I do that let's check if it works on line 15 I have this animation States
array which currently contains two objects one for idle and one for jump animation I could have also given it more properties but this spread sheeet is not irregular so name and Frames properties is all I need to map coordinates for each animation frame I take animation States array and I call Buil-in array for each method for each method executes provided function once for each array element I will do es6 syntax here this is so-called Arrow function it's a simplified syntax to write function expression in JavaScript I can skip function keyword here and I just create
brackets where arguments I pass to this SCB backun function go with for each the first argument we pass to it is just a variable that will represent each Element in the array as we are cycling through it I will call it State as for each method runs state will first represent this object then this object and so on if we add more I'm simply saying inside this callback function I'm about to write refer to this objects as state so this name property can be accessed as state do name for for example I will also pass
it second argument I call index index is another built-in feature of for each array Method it simply stores number of each element as we cycle through the array so this first object will have index zero this will have index one and so on I expect you understand basic array manipulation with JavaScript and fundamental methods like for each but I still wanted to explain in case we have some beginners here so this callback function will run for each element in my animation States array now I want to run through animation States and create data Structure like
this that Maps my spreadsheet and coordinates for each frame I create lead variable called frames and I set it equal to an object inside I will have property called lo location that will be an empty array for now I will create a for Loop that will cycle through state. frames property so for idle animation it will run seven times as I set it here on line 18 every time this for Loop runs I want to calculate X and Y coordinates of that Animation frame from my spread sheeet and I want to place them inside location
array on line 27 how do I calculate that I create a temporary variable called position X and it will be equal to J variable from the for Loop times Sprite width that I set to 575 pixels earlier as a for Loop runs and J increases position X will be calculated for each frame I will also need position Y which will be index from line 25 times Sprite height we declared Sprite height Earlier and we set it equal to 523 pixels to match our Sprite sheet position y will be the same for all seven frames of
idle animation when for each method moves to the second animation object here index will increase and for that animation row different position y will be calculated this might be quite a lot going on if you are a beginner this is more advanced than the first sprite animation method don't feel discouraged if you are Struggling to follow it takes time and practice it wasn't easy for any of us at first so this for Loop calculates position X and position y for each frame as it Cycles through my Sprite sheet every time we calculate X and Y
I take frames do location array from line 27 and I use push method I create create another small object here on a fly it has X property set to position X from line 30 and y property set to position y from line 31 I push these values into my location array on line 27 so this for Loop will run through all the frames in one row in this case seven times and once we create seven objects with X and Y cordinates and push them into location array I take Sprite animations array from line 14 and
I create a a new key in there I will create something called key value pair key is the name of the property value is the value of that property so I'm taking Sprite animations array from line 14 and I'm passing it state. name which will first refer to idle then to jump as for each method runs through animation States array I'm saying create a new key new property in Sprite animations array call it idle and its value will be frames from line 27 frames object contains locations array which I just filled with seven objects that
contain X and Y properties for each frame in this animation that's it we created a data structure that Maps locations in my Spread sheet I can conso log it now I can see I made a typo here on line 29 you probably noticed it already this should be J not s so now I'm consoling animation States from line 15 that's fine but what I actually want to see is Sprite animations array from line 14 which we just created and filled with data you can see that my Sprite animations contains two properties called idle and jump
if I look inside each contains Location array from line 27 and number of elements in that array corresponds to frames I declared for each animation each of these values was calculated here on lines 30 and 31 you can see that all y-coordinates for idle are zero and for jump animation vertical y-coordinate is 523 as we moved onto the second row in our Sprite sheet now I can replace hardcoded number six here on line 40 with length of these locations arrays I access this location Array by targeting Sprite animations. lock actually no I skipped one level
I need to specify if I want location array for idle or jump let's just hard code idle here for a moment and I want length of this array remember I'm just replacing hardcoded number six that was here so dot length and that's it now it's Dynamic I can add animations with four or 15 frames per row or however many I want and it will still work with no blank or left out animation frames Here I am accessing Sprite animations from line 14 idle location. length inside animation Loop we are still calculating frames using frame X
and frame y variables from lines 10 and 11 we don't need these anymore because now we have the exact coordinates stored in locations array I delete lines 10 and 11 on line 40 I add let keyword in front of frame X and I will declare frame y Variable here frame Y is just the value we can see here so I can access it by saying Sprite animations idle do location at index position from line 39y I could do the same thing for frame X or I can just leave it as is both will work let's
replace idle with a jump it breaks H notice that Row one with idle animation was working and row two doesn't which suggests something is wrong with how we draw vertical position Inside a draw image on line 43 I remove Sprite W value from Source y argument we don't need it anymore as frame y contains complete already calculated coordinate now I can go back inside animation States array and I add data for all the remaining animations it's important to understand that you can't skip rows here you have to go row by Row from top to bottom
to match your spreite sheet because vertical y-coordinate is tied to index in for each Method I add full animation with nine frames run animation has N9 frames dizzy 11 frames SE has only five frames roll seven frames and so on I also need to make sure there is comma between every object if I try fall I get blink in there must be an empty frame fall animation is actually only seven frames if I put less here we play only part of animation if I put more here we get blinking because some frames are Empty run
animation Works DIY Works sit animation works as well you can CIT animation has five frames and dis animation has 11 frames and I can swap between them easily without having to manually change number of frames like we did before roll animation Works bite animation Works let's go back to idle putting hardcoded text here like this is not ideal of course I go up to line 10 And I create a variable called player State I set it to run initially down online 71 and 73 I replace idle with this new player State variable now I can
swap between animations here on line 10 sit Works jump Works F Works in index HTML I create a new div with a class of controls inside there will be a select element with an ID of animations and name animation label for animations will say choose Animation I give it some options that match names we gave to animations in script JS file in Stall CSS I Target controls and I give it position absolute Z index 10 top 50 pixels and transform translate x minus 50% to centrate horizontally I take controls select and option and I increase
their font size to 25 pixels I can also remove the border Around my canvas I want animations to change when I choose different value in this drop down in script JS I take player state from line 10 and I put it up top on line one I create a constant variable called drop down and I point it towards this new select element with ID of animations I take drop down and call at event listener on it I will listen for change [Music] Event every time its value changes we will take player state from line one
and since we are inside call back function on event listener we have access to event object I'm referring to it as E Event object has Target property Target is simply referring to an element that was clicked and it has value property because I have added values myself whenever any of these option elements in my drop down is clicked player State variable will be set to its Value attribute now I can easily swap between different animations in my Sprite sheet just by selecting different option in a drop down paralax scrolling is when background images move past
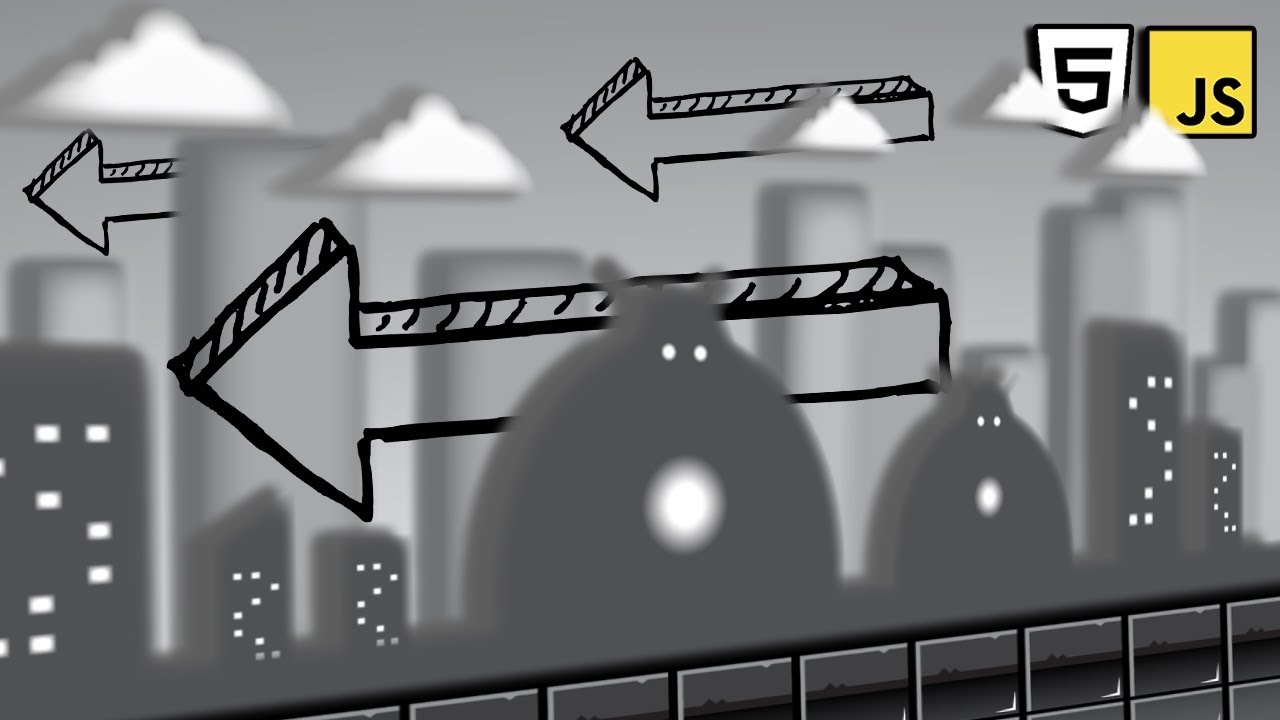
the camera slower then the foreground creating an illusion of depth in a 2d space this is what my game looks without it and this is what it looks with Parallax which one do you prefer today we are learning about ADV vanilla JavaScript game development for beginners and by the end of this video you will have deep understanding about endlessly scrolling backgrounds and how to add Parallax effect to your games and websites when we have full control of individual layers we can match scroll speed to different actions our game character takes for example my dog character
can sit down and The Game Stops moving or it can do this rolling attack and the game speeds up art assets For this episode were created by this amazing an artist check out their website for more if you want what is the easiest way to create endlessly scrolling backgrounds how to make different layers move at different speeds to create paralax effect how to make scroll speed Dynamic so we can easily change it we will learn all of that and more let's bring our coding skills one step further today together and have some fun with plain
vanilla JavaScript this tutorial is for beginners let's go click the like please [Music] I create a basic web page markup in document head I use Link tag to include my style CSS file we will use it to position canvas at the bottom of document body I place my script tag script GS file will contain all functionality and Logic for our project I also create HTML canvas element with an ID of canvas one it will be our main Project area and we will draw on it with JavaScript in sty CSS I take body tag and I
set its background to black canvas will be set to position absolute border 3 pixels solid wide width of 800 pixels height 700 pixels I do transform translate minus 50% for xaxis and minus 50% for y axis and then I offset Top by 50% and left by 50% this will Center my canvas in the middle of the page both vertically and horizontally in script JS I create a Custom variable called canvas and I point it towards my HTML canvas element by ID canvas 1 CTX shortcut for context will take this canvas variable from line one and
it will call get context built-in method on it get context can only be called on a variable that holds a reference to canas element and when I pass it argument that says 2D it will create an instance of buil-in canvas 2D API object that contains all Properties and drawing methods we will need today I need to make sure we have the correct scaling because if you don't set canvas width and height it will default to 300 * 150 pixels I create variable I call canvas underscore width all capitals to make it clear it's a global
variable I set it equal to Canvas from line one dot width which will access with attribute on HTML canvas element we created in index HTML and I set all to 800 pixels the Same value we gave canvas width in style CSS I do the same thing for height canvas uncore height is equal to canvas. height is equal to 700 pixels this is how you set up most canvas projects now we have our drawing board ready and we can focus on building Parallax effect I want the scroll speed to be dynamic tied to a variable so
that in our game we can speed up or slow down using special moves with our character to control scrolling speed I will Declare a global variable called the game speed and I will initially set it to for example five notice I didn't use const keyword here I used let let keyword in JavaScript is used to declare variables that can be reassigned to different values later I will need this to be able to dynamically change scrolling speed it's time to bring images to the project art for this episode was created by this artist I really like
his art Style you can download them in the video description you can use these images for learning purposes for commercial projects you would have to purchase a full license from his website this effect will also work with any other image but maybe you first want to use the same files I'm using so that you get the same result and don't have to worry about calculating different width and height or making sure your layers match once you fully understand the code from Today's lesson it it will be easy to switch the images and adjust values so
that the codebase works with your own files the images are very large If you experience any login or frame drops making images smaller will significantly improve performance I kept them large on purpose so that we get nice clean visuals but especially if you are creating a mobile game these images can be much smaller you can download the project files in the video description Our background will have five layers it is perfect to demonstrate seamless parala scrolling for G games this is one of my favorite 2D game artists if you want you can go and check
out his website I will leave a link in the video description he offers some free art assets you can play with and use in your games but if you want something a bit more special his prices are very affordable there aren't many 2D game artists out there so if you can help me Out to support them and buy some of their assets for your projects it will help us to make our games unique and by purchasing from and supporting our artists they can make more beautiful game assets for us to bring image into our canvas
project is very simple with JavaScript I create a constant variable called background layer one and I set it equal to New Image this is built-in image class Constructor it simply creates an image Element we can use aent childart built in JavaScript method and it would slot image tag IMG tag into our HTML file same as if we wrote that dark in index HTML ourselves we can also choose not to Abend it and it will stay hidden and it will just store the image for us image Constructor has the same functionality as the document.createelement IMG we
are simply creating HTML image element and saving it in this variable at first that image element is blank so I access its source property and I set it equal to layer-1 PNG for you the path might be different depending on how you structured your project files and folders I left my image files in the same folder with my script file for now we have five layers five different images so let's do the same thing for all of them to bring them into the project let's create animation loop I create a custom function called for example
animate it will contain all the Code I need to draw my backgrounds I will be calling it over and over to create animation let's start by calling CTX do draw image builing canvas method this method will take image and it will draw it on canvas the first argument I pass it is the image I want to draw so background layer one from line seven I want to draw it at coordinates 0 0 so from the top left corner of canvas then I call built-in the request animation frame function and I pass it animate the Name
of its parent function from line 18 this way animate will run over and over creating my animation Loop on line 19 I need to call draw image from my CTX variable from line two background layer one image is not the best one to use as an example let's try layer two layer three four five let's do this at first with layer four to see exactly what's going on and Then we can throw in all the other layers it looks like a static image but it's actually anima over and over let me show you on line
18 I create a variable called X and I set it to zero on line 21 inside draw image method I replace hardcoded zero with this x variable and every time animation Loop runs I decrease X by one this will make our image move to the left in a negative Direction on horizontal x-axis the reason the image is being smudged like This is because we can see all previous frames we can see old paint if we want to see only the current animation frame we need to delete old paint I use built-in clear rectangle method it
expects four arguments to determine what part of canvas I want to delete I want to clear the entire canvas so from coordinates 0 0 to Canvas width canvas height now old paint is being deleted and we can only see the current animation frame images moving to the Left by one pixel per frame on line five we declared game speed variable so down here on line 23 I can say x minus equals game speed and now scrolling of our game is attached to this game speed variable if I do 15 it moves much faster as you
can see the background just moves endlessly to the left and eventually it leaves canab us empty these images were specifically crafted for endlessly scrolling games and they are seamless it means you can stack them Next to each other and it will look like it's one repeating image I need to somehow detect when my image has moved off screen and I need to reset it so it can scroll again let's try it what if I say if x is less than minus th000 pixels set it back to zero else xus equals game speed I increase game
speed to 15 here on line five you can see the image is resetting but we can clearly see the jump when the reset happens let's try 1,600 on line 23 Still it jumps I know that images we are using today are 2,400 pixels wide so what if I use 2,400 pixels here and I also reset X to 2,400 now we have this image that is 2,400 pixels wide scrolling endlessly over the canvas and there is this black empty space that is also 2,400 pixels wide the trick people use is to simply draw the same image
twice and always reset the one that has moved off screen So that it's available to scroll again and canvas is never empty I will show you exactly what's going on using two separate X variables one for each image and then we will optimize it once we fully understand what's going on on line 18 I have X variable which will serve as horizontal position for one of my background images I will create variable I call for example X2 that's for the position of my second identical image X will start at position zero and on lines 25
4 and 25 I have my reset checks to make sure it Cycles around endlessly X2 will start where the first image ends since my images are 2,400 pixels wide X2 will be 2,400 images we are using today are very large you might experience frame drops and log in if you do you can make them smaller but maybe if you can just follow along with me till the end and then refactor your code and image files for performance just to make sure we are Looking at the same numbers at first it makes it easier for you
to debug your code if it's the same as mine once you fully understand this technique you can use it for any image size and any scroll Direction your game needs on line 24 I just call draw image again for the same identical image but instead of drawing it at position X from line 18 we will draw it at position X2 from line 19 like this I also need to reset X2 the same way I'm resetting X this is soal spuget Code we have some code repetition here and it doesn't look very clean yet I'm just
doing it for complete Clarity to show you what's going on we will refactor it later you will notice we have one problem when we do it this way but don't worry we will optimize it and fix everything I wanton even beginners to understand now I can see some frame drops because my images are large but I only see it on my screen recording software it still runs smooth in my Browser don't worry about the frame drops at this stage it can be easily fixed by making our images smaller let's focus on the code first and
make sure we understand it you might notice there is a gap between my images what's happening now I have image one drawn at position X from line 18 and I have image two drawn at position X2 from line 19 the problem with this technique is that my images ignore each other they Reset based on two different variables X and X2 these variables are completely disconnected so if width of my image is not divisible by game speed variable it can actually happen that this gap between images will grow larger or smaller over time and we really
don't want that we want endlessly scroll in seamless background let's deal with it step by step so what's this gap between my images why is it there and how do I offset my images to get rid of it part Of the Gap is my game speed because these if statements that re reset X and X2 happen independently of each other we have situations where X resets and X2 will move 15 pixels to the left for that frame 15 pixels because that's what my game speed variable is set to on line five at the moment they
never reset at the same time because one of them is always visible on canvas so when X resets image one resets on line 25 or when X2 image 2 resets on line 27 I need To offset the other one by the amount of game speed to account for the fact that for that frame the other image kept moving while the other one was resetting Gap is smaller now but there is still a gap game speed is 15 pixels per frame and my images reset when their X position is less than minus 2,400 so unless 2,400
which is my image width is divisible by the current speed with no remainder there will always be some leftover pixels creating a gap this Gap could even grow larger and larger as the scrolling and resetting continues some people deal with it by only allowing their game speed to be certain values so that image width is always divisible by game Speed without any remainder but we don't want this limitation we want our game speed to be fully Dynamic maybe you want your game to slowly go faster and faster as player progresses to more and more difficult
levels or maybe you want to have special Moves in your game and when player performs these moves you want them to affect speed of scrolling like I do with this roll attack for example to do this we just need to make sure that our X and X2 reset statements check position of the other image before they reset and they offset its new position based on the current position of the other image that way even when Gap is somehow created it autocorrects itself next time around during the next reset I do it by Accounting for the
current X2 position in my X reset check on line 25 and I account for current X position in my X2 reset check online 27 keep in mind that when these reset checks happen X or X2 are small numbers somewhere around zero at that point this might be a bit tricky to visualize and I know that some of you are already saying Frank what are you doing there is much simpler way to reset and LLY scrolling backgrounds using just one variable there is no need for this X2 variable there is no need for all this offsetting
by speed and position of the other image to synchronize them it can be done with much less code and it is so simple and if you already realized that well done you are good let me know in the comments if you are one of those people I went through all of this to show you my process and to actually show you how it works I didn't realize it can be done with one variable until I got to this stage when I was building the Initial prototype also I think everything we have done so far is
really good for beginners to see what's going on on and how this trick is achieved we will clean this all up and optimize everything but before we do that let's animate all layers and make them move at different speeds Parallax effect is when foreground layer moves faster than the background layer it creates kind of a 3d effect illusion of depth in a 2d space It can be used in games but it also looks really nice on websites in our project we will have five layers five images and I want each one to move at a
different speed at the same time I want all the layers to be tied to the same game speed variable so that when player performs special move for example the speed of all five layers is affected proportionately how do we do that let me show You first let's check if all five layers are animating correctly everything is working perfect so how do I animate all of these layers at the same time I guess I could just copy draw image on lines 23 and 24 and duplicate it for all five layers then I would have to create
a separate reset checks for their X and X2 positions to make sure they scroll at the different speeds it's possible to do that but there would be a lot of code repetition Let's do it in a clean way I delete X and X2 variable from line 18 and 19 I also delete all this code between lines 20 and 25 I will use JavaScript classes to create a blueprint for a layer object then I create five instances of that layer class one for each of my five layers I will put all of them inside an array
and I will be cycling through that array to update and draw them it might sound complicated if you never use the JavaScript classes before but don't worry I will explain everything it's actually quite simple JavaScript classes are used when you want to create many similar objects in our case we will create five image layer objects JavaScript class is a blueprint will Define it and then whenever I call it it will create one instance of that object based on my custom blueprint when I say it creates similar objects I mean these layer objects will have shared
Properties and methods but some of the properties will have different values they will all have the same width of 2,400 pixels each layer object will also have image and speed property but each layer will have different image assigned to it and different speed value that's what it means when I say similar same property but maybe different values let me show you how simple it is step by step we Define class by using class keyword followed by custom name of that Class starting with a capital letter I will call my custom class layer for example each
JavaScript class has one mandatory method called Constructor in objectoriented programming when you say Method All it means is function attached to an object method is just a function so this special mandatory Constructor method has only one job whenever our class is called later Constructor will trigger itself it will create one new blank object and it will assign values And properties to that new blank object based on blueprint inside the Constructor Constructor runs only once per object every time JavaScript class is called using the new keyword I will show you in a minute my Constructor will
expect two arguments image we want to assign to that layer and speed modifier because I want each layer to scroll at slightly different speed we will pass these arguments from the outside when we create our five layer Objects I will show you in a minute for now let's finish our blueprint the syntax might be a bit strange for you if you are new to objectoriented programming each layer object will have horizontal x coordinate that starts at position zero I say this do X because my layer class will create many similar objects so I'm saying here
on line 20 set X property on this particular object you are creating right now to zero because we are inside blueprint that Will trigger every time we call our class to create an object I will also have vertical y-coordinate that will be set to zero all our layers will have the same width of 2,400 pixels height will be 700 pixels for all my layers X2 coordinate will be where we draw the second image the second image needs to start where my first image ends so at the horizontal position 2 400 pixels I know I said
we could do this Without X2 property using just one variable let me just recreate what we had before as a class and then we optimize it together I want to do this step by step for clarity this. image equals image this declaration is a bit different what I'm doing here I'm telling my Constructor create property called image on this new object you are creating right now and set it to image we pass as argument online 19 I will show you how to pass arguments to Constructor when the class is complete I will do the same
now with this. speed modifier it equals the speed modifier passed on line 19 as an argument to my class Constructor this do speed will be how fast is my image layer moving I will calculate it by taking my Global game speed variabl and I multiply times this speed modifier from line 26 doing this will allow me to pass different speed Modifier value for each of my five layers and that way each layer will move at different speed but it will still be tied to my Global game speed you will see in a minute my layer
object will also have access to custom method I call for example update its job will be to move layers horizontally by changing their this.x and this. X2 prop piece from lines 20 and 24 and it will reset them when the layers move offscreen the same way we did it before we are doing The same thing we had before but this time we are wrapping it in a reusable class syntax so that we can do all of this at the same time for all five layers we will also have a method I call for example draw
its job will be to take information about this layer object and to draw it on canvas every time update method runs to change horizontal Exposition draw will run again to redraw the image at the new position to make sure my game speed is dynamic and always Reacting to the current value of my Global game speed variable from line 10 I need to recalculate this do speed like this if you want your game to have a constant never changing scrolling speed you don't need to do this line of code now I just say if this. x
from line 20 is less or equal to minus this do width from line 22 so minus 2,400 pixels then set this.x to this.width plus offset it by the current position of my X2 minus this. speed I'm just recreating The same thing we did before I explained why I'm offsetting it by X2 and speed it is to make sure there is no gap between my images I copy this entire code block and I do the same thing for this X2 property from line 24 so this do X needs to be offset by the current value of
x 2 and thist X2 needs to be offset by the current value of this x if they are not reset in I just want my X property to decrease by The amount of this dot speed from line 27 to make my background layer move to the left I will wrap it in mathod floor to make sure we have no decimal points in there not sure if this is a good idea let's see bit later uh I do the same thing for this. X2 this can be optimized and simplified and we will do it in a
minute now now I can take these newly updated X and X2 coordinates and I draw two identical images next to each other like we did Before so draw image builing canvas method I pass it this do image from line 25 this do X and this doy this do width and this do height then I draw the same image but I will draw it at this. X2 horizontal coordinate like with did before and that's it layer class is complete we have a blueprint inside the Constructor and my layer objects have access to custom update and draw
methods now I can create a new constant variable I call For example layer 4 and I set it equal to new layer like this the new keyword is a special command in JavaScript it will look for class with that name in our code and it will trigger its Constructor on line 19 I can see that my layer Constructor expects two arguments image and speed modifier I need to pass them here when I'm creating an instance of my class so I will pass it background layer 4 variable as image and speed modifier Will be maybe 0.5
I want this layer to be moving at half of my game speed so if my game speed is 10 pixels this layer will be moving at 5 pixels per frame let's test it so here on line 46 I call my layer class Constructor from my 19 it created one new blank object for me and assigned it properties and values I defined in my blueprint between lines 20 and 27 then it saved that new layer object inside this layer 4 variable so this is how you create an instance of Your custom JavaScript class as we know
my layer class has access to update method from line 29 and to draw method from line 40 I can just go inside my animation loop I can take layer 4 variable from line 46 and I can call update and draw on it like this and here we go we refactored our image layers into JavaScript class and now it's very easy to work with it I can pass it different speed modifier on line 46 to make it move at a different speed That speed is still relative to my Global game speed variable from line five because
I keep track of that online 30 inside update method I create variables for all my five layers I will pass different images to each one I could just call their update and draw methods by duplicating lines 54 and 55 like this now I'm drawing layer four and layer five but there would be a lot of code repetition if I did it for all Five layers if I change speed modifier value I to layer class Constructor online 50 you can see there are relative speed changes and we have paralax effect awesome it is because that speed
modifier takes game speed and adjusts it by multiplying game speed from line five times this modifier value at first it happens on line 27 when the new object is created then it happens on line 30 whenever update method runs to make sure we can change Global game speed Dynamically which we will do in a minute then we are just using this do speed property to recalculate horizontal exposition of our background images here on L 37 and 38 and this is how you make your layers scroll at different speeds but still tie them together by using
Global game speed variable inside my animation loop I can just call update and draw for all five layer objects but I don't want any code repetition I create a new variable I call for example Game objects and I set it equal to an array I put layer one variable from my 46 in there layer 2 3 4 5 now I have all five layers inside a single array so on line 56 I take this game objects array and I call buil-in for each array method for each method will simply run through all elements in the
array and it will apply whatever callback function I give it to each of these elements each of the layers first I need to declare how I want to refer to individual objects in Game objects array within my for each callback I will refer to them as object for example I'm doing es6 Arrow function syntax here where you can omit function keyword so for each layer object in my game objects array I will call their Associated update and draw methods like this here we go we are drawing all five layers now awesome let's pass each layer
a different speed modifier to create proper Parallax effect 0.2 0.4 0.6 0.8 and 1 now each layer moves at different Speed but they are all still relative to our Global game speed variable from line five if I change Global game speed variable it will affect all five image layers proportionately because their speed is calculated by multiplying game speed times speed modifier if you get any frame drops at this point it is because we are using five images that are 2,400 * 700 pixels you will get much better performance if you make the the images smaller
in Photoshop or some Other graphics editor as you can see I can change my game speed to any value and paralax background will still scroll based on that I want to allow my users to easily change scroll speed in index HTML I create a diff with an ID of container inside I will have paragraph tag that will say game speed colon and span element with an IDE Show game speed this will show realtime value of game speed variable I create HTML input element With type properties set to range Min value will be zero max value
will be 20 starting value will be five class will be slider for example and ID slider as well I put HTML canvas element inside the container install CSS I take container I give it position absolute with 800 pixels I Center it in the middle of the page using transform translate I set canvas to position relative so that it Aligns with container I put border on the container so we see where it is input with an ID of slider will have width of 100% text color white okay that doesn't work I take paragraph tag and I
move text color there on container I set font size to 25 pixels and I remove border in script JS I create a new constant variable I call for example slider and I point JavaScript towards my new slider element with the get element By ID on the first page load I will set slider value property which is here to game speed variable from line five then I take hold of this span element with ID of Show game speed and I save it in a variable I call Show game speed as well on the first page load
I set its inner HTML equal to the current value of game speed variable from line Five if I change value of game speed and reload page you can see it works now I want to change scrolling speed of my layers when I click this slider to do that I need to connect it to game speed variable from line five on line 22 I take slider from line 18 and I call at event listener we will listen for change event and in call back function whenever change event occurs on the slider which means whenever user clicks
on it to change its value I will run some code Call back function on event listener has access to its built-in event object I will refer to it as e here I can refer to it however I want JavaScript knows that the first argument passed to callback function on event listener refers to this built-in event object if I consol lock this e you can see it gets consol locked every time change event occurs on slider and it contains a lot of useful information about that event right now I'm interested in its Target Property which references
Target of this change event which is HTML input element with an ID of slider when it gives me that I can access its current value attribute which is exactly what I need if I consol loock e. target. Val it will give me the current value of this slider input element I set minimum value to zero and maximum to 20 here all I have to do now is take game speed variable from line five and I set it equal to e. target. Value like this and I will also update inner HTM l in Show game speed
span so that it displays the correct current speed for us now I can change scroll speed of my layers by clicking on slider if I change it to Max 50 we can get it to scroll really fast I hope your computer can handle that these images are too large let's set max value back to 20 you probably already realized earlier That we don't need to have this. X2 property here on line 33 and we can calculate position of both images using just this.x that way we don't need to have two separate reset checks here and
since everything is coming from just one variable we don't need to do all this complicated offset in we did earlier because we don't need to make sure X and X2 are synchronized if you want Little challenge pause the video right now and try to refactor update method Yourself By deleting all references to this. X2 and using only this.x to calculate positions of both images if you don't know how to do it don't worry I also didn't realize it at first until I started working on this tutorial I comment out line 33 on line 51 inside
draw image method I replace this. X2 with this.x from line 29 I comment out this if statement and also this line 48 I remove reference to this. X2 since I'm using this.x for both Imes online 51 and 52 you can see our parala has Gap again this time a big gap lucky for us it's very simple fix on line 52 I set horizontal x coordinate to this do X from line 29 plus this do width from line 31 that doesn't quite fix it yet as you can see I also have to look at my if
statement on line 40 if this. x is less or equal to minus this. width minus 2,400 pixels set this x back to Zero if you don't understand what is happening right now look at this I have one image drawn at position X which starts at zero and the second image is drawn at position X Plus width these images sit next to each other and scroll to the left together like this when the first image moves past the left edge of canvas the second image is there to fill the Gap and make make it look seamless
when the right Edge of the first image hits the left edge of canvas at the same time this x is minus 2,400 pixels because my image is 2,400 pixels wide we will trigger reset it will just jump back here and start scrolling again the first method was controlling x coordinate for these two images separately by using this.x and this. X2 variable we had to make sure it synchronizes correctly both images were moving Independently and I was upsetting them by their scroll speed and by the current horizontal position of the other image to make sure they
stayed aligned this is just a visual representation of what was happening of course the transition itself where the image resets after leaving the screen was happening instantly more like this this second improved technique uses just one variable to move images horizontally this image is at position this.x and the Position of the second image is calculated from that by adding this.x plus this.width the second image is always 2,400 pixels to the right of the first image this way they will always be synchronized since the position of both images is coming from the same variable as you
can see the movement is different now we never actually fully see the the second image anymore we just see this small part that pops in place so that it looks like it's one long seamless image Again the transition the reset where the images move to the right to start from their original position happens very fast it happens instantly so we jump from this to this and that makes it look like it's just one seamless Movement we can also calculate position X differently I can create game frame variable and I set it to zero then in
my animation Loop here on line 65 I increase game frame by one for every Animation frame this way we have a number that is endlessly increasing now I can replace this if statement on line 40 with a different calculation when I remove this if statement completely the backgrounds no longer reset when they leave the screen I also comment out line 43 and I can replace replace all of this with just one line of code I say this.x from line 30 is equal to game frame variable we just created and I use remainder operator and this
do Width from line 32 this do width is currently 2400 pixels and game frame is endlessly increased in number this calculation will make sure this.x Cycles endlessly between zero and the value of this dot width between 0 and 2,400 pixels which will have the same effect as we had before Oh it will go to the right I need to do game frame minus minus on 966 that's better but now all our layers are Moving at the same speed I need to factor in this dot speed for M 36 in this calculation on line 44 this.x
equals to game frame times this. speed modulus this. wi now we have the same Parallax effect this one line of JavaScript replaced all the code between lines 40 and 43 I don't think it's very clear and easy to see what's happened in online 44 just by looking at it I really have to use my brain and remind myself how Modulus operator Works to understand why it's cycling between zero and this. wi I did a complete breakdown of this technique in my sprite animation video I will link it in the video description I'm not going to
explain this calculation all over again I don't think we need to understand this line because it has one disadvantage when compared to the code I had previously on lines 40 to 43 look when I change scrolling speed the position of background jumps Somewhere else because we aren gradually increasing this x like we did before we are recalculating that value completely every time game speed changes clicking this input slider changes game speed Global variable changing game speed affects this.p speed because of Line 39 and this.p speed changes value of this.x online 44 if you know how
to use this technique to make it seamless without jumps in horizontal position when I change game speed let me know please I'm Sure there is some smart way to do it I played with it for a while and I couldn't work it out you you see how the background jumps every time I change game speed let's comment out these lines so that we can compare it when using the original technique horizontal position transitions smoothly without jumps and that is exactly what I want I need to be able to change my scrolling speed dynamically because I
want the scroll speed of my game to change when Character performs special moves like roll or sit let's comment out line 66 since we decided not to use this technique and I also comment out line six our images are large it works well because I'm running my code locally if this code base was hosted somewhere online we need to make sure all images and HTML elements on my page are fully loaded before we start the game on line 19 I take browser window object and I call add event listener on it I listen For load
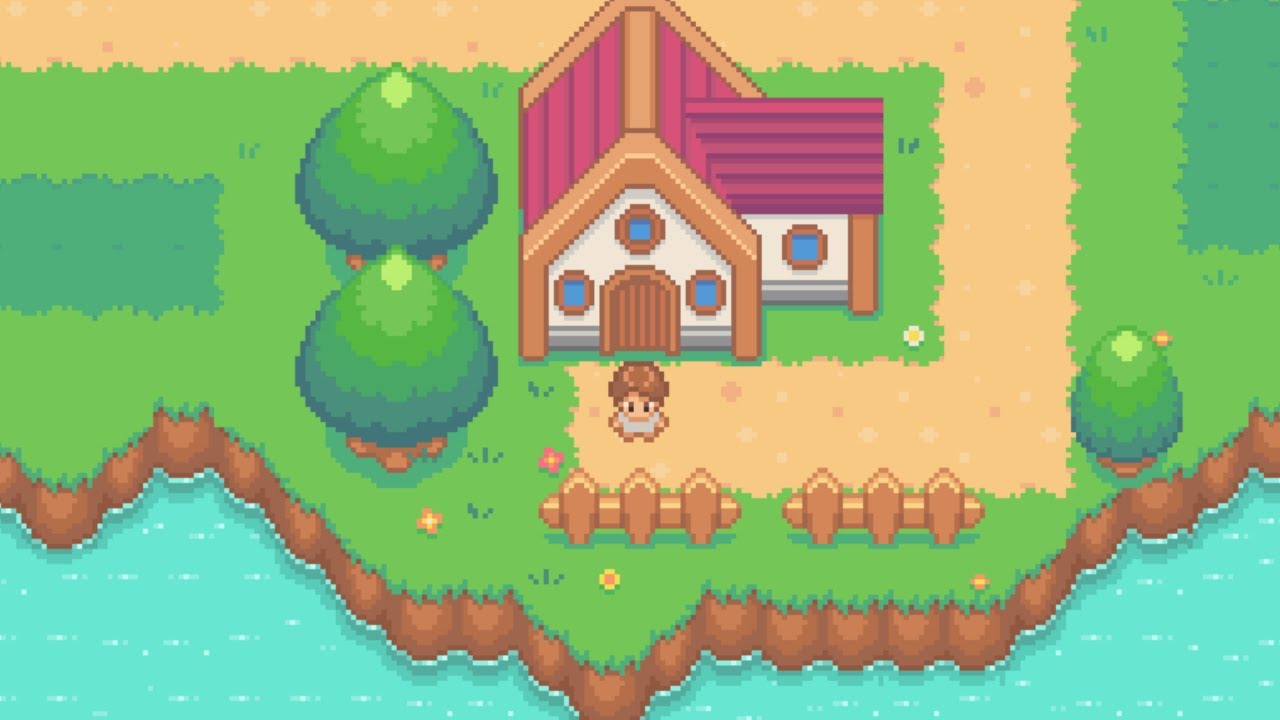
event in call back function when the page page is fully loaded only then I will run all this code that depends on images canvas and slider element to be properly loaded and available in this video we will build four small projects completely from scratch we will learn how to generate groups of animated computer controlled characters for our games and we will explore four different movement animation patterns I went to the forest And I caught some dangerous magical creatures for you today we will study them and learn how they move some of them have wings some
of them spin around and some just float in the air it will be interesting to explore their movement [Music] patterns this is creative coding tutorial for beginners let's learn fundamental vanilla JavaScript principles and techniques by building fun projects together hope you get a lot Of value today art for this episode was made by this amazing artist go check out his website if you want to see more we will cover four different movement animation techniques and by the end of this video you will have four complete projects and you will be able to introduce a variety
of different enemies and movement patterns to your personal JavaScript games sometimes we tend to make our games too easy and predictable let's give our players some challenge by Including different eneme types I create a simple web page markup I give it some title I link style CSS file in document head we will draw everything on canvas so I created here and I give it ID canvas one so that we can Target it with CSS and JavaScript later I also link my script JS file which will contain all animation logic in style CSS I take my
canvas element I just created and I want to give it some border size and I want to center it in The middle of the page so border 3 pixels solid black position absolute top 50% left 50% transform translate minus 50% - 50% now it's in the middle let's make it vertical so height th000 pixels width will be for example 500 pixels everything else will be drawn with code in script JS file this is a beginner tutorial so don't worry I will take you through it step by step as with every canvas project I need To
point JavaScript towards my canvas element we just created in index HTML I do it by using get element by ID and I pass ID I gave my canvas element canvas one like this CTX shortcut for context is equal to Canvas dot get context and I pass it 2D we will use a built-in set of 2D drawing methods today now I can call all these built-in methods from my CTX variable if I type CTX dot like this you can see that in vs code editor my autocomplete feature doesn't suggest any Built-in canvas methods if I want
them to be suggested I can go up to line one and type at type HTML canvas element like this this way I tell vs code this is a canvas project and it will suggest buil-in HTML canvas methods for me you can see Arc method here to draw a circle clear rectangle to delete paint from canvas and so on we will use some of these in a minute when we start drawing and animating but first let's quickly finish canvas setup we need to set Canvas width and height to make sure we get correct scaling of our
drawing so I create a custom Global variable called canavas width I set it equal to canavas from line two do width and I set it all equal to 500 canvas uncore height is canvas. height is equal 2,000 these values need to be the same I gave it in style CSS I want to create a factory function that will produce many similar objects for me each of these objects will be one Animated enemy before we create many enemies let's just build one and make it absolutely clear for beginners what's going on when we have that it's
easy to scale it up I will create a temporary an1 variable and I set it equal to JavaScript object I give it X and Y properties and I set them to zero this will represent horizontal and vertical coordinate on canabas where we draw that enemy I will also give it width of 200 pixels and height of 200 pixels like This so now I have this simple JavaScript object that is store inut position and size of one enemy let's animate it to create animation loop I like to write a custom function I call for example animate
inside I call buil-in fill rectangle method this method expects X Y width and height of the rectangle we want to draw so I will give it XY with and height of this enime object when I call animate like this we are drawing a black rectangle Representing the eneme object I can change its values and when I I refresh the page it will be reflected on canvas we are not animating yet what if I want the horizontal exposition to be slowly increasing to make the enemy travel to the right I can say for each run of
Animation Loop increase enemy 1.x property from line 8 by one to create animation loop I call buil-in request animation frame method I pass it animate now animate will run all its code and Then it will call itself again this will create an endless animation Loop I also need to delete old paint previous frames from canvas I do it by using buil-in clear rectangle method and I clear canvas from coordinates 0 0 to canvas with canvas height now we see only the current animation frame I can also increase vertical y position by one for every frame
so we get movement towards bottom right like this I can change width and Height of my anime easily you get the the idea I think let's comment out this temporary enemy object and make it into a JavaScript class so that we can generate a large number of enemies at once JavaScript class is kind of a template to create many similar object it's a factory and every time we ask it it will produce one new object for US based on a blueprint we give it classes are new syntax for older JavaScript prototypes Under the hood it's
the same thing it's just so-called Sy tactical sugar simpler nicer way to do the same thing classes are very easy and intuitive let me show you we use class keyword and then we name our class starting with a capital letter my class will be called enemy Constructor is a mandatory method every class must have it will contain a blueprint based on which every enemy object will be created so here in Constructor I just give it X Y width and Height same as we had in this simple enemy object on line 7 the syntax might be
a bit strange at first here I'm telling my Constructor on this new enemy object you are creating right now give it property called X and set it equal to 10 pixels start in vertical y-coordinate will be 50 pixels width will be 100 pixels and height 100 as well so this is how you recreate single JavaScript object into a reusable class now we can Call our enemy class as many times as we want and each time it will generate one new enemy for us based on a blueprint inside Constructor method between lines 16 to 19 I
can delete the old code and now these variables are undefined because enemy 1 doesn't exist so I create a new constant variable called enemy 1 again and I set it equal to an instance of my new enemy class to do that I use the new keyword followed by a class name The new keyword will simply look at that class name in my code it will enter its Constructor it will create one new blank JavaScript object and it will assign it values and properties based on a blueprint inside the Constructor now my fill rectangle method on
line 21 can use these values again to display a rectangle what if I want another enemy I can create another variable called enemy 2 and I set it to New enemy again inside animation loop I Take enemy 2 and I increase its X and Y coordinates as well and on line 25 I need to draw another rectangle representing that enemy like this they're moving at the same speed in the same direction so we can't see the second one let's adjust its speed for example now we can see that there are two of them we can
control them separately like this but this wouldn't be very efficient if we had let's say 50 or even 500 enemies so how do we make This code better and remove repetition first let's output this code between lines 21 and 24 that handless movement along X and Y AIS into a shared class method that way we can write this code only once and it will be available to all objects created by enemy class I will call that custom function for example update and as I said its job will be to update coordinates of my objects it
will handle position calculation and movement so inside I say For every frame increase X by one and also increase y by one let's delete all this code and to run update method I just created all I have to do is call enim one. update like this since anime 1 object was created here on line 19 as an instance of my enemy class from line 7 it automatically has access to this new update class method from line 14 I also need to remove line 25 so now we put all movement calculation Functionality into this update method
I also want to put this drawing code into its separate method so that we can draw all enemies at the same time we can also give them animated Sprites and so on I will show you in a minute on line 18 I create a custom draw method inside I call CTX fill rectangle the same way we did here on line 27 but instead of hardcoding enemy1 object here like this I will use this keyword that way this method will be reusable and can animate Not only enemy 1 but also enemy 2 enemy 10 enemy 100
it can animate all the enemies created by this class at once on line 27 I can replace these hardcoded values with enemy one. draw it will look the same but now it's reusable and scalable inside Constructor between lines 9 and 12 all enemies start at the same X and Y coordinates so if I create 50 enemies they would all stuck on top of each other and wouldn't be visible Let's randomize that every time I create a new enemy its horizontal x coordinate will be a random number between zero and canvas width and vertical y coordinate
will be a random number between zero and canvas height now every time I refresh page my enemy appears at a different position I could also randomize width and height if I wanted to to make each enemy random size I think you get the idea so how do I create many enemies Instead of just one I comment out line 22 and I create a for Loop this for Loop will run for example 100 times actually let's go up to line six and create a constant variable called the number of enemies and I set it to 100
and I replace hardcoded 100 on line 2 24 with this new variable that's better we shouldn't be hardcoding values if we can avoid it I want this for Loop to run 100 times and create 100 enemies for me using my custom enemy class but How do I store all these enemy objects objects and their properties such as their X and Y values I can for example go up here to line seven and create a custom variable called enemies array and I set it equal to an empty array down here on line 26 I take that
enemies array and I call buil-in array push method push method will just take whatever we pass to it and it will push it to the end of the array I pass it new enemy every time this for Loop runs and It will run 100 times it will create one new enemy using my enemy class Constructor and it will push that new enemy into enemy's array it's the same as we did with enemy 1 on line 24 but here we are doing it 100 times let's delete line 24 I also have to comment Out Lines 31
and 32 because anime 1 variable doesn't exist anymore how do I access all these 100 objects I just pushed into my enemy's Array and how do I trigger their update and draw methods one by one so that they can be animated on canvas first let's console lock enemies array to make sure that for loop on line 25 did its job and filled it with 100 objects in console I can see we have 100 enemies and each one has randomized x and y coordinate perfect so as I said the goal now is to cycle through all
100 enemy objects inside enemy array and to trigger their update and draw methods This will need to happen for every animation frame over and over because we need update method to constantly recalculate enemy position and the draw method to draw them at that new position on line 33 inside animation loop I take enemies array that contains my 100 objects and I call buil-in array for each method for each simply calls provided call back function for each element in the array I will use new es6 syntax with arrow function here inside My for each callback refer
to each individual object as enemy as you cycle through enemy array and for each of these objects call their Associated draw method and also their update method like this perfect you can see that each rectangle appears at randomized X position and they all move in the same direction because of lines 17 and 18 what if my enemy had randomized speed I create a new property called called This.p speed and I set it equal to a random number between min-2 and +2 because I want some of them to go to the left and some of them
to go to the right if you find it hard to read this line of code as a random number between minus 2 and plus two think of it this way this part of code generates a random number in this range so between zero and four and this number sets the start of that range so we are generating a random number between 0o and four but we are Pushing that range to start from min-2 so result we get is a random number between min-2 and + two I remember I always found math random very unintuitive until
I found a better way to think of it anyway now I have this speed property and I can replace it here on line 18 for horizontal position and also on line 19 for vertical position now you can see we have rectangles moving in many different directions I delete code on line 29 And also on lines 32 and 33 on line 21 inside draw method are enemies that don't have to be represented by black rectangle we can write any drawing code here and it will be called and replicated for all enemies at once I can for
example try stroke rectangle instead we can also draw circles Stars you can put selfies from your holidays to represent each anime object here we have complete flexibility what I want to do here is to create animated creatures Because we want these to be enemies for our JavaScript games with this video we are giving away four different animated enemies drawn by this amazing artist go check out his website for more content he is very talented he allowed me to share these Sprites with you for educational purposes for free you can download them in the video description
and you can also find link to his website there if you want to use these Sprites for commercial purposes you Would have to go to his website and buy a full license they are free only for purposes of this educational video show him some support if you can we don't have many good 2D artists like this if we support them they will be able to create more beautiful game art assets for us today we will create four different projects each one will have different enime with a different movement pattern and on each one we will
demonstrate different beginner friendly Movement animation technique I want you to always have a nice complete project at the end of my videos so that you have something to show to your friends or on your coding portfolio it feels good to complete something don't you think you can use this as animated backgrounds or a screen saver or you can take this code and Slot it into your personal games it will be compatible with my previous games if you follow these tutorials let's start with a very simple One the first project will have baths flying in random
jumpy patterns perfect for Halloween game or even a website for example I'll leave the creative applications of this on you first I need to bring new image into my JavaScript project to do it I create a custom variable called enemy image and I set it equal to New Image enemy image. SRC is equal to enemy 1.png if you are using the same spreadsheet I'm using it might be a good idea to use the same files at First and follow along and once you understand the code it's easy to adjust it and to use your own
custom images on line 26 inside draw method I call buil-in draw image canvas method we will use it to animate our bat Sprite sheet I will explain sprite animation quickly as I code B but if you need more detailed explanation I made a special video where I focus on it in depth I will link it in the video description CTX dot draw image and I pass it image I want to draw and I Pass it X and Y coordinates and this is what we get we can also pass it optional width and height arguments which
will scale the entire image into that specified size you can see it pushes the entire spreadsheet with all six frames inside the rectangle we don't really want that we only want to crop out one frame at a time and we want to be jumping by the amount of sprite width to the right to display the next Sprite frame we want to Go frame by frame from left to right until we reach the last frame then we want to jump back to the first one and start again we can do this with the draw image method
because it offers additional four optional arguments we can pass to it let's go up inside anime Constructor to create property called Sprite wi I check my Sprite sheet divide its width by the number of frames and I can see that width of a single frame is 293 Pixels Sprite height of this particular Sprite sheet is 155 pixels now let's add additional four arguments to draw image method to tell it what area we want to crop out from this spread sheet to display only one frame let's start by displaying just frame one so I want to
crop out area from coordinates 0 0 to coordinates Sprite width Sprite height now we are drawing just frame one so in this version of draw image Method we are passing it nine arguments in total the first is the image we want to draw the next four represent the area we want to crop out from the source spread sheet and these last four arguments determine where on canvas we want to place that cropped out frame onto you can see my bots are slightly distorted because I'm stretching them to fit this dot width and this dot height
here which are unrelated to the actual Dimensions of my butt enemy character ideally I want to preserve the aspect ratio so I make width and height relative to the Sprite size I take width and height and I move them to go after Sprite width and Sprite height so that they can see these values now I can make width 1/3 Sprite width and height 1/3 of sprite height now our bats are the correct ratio maybe I want to make them a bit larger let's try 2.5 that's better right now we are displaying only frame one because
of these hard-coded z0 coordinates let's cycle through all frames and animate our characters on enemy class I need a new property called this do frame and I set it to zero on 930 instead of hardcoding horizontal coordinate zero which will give us this Frame I will take this do frame variable and I multiply it times this do Sprite width that way when frame is zero we display this Frame when it's One we display this Frame two three and so on so now all I have to do is that frame Cycles between this and this Frame
between 0o and five I will use es6 turn operator which is a simple oneline IFL statement basically I say if this Frame is more than four question mark set this do frame back to zero else colon increase frame by one this dot frame Plus+ this should be colon our BS are flapping their wings And animating but they flap very fast and all of them flop at the same time let's fix that there's a proper way to time animation frames using request animation frame and Delta time and I will show you how to do that in
some other video today let's slow down our animation the simplest way possible online 11 I create a variable called game frame and I set it equal to zero inside animation loop on line 46 I increase game frame by one for every Loop and up on line 28 inside update method I say if this ever increasing game frame variable is divisible by let's say two with a remainder of zero only then serve a new animation frame this line simply means run this code only every two Loops of main animation Loop if you are getting a little
unsure I made a special sprite animation video where I go in depth and slowly over all of this for now let's just move on and focus on movement Patterns now bats animate slower but they all still move their wings at the same time in the same Rhythm I want to randomize their animation frequency I create a custom property called for example flap speed and I set it equal to a random number between 1 and four I replace hardcoded 2 online 29 with this randomized flap speed value this will make some of them animate very quickly
some of them slower some will animate every one or two or three or Four frames it will be randomized the reason it doesn't work is because math. random returns numbers with decimal points so game frame is never divisible by that very specific number with a remainder of zero and Frames never increase to fix that I just need to wrap it in math. floor now some bats flap their wing slower and some do it very fast I will remove the stroke Rectangle I can also take anime image variable from line n and actually make it a
property on JavaScript class like this this. image equals new image this. image Sr RC source is Anime 1 PNG I delete that and inside draw image online 34 I refer to this do image instead by changing value of number of enemies on line six we get a different number of bots in our project currently our bats just fly away from canvas and Never come back we don't really want that let's create the first simplest movement pattern which will simply be just randomized jumpy chaotic movement I comment out this dop online 17 and on line 26
I replace it with math. random times 3 I do the same with thisy on line 27 since we are adding positive numbers to X and Y all bats are going to leave canvas like this how about we tried a random number between Min - 1.5 and + 1.5 now they kind of stay in place and just wiggle around we can increase their Wiggle by giving this random number a larger range for example between plus 2.5 and minus 2.5 I can see that my initial enemy X and Y coordinates are not 100% within canvas let's adjust
line 15 like this and since I'm using thist width here I need to move it after this WI WID has been declared now they initially spawn within canvas horizontally these Brackets are important look what happens when I remove them they just start from minus this. width which is wrong these brackets need to be here let's do the same thing vertically for this.y I reduce the number of enemies to 100 or 10 let's make the range much larger online 26 between - 7.5 and plus 7.5 I can just play with these values and get the random
simple jumpy movement this is the simplest way you can animate eneme characters or NPCs for your JavaScript games we will do three more add in a little bit more complexity each time let's see what comes out of that I will be expanding deleting and adjusting the same code base so if you want maybe it's a good idea to create a copy of this project at this stage so you have this movement pattern saved in case you want to use it for your games later I will be using different enemy Sprite sheet and different movement pattern
for the next one I hope you're having Fun for the second movement pattern we will do something a bit different first let's switch to a different spread sheeet here on line 14 I will use image I called enemy 2 PNG it's different size so I have to change Sprite width and Sprite height Sprite width is 266 pixels and Sprite height is is 188 pixels I UNC commmand this do speed on line 15 and I give each game character a random speed between 1 and 5 pixels per Frame for example on line 26 I set this.x
to be equal to minus this. speed if I comment out why we can see that bats just fly to the left in a straight horizontal line and they never come back let's first do a reset check if this dot X from line 20 plus this dot width from line 18 is less than zero meaning when the character moved behind the left edge of canvas and is completely hidden that's why I included this dot width here when that happens I Want its horizontal exposition to be reset back to Canvas width moving it behind the right edge
of canvas so that it can do another fly over now we have endless right to left movement awesome we already have something interesting here but what if I want them to sway up and down as they flop their wings making it a bit more Dynamic and if these were enemies in my JavaScript game maybe it would make it a bit more difficult for player to avoid them how do I create Wavy movement do you know what sine wave is let's do a little bit of very simple beginner friendly trigonometry trigonometry is a branch of mathematics
that studies relationships between side length and angles of triangles we use it to create wavy and circular movement in our JavaScript animations thanks to built-in JavaScript math methods today we will have a look at math. sign and math. coine built in JavaScript methods s is a trigonometric Function of an angle defined in a context of a right triangle all we need to know for now is that math sign Returns the sign of a number we pass to it that number represents angle value in radians and it returns numeric value between minus1 and + one so
this input angle value it takes if I put it inside animation Loop and slowly start increasing it over time by very small amounts when I pass this angle value to math. sign it will return a series of Values that endlessly Cycles between minus one and + one making it easy for us to convert these values into wave movement so-called sine wave what I just said might be a bit complicated for beginners and it might not make much sense yet let me show you I will need this angle property on my enemy class Constructor and I
initially set it to zero this is the number that will be increasing and after being passed to my Do sign it will give us that series of values between minus one and plus one as I just mentioned let's do it so you can see on line 28 I set position y plus equals math. sign and I pass it this dot angle then I increase this dot angle by 0.1 for every animation frame as the angle slowly increases do you see the waves I can change the value here on line 29 to change change shape of
my sine wave angle doesn't have to start from zero it can be bit randomized let's Try with math random times two it will not be very visible it will become clear what it does a bit later I will point it out quickly said starting value of this dot angle determines what position along the sine wave this particular character appears at first before it starts moving it's more obvious if we map movement to a circle and we will do that in a minute I can also randomize the speed at which angle value increases on line 30
I do that by creating a new property called For example angle speed and I set it to a random number between 0 and 0.2 then I take this variable and I replace this hardcoded 0.05 with it now each anime has its own angle value that is being increased by a slightly different amount for each frame this will randomize the wave shape for each enemy let's set this dot angle to zero for now I reduce the number of enemies on line six as I said mathod sign returns values That cycle periodic lay between minus1 and +
one what if I want to make the curve more prominent I can simply just multiply it times three here on line 29 and now we are getting values that cycle between minus 3 and + three do you see how the sign wave of enemy movement is more prominent look what happens when I put the different numbers here I hope it's becoming more clear what I'm doing if I put times 10 we get a very Prominent curve if these are enemies in your game good luck to all players trying to avoid them especially for certain Sprite
sheets this movement might be very suitable maybe you have some strange aliens in your space game and you want to move them in this weird wavy pattern instead of hardcoding number 10 here I can again put this value in a variable that will be randomized for each enemy that way we get even more variation in movement Between enemies I will call it this. curve for example sorry about my variable names sometimes it's hard for me to come up with suitable names for all these custom properties I hope it's becoming at least a little bit clear
what each of these properties does so far I want curve property to be a random number between 0 and 10 and I replace this hardcoded 10 with it here on line 30 maybe 10 is too much let's do times here on line 26 do you see what we just Did some of them move in a very prominent waves some have barely any vertical movement this would make our game more unpredictable I can add as many enemies as I want let's put 200 here on line six bad infestation this will be a hard mode in my
game so we did Endless horizontal movement with vertical sine wave element to it what if we bring it a step further and also add some trigonometry for Horizontal X coord in it we can make the enemies move in all kinds of different shapes and patterns that way let me show you as usual I will first swap to a different image on 914 I set image SRC to anim 3 PNG I check my Sprite sheet and I see that with over a single frame is 218 pixels and height is 177 pixels let's comment Out Lines 29
and 30 which will stop our character from moving around on line 29 I want horizontal movement to be cycling within A certain range I call math. sign and I pass it this do angle from line 24 this do angle value is increasing over and over on line 31 as update method is called from inside animation loop I will also multiply it times math. pi ided by 180 let's just experiment here a bit If I multiply this whole thing by 10 nothing happens 50 we see some movement 100 yes they are moving now this angle speed
on line 25 affects how fast angle Value on line 31 is increasing if I set it to 0.9 they will move faster times 2 might be a good speed for now they kind of disappear behind canvas Edge I can move them by adding some value to this. X position like this plus 10 will move everything slightly to the right plus 100 how about plus canvas width divided by two I want to Center them horizontally now they are too much to the right I need to offset them by the amount of Their width I changed this
do curve on line 26 to be a random number between 0 and 200 and I replace hardcoded 100 on line 29 with this do curve property now some of them move in a large range some only in a small area as we said before mathod sign when we feed it an angle it will return a value between + one and minus one since this angle is ever increasing on line 31 we are getting a continuous series of Values that endlessly bounce between minus one and + one by multiplying all of this by this dot curve
here for characters that have this do curve 200 for example they are endlessly cycling between minus 200 and plus 200 put it in Brackets actually this has to be this. width / by two yeah now they are centered horizontally on line 29 we are animating horizontal X position let's also do this With this.y on line 30 and see what happens if I copy the same formula and replace width with height because we are dealing with vertical [Music] Movement we get this pattern this is where cosine comes in I'm not going to explain trigonometry in detail
in this video but the main idea is you have a circle and radius of that Circle can represent hypotenuse the longest side of a right angle triangle If we connect lines like this to complete the triangle s value represents relationship between opposite side of the triangle and hypotenuse cosine is the relationship between the adjacent side of that triangle and hypotenuse hypotenuse size never changes but s and cosine cycle periodic as the size of opposite and adjacent side of this imaginary triangle Changes as a result s and cosine complement each other to map a circular path
and that's what we are taking advantage of here mathod sign is creating periodical horizontal movement for me on line 29 and online 30 mathod cosine is doing that for vertical values together they complement each other in a way that results in a circle movement you can play with these values swap S and cosine make both of them s or cosine it should illustrate it better what's Going on if you see how these changes affect our animation if I want to have some space in the middle we know that this do curve determines radius of the
circle my characters are moving in that value is randomized for each one I can give it a minimum value for example let's do a random number between 50 and 250 I can also change angle speed on line 25 this will affect how fast angle is increasing on line 31 and because that Angle is being passed over and over to mathod S and math cosine it will increase that speed at which our characters move along the circular path see here we already have some interesting movement pattern for our enemies I could use this in some parts
of my game right now s and cosine are even what I mean is they cycle between the same set of values over and over which results in even circular movement what if I make the horizontal position The cycle at half the speed compared to Vertical position by saying math. pi divided by 360 here now vertical position does two cycles while horizontal position that's only one because of the difference between 360 and 180 these two values here this will give us a different movement pattern if I give both of them the same number it will be
a circle smaller numbers will result in a faster movement the result In movement is always a relationship between these two values these values don't have to be directly divisible by one another but it might help to visualize it better for example here horizontal Position will go over five Cycles while vertical Position will do one cycle it's because of the relationship between 90 and 500 it gives us interesting movement I can change their speed also by adjusting this angle speed on line 25 So this technique can be customized to achieve movement pattern you are looking for
maybe your game starts easy but later it becomes more difficult so you need faster enemies if I put 360 here 360 is divisible by 90 if you watch the animation we will get four horizontal Cycles before we get one vertical cycle because 360 divided by 90 is four don't feel like you have to fully understand sign and cosine at this stage to take Advantage of this technique I will make a special video where we Deep dive into this functionality for now this is all we need to know to be able to use this for our
games if I want the shape to be number eight I can just make vertical value double of horizontal value here I can play with different numbers and see what happens I can also have cosign for both like this it will cause them to backtrack to go back and forth following The same path rather than moving in circles swapping sign and coine will make our characters follow Circle path in the opposite direction I don't like how they fill the entire width but they don't F the height of my canvas how do I make them use all
available space we are using this dot curve which is a random number between 50 and 250 and it makes them move within that range what if I replace it with canvas with on line 29 okay that's too much because this Value is radius of their movement half circle if I want them to cover width of canvas I need to give them canvas width divided by two much better let's do the same for vertical position on line 30 canvas height divided by two awesome now our movement path is even more obvious I will increase number of
enemies on line six just so that we fill the path with more objects and see it better now you can clearly see that our Enemies are running along a set path shape of this particular path is determined by relationship between 90 and 270 here three horizontal Cycles fit into one vertical cycle because 270 ided 90 is 3 if I make the values the same we get circular path again it's an ellipse because I'm stretching the movement here and here 180 in X and 90 in y will mean two vertical Cycles happen before we get one
horizontal cycle what happens if I swap 180 and 90 interesting to get AG shape I would have to swap sign and cosine here are you starting to understand how these values affect the shape of path our animated characters take you can play with this for a while experiment with different values and see what happens on canvas trial and error can sometimes be the best way to come up with unique interesting Results trigonometry is a big topic and we will come back to it in some other course I'm sure some of you get other ideas for
this technique it doesn't have to be used for patrolling enemies in games as we are doing here you can for example use it to create automatically moving particle effects and animations for website and many other things creative coding gives us a lot of opportunities to come up with unique Beautiful stuff and that's why we are building these projects together to improve our vanilla JavaScript skills and at the same time to explore what's possible maybe it will spark new ideas in some of you I know that there are many creative people watching my videos I'm just
here to give you the tools where you take it and how you decide to use it is up to you we can play with these values and create a different paths this. angle property On line 24 determines where along our path our animated characters appear at first I can spread their starting position along the path by using mathod random I could have also used something a bit more unusual like oscillators or pearly noise here but I want to keep this video beginner friendly we can do more advanced path following and random movement algorithms later another
simple technique uses a completely different trick and it results in what I think is The best movement pattern if you want your enemies to appear like they have mind of their own at least when we stay in the world of simple beginner algorithms there are many Advanced AI techniques you could use but this is JavaScript for beginners you might want to make a copy of this code base because to achieve the next effect I will break this one a little bit let's delete lines 24 25 and 26 I will also set this.x and this.y to
Zero inside my update method and I delete line 28 I comment Out Lines 26 and 27 and now initial x coordinate is randomized on line 20 and vertical coordinate is randomized here on line 21 I will create a new property I call for example new X and I set it to random number between zero and canvas width I do the same for vertical y-coordinate with this. new y property so I have initial horizontal position on line 20 And I have new horizontal position on line 22 on line 9 I have game frame variable that is
endlessly increasing inside my animation loop I will say every time game frame is divisible by 30 with a remainder of zero which basically means every 30 frames of my main animation loop I want to reset this new X and this new y to different random position basically I just need to copy lines 22 and 23 Here now I will calculate variable I call for example DX distance on horizontal x- AIS it simply is the difference between this. X from line 20 and this do new X from line 22 DIY distance on vertical y- AIS is
this do y from line 21 minus this do new y from line 23 now that we have distance between Cur position and the new position I can make characters move towards that new position by saying this. x minus equals DX from line 32 and Thisy minus equals Dy from line 33 it's reset into fast let's change 30 to 60 here on line 28 now we get instant position change every 60 frames I can make them travel towards that position by saying DX / 20 I can also do that for vertical position by saying d y
ided by 20 here now current position is always moving towards the new position by 20th of their distance for every animation frame I can increase these numbers to make them move Slower I can also increase the interval on line 28 I like this but you can see that positions reset every 100 frames for all enemies at the same time that looks a bit weird I want each character to reset at its own randomized interval I create a property I call for example this. interval and it will be a random number between 50 and 250 then
I replace hardcoded 100 with this. interval on line 29 it won't work yet because this do interval is a random Number with decimal points so game frame will never be divisible by that very specific number with a remainder of zero so new positions will never be calculated to fix that I need to wrap this in math. floor which will round it down and make sure we get only integers whole numbers without decimal points awesome now you can see that each enemy is moving at their own Rhythm I can add more enemies on line six it
kind of looks like a swarm of [Music] mosquitoes I also need to swap animy Sprite sheet to keep up with tradition I will use aneme 4 PNG here I look at my Sprite sheet and width and height is 213 pixels this time there are many other calculations and algorithms that you can use to make enemies move in a certain way let's make that today's challenge can you alter some of the code we wrote today and create your own movement pattern you can Also make enemies follow the mouse or maybe try to avoid it there are
many ways to make this interactive let me know in the comments if you watched all the way here if you did well done today we added an important set of techniques to our vanilla JavaScript game development tool kit K I'll see you soon if you want more game development check out my playlists links in the video description Collision detection is important if you want to build JavaScript games and you need to detect when two elements Collide or when you are building particle systems where objects interact with each other or maybe you want your canvas animations
to interact with regular website elements for most projects all we need is simple Collision detection algorithm between two rectangles or between two circles for more complex shapes we also use Collision detection technique called Separating axis theorem it can be used to detect collision between convex polygons or rectangles that are rotated and iren axis aligned you might also have more specific needs for your games or creative coding projects some of other common scenarios are Collision detection between point and circle point and Square between line and circle line and square between two lines and so on it
becomes more complex when you need to Detect collisions where shapes such as convex and concave polygons are involved there are some clever tricks people came up with to handle these more advanced scenarios such as detecting collision by color or projecting lines from a point and check in if the number of intersections between that line and polygon is odd or even number with more complex shapes it's a good practice to wrap them in simple rectangles and only run Advanced Collision checks if these Rectangles Collide and we know that the shapes are close enough and collision is
possible for many games all you need is to create a generic shape around our objects soall hitbox even though the Collision is not Pixel Perfect we can adjust these hitboxes to roughly match Collision areas of objects with different shapes main advantage is that the code is very simple and performant because it doesn't require complex calculations to determine whether two Objects Collide or not these hit boxes can have shape or rectangle Circle or polygon the simplest Collision detection algorithm is between two rectangles that are axis aligned it means that they are not rotated it simply Compares
X and Y coordinates and width and height of these two rectangles if they overlap we get Collision if there is a gap between them we know there is no Collision let me show you two different simple algorithms you can use to detect Collision between two rectangles two hitboxes in our games let's say we have rectangle one and rectangle 2 both of these objects have X and Y coordinates and some width and height the first way I can check if they Collide is this I create a simple if statement and I check if horizontal position X
of rectangle 1 is less than horizontal position X of rectangle 2 plus width of rectangle 2 basically if this point is less than this point less means if it's to the Left on horizontal x-axis at the same time we want to check if x of rectangle 1 plus width of rectangle 1 is more than x of rectangle 2 that means if this point is to the right from this point we also do this vertically so we check if vertical y-coordinate of rectangle 1 is less than vertical y of rectangle 2 plus height of rectangle 2
if this point is above this point and lastly we check if vertical coordinate of rectangle 1 plus height of Rectangle 1 is more than horizontal y position of rectangle 2 if this point is below this point if all of these four conditions are true we enter this code Block in our if statement and collision is triggered else we know there is no Collision we can also flip the logic completely this second algorithm does the same checks but it's a bit more efficient if I change the logic a little bit and use or operator it returns
true if at least one of its operan are true Let's go through the logic here if x of rectangle one is more than x of rectangle 2 plus width of rectangle 2 we know they cannot possibly Collide so this will return true and we know straight away there is no Collision also if x of rectangle 1 plus width of rectangle 1 is less than x of rectangle 2 again we know these rectangles can't possibly Collide just one check and we know there is no Collision if y of rectangle 1 is more Than y of rectangle
2 plus height of rectangle 2 there is no way for Collision to happen if y of rectangle 1 plus its height is less than y of rectangle 2 we also know they don't Collide so if at least one of these four checks is true we know there is no Collision if all four return fals we know that the rectangles must Collide else statement is entered and collision is detected I hope this was visual enough And you got some clarity on how these checks work if you have any questions let me know if you want to
see how to implement these particular algorithms in an actual project and where exactly to place them in your code base I use use them in many of my games such as in Tower Defense Frogger Floppy Bird and many more I will link some in the video description if you want to learn more with me check out some videos on my vanilla JavaScript game development Playlist I also do web animations generative art for beginners and more everything with vanilla JavaScript using no Frameworks and no libraries hope you have fun and show me some of your creative
coding Projects please you can message me on Twitter if you want let's be friends Collision detection is important if you want to build particle systems where elements interact with each other or when you are building JavaScript games And you want to detect when two objects Collide or maybe when you want your canvas animations to interact with regular website elements three of the most common techniques we use for games and creative coding are Collision detection between circles rectangles and polygons there are also other potential scenarios and some clever people came up with interesting ways how to
detect them with code some are easier than others one of the most useful ones is Collision Detection between two circles you can detect if two circles collide with JavaScript very easily the algorithm just takes two Center points of our circles and checks if the distance between them is less than the radi of these two circles added together what does that look like in quote let me quickly show you let's say we have two JavaScript objects Circle one and circle two they have some coordinates so position on horizontal x-axis and Position on vertical y AIS and
some radius I connect their Center points with a line this line represents distance between Center points of these two circles I connect position of circle two to my current Mouse position so we can move it around if the distance between these two Center points is more than radius of circle One Plus radius of circle 2 we know they can't Collide if the distance is the same we know they touch and if the distance is smaller Then some of these two radi added together we know the circles overlap they Collide to be able to measure distance
between two points with Java script in this case center point of circle one and center point of circle 2 we will use simple and very powerful algorithm once you learn this and get comfortable with it you will unlock next level in your coding and animation projects to measure the distance between these two points and check if the Circles Collide we need to know length of this line we calculated by imagining there is a right angle triangle in between like this in this triangle our distance is actually hypotenuse the longest side of a right triangle opposite
to the right angle this is the right angle 90° we know X and Y position of center point of circle one and we also know X and Y position of center point of circle 2 with that we can calculate length of Both arms of the right triangle this side is simply just the difference between horizontal exposition of center point of circle 2 minus horizontal exp position of center point of circle one we can do the same thing to calculate this side vertical position of this Center Point minus vertical position of this Center Point now we
have this imaginary right triangle between our two points we know This side we know this side and and we know this is the right angle 90° now we want to know how long is this side hypotenuse of our triangle opposite to the right angle we can achieve that easily with Pythagorean theorem it allows us to calculate relations among the three sides of a right triangle imagine we draw squares on top of each line like this Pythagorean theorem tells us that the sum of the areas of the two squares around the right angle equals to The
area of the square on the hypotenuse c^ 2 is equal to a 2 + b 2 that means C is square Ro TK of a 2 + b^ 2 if you want to know why this is true check out ru's video I will link it in the video description so distance between center point of circle 1 and center point of circle 2 is DX * DX which is side A squ Plus Dy * Dy side b^ s this would give us squared value and I want square root so I wrap it in math do square
root like This now we calculated hypotenuse of the right angle triangle which is the distance between Center points of circle one and circle 2 if the distance is less than radius of circle 1 Plus radius of circle 2 two we have Collision if the distance is exactly the same number as the sum of radius of circle One Plus radius of circle 2 we know they touch if the distance is more we know There is some space between the circles and they don't Collide Visual and audio feedback that reacts to player actions and in-game events is
really important if you want your JavaScript games to feel good you can for example attach sound and explosion animation whenever Collision happens in your game you can also use this technique to make score points float from defeated enemies or from collected items today we will build an Easy fun project together that combines JavaScript audio and sprite animation when we covered all these basics of triggered event-based animations we will build a game that will look something like this to really put all these principles in action I create a regular web page markup in document head I
link my CSS stylesheet I create HTML 5 canvas element with an ID of canvas one we will draw on it with code I also link my Javascript file down here at the bottom just before the closing body tag all I need to do in Stall CSS is to position my canvas element so I Target it with ID I give it border 3 pixel solid block POS position absolute height 700 pixels width 500 pixels background black let's Center it so top 50% left 50% and transform translate minus 50% minus 50% this trick will only Center elements
that have position set to Absolute as we do here On line three everything else will be drawn with plain vanilla JavaScript here in script JS file I need to point JavaScript towards my canvas element so custom variable called for example canvas is equal to document. getet element by ID canvas 1 CTX shortcut for context is equal to canvas. get context 2D this will instantiate object that holds all 2D drawing methods we will need today canvas width is 500 canvas height is 700 let's test if we set it up correctly by drawing a quick simple shape
it's good to test your code as you go makes it easier to debug I set Global canvas fill style to White this will apply to fill of all shapes now unless I redeclare it again and give it a different color I call built-in fill rectangle method I pass it coordinates 50/50 with 100 pixels and height 150 pixels perfect we set it up correctly And we are drawing on canvas now let's make it more fun I delete the rectangle and I create a variable called for example explosions I set it equal to to an empty array
its job will be to hold all active explosion objects I create I create them using JavaScript class I call it for example explosion with a capital E Constructor will expect X and Y coordinates coming from the outside this is important because we want the animation to be Triggered at a specific location where the event happens for example we wanted to animate at coordinates where two elements collided or at coordinates of mouse click I will pass these X and Y coordinates to the constru Factor whenever I want to trigger new animation and create new object using
this class it's very simple I will show you in a minute so on this new explosion object give it this. X property and assign it to X that was passed as an argument on Line 8 from the outside do the same for thisy vertical y coordinate this do Sprite width will be width of a single frame in my Sprite sheet I calculate it by taking width of my Sprite sheet and I divide it by the number of frames in this case my spreadsheet is th000 pixels wide and has five frames 1,000 divided by 5 is
200 height of my Sprite is 179 pixels sometimes you get Sprite sheets that are too large or too small so you might want To scale it while still keeping the aspect ratio relationship between width and height to make sure the image is not stretched or squished I decare this do width property and I set it equal to this do Sprite width from line 11 divide divided by two this do height will be this Sprite height divided by two it's important to divide or multiply them by the same number to keep the same aspect ratio by
the way for optimization it's always better to multiply than to divide Division operation in JavaScript is more performance expensive so instead of dividing them by two I could have multiplied them times 0.5 I will bring my spreadsheet into the project you could declare it as a global variable but I think it's a bit cleaner to put it as a property on class like this this. image equals New Image this is just image class Constructor and it will create new blank HTML image Element this. image SRC will give it Source Attribute and I set it to
boom. PNG if you want to use the same file you can download it in the video description this image was kindly provided by one of my favorite game artists I will link his website in the video description as well he has a lot of cool game art there if you are interested to to animate the Sprite sheet I will crop out one frame and I will be jumping to the right by the amount of sprite width frame by frame to Do that I will need this Frame variable I will set it to zero at first
we will also need to add some Behavior to this class we do it by creating class methods I will need one to update and one to draw my explosions update method will only have one job for now to increase this. frame from line 17 by one for every animation Loop this do frame Plus+ draw method will take values from the Constructor and it will draw current frame of animation on canvas we will use Built-in HTML canvas draw image method that takes image we pass to it and it draws it draw image method has three versions
with three or five or nine arguments depending on how much control you want over the image you are drawing since we are animating a spread sheeet we will use the longest version with nine arguments the arguments we need to pass to it is image we want to draw Source X Source y y Source width and Source height of area you want to crop Out from the source Sprite sheet and destination X destination y destination width and destination height these last four arguments will determine where on destination canvas you want to place that cropped out image
on two it might sound complicated but it makes sense if you used it a couple of times when you learn how to use draw image method and you get really comfortable with it you will have complete control over Sprite sheets you Want to animate it's really good and so useful so now I will replace these placeholder values with actual variables we prepared inside Constructor image we want to draw is this do image from line 15 Source X is the only one from these nine arguments that might be a bit more complicated for beginners to calculate
current horizontal position I need to take Sprite width from line 11 and I multiply it times this dot frame from line 17 as the program runs this frame Increases inside update method online 20 we will get frame 0 1 2 3 4 because we are multiplying Sprite width times frame source Y is horizontal y-coordinate we want to crop out from the source since this Sprite sheet has only one row Source y will always be zero Source width is this. Sprite width and Source height is this do Sprite height from line 12 so now we told
JavaScript what spread sheeet we want to draw and what area we want to crop out From it to display just one frame now I just simply tell it where on canvas I want to draw it destination X is this.x from line 9 destination Y is this.y from line 10 destination width and height is this do width and this do height from lines 13 and 14 our class is complete this is all we need to trigger this dust cloud animation and attach it to any event we want to there are many events we can do here
let's try one I call window. add event listener built in JavaScript method we will be listening for Mouse click event and in callback function that will run every time click event occurs I will at first just draw a simple rectangle to make sure everything works fill rectangle expects four arguments X Y width and height I want this rectangle to be drawn at the current coordinates of my mouse click to do that is easy call back function on event listener has access to buil-in event objects usually we name it e or Event like this but you
can name it anything you want JavaScript knows that this argument passed to callback function on event listener refers to event object you can put ABC here and it will still work as long as you refer to it as ABC later in the code as well basically here I'm saying take event object with information about this click event and save it in a custom variable I call E if I Lo this E I will get an error let's comment out line 29 for a Second now whenever I click on canvas I get this console Lo that
contains all information about current click event that just occurred if I open it I can see we have all kinds of details here all we want is where on canvas this event happened so we can draw our rectangle at the these coordinates I can see X and Y coordinates are down here as properties called X and Y now that I know the name of properties I'm looking for I can use use these values inside Fill rectangle method I want to draw it at x coordinate of current Mouse click I know that value is stored on
my event object in a property called X as we just saw so I put e dox here and e.y width and height could be anything I want I want my rectangle to be for example 50 * 50 pixels I can't see anything when I click that is because I used black background and default fill is also black I said fill Style to white color when I click You can see that we draw a white rectangle on canvas but it's not being drawn under Mouse why is that in this case event. X gives me value that
doesn't account for this top and left margin between start of my web page and start of canvas what I need to do is offset my coordinates to account for it good way to do that is to measure canvas position first you can do this with one line of code I create a custom variable called for example canvas position and I Set it equal to canvas from line one and I call get bounding client rectangle built-in method on it get bounding client rectangle is a very useful built-in JavaScript method it returns an object providing information about
the size of an element and its position relative to the viewport I can conso loog my canvas position variable now and you can see the object here it contains bottom left right and top position on the graphics here you can see exactly What these values represent it also contains information about its width and height and its X and Y position you can use this to measure any HTML element on your page if you are offsetting something it's really useful I delete console online 7 I like to clean up after myself as I go so if
I want my white rectangle to be drawn under the current Mouse position I need to offset e.x and e.y by top and left margin between viewport and canvas horizontal x Coordinate is e.x minus canvas position do left now you can see that horizontal position is exactly under Mouse I also fix vertical position by saying e doy minus canvas position top perfect you can see that rectangle is being drawn towards the right bottom from my mouse cursor this is how rectangles work on canvas if I want my mouse to be exactly in the middle of the
rectangle both vertically and horizontally I need to do one more small Tweak here I of set my positions by half of width and height my width and height is 50 so I offset X and Y by minus 25 now when I click mouse cursor is exactly in the middle of white rectangle when I place it on canvas I know this might be very basic for some of you but I want beginners to be able to follow along with us this course is for everyone now that we understand how to draw a simple rectangle on click
let's take it to the next level and use our Custom explosion class to create Sprite and animation every time we click somewhere on canvas first thing I want to do is to take this calculation that offsets and centers my horizontal and vertical positions and I put them here in separate variables this is just to keep my code clean and easy to read I call them position X and position Y and I just copy this formula in there I can't really do minus 25 here if I want to keep my code base reusable I need to
Offset it inside my explosion class I will show you in a second I do this position y vertical formula I remove console lock on line 31 and I also delete my white rectangle we will be drawing animated cartoon explosions now on line five I have this array that will hold all my current active explosion objects the goal is to use explosion class on line 8 and when we click we push new object into this array from line five we cycle through all its Frames using update method on line 20 we draw each step to display
the animation and then when we reach the last frame we remove the object from the array and we delete it on line 31 inside click event listener I take this empty explosions array from line five and I call push on it push is a built-in array method it will take whatever we pass to it as an argument and it will push it at the end of the array I pass it new explosion the New keyword will find my class on line 8 and it will its Constructor to create a new object based on this class's
blueprint on line N I can see my Constructor expects two arguments for X and Y coordinates this is important because we need to know where on canvas we want to create this triggered animation here on line 31 I just pass it position X and position y variables we calculated on lines 29 and 30 so now I have a way to add new explosion object Into my array on Mouse click I will need a function to cycle through all objects in the the array to update and draw them let's create animation loop I will write a
custom function called animate inside I create a for Loop that will cycle through all elements in the array sometimes if we click really fast in sequence we will have many objects animated at the same time sometimes this array will be empty it will have zero elements and this Loop will be skipped For each object in the array we will call its update method and also its draw method to create anim loop I call buil-in request animation frame function and I pass it animate the name of its parent function from line 34 now I can call
animate to kickoff animation Loop awesome this is working kind of we can see old frames because we are not clearing canvas and I also need to Center my animation around the cursor better to only see the current frame I Call buil-in clear rectangle method and I want to clear the entire [Music] canvas if you look closely you will notice we are skipping frame zero because update method increases frame variable by one before we draw the first frame I want each triggered animation to have its own timer that way we can stugger the animation speed on
line 19 I created this.timer Property and I set it to Zero on line 22 inside animation loop I increase this dot timer by one for each animation step now I can say if this dot timer is divisible by 10 with a remainder of zero this simply means run this code every 10 frames only when timer is divisible by 10 increase frame by one this will slow down the animation timer has to increase 10 times before frame increases once now we can see the initial first frame as well and animation speed is 10 Times slower than
before let's make width and height slightly bigger on lines 14 and 15 you can see see that my animation is drawn too much down from mouse cursor same as we did with white rectangle before I want mouse cursor to be in the center of the animation to do that I can simply offset X and Y by half of width and height I can either do it here or I can also do it here inside draw image method it would give us the same result I can't offset X and Y here in my event listener because
at this point I don't know what width and height my animation is I could hardcode some values here but that would not be reusable I think the cleanest way is to move this do X and this doy to go after width and height here so that they can see these properties and I offset them here this. x is equal to X which was passed as an argument on line 9 minus this. width from line 12 divided by two this Centered my animation around the cursor horizontally and this doy is y minus this do height /
two perfect right now I'm just add in more and more objects into my array they stay there even after they stopped animating you can see that if we consol Lo explosions array from line five we are just adding more and more objects into the array every time we click I need to find a way to remove the ones that have stopped animating we Could do object pooling here to avoid instantiating and deleting objects over and over but I will show you how to do that in some more advanced tutorial today let's just do the the
simplest Solution on line 45 inside the for Loop that runs through all objects in my explosions array after I draw and update them I check if this particular object has frame property more than five frame property comes from line 18 and on line 24 we are increasing it to draw our Animation frame by frame Sprite sheet has five frames and we count from zero so I know if frame property is more than five we played the entire animation on line 44 if this particular object has frame property more than five I will remove it using
built-in array splice method splice method just wants index of object we want to remove so I for index and I want to remove one object at this index so I comma 1 to make sure the next object in the array is correctly updated And animated after we removed its neighbor we need to adjust index by minus one iusus because I'm conso in my array online 36 in browser console I can see that we are correctly adding and removing objects from the array awesome we have a solid infrastructure for triggered animation and we can connect this
code to Collision coordinates for example and run this animation when two objects Collide in Our game we can also connect it to different events and user input it doesn't have to be a click event to avoid code repetition I will put this code into a separate custom function I call for example create animation I cut all this code and I paste it here I call create animation from inside my click event we need to pass down reference to event object to calculate coordinates like This look what happens if I connect it to Mouse move event
it gives us pretty cool effect experiments this looks like some deep sea creature when I move it like this you can see that the first frame of dustcloud Animation is always rotated the same way maybe I want to rotate it at different angle every time we create new explosion to do that I use built-in save and restore HTML canvas methods let me just Write this and then I will explain what's happening translate will set rotation center point in this case I want to rotate around its Center so this do X and this do y I
want each one to be rotated by different random angle value I create a new property on line 20 called this. angle circle is 360° HTML canvas rotate method expects radians so 360° is roughly 6.2 radians This do angle will be a random number between 0 and 6.2 I pass this do angle to Canvas rotate method on line 31 like this now it's rotating too much it's because I translated drawing context to this.x and this.y on line 30 then I rotate it and then I go from that point further to another this.x and this.y here X
and Y coordinates for our animation are already captured here on line 30 so on line 32 I replace this.x and this.y to zero think about it this Way I use translate which would be 0 on canvas to this.x and this. Y so between these save and restore calls 0 0 is actually this.x and y that's better I also need to offset it by this do width divided by two and this do height divided by two here inside draw method and remove it on lines 14 and 15 this is how you rotate anything on canvas you
save the current state of canvas to make sure the following Changes affect only one draw call I translate rotation Center Point on top of my current object I want to rotate I rotate the entire canvas context by a random angle value we draw our image and we restore canvas context to the original safe point to make sure this translate and rotate only affects one draw Call of one object canvas rotation is one of the more difficult concepts for beginners to understand I spent the entire Halloween episode explaining it So don't worry if this was too
fast for you if you want more details on how to rotate things on canvas I will link that episode in the video description for now let's just move on you can see each dust cloud is now rotated randomly so the trail itself looks looks more chaotic as every dust trail should let's comment out Mouse move event now we have this nice cartoon dustcloud animation whenever we click on canvas it's missing something let's give It some sound it's really easy to attach sounds to event animations in JavaScript I go to opengameart.org and let's click browse and
sound effects I remember there was one I really liked here on left I will type magic in title [Music] search oh yes it's this one magic special effect spark it contains four cool magic sounds I download it and I take the one Called ice blast I rename it to boom. wav for you the path might be different if you chose different file or you placed it in a different folder I only want to play the sound file once per animation so in update method online 25 I say if this dot frame is equal to zero
take this dot sound from line 21 and call built-in play Method on it like this choosing the right sound and animation speed is very important to how Your game feels in the end if you do it well your game will be satisfying and your users will love to play it don't forget to click the like if you learn something new today for more vanilla JavaScript game development and animations check out my playlist I will link relevant videos in the description down below thanks for coding with me today hope you had fun you want to build
awesome games and master frontend web development at the Same time in this vanela JavaScript and HTML 5 canbas game tutorial I want to show you five techniques I wish I used sooner today we will build a game completely from scratch step by step with no Frameworks and no libraries we will learn how to achieve Pixel Perfect Collision detection using colors how to use timestamps and Delta time to make sure our game runs at the same speed on different machines we will learn about arrays and I will show you how to remove All game objects using
array filter method and how to use array sort method to create a correct draw order in a 2d game we will also talk about modern JavaScript syntax and we will learn how to make our animation code cleaner and less repetitive with spread operator I will also share many small tips and tricks as we go along students of today's course will get two premium Sprite sheets completely for free kindly provided by this amazing artist check Out his website for more click the like please if you are excited and ready to learn let's talk about JavaScript have
fun [Music] I want you to build projects you can show off to someone and be proud about so as usual we will build a game and by the end of this tutorial you will have a complete project I learned some of these techniques from my friend Radu he has a lot of other cool things to teach you if You want you can go and check out his courses I will link some in the video description some of you tell me that you only make games by animating diffs and other HTML elements it's a great way
to start and learn the basics HTML canvas can handle many more moving objects at the same time so if you want to try and build games that have a little bit more complexity maybe this is the time for you to give canvas a chance let me show you it is easier than you think to build Interactive animated projects with it I will take you through it step by step and help you understand I have a introductory game development series and a beginner playlist where I go slower over all the important techniques if you find yourself
struggling at some point or you think I'm going a bit too fast maybe try to watch that one first over there we also create really cool projects but I keep beginners in mind at all times it might be an easier starting Point for you and then you will be ready to take on videos like this one and actually properly understand everything I will leave some links in the video description let's [Applause] [Music] go let's create some Ravens I will an array that will hold all my Raven objects it needs to be a lead variable not
const I will explain why in a minute I create a custom class called raven it Will be a blueprint based on which all my animated Ravens will be created by JavaScript Constructor will create one blank new object every time it is called and it will assign it properties and values as we Define them here it will have with property and its value will be for example 100 pixels height will be 50 pixels this. x starting horizontal x coordinate will be just behind the right edge of canvas so they can fly across to the left so
canvas with vertical y Coordinate will be a random number between zero and canvas height since rectangles on canvas are drawn from the top left corner going right and down I don't want any Ravens to be partially hidden below the bottom edge of screen initial y Position will be a random number between zero and canvas height minus the height of a raven between here and somewhere around here it needs to be in Brackets like this to give us the correct range of values Direction X will be horizontal speed basically it will be a random number between
three and eight I want Ravens to bounce up and down as they fly so the initial vertical speed I call Direction y for example will be a random number between minus 2.5 and plus 2.5 minus values will move upwards plus values will move the Raven down along the vertical Y axis update method will move the raven round and adjust any values that need to be adjusted before we draw The next frame at first I will just simply move it to the left so this do X from line 11 minus equals this Direction X from line
13 draw method will take these updated values and any drawing code we put here will represent single Raven object visually first let's start with a simple rectangle I call built-in fill rectangle method and I pass it X Y width and height Raven class is complete we have a way to create Ravens let's create animation loop I create a custom Function I call for example animate it will take argument I call timestamp this will be a numeric value in milliseconds so 1 second will be number 1,000 I will show you exactly how it works any code
inside this animate function will run over and over updating and drawing our game frame by frame the first thing we will do between every frame is clear old paint all drawings from the previous frame so clear rectangle and I want to clear the entire canvas from coordinates 0 0 to coordinates canvas width canvas height we will run some code in between and then at the end we will use request animation frame method that will call animate again create an endless animation loop I will console Lo test to make sure it works and I also need
to call animate like this on the first page load to trigger the first Loop in browser console I can see the loop is running perfect it's good to test your code as you go to to make sure there are No typos it's safer than to write the entire project and then try to look for bucks there step-by-step approach will save you a lot of time I can also test if my Raven class is working I will use it to create many Ravens but I can also just create one I create a variable called raven and
I assign it to New raven like this this will create one Raven object for me which will have access to update class method from line 16 and draw method from line 19 I call it from inside my animation Loop and here's my Raven it just flies over once if I refresh the page it flies again this works so far we are doing great instead of having one Raven I want to create a new Raven periodically and I want to make sure that periodic event is triggered at the same interval on very slow old computers and
on brand new gaming super PCS to make sure the timings in my game are consistent and based on time in milliseconds rather Than on the power of my computer and its ability to serve frames at a certain speed I will use timestamps I will compare how many milliseconds elapsed since the last Loop and only when we reach certain amount of time between frames only then we will draw the next frame it's actually very simple but it might take some time to get used to it if you are a beginner let's do it and see how
it works what is happening here we are calling animate using request Animation frame animate becomes a call back function on request animation frame method and default JavaScript behavior for callback here is to pass it automatic timestamp as an argument its value is in milliseconds just so you know where this timestamp will be coming from it's a default JavaScript behavior when using request animation frame it will pass its call back function in our case animate automatic Tim stamp argument we will see it better in a Minute as the loop runs request animation frame calls animate over
and over passing it time stamps my goal here is to take time from the current Loop save that value run the loop again with new timestamp value and compare them to see how many milliseconds it took in between frames I will need some helper variables here time to next Raven will be a variable that will accumulate millisecond values between frames until it reaches my interval value and Trigger Next frame initially it will start at zero Raven interval will be a value in milliseconds every time time to next Raven accumulates enough to reach 500 milliseconds it
will trigger next Raven and it will reset back to zero to start counting again I will also need variable that will hold value of time stamp from the previous Loop the initial value will be zero inside my animation loop I will calculate Delta time this will be a Value in milliseconds between time stamp from this Loop and saved time stamp value from the previous Loop after I used last time value to calculate Delta time I will assign last time variable from line 8 to the new time stamp passed here in this Loop so that we
have that value ready to compare in the next Loop let's conso look timestamp I can see I misspelled last time here capitalization of letters is very important in JavaScript you can see in console I'm getting time stamps in milliseconds since the loop started the very first value is a second so it goes like this seven 8 seconds and so on so this is the automatically passed time stamp value here it's generated by default by JavaScript because we made animate into a callback function on request animation frame method here on line 33 there is a way
to do this without calculating Delta time at all but I Haven't tested that and I'm not sure what is the browser support for that technique so let's go with this tested safer solution today I will remove console loog leaving too many console logs in your projects especially the ones running so often like this can affect your performance so keep that in mind on line six I have time to next Draven variable here in my animation loop I will increase its value by Delta time for every animation frame I will Console loog Delta time now again
I need to be careful about spelling my variables correctly here I can see that on my computer time between frames is around 16 milliseconds my computer is powerful and it is able to serve new frame every 16 milliseconds on your computer the number might be different I would actually be very interested to know if it's the same number or a different one for most of you if you are following and coding with Me can you leave a quick comment with that number please you can just type 16 if it's the same number or whatever different
number you are getting right now so time to next rate starts at zero and is increasing by this value of around 16 milliseconds per each frame on line 7 I created a variable called raven interval and I set it to 500 milliseconds in my animation loop I will say when time to next Raven reaches this raven interval when this number that Starts at zero and increases by the amount of milliseconds that happened between frames reaches 500 at that point we will take Raven's array from line 10 and use built-in array push method I will pass
it new Raven which will trigger my Raven class Constructor create one new Raven object and it will push it inside Raven's array when that happens I set time to next Raven back to zero so it can start counting again from the beginning I know I just said raven a Lot time to next Raven starts at zero it increases by the amount of Delta time by the amount of milliseconds between each frame which will be dependent on performance of your computer however since slower computers will take longer to serve the next frame their Delta time will
be a higher number and it will move towards our Target Raven interval in bigger steps as a result this code will be triggered at the exactly same time on slow and fast computers this is one way How you can properly trigger periodic events in your project using using timestamps this might be a bit too much to wrap your head around if you are a beginner it's one of the reasons I don't always use timestamps in my animation tutorials because I can't really explain all of this in every single video but try to learn it if
you can if you still don't get it don't worry I will explain it in future projects again So eventually it will start making more Sense repetition in practice is the best way to learn at least for me it is I console Cravens and I see nothing is happening even though my animation Loop is running it seems that this this if statement never evaluates the true so the code inside is never triggered consolo is great for debuging I consolo time to next Raven first oh I can see its value is a nan not a number here's
our problem why is it this value it must be because we are Adding Delta time to it here I conso Delta time and I can see that the first initial value is also not a number Delta time is calculated here on line 30 so now I conso lock timestamp and this is the root of our problem that cascaded all the way through my variables that use each other to calculate their values when the animate Loop starts the very first timestamp is undefined because timestamp only gets created on the second Loop Here on Line 39 when
we call request animation frame to fix that is easy I just need to give time stamp a starting value on the first call of animate that starts my animation Loop here I will pass it time stamp of zero as an argument awesome that fixed it and since I'm conso in Ravens array on line 36 I can see it adds new Raven object to the array every 500 milliseconds I remove the console Lo we have data for Ravens inside the array we Just need to cycle through that array through every single Raven object and call their
update and draw methods so that we can actually see movement on canvas I declared my Ravens array here on line 10 inside animation loop I will use this syntax which might be a bit unusual for you here I'm creating so-called array literal by just dropping square brackets like that I'm creating a quick new array on the Fly and these three dots are so-called spread Operator now I'm spreading my Ravens array inside this new quick array I just created spread operator allows us to spread iterable such as this Ravens array to be expanded into another array
let's finish writing this line of code and I will explain why I'm doing that since we are dealing with an array I can call buil-in array for each method I need to assign it a variable name for each object in this array so we can use it as we iterate as we cycle through it I will call that variable for example object so this object variable now represents each individual Raven object in Raven's array and I can say for each Raven object in Raven's array call their Associated update method we wrote on line 20 so
this line of code will cycle through the entire Ravens array and it will trigger update method on all of them since we are inside animation Loop this will happen over and over for each Animation frame I will do exactly the same thing for draw method from line 23 and we are are updating and drawing our Ravens awesome now you might ask why am I using this fancy syntax here where I created a new array and I used spread operator to expand my Ravens into that new array just so that I can call update and draw
on them I could have just called it on the Ravens array directly without expanding it like this the reason I did that is because when I Create particle class in a minute I can just spread my particles into the same array along with the Ravens as long as my particle class will have update and draw methods to call the code will work and I can call all my classes by just expanding more and more arrays in here I can for example also have an array of enemies obstacles powerups and other elements in my game I
can spread all of them into a single array and call their update and draw methods all at once I Will show you exactly what that looks like in a minute I think it makes the code look clean and easy to read what do you think online 34 I'm periodically add in new object into Raven's array right now it's an endlessly growing array of objects and on lines 37 and 38 I'm iterating over all of them even the ones that have moved off screen and are not visible anymore eventually this would build up and cause performance
issues so I need a way to remove the ones that Have moved past the left edge of game area sometimes I use aay splice method to do that I used splice in many other tutorials before but there might be a better way to do it using splice while cycling through the array removes objects from somewhere in the middle of the array so then we have to write code to adjust the index to make sure neighbors of that object don't get skipped easier way to discard objects we don't need might be using built-in array Filter method
we will just run through the array call update and draw for each Raven and then we will filter out Ravens that have moved past the left edge of screen what does that look like in JavaScript let me show you I create a new class property called the marked for deletion and initially I set it to false in update method I say if horizontal x coordinate of this particular Raven object is less than zero minus this do width meaning it has moved all the way Behind the left Edge I set it's marked for deletion property to
True inside animation loop I take the variable that holds my Ravens array from line 10 and I reassign it to a new array that's why the initial Declaration of Raven's array needs to be a lead variable not cons because cons variable cannot be reassigned it will be the same array but objects that have marked for deletion property set to True will be filtered out filter method creates a new array With all elements that passed the test implemented by provided function so here I'm saying take Raven's variable from line 10 and replace it with the same
array but I want that array to be filled only with objects for which this condition is true here we have a little bit of d double negative sorry the test in my call back function wants marked for deletion value to be false if marked for deletion is false then this condition evaluates as true and this Particular Raven object will not be deleted again and said very simply take Ravens array from line 10 delete everything in there and replace it with contents of the same Ravens array but only with those objects that have marked for deletion
property set to false exclamation mark here here means false since we are console l in Ravens array online 42 I can check in browser console and I can see that number of objects in the array is between three And six it only contains Ravens that are active and visible on screen perfect I remove the console log these Ravens look a bit boring just black rectangles let's use animated sprad sheets instead on my class I create a new property called this. image and I set it equal to New Image I set Source on that new image
as Raven PNG art for his episode was made by this amazing artist link to his website is in the video description he also allowed me to Share this particular spreadsheet completely for free with my students so you can download it along with all other project files in the description for more game art check out his website and support him if you can there aren't many good to the artists like this and he's one of my favorites I try to buy his game art assets whenever I can I will need a couple of helper properties here
this do Sprite width is width of a single frame in my Ravens Sprite sheet In this case 271 pixels if you are using a different Sprite sheet take its width and divide it by the number of horizontal frames maybe it would be easier if you follow along with me using the same Sprite sheet and then when you understand the code and it's working for you you can replace it Sprite height is 194 pixels on 931 inside draw method I call built-in draw image method it expects between three and nine arguments Depending on how much control
you want over the image you are drawing minimum is three arguments image you want to draw so this. image from line 20 and X and Y coordinates where to draw it now it's just simply taking the entire spreadsheet and drawing the whole thing at its original size we can also give it optional width and height arguments which will scale it I need to make sure my bracket and commas are correct here so now it's scaling the entire Sprite sheet to fit inside 100 * 50 pixels let's do stroke rectangle here so we can see it
better we can also give it a total of nine arguments these additional four arguments will allow us to only crop portion of the image source X Source y Source width and Source height so the longest version of draw image method takes nine arguments image we want to draw XY width and height of Area to crop out from the source image XY with and height of where to place that cropped out image on destination canvas let's just scrop out the first frame now Source X and Source Y is coordinat 0 0 Source width is Sprite width
and Source height is Sprite height you can see our Ravens are a bit stretched it's because these initial width and height values are completely disconnected from the actual dimensions And aspect ratio of our Sprite sheet I move Sprite width and Sprite height up here so that we can use them to calculate values that come after width could be for example Sprite width divided by two and height could be height divided by two this works but now all our Ravens are the same size and as my friend Marcus says multip application is faster than division so
let's create a new property called size modifier and it will be a random number between 0.4 And one now instead of dividing it by two I will multiply width and height by this random size modifier value which will make the Ravens be different sizes while still preserving the aspect ratio so no stretch in this do frame is the number of frames in our Sprite sheet counting from zero so the initial value will be zero this Frame this Max frame could be four or five depending on how you reset it back To frame zero let's go
with four maybe I will adjust my frame reset check to this value in a minute if this dot frame from line 25 is more than this Max frame from line 26 set this dot frame to zero else increase frame by one to actually reflect this value on canvas I replace Source X argument on line 37 with this.t frame times this do Sprite width so it will go zero 1 2 3 4 5 and back to zero as frame variable Cycles online 32 all the Ravens are flopping Wings very fast and at the same interval how
do we speed up or slow down sprite animation the speed at which the next frame is served and how do we make sure it's consistent across all machines on Old Slow computers and new powerful ones as well we can do that by using Delta time we calculated Delta time on line 43 inside animation Loop Delta time is the difference in milliseconds between last frame and current frame and this value will differ based on power of your Computer some computers can serve frames much faster than others since I already calculated this speed at which my machine
can serve frames in my game I will just pass Delta time as an argument to my update method here on line 50 that way it will be available up here let's test it I consol Delta time it won't be available until I passed Delta time as an argument here as well now the values are coming through I will need a couple of helper properties Tam since flap will be zero at first it will be growing by the amount of Delta time until it reaches value in flop interval then it will trigger next frame of sprite
sheet and reset back to zero this do time since flap plus equals Delta time remember that Delta time is the amount of milliseconds between frames so faster computers will have smaller numbers here slower computers will have high Delta time values as a result it will reach the target value at The same time on slow and fast computers unify an animation speed across different devices I say if this do time since flap from line 27 is more than flap interval from line 28 only then run this quote that handles cycling through frames for this to work
every time this condition is met and if statement is entered I also have to reset time since flap back to zero so it can start counting again when to serve the next Frame now I can change the value of flap interval and you can see it changes the speed at which we cycle through frames in our Sprite sheet 500 milliseconds per frame is very slow 5 milliseconds per frame is fast faster than my computer can handle since we know my computer can handle the serve next frame every 16 milliseconds as maximum I can also randomized
flap interval so that each Raven animates at a slightly different Rhythm random number between and 200 feels too slow how about a random number between 50 and 100 that feels better quick recap we are calculating Delta time difference in milliseconds between last frame and current frame the value of delta time will be different on slow and fast computers to make sure we have consistent timing across different machines we have time since flap Variable that increases by the value of delta time per each frame until it reaches Target value in flap interval then it serves the
next frame resets back to zero and starts counting again preparing to serve the next frame Ravens are flying in straight lines from right to left I also created the direction y property on line 21 it's a random number between minus 2.5 and plus 2.5 so some Ravens will move up and some will move down in negative or Positive direction along vertical y AIS based on this value inside update method I say this doy plus equals this do Direction y now you can see some vertical movement it's now a little bit harder to Target them making
our game more difficult for players one thing I don't like now is how they disappear behind the top and bottom Edge I want them to move all the way across the screen and when they touch bottom or top edge of game area I want them to kind of Bounce and reverse their vertical movement to the opposite direction I do that with an if statement I say if this Y is less than zero or if this do y is more than canvas height minus this do height set their Direction property from line 21 to its opposite
value this the direction y * minus1 now they just bounce when they reach edges of the game area let's draw score I create a lead variable called score and I assign it to Zero initially I create a custom function called Draw score inside I set fill style to White I want white numbers I call built-in fill text method inside I will hard code string score colon space plus score variable which we just declared and I wanted a drone on canabas at coordinates 5075 for example now I just call draw score from inside my animation Loop
keep in mind since we are drawing everything on the same canvas sequence in which you call This will affect how our game is layered I want score to be behind Ravens so first I draw score then I draw Ravens it's very small so let's set Global canvas font to 50 pixels impact now it's easier to read I will play with it a bit I can use canvas Shadows here but I can also just draw the same text again at slightly different coordinates for example 55 and 80 the first layer will be black the second layer
will be white in the game we will have to click Ravens before they disappear behind the left edge of screen I create an event listener for click event call back function on event listener has the default access to this event object I assigned variable name for example e it contains information about The Click event that happened for example it's X and Y coordinates in relation to viewport if I consol e.x and e.y I get coordinates of my click whenever I click somewhere in the game area I promised we Would do Collision detection by color today
to do that we first need to know what color is the pixel we are clicking on I create a custom variable I call for example detect pixel color it will be equal to built-in get image data method get image data simply scans area of canvas and returns an array like object called U int8 clamped array it's a simple data structure full of unassigned 8bit integers it's clamped which means it can contain only integers whole Numbers between a certain value range specifically between 0 and 255 let's scan canvas and expect what it gives us get image
data needs four arguments X Y width and height of area we want to scan I want to scan just one pixel we click on with mouse so coordinates of this click event e.x e.y and withth and height of scanned area will be just one pixel we want Pixel Perfect Precision here okay let's just conso lock this variable to see in what Format get image data gives us the pixel color to make sure we understand how it works if you are getting error at this point keep watching I will explain it and I will show you
how to deal with it now whenever I click somewhere on canvas get image data scans area of one pixel directly under the mouse click and it gives us this image data object this autogenerated image data object contains three main properties data property which is an array currently it has four Numbers inside and with an height of scanned area in our case one pixel the way color data is structured here is that each four elements in this data array represent one pixel specifically it's red green blue and Alpha value if you use CSS you know that
any color can be created by combining a certain amount of red green and blue the only difference between CSS rgba declaration and this is that in CSS opacity is a value between 0o and one here opacity Alpha is also a number between 0 and 255 0 is transparent 255 is fully visible here for example you can see I clicked and it gave us 0 0 for red green and blue and zero for Alpha it means we clicked somewhere in the empty area keep in mind that canvas is just the Ravens and score the rest is
transparent rainbow colors you see are on the background and are applied to body element with CSS we are calling get image data on CTX Variable so it is just scanning that particular canvas element it doesn't see anything else some of you might be getting error when you click on canvas and try to run get image data on it we are drawing spread sheets or Raven images on canvas in some browsers you won't be able to call get image data on the same canvas where you draw images it will give you an error that says something
like canvas was tainted by cross origin data if you are running Your code locally most likely you see that error I'm using local server so I'm not getting that error right now it's a security measure related to cross origin resource sharing apparently there could be viruses hidden in some images and by scanning that image with get image data you could expose yourself to that virus there are many ways to get around this problem and scan canvas without exposing yourself to any potential risks in our case it's simple let me show you but First I will
assign a differently colored hitbox to each Raven so I want one canvas that has only these hitboxes and no Raven because when I click it I want to get color of that particular hitbox not of the black raven if I create a secondary canvas and I use it just to draw these hitboxes and no images it won't give me tainted canvas error I will explain more as we write it in index HTML I create an additional canvas with an ID of Collision canvas in style CSS I comment out rainbow background for a moment so that
it's very clear what we are doing the same as I set up the first I will also set up this new Collision canvas be careful here I always make mistakes and typos when assign in multiple canvases like this for some reason I don't know why constant variable called Collision canvas is document get element by ID Collision Canvas Collision CTX which is context is Collision canvas. getet context 2D I also set Collision canvas width and height just to check I give it red background yes it's covering the entire browser window perfect on my Raven class I
create a property called random colors at the point where each Raven is created I want to roll the dice and randomly give it red green and blue color value we know that color values can be in a Range between 0 and 255 so red will be math at random times 255 like this it will give us decimal points I need only integers here so I wrap it in math. floor I do the same thing for green and blue now we have three random values in this array assigned to each Raven object I create one additional
property called this do color and here I concatenate rgba color declaration using these values red is random colors index Zero green is index one and blue is index two plus closing bracket like this to use this color I declare fill rectangle on line 54 and I set fill style to this dot color from line 37 now each Raven has a random red green and blue color assigned when it's created by our class Constructor and we use these three values to create RGB color for its hitbox hitbox means Collision detection area and in our case it's
the colored Rectangle around each Raven we can also do much more complex shapes and still get Pixel Perfect Collision detection but for purpose of this tutorial rectangles are fine I don't want to complicate things too much this tutorial is to help you understand the technique so now each Raven has an array of three random values between 0 and 255 and these values are used to draw its hitbox we will use these Valu SC as a unique password for each Raven we Click on canvas get RGB value of that pixel we clicked on using get image
data method and we compare them with this random color property if they all match we know we click on this particular Raven this technique has one downside there is a very small chance that there will be two identical colors generated next to each other but since we do random number between 0 and 255 three times and we only have between three and seven active Ravens on the screen at any Given time the chances of that happening are astronomically low if we have any math experts who can run the numbers let me know in the comments
it will be one in millions possibly billions now I told you what I want to do what does that look like in JavaScript before we write Collision code there is one small thing layers I want big Ravens to be up in front and small Ravens to be behind to create a sense of depth and correct the draw order in a 2d space right now Sometimes you see smaller Ravens up front because they are drawn here on line 83 based on the order at which they were pushed into the array on line 78 I don't have
to sort them for every animation frame only every time time I push new Raven to the array I want to sort out all objects in the array by size I use built-in array sort method sort method will simply reorganize order of elements in the array their indexes based on provided check in a callback Function it will run through the array and compare every element against every other element and sort them in ascending or descending order ascending order is default it will run over my Ravens array and use these A and B Vari Ables for each
object I can choose many different properties to sort them by today I will choose WID because I know Ravens in the back will have smaller width than the ones up front I'm just going to return it like This simple syntax and I'm comparing width of every element in the array against the width of every other element in the same array a minus B will sort my array in ascending order based on width which is exactly what I want I want small ones to be drawn first and large wants to be drawn on top you can
read more about buil-in JavaScript sort method online we can see that it works large Ravens are up front and smaller ones are behind perfect as I said I want To avoid tainted canvas error so I need to make sure I have a separate canvas I can scan color from that doesn't have any images drawn on it I take Collision context variable I declared on line six and I draw my colored rectangles on that canvas instead by adjusting code here on lines 54 and 55 nice that worked I can see we are not clearing the old
paint on that canvas so online 74 I call clear rectangle on collision context as well now we have Two canvas elements one has colored Collision rectangle and the other has Ravens and score drawn on it on line 68 Inside click event listener instead of scanning my main game canvas for Pixel data I will scan just Collision can us instead now when I click it will ignore the black Ravens and image data object will give me red green blue and Alpha value of rectangle I clicked on I will compare it with red green blue value inside
random colors property on Each Raven to know which one was clicked on and then I will set its marked for deletion property to true there are many techniques you can use to compare two array like objects against each other let's just keep it simple when I click on one of these rectangles I can see the values are inside this image data object on a property called Data data is an array with red green blue and Alpha value of pixel we clicked on I create a variable to get hold of This array detect pixel color. data
which refers to this UI nt8 clamped array with four elements there is also a way to check for Collision detection between two objects based Bas on opacity Alpha value like this but today we will do collision between point and shape between Mouse and Ravens I will ignore Alpha value from now on and I will just focus on these three values red green blue so this PC pixel color variable Holds this data array with four elements I take my Ravens array and I call for each on it for each Raven object in the array I will
check if it's random colors property from line 36 if the first element in the array index zero is the same value as pixel we clicked on at the same time we also need the second and the third element to match if random colors array on my Raven matches exactly red green and blue values on Pixel we clicked on we know we have a collision index zero is red index IND one is green index two is blue we are comparing the two if they match we have Collision so I will take that Raven object and set
its marked for deletion property to true and I will increase score variable by one awesome it works I can click on Ravens and they disappear and increase my Score I can set opacity on collision canvas to zero and I can enable rainbow background on body element Collision detection still works correctly well done if you followed this far you are doing great what should we do next hm how about we add EXP iion animation and sound effect whenever we click on a raven I will just repeat the same pattern we did for Raven class I create
an array called explosions it Will hold all active animated explosion objects I will create a class to create a blueprint for these objects its Constructor will expect three arguments x y and size because position and size will come from the outside and will depend on the Raven we clicked on this do image will be new image this. image SRC will be boom PNG you can download the spreadsheet for free in the video description Sprite width will be 200 Pixels Sprite height 179 pixels this do size will be size we passed as an argument on line
61 same for this.t x and this doy these values come from the outside this dot frame active frame will start from zero this dot sound will will be new audio like this this do sound SRC source and here as a source you can add any sound you like for example I will go to opengameart.org webbsite I click browse Sound effects and I will search for Magic sfx special effects I will choose this pack of for sounds I download it and I will use the one called ice blast I will rename that file as a boom.
WAV and I will add it to my project folder you can choose a different sound if you want you can also have multiple sounds and play a random one here it's up to you in update method same as we did before I will use Delta time to time My animation we will have one variable to accumulate Delta time values called for example time since last frame it will start at zero then we need a second variable to Define limit when the next frame trick I call it for example frame interval and I set it to
200 milliseconds I pass Delta time as argument to update method it will be coming directly from animation loop I will show you in a minute this do time Since last frame will be slowly increasing by the amount of Delta time if time since last frame is more than frame interval 200 milliseconds I increase this dot frame from line 69 by 1 I also want to play the sound when we are on frame zero when the explosion first appears there are better ways to do that but for today I will simply check if active frame of
this explosion is zero and I take this sound from line 70 and I call built-in play Method on it Explosions will also need draw method which will draw the actual Sprite sheet animation we will pass a draw image nine arguments same as we did with Ravens image we want to draw this. image from line 62 four values for area to crop out single frame so Source X is this. frame times this. Sprite width Source y will be zero because we only have one row of Sprites Source width will be Sprite width from line 64 and
Source height will be Sprite height from line 65 so Now we told JavaScript what area we want to crop out now we need to give it X Y width and height where to place it on destination canvas so this. X this doy and this do size for width and this do size for height as this do frame variable increases here on line 79 because of this Source X property here we will show frames 0 1 2 3 and four now where do we trigger this code to create and animate new explosion the Best place would
be here I think this if statement detects collision by color so when when Collision is detected I take explosions array from line 59 and I push new explosion in there this will trigger explosion class Constructor on line 61 I can see it expects value for X and Y coordinates and size because I want explosion to depend on size of the Raven we clicked so here we are cycling through Raven's array referring to individual ravens as Object I want to pass x y and width of that r given as x y and size arguments here okay
that should work I can test it by conso explosions array from line 59 I can see as I click and hit Ravens explosions are being added perfect I made sure my explosion class has update and draw method same as my Raven class that's why here on line 123 I can simply just use spread operator and expand the entire explosions array into this array I'm creating on a fly so that I can call Update on all Ravens and all explosions at the same time like this I do the same thing for draw method on line 124
I like this syntax it looks clean down here I will also remove all explosion objects from the array using built-in array filter method I need to create a property called marked for deletion on my explosion class for this to work as you can see I'm repeating the same patternn we used for Ravens I hope that using the same structure like this Helps you to understand and navigate in the code a bit better initially I set it to false in update method I write an if statement if this do frame from line 69 is more than
five which means after all the frames of sprite sheet have been displayed one by one and explosion animation is complete I set marked for deletion from line 74 to true when I click on Ravens sound plays and explosion Sprites are animated we are Making great progress we just need to polish some details here if I change frame interval on line 73 to 500 you can see it only affects the first frame the rest of Animation is playing really fast hm oh it is because I need to reset time since last frame back to zero every
time so it can count towards the next frame interval over and over to serve next frames 500 milliseconds is too slow let's try 200 I want to align explosion animation Better over the Raven Sprites let's move it a bit upwards by adjusting destination y argument in draw image method I will make it relative to size this do y minus this dot size this do size divided by four yeah I think this is aligned well now let's create game over condition on line 11 I created a global variable called game over and I set it to
false initially inside update method on Raven class I create an if statement if any Raven manages to get all the way across the screen and behind the left edge of Game Area game will end if this. x is less than zero minus this.width set game over from line 11 to true and inside animation loop on line 132 I only want to run request animation frame and serve the next frame of our game as long as game over is not true exclamation mark here when Raven gets all the way across screen game over will be set
to true and game will stop like This I also want to display game over message same as we data draw score I will create a function called the draw game over first style will be black fill text will be for example game over your score is plus I concatenate score variable I want it in the middle of the screen so x coordinate will be canvas with divided two and y coordinate will be canvas height ided two now I need to call call My draw game over function here in animate if game over is false keep
serving the next frame else call draw game over method to display message and final score it's not centered it's because these coordinates on line 101 Mark top left corner and the text goes towards right and bottom from that point same as when you are drawing rectangle or image on canvas with text it's easy to Center by setting text align property to Center like this Yes that worked same as I did with score I want to give it Shadow I will use this trick where I draw the same text twice with different fill color and I
offset it by five pixels nice let's change direction of background gradient maybe 45° 125° let's do a little bit of experimenting now and also to solidify what we learned today I will use the same code pattern we used for Ravens and Explosions to add particle effects to our game I will go a bit faster now this part is just for fun feel free to run your own coding experiments I create an array that will hold all my particle objects I create particle class Constructor will expect X Y size and color this will be coming from
outside the class and will depend on what Raven is leaving this Trail and creating these particles it will be shooting from their tails as usual we will create properties For this.x and this do y this do radius since particles will be drawn as circles it will be random number tied to size of a raven let's try this formula and see what it looks like particles will be growing in size so we need Max radius to know when to remove them and also at which point they reach maximum opacity it will be random number between 35
and 55 for example marked for deletion as usual will be false at first horizontal speed X will be a random number between 0 .5 and 1.5 because I want the particles to slowly drift to the right this dot color will be passed from the outside update method will move particles to the right horizontally it will increase radius by 0.2 per frame and it will check if this do radius is more than Max radius if it is it will set marked for deletion to True draw method will just draw a simple Circle begin path to start
the drawing fill style will be this. color from line 101 Arc method to draw a circle I pass it X Y radius start angle and end angle like this and we fill circular path with color we have a class that will serve as a blueprint to create particles I want them to follow ravens as they fly to create Trails behind them to do that I go up inside update method on Raven class every time time we serve next Sprite sheet frame at the same interval we are going to take particles array we just created and
we will push new Particle inside my particle class Constructor expects four values to come from the outside X Y size and color so I pass it X and Y of this raven width of the Raven as size argument and this dot color we use for Collision detection rectangles will also be color of particle Trail for that particular Raven you can see here on line 95 Constructor wants these four properties to come from the outside so that it knows where on canas to draw the Particles how large and what color I can see I forgot to
declare this do size here like this it will come from here and it will be used here to make radius of particle circles relative to the size of Raven smaller ones should have smaller Trails so we have particle class here on line 52 we are creating new particle object and pushing it into particles array inside animate I use spread operator again to expand contents of particles array here so that their Update method gets called and I also expanded here for draw method I also need to make sure old particles with marked for deletion properties set
to True get filtered out from particles array nice we are drawing particle tra s you can see they come from the top left corner of Raven hitbox I will adjust that position a bit here inside particle class Constructor first I need to move this do size up so that its value is Available for all properties coming after it this do X will be X passest argument on line 95 plus this dot size from line 96 divided by two to center it horizontally yes this do y will be y plus this do size ided two no
that's too low this do size divided by three much better I want particles to be drawn behind Ravens we are drawing everything on a single canvas element so how things are layered depends on the order at which JavaScript Cycles through These objects and calls their draw methods for every frame I will change the order here to draw particles first and then Ravens and explosions will be drawn over them like this also we have a working code let's clean it up in update method on particle class I want radius to grow faster 0.5 0.8 0.5 is
fine drawing Trail on every single Raven can be performance expensive I want a property that will Allow me to randomize it and allow me to set what percentage of Ravens will have particle Trails on my Raven class I create a property called this do has Trail I want this property to be true for certain amount of Ravens and false for the rest as Marcus pointed out in my generative art tutorial any conditional expression results in a booing value so instead of doing if else statement here I can simply just roll dice with math. random M
that random called like this Will return a random value between zero and one so I call it and I check if that random value is more than 0.5 and that's it it should be true roughly for 50% of Raven this conditional expression results in a buling value true or false depending on if math. random rolls a random number that's higher or lower than 0.5 I really like this syntax very simple and clean inside update method on Raven class I will only create new particles if this do Trail is True like this now only half of
my Ravens will have Trails I also want particles to animate from fully visible to transparent inside draw method on particle class I set Global Alpha property on my canvas to be one which is maximum fully visible minus the current size of the particle divided by Max size as the particle's radius grows eventually radius will be the same size as Max radius so let's say Max radius is 30 pixels at that point Where the current radius is the same size as Max radius we will have 30 / 30 here which is 1 and 1 - 1
is zero particle is slowly growing more and more transparent and at the point when it reaches maximum radius it will be at zero Global Alpha this formula might be a bit difficult to completely understand if it's the first time you see it but it's very useful we will talk about it again in some other video as you can see global Alpha is Spilling over and affecting my ravens as well that's an easy fix if you want to change some Global canvas properties such as fill style Global Alpha rotate translate and so on and you want
those properties to affect only a single element you draw and not the others you can just wrap that drawing code between buil-in safe and restore methods safe will create a snapshot of current canvas global settings and then we change Global Alpha here which will affect just This one particular particle and then I call Restore to revert canvas settings back to what they were at this point say safe and restore are especially useful for rotating elements on canvas but you can also use them for other things like this my particles are blinking before they disappear it
is because JavaScript first runs over the entire array before it filters the particles that are too large out and my Global Alpha formula Works only in a specific range between Zero and Max radius some particles get outside that range and are drawn fully opaque for a second before they get filtered out to fix it is simple I just trigger marked for deletion a little bit sooner for example by saying Max radius minus 5 in my check online 111 let's make the trail nicer I will add five particles every time instead of adding just one on
line 54 I create a for Loop like this and I put this code inside if I make radius grow slower Trail will be longer because it will take particles more time to reach Max radius be a bit careful here not to have too many active particles on screen at once because at some point it will start affecting performance and frame rate I can also randomize the initial X and Y coordinates a little for example I can add random number between minus 25 and plus 25 I think it looks a bit more interesting like this I
can also add More enem types for example I can add fast flying bats that will be worth extra score points maybe I want Ravens with trails to be worth more score but also have more lives there are many things we can do here if you are still feeling creative check out some of my playlists I have creative coding for beginners game development playlist and advanced animation effects everything with just HTML CSS and plain vanilla JavaScript no Frameworks and no Libraries check out some recommended courses in the video description I'll see you there if you want
to build games with the JavaScript all you need is a small set of tools and techniques let's add a couple more of them to our toolkit today and make sure we really understand them in JavaScript the extend keyword is used to create so-called child class that way I can have my main parent class where I define properties and values share between all my enemy types and Then I can have child sub classes that Define specifics such as different visuals different movement patterns and so on for each anime type then when I instantiate my ghost object
and I call update on it if JavaScript can't find update method on the ghost class it will go look for it automatically on the parent enemy class and it will run the code from there there is another special keyword called super today I will show you exactly when and how to use it let's Build a project step by step completely from scratch and in the process let's learn everything we need to know about subclassing in JavaScript and how to use it to keep our code modular clean and easy to read this tutorial is for beginners
I will take you through the code in a way to make sure you understand everything we will build a really fun animation project and I will show you many game development techniques today this video Is independent and I will explain the code from scratch but it's part of a largest Series where I teach you tools and techniques you will need if you want to be a game developer or if you just want to learn frontend web development and JavaScript on fun visual animation projects if you Cod along with me today you will get three free
premium Sprite sheets so that you can get exactly the same result check out this website for more Beautiful game development art assets to start my project I create a basic web page of boiler plate markup I link style CSS file Javascript file and I created HTML 5 canvas element with an ID of canvas one I bring my three images into the project by creating three IMG tags with IDs worm ghost and spider you can find these images to download in the video description it might be a good idea to use the same images as me
at first and then modify the code and use Your own art assets once you get everything working it might save you a lot of time to buug in if you follow exactly what I'm doing especially if you are a beginner I give my canvas a border width and height and I position it with CSS in the middle of the page I will also hide the project images we will will draw them and animate them with JavaScript in a minute by including images as image tags I can make sure They are fully loaded before my JavaScript
code runs by using load event listener it will prevent potential errors I will show you exactly what I mean as we go along I set up my canvas using these four lines of code as usual let's outline the entire project structure now so that you can see what functions and classes we need and how they are connected to each other when we have the complete project structure we will be expanding on individual ual Parts to add more functionality the most important thing today will be my game class I will use it as the wrapper that
contains and controls all movement and animation logic and basically everything else it's a JavaScript class so it will need a Constructor which is a monitor method for all JavaScript classes it will also have update and draw methods in game class Constructor I create a property I call this do enemies my game object will hold an array that contains All enemies like this this my game class will also have a private method called add new enemy this method will be called every time I need to create and set up new enemy for my game if method's
name starts with a has symbol like this it will be a private class method it means it can only be called from within my game class to manage some kind of internal functionality in our case adding new enemy into this enemies array from line eight if you try to call this Private method from outside game class you will get an error notice that update and draw methods are public because I will need to call them from my animation loop from the outside a bit later my add new enemy private method will need a way to
create new enemies for the game so we will write another class I call enemy and inside we declare a blueprint Whenever I Call this enemy class from inside add new enemy method it will create one new enemy object for me I Will show you how to make animated ghosts worms and spiders they will all be created by this anime class but they will have different animations and different behaviors to make our game more interesting and maybe more difficult for the players so again as you know every class needs a Constructor to hold the blueprint and
we will also have update and draw methods here update and draw method on game object here will be Handling updating and drawing my entire game for example all enemies player obstacles backgrounds menus and so on update and draw method here on the enemy class will be handling only each individual enemy such as their position movement pattern sprite animation and so on and finally to complete this skeleton of our project we will need a custom animate function that will call what needs to be called and a loop around to move and animate things in our game
here In animation loop I declare what happens in our game frame by frame at first we will call built-in clear rectangle method and we will clear old paint from the entire canvas so from coordinates 0 0 to coordinates canvas width canvas height if you are a complete beginner this is horizontal x-axis and this is vertical Y axis so point 0 0 is here and point X200 y200 for example is here this is the basic thing you need to understand if you want to draw on canvas So we cleared old paint from canvas to make sure
we can only see the current animation frame we write some code here depending on what we want to happen in our game and we call request animation frame built in JavaScript method which will simply take function we pass to it and it will call it once animate will run its code and call itself again run its code and call itself again over and over this is how you create animation loop I don't want any of this code to Run until I'm sure my web page including canvas element and all project images have been loaded so
I highlight all the code and I cut it for a second I want to put it inside load event listener document do event listener and we will listen for a dum content loaded JavaScript event I actually made a mistake here because Dum content loaded event fires when the initial HTML document has been loaded and parsed but it doesn't wait for Stylesheets and images the correct event to listen for here is the load event which only fires when the whole page has been loaded including all dependent resources such as stylesheets and images so please replace Dum
content loaded event with load event here you will not notice any difference if you are working locally because images will load instantly but if you are loading images from an online server somewhere load event is the one you need here so I Paste all the code back here inside my load event listener we have canvas setup main game class enemy class and animate function if you want to animate something it's important that it runs at the same speed on slow old computers and on brand new gaming super PCS not every computer is able to Surf
frames at the same speed also some screens have different refresh rates and request animation frame adjusts when it serves the next frame Based on screen refresh rate so what I want to do now is count how many milliseconds happened between frames and only when we reach certain threshold we will serve the next frame since we are passing animate as an argument to request animation frame here request animation frame has another secret feature it will pass an automatic timestamp argument to the function it calls so our animate has access to timestamp argument which was Automatically generated
by JavaScript because I called animate using request animation frame here I want to calculate the difference between previous and current animate call in milliseconds difference between frames in animation is also called Delta time simply explained as request animation frame runs over and over it is passing animate this automatic timestamp argument I want to know what is the difference in milliseconds between previous Tim stamp And timestamp from the current Loop so-called Delta time I will calculate it by saying time stamp that was passed in this Loop minus time stamp that was passed in the previous loop
I will call it for example last time after I used last time variable that was holding old time stamp from the previous Loop to calculate Delta time I can reassign last time to the new time stamp from this Loop Loop so that it can be used in the next loop again let's consol Delta time To see if it works here I declare animate I also need to call it to start the first animation Loop oh yeah last time is not declared I declare it right here and I initially set it to one this value of
one will only be used for the very first Loop because on the second Loop it will get reassigned to the current time stamp in console I can see my Delta time is around 16 milliseconds this is very common refresh rate for most computer Screens but if you have high refresh screen you can get a lower number here and if you have old computer you can get higher number here especially when you create a bigger project where you animate many moving Parts at this point even very slow computers should handle 16 milliseconds Delta time time between
animation frames since our game doesn't have any graphics yet if I scroll in console all the way up to my first Delta time console o I can see the initial Call was none not a number it's because animate only receives automatic Tim stamp argument here when it gets called by request animation frame on the very first initial call it doesn't have any time stamp argument so I will pass it zero just for that first Loop now we know how to calculate Delta time number of milliseconds between frames faster computers will have lower number slower old
computers might have higher Delta time because it can take Them more milliseconds to serve the next frame since we have this Delta time time value we can adjust animation speed with it to make sure our game runs at the same speed on slow and fast computers I will show you where and how to use it as we build our project and start animate and move game characters around on canvas console o like this can cause performance issues so don't forget to remove your console locks when you don't need them anymore on line 22 I have
my Enime class it has a mandatory Constructor method which will be used as a blueprint to create one new enemy object Whenever I Call this class with a new keyword from somewhere in my project let's write that blueprint and inside we declare properties and values of our enemies each eneme will need X and Y starting coordinates so that JavaScript knows where we want to draw them on canvas I will first hard code coordinates 100 100 we will change that In a minute I will also give each anime width of 100 pixels and height of 100
pixels update method on enemy class will just move the Enemy by one pixel to the left draw method on my custom enemy class will call buil-in fill rectangle method and it will first draw a black rectangle representing my enemy I pass it this. X from line 24 this doy this do width and this do height great we have enemy class now we can call it to create enemy object and add it to our game Inside add new enemy private method I take disl enemies from line nine and I call buil-in Push method push method can
be called on array and it will take whatever we pass to it and it will push that at the end of the array so I pass it new enemy the new keyword is a special command in JavaScript it will make JavaScript look for a class with the name enemy and when it finds it it will take its Constructor and use the blueprint inside to create one new blank JavaScript object and assign it values and properties based on instructions inside the blueprint that new enemy object will also Auto automatically have access to update and draw method
on anime class when you instantiate object with the JavaScript it will run its blueprint inside Constructor so I will do something which might look a bit strange to you any code put inside the Constructor will be executed when you Create new instance of that object with the new keyword so here when I create new instance of my game object I will create enemies array and I will call its private add new enemy method automatically which will push new enemy in inside enemies array to check if that really happened I will also consol loog this. enemies
to execute all this code here all I need to do is to instantiate my game class so let's do it down here on Line 39 I create a new constant Variable I call for example game and I set it equal to new game like this doing that created one new blank game object and it ran code inside Constructor here on line 8 so this console loog from line 11 is showing that this. enemies from line 9 contains one new enemy object perfect you can see that enemy object has X and Y width and height as
we declared here on line 25 now inside update method on game class I will cycle through all enemy objects inside this. Enemies array and I will call their update method from line 31 I hope you know syntax of for each method I'm simply saying here take this enemies array from line nine and for each object in this array run their Associated update method this is es6 syntax so-called Arrow function I will also take the same enemies array from line 9 and I will call draw method from line 34 on all these eneme objects currently there
is only one inside but there could Be many more down here inside my animation loop I take instance of my game class from Line 39 I call update method we just wrote and I also call draw method and here we are animating one enemy in our game I hope you can see advantages of code structure like this let's say I also have array of obstacles background layers powerups players and so on I can call all of these from update and draw method on my game class to get Everything moving with a very little code from
a single wrapper function keeping my code clean and organized this way it's a good practice not to use Global variables inside our classes so I will take context width and height and I will put them inside my game class pass these arguments will be passed here on Line 39 when I create an instance of game class so I pass it CTX from line three to tell JavaScript which canvas I want to draw on I will Define width of My game by passing it canvas width from line four and canvas height from line five these three
variables just as my game class Constructor expects here on line 8 then I take these arguments and convert them into class prop properties this. CTX is CTX Past online 8 this do width is width and this do height is height now I converted public variables into class properties and I can pass them around when I need them by passing game object as an argument I will show You let's say I need width and height of my game inside the enemy class because I want my enemies to appear behind the edges of game area on line
23 when I create new enemy object I will pass it this keyword which here refers to the game object we are currently inside that game object will carry all references to its width height and other properties with it let me show you so I'm passing this keyword and inside my enemy Constructor I will call it game here I Created this do game property and I set it to game that was passed as an argument now I have access to game object from inside my enemy class I can conso it and you can see all its
properties including width and height so now I have access to width of my game from inside enemy class by saying this. game. width the initial starting X horizontal coordinate for enemies will be just behind the right edge of canvas initial starting y coordinate will be a Random number between zero and this Dot Game height so in this case between zero and 800 pixels because height of my game is 800 now whenever I reload page new enemy is generated with random vertical coordinate I achieved that by passing reference to my game class to enemy class Constructor
online 23 which will take all these properties and values with it I call it game and convert it into class property on my enemy class Making them available when I need to position newly created enemies this is one way how you can pass class variables around if you want to avoid using Global variables in your projects I don't really want to add just one enemy when I create instance of game class I want to create new enemies over and over in a certain interval if I just call this to add new enime from inside update
method it will create new enime for every animation frame that Is too many and it would freeze my game very quickly I commented out game class is responsible for adding new enemies to the game so I will give it two new properties this. enemy interval will Define number of milliseconds between adding each new enemy into the game let's try 400 milliseconds this enemy timer will count milliseconds from 0 to 400 over over and over in update method I can say if this enemy timer is more than enemy Interval call add new enemy private class method
also at that point we want to reset enemy timer back to zero so it can start counting again else meaning if enemy timer is less than 400 milliseconds increase enemy timer by one every time we add a new enemy I will consol loock this enemy array from line 12 just so we can check if it's add in objects or not I decrease enemy interval on line 13 awesome we are add in enemies but you know how we said that each Computer could run at a different speed that could mean that enemies are being added faster
or slower on some computers I want my game to run at the same speed on every computer and that's why down here on line 56 in animation Loop we calculated the Delta time time between frames and milliseconds I will use it now I pass Delta time to game. update method on line 58 from my previous console loog I know my Delta time is 16 milliseconds my computer can serve new Frame every 16 milliseconds value of delta time is dependent by the power of your computer but also on your screen refresh rate because request animation frame
method adjusts to maximum screen refresh rate if the computer can handle it now I have access to Delta time value here in my update method so instead of adding hardcoded Value Plus One I will add value of delta time to my enemy time on line 133 I set anim interval to 400 milliseconds or maybe 1,000 Milliseconds here I'm increasing enemy timer by 16 milliseconds per frame when we accumulate enough to reach 1,000 milliseconds 1 second we will add new enemy to the game if somebody has a faster computer their Delta time will have smaller value
on slow computers Delta time will have higher value and will be getting near to the Target 1,000 less often but in larger steps so in the end my code will run at the same or very similar speed on slow and fast computers Regardless of their power or monitor refresh rate and this is how you use Delta time to trigger periodic events in your games or animation projects I also need to make sure I'm passing the reference to my canvas properly and not using Global variable let's follow the logic we declare CTX here on line 3
I passed that Global variable to my game class when I instantiated on line 52 on line nine I take that argument and I convert it to class Property then I pass CTX from line 9 to draw method on my enemies and on line 47 I need to make sure draw method on enemy class expects that argument and this way line 48 is using this. CTX that was passed around from game object rather than using Global CTX variable I'm consol in this. enemies array on line 20 and I can see it keeps growing I either way
to remove enemies that have left the screen we could potentially also use something Called object pooling here but I will leave that for another episode first I will need a flag on my enemy objects that will mark them as ready to be deleted and then we will simply filter these objects out I will call that property this do marked for deletion and I initially set it to false then inside update method on enemy class I will check if this X is less than zero minus this. width meaning the enemy has moved across the screen and
behind the left Edge of canvas if it has I will set its marked for deletion property to true now I can go inside update method on game class and here I will take this enemies array from line 12 which currently has around 20 objects and it keeps growing and I will filter it filter is a built-in JavaScript method that manipulates arrays it simply creates a new array with all elements that pass the test implemented by the provided function so here on line 17 I'm saying Take this. enemies from line 17 and reassign it to the
same array but only include elements that have this do marked for deletion property set to false exclamation mark here means false let's run the code and see if it works yeah we stop at 10 enemies and it's not growing anymore because we are removing old ones as we are adding new ones maybe one good performance idea here you don't have to check and filter enemies for Every frame of Animation we could for example do it in a certain interval I could even take this line of code and put it inside this if statement it would
still filter old enemies but it would run only periodically whenever I add new enemy to the game we are making nice progress we have already implemented so many features here between lines 35 and 53 I have my enemy class it's a blueprint with properties and methods that determine What my enemies look like how they move and how they behave let's expand on it and make them more interesting rather than simple black rectangles I will create a soall sub class or child class by saying class worm extends enemy doing that will make enemy a parent class
of worm and for example if I call update or Draw and JavaScript can't find that method on my worm class it will automatically go looking for it on the parent class so it will look for that Method on anime class same goes for properties declared in Constructor if there is no Constructor on my worm class it will automatically use the Constructor from enemy when I do this I can have shared eneme class that declares all logic properties methods and features that all my enemies have in common for example their sprite animation logic Collision checks with
player and so on while at the same time I can declare child classes where I can Override improve and change some of these properties and methods to create unique and very different behaviors for different enemy types and that's exactly what we will do now let me show you how much Visual and behavior variety we can create without repeating the code all enemies have in common doing this will keep our code clean and modular and you can go crazy with different aneme types while still keeping your logic organized and easy to read on my worm class
I Don't have to declare Constructor at all and JavaScript will automatically use Constructor from line 36 on enemy class but in most cases you want each enemy to have different width height X and Y position and so on so I kind of want to use both I want to take all properties from eneme Constructor and I want to add some additional properties on top of it that will be specific only for my worm objects I declare Constructor and I know worms Will have unique value for image property so this. image equals worm this line of
code is a weird syntax and I will explain what's going on and how come it works when I bring image to my project this way in a minute let's first finish Constructor method on worm class same as on line 36 worm class Constructor will expect the game as an argument now I want to say take all the code between lines 37 and 43 on enemy class Constructor and use it here to do That we use special super keyword the super keyword is a special command in JavaScript and it's used to access and call function on
an object's parent so here I call Super and I pass it game to literally run the Constructor on its parent class after that I can add more properties on my worm class Constructor like this important thing to note here is that you have to first call Super and run parent Constructor like this before you declare any additional properties Using this keyword otherwise you will get a reference error in derived classes like this super must be called before you can use this keyword so now my worm Constructor contains all the code from between lines 37 and
43 and additional this. image property set to worm each enime type will have different starting X and Y coordinates and different width and height so I will actually take all these and put them on my worm I want enemy class construct to have only Properties and values that are shared for all my enemy types up here on line 31 inside private at new enemy method rather than instantiating parent enemy class I will instantiate child worm class again I'm passing it this as an argument and because we are inside game class this reference is the entire
game object so all these properties we travel down to worm class and inside Constructor we are taking that game and passing it to Super instantiating Constructor of its parent enemy class which is here enemy class also has update and draw methods and when I call update and draw on my worm and JavaScript can't find it it will automatically go looking for them on the parent enemy class I hope it's becoming a little bit more clear how this works and how parent and child classes relate and work together if I run the code we have our
worms come in again just to prove that draw method that is called From 946 is taking properties from worm class Constructor let's change this.width on line 56 as you can see now my worms are 200 pixels wide so what is this weird syntax on line 58 this is not how we usually bring images into a project usually I would use get element by ID to Target my image element with an ID of worm that I created in index HTML in the beginning I wasn't aware of this so all the credit goes to Danny who says
a little known Fact is that any elements created in the dome with an ID attribute are automatically added to the JavaScript execution environment as a global variable this means that you can access any HTML element with a JavaScript using its ID no need for document. getet element by ID or query selector I'm just doing this as an experiment and you will see in a minute that it actually works if you're having any issues you can still bring the image into the project The usual way and also ideally pass it to the worm class Constructor as
an argument so that we are not pulling Global variables directly from the outside I'm just experimenting here a bit I really like tips like this thanks Danny nowhere in my code have I declared this worm variable the only place you can find this reference is ID online 12 inside index HTML but this image will still work you can test it by console log in this. Image I have too many console logs let's comment outline 38 yes you you can see that the JavaScript is actually finding the image with an ID of worm automatically without us
having to use get element by ID like we usually do so let's use that image and make our worms look a bit better than black rectangles you can download these spread sheets for free in the description and you can use them to follow along with this video for Educational purposes to use them in any commercial projects you would have to buy a full license from the artist's website I link his site as well he has a lot of great game development art assets there check it out I feel like I explained buil-in canvas draw image
method 100 times on this channel this method is so important at first I will just use the version with five arguments image we want to draw X Y width and height where to draw it on canvas this Way we will just squeeze the entire Sprite sheet with all its six frames into the predefined area of 200 * 100 pixels notice that I'm calling draw method on my worm class it's using this prop properties but since JavaScript can't find draw method on worm it will look for it on parent anime class and it will use that
one let's remove this console loog and this fill rectangle as well I can change width and height but now I would actually like to draw just The first frame from the worm Sprite sheet I remove all these lines I commented out earlier I create a new property on worm class called this. Sprite width and it will be a width of a single frame in my Sprite sheet if I take width of my spread sheet and divide it by six the number of frames I will get 229 pixels height of a single frame is 171 pixels
I take width and height and move them up Here now I need to use draw method to cut out just single frame from that Sprite sheet and place it on canvas for that I will need to give it nine arguments so additional four to tell JavaScript what area I want to crop out from the source image I need to give it Source X Source y Source width and Source height arguments Source X and Source y will be 0 0 since I'm just cropping out the first frame for now Source width and Source height will be
this Sprite width from line 52 and this do Sprite height from line 53 so to crop out a single frame from an image with draw image method I need to give it nine arguments image I want to draw X Y width and height of what area I want to crop out and XY width and height of where on canvas we want to place that cropped out piece of image onto now we are drawing just one frame perfect you probably notice that it's a bit stretched that's Because this width and height which is coming from here
has no relation to the actual size of a single frame so the ratio is different let's make width and height the same aspect ratio as our Sprite sheet I do that by making width half of sprite width and height will be half of sprite height I needed to do half because the original size would be too large as long as I use the same modifier on both width and height in this case I divide both of them by two It will preserve the aspect ratio of the original Sprite frame all my worms are moving to
the left by one pixel per frame what if I want each worm to have different speed for example a random value between 0.1 and 0.2 and up here inside up method on enemy class I say this.x minus equals this. speed that will be very very slow let's make it faster you might have realized that I'm not using Delta time in this Movement calculation so let's use it to make sure the worms move at the same speed on all machines I'm calling this update method here on line 25 so I pass it Delta time which we
made available here before now that I have access to Del Delta time in update method on enemy class I will pass it here as an argument and to factor in time difference between animation frames when moving something around we have to Multiply it that way fast refresh rate with lower Delta time will move often but by smaller steps slower PCS will have higher Delta time they will not draw frames so often but they will have higher Delta time so they will make larger steps to compensate for the difference now the base speed is too much
so I amend it on line 59 I will actually rename it VX velocity on horizontal x- axis because maybe some other enemies will have vertical Movement also I need to rename it on line 41 if I go up on line 13 and reduce enemy interval to 100 milliseconds we will get a lot of worms and something will become apparent they are layered randomly in order as they are added to the game for example this worm should be probably behind this one and this one behind this one if if we pretend this is 3D game space
and worms that are higher should be behind worms that are lower it would look better how do we achieve that That index or whether worm is in front or behind other worms depends on order at which they're added to the array on their index in that array because as I push them into enemies array one by one we cycle through them from index zero to the maximum index in that array and we draw worm with index zero then worm with index one on top of it it if they are in the same area then worm
with index two will be on top of them and so on I want to reorganize my array so that index in The array is tied to their vertical position so that we first draw worms in this area and then we draw the ones in this area on top of them as we go down on the page vertically in plus Direction on vertical y AIS that will cause worms to look like they are properly behind each other and not messy like this look at this this is a mess this one is sliding over the other 's
eye so every time I push new worm into the array I will just build JavaScript Sort method you can simply just call sort on the array and it will sort them in ascending order by default if you want more control you can give it a call back function sort simply takes every element in the array and it performs a check comparing values between these two elements pushing them up and down in the array depending on the condition in the Callback I want worms with lower vertical y-coordinates to have lower index so that they are drawn
first so my Condition will be a.y minus b.y like this sort is a built-in JavaScript method it abstracts away the actual algorithm that does the sort in work so let's not spend more time on it now all we need to know for now is how to use it when I run the code you can see that worms that are higher are drawn behind the worms that are lower making it look like they're moving in actual 3D or maybe in 2 and 1/ 12d cartoon space well it doesn't doesn't look messy anymore You can swap between
ascending and descending order by swapping these values in our case we want a minus B also notice I'm not sorting the array for every animation frame only when I add new enemy into the array so this is our worm class it's a child of eneme and it doesn't have update and draw methods because as we said if JavaScript doesn't find them on the worm class it will go looking for these methods on the parent class but what if I want to use the base Code from draw method on enemy class and I want to add
some extra code to it to create some additional visuals for example as Boris suggested ghosts need to be semi-transparent but I don't want reduced opacity on worms only on ghosts so how do we do something like that I'm sure you can come up with some clever if statement but let's keep it clean and use child classes for that I will copy my worm class and rename it to ghost image online 74 will Be ghost referencing the ID here on line 13 in index HTML I look at my Sprite sheet with divided by number of frames
so Sprite width of single frame is 261 pixels height is 209 pixels in this case horizontal speed modifier will be a little bit higher than worms let's say a random number between 0.1 and 0.3 so that's the base ghost child class how do I randomly push worms or ghosts into my game one way way to do that is to create a property on my main game object called This. enemy types it will be an array with two elements for now worm and Ghost Inside add new enemy private method I will randomly pick one of the
options in the array I create a constant variable called random enemy and I set it equal to this do anim types and square brackets so if index here is zero we get worm and if index here is one we get Ghost how do I randomize this index and let it choose one of these randomly Every time we run add new enemy method I can just put math at random statement and it will be a random number between zero and length of this enemy types array that way I can keep adding more and more enemy types
to the array and this code will still work maybe my game will have 20 different enemy types it doesn't matter it will still work the only problem is that math at random returns numbers with de points and there is no index 1.5 in this array it's easy To fix I will wrap it inside maod floor which will round it down to the closest integer now I can check if random enemy variable is worm we will push new worm into this. enem array else if random enemy is Ghost we will push new ghost perfect so we
have this. enemy types array on the main game class this can contain as many enemy types as you want inside add new enemy we randomly choose one of them every Time we are about to create new enemy object and based on that random choice we create either worm or ghost so now both worm and ghost are child classes that extend my main enemy class let's switch to kind of flat 2D view I want worms to move only on the ground so I change their vertical y position to this. game. height minus this. height worms are
sliding on the floor ghosts are flying in the air I want ghost to take up only the top 80% of the game Area not to be so close to the ground their vertical y Position will be a random number between zero and game height times 0.8 or maybe 0.6 yeah since we switched to this new view I don't really need to be sorting my enemies by their vertical position anymore so I comment out this code on line 35 with both worm and ghost we are only modifying properties on the Constructor they both inherit the same
identical update and draw method from The main enemy class with no modifications at the moment we said we wanted to make the ghost semi-transparent so let's do it I decare draw method on ghost class and now two things can happen we can override the draw method with a completely different code here because when we create a new worm JavaScript will not find the draw method and we'll go looking for it on aneme parent class but with ghost it will find the draw method right here and It will ignore the original draw method on enemy class
the second option is that I wanted the code from draw method on anime class to run plus I want to write some additional code on top of it that will be unique only for ghosts I can do that by calling super the super keyword here simply represents parent class so imagine I'm saying enemy. draw because I want to call its draw method first super. draw means an draw basically super represents the super class the Parent class so here inside draw method on ghost class first I call draw method on enemy class and I know it
expects CTX as an argument so that it knows what canvas we want to draw on that CTX property is coming from here on line 29 by the way where I'm calling draw on all objects inside this. enemies array I'm call and draw on all ghosts and all worms at the same time so first we call draw method on parent enemy class from line 50 we will run all The code in here but we will also add some additional code that will be specific only for ghost objects in this case I will set Global Alpha property
to 0.5 this will set opacity to 50% you can see that it affects all ghosts and all worms as well it's because Global Alpha canvas property works the same as fil style for example once you set it you are setting it for the entire canvas it will stay that value for everything drawn on the same canvas unless you Redeclare it to something else since I want Global Alpha to only affect ghosts and nothing else on canvas I set it to 0.5 I draw my ghost and I set it back to one the alternative way to
do this would be to call CTX save built-in method which will take a snapshot of all canvas settings at that point then we can change Global Alpha and anything else we need to change we draw The Ghost and we call CTX restore which will automatically restore canvas properties Including Global Alpha back to what they were at this point when we called safe for the first time this technique is especially useful if I was changing multiple canvas properties at the same time not just Global Alpha so this is how you extend a method from parent class
with a help of super keyword now that we know how to do it we can also extend update method and make ghosts move in wavy patterns let's try I redeclare update method on ghost class And I pass it Delta time I call super. update and I pass a Delta time this will run all the code in update method on enemy class from line 46 here I add a new property called this. angle and initially I set it to zero then in update method I will say thisy vertical position of my ghosts plus equals math. sign
built in JavaScript trigonometry function and I pass it this. angle as an argument I covered This in my enemy movement patterns episode as part of this series before so now just quickly ma sign is a built-in JavaScript function that returns a sign of a number we pass to it it expects angle value in radians and it will return a value between minus one and + one if you keep calling it and passing it ever increaseing angle value as we are about to do here it will endlessly cycle by small increments between minus1 and + one
creating waving movement Pattern so-called sine wave so every time update method runs I will increase this dot angle from line 79 by one that angle value is being passed to math. sign function here at the same time you can see it makes the ghost shake up and down we can also multiply it times a certain radius value this will make the Curve larger like this we need to be increase in angle much slower let's try 0.1 per frame 0.05 0.02 you can see how that affects the movement curve I change radius value and angle value
let's randomize the wave size for each ghost I create a property I call for example this do curve it will be a random number between 0 and three and I use it here now some ghosts move in smaller some in larger waves I reduce the number of enemies by increasing enemy interval on line 13 Let's add a new enemy every 500 milliseconds for example so with ghost class we are extending draw method to make it semi-transparent and update method to give it wavy vertical movement worm class is just using the base draw and update methods
from its parent anemy class let's create another child class and let me show you a completely different type of movement for the third enemy type I just copy worm class here so that I don't have to write all of That again I will call it spider I check my Sprite sheet Sprite width width of a single frame is 310 pixels Sprite height is 175 i w SP ERS to start from just behind the top edge of game area so 0 minus this. height their horizontal speed will be zero I only want them to move up
and down image will be spider referencing this ID from line 14 in index HTML I give them v y velocity y property And set it to one now I create update method I pass it Delta time first I call update method from parent enemy class class from line 46 and then I add some additional code at first let's just increase vertical speed by one on line 15 I add spider to my enemy types and here I say else if random enemy is spider push new spider object into enemy's array my spiders are not showing and
that's Because yes they just move down and their horiz coordinate is off canvas so we can't see them I set their horizontal coordinate to be random number between zero and game width nice we have spiders here let's make them move up and down let's say if this.y is more than 200 pixels from the top revert this VY to a negative number since we are adding this. VY to Vertical position here on line 110 if it becomes a negative number it will make the Spider go up awesome we have spiders going up and down what about
instead of hardcoding 200 here each spider will have a different maximum movement range this. max length is a random number between 100 and 300 for example actually between zero and game height might be better now I just replace hardcoded 200 with this max length here I also want each spider to move up and down at different speed so this. VY is a random number between 0.1 and 0.2 I should also multiply it times Delta time so we get consistency across different machines I want the spiders to swing up and down from a spider web so
let's extend draw method as well and draw it first I will call draw method from parent class from line 51 here on line 88 I need to pass CTX as an argument I forgot to do that we don't want to use Global variables inside our classes so on line 114 I pass draw method CTX I Call draw from its super class from enemy parent online 51 to run all the code in there and also I will draw a spider web here so begin path to start a new shape built-in canvas move two method to set
starting coordinates of the line let's pass it coordinates 0 0 for now line two will be the ending coordinates of my line so this do X this do y I want it to be where my spider is at the moment I stroke the lines and here they Are we have spider webs coming from coordinates 0 0 two coordinates of my spiders let's change the starting coordinates to be exactly on top of the the spider horizontally so this.x horizontal and zero vertical this.x position is top left corner of my enemy rectangle so if I want the
web to come from the middle I need to take this x position and add half of enemy width to it I also do that for the starting coordinates I can see there is a small Vertical gap between spiders and the ends of their webs so let's do this. y + 10 pixels to make the lines bit longer notice that I'm not actually animating the Sprite sheets we are just showing the first frame for each anime type the best thing about our code structure now is that I can just write sprite animation logic once and it
will automatically be applied to all spiders worms and ghosts I go up to line 46 inside Constructor on enemy class where I declared properties and values that are shared between all enemy types in my game we will need frame X property which will cycle between 0o and 5 to spe specify which horizontal frame from the spreadsheet we want to show I also declared this Max frame which could be specific to each enemy but in this case all my enem Sprite sheets have six frames we count from frame zero so max frame is five I also
need to account for Delta time when animating frames to make Sure it runs at the same speed on slow and fast computers we already done it once today I will have frame interval variable so let's say 100 milliseconds and then I will have one accumulation variable that will be going from zero accumulating Delta time until it reaches my frame interval value I will call it for example this Frame timer I set it to zero initially I check if this Frame timer from line 49 is more than frame interval from L9 48 if it is I
do something else I increase frame time variable by Delta time now I just realized we need access the Delta time here so all this code actually needs to be inside update method here now I can say frame timer plus equals Delta time remember that Delta time is milliseconds between frames so fast computers will serve frames of our game animation very fast but we'll have smaller Delta time on the other hand slow computers can't serve Frames so often but their Delta time is larger so as a result it evens out and both fast and slow computers
will reach frame interval of 100 milliseconds at the same time this will ensure all the movement and animation in our games has the same timing regardless of speed of the machine we run the code on frame timer will start at zero it will be increasing by Delta time and when it reaches frame interval we can move to the next frame in Sprite sheet I Have to check if current frame X from line 46 is less than Max frame from line 47 if it is less we increase frame X by one else we set frame X
back to zero at the same time I set frame timer back to zero so it can start accumulating Delta time again on line 46 I set frame X initially to zero now I'm cycling between frame x0 and frame X5 to actually display that in game I have to replace hardcoded Source X and Source y properties in draw image method which I set to 0 0 I have to replace them with my new variables Source y can actually stay hardcoded to zero because our Sprite sheet has only one row there will be no vertical navigation within
this Sprite sheet Source X argument will be frame X from line 47 times Sprite width from line 70 that way when frame X is one we cut out this Frame frame X2 is this Frame and so on I have entire episode on this uh as part of this Series if you want more details about how to animate Sprites properly and in that episode I also show alternative techniques how to do this I can also add more functionality here in update method on enemy class and it will be shared across all my enemy types it could
be for example Collision checks with player some JavaScript generated sounds enemies can have particle effects and so on being able to write code here in one place and share it for all my enemy sub Classes will save a lot of code repetition that would happen otherwise on line 53 I'm checking if enemies have moved behind the left edge of screen and I'm marking them for deletion this check works for both ghosts and worms as they move move from right to left the problem is that spiders never move past that point they have no horizontal movement
so as you can see in the console if I let my game run it will just keep accumulating more and more spiders I Need a different check here to Mark spiders as ready to be deleted I go inside update method on spider class and I say if thisy is less than zero minus this do height * 2 then Market as ready for deletion spiders start at zero minus this height as declared hero online 114 they will move down and then they will move back up when they reach 0 Z minus this. height * to we
delete them I will be extending classes a lot in my games so I hope you learned something new Today creating child classes is not only useful for animations and game development but it's a very important JavaScript technique with many different applications across all front and web development I think sometimes it's better to learn these Concepts on fun projects like this to learn more fundamental JavaScript techniques on Creative coding projects check out related videos in the video description great job on completing today's course Say hi in the [Music] comments hey cers so I heard you like
making games me too I think projects like this are great not only for aspiring game developers but also to learn and improve HTML CSS and JavaScript skills in this class we will build easy animated s scroll game completely from scratch with plain vanilla JavaScript no Frameworks and no libraries the main goal today is to Learn about basic code structure how to split responsibilities between objects that make up our game how to make them communicate with each other effectively and how to put all of that together in an easy to understand way this class is a
part of a longer Series in each episode we built a small Standalone project for beginners to learn about fundamental building blocks of game development with the JavaScript full series is linked in the description in This part we will build a simple version of the game to learn the fundamentals in the next part we will expand on each element using the things we learned across the series let's see how it all comes together Games should be exciting full of secrets and special features I hope this series helps you to bring your creative ideas to life we
will work with three files in index HTML I link my CSS stylesheet and JavaScript file I create HTML 5 canvas element with an ID of Canvas one and I put all my game assets here in this area so that we can use load event listener to wait for these assets to be fully loaded and available before we run the game art assets were provided by this talented artist you can find more on their website I will have player image background image and Anime image here you can download project files in the video description in sty
CSS I give my body black background I make canvas blue and I position it in the middle of my web page I also want to hide my image elements because we will draw them with with JavaScript on canvas so player image display none same goes for background image and eneme image I want JavaScript to wait until all images are fully loaded so I will wrap my game inside an event listener we will listen for load event load event waits for all assets such as spreadsheets and images to be fully loaded before it executes Code in
its callback function I will place the entire code of our game inside this Anonymous callback function in JavaScript Anonymous function usually means a function without a name by placing all my code inside this Anonymous callback function I separate scope of my game from a global scope to make sure my custom class and variable names don't clash with any other outside code when all the assets are fully loaded the code inside will be executed Line by line I assign variable to my canvas element I create context instance of built-in canvas 2D API that holds all drawing
methods and properties we will need to animate our game I set canvas width to 800 pixels and canvas height to 720 pixels I make canvas transparent in this class I want to make it very clear how we split responsibilities between objects and how these objects interact with each other to create a complete game so let's just Write all the building blocks we will need today our game will need input Handler class which will apply event listeners to keyboard events and it will hold an array of all currently active Keys player class will react to these
Keys as they are being pressed draw and upda in the player I will have a simple separate class that will handle endlessly scrolling backgrounds we will also need a class that will generate enemies for us we will have multiple Active enemies in our game so I will have a function called hand handle enemies that will be responsible for adding animating and removing enemies from the game I will have a utility function I call for example display status text which will handle things like display in score or game over message and lastly we will have main
animation Loop this function will run 60 times per second updating and drawing our game over and over so that's it here We can see all the building blocks we need to create a complete game I could have wrapped everything in a main game class for example but I'm trying to keep it clean and simple today input Handler class will apply event listeners to the game and it will keep track of all keys that are currently pressed down inside Constructor I created this do Keys property and I set it equal to an empty array the way
I want to handle controls Today will be a bit different from my previous courses I want to have an array and I will be adding and removing keys from it as they are being pressed and released that way I can keep track of multiple key presses I will place event listener directly inside the Constructor when we create an instance of a class all the code inside Constructor is executed because of that just by simply creating an instance of input Handler class later all event listeners will be Automatically applied I will have event listener for key
down event callback function on event listener has access to this built-in event object I will assign it a variable name for example e and i conso late now I create an instance of input Handler class which will run all the code inside Constructor so at this point the event listener is applied Let's test it when I click my canvas and I press key on keyboard I can see this event Object here it contains all different details about keyboard event that just occurred what I care about today is this key property it contains a string that
represents name of key that was pressed so to get that value directly I say e do key now I'm getting those values as console logs I care only about arrow keys right now so I say if e do key is arrow down take this do Keys array from line 9 and push that value inside I move this Conso log here and I will also conso loog this do Keys we will get an error this do Keys is undefined JavaScript cannot find it it's because I'm instantiating input here and the event listener is called from window
object by the time that event listener is called JavaScript forgot that this keyword refers to this input Handler object and it's this. Keys property to make sure this keyword points to the correct object I can use JavaScript bind method or I can use es6 Arrow function Arrow functions don't bind their own disc but they inherit the one from their parent scope this is called lexical scoping doing that we'll make sure JavaScript doesn't forget Which object this keyword stands for and it will work you can see pressing arrow down adds an entry into this dokeys array
I don't want to have multiple entries for each key here we can see it added arrow down four times I only want To add it if that specific key is not in the array yet so I do second condition here and I say if this do key index of e do key key that was pressed is equal to minus1 with arrays if index of is equal to minus1 it means that element is not present in the array so I'm saying if key that was pressed is arrow down and if that key is not yet inside
this do key array only then push it into the array now you can see that when I press arrow down multiple times It adds it to the array only once perfect I I copy this code block and I turn it into key up event if key that was released is arrow down I want to remove it from this do Keys array so I call splice that takes two arguments index of element we want to remove and how many elements starting from that index we want to remove so I find index of arrow down inside this
do Keys array by using index of method again and second argument to splice I Want to remove one element at this index so here I'm saying when we release a key if that key is arrow down find index of that key inside this do Keys array and use splice to remove one element from that array now when I press down arrow key it's added to the array when I release it it's removed from the array nice let's also listen for other Keys using or operator I start with arrow up then we also need to listen
for key down on Arrow left and arrow right I'm going To break this down on individual lines for clarity and I use tap key to make them vertically aligned be careful here not to forget a bracket otherwise the code will break I will also listen for the same four keys inside key up event so we have this do Keys array here in key down if arrow down up left or right is pressed and that key is not yet press present in this do Keys array we push it into the array in key up when any
of these four arrows are released we find Index of that key inside this do Keys array and we use splice method to remove it this do Keys array now holds information about which arrow keys are currently pressed down sometimes it could be multiple ones at the same time I remove these console locks by instantiating input Handler class here on line 50 all the code inside Constructor on line 8 will be executed we have this. keys property as an empty array and we use key down and Key up event listeners to add and remove specific keyboard
inputs from that array and now we know how to handle keyboard inputs in a game we will use them to move player around in the next part player class will define properties of player object it will draw it animate it and update its position based on user input player object needs to be aware of game boundaries we don't want it to run offscreen so I pass it game width and game height as arguments and I convert Them into class properties like this I'm using spreadsheet of specific size here we have frames of width and height
of 200 pixels it's a good practice to size your spread sheets to the actual size you will use in your game I can also resize them with code but it's cleaner to have art assets of the right size this do X will be zero and this doy will be zero at first player object will have public draw method it will expect context as an argument to specify which Canvas we want to draw on in case we want multiple layers and multiple canvases in our game I will start by calling buil-in fill rectangle method to draw
a rectangle to represent our player I pass it X Y width and height since I have black background I set fill style to y so that we can see the rectangle on line 62 I create an instance of player class using the new keyword here on line 31 I can see player class Constructor expects game width and game height as Arguments so I pass it canvas WID from line four and canvas height from line five I get an error game width is not defined it's because I made typo here on line 32 now it works
and I can display our player by calling its public method we just wrote it expects context as an argument so I pass it CTX from line three I can move player around by adjusting its X and Y coordinates let's make it stand on the bottom of game area so this. game height minus this do Height we will also need update method to move player around let's start by increasing player horizontal x coordinate by one for every call of update method if I call update method just like this there won't be any visible movement I put
it inside animation Loop and I use request animation frame built-in method to make it loop I pass it animate the name of its parent function to create endless animation Loop and I call animate like This to start it I also need to put draw inside I delete this we can see trail behind play rectangle I want to only see the current animation frame to delete old paint from can I use built-in clear rectangle method it will delete entire canvas between each animation Loop perfect now we have player moving from left to right as we defined
in its update method instead of drawing a white rectangle let's draw a player image I call built-in draw image method I need To bring player spread sheeet into the project so this do image property is a document do getet element by ID and I give it ID of player image I pass this. image from line 38 to draw method and I pass it X and Y of 0 0 so top left corner of canvas it will just draw the entire spread sheet at these coordinates I pass it this.x and this.y instead you can see it
just draws the entire large Sprite sheet with all the frames draw image method can accept Optional fourth and fifth Arguments for wi and height it will then stretch or Shrink the image to fill all available area like this I actually just want to draw one frame so I pass it another four optional arguments Source X Source y Source width and Source height this defined rectangle we want to crop out from the source spreadsheet and destination X destination y destination width and destination height Define where on Destination canvas we want to place that cropped out rectangle
onto I pass it 0 0 as Source X Source Y and we are cropping to this. w with this do height so this area now we can see top left frame in the Sprite sheet I can use Source X and Source y to jump around the spreite sheet by changing value of source y we can jump between different rows by changing the value we pass as Source X we are navigating within the Sprite sheet horizontally let's just turn these Values into class properties called for example frame X and frame y I replace them here and
now we can navigate around Sprite sheet by changing values of these properties perfect I comment this line out the movement will work this way we will have this dot speed property initially I set it to zero we will be adding this dot speed to this do X at all times when it's zero there will be no movement when this do speed is a positive number player will Move to the right when it's a negative number player will move to the left on the negative Direction on horizontal xais now now we can connect keyboard inputs to
player movement update method will expect input as an argument I take input from line 69 and I pass it to player update method here we are interested in this do Keys property from line 9 which holds all currently active Keys we can access that property from input argument we are receiving here so This section will deal with horizontal movement if input. Keys contains Arrow up so if index off Arrow up is more than minus one run the following code actually let's start with arrow right and set this dot speed from line 41 to 5 when
Arrow right is found in this array from line 9 set player speed to five it will make player to move to the right but there is nothing to set speed back to zero so it never stops moving I create an L statement here and inside I Set player speed back to zero now player moves to the right only when I hold down down right arrow key nice I do else if statement here be careful about the brackets it's easy to get it wrong and get an error here else if Arrow left is pressed set player
speed to minus5 now I can move player left and right player can easily move offc screen if we hold the arrow for too long let's introduce some horizontal boundaries if horizontal x coordinate is less than zero set it Back to zero now we can't move past the left edge of game area else if player's horizontal coordinate is more than game width minus player width meaning right edge of player rectangle is touching the right edge of canvas area also don't allow it to move past this point perfect jumping is a bit more complicated but it's not
that hard I say if Arrow up key was pressed set velocity y property to minus 30 I set velocity y Property on player object and initially I set it to zero let's let's just move this around so that I have controls in one place horizontal movement separate and I create a section for vertical movement actually this line also belongs under horizontal movement here at all times I will be adding velocity y property from line 42 to Player's vertical coordinate from line 37 initially velocity Y is set to zero so we will get no vertical movement
when I Press up Arrow key velocity Y is set to minus 30 and player just flies off screen I need a force that will push in the opposite direction I can call it gravity or maybe weight I set it to zero at first I need a check to see if player is in the air or standing on ground I will need that check in multiple places so I might as well make it into a utility method like this I call it for example on ground and it will return true or false based on how this
Statement evaluates if this. Y is more or equal to game height minus player height we know player is standing on Solid Ground here in vertical movement section I say if on ground is false meaning if player is currently in the air take velocity Y and start gradually increasing it by this Lo weight from line 43 I set this. weight to one we jump and eventually player falls back down size of the jump depends on how long you hold Up Arrow key we don't want it to work like that let's fix it when we press Arrow
key I set velocity y to minus 10 so we can see it better I create an lse statement here and inside we set velocity y back to zero so if player is in the air gradually add more and more weight to Velocity y else if player is back on ground reset velocity y back to zero to stop vertical movement if I jump too high player partially falls through the floor before velocity Y is reset Back to zero to prevent this from happening let's introduce a vertical boun on the ground level if player's y-coordinate is more
than game height minus player's height I set it to game height minus player's height player can never be below this point that works the height of jump is still dependent on how long I hold up Arrow key because each tick adds another minus 10 to Velocity y also if I press up Arrow over and over player will keep jumping higher and Higher we only want player to be able to jump when it's Standing On Solid Ground here on line 55 I say if up arrow is pressed and if player is on ground only then decrease
velocity y by minus 10 now we can't double jump anymore let's do minus 30 for a bigger jump maybe minus 32 so jumping works like this velocity Y is zero when we press up Arrow key velocity is immediately set to minus 32 this statement online 66 becomes true and weight of one is being added over And over to Velocity y that will make velocity y go fromus 32 to 0o and then back to positive numbers so player will go up it will gradually slow down stop and it will start falling back down again as the
value of velocity y goes from negative into positive numbers when we hit the floor again line 69 will set velocity back to zero and the jump is complete when we jump we want to animate a different row of sprite sheet I want This jumping animation so I set this do frame y to one when we land back on ground I set frame y to zero and Lesly scrolling backgrounds are very easy to implement I made a special episode about different techniques I like to use and how to split it into individual layers for paralax effect
today we will just do a single endlessly scroll in layer Constructor will expect G game width and game height and I Convert these arguments into class properties this do image will be my background image I gave it an ID of background image spelled like this this do X will be zero thisy will be zero I check my image and I can see its width is 2,400 pixels height is 7 20 pixels draw method will take context as an argument to specify which canvas we want want to draw on I call buil-in draw image method and
I want to draw this do image from line 84 I pass it X and Y on Line 109 I instantiate my background class by calling the new keyword I pass it game Dimensions so canvas width and canvas height inside animation loop I call background. draw draw method from line 90 and I pass it CTX as an argument we are drawing everything on a single canvas element so I need to draw background first before I draw the player so that the player is visible now I want to make the Background animate to the left first I
pass it width and height here even though I didn't have to do it since my art assets are already correct final sizes there is no need for resizing them with code custom update method I create a property I call speed and I set it to 20 horizontal coordinate of the background will be minus equal 20 pixels per frame this will make it scroll to the left inside animation loop I call Background Update and it just Scrolls off screen in update method I create a reset check I say if this do X is less than zero
minus this width from line 87 meaning if background scrolled all the way off screen set its horizontal Exposition back to zero to create an illusion of endlessly scrolling background we need to use a trick here I will be drawing the the same image twice I will position the second image to the right next to the First one by setting its horizontal x coordinate to thisx plus this width now it looks like it's just one single endless seamless image if I put a gap of 50 pixels you will see where the first image ends and the
second image starts I remove the Gap we never actually see the full size of the second image they are both scrolling at the same speed and when we get to this point the image on the right just fit fills the gap before the first image can reset and start Scrolling again this happens very fast so it creates an illusion of endlessly scrolling seamless image I go much deeper on this topic in a special episode for now this is all we need to know here sometimes you can still see a small Gap where the first image
ends and the second one begins you can easily fix it by accounting for scrolling speed when set in horizontal position of the second image I will comment out line 124 now so The movement doesn't distract us you can do the same or keep it going it's up to you in our game player needs to avoid dangerous enemies by jumping over them enemy class will serve as a blueprint to create a single enemy object Constructor will expect game width and game height as arguments because enemies need to be aware of Game Area boundaries I check my
Sprite sheet and width of single frame is 160 pixels height is 119 pixels this do image will Point towards image Element with an ID of enime image draw method will expect context as an argument we call buil-in draw image method I pass it this. image from line 107 I will also need this.x and this.y properties on my enemy I pass them to draw method here I create an instance of enime class using the new keyword I pass it canvas width and canvas height I call anime one draw from inside animation Loop and I pass it
CDX now we can see what we are doing so back inside Draw image method on an class I pass it width and height I also need to pass it Source X Source y Source width and Source height like we did with player because we want to crop out single frame from the Sprite sheet Source X will be number 0 * this do width Source y could be 0 * this do height but since this Sprite sheet has only one row there will be no vertical navigation so Source y value can stay hardcoded to zero I
create frame X for Horizontal navigation in Sprite sheet and I replace it here inside the draw image method vertical coordinate of the enemy will be game height minus height of the enemy and horizontal position is game width so that it's hidden just behind the right edge of canvas I create an update method and inside we will just decrease X by one per frame to make enemy move to the left I call enemy One update from inside animation Loop and we are animating one enemy create with our Enemy class I don't want to just have one
enemy I want to have multiple active enemies on the screen at the same time up here on line six I create a Le variable I call for example enemies and I set it to an empty array I delete these two lines of code from inside animation Loop we will draw and update our enemies from inside handle enemies function on line 121 handle enemies function will also be periodically adding new enemies to the Game so I take enemies array from line six and I call push on it we will push instance of enemy class so new
enemy like this I know I have to pass it game withd and game height so I pass it canvas width and canvas height here then I want to call draw method and update method from 916 for each enemy object in the array so enemies for each I call individual object in that array for example enemy and I use Arrow function syntax here for each enemy object inside Enemy's array call their draw method I pass it CTX and also call their update method I will be calling handle enemies function for every animation frame so I can't
just leave this line of code here like this I don't want to push 60 enemies per second into our game I take this line outside temporarily so it will just run once on the initial page load so it will add just one enemy to the array at first I call handle enemies from inside animation Loop here on line 143 perfect everything still works let's say I want to add new anime into the array every 2 seconds how do I do that we can use time stamps and Delta time I create a helper variable called last
time which will hold the value of time stamp from the previous animation frame inside animation loop I create a constant called Delta time Del Delta time is the difference in milliseconds between time stamp from this Loop and time stamp from the previous Loop the Value of delta time tells us how many milliseconds our computer needs to serve one animation frame usually if we are running at 60 frames per second Delta time is around 16 milliseconds so Delta time is time stamp from this Loop minus time stamp from the previous Loop this stamp stem value is
autogenerated here request animation frame has a special feature it automatically generates a time stamp and passes it as an argument to the function it calls so because Animate is being called Over and Over By Request animation frame here it receives time stem values as argument each time it's called the first initial call of animate here on L 149 doesn't have autogenerated time stamp because it's not being called by request animation frame so I have to pass it something here I pass it zero when I calculated Delta time difference in milliseconds between time stamp from this
Loop and time stamp from the previous loop I set Last time to time stamp so that it can be used in the next loop as the value for time stamp from the previous loop our animation Loop is created by request animation frame it automatically adjusts the screen refresh rate so most screens will run at 60 frames per second which means if I consol Delta time I should get 1,000 milliseconds divided by 60 frames per second my Delta time should be around 16.6 m seconds if you get a different number here let me know I Wonder
if we all get the same value now that we have Delta time we can use it to time different things around our code base we will use it to trigger periodic events I pass Delta time to handle enemies I comment this out I make sure handle enemies expects Delta time value to time something periodically with Delta time I need two helper variables enemy timer which will be counting milliseconds from zero to a certain limit and every time it reaches that Limit it will trigger something and reset itself back to zero we will need enemy interval
which will be a value in milliseconds for that time limit I want to add new enemy in the game every th000 milliseconds every time timer reaches 1,000 in handle enemies I say if enemy timer from line 140 is more than enemy interval from line 141 push new enemy into enemies array then reset enemy timer back to zero so we can count again else just keep adding Delta time to our Enemy timer until the limit defined in enemy interval is reached using Delta time like this we'll make sure our events are timed the same on slow
and fast computers because faster computer will have lower Delta time so it will take more Loops to accumulate enough in its timer that way fast and slow computer will reach the limit at the same time I explain this in more detail in a special class I can also set enemy interval to 2, milliseconds 2 seconds I Create this do speed property on enemy class I could give each enemy randomized speed here using math. random I will give all of them the same speed of eight and here I say this.x minus equals this do speed you
can see enemies come in a set interval of 2 seconds very predictable maybe I want to randomize that interval a little bit I can for example create a variable called a random enemy interval and I set it to a random number between 500 and and 1,500 Milliseconds I change enemy interval to th000 whenever enemy timer reaches enemy interval plus random enemy interval I push new enemy and I set random enemy interval from line 147 to a different value I could have also randomly set some enemies further along x- axis to get the same result now
enemies are coming in more random less predictable intervals inside draw method on player class I can remove the white rectangle behind player I pause the background Again by commenting out line 154 we are displaying just the first frame in player and enemy Sprite sheets let's actually animate those Sprite frames the Sprite sheets we are using are optimized for Speed between 15 to 20 frames per second so I would like to be able to set FPS frames per second for sprite frame animation while still allowing the rest of our game things like player position and background
Scrolling to update 60 times per second how do we do it with Delta time I'm passing Delta time to handle enemies here on line 157 I pass it along to enemy update method and I make sure update method on anime class expects that value update method is being called from inside animate 60 times per second inside update method here I will use the Delta time to keep track of how many milliseconds passed between individ ual Calls and only when the right threshold is reached I will swap frames in the Sprite sheet to animate Sprite sheets
horizontally I will cycle between frame X of zero and Max frame which in case of enemy Sprite sheet is five to time frame rate with Delta time I will need three helper properties this. fps to set frames per second let's do 20 keep in mind this FPS will affect horizontal navigation within anemy sprad sheet how fast we swap between individual Animation frames nothing else will be affected I want the rest of the game to run at 60 frames per second I could use this technique to slow the entire game down to 20 frames per second
but then player controls wouldn't feel very responsive we would get delays in Collision detection displayed text and so on I want to slow down only animation of enemy Sprite sheet nothing else I will also need frame timer which will count from zero to frame interval over And over and frame interval will Define that value we are counting towards it's a value of how many milliseconds each frame lasts so th000 millisecs divided by 20 frames per second in this case first let's cycle between frames at full speed so if this dot frame X from line 111
is more than Max frame set frame X back to zero else increase frame X by one I have to do more or equal here so we don't get empty frame because of this Source X attribute we Are passing to draw image method on line 119 cycling between 0 and 5 with frame X variable will animate spreite sheet horizontally now you can see eny spreite sheeet is animating but it's very fast these particular spread sheets were designed for a lower frame rate we defined FPS of 20 on line 113 here I say if this. frame timer
from line 114 is more than frame interval from line 115 only then run this code that manages frame X Cycles at the same Time reset frame timer back to zero so it can count again else just keep adding Delta time two frame timer until the threshold of milliseconds defined in frame interval is reached now you can see enemy Sprite sheet is swapping between frames slower at 20 frames per second while enemy movement is still at original 60 frames per second inside update method on player class I will do exactly the same thing first I say
if frame X from line 40 is more than Max Frame which I need to Define here we will start with this row and there we have eight horizontal frames counting from zero if frame X is more or equal to Max frame set frame X back to zero else increase frame X by one running animation on player is anima in I go down here to anime class and I copy FPS frame timer and frame interval properties and I paste them here on our player class inside update method here we are dealing with sprite animation Here are
controls yes so if frame timer from line 44 is more than frame interval run all this sprite animation code and reset frame timer back to zero else keep increasing frame timer by Delta time update method doesn't have access to Delta time so I make sure it takes it as an argument when we call it here on line 181 up here I make sure update method Expects that argument now player Sprite sheet is animating at 20 frames per second when I jump we get blinking because Max frame is set to eight on line 41 and jump
R doesn't have that many frames so we are including empty frames we have only two player States basically jumping and running on ground so dealing with that is easy down here we deal with vertical movement when we are not on ground we set max frame to five for jumping animation else meaning We are on ground set max frame to eight for a running animation on line 151 we are adding new enemy to our game in a randomized interval when I consolo enemies array I can see it's endlessly growing and adding more and more enemies I
actually want to remove move enemies that moved offscreen from enemies array on enemy class I create a property I call marked for deletion and I initially set it to false in update method I say if Horizontal x coordinate on enemy is less than zero minus enemy width meaning if it has moved past the left edge of Game Area set marked for deletion the true inside handle enemies I say take enemies array which we defined earlier as a let variable and reassign it to the same array but filter that array first and only include elements that
have marked for deletion property set to false filter is a built-in array method which creates a new array with all elements That pass the test implemented by the provided function in our case all our elements are tested and checked if their marked for deletion property is false now you can see in console we have between one and two enemies in the array at any given time older enemies are being removed I want to display score on line seven I Define a lead variable called score and I initially set it to zero on line 168 we
have display status text Function I will use it to display current score I pass it context as an argument to specify which canvas we want to draw on I set fil style to black color I set canvas font to 40 pixels helvetica fill text built-in canvas method will actually draw the text it expects text we want to draw and X and Y where to draw it I want the text to say score colon space plus value of score variable from line seven x coordinate 20 y coordinate 50 I call this new function From inside animation
Loop and I pass it CTX inside update method on enemy class I will count score every time enemy moves off screen assuming player successfully avoided colliding with that enemy and I increment score by one that works nice I want to highlight the font I can give it canvas Shadow but for some reason in Firefox built-in canvas Shadow property causes lock and frame rate drops so I will do a trick here I will draw the same message twice one black One white the top one will have two pixels offset so I kind of created my own
shadow manually let's check for collisions between player and enemies first we need to decide on the right technique to use here the easiest ones are collision between rectangles and collision between circles where we give elements like player and Anime hitboxes shaped as rectangles or circles we could also do more complex and more precise Collision checks here such as Collision Check between polygons called separating axis theorem or we can base collisions on color or opacity I will stroke rectangle around our enemies so we can see basic Collision hitbox let's make it wide I do the same
for player you can see the rectangles now if I use Collision detection between rectangles and I keep those hitboxes at their base sizes whenever these two rectangles touch or intersect we will get collision between player and enemy I tried to Apply it before and I played with it and sometimes we get really unfortunate collisions like on this screenshot where my player is landing from a jump Dock and worm images are clearly far away from each other but you can see that the corners intersect and we got game over I asked you in my community tab
how you would approach this challenge we spoke about different options we have here some of you suggested separating axis theorem for collision between polygons Some of you think that we could use a set of smaller rectangles that match shapes of player and enemy Sprites more closely than one larger shape some of you think that simple Collision detection between circles would be enough in this scenario let's try to draw circular hitboxes around our objects to see what it would look like it's also easy to offset these Circles by by specific pixel value horizontally or vertically in
relation To player and enemy object we can also make them smaller or larger if needed I agree with you and I think that using circular Collision detection for jumping game like this will get rid of accidental collisions where two corners of rectangles Collide now I need to decide where in our code base we will run Collision checks I know I need to check position of player against position of all active enemies for each animation frame so I might as well do it Inside player update method I pass it enemies array as an argument it contains
all currently active enemy objects on line 59 inside update method on player class I make sure update method expects that argument we will calculate Collision detection here we need to run it against every enemy object in enemies array so enemies we passed as an argument for each and then I do Collision detection calculation between player Circle hitbox and enemy Circle Hitbox to do that we need to calculate distance between Center points of these two circles and we compare that distance with the radius of circle one and radius of circle two if the distance is less
than these two radi added together we know we have a collision to get distance between two points two Center points we use Pythagoras Theorem formula we have a center point of player Circle and center point of enemy Circle we calculate distance on horizontal X AIS DX we Calculate distance on vertical y AIS Dy it gives us imaginary right triangle and we know hypotenuse of this triangle is the distance between these two points we calculate it as square root of dx^ 2 + dy^ 2 if distance between center point of player Circle and center point of
enemy circle is less than radius of enemy Circle Plus radius of player Circle we have collision and we set game over to True up on line eight I create Leed variable called game over and I set It to false at first I want the game to pause when game over is true so inside animation loop I say only run request animation frame and continue animating our game if game over is false you can see that when Collision is detected Game Stops perfect I also want to display game over message so inside display status text function
I say if game over is true set text align to Center fill style to block fill text G over try again and coordinates canvas width Divided by two and 50 200 make a copy again set fill style to White and offset the second line by two pixels I need to fix our Collision detection we are using enemy X and enemy Y coordinates as Center points of collision Circle which means Collision area on each enemy is this blue circle and same with the player since player X and player Y is at the top left corner of
rectangular area from which player image is the Drone I can't set it As center point of collision Circle because I did do that we are not checking for collisions between white circles we are actually checking for collisions between the blue circles I is a drew the fix is simple DX distance on the horizontal x-axis between two Center points needs to be offset by half of enemy width and half of player width to move these Center points from top left corner to to the middle of rectangular area same goes for vertical DIY check Brackets are very
important here now after this fix collisions are correctly being detected between white circle areas around player and enemies I can offset these Circles by a specific amount to move them around I can make them smaller or larger we will expand on this in the next episode in this class we will learn how to use native JavaScript full screen functionality how to add touch support to our games and how to measure length and direction of Swipes so that we can attach specific events to them full series Linked In the video description let's make a mobile game
with HTML CSS and JavaScript let's go this is the game we built in the previous lesson I will be using Google Chrome browser as usual and if I right click to inspect the page we have this small mobile device icon here this tool is great for design in responsive websites keep in mind this is just an estimate there might be some differences When you run this same code on the actual device this simulator is not 100% accurate as you can see canvas doesn't even fit Mobile screen on landscape currently this project is not mobile friendly
at all it's actually very easy to fix this I can click this icon to toggle between lscape and portrait view I can choose different devices from this drop down so the first thing I want to do is to make sure we can see the entire canvas at all times on mobile I will do It with CSS I give canvas Max with property of 100% we are missing left border here let's reset all default margins and pings and set box size into border books to make sure element's border is included in its total width modern CSS
makes life so much easier so now in portrait mode you can set canvas to any width and it will always scale up or down to make sure we can see all of it I switch to landscape and we have the same Problem hm how do we solve this this is actually also very easy barely in in convenience I give canvas Max height 100% now canvas will scale until it hits edges of screen vertically or horizontally depending on aspect ratio whichever boundary it hits First Look What happens when I make canvas wider it still works I
can switch devices toggle between landscape and portrait we can see all of canvas at all times perfect there is also a way to make canvas fit The entire screen with no black edges but because of the scrolling background we're using here I would have to calculate aspect rtio IO I want to keep this class beginner friendly with no algorithms so I will get back to that in more advanced tutorial now we know a quick and easy way to make canvas fit on Mobile screen without stretching and Distortion the only way to restart game right now
is to refresh browse window let's write an actual restart game Function so that we can connect it to buttons or key presses or touch events we have to think what needs to happen when game restarts well first we need to restart the player to its initial position I will actually do it as a method on player class I will call it restart and inside we set X and Y to the original values let's move player 100 pixels to the right here and here that's better after restart I want player in Running Animation so max frame
will be Eight and frame Y is zero down on line 200 inside our custom restart game function I take instance of player class from line 205 and I call rest start method we just wrote I don't really have to restart background or maybe I will just restart its Exposition back to zero so that we get some more visual feedback that we are actually starting a new game again I take an instance of background class from line 210 and I call restart method we just Wrote the last thing I need to do when game restarts is
to take enemies array score and game over and send them back to their initial values notice I'm removing let keywords because I'm not declaring new VAR I'm just assigning new values to existing variables where do we call this restart game function from here inside event listener inside key down event we listen for arrows and we push them into this do Keys array I will create an lse statement and if key that Was pressed is enter and at the same time game over from line 8 is true we call the new restart game function we just
wrote it's still not working and it's because when game over is true I stop calling request animation frame here since we are setting game over back to its initial false value I can call animate again to start new animation Loop like this so we are playing game is running I get game over I press enter and reset function resets our game Awesome we are doing great so far I should tell the user to press enter otherwise how would they know you can see after game reset score is off screen it's because it's taking this text
align Center we used for game over message I need to set text Aline to left here and the message will be something like game over press enter to restart this works okay touch events this will be fun first I remove this console loog from line 175 up here inside input Handler class We will create new event listener for touch start event it will run whenever user touches browser window when that happens I consol loock something I will actually also need touch move and touch end event I'm going to consol start in touch start move in
in touch move and end in touch end the way these work touch start fires once as we start interacting with screen then touch move fires over and over as long as we are moving finger over the Screen and touch end just fires once when user releases the touch this is important to remember as we have to consider these when we are structuring our code code in touch start and touch end will run once and the code in touch move will run over and over as long as the event is firing this is actually very useful
and we can use Touch start to set something up touch move to make calculation such as Direction and time of the event and in touch end we do some Clean up and discard or reset values we don't need anymore there is no swipe up and swipe down event so let me show you how you can easily use these three touch events combined to determine direction of swipe let's have a look at autogenerated touch start event object by console login E when i t screen this event fires and I can inspect it there are many useful
values here for example it keeps track whether alt and control keys were pressed at the time of the Event we have time stamp of the touch here very useful and the main thing we care about is X and Y coordinates of the touch X and Y coordinates of touch event are stored inside this readon changed touches property it's a list that stores autogenerated touch objects that contributed to this touch event with touch start event we get just one object so we have to open index zero and here we can see page X and Page y
properties perfect we know where on screen this Touch event started if I consolo touch move and I swipe across my screen you can see that event fires many times let's go to one of the ones at the start if I check inside change touches list at index zero I can see page Y is 71 as I was swiping the event was firing so let's go to the last time it fired and here I see page Y is 104 I know this particular swipe went vertically from coordinate 71 to coordinate 104 we have all these values
we need to determine Whether us a swiped up or down I put this console loog into touch start event and I remove all other console LS to access vertical coordinate of touch event I say e do changed touches index zero because this is a list and I want this page y property okay let's put that inside touch move and touch end I create a new property on input Handler class I call it for example Touch y it will store the initial starting vertical coordinate maybe I also want the game to only react to longer swipes
to make sure user actually swipes and the game doesn't accidentally react to simple short tabs I will call this property touch threshold and I set it for example to 30 I wanted the starting touch point and the ending touch point to be at least 30 pixels apart to trigger the event I could also make the player jump higher here based On how long the swipe is this technique is easy and very powerful if you are designing mobile games I hope you are realizing the potential here in touch start event I just want to set starting
coordinate so this do touch y from line 13 is equal to page y value from this event let's delete all these inside touch move I will compare current coordinate and starting coordinate to determine Direction so let's have a temporary helper variable called for for Example swipe distance and set it to Page y value of this tick of touch move event minus the initial star in vertical coordinate so minus this do touch y from line 13 keep in mind that touch move fires over and over again as long as user is swiping I need more space
here if swipe distance is less than minus this. touch threshold from 914 so minus 30 we are swiping up so this dot keys push swipe up this might be a Little bit difficult to visualize for some of us so here's some animation if it helps at the same time I want to check if swipe up is not yet in the keys array so this is the distance between current vertical coordinate and starting y-coordinate if this swipe distance is less than minus 30 and swipe up is not yet in Keys array push swipe up into Keys
array else if swipe distance is more than this do touch threshold so Plus 30 push swipe down into this. key array also here I need to check that swipe down is not yet in the array before I push it in there I don't want duplicates of the same value in touch end I just consol lock this dot keys I can see we are getting many duplicates in the array so something must be wrong here I zoom out a bit so I can see the whole thing on a single line these brackets need to be here
brackets Are important it's easy to make a mistake and even a small thing can break the entire project that's programmer's life attention to detail and debugging perfect now it gets added only once per value as I said I will use Touch end event for cleanup I will use splice method to find swipe up in Keys array and remove it and I do the same thing for swipe down so in touch start I save initial vertical coordinate of touch event in touch move I compare starting Vertical coordinate to the current vertical coordinate to determine whether user
is swiping up or down and in touch end I clean up and remove all touch events from our custom Keys array let's remove this console loog I want to restart game when we swipe down I might as well put it in here why not so if we swipe down call our custom restart game function we wrote earlier but only do it if game over is true like This so I get game over I'm swiping up nothing happens I swipe down and game restarts great I can increase touch threshold if I want some functionality to work
only with very long swipes I set it to 200 I swipe down but only short nothing happens longer swipe still nothing I have to swipe almost the entire screen from top to bottom to restart game now so let's put the threshold back to 30 I want player to jump when we swipe Up so here inside update method on player class I put this part in Brackets because I wanted to evaluate first if Keys array contains Arrow up or if it contains swipe up and at the same time if player is on ground make player jump
be careful about brackets it's easy to create a bug here if you forget one let's see reload game I run swipe up and player jumps I swipe again and again This works touch events work really well with simple games like this in the next episode I will create a game with more complex moves and special abilities game like that is a bit more complicated when it comes to touch events also in most cases to make a mobile game like this work you should resize your art assets my player Sprite sheet has frames 200 times 200
pixels that's massive for a mobile game and if I had many animated objects on screen at the same time it Would start logging very fast for a bigger game I would have to create two or more sets of art assets for different screen sizes let's change game over message so that user knows we can Now swipe down to restart JavaScript also offers buil-in native fulls screen API that's easy to use it's now well supported in all modern browsers as far as I know only Internet Explorer and mobile version of safari don't fully support it we
are web Developers here so I'm sure all of you use updated version of a modern secure browser on your machine full screen API gives us methods that allow us to present a specific element and its descendant in a full screen mode it will hide all browser user interface elements sidebars and other applications as long as full screen is active let's create a button to toggle full screen I give it ID full screen button for example and it will Say toggle full screen in CSS I give it position absolute font size 20 pixels p in 10
pixels top 10 pixels and transform translate x minus 50% to center it horizontally I bring it to my JavaScript project using get element by ID I create a new function I call for example toggle full screen let's console Lo document. full screen element like this and call toggle full screen Function which wrote full screen element is a built-in readon property on document object that Returns the element that is currently being presented in full screen mode if it's null it means the full screen is not active we can use this property to check if we are
currently in full screen mode I say if full screen mode is not active take canvas variable from line two and call built-in request full screen method this method is Asynchronous it returns a promise which means I can chain then and catch methods to run some follow-up code when the promise is fulfilled or rejected I will just you sketch today to display potential error notice that the request full screen is called on the element I want to make full screen but full screen element property sits on the document object today I won't put any followup code
in Den method so I can delete it in catch I will take the autogenerated Error object if error happens we will create alert and it will say some error message to concatenate message I can use back ticks instead of quotes this is so-called template literal syntax it's just a simple way to combine strings of text and expressions that need to be evaluated into a single final line of text I say for example error can't enable full screen mode and to insert variable or expression inside template string we use dollar sign and brackets Like this here
I just put this autogenerated error object and its message property so we can read what went wrong so if full screen is currently not active present canvas in full screen mode else meaning full screen is active call built-in exit full screen method to switch back to Window mode notice that exit full screen is again called from document object if I save my project and refresh browse window I get an error you can see Catch Method worked and created alert popup window with our message in console I can see more information it says full screen can
only be initiated by user gesture here I declared my toggle full screen function and here I'm calling it on the first page load we can't do that full screen can only be triggered by user generated events such as click or touch that's what this error message is telling us we can't just make JavaScript to automatically trigger full screen it Needs to be triggered by user generated event so instead of running it on the first page load I create an event listener for a click event on full screen button element we created earlier when user clicks
button then run toggle full screen to exit full screen on a computer you can also just press Escape key on mobile you can exit full screen by swiping to reveal main controls and press back or home key depending on which phone you are Using sometimes we get unexpected collisions and game over when player and eneme images are not actually touching like this it's because we are checking for Collision detection on circular hitboxes around player and enemy and these circles don't exactly match the Sprite sheet image collisions between complex shape take a lot of performance and
especially for mobile games performance is something we need to be more careful about phones don't have as Much computing power as our desktop computers do it's usually not a problem when hitbox doesn't exactly match Sprite sheet shape but it should be positioned in a way that it's predictable when Collision can and cannot happen I drew a simple circle around player and now we can see its Collision area let's go copy this code to display Collision area of enemies as well you can see when these two wide circles touch we get collision and since The circles
are larger than player and enemy image sometimes we get Collision when player and enemy images are clearly not touching especially this one when we are about to land from what seems to be a successful jump how do we fix this since player and enemy images are not scalable in this game they are drawn at fixed width and height we can shrink and scale hit boxes this by a value relative to image size and we can also move the hitbox left and right by specific pixel Amounts to try and match images more closely and make collisions
more predictable we don't want surprise game over like this I'm using a bit unconventional technique here because Sprites are in a sense rectangular they have St in X and Y position and width and height but I chose Collision detection between circles to remove rectangular edges from sticking out outside player and enemy shapes what I'm about to do will work with rectangular Collisions as well if you prefer that we are calculating Collision detection between player and all active enemies here I explained it in the previous episode we are basically checking distance between center point of player
Circle and center point of enemy Circle first horizontally and then vertically we are drawing imaginary right triangle and using Pythagoras Theorem to calculate the length of hypotenuse which is basically the distance between center Point of player Circle and center point of enemy Circle then we are comparing radius of player Circle Plus radius of enemy Circle to that distance if distance is more than sum of these two radi circles are far apart if it's the same circles are touching and if the distance is less than sum of radi circles are overlapping here I'm just drawing white
Collision area Circle it's just a visual it doesn't actually detect Collision Collision is being detected here we are inside player class and this is the horizontal Center Point position of player Circle this is being used for Collision detection here this is vertical coordinate of that Center Point which is being used in Collision detection formula here and this is the radius of collision area Circle we are drawing and that same value is being used in Collision detection formula here I can simply Offset and resize that Collision Circle visual in this area and then replicate those changes
inside the actual Collision detection calculation area here let me show you what I mean what if I want player Circle to be smaller maybe I don't mind that ears and tail overlap let's say they are soft and they don't count when it comes to Collision also maybe I want to make my game a bit easier and forgiven this will allow a small overlap between player and enemy Image what if I want to move the Collision hitbox downwards relative to player image I change its vertical Center Point position here plus 20 pixels seems fine now I
compare changes I made to the visualization and I make sure I update the actual Collision detection formula to mat these new values I didn't make any changes to horizontal center point so that value stays the same I added plus 20 pixels to Vertical center point so I updated in Collision calculation here I also made the circle smaller so I update player radius value in this area we successfully adjusted player hit box let's also do something about enemies I can for example reduce the radius of enemy Circle I also want to move it to the left
to cover head of the worm better maybe minus 20 pixels for a horizontal Center Point I'm actually happy with this I want Collision to only happen when these two adjusted smaller Circles Collide let's take the changed values we used to adjust enemy hitbox Visual and transfer them into Collision detection formula like we did with player I copy this line just so I can look at it for reference I put it here just temporarily Collision detection is inside player class so this keyword here points to player object if I want to point towards eneme object I
can't use this keyword in this area we adjusted horizontal Coordinate of enemy Circle Center Point so I need to adjust it here minus 20 vertical center point of enemy stayed the same so I will not be making any changes here we did change enemy radius so I will change enemy radius here and this is how you resize scale and reposition hitboxes in your game to make sure they match your art assets more closely I didn't plan to make this episode but so many of you asked how to add Mobile support to our games so here
We go we can take it much further but I think this was a good beginner friendly introduction check out full series in the video description if you want I'll see you there when your games and applications start getting bigger more exciting and full of extra features it will be more and more challenging to keep your code clean and organized over time people came up with the general reusable solutions to commonly occurring problems These well- tested and widely used code structures are called design patterns design patterns are a toolkit of tried and tested solutions to common
problems in software design you could split design patterns into three main categories in this class we will use State Design patterns to control player character in a game it's a behavioral pattern that lets an object alter Its Behavior when its internal State changes why do we need to manage player State Let's say we have a simple sidescroller game our character is standing and when I press up Arrow key I want it to jump this code has a bug if I keep pressing up Arrow while jumping player character will fly off screen so I have to
do a check here only run this code and jump if character is standing in On Solid Ground great that fixed it I also want to add Sittin animation but player can't enter sit in state while it's in the middle of jump player can sit down only When it's standing or running on Solid Ground maybe I also want a dive attack when player tackles enemies from the air again this move can only be entered by pressing down arrow key while jumping because when we are standing down arrow key will make players sit down I'm sure you
can imagine how adding more moves will create a very licated IFL statement and since all of that is contained in a single piece of logic add in one new move later on can break all your other Existing conditions and you will have to review that single massive logic tree every time you need to fix a bu or add a new feature since this is a very common challenge game designers had to deal with for a long time there is a tried and tested way to do this right what if instead of this complicated spaghetti code
IFL statement we model our code structure based on finite state machine we want to have a limited set of States player object can be in such as standing Jumping or sitting player object can only be in one of those States at a time and for each state it will only react to a limited set of inputs we Define that way we have a class for each state and in rules of that class I can say that while player is jumping wait for a certain time before switching it to Falling state or if you detect down
arrow key input transition player into diving State other than that while in jumping State ignore all other inputs so Pressing down arrow key while jumping will switch player into diving State pressing down arrow key while standing will transition player into sitting state in this class we will learn how to implement State design pattern in a sidescroller game we will learn how to use a native JavaScript modules to split our code into multiple parts and many other important game development tricks and techniques as usual click like if you are ready to start building bigger Games and
learn how to make our code bases scalable easy to navigate in easy to manage and debug we are diving into more advanced territory today the challenge for beginners will mostly be to keep track of what each class and function is doing and how they interact with each other check out some beginner friendly game development tutorials in the video description if you just recently started with HTML CSS and JavaScript I created a simple web page This dock image will be our spread sheet you can download it in the video description it was made by this amazing
artist check out his site for more game development art assets I include my image as IMG tag this time that way I can wait for the image to get fully loaded before I run any JavaScript I include my JavaScript by using a script tag but this time I will set its type attribute to module like this this will cause the browser to process any Contents of this particular script as JavaScript module which will allow us to split our code into multiple separate files and use import export keywords to connect the data inside you can see
I'm important in only the main script JS file but we will also have player JS State JS input JS and utilities JS splitting files like this makes our project a bit cleaner and easier to navigate in JavaScript modules allow us to split our programs into separate Parts that can be imported where they are needed not GS had this ability for a long time but now modern browsers support module functionality natively use of native JavaScript modules is dependent on the import export statements and we will cover how to use them today it's easy don't worry there
is only one catch when using modules you need to run the code in some kind of Dev environment you need to have a server if you just write index HTML file and click To open it in browser locally as you can do with all my other course projects import export keywords will not work you need to run this code through a ser there are many ways to set up a local server the easiest one is to install a small plugin to your code editor I'm using visual studio code and when I click here on the
left side on the extensions icon and I search extensions for live server I find this plugin it's been downloaded over 17 Million times so it's very popular mine is already installed but if you don't have it it will say install here after installation you might have to close or reopen your vs code when it's successfully installed you will see this go live icon right here if you never used it it can act a bit unexpectedly when you click go live it doesn't open the file you are looking at at the moment it will run code
from the entire project folder your vs code is currently Pointed at to make sure your live server goes live with the correct set of files you click file in the top left corner and then click open folder and you navigate to your project folder on your local computer when you find it click select folder and then when you go live the correct project will open if you can't see this new live server notification area close your vs code completely and reopen it and it will get loaded the best thing about live server Extension is that
when you save any of the project files it will reload browser window automatically you can always see the latest preview of your code without constantly manually reloading browser on my Windows computer I use control+ S keyboard shortcut to save changes to my file I use it a lot while working in this environment so now we should have a project folder running through live server extension we have index HTML file style CSS main script JS file we will Have player JS where we write all the logic to control and animate our player character State JS will
be where we write State design pattern to swap between different player States input JS will handle keyboard input and utilities JS will have small useful functions that for example display status text or some other small tasks I will speed up CSS setup because that's very basic Global reset to make sure the page looks the same across different browsers I will Give canvas some background so we can see it and I will hide the spreadsheet image since we will be drawing and animating it with JavaScript I will also show you how to create a very simple
loading screen I wrote this H1 tag with an ID of loading so I grab it here I Center it in the middle of the page and I adjust it font size script GS is my main module which will connect all other parts into a final piece of logic the spreadsheet we are using today is a big Image file so it might take a second to fully load to make sure JavaScript waits for all the assets to be fully loaded before it runs I will create a simple event listener for load event load event will wait
for the entire page to be fully loaded and available including page content such as stylesheets images and so on in the meantime this text that says load in will be visible so if you add more art assets user will see this loading screen for however long it takes To load all assets when everything is fully loaded this event listener will run its code and inside I will Target this loading text and I will hide it because the page is fully loaded at the point when this code runs I will also set up my canvas so
document. getet element by ID canvas 1 I instantiate context object object which contains all built-in 2 the drawing properties and methods we will need today I set canvas width to window in width and canvas Height to window inner height I can see canvas is now full screen so I make it transparent it's time to draw the player in player JS I create a class I call player player always needs to be aware of boundaries of Game Area since we will be running and jumping around and we need to know when we reach the edges of
screen so I will pass it game width and game height from the outside as arguments and I will convert these arguments to class properties like this Today we are learning about State Management we will be swapping player between different states this do states will be an array and each position in that array will be one possible player State such as running jumping sitting and so on then we will have this do current state property because player can only ever be in one State at one time current state will be one of the options from this
States array so for example this do states index zero will Be standing State index one will be jumping State and so on this do states is an empty array now but we will fill it with States very soon this do image will be the doc spreadsheet I already loaded it into our project online 12 in index HTML so here I just point this variable towards it using its dock image ID I gave it the dock image is a sprite sheeet sheet with multiple frames when you divide width by number of frames in the longest row
or you can think of These as columns you will get width of one frame in this case it's 200 pixels height divided by the number of rows will give us the height of a single frame in this case 18183 pixels let's first draw it at X and Y coordinates 0 0 so from the top left corner of canvas area I create a public draw method that takes content text as an argument to specify which canvas element we want to draw on I call built-in canvas draw image method I pass It my dog image from line
seven and I draw it at coordinates X and Y so this is our player class creating a self-contained class that handles all player functionality is a good example of the first principle of object-oriented programming called encapsulation encapsulation means we WRA variables or data and functions that op on that data into objects encapsulation can be used to protect our data from unwanted outside access it simplifies Maintenance of our code by keeping it organized and easier to understand since we are including our main script JS file as a module and we are running our code through a
local server we can use export import statements native JavaScript modules are part of es6 standard and allow us to split our code into separate files so-called modules members of these modules so classes functions and variables can be exported and imported around our program wherever they are Needed I want to export my player class there are two types of exports named exports and default exports each module each file can have only one default export but there is no limit on the number of named exports named export looks the same just without this default keyword to make
My Player class available in main script JS file I go up top and I say import player from player JS this do slash means that player JS file is in the same folder as script Jaz since player is a default export I don't need brackets for named exports exports that don't have default keyword in front of them I would have to wrap them in Brackets like this but since player class is a default export we don't need brackets here and I can also refer to player using default here but there is no need to go
into that much detail about modules today I just want you to understand the main idea and get comfortable expor in and importing your Variables classes and functions between modules so now player class is available here let's test if it works and instantiate it I create a constant variable called for example player and I set it to new player here online too in player JS I can see our player class expects game width and game height arguments so so I pass it canvas width from line eight and canvas height from line nine if I consol look
player I can see My object here and I can inspect it to see all its properties and values congratulations now you understand how to use native JavaScript modules what else should we learn today click the like if you are getting any value we created a public draw method on our player class so let's call it here I have an error because draw method needs an argument for context otherwise it doesn't know what canvas to draw on I pass it CTX from line seven because in This project we only have one canvas element nice we are
drawing player image on canvas what you see on canvas right now is the entire Sprite sheet on line 14 here we are telling draw method what image to draw and what coordinates to draw it at draw method will just take the entire image at its original size and it places it at these coordinates I can change the coordinates here built-in canvas draw image method can take three five or nine arguments depending on how Much control we want to have over the image we are drawing if I give it optional fourth and fifth arguments these stand
for width and height and the entire image will be stretched to fill the rectangle defined by these starting coordinates and these ending coordinates the last longest version of draw image method expects nine arguments and it gives us full control over the image we pass it image we want to draw draw XY width and height of rectangle we want to Crop out from the source image and XY width and height of rectangular area where we want to place that cropped out piece of image on destination canvas so right now I want to draw just a single
frame from player spread sheeet so destination values will be this.x this doy this do width and this do height and Source values will be hm let's start by cropping out this frame in the top left corner so from coordinates 0 0 to coordinates this. width this do height These two values determine start of cropping rectangles so I can navigate around the Sprite sheet horizontally and vertically just by changing these two values now I'm traveling along the Sprite sheet horizontally it's not very obvious on this simple standing animation if you watch Doc's tail you will see
we are swapping between frames Source y argument here is for vertical navigation now I jumped to this Frame I can swap between frames just by changing These values I might as well put them into separate variables I create frame X variable for horizontal navigation and I replace it here I also create frame y for vertical navigation and I replace it here now I can jump between frames in our Sprite sheet by changing frame X and frame y variables wow we covered the main principles of JavaScript sprite animation so fast today I have a special class
about it if you want to go deeper to finalize sprite animation we just Rotate between Sprites on each row endlessly using frame X property and as we swap between different player states such as running and jumping we will be swapping between rows of sprite sheet vertically using frame y variable before we do that let's Place player in the middle bottom of canvas to make it seem like it's standing on the ground this x is game width divided by two minus player width divided by two and middle bottom placement is game height minus Height of the
player like this there are many ways to handle keyboard inputs I want to keep our code clean and modular so I have this input JS file inside I create a default export again and this time it will be a class called input Handler this class's job will be to set up listeners for specific keys and to keep track of the last key that was pressed or released and it will only one class property called for example this. last key this value will Be updated every time one of our selected Keys is pressed or released inside
Constructor I create an event listener for keydown event call back function on event listener in JavaScript has this autogenerated event object that is automatically passed as an argument here I will refer to it as e for example this E Event object has all kinds of different information about key down event that just occurred you can conso e to see it I used it many times before so I know this event object has a property called key that gives us the name of keyboard button that was pressed I could use IFL statements here or I can
use a JavaScript switch statement which is used to perform different actions based on different conditions we use it to select one of many blocks of code to be executed based on which key was pressed the syntax goes like this I open switch statement and I pass it expression to validate in this case I wanted to check For value of event. key which contains name of the key that was just pressed in this key down event I say case Arrow left and here's some code to be executed if e. key is Arrow left in this case
I will take this last key from line three and I give it value press left make sure you spell it the same as me it's case sensitive we can have multiple cases here so far I just have one but I will add more arrow keys in a minute switch expression on line five is evaluated Once and it is compared with each case in this case it will check if e. key is equal to Arrow left if it is Code online 7 will be executed we can also give it default case with code to run if
there is no match but I will not be doing that today let's copy this event listener and I change it to Key up event when Arrow left is released I will set this last key from line three to release left this way I can keep track of specific Keys being pressed and released i consolo e. Key inside key down event just to check if everything works so far so I have this custom input Handler class and all this code is inside its class Constructor which means all this code will get Auto executed when I create
an instance of this class using the new keyword instantiating input Handler class will automatically attach these two event listeners to our browser window object I'm exporting this class here and I will instantiate it from a Main script GS file by saying import input Handler from input JS with input Handler class available I create a constant variable called for example input and I set it to New input Handler that's it now when I click my canvas and I start pressing keyboard it will consolo names of those keys those names are values of key property on autogenerated
event object coming from e. key here so creating an instance of input handle class automatically Executed all the code inside its Constructor which added event listeners to our project we care only about certain Keys we will ignore others right now pressing and releasing left Arrow key will update this last key property last key stores the last keyboard input that was pressed or released I will add more keys in key down I add case for Arrow right and I set last key to press right and in key up event listener we set it to release right
I will add break Keyword after each case if we find a match we don't have to check the others so we are listening for presses and releases of left and right Keys let's see if everything works I consol look input from line 14 dot last key which is coming from line three and input JS file it's not working because we have a problem with this keyword since I'm attaching event listener to window object from inside a class I need to bind that reference to this keyword so That when event listener runs this line later it
still remembers that this keywords stands for this property on input Handler object I can use built-in JavaScript bind method here or I can use es6 Arrow function syntax which has a special built-in feature when compared to regular function Arrow functions do not bind their own in this but they inherit one from their parent scope this is so-called lexical scoping because of this Behavior Arrow Functions allow us to retain the scope of the Coler inside the function so we don't need to use bind in other words using Arrow function here we'll make sure these lines of
code will correctly remember we are pointing them to this class property I will also need animation Loop so custom function I call for example animate inside I will conso loog input. last key request animation frame and I pass it animate which will create an endless Animation loop I start the loop by calling animate like this now when I click on canvas and I press left or right arrow keys we get the correct console logs for left H I misspelled Arrow right on lines 9 and [Music] 19 now everything works great utils JS is just a
place where I can have my small utility functions I want the function that will display the Last key that was pressed I want to draw that text on canvas so that I don't have to check console it will be very simple I call it draw status text it will take Arguments for context to specify what canvas we want to draw on and input so that we have access to the last key value I said canavas font property to 10 pixels helvetica for example fill text method takes text we want to draw and X and Y
where on canvas we want to draw it So I pass it last input colon space plus input. last key and I want to draw it at coordinates 1020 I guess let's export it and import it in script JS this time I'm not exporting it as a default so I have to wrap it in curly brackets like this I import draw status text in Brackets from utils JS and I call it inside animation Loop here on line 19 it expects context and input as arguments so I pass it CTX from line 9 and input from line
15 H let's make it larger Maybe 30 pixels and coordinates 2050 nice it works I need to make sure I clear my canvas between frames to delete old paint built-in clear rectangle method and I want to clear the entire canvas from coordinates 0 0 two coordinates canvas width canvas height this will delete my player so I have to redraw it for every frame by placing player. draw inside animation Loop nice so far we only care about left and right Arrow keys when we press them canas gets updated let's delete this console Lo State design pattern
allows objects to change their behavior based on their current state in this case we will start very simple to demonstrate the main idea we will swap player between standing left and standing right State entering each state will draw a different Row in Sprite sheeet and in each of these states player will only respond to a limited set of keyboard inputs when we Are standing left we will ignore additional presses of left key and we will only react when user presses the right key which will swap us to standing right state in standing right we will
ignore any additional presses of right key and only pressing left Arrow key will swap us to stand in left state in each state we can limit what keys player will react to and we can write logic that defines behavior for each key press separately I will keep all potential Player States in this do states array here and I will keep track of the current one in this do current state here the way this is done is that each state in this do states array will be its own object generated by a separate class don't worry
let's go through it now and make sure we explain it properly so that it's easy to understand in state JS I will Define class for each state I will have an object that will contain a list of all possible States usually it's A good idea to use enam for this in this case we will use enam to define a set of named constants we Define a name for each state and assign it a number the order of these states must match the order in which we add them to player States array and that way swapping
between states will be more readable because instead of swapping to state zero I will be able to swap to State standing left for example it will make our code easier to read that's why we're Writing this enom statement I will have just two states at first to demonstrate the entire Logic on a simple example standing left will be state zero and stand and right will be State one I create a custom class called State its job will will be just to hold this. State Property which will be passed to Constructor as an argument it will
take this argument and it will turn it into class property this is just to keep track of name of the currently active State so that we can write that state name on canvas in state design pattern each state is usually defined by a separate class so let's create a class called Stand in left and that class extends State class from line six extends keyword is used to create a child class by extending a class I'm setting up a relationship between these two classes this is parent and this is child extended classes is a good example
of One of four pillars of object-oriented programming called inheritance inheritance is a process where one class inherits attributes and methods from another class we use it to avoid code repetition I will create multiple child classes that all extend this state class if I want I can Define a method on parent State class and it will be inherited by all child classes automatically so that I don't have to Define them on each class separately all Child classes will also have access to this state property because if I reference a method or a property from inside a
child class if JavaScript can't find it on this class it will go look for it automatically on the parent so this is our parent class also called super class and this is so-called child class or subass class it will have its own Constructor and that Constructor will expect player object as an argument because I need access to player Properties on here since I want to be changing things like player spreadsheet row or player speed as we swap between different states Constructor is automatically executed when we create an instance of a class so the first thing
I will do is use super keyword we can use super keyword in child classes to access and call methods on objects parent when super is used in a Constructor like we are doing here it must be used before this keyword call in super here will Execute all the code inside the parent Constructor on line 7 in this case we need to pass it name of current state standing left and Constructor will set it as a value for this do state class property on this particular subass we will just use that to write currently active State
on canvas a bit later now I take player object passed as an argument and I convert it to class property here my standing left child class will have enter method that will do everything That needs to be done when player enters this particular state for example it will change its speed or spreadsheet it will also have handle input method which will listen for a predefine set of inputs and swap to a different state when the correct key is pressed enter method will just run once when stand in left state is entered handle input method will
run over and over per each animation frame let's copy all this and make another child class called Stand in Right I pass stand in right string to its super class Constructor notice that we have two subclasses extend in one super class both of these child classes have methods that are named exactly the same this is very important placing methods with the same names on different objects is an example of one of the Core Concepts of object-oriented programming called polymorphism out of these four Concepts it's the most complex one to fully understand since it has multiple
Types in this case polymorphism allows methods to display different Behavior depending on which class calls it we will be calling enter and handle input methods from player class using the same line of code every time but as player swaps between different states different code will be executed because enter method and handle input methods will contain different behavior for each player state for each class those differences will be defined here so for This code to work every player State class we Define needs to have enter method that runs once every time we enter that state to
set things up and it needs to have handle input class method that runs continuously waiting for specific inputs to be pressed to switch player object to a different state handle input method will take input as an argument player object has this do frame y property which determines which role of player spreadsheet we are Animating when we enter stand in left State I want to animate Row one stand in right animation frames are on row with index zero the main principle of State Management pattern is that when in specific State object will only react to a
limited set of inputs other inputs for which we don't Define behavior here will be ignored so inside standing left class if input is press right we will set state to stand in right when player object is in stand in Right State and input is pressed left we will switch player to stand in left State and the final piece is the mechanism that will actually allow us to swap player to a different state that code will come here I create a custom public method on player class called for example set State and it will take the
new state as an argument inside I Set this. current state from line six to this do States from line five and inex X will be this state number we passed as Argument of course this will only work if this do states actually contains some states right now it's empty we will fill it in a minute we know that each of our states has enter method which will run once when player enters that particular state to set up our spread sheet to make sure we are animating the correct row back in set State we switch player
to a new state and we call that enter method if we pass it one here enter method will be called on on stand in left state if We pass it zero here method will be called from Stand in right State because in our enam we gave stand in left State a value of zero and stand in right state is value one so now we have a public method that can swap player between different states if player is currently in stand in left State and handle input method DET text that we pressed right arrow key we
call it this do player. set State and on line 18 here I see it expects State as an argument that Argument will be a number right now we only have two states so either zero for standing left or one for standing right will come here you can see we say this do states and index in square brackets so we are referring to this do States from line five again we will fill this array with State objects in a minute so I want to swap player to stand and right State here I can see stand and
right is one here so to pass it number one I pass it States from line one do stand and Right from line three this entire enam object is here just to give me more readable values to these numbers that represent States it would also work if I just passed it number one directly here that number one passed the set State method will be passed here on line 18 as an argument and this current state will be assigned this do States from line five index one this array will need to have two elements as we have
two states element with an index of zero and Element with an index of one these will not be just simple numbers like this these will be entire instances of standing left and standing right class but before I can use those classes here in player JS I need to import them to import multiple classes from the same file we need to wrap them in Brackets in state JS I export standing left class from line 10 and standing right class from line 22 in player JS I import both of them from State JS like This I need
to make sure I save changes to all files I made changes to I have an error because I didn't finish this other if statement if player is in stand in right State and handle input method detects we press left Arrow key call set State on player class and pass it number zero states do standing left this stands for zero so zero is being passed here to set State and this current state is set to this do States from line 7 index zero which is this now we can finally Define Our states here properly so index
zero in player States array will be an instance of standing left class so new standing left and index one will be new standing right we need to make sure that state objects in this array have the same indexes as numbers we defined for each of these states inside enum here now that we can swap between states I also need to be calling handle input method over and over so that we can listen for new inputs and change States When needed I create update method on player class and it will take input as an argument inside
this method I will be periodically call in handle input from this current state property from line8 this property represents currently active State because of logic we defined on line 24 so player will be either in standing left or in standing right state it will call either handle input method from line 19 that reacts only to press right or handle input method from line 30 that reacts only to press left I call it like this and I pass it input that we passed here as an argument that input then comes through here so that handle input
method can check what was pressed and if the right key is pressed it will swap player States we call player update we just wrote from animation Loop and I pass it input from line 17 do last key from line three in input JS we are done we just wrote the entire Logic for State Management of player object let's quickly follow the logic one more time to make sure it's clear we are calling update method for every animation frame and passing it input. last key the last key from selected inputs that user interacted with that input
last key is passed here this time I call it just input and I pass it to this current state from line 8 do handle input and I pass that same input value along this current state represents the entire State object at first I'm setting it to this. States index zero which is this standing left object so for this animation frame handle input will be called from standing left class so from here I can see Constructor for standing left and standing right expects player as an argument so that we can then correctly set up our spread
sheets here and here in inside player JS I need to pass it that player argument since we are inside player class right now I pass It this keyword which in this scope of this class represents the entire player object okay so this do current state is this. States index zero which means our standing left class and we are calling handle input on it so handle input from line 18 will be called if the initial current state is index one that would be stand and right state so this handle input method will be called from line
30 instead if handle input is called from standing left class it will only react If right arrow key is pressed and it will swap player to stand in right state if player is currently in stand in right State handle input will only react to left Arrow key being pressed and it will swap player to stand in left State whenever we set a new state it will update which of these two states this current state is pointing towards and then from that new state it will call this enter method enter method was defined on lines 15
and 27 and depending On the current state it will set spreadsheet to animate a different row I save changes to all my files and when I click my canvas and press left and right arrow keys we are correctly swap in between standing left and standing right State let's display what state player is currently in on canvas as well here on line 24 every time set state is called we set this do current state from line 8 to one of our available States so far we have standing left at index zero and Standing right at index
one parent class of all our states has this do state property in its Constructor we are given that property a different value from each child state by calling super class Constructor from each subass basically all that this is we are declaring this do state property on parent class that property is being inherited by all child classes and it's set to standing left on this class on line 12 and two standing right on this class on line 24 I just Want to draw this value on canvas so that we know currently active State I will use
our existing draw status text function for that we are calling it from inside animation Loop here and I need to pass it player object so that we can access current player State here I make sure my function expects that argument the same as we did with input last key I will call fill text and I say active State colon space plus player we passed as argument do current state do State when current state is set to stand in left this do state here will be set to stand in left and that's what will get displayed
for standing right it will display this line as I said before using super keyword inside child class Constructor will call Constructor of its super class its parent class and it will execute all its code in this case this code will assign value of standing right to this inherited State Property when using live server in vs code watch for These dots here it means you have unsaved changes in your file so just make sure you save all your code in each file if you're not getting the same result as me I save my changes I also
have to give Phil text some X and Y coordinates how about 20 100 maybe 90 and I reduce for size to 28 pixels when I save my changes and interact with canvas now when I press left and right Keys we see status text that tells user the last input that was pressed or Released and currently active player status that's it State pattern is complete now we just add more states by extending it before we add sitting and running State let's recap the logic because I realize this must be lot for beginners to follow if you
are following so far well done you are doing great it all starts by calling player update and passing it the last key that was pressed or released inside update method we take that input and we pass it along To handle input method the whole trick here is that we are calling handle input from this current state property which swaps between different states when we pass it one it points to state with index one inside this do states array so in this case stand and right object if it's zero it points towards standing left State object
both of these objects have their own version of handle input method so that as we point current state towards different state objects behavior Of player will change even though we are always calling the same handle input method it's important that all our state objects have their own definition of enter method and handle input method I could also create a backup enter and handle input method on their parent class here in case child class doesn't have methods with these names but let's not over complicate things I like to think of this type of State Management as
we are locking player in different States while player is in a specific state it will ignore some inputs and it will only react to inputs we Define in its handle input method here we can see that while in standing left State player will only react to pressing right arrow key and it will make it switch to stand and right State while in stand and right State player will ignore all input PS except for pressing of left Arrow key which will make it swap to stand in left State you might notice that state design Pattern has
some code repetition but the code is easy to navigate in and if we get a bug it will be limited to a specific State making larger projects much easier to manage and debug if we get some unexpected Behavior we can see what state was our player object in when that unexpected thing happened and what was the last input key that was pressed or released and we check our code inside handle input method on that particular state to see what went wrong structuring Your code like this comes very useful when you want to give your player
multiple abilities weapons and special moves we are capturing the last key that was pressed here inside our input Handler class I'm importing and instantiating that class here in script JS and passing it to player update method we pass that input value along to handle input method and value of that input gets checked against a set of specific values we Define for each state And based on that we swap player to a different state using our custom set State method set State method takes a single number as an argument as we defined them inside enam state
do standing right is one state do standing left is zero so right now I'm basically passing it number one here that number travels as an argument passed to set State here it's passed along here and it represents index of that state inside this States Array on player class so number assigned to each state inside enum object in state JS have to correspond to index of each of these particular States inside this States array on player class that way when it receives number one here it swaps to stand in right state if it receives number zero
it will set state to stand in left after swapping to a specific State enter method will run once to set up player object for entering that state in our case we just Adjust Sprite sheet Row for now and then it continuously calls handle input method from that state class which listens to specific set of keyboard inputs that's why we have enter and handle input methods with the same names on each state so that we call them from the same place but we get different behaviors depending on which state object is player. current state pointing toward
wordss at that particular moment let's add sitting State I copy This code block and case will be arrowed down if you want to know what are the values of e. key so that you can check for correct spelling of key names you can just console in here I'm going to say if e. key value is arrowed down set this last key from line three to press down in key up event we set it to release down in state JS I copy this code block I use it to create a new class called Sittin left I
pass it sit in left here I Check my spreadsheet and I see that sit in left animation is on row nine we are counting from zero while in sitting left state if we detect that user pressed right key we will swap player to sit in right state which we will create in a minute else if we detect that user pressed up Arrow key we will make it stand up again I need to create these new key value pairs in my enam object up here so sitting left will be two and sitting Right will be three
in input JS I will check if pressed key is Arrow up and I set last key to press up in key up event I set it to release up so now we are tracking presses and releases of all four arrow keys perfect in my new sit and left class when we press right we set state to sit and right and when we press up our dock will simply stand back up so here I need to do standing left because we are going From sit in left State I copy this code block and I turn it
into sit and right class we set name of state to sit and right so that it displays correctly here while in sit in right state if we press left we set state to sit in left if we press up we set state to stand and right in player JS I import these two new state classes I instantiate them inside this do states array while making sure I am adding them in the right Order nice so we have two new state classes I hope you can see now how State pattern limits the number of inputs player
reacts in each state we have logic that defines how player behaves while in these two new sitting States but we have no way to actually enter these sitting States I go inside stand and right class and I say if input is pressed down we set state to Sittin right if we press down while in standing Left class we set state to Sittin left I also need to make sure enter method on sit in left class sets player sprad sheeet to the correct row sit in left is row with index 8 actually sorry sitting left is
row index 99 sitting right is a row index eight now it's correct I will also set the initial state to standing right so this do states index one just for the first page load before we start pressing keys and swapping player States now when we press down arrow key player Will sit we can press left and right keys to make player turn left and right while sitting and pressing up Arrow will make it stand up and face the correct direction this is going really well we can also change how the entire sitting State works by
only making the player it while arrow down key is being pressed and when it's released player will stand back up automatically so inside sitting left state if input is released down we set player to stand in left and inside Sitting right we set player to standing right it really depends on what kind of game you are building and what player Behavior you want I hope you can see that you get a lot of freedom and flexibility with this Cod structure you can easily control every detail of player behavior when you structure a code like this
the way a rote this code we only react to the last key pressed I'm not keeping track of multiple key presses in memory since I want to keep This simple but I will cover how to handle pressing multiple keys at the same time in a special episode as well probably add in running States will be similar but we will have to handle horizontal speed so let me show you how to do that again I start by adding new States inside my enam running left will be state number four running right will be number five I
make a copy of this block and name it run and left I put run and left here I check my spread sheet And the row for this animation is seven when we release left while in this state we will switch player into standing left State and when we press right we will switch into running right I also copy this line of code from here and when we press down from run in left State we will go into sit in left State duplicate this and turn it into runin right state if we press left Arrow key
while in runin right State we will switch into running left if we release right key we Will go into standing right and pressing down arrow key will make players sit to the right not every game needs to have left and right version of each state also there are other ways to write code when you have a set of states that each has left and right version or maybe each state has a version with weapon ready and weapon hidden for example again I'm doing it like this for Simplicity and to demonstrate the main idea of my
version of State Management pattern so we Defined beh behavior for player while in running States now we need a way to actually enter these states we can enter running from standing state for example while standing left if we press right we set state to run and right here inside run and right State we see that when we release right key it will switch back to stand in right state so we are only running as long as the key is being pressed down if we press left while in standing State we will Start running to the
left I get this error because I refreshed my project before I finished adding new state on player class don't worry about that while in standing right state if we press left we will start running left if we press right we will start running right so here we are exporting two new state classes we just wrote here we are assigning them values four and five these numbers need to correspond to indexes to order in which we add these States inside this States array here first I import them on line one as usual and then I add
instance of running left class as index four in this array and running right will be the fifth item in this array counting from zero I save changes to all my files run and right animation is row six in our spreadsheet perfect it works and swaps between running and standing States correctly we also want player to actually move when in running state so Let's give it this do speed property and set it to zero then I create Max Speed property and I set it to 10 pixels per frame for example when we enter running State we
set player speed to player max speed and in running left we set player to minus player max speed because moving left is in the negative Direction on horizontal x-axis inside update method on player class I will be adding player speed from line 16 to horizontal position from line 12 problem now is That player will just move off screen because even when we switch away from running State nothing is setting player speed back to zero so when we enter standing left State we set player speed back to zero we do the same thing inside enter method
on standing right sit in left and sit in right State perfect player now stops moving when we enter standing or sit in state I will also introduce horizontal boundaries so users can't move player outside the canvas if Horizontal position of player is less or equal to zero I set the position to zero else if the position is more or equal to game wi minus player WID meaning player's right Edge is touching right edge of canvas I will also not allow it to move past that point this is going so well we applied State Management to
our player and we have granual control over Its Behavior separated for each state we can do so many things with this common thing you Will see in games is jumping again there is a new small trick we have to use here if you never C it jumping in a 2d sidescroller game we will learn how to do it properly right now and we will make it look really good by switching player to a separate falling animation after it reached Peak height of its jump let me show you that swapping between states doesn't always have to
happen on user input we can also tie State swapping to other game events in this Case we will swap player from jumping into falling state after it reached maximum height of its jump we are creating new States as usual I will first add them up here to our states object which we are using to pair readable state names with numbers that represent each state I copy already existing state class and I turn it into jumping left class I check my spreadsheet to see which row has jump in left animation frames I delete player Speed I
think because I want the speed to be inherited whether we enter jump from standing on running State H we will see about that I delete all these inputs for now I copy this block and turn it into jump in right class frame y for jumping right is row with index of two I go up to stand in left State and when input is pressed we switch player to jump in left inside stand in right State when we press up Arrow key we set State to jump in right I'm exporting these new state classes so in
player s i can import them and I instantiate them inside player States array I'm getting an error hm it's because up here in my enum I skipped some values let's assign my new states to the correct values now we correctly enter jumping State when I'm in that state it doesn't matter what I press we are locked in that state Because inside handle input method I didn't give it any way to switch off to a different state first when we enter jumping State let's push player upwards on minus Direction on vertical y AIS when we enter
I say this do velocity y minus equals 20 I do the same for jumping right state in player JS inside update method we will deal with vertical movement here I give player VY velocity y property and I give it property I call for example weight I could have also Called it gravity or something I will use velocity y to pull player upwards and wait to pull player down as the ratio between these two values changes during the jump it will create a nice jumping curve for every frame we will add this do velocity y from
line 14 to Player's vertical y position from line 13 right now velocity Y is zero so even when we are adding it there will be no vertical movement if player is not standing on the ground so if player Y is Less than this Dot Game height my minus player height gradually add value of player weight to Velocity y else meaning player is standing on the ground set velocity y back to zero give me a second to figure this out to make sure I'm doing it correctly in state GS here I actually want to access velocity
y property on player object so this player VY minus equals 20 I get small jump and it stops moving again H oh yeah this is a typo this needs to Be game height now it's working we have multiple places in our code where we need to check if player is standing on the ground or if it's currently in the air this is a good time to create a small utility method on our player I will call it on ground and its job is to check if player is standing on the ground I will just make
it return true or false directly like this based on how this expression evaluates if players Y-coordinate which is the top edge of player image rectangle if it's more or equal than game height so this point minus player height so if this point is more or equal than this point we know player is standing on the ground so this method will return true else it will return false now I can just call this method whenever I need to do this check and it will also make the checks more readable here on line 32 I'm checking if
player is not on ground so I say if on Ground is false actually if this dott on ground is false now it's working I want player to be able to switch sides while jumping so in jumping left state if we press right arrow key we set state to Jumping right in jumping right state if we press left Arrow key we set state to jump in left player is flying off screen really far let's change this to minus equals 10 that's a very small jump but you will notice a bug here if I swap a between
Jumping left and jumping right quickly each time we enter these states we are running their enter method so each time we push player further and further up I want the player to only be able to propel itself further up if it's standing on the ground so in enter method on both jumping States I will first check if player do on ground is true before we push it upwards if it's already in the air this will be false and player will receive no vertical push I change these values to minus equal 4 40 I just make
sure I spell on ground correctly perfect we are able to turn to sides while jumping I will actually give it some horizontal speed as well when we enter jumping left set players's horizontal speed to half of player's max speed and the same for jumping right in jumping left it actually has to be negative number since we want to move in minus Direction on horizontal x axis that works awesome I can switch between Jumping left and jumping right States but otherwise I'm locked in jumping I didn't give it any way to get back to running or
standing State inside jumping left I check if player on ground is true and when player gets back on the ground we set its state to standing left in jumping right again we check if player is back on ground and we set it to standing right we are running standing sitting and jump in well done if you followed this far let's polish This and make it look even better jumping works this way we are always adding velocity y to Player's vertical position here on line 31 most of the time that velocity Y is zero so there
is no vertical movement when we enter jumping State we set velocity y to minus 40 which will push player upwards in minus Direction on vertical y AIS when that happens player is no longer standing on the ground so this if statement triggers and we start Increasing velocity from line 14 by player weight from line 15 15 this happens for every frame step by step so actually velocity y goes from - 40 to 0er making Player move up slower and slower when it's zero player will stop moving at that point we are still not on the
ground so this line of code keeps increasing and it moves velocity y from negative to positive numbers which will make player reach peak of its jump and it will start falling back down when we Touch the ground this L statement triggers velocity Y is set back to zero and vertical movement will stop understanding how velocity y goes from minus 40 to zero and then into positive numbers gives us ability to tie player State change to it I can tell that player is at its peak of its jump because its velocity y switched from negative to
positive values I will just add a quick check here to make sure player doesn't fall through the floor it Shouldn't happen but this is kind of my insurance if player Y is more than game height minus player height set player y to game height minus player height this line will make it impossible for player to move below ground level under any circumstances I don't think this check is needed even when I increase player weight to 10 we still don't fall through the floor maybe you can just comment it out it's up to you it's just
a check to be Secure I created falling States falling left is eight and falling right is nine I copy one of my state classes and I turn it into Fallen left enter method will just set frame y to 5 inside handle input method while in Falling left if we press right arrow key we want to turn so we will switch to fall in right I also want to keep this check when we fall all the way to the ground we will switch player to stand in left State I copy this and turn it into Fallen
right Class frame y here will be four and when we press left we set state to fall in left I imported this class in player JS and I instantiate them inside player States array so how do we enter Fallen State as we said when we enter jump velocity Y is set to minus 40 and we start adding player weight to it so it goes all the way to zero and into positive numbers I know at the point velocity y reach zero we are at the peak of jump and as it goes into positive Numbers player
is falling back down bear with me a second here please so inside jumping left state if velocity y on player object is more than zero we set player state to fall in left inside jump in right state if velocity Y is more than zero we set State the jump in right so this is one example of how you can switch switch States based on other conditions state changes don't always have to be triggered by user pressing keys on keyboard this works Really well we created standing sitting running jumping and falling States we are just drawing
the first frame in each Sprite sheet row let's actually animate the frames horizontally we have frame X property for horizontal navigation within our Sprite sheet for every animation frame I check if frame X is less than Max frame and I increase frame X by one I set frame X back to zero some rows have different maximum number of frames but that's easy to deal with Initially I set max frame to five we are counting from zero you can see that Sittin animation has less frames so it's blinking since we are animating empty frames we will
start with standin animation so the initial Max frame is six every time we enter a new state we set max frame to a different value when we enter standing left we set max frame to six I should be setting Max frame before I set frame wide because in some cases if I switch row at first we can get blinking before the right Max frame is applied or maybe I could also set frame X to Zero every time we enter a new state I'm not going to go deep into this today I made other episodes about
sprite animation this is just a quick solution running left and running right we'll set max frame to eight jump in and fall in have Max frame six awesome we are correctly animating all our Rows if you want to make Player move faster you can change Max Speed property here on line 20 this value affects horizontal movement the Sprites are animating very fast maybe I want to slow them down a bit without changing FPS of the entire game how do I set FPS for how often we switch between horizontal frames in Sprite sheet while still keeping
everything else running at maximum 60 FPS as always we can use time stamps and Delta time last time will be The value of time stamp from the previous Loop animate takes this autogenerated time stamp argument which was produced and automatically passed to it by request animation frame from line 23 Delta time is a number of milliseconds that passed between the last animation Loop and this animation loop it's the difference between time stamps from each Loop so Delta time equals to time stamp from this Loop minus time stamp from the previous Loop When we have that
calculation I set last time to the current time stamp so that it can be used for the next loop I also have to pass animate the initial time stamp just for the first Loop because request animation frame autog generates it from the second Loop onwards so now we have Delta time we know how many millisecs it takes for our computer to serve the next animation frame it depends on power of our machine how much animation and calculations our game is Doing per each frame as well as on refresh rate of screen we are using this
number can be different for every computer but we can use it to unify how our game runs across different machines today I will use it to control how often we serve the next horizontal frame in Doc Sprite sheet I pass Delta time to player draw method here and in player JS I make sure draw method expect that argument timing things with Delta time needs three helper variables one Variable to set FPS frames per second one timer variable that will accumulate Delta time until it reaches a certain value and one variable that defines that value we
want to reach I call that value frame interval and it will be th000 milliseconds divided by frames per second which will give me number of milliseconds I want each frame to be displayed on the screen before we switch to the next one so if frame timer from line 22 is more than frame interval from Line 23 only then switch frame X variable at the same time set frame timer back to zero so that it can count again else just increase frame timer by Delta time and wait until it accumulates enough milliseconds H it's not working
I see here in animation loop I need to correctly assign last time to the new Tim stamp value after we used it to calculate Delta time so that it can be used to calculate Delta time in the next Loop if I change FPS it affects how fast we serve horizontal Sprites while still allowing player to move around at maximum 60 frames per second or whatever your request animation frame can handle on your computer if I give it FPS that's higher than my screen's refresh rate request animation frame will automatically cap it so it won't animate
faster past a certain value that maximum value of frames per second is limited by your screen refresh Rate making games with JavaScript is one of my favorite ways to practice coding today we will build a 2d game and we will animate everything to bring it to life I want to show you how to make keyboard controls feel quick and responsive we will apply animated Sprite cheese and paralu backgrounds we will learn how to give our game different skins we will explore a new technique to make particle effects and we will challenge our players by giving
Different eneme types different behaviors on my Community page I asked you to choose between three superpowers and you chose the fireball tackle so let me show you how to turn into a flaming bow of plasma and vaporize enemies to earn points come join me and learn how to create your own 2D adventures with HTML CSS and plain vanilla JavaScript no Frameworks and no libraries C the like if you want more [Music] Games to keep the code organized and easy to naviga in I will split JavaScript into multiple files so-called modules and I will export and
import them around the code base as needed to enable this functionality we have to run our code in some kind of Dev environment they need to be run through some kind of server you might already have a preferred way to run a local server you can go ahead and do that for the rest of us the easiest way to create a simple Local server is to use VSS code editor which has a built-in one when you open your vs code check if you have this notification area down here that says go live if you can't
see it you can just come here to extensions and search for live server it's this one mine is already installed you can just click install here when you install it close your vs code and reopen it and you will see go live down here one last thing to do we have to point vs code to the Correct folder with the files we want to run through this live server we do it by going to file open folder and in there you navigate to the folder you will work with today on your local computer and click
open now when I create new files they will be automatically created in that folder so I create index HTML style CSS and Main JS in index HTML I create a basic blank web page markup in vs code you can just press exclamation mark and Tab Key and it will create it for you Let's give it some title and Link style CSS file like this I create a canvas element with an ID of canvas one down here I link my JavaScript using a script doc I give it type attribute and set it to module to specify
that this file will be a JavaScript module it will be my top level module and we will be importing other JavaScript modules inside I click this go live button and live server plugin will automatically open my default browser and it will run Our project in it it will also automatically reload the browser window whenever we save any of the project files you don't have to use vs code and live server plugin if you know how to create your own local server in a different way feel free to do that so now I can see my
live server is running on Port 5501 it will reload browser window whenever I save any project file I usually use control+ S keyboard shortcut to save sometimes you have to Manually reload the browser page for the first time and then it will start doing it automatically in sty CSS I reset margin and padding to zero on all elements and I set box size into border book this is so-called Global reset and we do it to make sure our page looks the same across different browsers canvas 1 will have border 5 pixels solid block and I
Center it in the middle of the page so the usual four lines of CSS position absolute top 50% left 50% Transform translate minus 50% minus 50% I will provide you with game art assets you can use to code along with me and at the end in the experiment sections I will show you how to apply different skins to your game so that you can make it unique based on your own creative preferences check out this website for more beautiful art assets that are already compatible with today's project today we will be using images for player
backgrounds enemies and other things the Easiest way to make sure our code runs only after all art assets are loaded is by placing the images inside index HTML which we will do in a minute and we will put all JavaScript inside a callback function on event listener for window load event that way JavaScript waits for all dependent resources such as stylesheets and images to be fully loaded and available before it runs when the page is fully loaded we will Point JavaScript to our canvas element using Its ID I create an instance of buil-in 2D draw
API using get context method and I save it as CTX shortcut for context canvas width will be for example 500 pixels and height 500 pixels as well you can make your project wider but keep the height at 500 pixels for now because I optimized the background images for that size we can make canvas scale up and down to make sure it's always fully visible if I set WID to 1,500 pixels we can only see the middle it's cut off on Left and right I can give it Max width 100% and it will make it scale
down until it's fully visible whenever the width of the page is less than the width of the canvas element I can also give it Max height 100% in case that the restricting factor is Page height now we can always see the entire canvas regardless of its width and height I set it back to 500 500 for now the main brain of our project will be this game class all logic in our project will Somehow go through it if it will expect width and height as arguments and inside we convert these to class properties like this
it will have update method that will run for every animation frame and Trigger all calculations that need to happen and draw method will draw our images score and so on right now we don't have anything to update or Draw yet I create a new Javascript file called player JS if you are a beginner it will be easier for you if you follow My code exactly and use the Sprites and images I provide you and only once you have a work in Project then you can modify it and add your own art assets and game features
if that's what you want to do inside player JS I create a class called player its job will be to draw and update our super do character Constructor will take the entire game object as an argument through it we will have access to some things we will need such as width and height of the game Area and so on JavaScript objects are so-called reference data types which means when I pass the entire game object to other classes like this I'm not creating a copy of the game object I'm just pointing to it so now it's
time to bring player image to the project it was provided by this talented artist and you can download it for free in the video description and use it for learning purposes to follow along with this class check out their website for more game Art assets if you want to make your projects unique so we have some images and sometimes it can take a while maybe even a couple of seconds for the images and audio files to load in JavaScript if you try to use an image that hasn't yet been fully loaded you will get an
error with we need to make sure our images are loaded and available before we draw them one way to do that and the simplest way to do that is to actually include those images on our web page I simply create An image element and as a source I point it towards the image file I have a folder called Assets in the same place where my index HTML file is and in there the image I want is called player PNG I give it ID player like this I will draw that image on canvas with JavaScript so
I don't really want to display it on the page like this inst stall CSS I Target it using its ID and I set its display To None it's a good practice to make your images the exact size you will use in Your projects we can scale it down with JavaScript but for maximum performance it's better to size your images in Photoshop or some other graphics editor I already did that with the images I gave you today and I sized each frame to the same size we will display in game the width of each single frame
in the Sprite sheet will be 100 pixels and height will be 91 3 pixels if you are using your own Sprite sheet you can get the width of a single frame by taking The width of the entire Sprite sheet and dividing it by the number of horizontal frames and height is the height of the entire Sprite sheet divided by the number of vertical frames the number of rows player will also need to be positioned somewhere on canvas so it will need X and Y position it will have update method that will move it around based
on user input and it will cycle through the Sprite frames and the draw method will take those values and it Will draw currently active frame add the current coordinates it will need context as an argument to specify which canvas element we want to draw on let's start by calling fill rectangle first and we draw it at coordinates this.x this.y and we also specify its width and height if I want to use this JavaScript class in a different module in a different file I need to export it I can just say export like this each file
can have unlimited amount of exports or I can say export Default each file each module can have only one default export in main JS I import player class by going up top and saying import player in Brackets like this from do/ player JS in quotes class Constructor on JavaScript class is a special type of method it gets automatically executed when we call this class using the new keyword it will create one new instance of this class and as a side effect all the code inside the Constructor will run we can take Advantage of that by
putting in any code we you want to run at that point when I create an instance of game class I also want to automatically create an instance of player class since I'm important in player class on line one I can instantiate it here this player property on game class will be new player like this inside player JS Online two I can see that player class expects game as an argument so here since we are inside that game class I will pass it this Inside game class this keyword means this game object object now that we
have access to the player object from within game class here inside draw method I can take this do player from line 13 and I call its draw method we declare that draw method here on line 12 inside player JS and I can see it expects context as an argument my main public method will be this draw on game class it will get context pass from the outside in a minute and we will just Pass that reference along to player draw like this our game class is complete let's create an instance of it I need to
pass it width and height so I pass it canas width from line six and canas height from line seven so now we created an instance of game class which triggered class Constructor and that automatically triggers class Constructor on imported player class and also creates our player make sure you save changes to both Player JS and Main JS file every time you make any change if you have any unsafe changes in player JS at this point you will not get the same result as me I console a game and I can see it has height width
and it contains player object as we defined in the Constructor perfect we will also need animation Loop because I want the game to update and draw over and over 60 times per second I create a custom function I call for example animate inside I call game. draw From line 18 and as context I pass it CTX from line five then I call request animation frame and I pass it animate to create animation Loop when I call it we are drawing this black rectangle representing player object nice this code inside draw method on player class will
determine what the player looks like I can make it red for example I can move it around by changing its coordinates if I want to align the player on the bottom of the game area Player object needs to be aware of game height I have width and height of the game area here as properties on game object and I'm passing a reference to the entire game object to the player here inside player JS I convert that reference to a class property called this. game and I can extract width and height of the game from that
so to position the player on the bottom of game area I set its vertical y-coordinate to this. game. height minus This. height height of the player I don't really want the player to look as a red rectangle we have a special Sprite sheet with our super dog to use here we are about to learn how to use built-in draw image method to animate a game character from a Sprite sheet if you want to go deeper on sprite animation the very first episode in the series linked below will explain it in a beginner friendly way this
is an advanced video if you feel it's too Challenging for you at some point don't worry it will make more sense if you keep going and you can always watch a special episode describing each technique on a simpler project so draw image is a special HTML canvas method we can use to draw and even to animate an image it's simple I have my player Sprite sheet here in index HTML and I gave it an ID of player I create a property on player class called this. image and I point it toward words. image Element using
get element by ID now I can draw that image draw image method needs at least three arguments image we want to draw and X and Y where to draw it by the way I'm not sure if you know but I don't really have to use get element by ID here I give my image ID of player here and JavaScript automatically creates references to all elements with IDs into the global name space using its ID as a variable name so I can simply just use that ID as a variable name here And it will still work
it's a bit strange and for some reason nobody uses this feature but it will work I will go back to get element by ID here even though it's kind of redundant draw image method can also accept optional fourth and fifth argument for width and height and it will shrink or stretch the image to occupy these Dimensions now it's just squeezing the entire Sprite sheet into the small space the longest version of draw image method takes nine arguments And that's the version we need we pass it image with we want to draw Source X Source y
Source width and Source height of the rectangle we want to crop out from the source image in our case a single frame of the Sprite sheet and destination X destination y destination width and destination height will Define where on destination canvas we want to draw that cropped out rectangle on two at first I just want to crop out the top left frame in my Sprite sheet so I crop From coordinates 0 0 and the area will have a width of 100 pixels and height of 91.3 pixels I'm cropping out exactly one frame I don't need
the red rectangle anymore we are redrawing the same image over and over 60 times per second but it looks static let's check if we are actually animating by putting some code inside player update method for every animation frame I want to increase player's horizontal x coordinate by one pixel to actually run the code I need to Go to update method on game class and I take this. player from line 13 and I call update on it like this finally I call game. update from inside animation Loop and we have some motion congratulations you are a
JavaScript animation Master okay we can do a bit more with this if you want the dog is leaving a black trail behind that's old paint we can just see all the previous frames if you want to see only the current animation frame we need to clear Canvas each time we update and draw I call built-in clear rectangle method and I want to clear the entire canvas from coordinates 0 to Canvas width canvas height now we can see the current animation frame I don't really want the player to move like this let's commment this out I
want the player to move left and right jump and to use superpowers based on keyboard inputs I create a new Javascript file a new module I call it input JS its job will be to capture and Keep track of user input again I will create a JavaScript class here I will call it for example input Handler inside its Constructor I create a property called this. keys and I I set it to an empty array at first I will be adding keys that are pressed down into this array and removing the keys that are being released
that way we can always check if a specific key is pressed by chicken if it's included in this array as we said before the code inside a Class Constructor is executed automatically whenever we create an instance of this class so I will take advantage of that and I will apply key down event listener from here event listeners return an autogenerated event object which contains all kinds of information about the event that just occurred the property that holds the name of the key that was pressed is called key so let's consol lock e. key I export
input Handler up Here inside main JS I import my new input Handler class same as I did with player I will create an instance of input Handler class inside game class Constructor I will call this property this do input this way input handle class gets automatically instantiated when I create an instance of game class it will create this. Keys array from line three and it will also automatically apply this key down event listener now when I press Keys on my keyboard I can see their values I don't want to react to every key we will
ignore some and we will only respond to specific controls defined here we will also make sure each key can be added to this do Keys array only once so when the user holds down a specific key it will not be added 20 times it will just be added once let me show you I say if e do key meaning the key that was just press has key value of arrow down and at the same time this key that Was pressed is not yet included in this dokeys array so this. keys index of e. key is
equal to minus1 you can also say is more than minus1 in JavaScript when element has index minus one it means it's not present in the array then I just do this do Keys push e do key so if the key that was pressed is arrow down and if arrow down is not yet inside this do Keys array push arrow down into this. Keys array I can cons key that was pressed and this. keys array you can see It will stay empty until I press arrow down if I press it it will be added to this
do Keys array once I will also create an event listener for key up event if e do key is arrow down meaning if the key that was released is arrow down I will use splice method to remove it from this dokeys array splice method takes at least two arguments index of the element we want to remove and how many elements to remove At that index Let's test it actually to test it properly I want the console Lo after the if statement now when I press arrow down it gets added to this dokeys array through the
code inside key down event when I release it key up event removes it from the array perfect I also want to listen for Arrow up key so I use or operator be careful about brackets here I have to wrap this block in Brackets like this if Key that was pressed is arrow down or Arrow up in Brackets and at the same time the key is not yet present in this do Keys array only then push it inside I also need to make sure I remove that Arrow up key on key up event again pay attention
to how I use brackets here it's easy to make a mistake here and break your code we will also listen for Arrow left so or operator e. key is Arrow left and another or operator and I check for Arrow right I will check for One more key for now I will use it for a special move and attack and you can use alt control but be careful Mac and windows call alt and control keys differently they might have a different value consol e key and press them on your machine to check for that value in
this case I will use Enter key which should be more Universal and compatible with both Mac and Windows systems let's add all these keys to key up event as well and I have to make sure my syntax Is correct now it should work I click my canvas to select it and when I start pressing arrows and enter I can see they are correctly being added and removed from the array you can see we are also keeping track of multiple key presses at the same time great so now this. Keys property on input Handler class always
contains all currently active active keys I have an instance of that class here saved as this. input for every animation frame I want to pass the Current list of active inputs to player update method as an argument so that it can react to it I will pass it this. input. keys inside player JS I make sure the player expects that input value I will call it for example input it still refers to this do Keys array we have on our input Handler class inside update method on layer class I want to check if it includes
specific values I use buil-in array includes method I could Also use index off method here it would work the same if input includes Arrow right increase horizontal x coordinate of the player by one else if it includes Arrow left decrease X by one making the player move left on the negative Direction on horizontal x- axis I actually need to say this. x to correctly refer to the property from line six the error I'm getting now is because I didn't save my changes to input JS or main JS files with file Structure like this when we're
using modules we always have to make sure we save every file whenever we make any changes to it now when I press right arrow player moves right when I press the left Arrow key the player moves left let's refactor this I give player a speed property and initially I set it to zero I also give it Max Speed property which will be its speed in pixels per frame when it's moving so this section of code will handle horizontal movement For every frame I will increase player's horizontal Exposition by its current speed so right now the
speed is zero so the player is not moving down here I say if input includes Arrow right set this do speed to max speed if it's Arrow left set speed to minus max speed now I can move left and right again but I can't really stop there is no condition when the speed returns back to zero I can fix it by saying else this speed is zero meaning if input array doesn't include Arrow right or Arrow left stop the horizontal movement I also don't want the player to be able to move outside of the game
area so I need to introduce some boundaries I say if this. x is less than zero set this. X to Zero now I can't move past the left Edge I also say if this. x is more than this. game width minus the width of the player set X to game width minus player width now I can't move past the right edge of game area as well perfect it's time to handle Vertical movement which will include jump in and also a special dive move where we Crush enemies from above I create a new class property called
this. VY velocity y basically a vertical speed initially I set it to zero for every animation frame we will add the current Vertical Velocity VY to Player's vertical y position currently v y is set to zero so there will be no vertical movement at first I will have to check in multiple places in my code Whether the player is standing on Solid ground or if it's currently in the air to make our code more readable and to avoid code repetition I will put that check into a small utility method I will call it for example
on a ground and I just want it to return true if the player is on ground or false if the player is in the air I do that simply by saying return thisy is more or equal to height of the game minus the height of the player Let's start by saying if input includes Arrow up set this velocity y from line 8 to minus 20 I press up Arrow key and the player just flies up off screen okay that worked I only want the player to be able to jump while it's standing on ground I
don't want it to jump higher and higher in the air when we are pressing up Arrow repeatedly I add one more check here to see if on ground from line 28 is true I set velocity y to minus 2 nice if you want a nice jumping Curve in a 2d game we usually do it by making the power of the jump in our case VY property work against the gravity or weight of the object and while that object is in the air we keep increasing its weight until it eventually is higher than its jump power
and it will make it slow down and start falling down let me show you exactly what I mean this used to be a bit confusing for me but it becomes easy when you use it a few times I create a new property called this. Weight for example and I I set it to one so we have velocity y property on line 8 and when we press up Arrow key we set it to minus 10 this will be the power pulling the player upwards at the same time I want the weight of the player from line
nine to be pulling it down and I want that pull to be stronger the longer the player is in the air to get that smooth curve when we jump I do that by saying whenever this dot on ground is false whenever the player is not Standing on the ground increase its velocity y by this do weight nice we kind of jumped I also need to make sure that when the player lands back on the ground velocity Y is reset back to zero to stop all vertical movement I say else this do velocity Y is zero
for this to actually work as intended I need to first run this line of cod and then this one and we are jumping velocity Y is constantly being added to players's Vertical y position at first it's zero so nothing is happening when I press up Arrow key I give it a push in the negative Direction on the vertical y AIS so upwards at that point the player is currently not on the ground so this line of code will start running and velocity Y which is currently set to minus 20 and which is moving the player
20 pixels up per animation frame will start decreasing by this do weight from line 9 so - 20 + 1 is -9 -8 -7 All the way to zero when we reach velocity y of zero player is at the peak of its jump but it's still not on the ground so this line is still adding weight to Velocity y making the player fall down faster and faster when the player hits the ground this lse statement will set velocity y back to zero and the jump is finished the ratio between weight and this minus value will
determine the curve height and speed of the jump I will keep weight at one and I Will adjust velocity y to make the player jump all the way to the top of the game area we have runin and jump in I would like to add more player States and properly animate them we need a fireball attack and when the player sits down I want the game to stop scrolling how do we organize and manage this functionality by structuring our JavaScript code in so-called State design pattern I will show you exactly how to do that in
the next part we are Building a fast-paced animated Sid scroll game with vanilla JavaScript and HTML canvas in the first episode we created the main game logic animation Loop and the player let's continue building our game in this class we will apply State design pattern to our player to make it switch between the states properly we will learn how to control FPS how to animate Sprite sheets and how to implement multi-layered seamless backgrounds with scrolling speed that Reacts to player movement part one is linked in the video description let's go I like writing my code
like this for small simple games as you you can see there are quite a lot of IFL statements in here already I want to add some special moves this single code block already does so many things and we have just run in and jump in if we keep adding more and more in here we can get to the stage where changing one line of code can break something else Unexpectedly for small games it's fine to have all logic in one place like this but for this game we will go ahead and structure our code a
little bit better I will manage player States separately in its own file I call it player States JS at first I will create a simple enam object that will pair values and names of each state it will help with code readability rather than swapping to state two I will swap to state do jumping which has a value of two behind It it will be easier to see what our code is doing this episode might be a bit challenging for beginners we will be passing values around between JavaScript modules and classes and I can imagine if
you are a beginner it might take some effort to keep track of which values are coming from where I will guide you through all the steps and we will make our code easy to navigate in but this is the finale of my vanilla JavaScript 2D game development Series so I expect you Either already watched my beginner friendly episode on State Management Linked In the description or that you have already done some JavaScript coding before I will explain everything today no previous knowledge is needed but it will be easier if you watch the beginner class first
it's up to you today's tutorial is mainly to show you how I put everything together to make a polished animated game that feels good to play check the video description ion for the Full series I create a class I call for example State each state will have its own class so that I can give each state a different enter method to set the player up when it enters that particular State and handle method that will react to different user inputs depending on which state the player is in at that moment in time for example when
the player is in the running State and I press arrow down I want to switch to sitting state but when the player is in Jumping State and I press arrow down I don't want the player to sit in the air I want it to do a crushing dive attack from above State design pattern is perfect for changing how the object behaves depending on its current state I will show you exactly what I mean as we write the code Constructor will take a single argument called for example state it will be a simple line of text
with the name of the state such as Sittin runin jumping and so on inside I convert That argument to A Class Property I will use this value only so that I can cons loog the name of the currently active state for debuging purposes it's not important for the logic of State swapping we will have one class for each state the first state will be Sittin which will also be special because it will stop the game from scrolling as the player sits down we will export it so export class Sittin Constructor will take a reference to
the player object as An argument so that it can access properties on the player class I am extending a class and I wanted the code from this Constructor on the parent to run as well so I have to call Super keyword here the trigger Constructor of its parent class also known as a super class we can see that the parent class Constructor expects a value for State this is simply for monitoring purposes I will pass it word sitting and it will get converted to this do State Property Here only after we called super we can
use this keyword here in a child class if we use this keyword before using super we will get an error super on child class always needs to be called before this keyword is used each class will have enter method that will run once when this state is entered and handle input method that will take input as an argument and it will keep checking if the correct key is pressed and it will switch player to a different state When that happens for example it will switch to jump in state when we press up Arrow key in
player JS we will need three helper properties to apply State design pattern let's just write them and I will explain in a minute we will need a property called this. states which is an array of values we will also need this do current state which will point to indexes in this array when the player object is initialized for the first time we will Call its enter method to activate its initial default state I'm exporting my Sittin class here let's import it up here in player JS I import the entire sitting class from player States JS
quick overview of how we will apply State design pattern into our code Base today player object will have this. States property which will be an array containing individual states such as sitting running and so on the player can only be in one state at a time so we Will have another property here called this do current state when this do current state is equal to this do states index zero player is sit in when it's this. States index one the player is in the running State and so on the final piece of logic will be
that each player state is actually its own class we will have a class for Sittin another class for runin there will be a separate class for every state the reason for that is that each state needs to have its own Separate enter method that will set speed animation row and everything else that needs to be done whenever the player enters a new state each state class will also have handle update method which will listen for keyboard inputs and it will be ready to switch the player to a different state whenever the correct key is pressed
because all state classes have their own enter and handle input method and because this current state points to Different states as the player switches from one state to another we can just keep calling this. current state. handle input and we will get different behaviors depending on the current state the player is in at that point in time and this is the entire logic behind State design pattern if it's still not clear don't worry I will go over it today step by step as we write the code it will make more sense if if you practice
and code with me inside this do States array I will instantiate each state class right now I'm creating an instance of sit in class here on line 14 in player States JS I can see that it expects a reference to the entire player object as an argument because here we are inside player class I passed this keyword which references this entire player class when we enter sit in state I want to draw a different animation Row in player spread sheeet let's set up sprite animation we will have frame X Horizontal frame that will cycle from
left to right animating the player and we will have frame Y which will travel in the Sprite sheet vertically whenever we switch to a different state you can see that frame y0 is standing frame y1 is jumping and so on changing the values of frame X and frame y will jump by the width and height of a single frame so that we can animate the Sprite sheet in draw method I replace hardcoded coordinates 00 0 which are Cur Curr L Display in this top left frame two Dynamic values Source x value will be this. frame
x times the width of the player frame source y will be this. frame y times the height of the player frame I'm getting a console error it's because I forgot a forward slash here on line one in player JS now it's fixed so now frame X Cycles horizontally frame y travels around the spreadsheet vertically I can see that the sitting animation is frame y5 when We enter sitting State I take this do player from line 16 which points towards the player object and I set its frame wi property to five I could have defined Getters
and Setters on the player object to do this by the book but I don't think it's necessary for our purposes today this code will work well back in player JS I set the initial frame y to zero which is this standin animation now I need a method that will allow us to switch player between states I Define it Down here on the player class I will call it for example set state it will take this new state we are about to switch to as an argument it will be a number corresponding to indexes in this.
States array from line 17 inside I set this current state from line 19 to one of the states from line 17 depending on which index I pass to it right now we only have one element in the array the sitting State that's index zero if we have more State classes in the array on Line 17 I will be able to swap to index one two and so on to switch player to those states keep in mind set state will take one argument called state which will be a number corresponding to the index in this do
states array then we call enter method on the currently active state to set up things like speed sprite animation and so on there's also handle input method we defined here enter method will run once every time we enter that state handle Input method will be running 60 times per second waiting for keys to be pressed so it can switch the player into a different state when the user requests it by pressing the right set of keys in our case mostly arrows so far I will be calling it from inside update method on player class here
so this do current state do handle input I'm passing input value as an argument to the update method here the value of input is coming from update method on game class Pointing to Keys array on an instance of input Handler class from line 15 this way player update method can always see what keys are being pressed in our game by checking if they are present in this input Keys array we defined it before here on line three in input JS if you remember we pass it through game class to update method on player class and
I will just pass that argument along to handle input method like this this code will be running 60 times per Second constantly checking what keys are present in input Keys array handle input expects Keys array here as an argument I called it input and we will be checking and waiting for specific keys to be pressed the main function of State design pattern is that we are basically locking player object in one state at a time and while the player is in a certain state it will only react to a limited number of keyboard inputs while
the player is in the sitting State we Will react to Arrow left and arrow right keys and when they are pressed we will switch into running state so I say if this input value that was passed as an argument which points to this. Keys array on input Handler class if that array includes Arrow left key or if it includes Arrow right key call set State method on player object here we can see that set State method expects State as an argument and it will set the current state of the Player to that index in this
do states array from line 17 right now that array has only one element so it will only work when I pass it index zero as a value of this state argument here it will then call enter method on that new state we just switch to back to player States JS so now we know that we have to pass this set State method a number that will be used as an index in player States array to correctly switch it into that state I Can pass it number zero here but we have this enum object here to
convert numbers to words like sitting and running to make our code more readable the order of states in this enam must be exactly the same as the order of states in this do states array on line 17 inside the player class index zero is sitting State because it's the first element in the array this enam also needs to have the value of zero paired with sitting which it does now I can call set state and Instead of passing number one which would also work but it would be less readable I pass it States from line
one do runin which has a value of one behind it as well I hope it's a bit more clear this is the most complicated part and we just covered it just keep coding with me and it will start making more sense right now there is no index one in this array yet we need to create running class to add it I copy this code block and I rename it to Runin and I also put runin here I check the Sprite sheet and I can see the fourth row in the Sprite sheet is running so I
set frame y to three because we count from zero in handle input on running class we will listen for arrow down and when it's pressed we switch player to the sitting State we are exporting running class here I import it up here in player JS and I instantiate as an element with an index of one inside this States array Nice so now when we are in the Sittin State and we press left or right key we switch into the running State when we are in running State we listen for arrow down key and when it's
pressed we switch back to the Sittin State perfect we have all the logic for swapping States in place let's add a jump in state again I copy this code block I rename it the jump in and I put a jump in here I comment out line 31 inside player JS that we used for jump in before let's Refactor it when we enter jump in state we set frame y to one if the player is on ground that method comes from Line 39 in player JS we set velocity y on the player to minus 30 pushing
it upwards as we discussed in part one during a jump velocity y goes from minus 30 to Zer moving the player upwards and then as it moves into positive numbers the player will start falling down we have a nice falling animation Row in our Sprite Sheet so let's switch the player into Fallen State when it reaches the peak of its jump instead of listening for key presses we can also check for values of properties on the player when velocity y switches to the positive values and is more than player weight more than one we know
the player is falling down at that point so we set State the states do fall in that will point up here so I add fallen in our enam and I give it a value of three we have our new Jump in state But there is currently no way to enter jumping in our game we can enter it from running state for example when the player is in the running State we already listen for down arrow key we will also be checking for up Arrow like this if input includes Arrow up while the player is running
set state to jump in so value two now I copy jump in state and I rename it to fall in I give it a text value of falling in here while we are Falling we won't be listening for any Keys we will just wait for the player to be back on the ground and then we set state to run in we are exporting jumping class on line 46 and falling class on line 62 I import them up here inside player JS then I instantiate both of these classes inside this do states array the order in
which you do that is important and it needs to be the same as States enam we have online one inside player States Js those indexes have to match you can see I'm important jump in as index two in this do states array fall in is index three and here inside enum object jump in has also the value of two and fall in has value of three it needs to match while we are inside the sitting State we can press Arrow left and arrow right and it will switch player into running State while we are inside
running state we can press arrow down to Sit or Arrow up to jump to keep things simple I can also check for Arrow left and arrow right here inside update method because I want the player to be able to move left and right in basically all states when the arrows are pressed the controls feel better that way that means we can move left and right in the air even while we are jumping or falling or rolling when I'm in the running state if I press up Arrow key we jump and when we Reach the peak
of the jump we get automatically swapped into a fall in state when we hit the ground we automatically switch into runin State great I adjust this minus velocity y value to change the height of the jump well done if you follow the code all the way here now you know how to apply State design pattern which is quite an advanced technique especially if you are a beginner we will add more states to it soon but before we do that let's Properly animate the Sprite sheet of our dog I want it to animate and move I
this line of code we will handle sprite animation in this area inside update method on player class we have frame X property which holds the index of horizontal frame we have frame Y which refers to the vertical position in the Sprite sheet you can see that different rows have different number of frames I want to rotate between frame zero and Max frame On that row depending on which row we currently are on sitting State and running State have different number of frames we will hold that value in this Max frame property and we will adjust
its value every time we swap States since we have our code nicely organized in state design pattern it's easy to do that and to keep track of each state separately let me show you so to animate each row we will always cycle between frame zero and Max frame on that row if Frame X is less than Max frame increase frame X by one else reset frame X back to zero it's going too fast and it's blinking for sit in state because we are including empty frames it's animating so fast because this particular Sprite sheet was
designed for lower frame rates it really depends on which art assets you are using but it's also easy to control FPS of sprite animation independently of the FPS of the entire game I can for example Have the dock Sprite sheet animate at 10 frames per second while the entire game is still updating at 60 FPS you can do it by checking animation time stamps and calculate in Delta time it's easy let me show you I will explain it right now we will need a helper variable here last time we'll hold the value of the timestamp
from the previous animation Loop request animation frame method has two special features first it automatically adjusts the screen refresh Rate so most of us will get 60 animation frames per second unless you have some game in high refresh screen request animation frame also autog generates a Tim stamp value and it automatically passes it as an argument me to the function it calls in our case animate I can assign it a variable name here I will call it time stamp for example so this time stamp is autogenerated By Request animation frame every time it serves a
new animation frame every time It Loops I will use it to calculate so-called Delta time Delta time is the difference in milliseconds between the time stamp from this animation Loop that was passed here and the time stamp from the previous Loop it will give us the value of milliseconds for how long each frame stays on the screen before it gets redrawn last time will always hold the value of the time stamp from the previous Loop so when we used it to calculate Delta time we override last Time with the value of time stamp from this
Loop so that it can be used to calculate Delta time in the next Loop this might be a bit complicated to understand at first but don't worry it will make more sense as you use it more often for this to work time stamp gets autogenerated only when it's called by request animation frame so for the very first initial call of animate I have to pass it some value for time stamp I will pass it Zero I consolo Delta time and I can see that it's around 16.6 milliseconds which is around 1,000 milliseconds divided by 60
my frame rate is 60 frames per second perfect yours should be similar the value of delta time calculated this way depends on the power of your computer and on the refresh rate of your screen so as the animation Loop runs we are recalculating Delta time over and over every time we calculate it we pass it the game update method up here on line 17 I make sure update method expects that argument I want that Delta time value to be used inside player class so I pass it along to player update method as the second argument
here inside player JS we make sure that it's expected so now the player class has access to Delta time value we know how many milliseconds it takes to serve the next frame we can use that value to adjust sprite animation speed for example we can say only serve the next Horizontal frame in the Sprite sheet every 50 milliseconds or something like that we can get complete control over that frame rate it's simple let me show you how this particular dock Sprite sheet works the best when it's being animated at 20 frames per second I will
need a number of milliseconds for how long each frame should stay on the screen if the frame rate is frames per second one frame should stay for 1,000 milliseconds divided by this FPS divided 20 frame timer will cycle between zero and frame interval increasing by Delta time for each frame every time it reaches the interval it will trigger the next frame and it will reset we will handle that logic here if this Frame timer which starts at zero is more than frame interval set frame timer back to zero so it can count again when that
happens also serve the next frame X horizontal frame in the Sprite sheet else keep increasing frame timer by Delta time until we reach that frame interval value perfect now you know how to control FPS in the game the sprad sheet of our dog is animating at 20 frames per second you can see it's blinking it's because we are animating this empty frame here for sitting animation Max frame is in five so I remove this value when we enter sit in state we set max frame on player class To four we count from zero when Max
frame is four we are not seeing the whole Running Animation so I set max frame inside running state to six I will also swap Max frame and frame y to prevent occasional blinking if we swap states too fast in jump in Max frame is six and fall in is also six now we are correctly animating each state do you see how it's easier to keep the code organized when we separated each state into its own class occasionally we can Get a situation where we swap State and frame X is currently too high and that row
doesn't have that many frames so we get a quick blink to prevent that from happening every time we enter a new state we set frame X back to zero before we swap to a different vertical Sprite row with frame y it's just a small thing we have complete control of FPS how fast we surf frames in player sheet I can come here and set it to five the great thing is that the player still Moves at 60 frames per second but the Sprites are animating at 5 frames per second we can control these two things
separately it would be very bad if controls reacted so slowly but maybe you have a Sprite sheet in your game that was designed for lower FPS our Sprite sheets were designed for Speed around 20 FPS depending on what art assets you are using for your game level you might not want the player to be standing all the way at the bottom of the game area Sometimes you need to adjust this value today I will give you all art assets to use so I know we will need to create some margin on the bottom that margin
will have to be considered in more than one place around the code base so let's put it in the main game class so it's easy to access I want the ground level to be 50 pixels from the bottom edge of canvas this do ground margin is 50 inside player JS we have access to it through this Dot Game reference so the Initial vertical coordinate will be height of the game minus the height of the player minus ground margin like this this will not work because here I creating player before I declare that class property I
need to put it up here so it's available at the point when the player is created that worked I also need to adjust this on ground check because being on ground now also involves this ground margin perfect you can adjust ground margin value to match The environment in which your character is currently moving in our environment will be an abandoned monochrome City you can download all art Assets in the video description if you are a beginner I suggest you use my art assets first and get the game to work before you start adjusting it to
your own version it will save you a lot of headache if you encounter some unexpected challenges because you can just look at my code to fix it we will be animating a parala Multi-layered background I made a special episode about this if you want to go more in depth at a beginner friend friendly pasted we built a small Standalone project in there showing all the concepts and alternative approaches let's use the quickest version here so we have a new file I called background JS I will need two classes here helper layer class that will handle
Logic for each state separately and Main wrapper class I will call for example background That will be exported and animated from the main game class it's actually quite simple let me show you layer class will need access to the game object because we need to be constantly aware of width and height of the available game area we will also need the width and height of the actual background image we will need speed modifier argument because each layer will move at a different speed but relative to the current game speed the last argument will be an
image each Layer will have a different image all five images are available to download in the video description I might also include some alternative art assets in there for experiments later as usual we conver the arguments that are passed to layer class Constructor into class properties each layer will also need X and Y position update method to move it and draw method to draw it on canvas you know how it goes now I try to keep similar code structure across all Classes for clarity I could also name this method something else if I wanted to
the background images we use today are seamless which means that when they are scrolling from left to right continuously we can't see where they end and where they begin there is a small simple trick to create an illusion of endless background in a sid scroller game and we are about to learn it right now click the like if you are getting any value today we will be updating Horizontal x coordinate vertical y-coordinate will always be zero if this. x is less than minus its entire width which means it has scrolled all the way behind the
left edge of the game area and now is hidden reset it back to zero so it can scroll again else keep decrease in X by the current game speed times speed modifier because I want each layer to move at a slightly different speed for Parallax Effect game speed doesn't actually exist yet so I declare It here on line 15 inside main JS let's set it to 3 pixels per frame for example draw method will need context as an argument to specify which canvas element we want to draw on we call built-in canvas a draw image
method again this time we don't need the longest version with nine Arguments for backgrounds we just need to pass it five arguments image we want to draw X and Y where to draw it and width and height of that image so this is a helper class that Will handle Logic for each individual layer our parala background will have five layers we create and combine them together in another class I call for example background and I will be exporting that class it will need access to the main game class because we need its width and height
and game speed properties I'm providing you images of of a specific size for this project the width of each layer image is 1,667 pixels and height is set to 500 Pixels I made those images the exact size we will draw on canvas for performance optimization reasons you can also use larger images and you can scale them down with code but that will take more computing power and it can affect the FPS of your game let's bring all five images for our layers into the project this layer 5 image is equal to layer five if you
downloaded the project images and placed them inside your assets folder You can go ahead and inside index HTML bring them into the Project image element with an ID of layer five and Source assets SL layer-5 PNG I also bring layer 1 2 3 4 5 like this in style CSS I give all of them display none we don't want to draw the actual image elements on the website we want to draw them on as I said before JavaScript automatically creates references to all elements with an ID in the global Namespace so I can just pulled
the images in using its autogenerated variable name like this it would work like this but I noticed more people are comfortably using get element by ID in here so I will do that we will also need an array that will hold all background layers so I created here and here inside background class Constructor I will create an instance of layer class from line one I call it for example this. layer one and it will be equal to new Layer you can see it expects five arguments so I pass it this. game this.width this do height
speed modifier will be one for now and the image will be this do layer 5 image from line 25 now we have one instance of our layer class let's put it inside background layers array I give it update method and inside I take that background layers array and I call for each array method on it for each layer object in the array I call its Associated update Method I also do the same for draw method and I pass it context because we know it expect it up here on line 15 let's see if it works
I import the new background class up here in main JS I instantiate inside game class Construction and I pass it this keyword as a reference to the entire game object because I know it expects it here I have my background now so I can call its update method I get an error we will fix that In a second I will also call draw method on the background and I call it before I draw the player because I want the background to be behind the player and I pass it context so we have an error somewhere
inside our background class the first typo I made here probably already noticed I need to use this dot here to correctly point to the instance of layer class now we get draw image error so I know something is wrong with the way I'm Linking my image if I check here I can see I misspelled the name it's supposed to say this. layer 5 image nice we are animating our background layer I can adjust ground margin to move the player a bit up to match the background artwork the trick to create seamlessly scrolling backgrounds is to
draw the same image twice next to each other so one add the position X and the other add the position X plus this do width like this I give it additional plus 20 so that we Can see where the second one starts here so what is happening here we have two identical images scrolling side by side when the main image one Scrolls all the way off screen we quickly reset it so that it can scroll again image 2 is never fully visible it's just there to fill the left gap before the first image has a
chance to reset I hope this visual makes it clear what's happening and now you know the secret of endlessly scrolling seamless backgrounds it's easy Let's make them Parallax which means it has multiple layers that move in slightly different speeds to create an illusion of depth of distance I already brought those images into our project in index HTML so I just turn them into class properties here I instantiate each layer class with its Associated image I put all those layer objects inside this background layers array so we can cycle through all of them at once Using
for each method inside update and draw now we are animating all layers at the same speed I can give them different modifiers layer one is just gray sky no need to move it at all so its speed will be zero the speed of layer two will be game speed time 0.2 Layer Three is game speed times 0.4 layer 4 will move at 80% of the current game speed and layer one will move at the same speed as the actual current game speed perfect you can see that if I Change the modifier even higher it gives
us faster scrollin since we connected everything to the current game speed I can change the scrolling speed of the game when the player switches to a different state maybe I want the game to stop scrolling when the player sits down and I want double scrolling speed when the player does a special attack or a roll there are many ways how we can structure the code at this point I can either bring a reference to the main Game object into player States so that we can manipulate game speed property from there or I can for example
do it from within set State method on player class because from there we already have access to game speed I will give set State a second argument called speed inside I set speed property on game object to the speed value passed as an argument at first the speed of the game is 3 pixels per frame since we start in the sitting State the initial game speed Should be zero in player set State whenever I set State I will also set game speed I might refactor this later maybe it's not the best solution but it should
work let's see when we are run in game speed will be one sit in game speed zero jump in game speed is one fall in also one run in one I save all unsaved changes in all my files Now The Game Stops scrolling when we sit and it starts scrolling again when we start moving we can refactor This to make this code a bit better on the game class I create a new property called this max speed and I set it to three I set this do speed to zero at first inside set State we
set the current speed to Max Speed times the speed that was passed the set state that way I can adjust the actual game speed by adjusting just the max speed property on the main game class rather than adjusting the values we passed the set state in all those Places in player States JS now we have quite a lot of logic going on if you are a beginner well done you should be really proud of yourself if you manag to follow along this was the most complicated episode in this entire project the rest will be relatively
easy when you understand the tips and tricks I'm about to reveal it's important that player feels like they have control over the character quick responsive controls add a lot Towards positive user experience we are building a fast-paced animated 2D game with plain vanilla JavaScript and HTML canvas element we applied State design pattern to animate our player we have endlessly scrolling parala backgrounds where scrolling speed reacts to player movement today we will learn how to make our game more fun by adding three very different enemy types are you ready to take our dog for an adventure
and help it find its way home while avoiding Enemies and creatures of the dark let's go I create a new file called enemies JS and inside we declare a custom JavaScript class I call for example enemy I will have a Constructor and inside I declare this do frame X which will handle horizontal Sprite sheet navigation and frame y will navigate in Sprite sheet vertically the Sprite sheets we will be using are optimized for 20 frames per second so we will control them with time stamps and Delta Time again so three helper variables FPS frame interval
and frame timer it will work exactly the same as it did in player class we will also need update method to move enemies around and draw method to actually draw their Sprite sheets I want to create multiple different enemy types to keep our code organized and easy to navigate in we will use JavaScript subclass in which means we will have apparent eneme class that will define properties and methods Shared between all enemy types and we will extend that that parent class into multiple different subclasses each subass will have properties and methods behaviors that are specific
just for that enemy type so enemy is so-called parent class also called a super class and we are using this special extend keyword to create three child classes also called subclasses JavaScript actually doesn't have classes this is just syntactical Sugar modern cleaned and simplified JavaScript syntax behind the scenes this code is just setting up prototype chains using JavaScript inheritance it just looks cleaner and easier to navigate in if you write your code this way so we have a parent enemy class and three child classes called Flying enemy ground enemy and climbing enemy all three child
classes are using extend keyword pointing towards their parent enemy class this will automatically set up Prototype chain behind the scenes and all these classes will have access to properties on their parent class and also to the update and draw method that way we can avoid code repetition and we don't have to redeclare methods and properties that are shared across all enemy types inside each subass we will only Define what's unique about them I will show you exactly how this works as we create three unique enemy types with very different behaviors and movement Click the like
if you are getting any value let's start by bringing images into our project in the video description I will give you spreadsheets for many different enemy types for now we will use just three of them if you are a beginner you should maybe use the same ones I'm using and when you have a fully working code base you can play with it and use your own custom Sprite sheets we will use enemy fly enemy plant and this big spider I will hide images With CSS because we want to draw them with JavaScript on canvas there
is one more thing we have to understand when extending JavaScript classes there is a special keyword called super it's used in two different ways because we can extend code from parent class Constructor or we can extend a method from the parent class I will show you how to do both as we create different enime types with different behaviors I have flying enemy subass that extends This enemy super class when I create a new flying enemy I want to run all this code from parent class Constructor and then I want to add some additional properties that
are specific only to the Flying enemy I do that by First Call in super like this this will automatically run all the code from here while extending class I can only use this keyword after I used super if I use this keyword before super I will get an error flying enemies will need access to the Entire game object because they need to be aware of Game Area width and height so that they know when they are off screen I will pass game as an argument to the Constructor here and I will convert it into a
class property as usual each enemy type will also need width and height but because each enemy type has a different size I couldn't put these values on the parent class with and height will be declared here I look at my fly Sprite sheet and I can see That the width of a single frame is 60 pixels and the height is 44 pixels each anime will also need starting X and Y coordinates flying eneme will start at a different position than a ground anime so X and Y properties will also have to be on the child
class not on the parent class speed X will be horizontal speed and Max frame on our fly Sprite sheet is five by the way all my flying enemies will be flies for now but I could also have multiple flying enemy types I can Have flying enemy class that extends parent enemy class and I can have bird fly and ghost classes that extend fly in enemy class we can go down multiple levels if we want to in that scenario flying enemy class would only have properties and methods shared between all enemy flyers and things like width
and height speed X or Max frame would be declared separately on each subass because each anime will have different Sprite sheet we are keeping code modular And well organized so that it's easy to make these changes later if we want to inside update method on the parent class we will handle movement for every animation frame I want the horizontal x coordinate of the enemy to be increased by its speed X property I will do the same for vertical y coordinate and speed y property we will also handle cycling through Sprite frames here it will work
exactly the same as it does for our player Sprite sheet update method will Have access to to Delta time difference in milliseconds between the previous and the current animation frame if frame timer from line seven is more than frame interval from line six we reset frame timer back to zero so it can count again for the next frame and we serve the next horizontal frame in the spread sheet or if we are at the last horizontal frame we reset back to frame x0 else meaning frame timer is not yet higher than frame interval we keep
Increasing frame timer by Delta time until it gets there draw method will expect context as an argument inside we will draw an M Sprite sheet using canvas a draw image method it will need nine arguments the first argument is the image we want to draw I will hold a reference to that image in this. image property since each enemy type will have a different Sprite sheet it needs to be placed here on flying enemy class I use get element by ID and I will point it Towards this IMG element with an ID of enemy undor
fly from line 19 in index HTML so draw image expects nine arguments in this case the image we want to draw Source X Source y Source width and Source height of the rectangle we want to crop out from the source Sprite sheet one frame and destination X destination y destination width and destination height to specify where to place that image on destination canvas it will work exactly the same as it does With player we already explained before how frame X multiply by the width of a single frame travels Sprite sheet horizontally Source y argument will
always be zero because enemy Sprites will only have one row so we have image to draw these four values Define what to crop out these four values Define where to place that cropped out image on canvas as I said before we can extend parent class Constructor using super keyword we can also extend a method from A parent class in this case I want to have update method on flying eneme type I want it to first run all the code from update method on the parent class and then I want to add a little bit of
code that will be specific only for flying enemies update method will expect Delta time as an argument I will call update method on the parent class from line nine by saying super referring to its super class do update and I pass this Delta time long because it's expected Here on line 9 doing that will first run all the code between lines 9 and 19 that code will be shared for all enemy types after after I run that code I will add a little bit of code that will be specific only for flyers I can make
them do so many different things here I made a special episode focusing only on enemy movement patterns before let's just pick one maybe I want vertical wavy movement before we do that let's actually add some enemies into the game To see how the movement changes let's make sure we are exporting all our child classes I imported them up here inside main Js I want to periodically run some code that will add enemies in a specific interval I will declare that code in a special method on game class I call it for example at enemy we
will need some helper properties to build this functionality this. enemies will be an array it will hold all currently active Enemy objects every time add enemy method runs it will take this array and it will use built-in JavaScript push method to push one new eneme in there push method set adds one or more elements to the end of an array and Returns the new length of the array we want to push one new flying enemy in there for now we are importing flying enemy class here from enemies JS and here I can see flying enemy
class Constructor expects game as an argument So down here in main JS I'm creating an instance of flying enemy class and I pass it this skiward as an argument referring to this main game object we will handle enemies here inside update method on game class similar to how we use Delta time to periodically serve the next frame in our Sprite sheet we will have timer and interval helper variables to periodically add enemies into the game Enemy timer will start at zero it will be increasing by Delta time Every time it reaches a value in enime
interval we will add one new enemy into the game and we will reset enemy timer back to zero let's say I want to add new enemy every second so th000 milliseconds let's write that logic in quote if enemy timer from line 23 is more than enemy interval from line 24 call this do add enemy custom method from line 38 and also reset eneme timer back to zero so it can count again towards the next enemy time else keep increasing Enemy timer by Delta time until we reach enemy interval again let's put a conso Lo in
side add enemy to see if it's working I will consolo this enem array from line 22 nice you can see as the game runs every second one new flying enemy object is added into enemies array perfect so all our enemies are held inside this enemies array I will run through the array and I will trigger their update method to make sure they move around for Each method executes a provided function once for each array element I will use fat Arrow es6 syntax here in the call back function I just trigger update method on each eneme
object and I pass it Delta time from here because I know it's expected there I will do the same thing inside a draw method I will cycle through all enemy objects and I will trigger their draw method I pass it context as an argument I don't see any enemies coming Hm let's try to use minus equals here to make them move to the left still nothing I'm console l in enemies array so let's check the console I open up the array let's change the initial X and Y coordinates to 50/50 now if I open the
array again and I check one of my flying enemies I can see their vertical y coordinate is none not a number JavaScript doesn't know where to draw them vertically let's track the problem I Define vertical y coordinate correctly On line 33 but as the game runs I'm increasing it by speed y proper here on line 12 speed wi doesn't exist so as a result we are breaking our code I will Define vertical speed wi property on my flying enemy class let's set it to zero nice we have enemy flies moving from right to left from
the initial starting coordinates 50/50 as defined here I actually want them to start from the point just behind the right edge of available game area so the initial x Coordinate will be this.t game from line 29 dot width nice I randomize vertical y-coordinate to spread them around I want them to only move in the upper half of the game area so math. random times this. game. height time 0.5 in console you can see we have an endlessly increasing array as more and more enemies are being added I actually want them to be removed when they
fly past the left edge of screen I will check if enemies are off screen in this Area if horizontal coordinate of the enemy plus its width is less than zero meaning it's completely hidden behind the left Edge set it's marked for deletion property to true this property will be shared for all child classes so I can Define it only once up here on the parent class initially I set it to false so we are adding new enemies they fly from right to left when they are hidden behind the left Edge we are setting their marked
for deletion property to True here inside update method on game cloud Plus in the area where we handle enemies we are cycling through every object in enemies array triggering their update method at the same time I will also check if their marked for deletion is true and if it is we splice it out of the array removing it splice method needs two arguments in this case index of the element we want to remove from the array so index of this anemy with marked for deletion set to true and how Many elements to remove at that
index we want to remove only one element and now I check in the console and I see that new enemies are being added and old enemies are being correctly removed perfect let's play with the movement a little bit I can do so many things here and there's a special episode about it I can for example randomize their horizontal speed x value so that each enime flies at a slightly different speed let's try a random value between 1 And two pixels per frame I can also randomize their initial x coordinate so that we get even more
Randomness in their spacing when the player starts running it becomes obvious we need to account for the current game speed when making enemies move up here on line 12 I just include game speed in horizontal position calculation I actually need to use plus here now when the player moves and when It stops moving the enemies are always positioned correctly in relation to our dynamically scrolling game work world we made a lot of progress today if you are still following well done these are all fundamentals of 2D game development I hope you are getting some value
out of this so the Flies are moving in a straight line from right to left what if I want to give them a wavy up and down wobble as they move it's easy I will need two helper variables and these will Be specific only for flying enemies so I declare them down here angle will start at zero and we will be increasing it slowly and feeding it to math. sign method which will map it along a sine wave it will be increasing by this custom VA value velocity of angle and it will be a random
value between 0.1 and 0.2 inside update method on flying anime class I first trigger all the code from the parent enemy class and I will add some extra custom code that will be Specific only for flying enemies for every animation frame I will increase angle by VA value and then I update vertical y-coordinate by math. sign of this ever increasing angle value passing a slowly increasing angle to math. sign will map positions of our enemies long sine wave we can also create a circular Movement by using math cosine on horizontal x coordinate for now let's
leave it like this we have our flying enemy type Perfect let's create a ground enemy it will be app plant so it will have different Behavior it will be much simpler to implement let me show you class ground anim extends an enemy so again this class will automatically inherit everything from the parent enemy class we declared up top the only properties we will declare here are the ones that are specific to ground enemies shared properties will be inherited automatically because of this extend Keyword Constructor will expect game as an argument and we convert it to
this. game property the width of a single frame is 60 height is 87 pixels initial X is just behind the right edge of canvas so this game. width we want the enemy to be sitting on the ground level of our game world so vertical y-coordinate will be game height minus height of this enemy minus ground margin image will Point towards enemy plant image from index HTML horizontal speed will be zero and vertical speed will be also zero this is a plant it won't move around Sprite sheet is very simple it has only two frames Max
frame is one because we count from zero if I don't declare update and draw Methods at all on ground enemy class JavaScript will automatically travel up the Prototype chain and it will find update and draw method on the parent enemy class in main JS inside add enemy Function we only want to be add in ground enemies when we are moving if we are sitting down we don't want the game to keep adding new ground enemies because they would just be accumulating off screen we only want to add a new enemy if game speed is more
than zero when the game is scrolling and also I don't really want to add it every th000 milliseconds every time at enemy method runs I only want there to be a 50% chance that we add one so math at random Is less than 0.5 math at random code like this returns a random value between 0 and 1 so a value lower than 0.5 should occur on average 50% of the time so every time at enemy method runs we always add one flying enemy and if the game is scrolling and this 50% check is true we
also add one new ground enemy I get an error which tells me I forgot to call Super class Constructor on my subclass easy to fix like This nice we have a ground enemy in our game I can see there is a small wobble between enemy plans and the ground texture I'm not really sure what's causing it now if you know let me know in the comments we will fix this later let's add a climbing enemy climbing anime will be a big spider suspended from a web I showed you how to extend update method to make
our flies move in a different pattern I also showed you how it works when you don't need to Declare any additional update and draw methods with the plant now I will show you how to extend the draw method and how to add some additional Graphics in this case spider webs Constructor will expect game as an argument we call Super to trigger class Constructor from the parent enemy class this. game is game as usual with of a single frame is 120 height is 144 pixels the initial starting coordinate is behind the right edge of canvas so
this. game. width Vertical y-coordinate will be a random position in the top half of the available Game Area image will point to the big spider image we linked earlier in index HTML horizontal speed X will be zero our spiders will be moving up and down vertically vertical speed y will be either plus one or minus one depending on this math random check this is so-called tary operator we are using it as a simple oneline if else statement if mathod random is less than 0.5 which should be roughly in 50% of cases set speed y to
one else set it to minus one so if condition is true question mark return this else colon return this this will make sure some spiders are moving up some are moving down when they initially spawn in our game Max frame of spider Sprite sheet is five update method will take Delta time as an argument it will first call update method on its parent aneme class to run all the code from there we will also do The same thing for draw method like this here I'm checking if game speed is more than zero and if random
check is less than 0.5 and I'm add in a new ground enemy I'm going to add else if here and if this random check is false and at the same time if game speed is more than zero we will add one new climbing enemy into our game now every second we always get one fly and we get either one spider or one plant Nice I'm extending update method on climbing enemy because I want to climb up and down when it's moving down and it reaches a bottom boundary we Define here I want it to kind
of Bounce and start moving in the opposite direction upwards let's make it move upwards whenever it climbs all the way down and touches the ground level so if vertical y-coordinate is more than game do height minus height of the spider enemy minus ground margin set its vertical speed to its minus Value so this. speed times minus one also I want to set its marked for deletion to true if it climbs off screen vertically so if this Y is less than minus height of the spider Sprite sheet said it's marked for deletion to true this spider
spawn moving up this one is moving down when it reaches ground it bounces and it starts moving back up perfect we are also extending a draw method so let's draw a spider web spiders don't fly they should be hanging From a spider web we are calling draw method on the parent enemy class that will handle drawing of the actual spider Sprite sheet and we will add some extra code here just to draw the spider web I want to create a line so I start by calling big in path move method will set the initial X
and Y coordinates of the line I give it coordinates 0 0 for now the top left corner of canvas line two will Define the end in X and Y coordinates so I pass it spider's Current X position as X and zero as vertical y now I can stroke my line I don't see any line right I need to use this do y here to move it on screen and here's our spider web it works let's make it look better I want it to start from thisx and zero so just above the spider nice so it
goes from the top left corner of spider Sprite sheet upwards I need to center it horizontally so plus the width of the spider divided by two and I increase y By 50 to actually touch the spider image almost there I just need to also offset the initial starting point of the line like this I'm happy with this if you are designing a game with multiple levels you can for example have a different flyer different ground enemy and different climbing enemy for each level so three enemy types like this could be enough depending on your game
structure also it's possible to put many more enemy types into the game and mix them Together it's up to you I gave you all the tools you need if you have any questions let me know we will learn how to handle Collision detection next time we will also fly particle effects to give the player a fire Trail and we will add two more states with unique animations for when the player is attacking and when it gets hit well done on completing the lesson see you in the next one we created a player we have our
game world and we added dangerous Creatures of the night it's time to add some interactions and special moves today we will learn an easy way how to handle Collision detection and we will resolve collision between player and enemies in two different ways depending on the correct player state if the player is rolling enemies are destroyed and we get score points in any other state it's the player who receives a hit we will also add dust particles and Fire trail if you followed any of my other Creative courses you can also use those animated trails and
use them here like you see in this demo I like to combine game death and creative coding with JavaScript and HTML canvas it's all the same set of techniques let's go we have player and enemies in our game we want them to be able to interact in different ways way with each other let's apply Collision detection first I want to draw a rectangle around the player and around each enemy to see Their Collision areas so-called hitboxes I go to input JS file and I delete these console LS I want our game to have a debug
mode when I press letter D on my keyboard we enable debug mode and collision hitboxes will be drawn when we press D again we exit debug mode and hitboxes will be hidden it's very simple to implement in key down event I create an else if state M if e. key is D set debug property on the main game object to its opposite value if it's currently True set it the false if it's false set it to true in main JS I create this. debug property on game class and initially I set it the true in
draw method on player class before I draw the player spread sheeet I say if this. game. debug is true draw a rectangle around the player this rectangle will be exactly the size SI of players hitbox so from this.x this.y players coordinates to players width and height like this now I can go Back to input JS here we are toggling debu mode on and off by pressing letter D for this to work I need to bring a reference to the main game object here I pass game object as an argument to the class Constructor and I
convert it to A Class Property from here we can point to the game object and toggle debug mode on and off finally we know that input Handler class expects game as an argument so here on the main game class I pass it this as an argument now when I Press letter D on my keyboard we are toggl in debug mode on and off perfect I can also create hitboxes around enemies inside a draw method on enemy class I say if this. game. debug is true stroke rectangle around the enemy like this this will work reference
to the game object is not on the main parent enemy class but we have it down here on each enemy type separately our game now has a debug mode you can toggle it on and off by pressing D these hitboxes represent Collision areas when the player hitbox touches any of the enemy hitboxes I want them to interact in some way we can have multiple different interactions today I will show you how to have two different interactions when the player collides with an enemy while in Rolling state it will destroy that enemy and we get some
score points if the player is not rolling it will get hit and it will stop its movement for a moment and play dizy Animation from our Sprite sheet we will use a simple Collision detection formula between two rectangles to check if player and enemies interact here inside the player class I create a new helper method I call for example check collisions inside we will cycle through enemies array that holds all currently active enemy objects and as we cycle through them one by one we will compare their XY width and height to the current XY width
and height of the player object So this. game. enemies. for each and for each enemy object I will run the following call back function we will have a simple if else statement if some conditions are met Collision is detected else there is no Collision to check if two rectangles Collide which means they touch or they overlap we have to compare their X Y width and height keep in mind that the way images our spread sheets are drawn on canvas we go from their X and Y coordinates from the top left Corner of the image to
their width and height like this so now player's current horizontal X position is here and vertical y position is here for example we need to check if x coordinate of this enemy is less than x coordinate of the player plus player width if this point is less or to the left on the horizontal x axis from this point at the same time we check if x coordinate of the enemy plus the width of the enemy is more than the current x Coordinate of the player if this point is to the right of this point if
these two conditions are true we know that the player and enemy are colliding horizontally we still don't know if they Collide because they could be far away from each other vertically we will need two more checks here we check if the enemy's current vertical y position is less than vertical position of the player plus player's height we check if this point is above this point and Finally we check if enemy's y position plus its height is more than y position of of the player if this point is below this point only if all four of
these conditions are true player and enemy are colliding even if one of these is false this entire if statement will evaluate to false and we know there is no Collision if we Collide we will set marked for deletion property on that enemy object the true I will also add one more score point so this. game do Score Plus+ I save changes and in main JS I need to create this DOT score property and initially I Ed it to zero now I go back to player JS I take our new check collisions method and I will
be constantly calling it over and over from up here inside the update method like this and we have interactions in our game whenever the player hitbox touches a hitbox of any enemy that enemy gets deleted perfect whenever we destroy an Enemy we are also increasing our score but we can't see it yet let's create some U elements I create a new file called UI JS inside I create a custom class I call for example UI and I will be exporting it be careful about lowercase and uppercase letters with the word UI make sure you spell
it the same across our code base Constructor will need a reference to the main game object because that's where the current score value is stored I create a property Called font size and I set it to 30 pixels for example font family will be helvetica you can also Al use any Google fonts here just link them in index HTML and use their font family name here if you want to it will work this UI class will have just one method I call for example draw its job will be to draw all UI elements and game
statuses that we need first I declare some basic settings context. font will be this do font size plus pixels space plus this do font Family in this part we will declare code that's specific to draw in score up here some more global settings Tech align will be left and fill style for all fonts will be kept on the main game object in case we need to draw fonts from some other modules as well this. game. font color it doesn't exist yet so I declare it here online 27 in main JS file to draw score I
call buil-in fill text method and I pass it some text we want to draw so score colon space plus This. game. score that's a variable from line 26 in main Js and I want it to be drawn at coordinates 2050 we are exporting our new UI class up here so we can import it to main GS like this I will instantiate UI class inside game class Constructor as usual and I pass it the reference to the main game object so this keyword inside a draw method on game class I take this UI property that holds
An instance of our new UI class be careful about capital letters here and I call it draw method and I pass it context perfect we are drawing score and it's increasing as we collide with enemies so this is how I like to handle drawing game text and statuses if we want to display more information to the user we can just add more code inside the draw method on our new UI class we are keeping our code modular and organized today it's easy to expand it Later I want to add more player States we will have
two different attacks and a separate state that will play dizzy animation when the player gets hit by an enemy let's go ahead and add them up here inside player States JS into our enum object that holds key value Pairs and it assigns each state number a more human readable value we will have rolling state with index 4 diving state with index 5 and hit state with index six for when the player gets Hit I copy this entire code block and I rename it to Rolling I will also put rolling in all caps here I check
my spread sheeet and I can see that rolling animation is on the row six counting from zero so frame Y is six I want player to start rolling when we press enter and I want it to keep rolling as long as Enter key is pressed down inside handle input we deal with switching States we only want to switch player to a different state when enter Is not pressed anymore so if input doesn't include enter and at the same time if player is currently on ground we can exit rolling State and switch the player into running
State else if input doesn't include enter and player is not on ground if we stopped rolling in the air switch into the falling State like this we have our rolling State now we can decide from which states we will allow the player to enter Rolling In This case I will allow it from all states because player can start rolling any time inside handle input method on sitting clock I say else if input includes enter set state to Rolling and pass it speed of two rolling will increase the scrolling speed of our game compared to the
regular running speed I take this L statement and I paste it down here inside running class we can also start rolling when we are running I do the same in jumping class We can also start rolling while we are in the middle of a jump for now I will not allow player to start rolling while it's Fallen that let's see how that feels we can always add it later so now we have rolling with a value of four up here inside our enam and we are exporting rolling class on line 94 on line one in
player JS I import rolling and I create an instance of it inside this. States array on line 21 I get an error it's because I didn't save Changes I made to player States JS VSS code editor indicates that you have unsaved changes in a file with this little icon here I go in I save it and now I can press enter and I can roll around nice work I can start rolling from running state from sitting State and from jumping state I'm testing my gam playay and I feel like I would like to start jumping
while I'm rolling on the ground like this but the game won't allow me to do That I can't enter jump while rolling on the ground because we didn't write that behavior let's do it in handle input method on rolling class I say if input includes enter which means we are rolling and if input also includes Arrow up at the same time remember that our input Keys array can hold multiple keys at the same time if enter and arrow up are pressed at the same time and if we are rolling on the ground at that moment
so this do player on ground is true we Will push player up in the negative Direction on the vertical y AIS this do player velocity y minus equal 27 now I can roll around and I can jump up and down like this this feels much better to play this is a superhero dog I want the controls and movement to feel good and quick this dog can roll and jump around freely and the controls are very precise time to add some particle effects we will have three different particle types in this game Dust that Comes from
the ground at player's feet when it runs on Solid Ground blazing fire Trail when the player is rolling and Diving and a big splash of particles when we dive and stomp into the ground I create a new file I call for example particles J s inside we will have the main parent class called particle I will not be exporting it it will just contain properties and methods shared between all three particle types Constructor will need a reference to the main game Object marked for deletion will be false at first update method will also have some
code shared between all particle types horizontal x coordinate will decrease by the amount of speed X and game speed like this vertical y-coordinate will be affected by speed y property for every frame the size of each particle will decrease by 5% when size is less than 0.5 pixels the particle is small enough and we will set its marked for deletion property to True Values like speed X and size don't exist yet I didn't declare them on the main particle class because they will have different values for each particle type we need to make sure we
Define them on the child classes because if JavaScript can't find these properties when update method runs we will get an error so child class I call dust extends parent particle class we will be exporting it we will also have Splash particles for when we hit the ground at high speed and Fire particles for the attack animations I start with the dust class Constructor will need a reference to the main game object and X and Y coordinates because the location of the particle will depend on the player's current position we want them to appear under the
player as it moves around I call Super and pass this game along because it's expected up here this will trigger class Constructor on the parent part particle class activating all shared properties size of Dust particles will be a random number between 10 and 20 x coordinate will be X that is passed as an argument same goes for the y-coordinate horizontal speed X will be a random number between 0 and 1 vertical speed Y is also a random number between 0 and 1 color will be black draw method will take context as an argument as usual
I want to draw dust particles as circles so we start with begin Path we create an arc add coordinates this dox this doy with a radius of this do size start angle will be zero end angle is ma Pi * 2 so full circle we set fill style to this dot color and we fill the path with black color we are exporting dust so I will import it up here on line one in player States JS since we are using State design pattern it makes sense we control particles from here as well because they will
be closely tied to Player States I have a problem now if I want to handle particles from here this way I need access to the main game object when I initially build this State Management code I thought I would only need access to the player class but we need to go one level up and access the game object this is why it's good to plan your code bases well before you start writing the code I will have to do a little bit of refactoring here here to make sure we have access to the main Game
class from within each individual player State class here on line 14 I pass the main State par in class a second argument called game and inside I convert it to class property this. game equals game I want to replace all references to the player object with references to the game object game object contains the player so I will still have access to the player object from there Constructor on the sitting class Will expect game as a argument we delete this line with player I pass that game object reference along to the parent class Constructor as
a second argument because I know it's expected here on line 14 it will get converted to this. game class property now if I want to access player in these five places I need to say this. game. player in vs code you can highlight a portion of text and hold control key down then whenever you tap letter D it will highlight Another occurrence of that text using this you can select multiple lines at the same time I tap D four times to select all five occurrences of this text and that gives me multic cursor selection I
can use left and right arrows to move around and I just type game dot I do the same in the running class I pass it game I remove this player line and I pass game as the second argument to the super class Constructor then I Select 1 2 3 4 5 6 and I need this dotame dopler here in all these places I do the same in jumping class refactoring sorry I should have planned this part better we are almost done I replace all nine occurrences of this player here with thist game do player falling
class doesn't have much code so this one is easy and rolling class is the last one we need to refactor 1 2 3 4 5 6 7 8 9 and this. game. player If I save this it will break our code because our state classes are expecting game as an argument now so on line 21 in player JS we are currently passing this keyword which means player object I need to pass this do game from line five instead to all of them now we are getting some new errors and that's because I'm passing game object
as an argument and immediately I'm triggering that state class and its enter method but at this point the game Object is not yet completely loaded so the initial state is failing I need to cut these two lines of code and I only want to run them when the rest of the game object is ready so at the end here when everything is ready including game class player class and all state classes is we take current state property on player class and we set it the states zero sit in state and we trigger enter method on
the sitting State we refactored our code and now everything Is working again we are well positioned to start adding particles through our state classes we have a lot of console logs here I press crl F and I search for console I delete this one on line 61 in main JS and this one online 65 we also have a console Lo online 57 in player JS I delete it debugging is better with a clean console so we are exporting dust glass here and we are importing it up here in player States JS I will hold all
currently active Particles in an array on the main game object so I created here this particles will be an empty array at first back to player States GS I only want to add dust when the player is running so inside handle input method on running state that runs 60 times per second I will be pushing one new particle in every time it runs this. game. particles. push and I pass it new dust on line 14 in particles JS I can see that dust class Constructor expects game X and Y as Arguments so I pass it
this. game from line 16 I will also be passing the current X and Y coordinates of the player because I want the new particles to appear at player's current position I close some of these JavaScript files for now to keep our workplace clean inside update method on the game class after this block that handles enemies we write our code to handle particles on line 25 we have this Do particles array that holds all currently active particle objects we are pushing new dust particles in here from inside running State class I take that array and I
call for each for each particle in the array I will call their update method if particle is small enough and it's marked for deletion property has been set to true we call splice method to remove it splice method will need index of the particle we want to remove And how many elements to remove starting from that index for each method passes autogenerated index argument so I can just assign it to a variable name here I call it for example index and I pass it to splice to identify the particle to remove and I want to
remove one element at this index so here we call update on all active particles and we delete old ones inside draw method I will cycle through all the particles again and I will call draw method one optimization Tip here would be not to cycle through the same array once in update and once in draw method I can for example have a utility handle particles function that does all of that there are many ways to refactor this code we might do it later for now this code will work well you can see we are drawing our
dust particles from the top left corner of the player hit box only when we are in a running State nice I will conso this particles array to check if old particles are Being correctly removed we don't want to have an endlessly growing array in our project that would become a performance problem soon in console I can see that particles go up to 50 or 60 and when we stop running the array is getting smaller and smaller until it's empty again perfect I want the dust particles to come from a different point relative to the player
I adjust horizontal x coordinate by the half of player's width like this I will also adjust vertical y coordinate by player's height pushing the particles initial coordinates down closer to the game level ground you can see how well this works in combination with State design pattern we are only adding new particles when in running State when players's feet are moving and touching the ground I can go to my dust class and play with properties of the Dust I can make the particles different shape or Size here if I want to I can also give them
a different color red blue it will all work I can also do a semi-transparent color using rgba Color declaration like this I'm happy with this but feel free to play with the code and adjust these effects I came up with two different versions to animate fire for this game I showed you both versions this is the version with SVG filters where we are blurring and sharpening particles to Create this Liquid Smoke effect I use this a lot in my generative art videos you could actually look at any of my creative coding videos where we build
trails and use that code to give your player a unique Trail effect it will be compatible with everything today I will do something I haven't showed you how to do before I will use a particle image it will be this simple flame texture canvas is very good and efficient at drawing images drawing a rectangle or an image Are often two most performance efficient options for an effect like this from my experience you can download the the fire texture in the video description the texture is big I will probably make the image smaller before I give
it to you for download you can also color shift the image in Photoshop to create blue or red fire Trail if it fits your level art assets I set it's displayed to none with CSS we will use this image here for our fire class Constructor will expect game X and Y as arguments this thought image will be this fire texture image I gave it an ID of fire size will be a random value between 50 and 150 pixels x will be passed as an argument and same goes for y horizontal speed will be 1 pixel
per frame and vertical speed will also be 1 pixel we have update method on the parent partical class I will first call The code from here so update super update like this draw method will take context as an argument and it will call draw image I pass it this image from Line 39 this do X this do y this do size as width and this do size as height nice so this is our fire class we are exporting it so I can import it online one in player States JS I can copy this line of
code from running class that is add in new dust particles I paste it inside handle input Method on rolling class and instead of dust I instantiate the new Fire class we just wrote now when I wrote I'm getting a trail of fire I adjust these properties a bit before we fix the position of our fire Trail let's make the individual fire texture images rotate I will need two helper variables called this. angle which will start at zero and this. VA velocity of angle it will be a random Value between minus 0.1 and plus 0.1 inide
update method I will increase angle by VA for every animation frame we will be rotating so to make sure the rotations don't overflow to other elements and only affect this fire particle I will wrap this code between save and restore this will make sure all canvas settings I declare in between will only affect this one particle to rotate anything on canvas first we have to translate rotation Center Point from Its default position at coordinate 0 in the top left corner of canvas over the center of the item we want to rotate so I will translate
to this do X this doy of this fire particle that particle is a rectangular image so I'm translating to its top left corner then I call built-in rotate method that takes angle value in Radiance and it will rotate everything that's drone after this call unless we restore canvas again to its original default state if I roll now we are Getting a spiral of small fire particles in a big circle around the player it's because we are translating to this.x this.y and from that point we are drawing again to the distance of this do X this
doy here I fix that by setting this to 0 0 because position of particle on canvas is already defined in translate method here translate method moves rotation Center Point and what is considered coordinat 0 0 on canvas to the coordinates we pass to it so because Of this translate call for these particles coordinate 0 0 on canvas are here in this area I'm translating to the top left corner of each fire image of each particle rectangle I want to center it so I adjust this value by half of its width and this one by the
half of its height canvas rotation can be difficult for beginners but we just covered all of it I have more detailed lessons on this topic but for now let's just move on I can increase the size of fire Particles here on line [Music] 40 I can also give them some horizontal wobble using the same Technique we used for flying enemies for each frame I increase X by aign Val value of ever increasing angle and it will map horizontal expositions along an endless sine wave shape if you are a beginner all you have to understand about
this is that if you pass math. sign an ever increasing angle value our angle is Increasing here on line 50 it will map positions along a wavy path if you look at the particles now there is some left right wavy movement I can also make the particles shrink slower by adjusting this value this will result in a longer Fire trail as particles stay longer to be small enough to be removed I can make the rotation faster or slower by adjusting this range of values I can increase particle Size I can make them shrink faster in
main JS I remove this console loog on line 53 I want to make sure we don't get too many particles I want to have a property that will limit the maximum amount of particles we allow in our game so we can easily adjust that value if we need to so inside update method on the main game class in this section where we handle particles I say if the length of particles array is more than 50 I want To slice the array and remove everything from 50 upwards I do that by taking this do particles and
assigning it to the same array but sliced from index 0o to index 50 it will only allow the first 50 particles to be in this array anything over and it will get sliced away slice method returns a copy of an array with only a portion of elements from start index to end index we defined the original array will not be modified so that's why I'm overriding it like this Because in this case I want to modify the original array so we have some hardcoded values repeated here and here let's replace them with a variable I
call it for example this. Max particles I declare it up here and I set it to 50 I can see it works because it slies particles from the array you see how they disappear and we are getting gaps in our particle Trail I actually want to slice particles from the other side of the array I want to remove the old ones Not the new ones I can change the arguments I pass to slice method or I can change how we push our dust and fire particles into particles array in player States GS online4 instead of
using push method which adds one more element to the end of the array I will use unshift built-in array method instead unshift method adds one element to the beginning of an array so now when I'm slicing from index zero to index 50 I keep those new particles and I'm removing old ones if Their index exceeds the value stored in Max particles variable I do the same thing on line 48 I will be un shifting dust particles adding them to the beginning of our particles array to check if everything works I will consolo this dot particles
from here it starts empty if we start rolling it fills with fire particles if we run it fills with dust particles it never exceeds 50 particle objects so our slice method is correctly limiting the length of the Array nice I'm on a strong computer so I will set my maximum particle limit to 200 but you can keep it on a lower number if you want to it's up to you I will also delete this consolo online 57 to clean up congratulations on completing this lesson in the next part we will make our game look and
feel better by adding more animation it will help the player to get more visual feedback to the events happening in the game I'll see you There hey creative coders in this episode we will finalize player abilities and particle effects we will animate collisions with a special Sprite cheet and we will add win and lose condition based on game timer we will also clean up some loose ends in our code let's finish the base game and then we can talk about some optional bonus features have fun I want to create a second attack this time it
will be a crushing meteor attack from above player Can only enter this state when it's in the air it's a perfect use case for State design pattern we have here in our code base when the player is running on the ground and we press down arrow key it sits down when the player is up in the air we press down arrow key it will do a crushing dive attack from above I copied the entire code block with a rolling State class and I call it divein I also pass a string that says divein in all
caps to Super class Constructor all The values inside enter method will stay the same because div in uses the same sprite animation row as rolling we will also leave the same fire particles code because diving also leaves a fire Trail while the player is in diving state it is just moving moving fast towards the ground when it hits the ground and this statement is true we switch player to the running state to keep the momentum going I can delete this entire else if statement and here I say else if input Includes enter and player is
on ground transition directly into rolling state it should make the transition animation connect better we have our dive in state but there is currently no way to enter that state let's define rules for when it can happen we can enter Dive In State while we are in a jump in state when we are jump in and we press arrow down we set state to dive in and game speed will be zero because we are moving directly down let's take full Advantage of the fact that the scrolling speed of our game world is connected to player
States we can also enter diving State while falling so I just copied the same else if statement here and we can also dive while rolling let's test it and see I save my changes and the code breaks because we need to import and instantiate the new dive-in class I import it on line one and I create an instance in this States array on line 21 it works I want to feel like we are Slamming into the ground with a great power but right now the player hovers in the air for too long in enter method
on diving State class I set velocity y to+ 15 instantly giving the player a massive push towards the ground nice now it feels like there is some power behind that special to move as I'm diving and hitting the ground player kind of gets stuck below the ground level let's fix that so here inside update method on player class we Handle horizontal movement and horizontal boundaries here we handle vertical movement and vertical boundaries will be defined here let's keep ourselves organized I want to make sure that the player cannot get stuck below ground level like this
so I will limit its vertical position if this do y is more than the height of the game area minus the height of the player minus ground margin set player's vertical y position to game height minus Player height minus ground margin like this now the player can never move to the space below this point below the level of ground texture in our game world we have one more particle class I called Splash when the player does a meteor dive attack from above and it hits the ground I want it to do a flame explosion and
I want the Flames to Splash in all directions to make that move look and feel very powerful Constructor will need three Arguments as usual game and X and Y positions I trigger Constructor on the parent super class and I pass the game along so this code will run size of the splash particle will be a random number between 10 and 200 pixels this x is X this do y is y speed X will be a random number between minus 3 three and plus three because I want them to Splash in both directions horizontally speed y
will be between 2 And 4 for example I want the particles to start moving up but as the gravity slowly grows stronger I want them to curve and start moving down similar principle we used for player jumping logic image will be the same one we are using for fire particle class update method will at first call update on the parent particle class as usual grav gra it from line 40 will be slowly increasing by 0.1 and this y will be increasing by the ever increasing Gravity value to get that curved path draw method will just
draw the fire image from line 41 we are exporting Splash class so I imported online one in player States JS I can't really create this particle explosion when we enter dive in state because at that point the player is still in the air I want to create it as we hit the ground so I could add exit state to all my states which would be an ideal location for this to happen given Our code structure I can also create some small transitional State just for this or I can just do the simplest option and create
the explosion in this else if statement on l33 when player is in diving State and handle input method detects we touch the ground we set player state to run in and we create our Splash particle I use unshift again to add one particle to the beginning of the array and I pass it game X and Y position of the player one particle Wouldn't be very impressive so I create a for Loop here and I will run it 30 times we will create a splash of 30 particles I'm getting some errors it's here on line one
in player States JS I misspelled my class name when I dive I get another error it just says that I forgot to pass context to draw method on Splash class console errors are usually good at pointing us to the file and line of code where the problem is these two errors were easy to Find and fixed thanks to my browser console now when we hit the ground we get a splash of particles I offset initial x coordinate maybe like this I also offset the y coordinate I adjust the initial position values I pass to Splash
particle class Constructor I'm kind of just playing with the values and offsetting them in random way because I want the particles to shrink in size which makes them move towards their top left corner I adjust This value hm there is a better way to deal with this but I think for the purposes of this class we can just do this quick hack it will look good enough and I just speed X like this this looks all right for now I think we get a nice impact animation when we hit the ground perfect I also want
to have a player state that will play DIY animation when we get hit by an enemy while we are not in a fireball State I call it hit I delete This line that adds fire particles I also deleted this I check my spreadsheet and I can see that Max frame for this animation is 10 frame Y is four and I delete this I will spell class name like this and I pass it hit here with this state class I will do something I haven't showed you before we can enter a state have it play its
animation row once and when that animation has been played we automatically transfer to another state so the trigger for Switching state will be animation frame this time so while we are in this hit State this animation row is playing I will wait until frame X is at position 10 and I check if player is on ground and I switch player back to running else if we are on the last frame on this animation row and if player is not on the ground we set state to Fallen nice up here I can see that hit state
has an index of six I imported into player JS module and I Instantiate it as the item with an index of six inside this do states array ideally I want to do all my state swapping from within player States GS I could do it through a set of flags and flipping values around but since this class is beginner friendly I will do a simple thing and switch my state from here now I want to enter this new state when player collides with an enemy and it's currently not in Rolling or diving state So if Collision
is detected we will always Mark enemy for deletion regardless of what type of collision it is I delete this L block we won't be needing it we are going to run if El statement if Collision is detected if we detect collision and player is currently in Rolling or diving state so index 0 1 2 3 4 and five player is invulnerable in these states so it will destroy enemy and give us plus one score this do current state is this do states four Rolling or if this do current state is this do states 5 diving
increase the score else meaning the player collided with an enemy while it wasn't in one of those two states it means player will get hit by enemy and it will play the hit animation we will of course get no score points for that I call this do set State and I pass it six the index of hit State and I pass it speed zero because I want the game to stop moving for the duration of this state to properly Emphasize that we collided with something if I test it I can see the score is correctly
increasing as we hit enemies in Rolling or diving State and if we collide with an enemy while not in one of these states we enter hit State perfect great job if you are coding along hope you are getting a lot of value when the player collides with an enemy I want to run this sprite animation let's handle that logic in a separate module I will call it for Example Collision animation JS you know how we do this by now there will be a class called Collision animation Constructor will expect game object reference and X and
Y positions we convert game into class property as usual you can download the image in the video description I place it in my assets folder and I link it here in index HTML I give it an ID of collision animation I hide the image with CSS Sprite width the width of a single Frame is 100 pixels Sprite height is 90 pixels we will have size modif fire to randomize the sizes a bit it will be a random value between 0.5 and 1.5 the width will be multiplied by this modifier value like this Sprite width times
size modifier height will be Sprite height times size modifier it's a rectangular image and I want X position to be in the middle of the image that's why I waited until now to convert X and Y into class properties we can only do It after we calculate the width and height of the animation I want to push X and Y over the center of the animation so X will be x coordinate passed as an argument minus half of the width y will be y coordinate minus half of height frame X will start at zero Max
frame is four marked for deletion will be false at first we are animating a Sprite sheet so as usual we use a draw image built-in method and pass it nine arguments image we want to draw so this. image from line Four Source X will be frame x times Sprite width for for horizontal navigation around the Sprite sheet Source y will be zero because this Sprite sheet has only one row Source width is Sprite width Source height is Sprite height so these four values specify which area we want to crop out from the source Sprite sheet
now I pass it for more values destination X will be this. X from line 10 destination Y is this doy destination width and height Will be the width and height we calculated on lines 8 and N these last four values determine where to draw that cropped out frame on destination canvas update method will make sure that Collision animations move with the game world so this.y minus equals this. game. speeed we exported the class up here on line one I imported up on line two in player JS because this is the module where we handle collisions
I create an array that will Hold all currently active Collision animation objects I call it this. collisions and it will be an empty array at first first we have Collision animation class available so I go down to check Collision method and every time player collides with an enemy we set marked for deletion on that animat true and I will also push one New Collision animation object into this collisions array I can see it expects game X and Y so I pass it this. game and I pass it X And Y coordinates of that enemy since
enemy is a rectangle I pass it the middle of that rectangle horizontally and vertically like this I want the Collision animation to be centered exactly over the enime that just collided with the player inside update method on game class down here we will handle Collision Sprites for each object inside Collision array we will call its update method and I will pass it Delta time Because we want to slow the animation down if that Collision object is marked for deletion I splice it out of the array same as we did with particles inside the draw method
I will cycle through all the Collision objects again and I will trigger draw method on each one nice we are drawing collisions we are just drawing the first animation frame in the Sprite sheet let's go here inside draw method on collision animation class and animate Frame X if frame X is more than Max frame set marked for deletion to true I conso O collisions array and I can see that collisions are correctly being added and removed I can delete this console loog Collision animations are running very fast we can control their FPS frames per second
using Delta time Delta time is the difference in milliseconds between the time stamp from this animation frame And the time stamp from the previous frame it will be passed as an argument up here we will need three helper properties FPS will Define frames per second frame interval will be the amount of milliseconds that need to pass before we serve the next animation frame it will be 1 second th000 milliseconds divided by FPS frame timer will be counting from zero to frame interval over and over every time it reaches the value in our frame interval it
will Reset back to zero and it will serve the next animation frame in our Collision animation spreadsheet so here I say if frame timer is more than frame interval only then serve the next horizontal frame and reset frame timer back to zero so that it can count again for the next Loop else keep increasing frame timer by Delta time now Collision animations are animated at 15 frames per second I can also randomize that FPS not sure what That will look like let's try a random number between 15 and 25 frames per second I can make
that a larger number it will be capped at 60 FPS anyway I think smaller numbers will look better since this sprad sheet only has five frames this will make sure they don't disappear too fast I will set the initial value for debug to false so we don't see Collision rectangles on the first page load you can still view them by entering our debug mode by pressing The letter D win condition for this game will be a time limit we need to get as many score points as possible within a specific specific game time window I
want a fastpaced fun game we will store game time in this do time variable here on the main game object when time reaches Max time value the game level is complete for testing purposes let's set that time to 2,000 milliseconds 2 seconds just for now inside update method we will be increasing Game Time By Delta time that's passed as an argument up here milliseconds between animation frames will be accumula in this. time variable giving us the total amount of time that has passed since the game started if time from line 33 is more than Max
time from line 34 we set game over to true we need to declare this game over property up here when the game over is through I want to display a scoreboard a Custom message and I want the game to stop animating down here in animation loop I say only request the next animation frame if game over is false this will make the game freeze and stop animating when game over happens I could also have just disabled controls and have the player running endlessly in the background you can customize your game over screen later based on
your preferences I open uig JS and here I want to display game time and game over Messages let's start with the timer I want the font to be smaller let's say 80% of the font size we used to draw score I call fill text and I say time colon space Plus this. game time at coordinates 2080 nice we are drawing game time we will fix this but first let's also draw game over message if game over is true set text align to left I want font size to be double of the base value I will
have two messages One where the level is successfully completed and one for when the player fails to get enough score points in time this will be the winning message I will say booyah in large letters coordinates will be the middle of canvas so game width time 0.5 and game height time 0.5 okay I set text align the center I need to fix this to actually set font size correctly I need to move this space from here to here and the same on line 14 nice wining message will have a second line of text with smaller
font size that says what are creatures of the night afraid of you exclamation mark exclamation mark this message will show up when we win I change font size to 70% I move the first line up 20 pixels and the second line down 20 pixels nice so this is our winning message I want this message to display if score is more than five for example this is just for testing Purposes when we have the whole game working you can tune it and you can set game time and the score required to win the game game to
different value depending on how difficult you want your game to be if game score is more than five we display this message else meaning game over is true and game score is less than five we display a different message I will say Love At First Bite I like to keep the Halloween theme the second line will say nope better luck Next time so this is when we fail the level to test it I give us more game time so we can get enough score points 10 seconds nice win condition works well and now loose condition
let's wait perfect we can also lose if we don't get enough score points in time we need to fix game timer it's showing milliseconds I want it to show seconds so I multiply it by 0.1 to move the decimal point from milliseconds to seconds and I only want To see one decimal space so built in JavaScript to fixed method and I pass it one we can also highlight the text to make sure it doesn't blend in with the background I wrap all the codee inside the draw method on UI class between save and restore that
means all the settings here will only affect this text I want to apply canvas shadows and I don't want them to be applied to player and enemies canvas Shadows are still not well optimized in Firefox so if you notice Lower frame rate I suggest you don't use them but if you want to know how to use them it's simple Shadow offset x 2 pixels Shadow offset Y 2 pixels Shadow color white and Shadow blur zero now our text gets a nice wide highlight we could also achieve the same effect by drawing the same text twice
and the second one would have two pixel horizontal and two pixel vertical offset that would be more cold but it's more performance efficient than us in Built-in canvas Shadows let's clean up the Cod and fix some small bucks we have here when the player gets hit I don't want it to be able to move left and right when the player is in state six left and right arrow inputs will be disabled on line 11 in Collision animation JS we are calculating vertical y coordinate so this value should be height in running State we are setting
Max frame to six we are missing two frames Max frame should actually be Eight when I'm rolling on the ground and I press down arrow key player starts diving and it's causing this weird movement pattern we are not supposed to be able to do a dive attack when we are on the ground we can only switch to diving State when the player is not on the ground like this that fixed it one last small thing is here on line 61 in main JS we don't really need to call slice method we can just set length
of particles array to Max particles value Like this in the next episode we will add more bonus features but from this point you can consider the game complete feel free to add your own features and run your own creative coding experiments I'll see you in the next one this is a final episode where we quickly Implement some of the bonus features I showed in the previews we will improve visuals and clean up our code I will start by quickly changing background Images just to keep things interesting you can download the forest background layers in the
video description and I just replace them in the assets folder overriding the city images I backed the old images up somewhere else on my computer you can also go to background JS and adjust speeds of individual layers sometimes different background art looks better when speed modifiers on background layers are adjusted I also change ground margin on line 17 in main JS to better fit this new Forest environment since we are changing visuals let's also change the font to something nicer you can go to Google fonts and choose any font from there it will all work
and it's very easy to implement let me show you with creepster because this is a Halloween themed game we are in a scary dark Forest escaping from creatures of the dark when you choose your font click select this style now I click up here and it will give us Everything we need to use this font on the web in our web browser game I copy this link tag you can also select multiple fonts and they will be automatically added to the same tag I will use just one font for now I copied the link tag
and I paste it up here in index HTML notice I put it before my custom style CSS file because I want the font to be available when that file loads then I just take this CSS Rule and I apply it to Canvas element now I can Use this font all over my project and canvas will draw it I will use it in uig JS for score timer and game over messages by replacing helvetica with creepster here I think this looks much better and you can choose from so many different Google phones to fit the art
style of your game I have other favorites on here for example a font called bangers for a really cool comic book art style I want the player to have a limited number of lives and I want Those lives to be displayed on screen each life will be represented by a small image of dog head you can also use heart image or something completely different it's up to you if you want to use the same image as me you can download it down below as usual I bring it into the project here in index HTML first
then I hide it with CSS I will be drawing the lives here in uig JS so in the Constructor I bring the image into the project like this I will call it for Example this. lives image down here under timer we will draw player lives I will call draw image and I pass it the image I want to draw I want to draw it at coordinates 20 95 and width and height will be 25 pixels nice we are drawing it here I created this lives property on the main game object let's start with five lives
back in UI JS I create a for Loop that will run once for each life and it will draw an image that represents It now I'm just drawing five images on top of each other I need to multiply horizontal X position times index from the for Loop actually it will be the width of the image so 25 pixels times index plus left margin of 20 pixels perfect now when I change the value here it changes how many lives are drawn on screen maybe you want your game to be easy you can give the player 15
lives to start with I will go back to five lives in player JS in the area where we handle Collisions when the player collides with an enemy while not rolling or diving this animation is played by setting state to state six we call that state hit and at the same time I want to remove one life so this do game. lives minus minus after we removed one life we check if total lives are less or equal to zero and if they are we set game over to true I tested by colliding with enemies on purpose
you can see that each time we Collide we lose one life per enemy and when we lose the last life we get game over screen perfect I want score numbers to fly from enemies as we defeat them this can also be used for other floating messages in our game I create a new file called floating messages JS I create a custom class I call for example floating message and I export it Constructor will expect value of the floating text star in X and Y position and Target X and Y position text with This value will
float from this position to this position and then it will disappear I convert these values to class prop properties as usual I also create a property I call timer just to set some simple time limit after which the messages disappear we will need update and draw methods as usual update method will push horizontal Exposition by the difference between Target position and the current position making it slowly move towards the Target same for the vertical y position difference between vertical Target and current vertical position for each Loop timer will increase by one when timer is more
than 100 we set marked for deletion to True draw method will take context as an argument we set font to 20 pixel scrapster fill style will be white and fill text will draw value from line three at its current X and Y coordinates now I show you an alternative to us in canvas Shadows for Score and timer we are using canvas Shadow properties here we will achieve the same effect by drawing the same text twice white first then black on top of it and we give it two pixels horizontal and two pixels vertical offset we
are exporting our new floating message class I imported up here on line three in player JS inside check Collision method when we successfully hit an enemy and score Increases I want those score points to fly from that enemy towards our scoreboard I say this game. floating messages push and I want to use floating message class to create one new floating message object first I need to go to main JS and on the game class I create this floating messages array it will be an empty array at first now I'm pushing new floating message into it
like this I check here and I can see that class Constructor expects text value St in X And Y coordinates and Target X and Y coordinates value will be+ one because we get one score score point we could also make this value Dynamic if every enemy type gives different amount of score points starting coordinates will be X and Y of the eneme we just collided with and Target X and Y will be for example the top left corner of canvas so coordinates 0 0 inside update method on game class the same way we cycle through
all enemy Object inside enemy's array we will also cycle through all floating message objects inside floating messages array for each message we will trigger its update method meod I delete this splice to remove old messages because we will do it in a better way I'll get to it in a minute so for every floating message object I call their Associated update method I copy this code block and inside draw I also call draw method on every message and I pass it context if I play The game messages will be moving too fast so there is
no animation I just see the bottom of the letters here I need to go to update method and I need to multiply both of these by 0.03 so I'm saying here for each animation frame increase the current vertical and horizontal position by 3% of the difference between the target position and the current position this will make the text move towards its Target position by 3% of the distance per Animation frame meaning it will start moving fast and as the distance between current and Target position gets shorter so it's a smaller number 3% of that value
is less pixels so it will travel slower and slower given us a nice ease out effect you can see that the movement is faster at first and it slows down as the letters float closer to Target z0 coordinates on canvas I adjusted the target coordinates I want them to flow somewhere to the end of score line maybe This coordinates yeah let's do 150 and 50 right now we are creating an ever increasing floating messages array because we are not removing the old ones I will use filter array method to do that it's better than using
lies for a reason I will explain in a minute built-in array filter method runs a provided callback function once per each element in the array array Elements which do not pass the Callback function Test are skipped and are not included in the new array so when I say this do floating messages do filter and as a callback I say marked for deletion property on each object needs to be false the new array will contain only elements that have marked for deletion set to false elements that are set to True will be excluded it at the
same time I am assigning this new filtered array to the original floating messages array overriding it so this simple line Of code filters out all elements that have marked for deletion set to true in the previous episode I mentioned a bu where I notic that ground enemies jump and wiggle horizontally even when they are supposed to be static it's especially visible When comparing ground enemies against the ground texture but it is actually happening with all enemies it is because as I cycle through the array I am removing enemies that collided with player or moved off
screen Using splice problem is that when I splice out and remove enemy from the array while I'm in the middle of cyclin through that array it changes index of all the following elements in our case enemy objects because of that their position is not calculated correctly for that Loop and they jump around instead of splice I will use filter method and I will only remove enemies that have marked for deletion properties set to True after we finished cycling through The entire array so there are no problems with indexes and skipping position basically I will do
the same thing for enemies I just did for floating messages I will also do the same thing for particles like this and finally I also do it for Collision animation objects now that's better we fixed the bu and I think this syntax is a bit cleaner as well I just quickly consol Loock all my object arrays I put it inside at enemy so it logs it only periodically not for every animation frame I play the game and I can see that all the arrays are being correctly filled with objects and those objects are also being
removed perfect player class doesn't have this do current state property because I had to Define it from inside game object here that property belongs on player class so I can Define it here and initially I set it to null This is just a clean up the code will still work the same let's tune the game difficulty to make it a bit more challenging Max time will be 30,000 milliseconds or 30 seconds in this time the player needs to reach at least the minimum winning score of 40 to see the winning message we can do other
things for example every time player gets hit by an enemy and this animation is played we can remove Five Points from the score as a penalty you can tune your game However you want you can make it easier or more difficult by adjusting these values when the game is over after 30 seconds I check if score is more than winning score and if it is we display winning message else we display the losing message let's test it I play it and I get hit over and over my score is in minus values I get game
over and losing message from line 35 is displayed nice I increase game width to 900 pixels I will keep game height at 500 pixels Because our background images are optimized for that size we're not going to go into aspect ratio calculation in this class this time I will really try to play the game game and let's see if our winning condition works I need to score over 40 in 30 seconds it's actually pretty close yes I played well I got 55 score points and winning message is displayed awesome we are done let me know in
the comments if you Cod it all the way through and if you learn Something new I'll see you later [Music]