today we're diving into the world of f Studio to uncover over 20 tips tricks and features that will completely change the way you produce music so stick around until the end because you won't believe how easy it is to unlock FL Studio's true potential so the first thing we're going to talk about is the playlist the playlist is where everything happens and we have some crazy shortcuts for the playlist so the first feature is making stuff unique let's say we want to make this pattern unique and change it up if I go in here right
now and I just add a cord or cut right here this pattern is also going to be affected because it's also pattern four so if we want to change this pattern up without this being affected then we have to make this unique normally you would go here and press make unique in the new FL Studio update there's an easier way now you can just press shift V and then you drag on the pattern and you drag it over and as soon as you let go as you can see it made it unique now it's pattern
five so now we can go in here and cut right here this is insane if you make jums in patterns and want to change like the end of a jum section this is also insane if you're working a lot of audio and let's say we have this vocal right here and we want to pitch this down but we want the normal vocal to stay like this then we can just shift V drag it out let go now it's Unique can move it back and we can pitch it down easy as that this is a new
feature that's just been added so definitely got to get used to that something else we can do in the playlist is consolidate certain sections this is super cool if you're trying to make transitions let's say we have this right here [Music] and I want to make an transition right here but I need it to be in audio form instead of like bouncing everything out we can just select the whole section or we can just select this part right here where the transition should be press control all and c and just bounce it out it bounced
out this part and it already disabled all the patterns right here to enable the patterns again you can just press T and draw over them I'm going to leave it like this and now right here we have just audio file and now we can do all kinds of different stuff to it we can reverse it pitch it we can put it to a mixer [Music] trck see we can even fade it in and still let these play just as an example you can also do this with jumps which also sounds amazing this next tip is
a lifesaver we've all been there you play a song and something just doesn't see right you know and then you zoom in and you can see your patterns and audio clips are not aligned to the grid which can be like a pain in the ass to fix so normally we would have to go in and just move them over like this and fix it like that what you can do is just press shift q a lot of people know you can actually do that in piano roll you can also do it on the playlist which
saved me a lot of time already and I'm sure it's going to save you a lot of time a really cool workflow tip is using these tools instead of going to the top right here pressing this pressing this we can just right click and use the Mouse wheel to scroll through them this way you don't have to go to the top right here all the time you can just right click boom pen tool right click and then go to the disable tool left right click boom super simple now I'll show you guys my favorite playlist
trick this is the arrangement view as you can see we have Arrangement right here if you press it you can add one and then you press yes give it a new name and you have a completely new arrangement with nothing in there and you can switch between them like switching between patterns now we can go in here and select these patters contrl + C to copy contrl + V to paste and boom this is obviously cool when you're trying to rearrange a song let's say we want to try out a different Arrangement super simple this
can also be cool if you're making beats from scratch and you just want to bounce out the sample let's say this is your whole beat you just finish that want to send it to a rapper you can just copy the M pattern go to Arrangement two paste that in here and then you can structure it as a loop bounce it out and also send it out to other producers to work on to get collaborations in this is a super underutilized tool that's going to be it for the playlist next up is the browser the first
thing I'm going to show you guys is how to maximize screen space let's say you have a small screen and the browser can take up a lot of that screen what you can do is come right here and press on auto hiide this will automatically hide the browser and once you use your mouse to get to the left it's going to unhide itself you can combine that with actually left clicking on the browser and just moving it to the site this way you have a lot of screen space and then once you need it you
can go in there and get your stuff you can also put the browser if you have a second monitor on the second monitor stuff like this is super nice if you have a small space the next thing is as you can see I'm on my sounds tab this is just basically a collection of the sounds I use the most instead of being on all and having a million different things I like to have my stuff organized ready to go so I don't miss a beat when making beats to do this it's super simple all you
have to do is right click on the folder you want to add a new tab go open your new tab and then you have this right here you can rename it say it sounds you can give it a color if you want to and you can even give it an icon if you want to boom and now you have your sound thing right here now to add new folders to this you can just right click and then add folder to tab sounds and this way you can organize your sounds have way quicker access to everything
and it's just very nice for organization purposes next one is the toolbar on the top right here it's not something a lot of people talk about you can customize this toolbar a lot we do this by right clicking and pressing edit as you can see you have already preset some presets here but first let's go edit and now as you can see you have a lot of stuff if there's stuff that you don't that you personally don't use I don't use this one this one this one this one so the mixer the Pian roll and
stuff I don't use these buttons because I use my keyboard for that F5 F6 F7 F10 you know you can preview your stuff and you can add stuff that you really need I personally have a preset so this is my preset as you can see I just have the most NE Neary stuff for recording I like to have it small because I like to have a lot of like screen space available if you made your own preset then you can just come right here and press save preset as this will open this and then you
can put like tool bar reset boom and then I saved it and every time the bar resets you can just put your preset there and it goes back to your old ways I recommend only using really putting in the buttons you need there are certain stuff you can't remove stuff like the hint panel can't be remov which is okay but certain unnecessary buttons you can just take away let's talk about some of these buttons so we all know the music keyboard right here you can just press it and if you press it you can use
your keyboard to play instruments basically you can also right click this and it's going to open this right here you can choose a scale right here and this allows you to always play in scale basically so just as an example right now this call progression is in c minor so if I wanted to play on my keyboard then I would just go right here press C and then pick the minor one uh if I can find it here and now as you can see all the notes I'm pressing are all in key this allows you
to record without having a midi keyboard just using a keyboard and being able to even if you don't have like the knowledge of Music Theory you can just always hit the right Keys basically so as you can see right here I just dragged in a one shot and now I can it's always going to be in key you know whatever wasn't the greatest but you get the point you can also combine this with the loop recording function something else is very cool on a tuba is a tool function and then macros if you have a
PC that can't really handle that many plugins this is like a gold M for you this basically allows you to set macros for f studio so a big one is switch smart disabl for all plugins this basically means that if you have 100 plugins and if you're playing the track only like 16 get get used but the other ones are also there these plugins will be dis abled and as soon they are like needed they get switched on this just saves you a lot of CPU this just saves like your PC from burning down basically
another cool macro is purged unused audio clips as an example if I'm playing this right here and I have like 100 audio clips right here and I'm only using five of those and I go to tools maros and press Purge and use audio clips as you can see it deletes everything that's not on the playlist and it's not not being used this is like a cool feature like let's say you're recording like vocal text and you have 200 different vocal takes and you already combed your vocal and then you still have like 300 here then
you can just like instead of deleting them one by one you can just go in and micro that something you can also do in the macros is right here switch all plug-in editors to attached or detached the attached and detached is pretty simple I have an EQ right here if I press to the next EQ it's going to close that's because it's attached as soon as I go right here to detached and open the next one it stays open you can do that for all your different plugins by just coming to macros and switch all
plugin Adas to attached detail detached detach basically allows you to move it around and it stays open attached closes the plugin once you close it so now we're going to the mixer I just have a couple quick ones right here which can be very helpful and save you a lot of time so as you can see I have a Different Drum Busters right here let's say I want to know which of these tracks is connected to this bus without going like this and checking you can just come right here press select and then tracks routed
to this one and boom as you can see now I can see all the tracks that are routed to this bus just something quick because I have this problem a lot because I work with buses a lot that I keep forgetting okay which bus is this router to this is just a simple trick to save you some time and headache the next one to reset one of these mixer tracks you can just right click e and space bar this is going to reset the whole track delete all the plugins delete the name the color everything
it's just going to set it back to standard super useful if you're trying to keep your project clean if you want to clone a mixer track and all the effects and the effects settings within those effects it's super simple you can just right click go to file safe mixer track don't click it just hold it and move it to the mixer track that you want to clone so as you can see same Echo boy same panman and it's going to be the same effect settings super simple another mixer track with buses let's say this is
your whole Melody section and you want to send it to this bus right here what you can do is select all of them by holding s control and just moving along and then just right clicking on this little arrow right here and this allows you to route to this track only or rout to this track if you route to this track only all all the other connections are going to be cut and it's just going to send it to this bus boom as you can see now we can go in and use the other trick
and see boom all these make tracks are ordered to this bus right here super important shortcut if you like have a drum bus or vocal bus it's going to save you a lot of time now let's talk about more of that Hands-On stuff I just took like one shot out of the simatics fantasy sample pack if you want 500 fre one shots you can just check the description it's some of the rarest synthesizers in existence and we took all the presets from them and put them in a pack for you so now we're going to
talk about the CH the CH is like a gold mine in F Studio we have a simple one shot and we can turn this into something crazy the first section we're going to talk about is obviously the pre-computed effects and this wrench tool stuff like normalize length on the time and that's cool and that's like very useful right but I wanted to talk about this section right here and the wrench tool first up I'm want to talk turn the envelope into like more of a bellish sound the next thing I'm going to do is let's
go to the wrench tool here we have an apator we have polyphony and we have like a delay so I'm going start with the apator something we can do is turn this into apator let's add liy to this so we go to Porter mono as you can see already pretty cool if we go back to this envelope section we can add some attack to this and we can like turn this can give it some tail and that's just like playing three notes you know we can obviously turn AED into something [Music] else can turn it
down we also have this mod x and mod Y section this mod x is basically like a filter right so this is like a low pass filter you can also go in right here and using this you can add a chamow effect [Applause] [Music] [Applause] [Music] can also go interet here and add an envelope to that how like how crazy it should [Music] be we can also use the mod Y section is also a filter and you can even like select what kind of filter you want to do this with so we can do the
same thing right here can add like an envelope to the filter an LFO and play with that which is insane so you can actually go from like a pretty simple one shot to something like complex like this and that's all within just the generic another cool thing that's going to save like a lot of people's lives is this part right here so let's say I went through different like 20 different one shots right and I really like the first one but I can't remember the name of the one shot I can just go right here
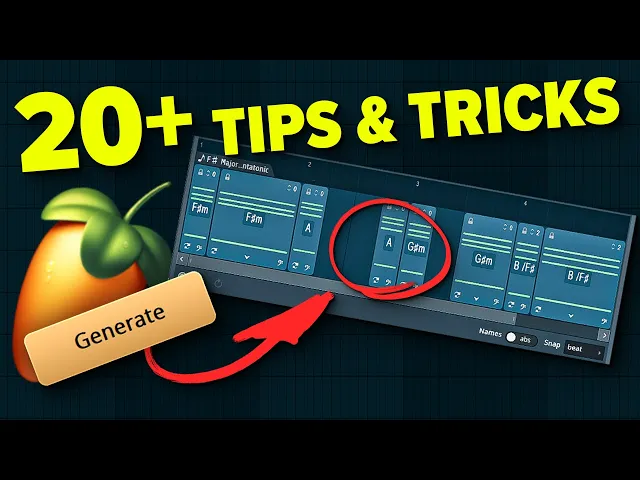
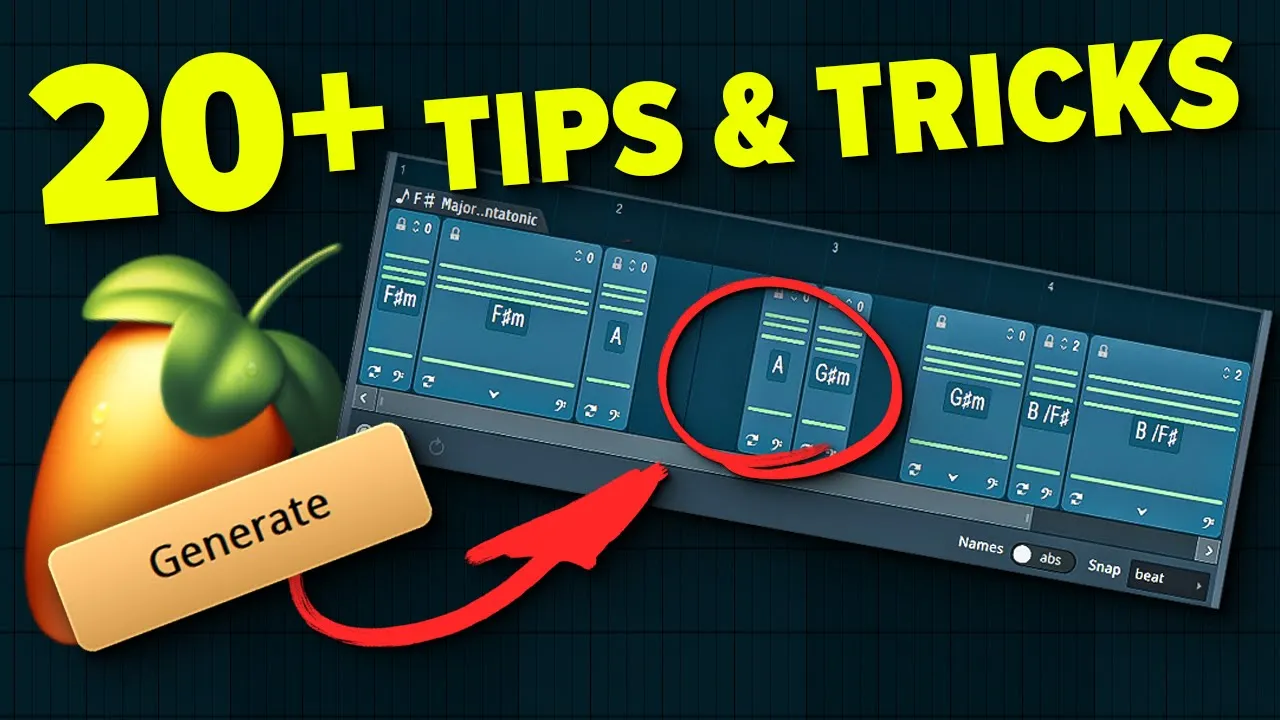
and press right click and then I can see all the ones I already went through and then I go back to the first one and we're back at the beginning this is a super useful feature to have that already saved my life like 20 times easy so next we have the piano roll and we have some huge huge huge features that just have been added to E Studio the first one is right here and right here alt P generate core progressions and we're just doing then with the one shot as you can see a whole
new window pop up as new and there's a lot to talk about here let's go through it let's start right here this basically allows you to generate new core progressions at the click of a button you have multiple different options here the first one it generates a core progression based upon the core progression you have in here so if you have like a C minor core progression in here it's going to generate C Min progression and just going to go off this you have this button right here which completely starts over so if you generate
like it changes the key it changes everything under this we have con like conventional to adventurers and this basically just lets the AI know do you want to have a common one or do you want to have like a corporation like a little bit out there it's a slider you can just choose where to put it next we can select the length how long do you want the cor progression to be two bars four bars six bars whatever it is and the range of the cor progression okay this like the cool part right here if
we go to this G minor right here we can right click edit and select the scale so right now we see minor which is really cool to have below this we have the chords so now let's just generate one and listen to now we can go in and just say okay let's try a different one let's say you like this cord Discord and Discord so you like the first three cords but you don't like the last one then you can just lock the first three and regenerate and this give brings you like a ton of
different cords right but let's say you want to be like a little more specific then you can just go right here press this arrow down and select one of the like alternative Cordes so let's say you like this one [Music] let's say you like this one what you can also do is right here if you re if you click it you can preview just one chord so if you lock these three and you're trying out chords you can just go in and preview you can also start right here and prev from this cord boom easy
you can also right click it and go right here to change nodes here you can invert it you can transpose it fix the Baseline add externals everything you can do everything in right here right so what you can also do is go to the edge of the cord and elongate it so you move all this over and then you can make it longer you can really go in and build a whole C progression right here another feature that's really cool is adding passing chords so we have these two chords and I want to progress from
the C minor to this a flat what you can do is right click and create a passing Corde [Music] let's say this is too high we can go right here and go down and the [Music] inversions super simple as you can see you can like go really go deep and create custom C progression out of thin air without knowing like any music theory just by listening the last thing right here is the this bottom part right here we have presets performance and Advance the presets are really cool as you can see you have like a
ton of different presets you can just go in as you can see you can see the mood of it or let's go for velvety [Music] very nice something else you can do is decide the rhythm of it so you can like chopped cords you have shuffle a bunch of different rhythms basically what you can also do is go to Performance and go right here as you can see you have AR chop and humanized I'm going first show you humanized you can just basically come right here and add the humanization as if we were in a
piano roll and pressing all C to stor something that's what you have right here you can go in and add change the depth as you can see as I'm turning this this is changing can add the the time the weight everything the same for the up we have SIMPLE [Music] ABS can take it offbeat change the bias more of everything articulation no repeats like there's like a million different ways so if you're looking to get like an idea for a Melody this is definitely where to start this is great like for people that have no
idea about music theory even for people that have idea of Music Theory and just want like quickly to get into creating and just want to lay something down without having to think about a million different things getting this and just playing around with it is going to 100% give you some great ideas so let's let's quickly make a core progression using this reset the pageor go back to humanize light humanization and then generate you know what that's actually already great the next thing I'm going to show you guys is this combination of features that all
come together in a great thing the first thing is right clicking this note right here and then going snap incoming midi and then you can do snap to scale as well but uh step incoming midi this basically allows you when you're playing the keyboard that's instantly going to snap to the to the grid after recording if I play something and I stop it's instantly going to go to the grid and it's going to snap to the grid that you have select right here so the like the smaller the grid the less correction is going to
happen this by itself is pretty cool so if you combine this with a different feature I just showed you the feature where you can select that all your keys that you press are going to be in key while on your keyboard this makes it super easy to record and if we add this with another feature the Le Loop recording feature it's going to turn you into bait HOV even though you have no idea about playing quarts or something or playing like Melodies so workflow is pretty simple you just turn your on your magical keyboard you
have some chords playing you have the loop recording on and then you just record and you just play and now it loops and we just can add something so as you can see it becomes super easy to create a pattern create a Melody because you just Loop it and you just try stuff out you know and you can't really mess up because all these Keys sound good you know because they're in they're already in scale that's just a very cool combination of features that stack upon each other and create something that's like super easy to
use and that gets you very very cool results so that's it like I said if you want 500 free one shots from some of the rarest synthesizers in existence you can just check the description they're all in there free of charge I really hope that some of these features can help you in your music production journey and I'm going see you guys in the next one peace out [Music]