in this video I will be discussing the fundamental principles of the technical performance of spinal anesthesia that I use on a day to day basis in my practice and which I believe minimize technical difficulty and maximize the chance of success the technique and principles can also be applied to epidural anesthesia or indeed any technique involving percutaneous access to the spinal canal such as lumbar puncture a lumbar drain insertion there are four major reasons why difficulty may be encountered when performing spinal or epidural anesthesia first when inserting the needle it doesn't go where you intend it
to go second the spaces that the needle must traverse the inter spinous and Inter lamina spaces are narrower than usual this may be due to suboptimal patient positioning and a persistent lumbar lordosis or degenerative changes in the spine in this setting meticulous and precise technical skills are essential for success third the usual surface landmarks particularly the spinous processes cannot be identified they may be obscured by subcutaneous tissue or removed as in the case of previous spinal surgery finally landmarks may be present but are distorted by congenital or degenerative deformity chiefly scoliosis the first and second
causes are dealt with by good fundamental technique which is the subject of this video the third and fourth causes can be effectively addressed with the aid of pre procedural ultrasound imaging which will be discussed in other videos it goes without saying that a successful midline approach involves inserting the needle in the near axial midline the problem is that the true near axial midline is not always accurately located by palpation alone and we are often not placing our needle in the midline this is illustrated in this study which looked at whether placing an epidural off the
true midline affected the efficacy of labour epidural analgesia what was interesting was that the average distance of the epidural puncture site from the true midline as assessed by ultrasound was almost 4 millimeters now all the epidurals was successfully placed and there was no correlation of this distance with efficacy so does it matter that you can be almost half a centimeter of midline when performing your axial blockade very midline approach perhaps not if you're doing it in young patients who aspyn's an inter lamina spaces that look like this in fact the question almost becomes why should
we have any trouble finding the space in these patients my concern is not whether I can do in your axial block in normal patients with wide open spaces but whether I can do it in patients with difficult and that to me in narrow spaces not all patients have spines that look like this many older patients have spines that look instead like this clearly more precision and accuracy will be needed here I therefore use the same steps I'm about to describe to you in every new axial block that I do because practice makes perfect and more
importantly because I have found that they minimize the chance of failure just so that you can appreciate the difference a few millimeters might make in this obese older gentleman we scan and marked his midline and spaces due to a surgical delay he was allowed to lie back down and was later set up again for the spinal initial attempts using the original markings were unsuccessful because the skin was now in a slightly different position and he had very narrow spaces we rescan as a rescue and you can see the difference between failure and exact and success
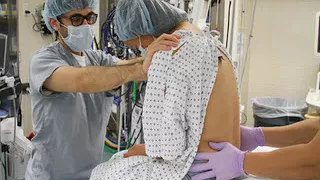
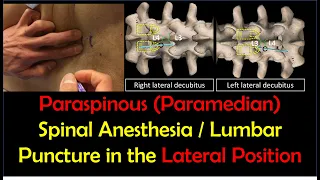
is only a couple of millimeters the first impossibly most important thing in any percutaneous procedure is to control the overlying skin this ensures that our skin puncture point has a constant relationship to the underlying deeper target in this case the spinal column if we don't do this we can easily be three to four millimeters off the midline or wherever it is we think we want to be this is best done by using the second and third fingers of our non dominant hand for palpation and fixation I strongly recommend that you avoid the habit of palpating
spinous processes with your thumb as it does not allow you to subsequently control the skin with the patient in the lateral position our hand is rotated but the same two fingers are used to control the skin this is even more important here is the soft tissues tend to sag downwards with gravity finally note that because skin is mobile we can slide it lateral or medial cranial or core dead and adjust where our needle tip is going without necessarily making another skin puncture so to recap we avoid using our thumb to palpate spinous processes and rather
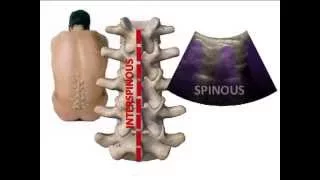
we use our second and third fingers instead this also allows us to shift the skin slightly back and forth under control we keep our fingertips close together as we palpate the tips of the spinous process and the inter spine of space can be easy located by rolling our fingertips over the raised peak of the spinous process and down into the deeper valley between spinous processes most importantly once we have found space we spread off in this slightly to fix the skin overlying the actual target for an accurate needle insertion we talked about the importance of
being the midline that requires that we accurately find the midline the tip of the spinous process is wider than you think it is about three millimeters on average and as we palpate the tip of the spinous process the overlying soft tissue contributes to making it feel wider than it really is in older people degenerative calcification the supraspinous ligament can further contribute to widening of the tip of the spinous process so how can we tell if we have put our needle into the true midline or if we're slightly off midline if we are in the true
midline we will have placed our needle into the inter spinous ligament if we are off the midline the needle will be in the adjacent paraspinal muscle and further progress will be impeded by the laminar articular processes more importantly is what happens when we have someone with degenerative changes in their spine there are narrowed spaces due to more prominent and hypertrophied articular processes a degree of scoliosis is also not uncommon making the true inner axle midline and needle trajectory even harder to discern it is therefore very useful to use the small gauge local anesthetic infiltration needle
to explore the underlying Anatomy entry into the inter spinous ligament is signaled by an inability to inject whereas local anesthetic can still be injected if the needle is placed into the adjacent paraspinal muscles if this is the case metre or lateral parallel shifts should be made to attempt to sink the needle into the inter spinous ligament do not angle the needle small adjustments can be made through the same skin puncture site by shifting the skin with our two fingers but if necessary a new skin puncture should be made this video illustrates all of the above
steps fix the skin between two fingers placed on either side of the inter spinous ligament and insert the infiltration needle inject local tour and easter ties the skin and subcutaneous tissues then advance the needle deeper and perform test injections to locate the inter spinous ligament and midline here I'm able to inject signifying that I am in muscle and not the midline I therefore withdraw the needle to skin and drag the skin across to make a slight parallel shift and reinsert and re-inject I repeat this left and right as needed until I find absolute resistance to
injection the needle is now anchored in the inter spinous ligament I leave it in place to serve as a guide for subsequent insertion of the introducer needle or the spinal or epidural needle once we found the inter spinous ligament the next step is to insert the introducer or spinal needle following exactly the same trajectory once again fixation of the overlying skin is essential to ensure accuracy the spinal needle itself must be advanced in a smooth and controlled fashion with a conscious attempt to sense the feel of the tissues at the tip and most importantly without
allowing the needle to bend a deviate there is a tendency of all needles to deviate usually influenced by the shape of the bevel and not necessarily the gauge of the needle and engage to a needle was shown to deviate more than a 25 gauge with a co needle in a phantom model this of course assumes good handling it is easy to inadvertently flex a thin small gauge needle especially if it is a long one now if and when we strike bone it's not a disaster as long as we use it to gather information and to
map the bony contours of the vertebra ask ourselves what boney surface is this and confirm it by making a redirection and seeing what happens if we are on the spinous process cranial angulation will take us progressively deeper if we are off the midline and walking up the lamina it will feel like we are striking bone at the same depth each time if we are very far off the midline we may strike the Fassett drawing which will elicit pain on that epsilon side it is vital at any redirection we make is in very small gradual increments
now this doesn't look like a very large angle but remember that for any given angle the distance translated is progressively larger the deeper the needle goes and it becomes very easy to overshoot the space this illustrates the magnitude of change in angulation that should be made especially when trying to creep our way in to very narrow or small spaces finally it helps to have a three-dimensional model of the spine in your mind and as you palpate landmarks or contact bone with your needle you are building and confirming this mental model so that you have a
good idea of where you need to redirect your needle to navigate into the inter laminar space this video illustrates the steps discussed above we fix the overlying skin with our two fingers and only then do we withdraw the find a needle and replace it with the introducer I try as far as possible not to take my eyes off the patient so that I can exactly replicate the trajectory with the introducer I like to push the introducer in with my thumb as it gives me the best feel the left hand holding the introducer is responsible for
controlling direction and trajectory the right hand merely advances the needle forwards in a controlled fashion sensing the feel of tissues at the tip ensuring it does not Bend when bone is contacted very small cranial redirections are made the tip of the spinal needle must be withdrawn out of the tissues and into the introducer before the introduce is manipulated or else the spinal needle will just bend to keep the angle small just lever or joystick the introducer without withdrawing and reinserting it you can easily get 5 to 10 degrees of change in this way only withdraw
and reinsert if you feel that the introducer is starting to bend and that you need to create a fresh needle track in the tissues once CSF back flow is obtained I attach the syringe with a gentle push and twist to get a good seal and then aspirate very gently my primary aim is not to dislodge the needle I don't need to suck back 1 mil or even half a mil a CSF I just need to censor the plunger moves again to minimize risk of dislodgement I personally don't ask her in the middle of injection i
aspirate gently at the end to confirm that the needle is still in the space and that I have likely delivered all of the dose into the intrathecal space I'm going to finish off by addressing one common problem in spinal anesthesia which is sluggish CSF backflow or an inability to aspirate with a syringe in older or dehydrated pre-surgical patients CSF pressure can be low to begin with with pencil point needles the setback of the RFS from the tip means that the orifice may not have completely entered the intrathecal space despite visible black flow of CSF another
scenario is the Douro flap created by puncture may divert some of the injected local anesthetic away from the intrathecal space or into the subdural space leading to therapeutic failure of the spinal anesthetic an easy maneuver to minimize these issues is to spin the needle through 360 degrees and is something I personally do routinely another reason you may be unable to aspirate is if you pull too hard on the plunger of your strange this can include the orifice by sucking the cauda equina up against it in the same way that we can collapse a small vein
when trying to draw blood too aggressively in both cases gentle aspiration is the key as I've said earlier you just need to feel the plunger move slightly if it doesn't move disconnect the syringe rotate the needle 360 degrees and look for backflow of CSF in the event that I really cannot aspirate after a couple of attempts I don't keep trying instead I disconnect one last time look for evidence of backflow by movement of the CSF meniscus and then I just attach the syringe and inject very carefully I avoid unnecessary maneuvers that risks dislodging the needle
during injection such as aspirating midway through