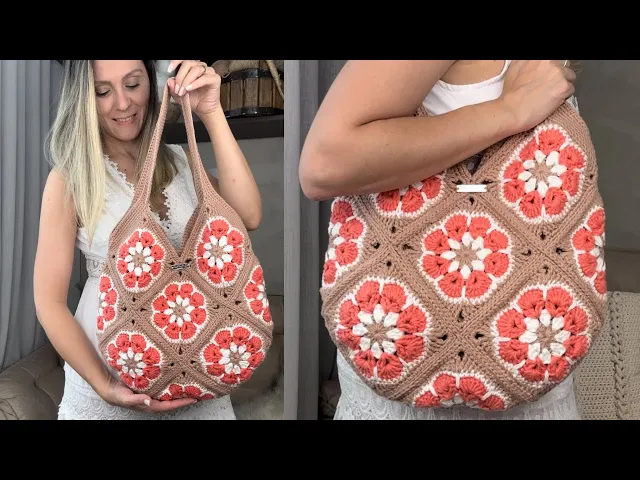
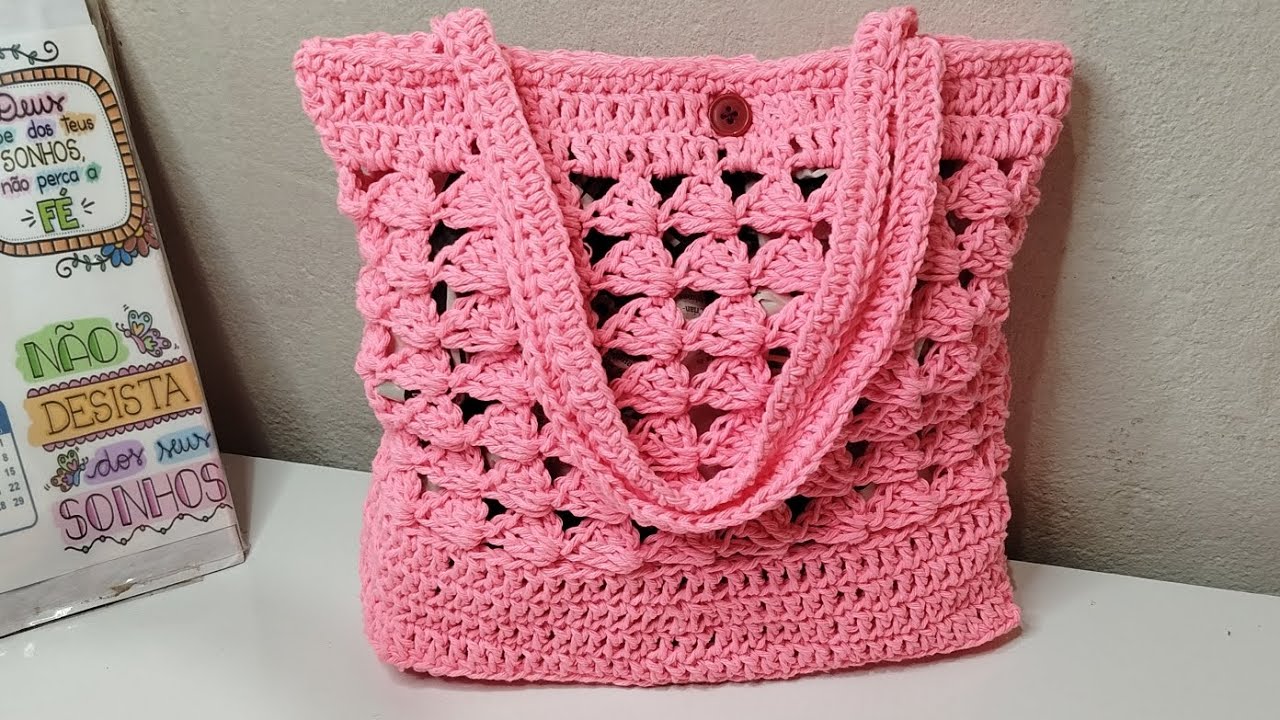
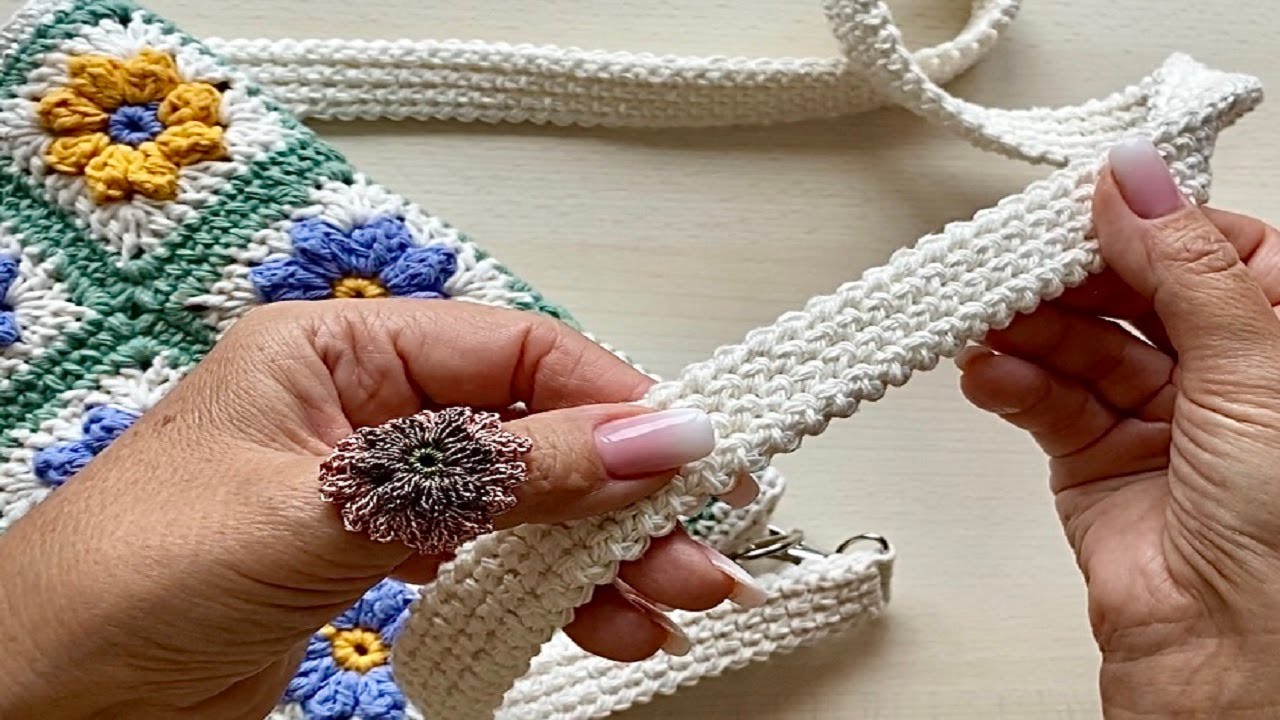
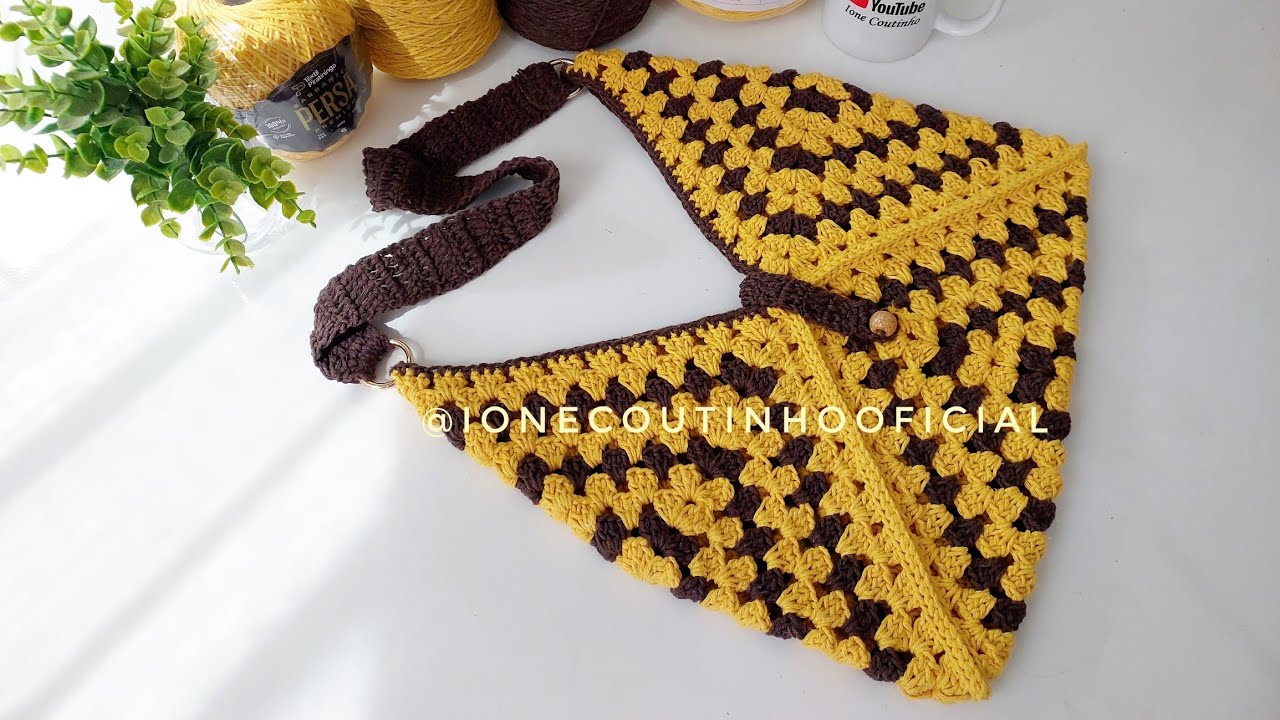
[Music] Hi everyone, my name is Camila and in this video I brought a bag made with Square, grandma's beautiful squares. Look what a wonderful bag I made on Square with an African flower, which is this flower here, which even has the exclusive Square video from African flower here on the channel and look at the wonderful design that forms on this bag, in addition to forming the design with the flowers, we still have a detail as if it were a little flower here in the space between the squares, look what a cuter thing it turned out
and this bag I'm going to teach you how to finish it perfectly so that it looks beautiful on the inside and also on the outside, look at its finish on the inside, it's a bag that, if you don't want to add lining, there's no need, it has a very beautiful finish without showing anything like that I will teach you how to make this finish so that it is perfect and this bag weighed a total of 360 G. I worked on it with string number 6. You can also use other types of Thread. If you prefer,
adapt the needle to the thread. you are going to work and for these measurements for this thread that I used, my bag was 40 cm high from this highest part to the tip and 29 cm high from this tip here to here, which is the area that is actually smaller here of use but we have this area a little higher and it was a total of 37 cm wide, its handle was 47 cm in the video I will also teach you how you can make it bigger or smaller If you prefer and also thicker or
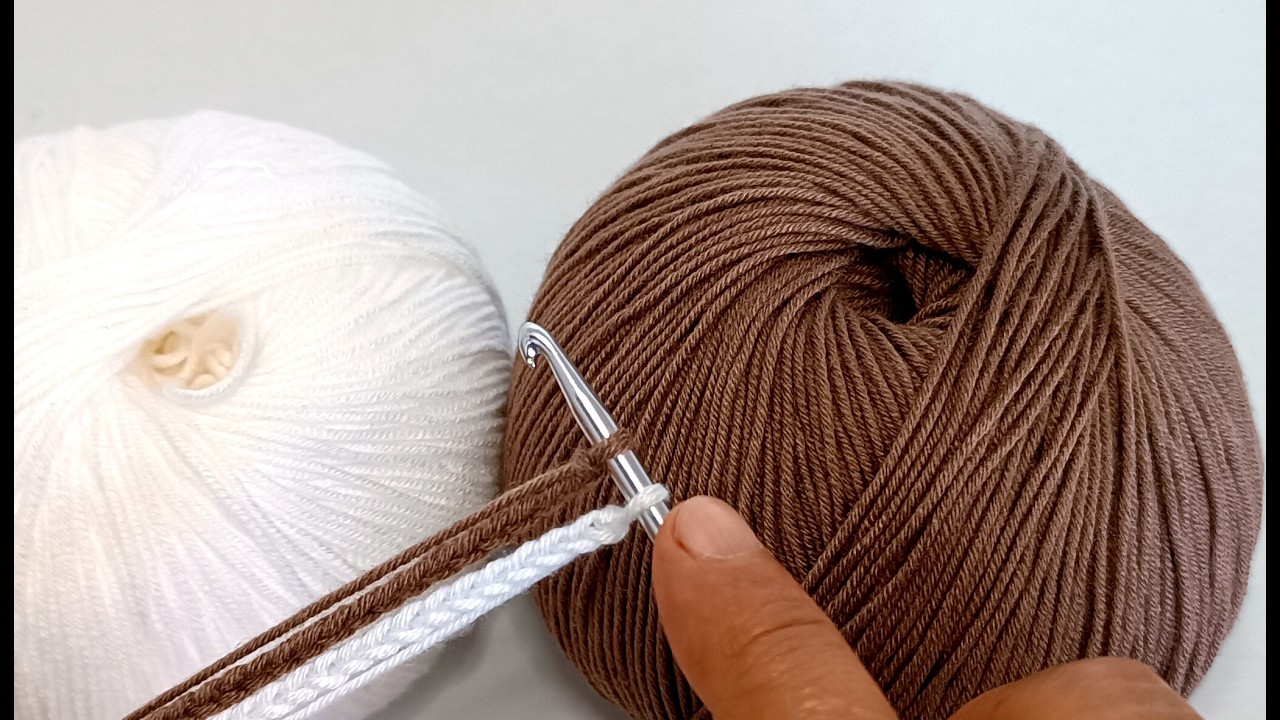
thinner if you wish and the coolest thing about Square is that you can also work with the colors you want, you can change the colors and in this bag you can highlight the flower just like I did in this bag or you can highlight the squares I'm also going to teach this in this video So, leave here in the comments what you think of this wonder, leave a like, it helps the channel a lot and share the video with other people, let's make people [Music] And to start I'm going to use the string number if
here I am working with the Baroque maxcolor da circle and this color here is the one that I will leave in the video description and here I am working with a 3.5 needle for this thread that I am using and here now I go make a magic ring So I'm going to loop it over my hand, pass it under this thread, over this other thread, bring it up, pull the thread from the ball here, bring the thread here in chain loops one and two, staying here in total with three times and in here from my
magic ring I will include 16 double crochets, a loop, I place it here inside the magic ring, I pull it up, a loop, I take two and a loop, I take two more. These little chains that we made are already considered as a double crochet, so here I already have two, I will include here in total 16 double crochets so here is three and I'm going to do up to 16 I worked here 16 double crochets I can now cut my thread Now I'm not going to work with this color anymore I'm going to pull
my thread out I'm going to pull this little thread here from the ring magic to close, touch one point to the other and now for the closure I'm going to use a smaller needle Here I'm working with the 2.5 Needle If you have any other number that is a little smaller than the one we used, it will help to do the finishing touches, but if you don't have one, you can use the needle even though you were making the stitches. Now here we are guys and I'm going to go through it in a more advanced
way and without so many details, just giving you guidance on how to make the Square and if you want, in detail in a calmer way , especially if you're a beginner, it's possible to do it. I'll show you this one. Exactly this Square, done in a very slow and detailed way. I'll also leave it here in the description of the video. It's here in the cards. If you want to go faster, go to the Square video, which will be very detailed there, even if you are a beginner, so here to do the closing, now we,
I have my chains here and my first point here, I'm going to come here in the head of my first stitch, taking the straps here from above, I'm going to loop, pull my thread here from the inside, I bring it back here and I'm going to return to the inside here from where I I then left passing through this Nozinho and inside here in my turn I pull my thread in here and return to where I came from so here we just made a little head for the little chains that we had, we ended up
with 16 little heads of stitches in total and here now I'm just going to hide the thread I'm going to make three little knots and hide the thread inside here to finish I've finished here my circle is ready with the finish I can start anywhere we're going to work between the stitches so putting the needle here in the little between the stitches I'm going to loop now we're going to work with the white thread string number if also in white color I'm going to loop bring it up here loop again to secure the thread I've
tied the thread here now I'm going to make two chains so one and two two chains and I will now make two more double crochets in the same place where I pulled these chains from, these chains will be equivalent to my first stitch, so in total in this row we will make three double crochets and one chain, so I did it here already equivalent to a double crochet I'm going to do two more then in the same place a double crochet and another double crochet so here in my sequence I had three double crochets and
now I'm going to do a little separation chain now at my base point here I'm going to jump two double crochets then one and two and I'm going to come here in the middle I'm going to loop my thread and do it here in the middle So my three double crochets then 1 2 and 3 and a chain I come here I skip two base stitches and start the next one So this is our second row sequence I got here at the end I can't forget to do my separation chain here my last one here
as I'm not going to work now but with this color I can also cut my thread pull the thread out I'll go take the needle to finish and here I'm going to come here not in the chains in the head of the first double crochet then from the back to the front I take it here once in a while I'm going to throw my thread back here then I loop I pass my thread back here and come back inside The chain here, which is from inside the same place where I came from, I go inside
the chain. I leave here the stitch head of the size proportional to the other stitches I worked on and here now to get my thread here to finish I'm going to go through these stitches here, I'm going to go here and I'm going to get down here with the other thread where I'm going to make two little knots, the first one is weaker, the second PR doesn't pull and the second one is very strong and hides it down here and I like to pass it the glue too If you have it, you can use it
so as not to loosen the tips, I finished my finish, I always do it within the color so it doesn't show and now we're going to start working with this other color, this color here, the relief color, I'm going to take my 3.5 needle again and now we are going to work here in the gap, I can also start in any gap, I will put my needle here in the middle of the gap, bring my thread up here and make a loop and this smaller thread I pass it over the larger thread just for it
don't keep opening and here I'm going to make two chains one and two which are equivalent to my first double crochet and I'm going To make one more double crochet here in the same place plus one double crochet so I'm left with two double crochets now I'm going to make two chains one and two and I'm going to make two more double crochets within the same one, they form a fan here, so one double crochet, I'm going to open my thread here, one and two, two double crochets. So that's our sequence, this little fan here,
I come in the next gap and do two double crochets. two chains and two double crochets so do your sequence until the end I arrived here at the end of my row and now, right? In the next row I'm still going to continue using this color so we're going to close our stitch here, our row I have here my chains, one, two and 3, I'm going to come here on the third one, taking only this little strap on the Outside loop, I pass it inside and I pass it inside this one that's on my needle
and now I need to get to this little gap here in my little fan because here we Let's do our work here and we'll include the stitches so for this I'm going to use a slip stitch so I'm going to go inside the next head From [Music] loop stitch I do very low here I pass inside the one that is on the needle and now I arrived here in this gap here now I insert my needle I bring the stitch up and I pass inside the one that is on the needle so I arrived here
now yes I I'm going to start including my stitches so I'm going to loop and make three chains, one two and three to be equivalent to my high point and still within the same space I'm going to now include here six more high points so in total here within my space I I'm going to have seven double crochets, considering the chains here, so I'm going to make stitch number 2, 3, 4 , 5 , 6 and 7, so I'm left here with a fan of 1, 2, 3, 4, 5, 6 and 7, I finished my
seven double crochets, I'm going to loop, come here for the next one here between my fans and here I will include Seven more double crochets, also without separating chains, so go Including yours seven double crochets inside each gap I arrived here at my last stitch Now I 'm going to cut my thread I'm not going to work with this color anymore, pull the thread out, come here with the finishing needle in my first double crochet here, I have the single crochet chain with the chains, I'm going to come here at the head of the first
double crochet here, taking the straps here, loop step from the inside, I go inside the Nozinho here and from the chain I throw my thread in here and here I'm just going to bring my thread down here I bring my thread down here so that it reaches here against this thread, make the knots and pass the glue I finished my finish here too Hiding here inside the same color and now here we're going to start on any of the petals I'm going to choose one here to start I'm going to come here on mine on
top of my high point taking my little turn here and we're going Now work with the white color again So I'm going to loop, pull my thread here in front of the Smaller thread, I'm going to put it on top of the ball thread, I'm going to loop and make a single crochet here, this little thread, we can leave it hidden here as we work we can leave it hidden in this color, we can do it over the stitches, so I did the double crochet here, I'm going to do a double crochet on top of
each stitch head here, so if I have seven double crochets, I'll have seven double crochets, so I come here in the next head I do one more single crochet then single crochet I come to the next single crochet in the next single crochet so here I already have four 5 6 and 7 seven single crochets as I walked here with this thread over it I can now cut that my point is no longer in danger of coming loose So I can now cut here too so it doesn't get in the way I did the seven
single crochets here now now I come here in this little gap that I have Between the petals I'm going to come down here so there's the first gap and the second one, I'm going to come here in the second gap and pull an elongated single crochet, so I bring it up here, my loop up here, don't tighten it so it doesn't get too tight, leave the stitch looking at the size it would normally be, so I leave the loop just fine. stretched without leaving it too loose, but I don't leave it tight and I do
it here again stitch after stitch, the first one will be a little hidden here, my first double crochet is here, I can't forget to pick it up here too and I'll do my double crochets again, so stitch low single crochet then single crochet over single crochet here on top of each head and in the gaps I do this elongated stitch so do yours until the end I finished here I did the seven double crochets on my last petal Mine plus the elongated stitch ending here is my row now I can cut the thread pull the
thread out take the needle to finish and then we have here this first loops we pull the stitch and the second I'm going to come here at the head of the second from back to front loop Pull the thread back here goes back inside where I left So inside this little knot here at the elongated point Oops here inside the little knot and inside my little place also here I pull my thread back here and now I'm going to hide this little thread to here on the white part I also did my finishing here also
in the white part and now we are going to start our next row Our sixth Row with the color we started this color and here I will also go back with Needle 3.5 and here now we are going to start at the beginning of one of the petals so here at Pontinha right after the elongated stitch in this first little head I come here in one of them it can be anywhere to start I will attach my thread then I tie I pull the thread here forward I tie the thread from the ball and I
fasten my thread now I adjust it here and this Point I I'm going to throw it here over my ball thread now I come here to the next stitch in the stitch head and I'm going to do another double crochet, I tie the ball thread and do a single crochet I'm going to do a total of four double crochets So I've already Done two I have 1 2 I do the third 3 and 4 four double crochets made my four double crochets now I'm going to do a half double crochet then loop I come in
the next stitch I bring it up loop and I remove them all at once and now I'm going to do a double crochet loop I come in the next one I do one double crochet and one more double crochet in the next double crochet, this is already our preparatory sequence for the Quina and right here on top of the elongated stitch I'm going to do the double crochet then loop twice I come here in the head of the loop stitch take two loop take two more and loop take two more I did a double crochet
now I'm going to make three chains 1 two and three and inside the same place where I did my double crochet I'm going to do one more then loop twice I come here to the same place and I'm going to do another High Point double loop take two loop take two more and loop take two more I'm left with a little fan here that will be my Quina's place now here we're going to go back to the same sequence that we did here we let's go back here so I'm going to do a double crochet
in the next stitch here on top of the double crochet I'm going to do a double crochet and a double crochet in the next [Music] stitch in the next half double crochet and now here the sequence of four double crochets 1 2 3 and qu So this is our Quina sequence we have a Quina here we are going to have a total of four Quinas here now we come again to the elongated high point so in this one in the middle of our Quines we are going to make a half double point instead of doing
Quina's lequinho so here half high and now here I repeat the same sequence that we had done so I'm going to start here again with four double crochets [Music] 1 2 3 and that one half double crochet or two double crochets one in each stitch then a double crochet plus a double crochet in the next stitch we arrive again at our Quina where we are going to do the little fan here now on the elongated stitch a double crochet [Music] double three chains one 2 3 Another double crochet in the same Place and now we
go back to the Quina part here so I'm going to do a double crochet plus a double crochet in the next [Music] stitch a half double crochet and here now four double crochets 1 2 3 and 4 and arriving here at the elongated stitch the half double crochet So this is our sequence repeat one then this sequence we have to have a total of four Quinas here I arrived here at the end of my career meeting the place where we started and here I ended with a half double crochet now we're going to continue working
with this same color so I'm going to close here with a slip stitch here in this head so I come here in this little loop I'm going to close here with a slip stitch which is this first loop of the second stitch and now here we're going to start here in the second stitch where we we pull our strap So I have the first one here and I'm going to come here in the second one I come here in the second one taking the two loop straps here and I'm going to start here making a
single crochet loop and I do a single crochet so I made my first stitch here now from our seventh row and In this row we are going to do a single crochet over each stitch until we get there. Then I do one more single crochet and one more double crochet, I continue with single crochets until I reach my corner and here I made a total of eight single crochets so my first 1 2 3 4 5 6 7 8 in this gap between one Quina and another we will have a total of 16 stitches in
all rows we will have 16 stitches around here between one Quina and another here we made eight which is exactly half why we started here in the middle so I made eight double crochets in total and now here within this little space in my fan I will include two double crochets 1 and two I will make two chains one and two and two more double crochets 1 and two and after doing here in my corner I'm going to start my sequence of double crochets, do the 16 double crochets, I'm not going to do it here
on this double crochet, I'm going to start here in my double crochet, the first double crochet that I have, so here I'm going to do mine first single crochet and now counting with it the sequence of 16 single crochets I made 15 stitches here and my stitch number 16 will be here at the head of the double crochet Here so here I have the sequence of 16 single crochets starting here with the first stitch high now I'm going to do the Quina again with two double crochets, two chains and two more double crochets, one and
two, I come here at my high point and start the sequence of 16 stitches again, so here my sequence is this 16 double crochets in the straight part in the corner two double crochets two chains plus two double crochets and back to the 16 double crochets I arrived here at the end of meeting the half where we started and here I made eight stitches and my eighth stitch was right on top of the half double crochet here now I I can release my thread cut we just worked here with this thread and now I pull
the thread out so we can finish and here we come to our first stitch So from here here I have my half double stitch and here from here I have one point over the other you can see here one point over the other so we are going to make this closure go over this first one here in this little ring we are going to make the closure here in the second one so here we have the first one, the middle point high here Here the first point over the low point and here in the second
we are going to take the head from there to here we are going to pull it we are going to do it as if we were continuing here doing it over this other point that is already here which is the point down and let's go back here over this other thread here we pass inside the Nozinho and inside the little place I pull the thread back here and here I also walk with the thread here behind until we reach this other one to finish and here we finish, I'm going to pull it a little bit
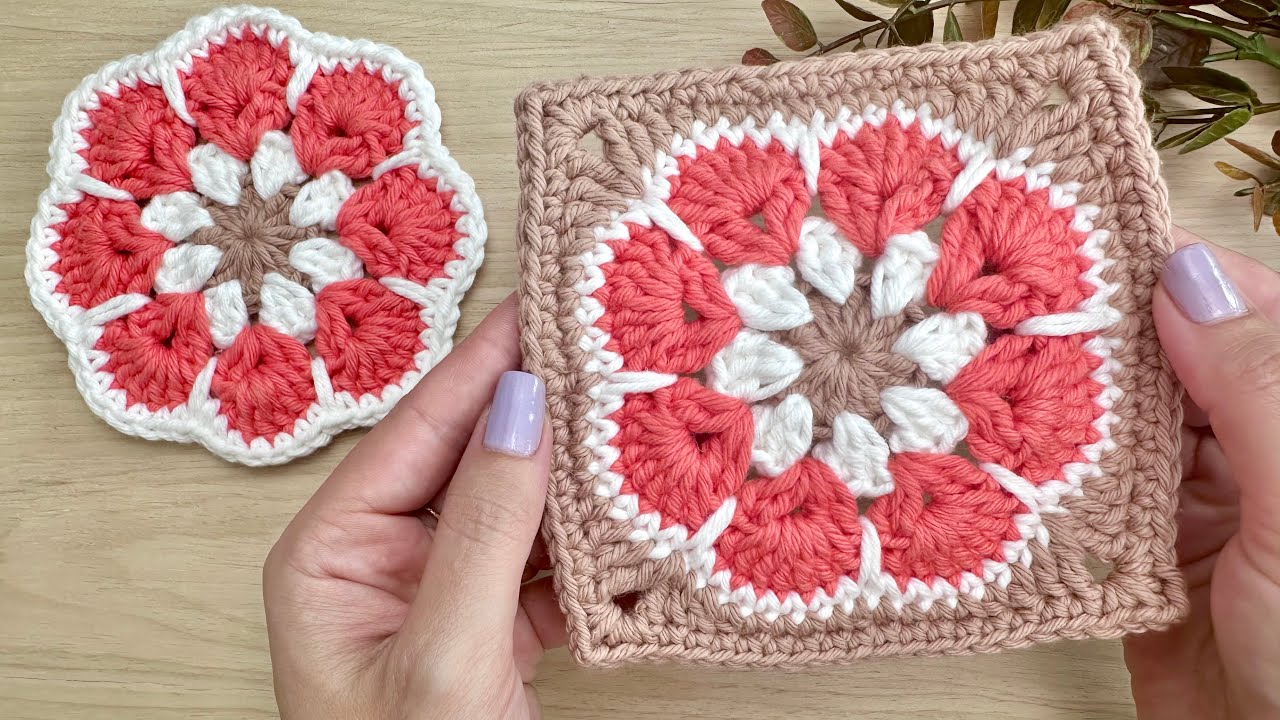
to make it the same proportional size as the other heads. So look, it looks like this and here we have it, and not counting our Quinas, we 're left here with 16 little heads 1 2 3 4 5 6 7 8 9 10 11 12 , total So we've already made one, let's make 12 more for the bag in this format that I'm going to show you here guys, I drew them by hand, even though I'm not a designer, OK, but I wanted to bring them to you so you can know what the assembly of
ours will be like. bag so here will be the strap and here we will have on the front we will have five squares placed like this so 1 2 3 4 5 so Here we have five if this is the front on the back we have five more So there are already 10 and then we will have these three squares here which are squares that will be folded in half so these here are whole S squares and these here, this one and this one will be squares that will be folded in half to make the
junction so this It's going to be the shape of our bag, that's why in total we use 13 squares, so leaving the paper the shape of our bag, I put it together here so you can see it will look like this. So the entire squares are here 1 2 3 4 5 and the folds here they make this shape closed in the middle and then here the front part we have to have two parts that's why we have five more which will be the back part of the bag and it stays in this shape so
here we have the 13 squares, good guys, so here I've already marked it, I put the markers here at the junctions of My squares, I put the markers on this side here and I put the markers on the other side, also on the back separately, first I put the ones on the front, I turned it over and I put the one part from the back, so it is already assembled and as we place it, I will just release the marker from the place where we go and move it and here remembering that the Square When
you are going to place it You need to place the outside part towards the outside, then the Square it It has a front and a back, although it has a very nice finish, so very perfect . it remains with the little threads but with the more details appearing from the more complete thread at the back we can already see the little dots that have the knots at the back So that's the difference so we put them in Remembering that all forward we are going to start our sewing here we do it in a straight line
So here we have a straight line here we have another one and then it goes over to the other side and continues in the same way here the same thing we have on this side It goes around and ends here on the other side and the same thing here we have the straight line here and we also have the straight line here so here is the top part of the bag we are going to start here in this Quina from here so we know where we start you can see here the Quina our Quina is
composed through two stitches, two chains and two more stitches here we are going to work on this first little head that we have here at the tip which is equivalent to the Quina so here before the single crochet So we are going to take this little point here let me take the needle here to show for you, so here would be the little head of this first point on this side, it's this one where I'm going to take one before and the same thing when I look here on the other side I have here my
last point here before the Quina My little head I'm going to work on this one first, which is this one here, okay, so we're going to work on taking these two points here to make our Quina, so I'm going to put the needle here so we can get it ready, so I have the two points here, here I I have the Quina where I have my stitches, my chains, so Here is the head of the first stitch, I'm going to come one before, which is right in the middle of the Quina. I'm going to fit
it here on this other side so here I also have look at the four stitches let me take another needle to show you and the middle of my stitches here where I have the chains right that forms this little space so here we are going to work with the Square turned here so I also need to work on the chain so here my first point is this one here my first point on this straight part is this one his little head is this one here would be his little head so one before that is this
little chain here I will also just take it here in the strap here on the outside then in this place here so with the same needle that I inserted here in this Square I will come here and fit this one in this other one here also taking only the strap on the outside so I will fit it here in the chain we will always walk taking it on the inside straps So look here I have both of them on the inside straps together, here it's always on the inside straps, so my front straps Are here
and here mine, my inside straps are this one and these are these two of all the temposin OK, so as we pick it up, first we're going to fit the needle into this and then we're going to come here and fit the needle into this one from the inside, on top, we're not going to get it by bringing it up here, we're not going to get it here because our thread will be down there So we're going to do this movement, I put the needle here, I come here in the next notch in the middle
of my chain and here in this movement I'm going to loop and get the needle down here so I'm going to do it here in practice, I'm going to get it here now and work with my yarn in the color that I made the last part of my Square here guys, if you want to work for example in another color you can also do this detail that we are going to do here is the joining of the squares in other colors You could work, for example, with white. It would be much more eye-catching. But as
I want the highlights to really be the flowers, I'm going to work in the same color so that it looks neutral so the flowers stand out If you do it, for example, with white or Even pink, it will give a very detailed highlight to the squares, okay, so that's preferably here, I prefer the highlight to be on the flowers, that's why I'm going to work in the same color that I finished in the color cque So I've already inserted my needles here or rather my needle here in the two squares now I'm going to loop
it here underneath, I leave a little space here, just a little bit to do the finishing, I take it down here and I go pass through this [Music] looped my threads down here this thread from the ball will always be here under the bag so I will always pull it here inside the work it won't always stay on top here below inside here I'm going to hunt it down there So put this one, leave it here so you don't end up finishing on the smaller thread, leave the ball thread here and now let's go to
the next one the next chain that we're going to do here the important thing is that we always leave it the laad is proportional to the stitch heads that we have, so try to keep it the same size so that it looks really nice. This finish brought it closer here to Make it better visible, so I worked here at this point, I'll come to the next one, taking it here and the next one is here, so always in the middle of my stitch head, I come back here, I leave a little thread here, I take
the thread from the loop ball, I'm going to bring it here inside and here inside and inside this thread that is here on my [Music] needle, I come to the next so my thread came out of this my next one is here I come in this one I come in the next one I look for my thread down there Here I look for the thread I go inside I go inside and inside the loop that is on my needle as we do this it goes like this more automatic it's at the beginning we need to
repair it well then it goes we don't need all this detail here to do this finish we end up getting through it even easier inside the three and so I'll walk people until we get there at the top, then, always taking the middle here, in the next loop, the thread of the ball, I pass it inside, I pass it inside, and I pass it inside, I will now do one here, passing it through the inside of the three so you can see that later, as we get more practiced, It will go more quickly, we just
learn to turn and position the needle in a way that makes it easier for us to pass through it faster and that's the important thing is whenever I pick up this loop I'm going to pick up this side first, I continue like this until the end first this one , then this one , so I always continue in the same sequence, so first I'm going to take it here on this side and then on this other side so that our finish is correct. I try to make it proportional, always trying to keep it the same
size here so that it looks exactly right and I arrived here on my first amendment to do it together with you here, I already released my marker and stayed here with the four dots, so just so you can see here I already walked all this way until I got here where I will now find four points so here now we are going to do the following I walked here until the last point until the head of the Last Point where I have a low point so you can see it is here here I I have
the Quina and Here my Other low points begin so I worked here on the last head on this side here the same thing on the last head on this side I have left here now the ends so I worked on that I worked on that now the next one is the point of the Quina which is already my first one from the chain So I'm going to take this one and I'm going to take this one on this side, just continue normally So I do one Quina here I do the other Quina and I do
a step here inside and now I'm just going to continue with the next ones here I also just need to identify where that so remember that we have the little chain here, right here is my little stitch so my first stitch here on this row on this side, my first is this one here so here it is in this little loop here that I'm going to take here and here on the side of here just identify Where are my stitches here, my little one is here, my little chains are here at this little point, so
my first stitch is here, the first little head is here, so my first stitch is here, so it's in these little straps here that I'm going to get it, so, I come here. on this side Or better here, taking the inside strap and here, taking the inside strap, loop here my Thread, I pass it inside, I pass it inside, I pass it inside, and here I already have my first Quina, now just continue, I'll come to the next one. I come to the next loop and go inside so we just continue as if it were
a sequence, really using the dots with dots here and they will stay like this, they are loose, they are only joined here in the middle and mine are now ready here to be worked on when we do this side here and now just continue here, the piece here, I've already released it next time, we'll also go through one more junction and then we'll have this other end here, which is the end here on the bag and here I've already done the whole straight part and arrived here at the corner Here I worked on my Last
Point so on the chain here and on the chain here and turning here it's my chain on the corner it's already my chain that starts this next one career here so I'm going to place it here in this corner and I'm also going to take the chain on this side, my thread needs to be here so I can pull it later, so here I have my last stitch here, the head is here and it's at this point here that I'm going to take it from my chain, so here in this place I take the loop
thread, I pass it inside this one, inside this one, I did this, I turn my piece and I'm going to continue also now here on this side, I pull the thread up here, I come here next time I'll take it here and I'll take it here next time, just keep really following this same pattern that we're doing, even though it's here in Quina, we consider this edge here together with this one now and now you continue doing this whole straight part here until get here at the other beginning here where we started and here I
walked to the end and arrived here at my little point right where we also started so we went around I went around here I did this whole part I turned around and I'm getting here where we started so here in this Pontinha I'm going to make my last stitches here so I'm going to take this one here with this one here I'm going to loop the thread of the ball and do the slip and now I've arrived here in Pontinha so I'm going to do This last one here I'm also going to take this one
here and this one here and I'm also going to go through the inside so that it reaches here from one end to the other now here I can cut my thread pull the thread here out this thread that I left out here for now I'm going to leave it here so here I just did this part here going around and now I'm going to do this other part here Parallel this part which is a little smaller it comes from here it goes around and comes here we're going to do exactly the same as we did
this one here we're going to start in the same way in the same place and we just go and work here at the junctions and we're going to do exactly the same until we get to this other end, oh guys, an important tip, I'm also starting here now we went to this side so I started here and walked like this and went around to finish here in this back part so we also start on the same side in the same direction that we started so that our chains and our finishing veins Are all on the
same side so there is no one up and one down so here I started here on this side, I will also continue to always start here on this side of the bag, not on the other side, otherwise it will go in the opposite direction, so I made my second junction here, I made the first and the second here, but now in reverse I will start with this one, which is the smaller and then I'm going to do the biggest one last because in this last one here I'm not going to cut my thread so we
can start doing the handle part here so we start here with the smallest one here I left my little thread of what I just made then we can do the finishing and I'm going to start here with this one, we're just going to go over it, so start yours and then I'll show you here making the junction So now I need to start on the other side so that my veins are in the same direction, so I turned the bag over here. So I'm going to start from here on the smaller one in this smaller
part so that my veins are also facing up, so, oh, here's mine vezinho was up here it was up so I also need to start in the same direction to get this detail here of these vezin That form this little chain here from the finish to the same side and there are two more left for me to get to the junction I'll do it with you so I'll take it here I'll go through inside and now I'm going to do the last one here here loop I step inside and now here I'm just going to
go over this finish So I'm going to come to the next one which is Oh this one I worked on here so my next one is here on this one And here where I have here the little head, the next one is this one here, this one here refers to the little heads here, so my next one is this little corner here and I'm also going to do it like this, going over here, try not to leave it so open, so let's adjust the size of the wire here so that Don't leave it so open
so it doesn't have such a big space, leave one always trying to be normal size, this one is a little big. I'm going to come back here so it doesn't get so big. So I'm going to pull it a little so it's always proportional to the size. the ones we do To make it look really nice, a really nice finish, so now I'm going to take it here, I'm going to go inside and here, I'm just going to go inside, I'm going to continue or better yet, I'm going to go over it and I'm going
to continue here just continuing in the normal sequence I made the last seam of the straight part here And Now We are not going to cut the thread this time here we are going to continue now to make the top part of the bag the part where we have the handle So right here in this first little stitch that I have here I knot I left this place in the middle and we're going to get right here at the corner of this first little head and now we're going to work instead of working just on
the strap, we're going to get the two straps, not just one, so I put my needle here and from here I already I'm going to do a single crochet then I'll make a single crochet and I'll do a double crochet and I'll do a double crochet over each stitch until I get here at the tip . which precedes the pout right here and this other one also which is after The pout so here I'm going to make a point before this place on the corner is just one so I put it here right in the
middle of the Quina And I continue here in the next ones also a point on each point I I'm going to get here to the next one here where we have our next gap our next junction here and then I'll come back with you I'm coming here now to my qu in and here remember I told you to cut the wire and leave a little piece for us do the finishing as we are finished in the same direction the two points are here I'm going to make two little knots here at this point the second
one I can make much stronger and then just hide the thread here inside the weave and apply a little glue the same thing here on the other side I can do this also here on the other side so together here the threads are ready to make the finishing pass the glue now here we are going to do the following I'm getting close here I still have this last one here which is the one before the Quina I have this little head to make the stitch I'm going to do a single crochet Here and now I'm
in my Quina so my Quina is here I'm going to put it here in the middle I'm going to come here in the next Quina of my next Square and here I'm going to do a very low so I go inside this step inside these two here I did the very low point now I can come to the next little head which is this one and do a single crochet and from here continue my career in single crochets until I complete my round so look I did the low stitch here, the junction looks like this
and now I'm just going to continue Remembering my Quinas I make a stitch And I'm still here we have another finish so V let's do it up to here and then when I get here I'll show you again how to do it here the combination of the two We are going to do the corners in the same way as we did, I did my Contour here, I arrived here at my other point here, I also have the two threads, I am also going to tie the two knots and hide the threads here inside and now,
continuing here, we are going to do the same something We did there on the other seam too so I've already done my last single crochet here, I come to the corner of this Square on the corner of this other Square I do a slip stitch passing through everyone here to keep them close together and now on the next low crochet, here we go When we catch it, it's at the very tip, okay, it's not in the little space we have, it's at the tip here at the head of the stitch, let's continue our sequence now,
we're going to go all this way around, we're going to pass again here in the middle where we've already done the Nozinho, let's go do the same thing that we did here in this other place and the same thing that we did in this other place until we arrived and went all the way around where we started our low points here and here people to take advantage and hide these little threads here that we gave the little knots we can do the low points on them because it is already a way of hiding so when
we place the low points we are already doing them, leaving them Parallels here at the back of our work, leaving them here close and we are already hiding them the threads, we don't need to pass them inside afterwards to place them, it's inside the weave And you can hide them as we make the single crochets. I arrived here on the last Quina meeting the first single crochet that I made, which is right here and here we are going to do the following to join the two points here. So I will place it here in the
center of my point of my Square as we were doing and I will also take the first head of the double crochet that we made, my first double crochet is here you can see that we went up here and we've already done this single crochet here so I'm going to take the two loops of my low crochet here and I'm going to loop it Oops here again I'm going to loop it and pass it through the inside using a slip stitch so I go through the inside I go through the inside and I pass through
inside I made my slip stitch from here we're going to start doing the whole circular row we're not going to do any more closing we're just going to continue the sequence over the loops which we're going to do now too So from here how are we going to do the circular rows Here This is the part, let me enlarge it a little here for you, this is the part where we have the corners, here we have the sides and here will be Our handle in these little points, here our handle, we will build our handle
here and here are the ones on the side, every time we get here to these little points on the sides we're going to skip a point on each side so here I'm right in the middle I have this little dot here and this little dot here whenever I get here to do the continued, we're going to skip these dots so that the bag doesn't start to open because if we do the low dots over them too, it will start to make a little point. So as we don't want to keep the bag's straight pattern here,
we're going to skip these two dots so here I am in the middle if in the next round I'm going to jump here I need to jump this one this first one and come here in the second So right from here where I'm leaving with a slip stitch I skip this first one I come to the second one to do the slip stitch here, join it well so that there isn't a little space, that's it, I joined it and made the low stitch here and I'm going to continue until the point here let me turn
it now we're already working here on this side I'm going to get to this point here where we're going to make the handle also in Single crochet stitch over stitch I arrived here at the tip and we will start from here to make the last stitch here from the top point which is the very point of Nossa Quina and from here I will make the chains that will be our handle So, we will make the chains in the quantity you think is appropriate for the size of your strap. I made mine here, mine, I made
a total of 80 chains. If you want it bigger, you can make more chains, and if you want it smaller, you can make this strap. less chains, mine I made here with 80 chains and now here we let's attach it to the end of the strap here, it's important that we leave it without twisting. So look, it's facing forward and I attach it while still facing forward so that later we can fit the stitches easily, so I leave it very straight without twisting it properly. from the front and I'm going to attach it here with
a single crochet right here in my Quina stitch, then I put a loop here, I do my single crochet on the strap and on the bag, leaving it straight here, I'm going to continue here until our next Quina and I'll come back with you, I got here at the corner, remember that I told You that we are not going to do the double crochet here on these two here, we end up skipping this one and not doing it on these ones, we are going to do the double crochet here instead of the double crochet. So
we are going to take this one here, this little point with this little point and we will also close with a slip stitch to join these two sides here with a slip stitch. Now I come to the next one and continue making a single crochet in the next single crochet, I'm going to go through one more corner with you and then I'll also show you Quina again now here we are getting to the part on the other part on the back of our bag so up here let me zoom in here to show where I
am here at the top is where we need to make our handle so I'm going to make it walk with bottom stitches Up here at the middle point I'm going to make the same number of chains as you did on the other side, in my case here I'm going to make my 80 chains and add them here also at my top point so I made my 80 here chains, ensuring that they are facing the front, I'm going to come here in the top bay stitch, right in Quina and do the low stitch And here I'm
also going to continue doing the low stitches until I get here in this Quina where I'm going to do one more with you, I got here so one more Quina I have here this stitch in the middle and this one here so I'm going to do the double crochet on this one with this one here I go inside I go inside and I pass inside and I'm going to continue here in the next one doing double crochet here I'm going to continue doing the double crochets Until I get to the strap to show you, I
got here on my chains, our chains are made like this, they have two straps here in the front and they have a little knot here on the back, so when we go to get them here inside the chain, I'm going to take them leaving just this one from the bottom here to the bottom and I'm going to work on the chain, the strap at the top plus the Nozinho here at the back so I'll have two strands here to hug instead of just one so here I'm going to do the first one single crochet on
the chain, I'll come here on the second one, leaving just the bottom strap, see I'm going through just one, then up here Are my other strap and Nozinho also here at the back, so this way it has a pretty finish here because we are leaving just this lower part and we embrace a larger quantity of threads so it doesn't open up, we embrace two threads here instead of just one and here with each chain I make a single crochet then a stitch down here for each chain like this it will look like this and I
will continue here Leaving it always facing forward until I get here at Pontinha I finished doing the stitches on my strap Look how cute it looks on the front back I got here until my last chain here I also worked on the last chain, so it's like she made a little detail for each point that I have, so in each point under each point that I have, I have this little detail which is the little detail of the chain, so I did it here until the last one and now from here I'm going to take
the two stitches again and do the double crochets and normally follow stitch after stitch here we're going to go through the corner again and we're going to start our loop here at the corner If you have any questions come back to Previous corner is exactly the same way we are going to do it and here in the loop we will also start as we did here in this loop so Take your turn, we will do the continuous turn going through another Quina also in the same way and when we get here again at the tip
of the strap I'll come back with you to show what the second row of the strap will be like, I went around and arrived again here at the strap and here at the strap I'm just going to continue also doing the single crochets also taking the two straps we're just going to continue in a circular way doing it here also on the strap and we're going to make the handle here as thick as we want. So the next number of turns we're going to do with this in mind, the size we want the handle to
be, so here I'm going to make another row, it's going to be here like this thickness considering the two rows and we will increase the number of turns here, it will be enough for us to make the strap in the desired width. I finished going around My strap, I made the chain and then I made more than rows 1 2 3 4 four more rounds and I arrived here at the end I will finish with you if this width of the strap is already good enough for you to finish, leave it like this If you
want it thicker just keep doing more rounds of the round This one mine was 2.5 C wide and to do the finishing here I've already come this far one point before the last one that we make by joining the two, I'm going to do a very small one here at this point in the next one and I'm going to pull mine thread inside here, take the thread out as I already cut my thread, I'm going to come here, not this way, I'm going to come to this one, I'm going to take it from the inside
out, pull my thread and now I'm going to return it here, inside this point that we we did, let me turn it here, I'm going to go inside this little knot that I have here and inside the stitch ring, so I take it here and the stitch ring, I pulled it here, now I'm going to go inside and throw my thread inside here I leave It in the same size as proportional to the other stitches and here I finished my Quina, my Quina ended up like this, let me show you, it looked like this with
the decreases we made and now this little thread I'm just going to finish it here inside and all my little threads that I still have some finishing to do I'm also going to do the finishing now at this moment Our handle is ready finished the bag is almost ready There are just more of these l Lis for us to finish because it was left with this opening as we did here the straight part there are still these two little pieces left here so one I've already closed here to show you how it will look so
closing it looks like this it's exactly the same as we did but we're going to do it now just in a little square which are the little squares at this point that were one on each side so I already put my thread inside there is already a point here for me to start here from the inside and I'm going to start it here under this part from the bottom to the top because doing it this way I continue here I'm going to go up my Work and as if it were continuing here one and it
doesn't matter if one is going to face downwards the other will end up facing upwards but as here on this other side I went up too so this one I'm going to If you want to do it going up, you can do it going down, also starting here at this end and coming down here is also no problem because it continues anyway in one of the parts of the squares and here we are going to do it exactly the same way as we started there we're going to take here one before it's from the first
point so the head of my first one is here and my first one before it is here so I take it here too, always on the same side starting from here to here and the other one here my first head is here after the Quina, so the before is this one, I took them both here, I put the thread inside here and I do the same thing very low here, we're going to hold the thread so it doesn't pull it completely, leave a little tip inside and here I'll start, I'll come next time so I
worked on this, my next one is this one with this step on the inside, step on the inside, step on the inside, I pull the Little thread on the inside here to adjust the Quina right here and here I'm just going to keep going up when it's inside, we put our hand inside to hold the thread here completely inside to make it easier. By holding my thread here on the inside, I make it easier here when doing it the last stitches I'm going to get here to finish with you I got here to my last
stitch Now I'm going to cut my thread that's inside here so I'm going to [Music] cut I cut my thread I'm going to pull the thread to Outside, I'm going to take the finishing needle here for me to make it easier and here as I'm going up I'm going to hook it to the one that's going up so it stays in the same direction so you can see that mine here, my Elinho is up here, I'm going to continue here in this from here, which is also going up, so the stock market is like this,
I can either take this or take this one, so to continue in the same direction, this one is going down and this one is going up, so I'm going to take the one that's in the same direction as it's going up, so I'm going to come here from back to front as if I were going to hug this point here in Quina, I hook it here Inside, I go inside it and now I need to go back here into this same point where my thread came from, so for that I need to put it there
now inside the needle inside I'm going to come here and fit my needle here without looking it's a little harder to find but we can find it here by putting the needle inside coming out here in the same place where my thread came out and I'm going to pull it now he went in here, I hooked the needle here, now I can turn it inwards, pull my thread all the way in here and now we can see if it was correct, so he hugged the stitch as if he were continuing to make a little turn,
as if he make a Quina so it's going up like this and it's still here like this it looks very pretty in this finish and now here this thread here these little points, right, that was the little point where we started our work here we started here and we finished here so these two little points that I have here I'm also going to open the thread and finish it for this side and open it here and finish it for this one and here people, with all our sewing part already done, I put The label here,
you can put it personalized If you have it here, I I thought the silver one would look better instead of the gold one, but I like it too And you can also add a small border label as a suggestion. If you prefer, here on the Pontinha, or on the handle or even on the bottom of the bag, down here, but I also like it more to leave our identity when we do a job and here I separated a magnet for us to put here as a zipper on the bag, this magnet here that I separated,
it is the one that can be sewn, so it has two parts and we it only attaches by sewing the edges here, we can sew with a normal sewing needle, a needle with a very fine sewing needle and a sewing thread that is close in color to the work we are doing here, I will use the silver one since I made it Also here the detail of the brand in Silver I'm going to put the Silver ion you you always follow the color So if you work with gold try to always put a little gold
clasp to match the accessory pieces and here I've already put a part on one side of the magnet, the other one, I will show you here How I place this sewable magnet, we can place it with a sewing needle or we can also attach it with a small piece of thread, we can even use the thread of string, which was the thread that I attached here the same thread that I worked with and here I can also use the same thread if it fits here for the passage here where we pass the little thread or
I can use a thread of a similar color, this thread here that I am working on is a thread It's the charm thread, it has a very similar color so it disguises it here so I can attach it, I could also use the open thread . and it will be very firm too so we have these three options to use the normal sewing thread this thread another thread that is close or open the thread we are working on and here I have already tied it in four with four parts look separate four little wires for
each side I'm going to put it here to leave it in the same place where my zipper is now and I'm going to put it here to see exactly the place where I'm going to attach my magnet, I saw here the place where It will stay I can now hold this side here so I can start sewing here and here I do it as follows I take my smaller needle here to be able to do the finishing touches to make it easier I'm going to pass it here through some small threads that they are tighter
then Oh, I have this little thread here that is very tight, I'm going to pass it inside this one, I'm going to pull one of the threads just inside here and I'm going to pass it inside another one here, so Oh, inside another one, it's good that we actually take two strands so that it stays very firm, so I'm still here on the inside, I'm passing through two so that it stays very firm, I passed here through two and this one I passed here through just one to bring it a little more here so I
can make a little knot further here and here at the back it doesn't appear, ok, so I didn't take the weft back here and here I'm just going to make two really tight little knots, hide my thread inside the weft here Where it doesn't show, don't go there either to the back there I put the knots and hide the thread here the same thing I'm going to do here on this other side and that's it, it's stuck here and Hiding here the little ends of this one that I already put in the finished bag look
how beautiful it looks, wonderful and the zipper here is also super secure on the inside, it has a perfect finish, exactly like on the outside, we have the stitches on Avesso, but it looks very, very beautiful on the inside, too, with the same little flowers that we see on the outside here, in case you want to add a lining, you You can also add it, but just like that, it 's already wonderful on the back, the same design here on the front and our bag is finished and finished, well guys, I really hope you enjoyed
making this bag that 's yours, it also turned out amazing and wonderful, leave it here In the comments let me know what you think, leave a like, it helps me a lot and share the Video with other people, thank you for staying with me, kisses and see you in the next video [Music]