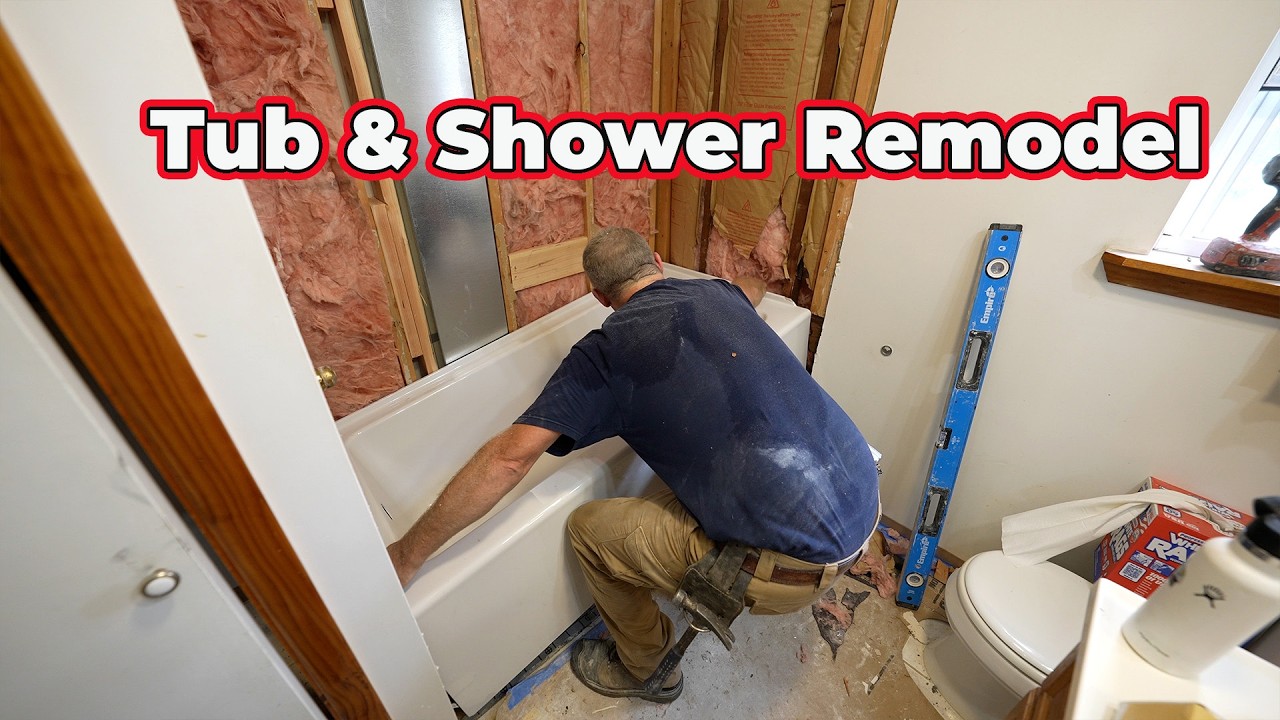
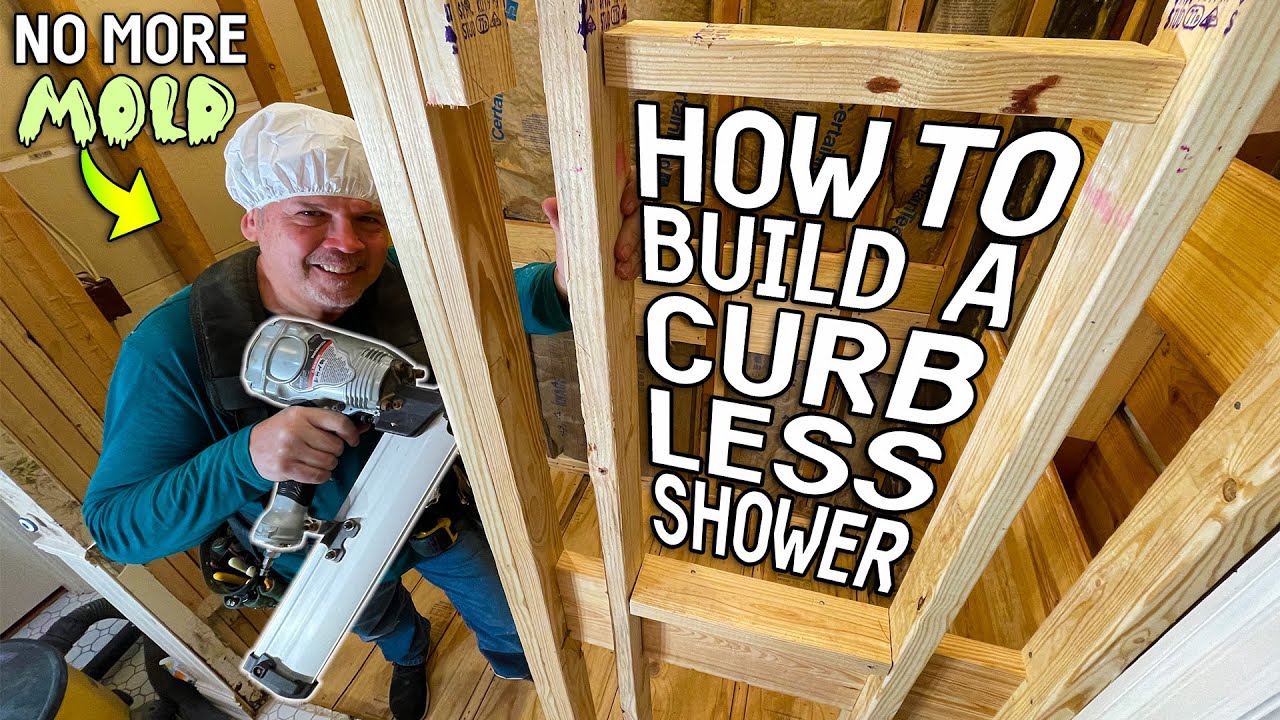
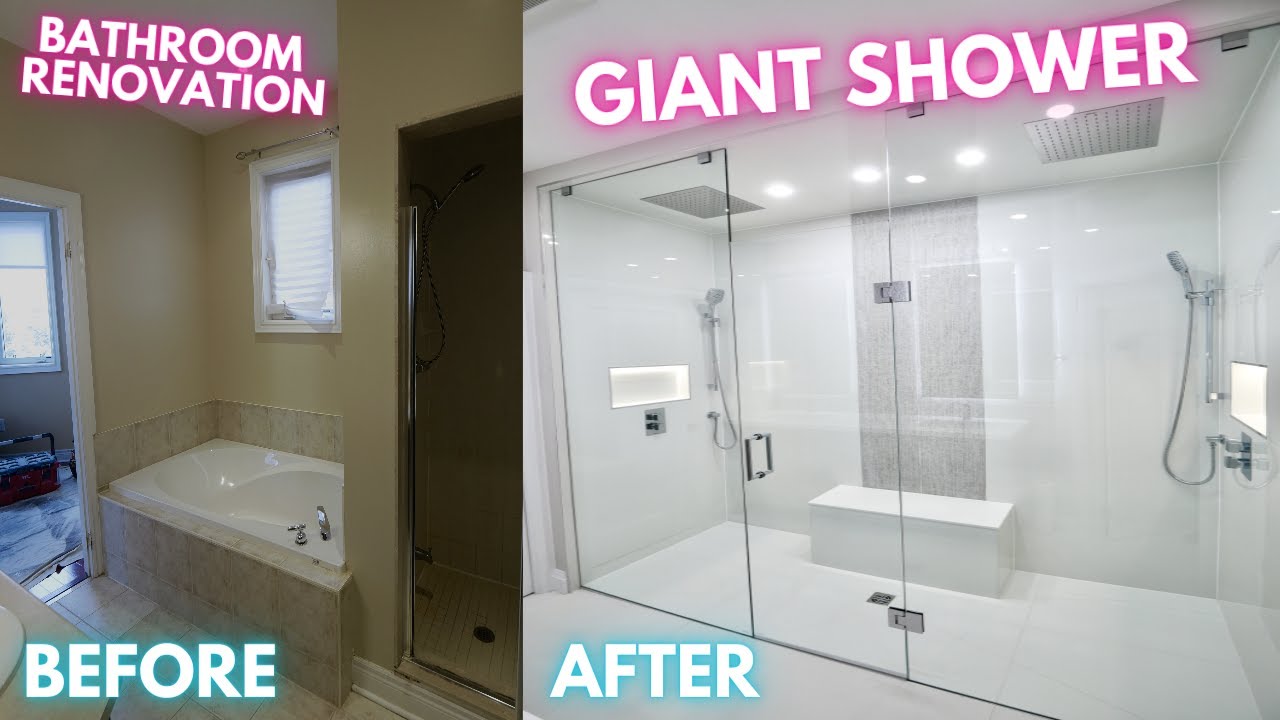
all right boys and girls this this is not shower this is a phone booth with a water source not enough elbow room no no not this but we have kids we don't time take baths so we're gonna knock all this out and give us one good beautiful Rumi shower so that wasting time is a little movie magic I'm gonna take this face and turn it into that so that wasting time let's get into the video let's go when it comes to taking on any kind of demo work the three basic tools necessary for the job
is a pry bar or a hammer and a stiff putty knife you can't go wrong with these tools to take on almost anything if you have no clue of what to get I'll link some of my favorite tools in the description for you guys to check out if you'd like what am i doing let's not break our legs folks let's be safe one thing I do want to mention to you guys listen a lot of people go like oh I wish I have good skill I wish I somebody Tommy really taught me I'm any formal
training I was never in truth what I did do is I broke stuff like this and then I saw how Wu's made as I was breaking and then I tried recreating it but slightly better that's it so try can do it you can do it there really no rules about demo work the only thing that I would advise you is to make sure the plumbing and electrical is turned off to prevent a bigger mess and from that point on just start inserting the putty knife or a pry bar and start pulling things off or better
yet hammer it until you can catch some leverage just be safe about it and use goggles and glove and one thing I'll say is if you make a bigger mess well that's just an opportunity to learn how to fix it did you see that white inch-and-a-half PVC pipe running down the wall well it's a vent tube it's used to allow for all the sewage gases to escape out of the house and to the outside there's basically one in every bathroom and anything that has a drainage system it's an absolute must to have a vent tube
and since we don't have a bathtub anymore we can just get rid of this vent tube cap it off and just keep the vent tube for the shower easy fix the shower requires a black 2-inch drain with a trap so we are capping off the small drain from the bathtub and rerouting the large black shower drain to sit in the middle of our shower the trap is required to create a water lock to keep the stinky sewer gases from back flowing into the shower all of this is super easy it's essentially like putting together Legos
but also gluing them more permanently so here's the thing since I'm going to have both a water rain feature coming from the middle of the ceiling as well as a traditional removable water spray handle coming from the wall I still had to remove the old water lines because I want the ability to turn the shower on for the water to actually warm up and not freeze me without having to get into the shower so I would need to run the new water lines from the ceiling instead of the floor to install the regulator by the
entrance all right boys and girls a really cool part right now we're gonna be doing the water feature coming down the middle the waterfall and then the 45 showerhead as well the way we're gonna do it is the PEX piping is going to come running across the attic and then it's gonna come into this drop here this secures right into the studs and the PEX piping slides in here and then this is where the shower head will come in but in the meantime we're gonna cap it all off we don't need to make a bigger
mess with water except this time so that's how that's gonna run in then we're gonna have another one so basically to PEX piping more the story guys super simple you can do it I can do it we can all do it just give it a try what's the worst it can happen flood your house when running the new water lines I'm using half-inch PEX piping connections to a half-inch drop your sharkbite connection which is basically a 90 degree brass elbow that attaches to a 2x4 with PSM screws will allow for a showerhead to actually screw
in when I'm done since we're not ready to connect our new showerheads yet I'm using a half inch galvanized pipe with a cap to temper include the water line so well obviously I don't flood the area once all the plumbing was done I patched up the subflooring and reinforced it with an extra sheet of OSB for added support now speaking of overkill it might be a little overkill to make my shower 1012 feet long so I to stay a little humble I only moved the wall two feet to make the shower seven feet long now
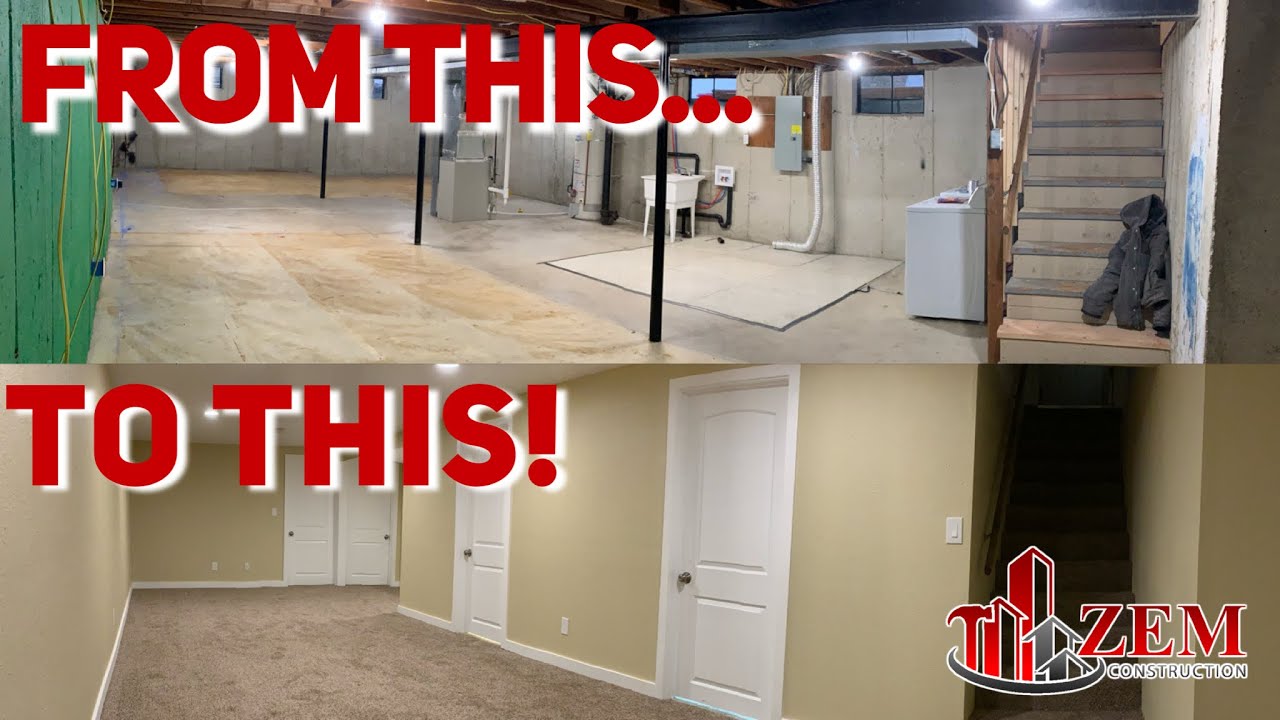
I know it's silly how we had to tear down a wall just to build the back up two feet further this was a must since we're going for a bigger shower and not a smaller shower I mean we're here anyways right the good news is it didn't cost me any more money since I was able to reuse the old studs of the wall so basically I just relocated it I patched up the old shower space with new sheets of drywall and turned that area into a small broom or a utility closet depending what you call
it side note I do have a video of how I created that space and gave it a secret door so you should check it out it's on my channel I figured while everything's still a mess I might as well make a little bit bigger mess and add an extra light housing into the shower to brighten things up a bit I know that if I didn't do this now I'm sure I would regret it later all right so the water ledge that's gonna be for the shower and there's gonna be glass coming all the way there's
a couple of methods that I've seen it being done one method is putting down bricks make sense 100% just cuz you got thin set mortar and all that stuff but another guy said what he likes to do is he's done this for hundreds of houses he would lay down three two by fours are pressure-treated so they can kind of deal with any kind of moisture there and then obviously it's all gonna get wrapped with a liner that's inside this paper and that's pretty brilliant so that's what I'm gonna do I'm gonna put him in here
and I'm gonna put some long screws in it and then now we'll get the liner going all right so let's address the window situation cuz of my Instagram story is everybody's asking me the one there you're gonna keep the window yes I'm gonna keep the window because I want my neighbor's to feel like I can provide a service for them an entertainment if you will so yes we're gonna keep the window no I'm not gonna keep the window we're gonna take the window out I we do want to keep the light that's the thing about
it I don't want to block this off because it's gonna look dark in here put a light fixture in there and I don't want to pull those small little mirror windows on top just because it's like it doesn't really do that much for you so I'm gonna put a slightly smaller window and bring it nice and high so here's what I found this is a 24 by 36 I believe and we're gonna move it up to here so I'm 6 foot to hold it I'm 6 foot 2 when this is up you were basically gonna
see my neck up much like 5 foot 5 I think so even lower and in case a giant from professional football comes in here well you'll see his clavicles and if that's not needed before you I don't know what is alright so I'm gonna see if I don't kill myself put a 18 foot ladder back there try to get window up since the second-floor window is 16 feet up from the ground and I Curley do not own a ladder big enough I'm gonna get a little creative and frame everything from the inside of the house
and secure the window to the frame from the outside of the window opening now since the windows going to be smaller in size we're just going to recreate the framework that's needed to secure the window the certain atomies of framing includes king studs Jack studs crippled and sill plate these are simple things but very important anatomies of framing in order to make sure our window last the duration of the rest of this house that's probably the most impressive thing I've ever done installed removed installed and did the siding cold outside and put the framing of
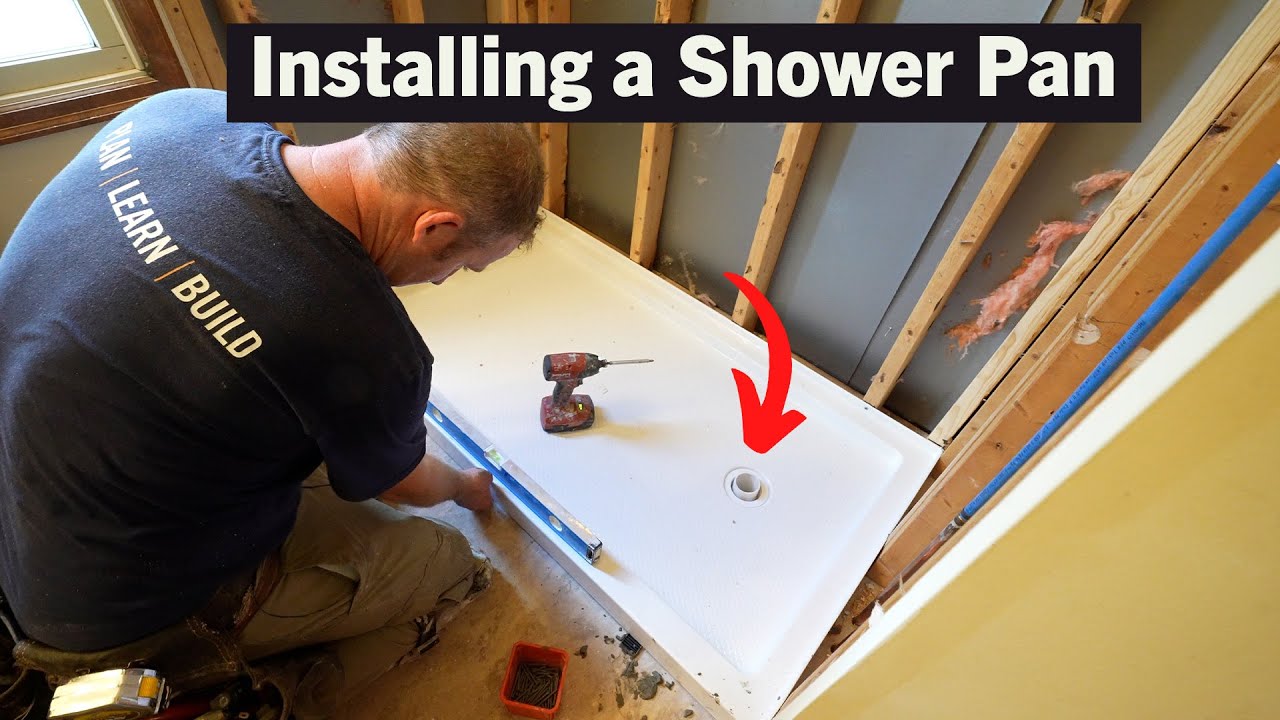
a window that's Talent they don't teach that in school now of course later on before the wet weather kicks in I will rent a ladder long enough and replace the siding along with the window trim from the outside like a normal human being the shower pan has the most specific rules as well as waterproofing drainage layers that are needed to be followed very carefully for the sake of this video later on I'll put out another video did it can be exclusively to the drainage in the waterproofing steps when building the shower pan so in the
meantime I will just brush over some of these steps in this video right now alright here's a little dilemma guys um just to show you that I'm not a contractor and I don't know what I'm doing all the time but I'm always asking the right questions to the right people and not afraid to fail so here's an example failure and asking somebody for the right question this bench cannot be closer than eight inches away from the glass here that's for cleaning the glass purposes and stuff like that so it has to be either a flush
which I don't want it to be where meaning the window would have to come out here it's complicated basically the easiest solution we found out is I'm going to chop it off right here and I'm gonna see if I can realign this for the Caddy so only human so no point showing you this so I'm gonna take this and and just like that we're a lot shorter and that is pretty but right I secured two by six scrap pieces to the bays to allow for the waterproofing liner to wrap up this is basically creating a
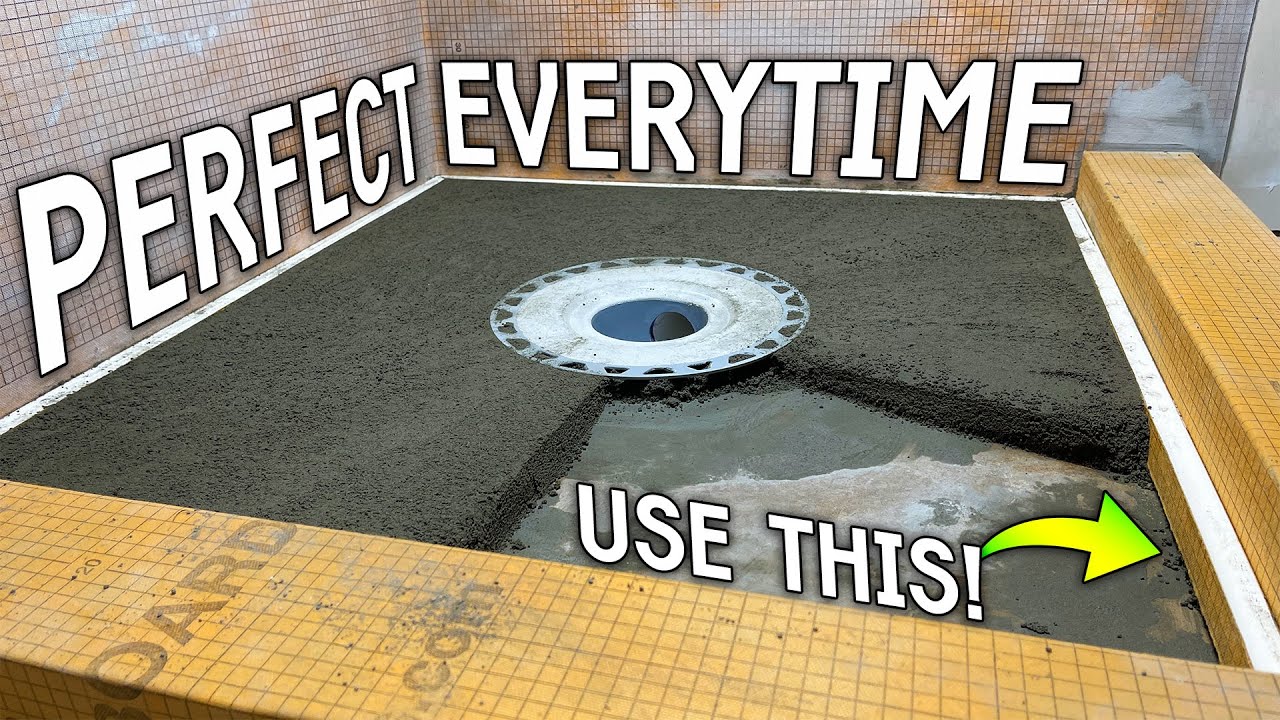
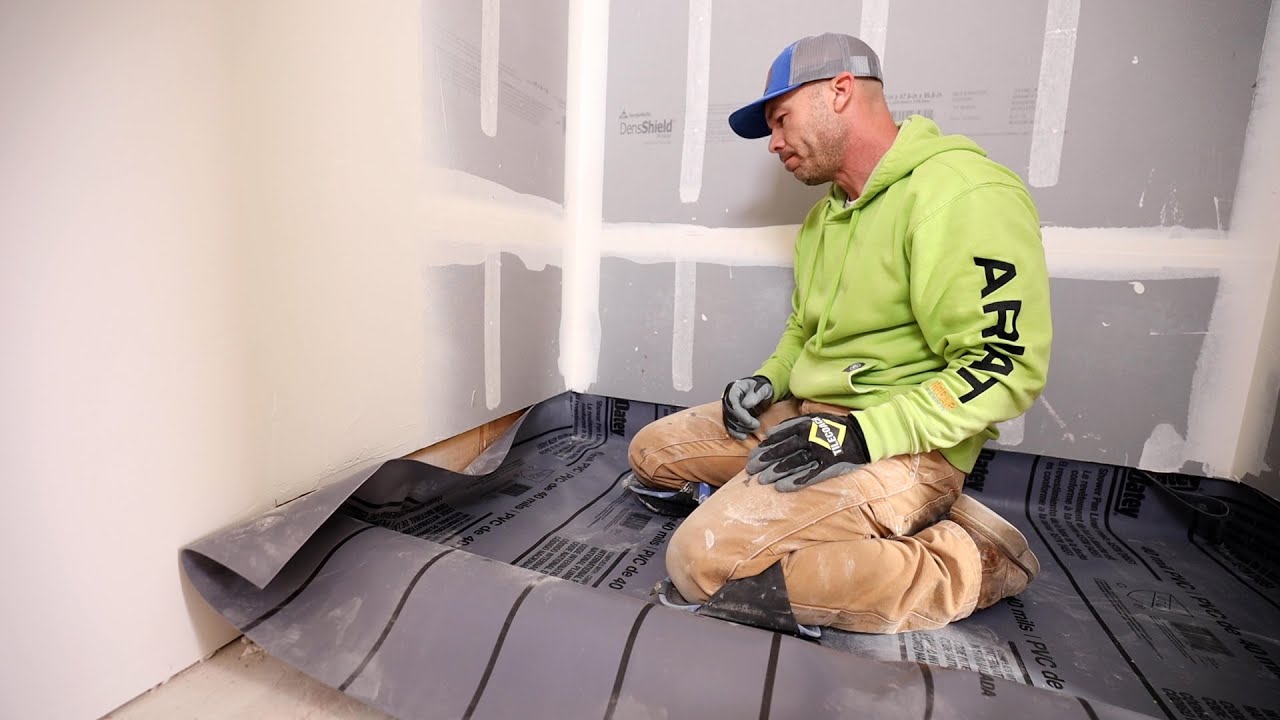
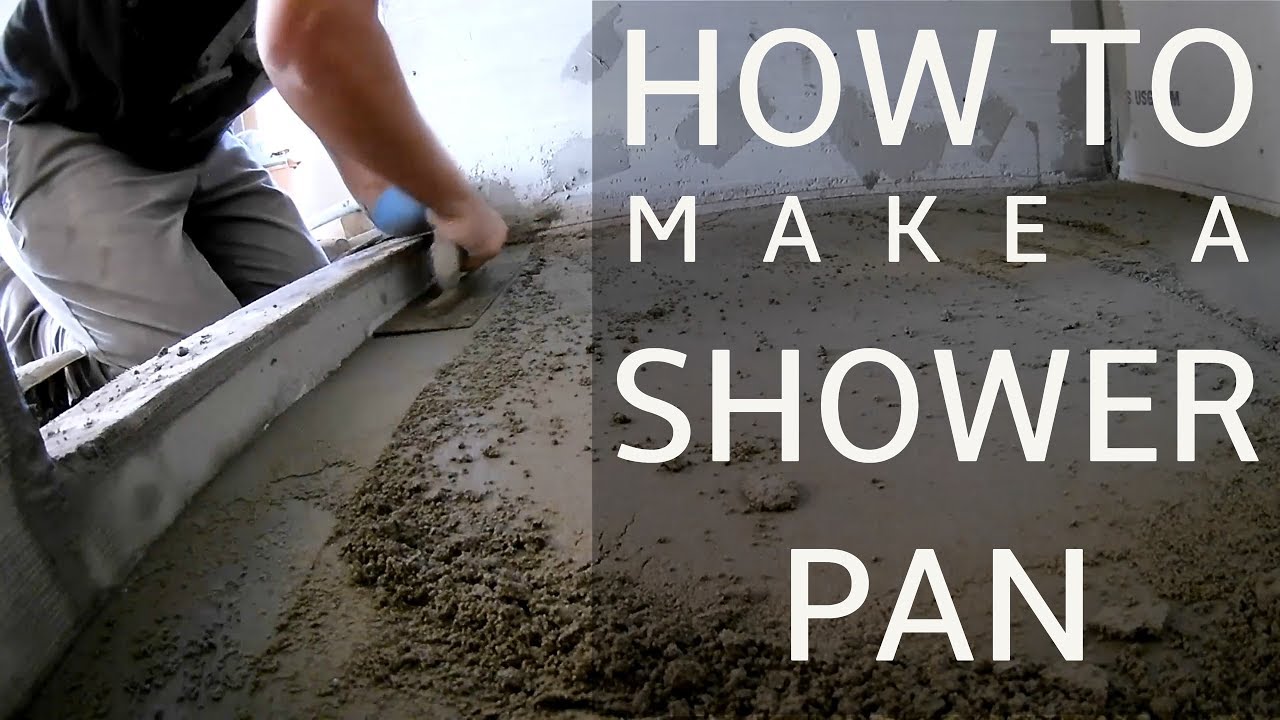
flood zone so we will secure the liner to this edge then I secured the tepee shower drain with the two inch drain pipe using adhesive and set the screws in the subfloor I used a mortar mix to create the first slope which runs from 1 inch and slopes down to 3/8 of an inch which is basically flushed with a drain now seems to be that some people are using carbon paper barrier before this layer and from my homework on this project it seems like it's an old-school method that's being practiced less and less these days
next I lay down the PVC shower line our folding the edges and securing at the top of the 2 by 6 boards to prevent water leaking in case this level floods I remove the top of the two-piece drained laid a bead of silicone around the ring creating a gasket and folded carefully the water liner over it here's a tricky part I use the top piece of the two-piece drain to find the hole create a small X and screw the top piece to the bottom piece making sure the slits fold down into the drain then I
found the small divots for the screw holes and secured at the top of the drain to the bottom using the provided bolts I play small pea gravel or pebbles around the drain for adequate drainage and then begin working on the second and final slope which runs from one inch down to half inch just covering the rocks it's important to note the need for a dry compact when using the mortar mix all while checking the slope to ensure all the water running into the for cement board I'm using half-inch cement board to cover the walls where
the tile will be hung then securing the joints using fiberglass cement board tape and thin set this is basically like taping the joints on drywall for the shower niche I bought a premade waterproof ditch that would make tiling and waterproofing easier for me not to mention save time on such a small section I found it easier to secure the cement board cut out the perfect fit for the niche where it could attached directly to the studs with screws and then secure the joints using fiberglass tape just like the cement boards alright so when it comes
to doing the border here very important you have to think of everything in terms of flood line and waterproofing in terms of that so what I mean by that is everything's sloping into the drain correct and then I'm talking about the cement board we didn't secure anything below that five inches off the ground here because we have our liner overflowing to the two by sixes now this border here we can put screws from the outside totally okay in fact this liner secured from the outside here but we have to consideration the liner on the inside
we can't just put cement board on the inside here and start screwing in because now we have holes and it's all you know it's all going to flood through so here's what we're gonna do we're actually gonna pour the concrete over this or well it's like a mortar thinset mix whatever it is and so to accomplish this we're gonna set this 2x4 here we're gonna take caulk or silicone I think Huck is a little bit easier to take off and we're gonna create a watertight seal and then on this side we're gonna secure this six
inch long or wide cement board once it's secured we're basically to have a channel here now this is touching against it so tiles gonna sit on top of it we're gonna see film at least a half an inch on top I'm gonna do an inch and then at least half an inch on the inside again I'm gonna do an inch and let it sit overnight and then our borders gonna be done we'll take it two by four off and we should be good these are the exact directions out of futile guys tell me so we
are so far TRUCKING on solid ground so that's what we're gonna do waterproofing folks waterproofing because the cement board would get damaged as the water creep into it we needed to waterproof this area and all the joints I'm using this waterproofing product from liquid rubber I brushed the liquid rubber on all the joints first then laid the waterproofing membrane over it and then covered it with more liquid rubber this ensures all the joints are protected from any kind of potential water threat so it's very important that you put this waterproofing membrane on any place that
you've had the joint really the idea behind I think is when any of the stuff cracks which you're assuming it will this will be kind of the waterproofing membrane that prevent water from getting behind into those little cracks so once you get that on I'm gonna put a fat slab of waterproofing liquid rubber here and should be good it's almost like therapeutic you know once every joint in seam was covered I rolled three to four heavy coats of waterproofing using a nine inch roller to achieve about a 40 mil thickness as recommended by the manufacturer
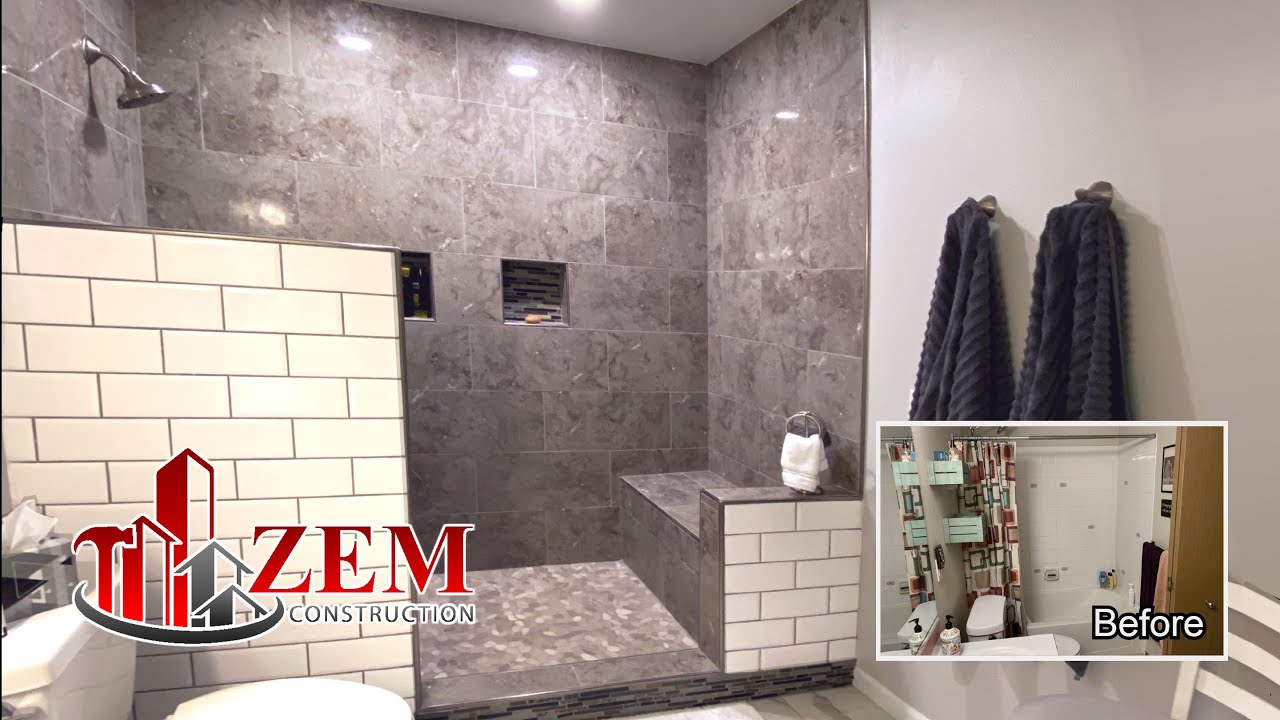
for child I'm using this three by twelve tile in a vertical layout from here on out is just a lot of patience and repetitive work if you need a few pointers on laying tile I made a quick video tutorial about some of the tips tricks and tools required when laying tile shower I'll link that video along with the type of tile used down in description of this video [Music] so when it comes to doing the windowsill it's important to keep a slant into the shower that way when the shower water comes down and you're watching
you hear and spotters here it doesn't pull up and do all sorts of damage and gun what you want to do is slant it in just a little bit nothing too crazy and then kind of work from there the next day when the towel was dry I applied the grout and then let the area dry one more day now you might be asking why I'm cutting the hole for the water regulator so last minute well that's because the exact type of water regulator I ordered was on backorder and so I couldn't let that slow down
the momentum besides I'm still able to access the back of the wall with a regulator Viso mounting won't be an issue most prefabricated shower glass panels are sold up to about three feet wide and since I needed six I had to special order it from a local glass company the glass took about five days to be cut and delivered to my door now because I wanted to do the installation myself I have the guys that the glass company give me a quick tutorial of how to do it right it starts with mounting the provided brackets
onto the glass via the designated slots then bringing it a glass to where it will sit and setting the glass onto these clear rubber eighth inch spaces that way your glass is not sitting right on the glass where it could chip I then marked out where the holes for the brackets will go once marked I used a quarter inch tile drill to drill out the holes vacuum out all the debris from the holes and secure the special tapered anchors into the holes I then aligned the glass into position and secure the brackets into the anchors
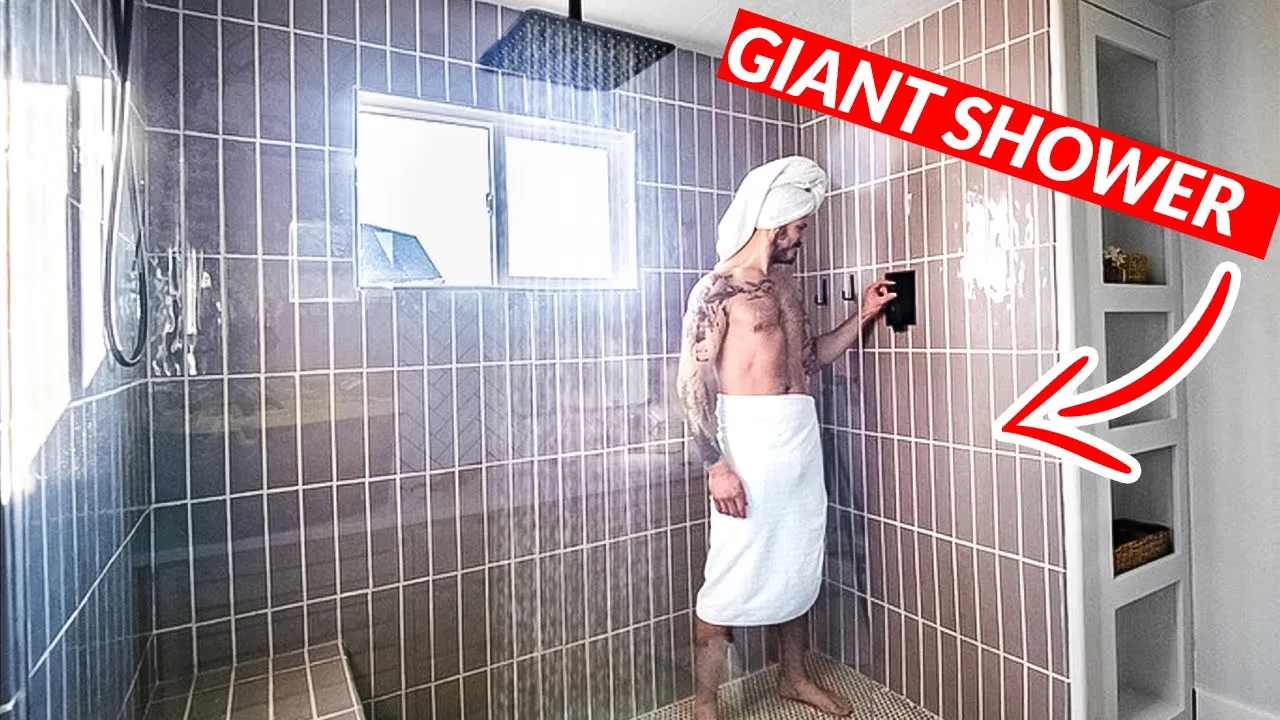
with the provided screws all that was left was to trim off the eighth inch spacers with a blade and fill all the brackets and all the seams using the waterproof silicone one of the last steps in the waterproofing they recommend to take a waterproofing silicone and run a bead down at the bottom of the shower pan to give one more layer of added protection encase the grout cracks and water starts breaking down the materials the last step in making the shower operational is the showerhead and the hardware I bought this two-piece shower system on Amazon
for three hundred dollars it includes sixteen by sixteen overhead arranged as well as a detachable handheld sprayer water regulary and absolutely everything needed to install it so far I really like the system and it has great reviews not to mention some of the name brands out there are selling these systems for like triple the price I'll link it down description as well for you guys to check out if you want [Music] hey thanks so much for watching this video if you bring the channel and you like the videos like this make sure you hit that
subscribe button and tap the notification Bell that way you'll be alerted every time I put a video out if you liked this video make sure you like comment and share it with your friends if you have any questions write them down in the comment section below I'd love to answer them follow me on social media I'll put links down description below tune out this week we'll see you guys on the next one see ya


![Plumbing a bathroom explained in 4 minutes. [You CAN do it!] #diy #plumbing](https://img.youtube.com/vi/lxhUIkZrnFw/maxresdefault.jpg)