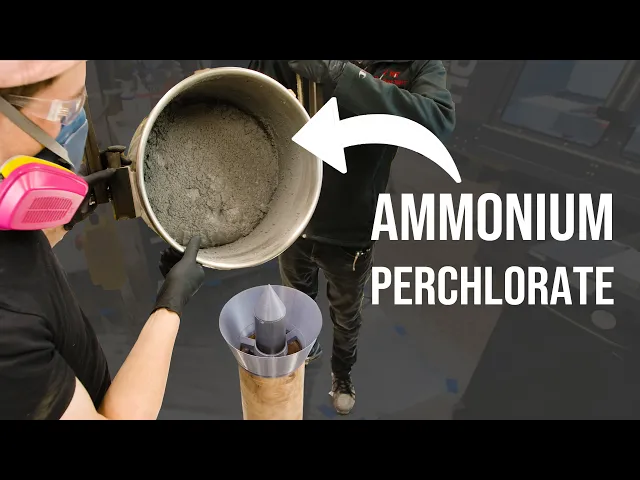
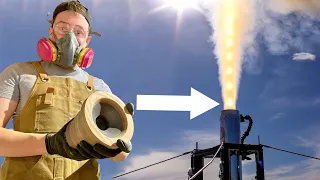
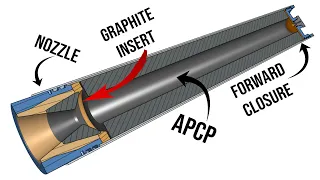
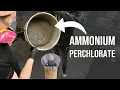
this video is sponsored by a bespoke post this is the second in a series of videos about Simplex a solid rocket motor that I designed built and fired over the last few months in this video we're talking about the components that make up solid rocket fuel and how to put them together so let's get started [Music] three two one fire we're using a fuel in this motor commonly referred to as apcp which stands for ammonium perchlorate composite propellant the specific blend of this apcp that we're going to use is a Formula called Cherry Line let's take a look at some of the components starting with the ammonium perchlorate you might notice we have two types of ammonium perchlorate in here 90 and 200. these numbers are in microns they're the size of the particulate let's take a look at how this works with a little diagram we're going to draw a zoomed in cross section of our rocket propellant starting with the 200 Micron AP all right even when we pack this volume as tight as it can go there are still open spaces here so we can get higher performance basically for free by adding the 90 Micron AP in the spaces in between these two particulate sizes mean that propellant is bimodal and if we had three different particulate sizes say 90 200 and 400 that would be called a trimodal propellant there are a lot of schools of thought as to how to size these different particulates in your ammonium perchlorate composite propellant and ope I'm so sorry look at the time it's time to get back on track the next thing on our list is 7. 5 percent of aluminum the stuff we're using here comes in 30 Micron sizes so smaller than the smallest AP particle this is going to help us even further by fitting in the little voids left by the space that the 90 Micron AP can't fill foreign can be considered our fuel here because ammonium perchlorate is a very powerful oxidizer but it doesn't quite work like the discrete Fuel and oxidizer setup that a lot of liquid engines have the aluminum does burn but the ammonium perchlorate also sort of burns on its own adding a metal like aluminum to a solid rocket motor can really increase its performance and the combustion of that metal is usually a fairly complicated process specifically for aluminum you actually want a longer motor it's this very weird dependency where as the aluminum travels down it needs a lot more time to burn than the ammonium perchlorate does generally in larger Rockets like the space shuttle rocket boosters you'll see higher aluminum or higher Metals content than in smaller hobby Motors our propellant diagram is looking pretty good here but if we don't add anything else these particulates are just going to turn into a pile of particulates we need this propellant to hold its shape you might say we need to bind all of these particles together and we're going to do that using a binder cherry limeade uses a binder that comes in two parts htpb and modified MDI h TPB stands for hydroxyl terminated polybutidine and it's basically like a rubber and MDI is a polycarbo diamide modified diphenomethane diisocyanate I think I got it I think I got it I have the whole I have the whole script up here and I'm pretty sure I got it right polycarbo diamide modified diphenyl methane diisocyanate I did it normally I would tell you that you shouldn't be scared of chemicals just because they have a long name but you should be scared of MDI that bad boy needs a respirator with Organics cartridges we'll also talk a little bit more about safety later so we're going to move on for now these two chemicals the htpb and the MDI work together like a two-part epoxy you have the httpb which is the resin and the MDI which is the Curative or the hardener these two liquids slip in to fill the voids between the particles in our diagram and then once they solidify they help this Rocket Fuel hold its shape all right let's finish this formula with the smaller parts now next up is 4.
275 IDP which stands for isil Deco ISO ISO ISO decal pelorganate come on you gotta come up with better names for these this is what's called a plasticizer and it plasticizes the plasticity of the rocket fuel I'm sorry basically while the fuel is uncured and still a gray sludge it helps things flow more easily this gets you fewer voids and Bubbles and Bubbles are always good to avoid once everything cures after casting this IDP helps give the propellant a more rubbery feel and it helps prevent things like cracks or over hardening finally cherry limeade uses 0. 3 castor oil which actually makes the propellant a little bit stiffer which can help with some larger sizes of Motors then we have 0. 05 pdms which stands for polydimethyl siloxane these I'm telling you these chemicals are crazy that's a scary name for a chemical but it's basically a lubricant and this is not actually for the rocket motor it's another one of these little agents that helps us cast the rocket motor it makes it easier to work with while the propellant is still a gray sludge and the last thing on our list here is Triton X100 which is a surfactant or detergent this is another thing that helps remove bubbles from the mix and especially some of those like smaller bonds within the httpb it helps open up those bonds and break the surface tension so in a nutshell that is what cherry limeade is made of the rocket propellant not the uh not the drink this is one formula out of hundreds maybe thousands and people who really know what they're doing can take these different percentages take the different chemicals involved swap them out for different chemicals change the percentages a little bit if you really know what you're doing you can use this formula as a jumping off point but I do recommend just sticking to known formulas to start cherry limeade has a whole set of ups and downs but we don't really care about performance here the thing that's important to us is making a motor and learning as we go something I've learned with making rocket propellant so far is that especially for propellants like cherry limeade the propellant is the process the process is the propellant which means that you cannot just take these things toss them in a bowl hit mix and you're done making rocket propellant is a step-by-step process that should be followed identical to the T every time so much as you can do it the process totally affects the outcome of the propellant we are about to get into the casting process for Simplex I'm about to show you all about how that works but first a word from today's sponsor this video is sponsored by bespoke post if you don't already know bespoke post is a monthly membership club where each month you get a box of awesome the boxes contain top shelf goods from small Brands and it's totally free to join each box has around 70 dollars in value but you pay a fraction of that and ninety percent of the products in bespoke post boxes come from small Brands many of which are based right here in the US the good thing here is that you only pay for what you want after taking a quiz about your preferences each month you'll get a preview of what's inside the Box before it ships so you can decide if you want to swap or keep various products inside and you only pay for what gets shipped I've got a few boxes that came in the mail here and let's take a look this one is The Scorch kit oh man look at that it's got all sorts of cool hot sauces this one here is the cold brew kit which looks amazing you've got a cold brew coffee maker here this looks like some type of grinding stone this is great and this one isn't even a box this is a chair that I'm sitting in but we're not here to talk about geometry we're here to talk about how you can get 20 off your first box to get 20 off your first box of Awesome click the link in the description and enter BPS space 20 at checkout or go to bespokepost.
com bpsspace20 thanks again to bespoke post for sponsoring today's video and now let's get back to it so now it's time to make this rocket propellant and you already know what's coming you know it I know it we gotta talk about safety making a rocket motor is not the same level of safety as flying a rocket this is a much higher level of safety and you need to be thinking way harder like 10 steps ahead before you do anything like this when you're processing rocket propellant that is to say mixing and casting a rocket motor the two big things you're worried about are personal protection and fire we'll start off with personal protection you're thinking about respirators with Organic cartridges you cannot be used in those covid-19 masks those are not going to cut it you need a proper Organics cartridge that's going to actually filter out all of the particulate in the air that is very important and you should double check anytime you put that respirator on that it is truly airtight eye protection you want to make sure through the whole process you're wearing in some of these they're super cheap it is really easy to just put these things all of your shop and I cannot recommend it enough you might think about ear protection if you have a particularly loud mixer you're going to be listening to that thing mix for a whole long time so think ahead get some earplugs or ear muffs now onto safety thing number two which is fire there are parts of this that are obvious I. E don't mix next to a scented candle and then there are parts of this that are not obvious so I just want to list some of those things that you might not think about most bowls for planetary mixers are stainless steel so any other metal that you use in that process needs to not be stainless steel or any other type of sparking metal aluminum brass bronze any other non-sparking metal is fine but you can have no possibility of accidentally bumping two steel or iron things together creating a spark and then burning half your face off static electricity is another one if you're not properly grounded throughout the mix and you touch the side of the bowl you can light up a bunch of AP in a way that you don't want with electric mixers you have a motor in there and there are a number of Motors that create Sparks when they work do you know how close your motor is to the Bowl do you know how far those Sparks can go these are things to think about and even after the mix if you pour some of that AP in too fast if you pour the aluminum in too fast if you pour any of these things in too fast you can create dust the dust can settle around your shop and you've now created a fire hazard all over your shop there are a lot of ways to create a fire here so how do you put it out you don't you leave a propellant fire is not a fire you can fight it is a fire you can remove yourself from so before you mix before you do any of this stuff you need to have an Exit Plan and you need to know your local and federal authorities to call if you have an emergency a fire extinguisher is not going to work at all here I am making these videos as a resource they are not a tutorial if you're starting to make solid Motors and this is the only channel that you've seen or the only information you're getting about them you're not getting enough information and you should seek it elsewhere I strongly recommend working with at least one other person who has done this before a number of times before you mix your own propellant once again I am actually trying to scare you it's good to be scared of these things being scared will make you prepare harder and be more thoughtful about safety before it becomes a problem all right that's my safety disclaimer out of the way now let's get to the mix process I drove out to Colorado to Charlie Garcia's place to make this Simplex motor if I yeah if I remember correctly bearings do this when they're really happy yeah the bearings only do this like once in their life when they're extremely joyful which is a good time to mention that you should check your local and federal regulations on mixing rocket propellant state by state country by country it's totally going to be different wherever you go so make sure you check those first we started this mixing process by cleaning out all our mixing bowls and measuring cups to avoid contamination in the motor I also got to work on cleaning the mix paddle that came with this old mixer Charlie had purchased from a pizza shop recently we spent some time making a rotating hanging mount for the mix Bowl so we could pour the 40 pounds of propellant into the motor without needing to hold the bowl ourselves final mixing prep included laying down mylar sheets on the floor to make cleanup easier and pre-measuring out the mix ingredients this makes it easier because the timing and steps of the cherry limeade mix procedure are very rigid you don't want to spend that time during your mix trying to measure out other ingredients in terms of personal safety some of these ingredients are a little less harmful than others and there's no use taking a risk on which ones you have to wear a respirator for so as soon as we cracked open that first bottle we put our respirators on some of the ammonium perchlorate shows up just a little bit clumpy so I also sifted through it to remove as many clumps as I could often this process is done with the sifter or screen to make sure you're only getting the right size particulates as we went we also notated the exact weights we achieved when measuring out the ingredients in high performance motors keeping track of the actual exact weights that you measured out is important obviously you want the exact weight to the point but just in case you don't get it and something goes wrong down the road having a record that shows that you mixed a little bit off this time is very helpful just before we started the mix we noticed that the mix pedal which came with Charlie's used mixer did not actually fit I'm really quick I want to check and make sure that this oh the bowl needs to go up another three quarters of an inch and it's hitting the wow do you want to move back to the other beater we may have to it was too large to rotate through the mix Bowl so we switched to a dough hook Instead This would have been an excellent time to consider that the dough hook would do a significantly worse job blending all of the components together than the mix paddle but we didn't think about that and we moved forward we started the mix with the httpb making sure to scrape as much in as possible to reduce losses and then we added the IDP as well and began the mixer next up we began slowly adding the aluminum powder one plastic cup at a time it's important to not just dump these powders in because it makes mixing things together more difficult and can create dust which causes a fire hazard down the road after adding the aluminum we ran the mixer for a while then added the castor oil pdms Triton X100 and mixed again even though the dough hook wasn't doing the best job combining things here you want this mixing to be as thorough as you can get it the goal is to create a fairly homogeneous liquid with that aluminum powder just suspended in it plus added benefit it's also mesmerizing to watch at this point we've reached the end of what we would consider are liquid pre-mix which means that it's time to pull vacuum we take this mix bowl out of the mixer put a vacuum lid on top and then pull as much air out as we can and we do this because it can suck out the little tiny air pockets within this liquid the goal here was to get maybe 27 or 28 inches of mercury but the pump wasn't quite powerful enough or we may have had a leak somewhere another helpful thing you can do during this process is agitating the mix which means moving the liquid around a little bit to expose some of those lower layers to the vacuum that it wouldn't otherwise see then after carefully letting the air back in without creating more bubbles we put the bowl back in the mixer and started adding the ammonium perchlorate this happens in short batches for the same reason as the aluminum we do not want dust or clumps so we go slowly and carefully we added a bit at a time folding it in a little then mixing for a minute or two before adding more we start out with the 200 Micron AP here and then we'll add the 90 Micron AP after once the 90 Micron is in we mix this for a good long while the goal is again to create a very homogeneous this substance then the final step after this segment is to add the MDI which is the Curative as you might remember this is where time really starts to count this is our last component of the mix and the second we put it in is the second that it starts reacting with the httpb and hardening the propellant bit by bit it's also worth noting that with mixers like these it's good to pause one or two times throughout the mix segment to get a plastic spatula so that you can get in there and scrape the walls it's a little bit too easy for unmixed segments to remain on the side or bottom of the bowl if you don't do this once this was done I scraped down the dough hook and we moved it over to the table to pull a vacuum on the propellant so we could remove those bubbles one tricky part of this process is that as you pull vacuum on the propellant the propellant gets larger in order to combat this you have to slowly pull vacuum as the air escapes so that the propellant doesn't touch the vacuum lid and that would be very bad because if the propellant touches the vacuum Inlet it can get sucked right into your vacuum pump and propellant does not belong in the vacuum pump this is also around the point that we started to notice the propellant was a little bit it less flowy than we wanted a rocket propellant can be considered portable or packable or anywhere in between portable propellants like these flow smoothly from the bowl into the rocket motor and packable propellants usually require grabbing chunks of the propellant from the bowl and shoving them into the tube The Pour ability of a propellant can depend on a ton of different factors it can depend on your Metals content your solids loading it can depend on the quality and or type of your Curative you can depend on the temperature it can depend a little bit on the humidity it can even depend on like the actual subscale shape of the AP particles like consider that a sphere is going to roll past a sphere more than a square is going to roll past a square oh I am so sorry uh it looks like it's time to get back on track at the time we weren't sure what step we messed up to turn this propellant into more of a packing situation but we do know that the temperature on the day was cold we used a dough hook instead of a mixing beater and the MDI we used may not have been the top shelf stuff and frankly there could be plenty of other reasons but our time for troubleshooting was pretty much gone and we were on the clock to pack this motor as I mentioned earlier our initial intention was to pour this propellant from the bowl into the motor but as you can see there was no way that was happening the MDI was working quickly to harden the propellant so instead of pouring it we lowered the bolt to the ground started grabbing chunks with our hands and putting it in the tube manually also quick sidebar about casting prep we're putting this propellant directly into the liner of the rocket motor but often people will load propellant into casting tubes those casting tubes then get glued into the liner and then the liner goes into the case the liner is an eighth inch wall tube with an outer diameter of 5. 75 inches which means that it should fit right into an 8 inch wall case with an inner diameter of 5.