in this video I'm going to introduce three Advanced logo design techniques show you them in use in some famous logos and demonstrate how you can begin experimenting with them in Adobe Illustrator the first technique is known as overshoot and this is something that we learned from type design have a look at these two well-designed typefaces here we have castlon and GT America now what you'll notice with both of them if we zoom in a little bit and just select one of them illustrator leaves the Baseline in for us and you can see that the characters
with a flat horizontal bottom to them like the L and the E sit right on the bass line but those with a curved bottom like the S and the O overhang the bass line This is called overshoot see it here with the Sans serif we have perfectly horizontal bottoms to the L and the e but if you have a look at the curved bottoms the S and the O they overshoot they move down let's just make this into an outline just to demonstrate this a little bit we can drag in some guides here just do
it at this Anchor Point on the L the top and the bottom and you see here now with the O you see how it overshoots both at the bottom and the top and the reason for this is that if it wasn't like that if it was smaller then things wouldn't look right I mean what we can do now if we just ungroup these and join them all at the bottom we can see now they look odd they're kind of different sizes if we were to make this s and this l you know small I know
it's stretched out perspective as well now but it it doesn't look right they don't look like they are the same size the S and the O looks smaller but in the original versions here they look correct so this is required so it looks right Optical to the eye and that's a key thing with logo design we use grids we measure things but then at the end everything needs to look right to the eye and overshoot is one of the things that helps it look optically balanced so this is in evidence on the Australian Open longer
if we just kind of rip this to bits there is the overshoot and if we were to again do the same thing let's move this quick Copy this I'll do it proportional this time that's roughly there with the guide and can you see looking at these two the one on the left looks balanced but on the one on the right let me just move it a little bit further away so you can really see that it looks like the a is dominating the L is that little bit larger and it loses the optical balance even
though they are the exact same height right now so overshoot is something that will help you get that Optical balance right so if you have any curved sections next to Flat sections it can be with type but it could be with a symbol and you want to combine them then usually if the curve section just overshoots where the flat section goes that will help the thing look optically balanced the second technique is negative and small alternates let's go back to our sludge in type if we had another version of this so let's say this was
our word Mark not particularly interesting really would need a little bit more going on for to make it distinctive but let's say we have something like this where we need to put a light type on a dark background whereas in the primary version the positive version we have dark type on a light background what happens is now in our negative version these spaces in between the characters look smaller so look between the O and the E here or maybe look between the I and the N it looks like the space is small here but we
know it's exactly the same because we just dragged out a copy so what the general rule what we want to do because this looks a bit smaller is just open this up so I'll probably just go to my tracking and have a play with this now obviously we don't need to look different we want it to look the same before it to look optically the same you want to just play around and find something which is similar so maybe we do plus 10 on the tracking and there's something that we would test similarly this works
for small sizes so if we had a much smaller Point size here we might have a rule where when it gets very small we just open this up a little bit so that it still works and we don't get effect of the letters squashing into one another that's fair enough with type what about with symbols and more complicated shapes how can you do that well let's create something and try and demonstrate that here so I'm just going to create some sort of rough logo that has a strike within it and a stroke within it and
we'll see how this works okay I've quickly made this terrible symbol but it will illustrate the point and show you the technique let's just drag a copy over here something we should always do save our work as we go through I'm just going to click on this stroke and I'm going to expand it then I'm going to use the shape Builder tool just do whoops making sure both shapes are selected and just delete this central part and we've got a symbol here okay we can recolor it or whatnot so what I'm going to do is
just do a copy of this and just see like we did before what about if this is on a black background how's that going to look how's that going to work in this scenario so let's have white on black um black and white now have a look at these two again we've got that same problem this black line through the white circle looks smaller than the white line through the black circle so that's something that we want to adjust so because we've saved our work in probably quicker to do it this way if we bring
this one over here save this as a an original and what I'm going to do is just adjust the width of this stroke now if you press command H you can hide the extras you can see a little bit clearer without that line going through the stroke and we can just try and push this up 11 12 booking close you can go a bit higher that's too fat it's somewhere around there 12 I think let's go for 12. okay so now we know that this stroke was 10 this is going to be 12. and we
can see the effect here of these two together so you can see that the one on the right clearly is wider but it looks like it marries up more closely with our original symbol so this is something that you can do for negative alternates to fix this issue and you can also do it for small sizes again if this was going to be incredibly small we might start to lose the line through the middle or it start looking too small so you might want an option where once it gets Beyond a certain size you increase
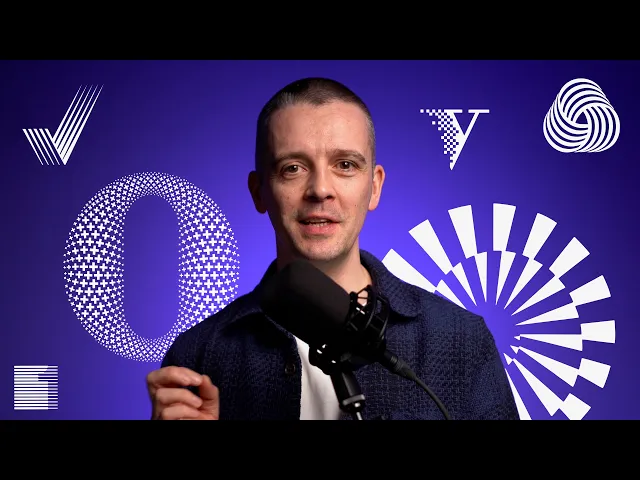
that stroke size in the middle the use of when to use these different logos would be something that you would include in the style guide so the client and any other designers working with it always use the correct logo in the correct situation technique number three is gradation this is a transition from one thing to another now logos which rely on continuous gradients for their form are problematic there's often problems in reproducing them and you really want something that works it as a solid shape in black and white we've seen a lot of companies over
the the last 10 to 20 years changing from complicated designs with lots of gradients in them to more flat looking logos for this reason but we still sometimes want to have a sense of 3D or a sense of movement or a sense of progression or if different layers and how can we do that well there's different forms of gradation that we can use that will actually achieve this without the need to use these you know infinite continuous gradients that might use at millions of colors to move through to make something that looks seamless there's some
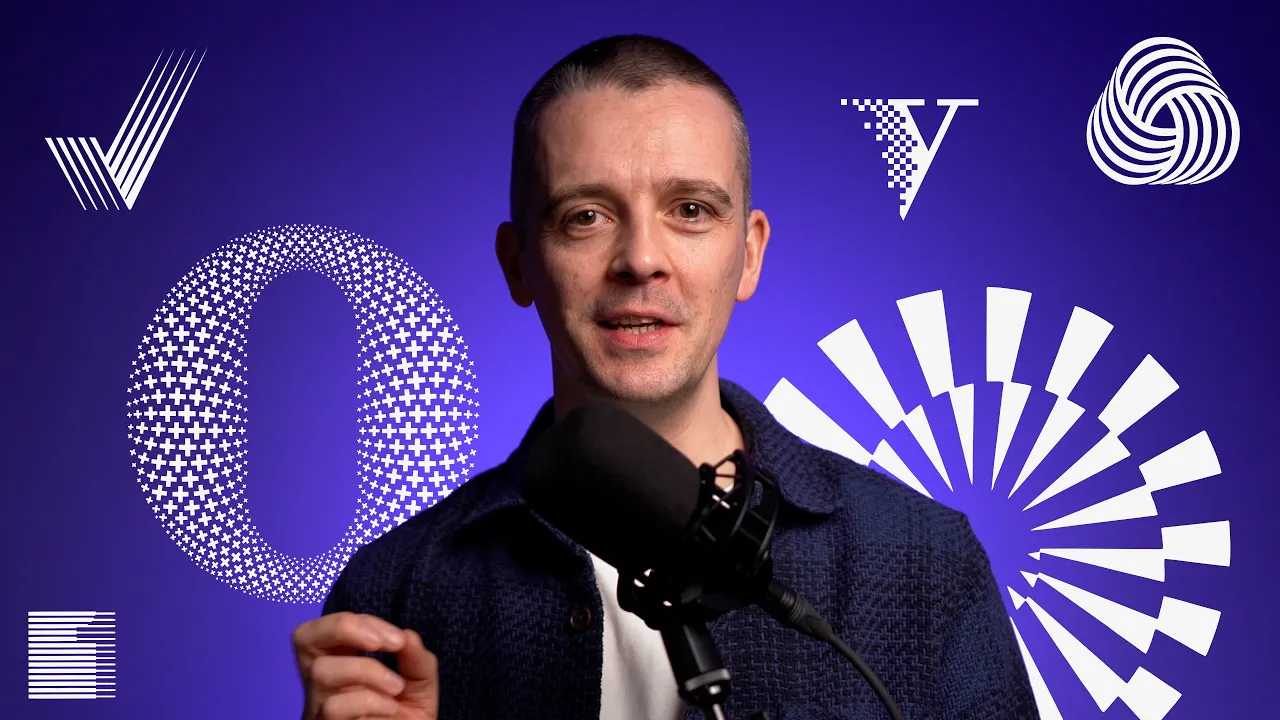
great examples here like this one on Rob Clark's so he is one of the best logo designer type designers that is working today work for a lot of huge companies and this one for Oxford University press where we could see if this symbol was just a plain circular ring it would just be so boring I have nothing distinctive about it so here where we have this sense of the movement the spiral moving into one another 3dness of it added here it gives it some interest so this reminds me the Rob Clark one of the Olympic
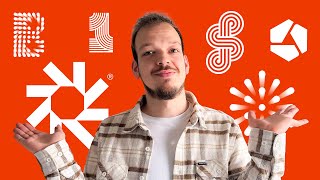
Games Munich 1972 which is one of my favorite Identity Design systems and the wall Mark are really classic logo symbol from 1964 but it looks like these like a bowl of wool how it's woven together this one from Verlin found interesting using almost looks like pixels today although this is from 1983 um and it looks like it is transitioning it's it's moving out over to the Solid V on the right hand side this one from 2013 by rice creative all these plus marks are at different sizes on this oh so it creates this 3d effect
this rounding to shape but of course it isn't these are all solid just black and white which really AIDS at reproduction although there is a lot of detail on that one here we've got an impossible figure but just simple shading on certain sides has it appear that way this one push Works has The Strokes going at different angles to give it that a 3D blocky effect First Fidelity Bank the number one on the right hand side when you squint you really get that effect that is producing it looks kind of like a screen and this
is all on my horizontal lines very clever way of doing that or it's a technique which has been used many times now this one with the American Institute of designers these Strokes taper so it begins to seem to move away and similarly that with this one for very stream where we have these tapered Strokes so it's like the suggestion of a of a gradient of moving from black to white and it just allows it to give the element the impression of different layers let's see if we can demonstrate that and have a go at how
we might do something like that in illustrator I'm just going to draw a simple letter f using the grid here okay that will do for me again I'm going to drag out a copy of this and make it red I'm going to join this I'm going to lock it for a minute and I'm going to try this technique that we just saw with these spikes kind of going across now we can finesse this but what this is clearly not right yet but what I'm trying to illustrate here is that this F is not a logo
we can't use this in any sense as a logo because it's just not distinctive enough and if we were trying to create this effect maybe where we had you know the gradient underneath maybe it needs to be like it it marries up to the top there but this kind of thing but again it's still not very distinctive and we've got the problem of this actually means all these different colors these Grays here being reproduced and that can lead to problems as well this gradient can have been a little bit of a dated look so what
can we do with this that maybe make it work a little bit better I think we're getting somewhere here I think I'm just going to fake this cutting these out by introducing a white box in your logo designs you will want to make sure you draw this out properly but for now this will do the trick I'm just going to make it a red box for now move this vertical stem to the very back then make these white these red boxes White a little bit of that edge so I'm just gonna drag them over one
more we start to get this effect and this now is something a little bit more interesting do we want it like this what you want to do is always make copies drag them out and just compare them and see is this better what about if it goes all the way to the top that feel more natural I wonder about if it's just part way because it's just to the eye but let's just throw that in as an example now this is done on the Fly With all you guys watching me which is not how I
recommend designing but if we just bring these down here and from what we had this is not a logo no distinction to it this is more distinctive but it's still very generic and difficult to reproduce doesn't really say anything this now we're starting to get into something which feels a little bit different and again if we zoom out we see how it still works we kind of squint we're getting that gradient type effect here um you can see as well by just scaling this thing down and you start to kind of experiment like what could
this be like what if we actually just did a really quick uh skew of this thing but let's just share it by like 30 degrees or too much 15 degrees the kitten looks kind of like motion blur now I'm not sure if that's the one but the point is we've progressed from something completely flat and generic by using this shading thing started to create a little bit of movement a little bit of a sense of of 3dness and that's a technique like I showed you with all those different real world examples that you can begin
to apply and experiment with in your own designs let us know if you'd like to see more logo design tips here on the channel subscribe if you haven't and until next time happy designing