In this video, we take a look at the best sodium settings for Minecraft. So, in this video, we're going to try to optimize performance as much as possible without sacrificing visuals because obviously we still want to make sure that Minecraft looks good. So, here are the best settings.
So, let's go ahead and get started. Let's go ahead and open up the video settings just like so. So, for starters, you want to go ahead and select on the tab that says quality.
And where it says graphics, please make sure to set it to fast. This reduces graphical fidelity. It will make simpler textures and lighting to prioritize performance.
Then where it does say render distance, which is over here in general, you want to make sure that it is set to like 8 to 12 chunks. That is usually like the good spot. So I like to put it at like eight chunks over here.
But if you want to go a little bit higher, I recommend going to 12 chunks as well. That is a pretty good spot because you are still able to see everything that is close to you. And it's not as terrible as like having like three chunks or something like that.
And over here where it says simulation distance, you want to set that to six to eight chunks over here. And this basically controls how many chunks have active mobs and blocks. So a lower value reduces your CPU workload.
And over here where it does say VSY, you want to make sure that you actually disable that. And this removes the frame rate cap tied to your monitor's refresh rate, allowing for higher FPS. And where it says maximum frame rate, please go ahead and select that to unlimited so that there's no limit to the amount of FPS that you're able to get.
Then you want to go over here back to where it says quality. And then please go ahead and locate smooth lighting. And where it says smooth lighting, you want to go ahead and turn that off just to see if things get any better.
Then afterwards, where it says particles, you want to make sure that is set to decreased. Where it says leaves, that is set to fast. Where it says weather, that that is also set to fast as well.
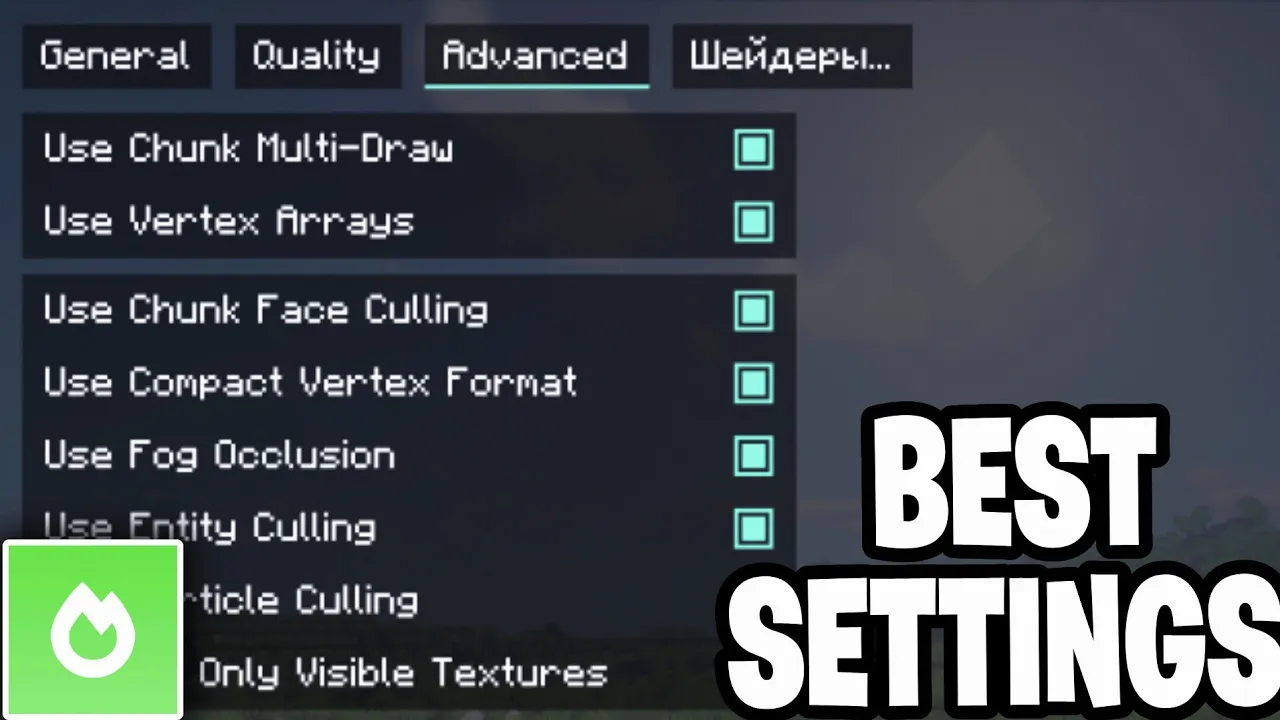
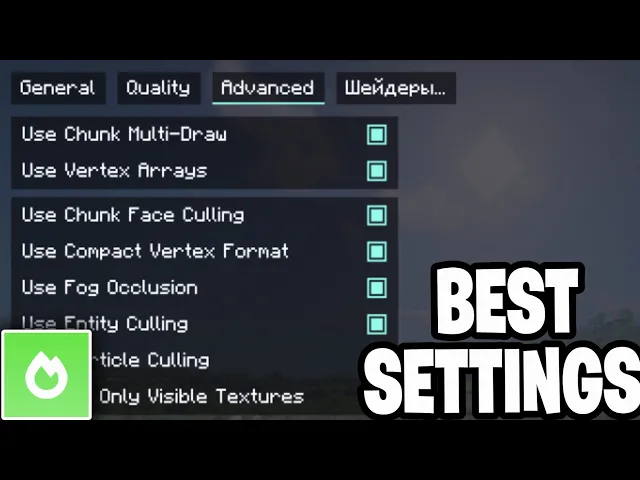
And also what you want to do is where it says entity shadows, you want to go ahead and turn that off. Next up, let's go to the performance tab right over here. Now, where it says chunk update threads, you want to go ahead and actually change that.
And you want to set that to something low like two threads over here, which will definitely help you out significantly. And you want to make sure that where it says always defer chunk updates, make sure that is set to on. And over here where it says use entity calling, make sure that is set to on.
Make sure this is set to on. This is set to on right over here. So just make sure that all these are actually turned on so that you are good to go.
Okay. And then after you're done with that, what you want to do is you want to go ahead and apply all of these changes. Then go ahead and press on done right over here.
and you should be able to notice that your game is significantly faster. So, if you take a look at your FPS, guys, we are able to get over 300 FPS. And if you guys are still like thinking to yourself, that's a little bit low.
That is because I do have a lower-end PC. It's an RTX 20 like 60. So, it's obviously not the best one out there.
But, you know what? We are still able to get a significant FPS boost thanks to all of our settings. If you guys found this video helpful, make sure to leave a like and subscribe.
I'll see you in the next tutorial.


![this is how to ACTUALLY double your fps [1000+ FPS]](https://i.ytimg.com/vi/SPBGhzqKDR4/mqdefault.jpg)